Twilio on Rails Part 2 – Securing Your Rails 4 App and Sending SMS/MMS
Time to read: 9 minutes
October 06, 2014
Written by

Welcome to Part 2 of our series on integrating Twilio with your Rails 4 app. In Part 1 we walked through signing-up for a free Twilio developer account, getting a phone number and processing an inbound phone call. In this blog post, I’ll walk you through:
- Securing your webhooks so that only Twilio may access them
- Using Twilio’s REST API to send outbound SMS and MMS
- Receiving delivery receipt notifications from Twilio
Securing Your Webhooks
In Part 1 of this series I talked about webhooks and how they are the fundamental mechanism by which Twilio tells your app about inbound messages or phone calls. Since these webhooks must be on the public internet in order for Twilio to send requests to them, it is important that these URLs be secured so that requests from a non-Twilio client are rejected. As luck would have it my colleague Phil Nash just wrote a blog post on how to do this in Ruby using Rack middleware. Let’s walk through getting your app secured using this new Rack middleware.
First, you’ll need to update your app’s Gemfile and make sure that you’re using a version of twilio-ruby that is 3.12.0 or greater:
Then run bundle install to update your gem.
Now, in order for the Rack middleware to function properly it needs to know about your Twilio Auth Token. When you signed-up for your account Twilio created a unique ID for your account (known as an Account SID) and the equivalent of a password (the Auth Token). These are used for programmatic access to the Twilio API. They let your Rails application connect to your Twilio account. You can find these values on your dashboard:

New in Rails 4.1 is a configuration file called secrets.yml that you can use to store sensitive information for your app. Your Account SID and Auth Token definitely fall into this category. In order to take advantage of secrets.yml, we need to be running Rails 4.1. You can check to see what version of Rails you are using by running rails --version . If you are running a version older than 4.0, here is a guide for upgrading from 3.2. If you are running 4.0.x, follow the steps below. Otherwise skip to the next section.
Upgrading from Rails 4.0 to 4.1
Follow the steps below to get secrets.yml up and running on a Rails 4.0 app. Make sure to also reference this complete guide on upgrading your app from Rails 4.0 to Rails 4.1.
1) Edit your Gemfile and add the following version descriptor to the rails gem.
2) Update the rails gem and its dependencies.
When it’s done, create a new file in the config folder called secrets.yml and populate it with the following YAML:
3) Copy your secret_key_base into secrets.yml.
When you first generated your Rails 4 app a secret key base was generated for you. Please copy this value from initializers/secret_token.rb to secrets.yml.
Configuring the Twilio Webhook Authentication Rack Middleware
Now that you have configured your app with your Twilio credentials you can activate the Rack middleware to secure your Twilio webhook routes. Edit config/environments/production.rb and add the following line:
One thing you might have noticed in the secrets.yml file was ERB code that references the Rails ENV object. Many popular PaaS providers (Heroku, etc) encourage application developers to store configuration information in environment variables. Keep this in mind when you deploy your Rails app to production. For the purposes of development, go ahead and set some local environment variables. In your terminal enter:
Now you can run your local server and test to see if your webhooks are secure. Run rails server and then use curl to make a POST request to your voice request URL:
Uh oh, what’s going on here? Well, while it may seem at first like you failed to secure your route, that’s not the case. We only enabled the Rack Middleware for production. Stop your local server and restart it in production mode:
Now, try to access the URL again:
Huzzah! You have successfully secured your webhook.
Sending a Text Message
In Part 1 we learned about handling inbound phone calls. This is great when your user is the one initiating the communication with your application. However there are times when your app needs to initiate contact with your users. This is where Twilio’s REST API comes into play. Let’s write some code that sends a simple text message. Create a new controller called notifications_controller.rb with the following code:
Now fill out the notify action. First, initialize a client object that you can use to make requests to the Twilio REST API:
You’ll notice that you are initializing this client with the Account SID and Auth Token values from the secrets.yml file. Pat yourself on the back for not putting secure credentials in your code. Next, send an SMS:
Please replace AAA with your Twilio phone number and BBB with the phone number you used to verify your Twilio account. You can see a list of your verified phone numbers at Numbers > Verified Caller IDs. Finally, return some plain text with the status of the sent text message:
Finally, edit config/routes.rb to create a new route for this controller and action:
Go back to your terminal and restart the Rails server (no need for the -e production flag, development environment is just fine). Test the new route using curl:
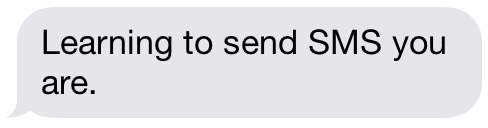
If all goes well your phone will buzz and you should see:
Sending a Picture Message
Now, sending an SMS is pretty awesome. But you know what’s cooler than sending SMS? Sending an MMS. Twilio recently launched MMS support for US phone numbers, and it’s as easy as adding one more parameter to a function call. To see if your Twilio phone number is MMS-capable, just go to your Numbers page:

All you need to do to send an MMS is to include one more parameter in your call to the Twilio REST API. Edit notificiations_controller.rb and add a media_url parameter:
Restart your local Rails server and test it out:
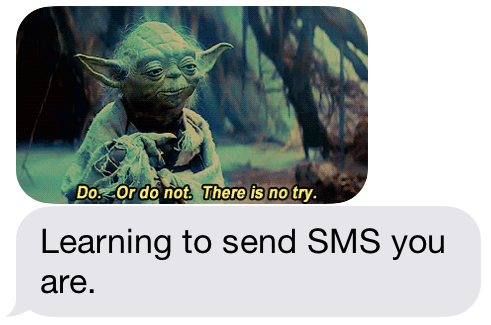
You should see a familiar face encouraging you to keep going:
Getting Notified of Delivery Status
Now, in the event that you’re sending an important message you might want to know for sure that it was delivered. Twilio provides delivery receipts for messages that you send and you can use webhooks to have your Rails app notified when a message is successfully delivered.
The first step in setting this up is to pass a Status Callback webhook to Twilio when you send your message. Twilio will make HTTP requests to this URL as the as the status of your message changes. Edit notifications_controller.rb and modify the code you use to send the MMS to specify a Status Callback URL that points to a /twilio/status route:
Next you need to actually implement this new route. Create a new action called status in twilio_controller.rb :
The delivery status of your message can be found in the MessageStatus HTTP POST parameter. We’re not doing anything interesting with it in this example but you could imagine using this information to:
- Store the status in a database
- Initiate a re-send of the message if it failed
- Log a failure to deliver and notify an admin
Finally, modify config/routes.rb to add the route:
Restart your local Rails server and run Ngrok. Since Twilio will be calling our Status Callback webhook, our app needs to be on the public internet:
Copy the domain that Ngrok provides you and use it to make a request to your app using curl:
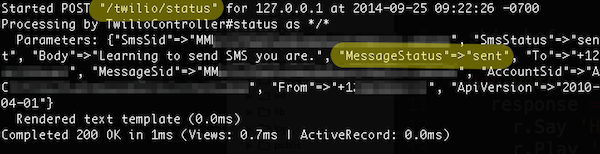
Now, go look at the output of your Rails server. You should see several requests come through. The first request is the one you made to the notify action:

The next request is from Twilio to your new status action. There are a couple of things that Twilio might tell you about the status of your message, hopefully you’ll see that it’s been sent.
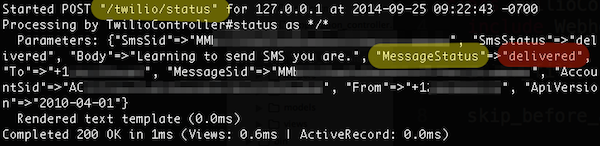
And finally, in the event that the message is successfully delivered to the user, Twilio will pass that information along:
Wrapping Things Up
In Part 1 we walked through signing-up for Twilio, getting a phone number and building a Rails 4 app that could handle an incoming phone call. In Part 2 you learned how to:
- Secure your app
- Send text and picture messages
- Get notified by Twilio about the delivery status of your message
In the final part of our series on integrating Twilio into a Rails 4 application we will cover how you can use Twilio to enable real-time voice communications on a webpage using WebRTC and the Twilio Client JavaScript library.
All of this code we looked at is up on Github. Until next time, happy hacking!
Update: Part 3 has been published. Check it out!


Related Resources
Twilio Docs
From APIs to SDKs to sample apps
API reference documentation, SDKs, helper libraries, quickstarts, and tutorials for your language and platform.
Resource Center
The latest ebooks, industry reports, and webinars
Learn from customer engagement experts to improve your own communication.
Ahoy
Twilio's developer community hub
Best practices, code samples, and inspiration to build communications and digital engagement experiences.