Generating Music with Sonic Pi and Ruby
Time to read: 5 minutes
May 17, 2018
Written by

Sonic Pi is an Integrated Development Environment (IDE) for writing music in Ruby. I write code with Ruby using the Sonic Pi IDE and sample myself screaming over it with Audacity under the artist name Messica Arson. The sound I create is very much inspired by the strange sounds of noise music combined with my screams I perfected while fronting a punk band.
In this tutorial we’ll walk through how to create this song together.
What is Sonic Pi?
With Sonic Pi we can interact with our computer as if we were using a synthesizer. Under the hood Sonic Pi is a Ruby wrapper for SuperCollider. There are samples and synthesizers loaded in that you can interact with in countless ways. You can also add your own samples as we will be doing in this tutorial.
Download Sonic Pi before moving on with the rest of the post. If you have an older version of Sonic Pi be sure to update to the most recent version (version 3.1). To update, go to the help menu and then click where it says updates and click check now to see if there any recent updates.
Loops are the core of Sonic Pi
Since electronic music is built off repetitive loops, understanding how loops are created is a critical concept to using Sonic Pi effectively. Live loops allow you to make changes on the fly.
The basic syntax of a loop in Sonic Pi is as follows:
The first step to creating a loop is to name your loop. From there you can call in the synth or the sample you are working with. The sleep allows you to adjust the timing of your loop. For sleep, lower numbers make the sound faster and higher numbers make the sound slower. It’s important to note, if you don’t include the sleep the loop won’t work.
Let’s get started writing a song together
Now that we know the basic syntax of loops in Sonic Pi, we can write our first loop in Buffer 0 of the IDE. In Sonic Pi a buffer is where you write code. You can write code in one buffer and move to another buffer to write more code while you are creating a song without stopping. Some developers choose to write code in multiple buffers to keep things organized. There are 10 buffers that start count at 0. Today we will be writing code all in one buffer.
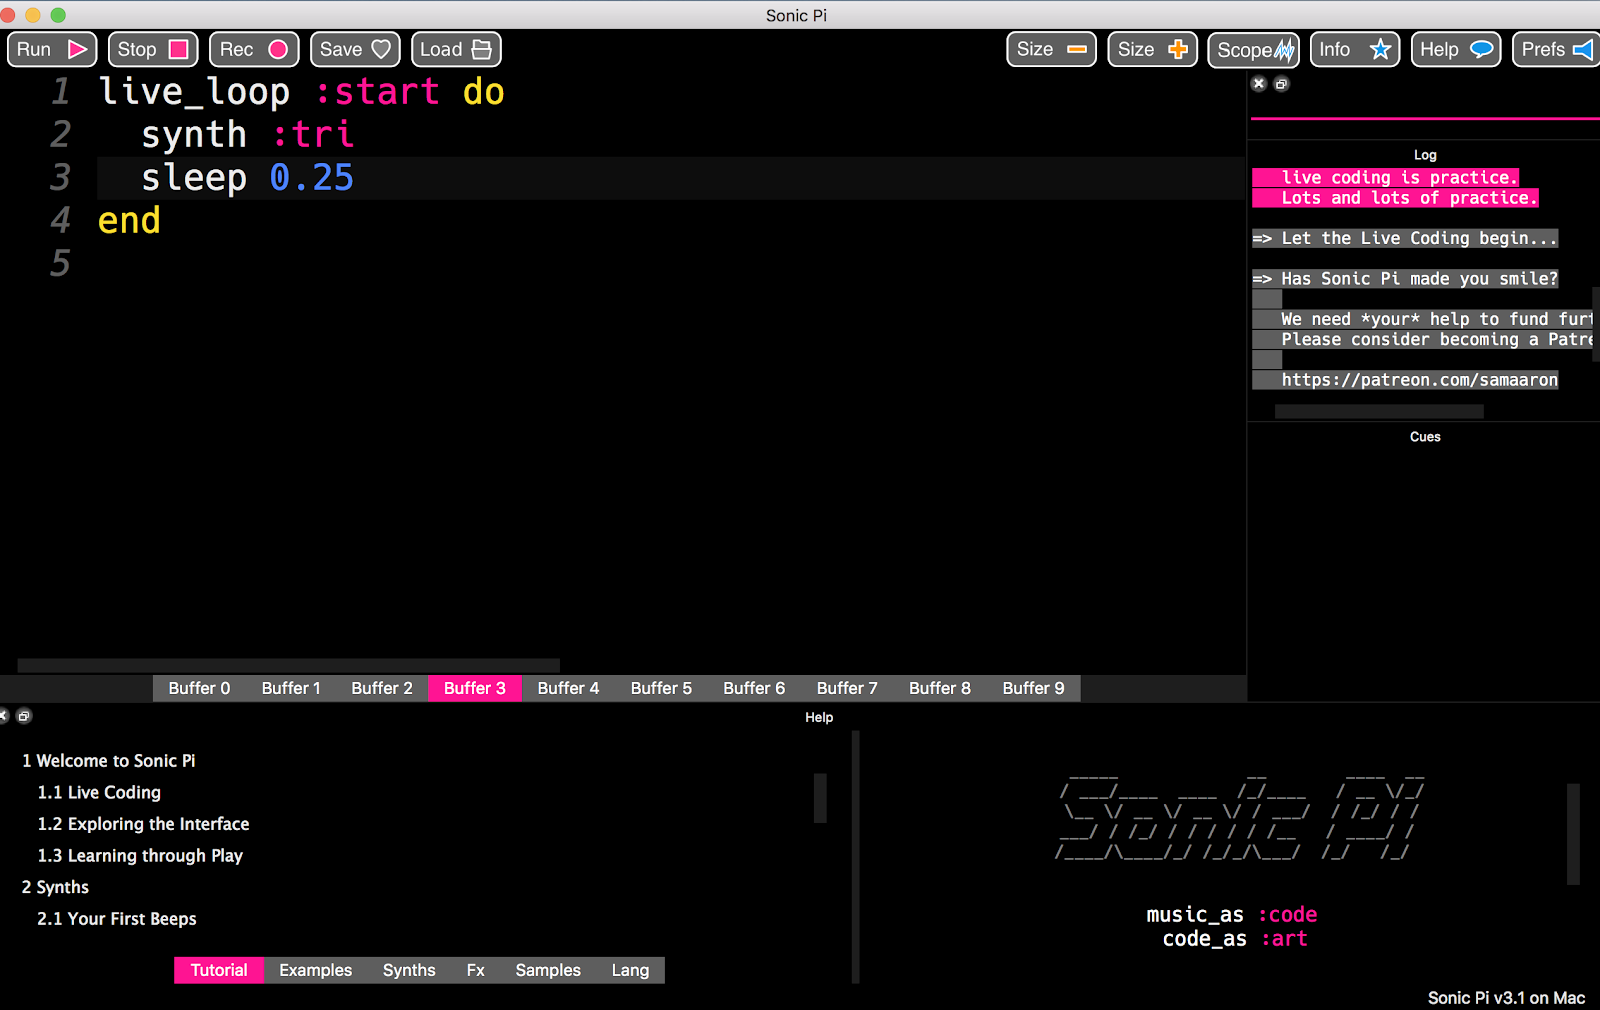
Let’s create a loop named start that uses the tri synth in Buffer 0 which is the first buffer in the IDE:
To run the loop press the Run button or alt/cmd R. To stop the sounds press alt/cmd S or the stop button. The tri synth creates a nice pleasant melody that sounds like this. A full list of keyboard shortcuts for Sonic Pi can be found here.
Adding a sample to our song
We can now add in a sample to our loop named start. Let’s use one of my favorite premade samples called loop_safari. Edit your loop to look like this:
The sound now should have more percussive elements to it and sound like this.
Adding a second loop with bass
So far, we’ve been working in one loop but if we added a different loop we can adjust the timing. The timing denoted by the sleep of the loop so that it plays at a slower or faster pace. To create a more complete sound for our song, we’re going to have our bass be slower than our first loop.
Right below your start loop let’s add a second loop:
As you can hear, the bass makes the sound we are creating seem more full.
Adding effects
We can add effects such as distortion. Distortion increases the amplitude of the gain of the sound to create a fuzzy effect. We are going to add in another melody with a fuzzed out bell sound. Let’s add a third loop under our loop entitled second that uses the distortion effect:
Here is what we should be hearing right now.
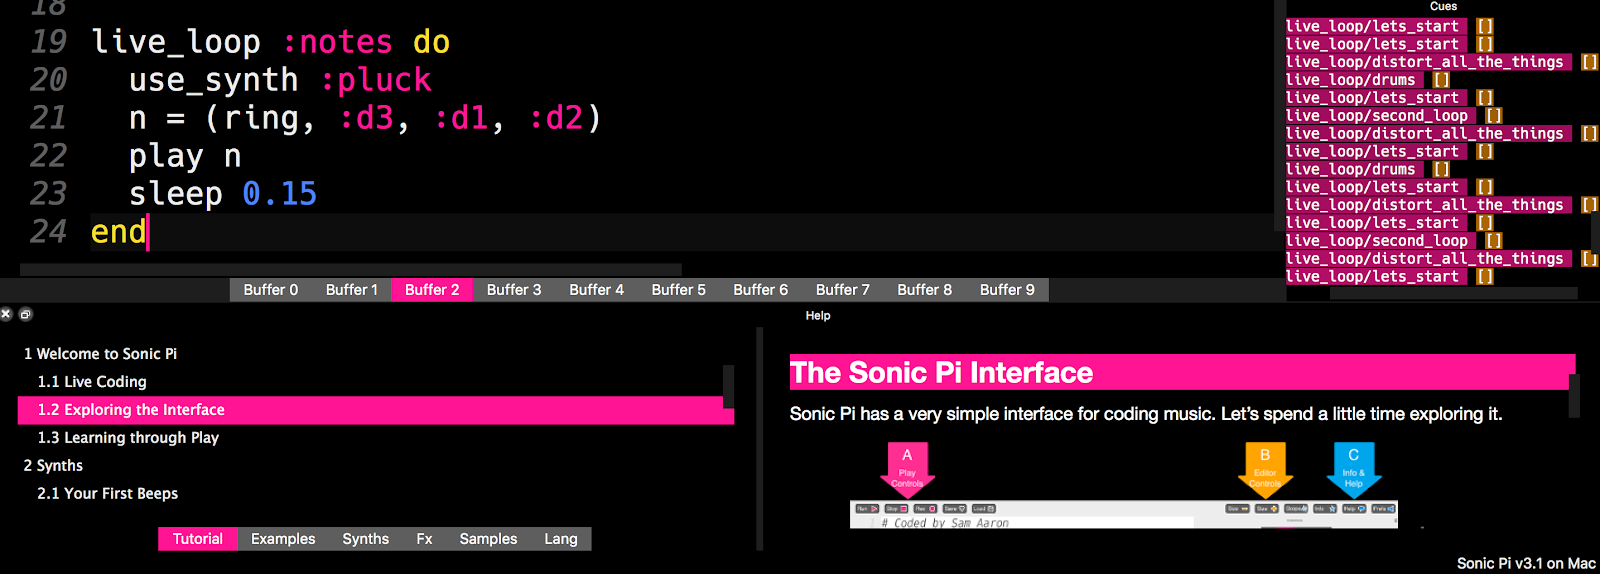
Using notes
We can also play a ring of notes by adding in a fourth loop under the distort_everything loop. Let’s add this loop:
We just added a synth that sounds like the plucking of a guitar string using the notes d3, d1, and d2. With this loop added our song now sounds like this.
Adding in audio samples
At this point in the tutorial, you can download the file that I use or you can use another audio file of your choice. You can also sample yourself as well. To sample myself, I record myself screaming in Audacity using a microphone connected by a usb cable. I can use the path of the file I created in the recording process to create a loop such as this one:
Be sure to replace the path/to/soundfile.wav with your own file path of the audio file you created in Audacity or the file that was downloaded.
This loop is placed at the bottom of my code below the notes loop.
Full code
The full code of the song is as follows:
My favorite feature of Sonic Pi
When I got started with Sonic Pi, I had written zero lines of Ruby. This was my favorite way to learn a new programming language because I got to hear my code make cool sounds. If you change the code slightly, it’s fun to see what it does to the sound. You can live update the sound by pressing Run or alt/cmd R even if you are already playing music.
One of the coolest things about Sonic Pi is that the documentation is built into the IDE. When I first started with Sonic Pi I took the examples in the documentation and changed them until they became my own sounds. This feature also comes in handy when you are getting started or if you are stuck.
Now that you know my process of creating songs in Sonic Pi, I hope this gives you inspiration to get started. You can record songs you create by pressing the Rec button and saving the .wav file. Please be sure to send me an email at @JessicaGarson to let me know what cool sounds you make with Sonic Pi.
Jessica Garson is a Adjunct Professor at NYU. She’s previously also the organizer of the Tech Lady Hackathon, and the organizer of Hack && Tell DC. She is a frequent teacher at DC’s Hear Me Code, beginner friendly classes for women by women and has run programming classes at DC area public libraries. Jessica also runs a self-published programming magazine called What’s my Function. In 2015, she was named by DC FemTech as one of the most powerful Women in Tech. In 2017, one of her projects nominateher.org got named best web/mobile product of the year by Technical.ly D.C.


Related Resources
Twilio Docs
From APIs to SDKs to sample apps
API reference documentation, SDKs, helper libraries, quickstarts, and tutorials for your language and platform.
Resource Center
The latest ebooks, industry reports, and webinars
Learn from customer engagement experts to improve your own communication.
Ahoy
Twilio's developer community hub
Best practices, code samples, and inspiration to build communications and digital engagement experiences.