Automating Ngrok in Python and Twilio Applications With Pyngrok
Time to read: 6 minutes
June 26, 2020
Written by
Reviewed by

When you are developing an application that uses Twilio services you need to expose your webhooks on public URLs that can be reached by Twilio. If you have followed some of the tutorials that we published on this blog you know that we recommend using the excellent ngrok tool to generate temporary public URLs for your development web server. Ngrok is an incredibly useful tool that creates a tunnel from a URL on the ngrok.io domain to your application running on your computer. You can then configure your webhook using the ngrok URL and when Twilio sends a request to it, ngrok redirects it to your application.
If you use ngrok frequently enough, it pays off to become a paid customer, which allows you to secure a permanent URL. But if you only use this service occasionally, it is tedious to have to log into the Twilio Console to update your webhook URL every time you start a new ngrok session.
In this article I’m going to show you how to fully automate ngrok, by incorporating it into your Python application. The application will create an ngrok tunnel and update the Twilio webhook with the assigned URL automatically!
Tutorial requirements
To follow this tutorial you need the following components:
- Python 3.6 or newer. If your operating system does not provide a Python interpreter, you can go to python.org to download an installer.
- A phone with SMS support.
- A Twilio account. If you are new to Twilio create a free account now. If you use this link you’ll receive $10 in credit when you upgrade to a paid account (review the features and limitations of a free Twilio account).
Configuration
Let’s start by creating a directory where our project will live:
Following best practices, we are now going to create a virtual environment where we will install our Python dependencies.
If you are using a Unix or MacOS system, open a terminal and enter the following commands to do the tasks described above:
For those of you following the tutorial on Windows, enter the following commands in a command prompt window:
The pyngrok package
The secret tool that makes it possible to automate the ngrok workflow is the pyngrok package, a Python wrapper to the ngrok command line tool.
You can install pyngrok into your project’s virtual environment using the pip installer:
The package automatically downloads the ngrok client the first time you use it, so you do not need to download or install anything else besides this. After installation, you’ll have the ngrok command installed in your virtualenv’s bin directory ready to be used, either directly from the command line as you may have done before, or from Python code, which is much more interesting and fun, as you will see below.
In the command line, you can run ngrok http 5000 to start a tunnel to the local application running on port 5000, in the same way you would if you downloaded the ngrok client directly. But when using pyngrok you also have the option to configure your tunnel programmatically. The equivalent using Python code is:
The value returned by the ngrok.connect().public_url expression is the randomly generated URL that is tunneled to your local port. You can try the above code in a Python shell if you like, but you’ll have an opportunity to apply this technique on a real project later in this tutorial.
Setting Twilio webhooks programmatically
Once we have the temporary ngrok URL assigned, the next step is to set the appropriate webhook for our application. Normally we do this by logging in to the Twilio Console, going to the Phone Numbers dashboard and finally copy/pasting the webhook URL into the SMS or Voice webhook field.
To eliminate the tedious manual work involved in this we are going to use the Twilio API to set the SMS and/or Voice webhooks. If your application does not use the Twilio API already, you will need to install the Twilio Helper Library:
You will also need to have your Twilio Account SID and Auth Token set as environment variables. To obtain these credentials log in to your Twilio Console and then select “Settings” in the left sidebar. Scroll down until you see the “API Credentials” section.
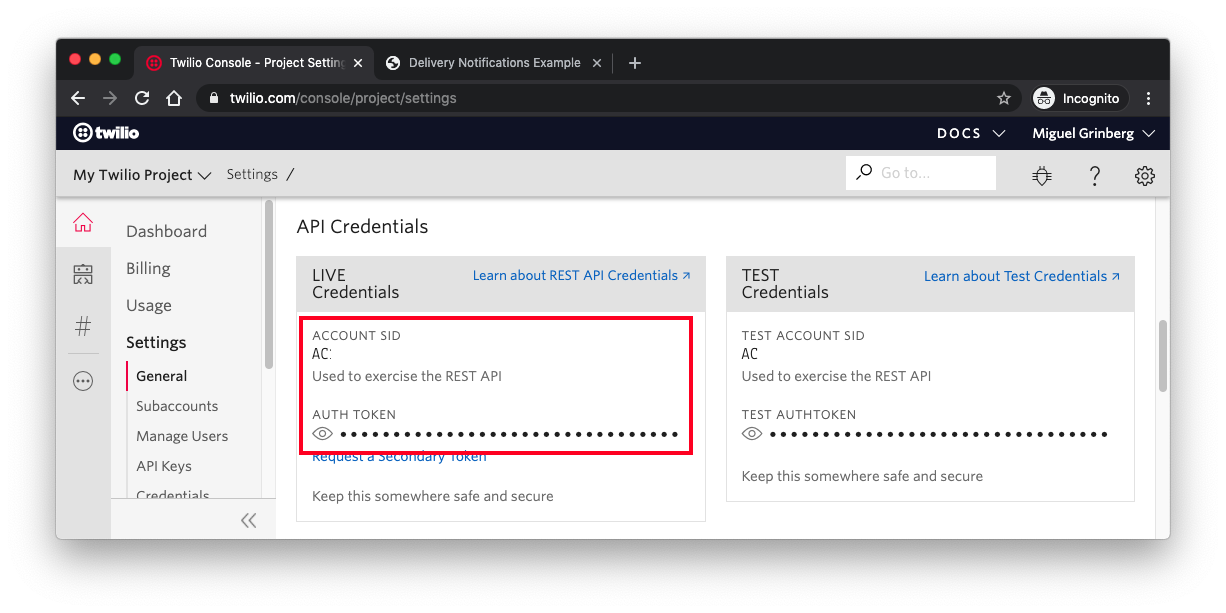
Two environment variables with the names TWILIO_ACCOUNT_SID and TWILIO_AUTH_TOKEN must be defined for the Twilio client to be able to authenticate. You can set these variables in any way you like. In the next section we’ll use a .env file to configure these variables.
Once the variables are in the environment, you can change the SMS and voice webhooks for a phone number associated with your account using Python code as follows:
The client object automatically imports the Twilio credentials from the environment variables mentioned above. If the variables are missing or incorrectly set, the client won’t be able to call the Twilio service.
The list() method that we call on the incoming_phone_numbers resource performs a search of our target phone number. The return of the search is a list, but because we are looking for an exact number we can directly use the first entry, on which we call the update() method to set our webhooks.
The update() method accepts a few more arguments that are related to webhooks. Here is the complete list:
sms_url: the SMS webhook.sms_method: the HTTP method to use when invoking the SMS webhook. Defaults toPOST.sms_fallback_url: the SMS fallback webhook.sms_fallback_method: the HTTP method to use when invoking the SMS fallback webhook. Defaults toPOST.voice_url: the voice webhook.voice_method: the HTTP method to use when invoking the voice webhook. Defaults toPOST.voice_fallback_url: the voice fallback webhook.voice_fallback_method: the HTTP method to use when invoking the voice fallback webhook. Defaults toPOST.voice_receive_mode: eithervoiceorfax. Defaults tovoice.status_callback: the status webhook.status_callback_method: the method to use when invoking the status webhook. Defaults toPOST.
A complete example
To help you incorporate these techniques into your application, I’m going to show you a complete example. Make sure your current directory is the twilio-pyngrok one you created above, and also that your virtual environment is activated.
Install the following Python dependencies into the virtual environment:
Create a .env file (note the leading dot) where you can store credentials and application settings:
For the phone number, use the canonical E.164 format. For a number in the United States, the format is +1aaabbbcccc, where (aaa) is the area code, and bbb-cccc is the local phone number.
For this example we are going to use a small bot that replies to all incoming messages with a greeting. You can copy the following code in a file called bot.py:
Let’s review what this application does. Right after the imports, we call the load_dotenv() function. This function comes from the python-dotenv package, and as its name implies, it looks for a .env file and loads any variables it finds in it into the environment. The app instance is the Flask application instance.
The bot() function is our SMS webhook handler. This function is associated with the /bot URL, which is going to be configured as the SMS webhook that Twilio will call whenever the Twilio phone number receives a message. Since this application is intended as a simple example, the only logic in this bot is to send a greeting as a response.
The start_ngrok() function uses the techniques we have learned in this article to automate the use of ngrok. First we set up a tunnel on port 5000, which is the port on which the Flask application will listen for requests locally. Once we have the ngrok URL, we instantiate a Twilio client and use it to update the SMS webhook URL as shown in the previous section. Note how we use the TWILIO_PHONE_NUMBER environment variable to select the phone number we want to configure.
The webhook URL that we are configuring has two parts. The root URL is the temporary URL generated by ngrok. We then append the path to our bot route, which is /bot.
The last four lines of the script have the startup code for the application. Normally we just call the app.run() function from Flask to get the server started, but now we want to set up the ngrok tunnel before we do that.
Instead of simply calling start_ngrok() before app.run(), I added a check on the WERKZEUG_RUN_MAIN environment variable, which is used by the Flask reloader subsystem. If the reloader isn’t used, then this variable isn’t defined so start_ngrok() will be called every time. If the reloader is used, this condition will be true when this code executes in the parent reloader process, but not on the child process that gets recycled with every reload. This ensures that the tunnel URL stays the same as the server reloads.
Ready to give this a try? Make sure you have your credentials and your phone number in the .env file, and then run the bot.py script:
And now send an SMS to your Twilio phone number to confirm that the bot’s webhook was automatically configured.
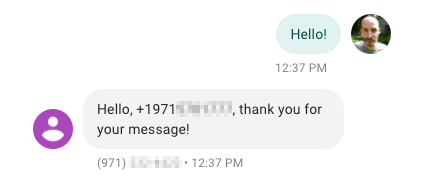
When you stop the server with Ctrl+C the ngrok tunnel will be deleted.
Conclusion
In this tutorial we have implemented a convenient workflow that uses the pyngrok package to attach a public URL to your Twilio webhooks during development with no manual configuration needed.
I hope this technique makes you more productive when working on your Twilio apps!
Miguel Grinberg is a Python Developer for Technical Content at Twilio. Reach out to him at mgrinberg [at] twilio [dot] com if you have a cool Python project you’d like to share on this blog!


Related Resources
Twilio Docs
From APIs to SDKs to sample apps
API reference documentation, SDKs, helper libraries, quickstarts, and tutorials for your language and platform.
Resource Center
The latest ebooks, industry reports, and webinars
Learn from customer engagement experts to improve your own communication.
Ahoy
Twilio's developer community hub
Best practices, code samples, and inspiration to build communications and digital engagement experiences.