Build a Digital Sticky Notes App with Flask and Svelte
Time to read: 8 minutes
September 02, 2022
Written by
Reviewed by

Sticky notes are a great tool for organizing your thoughts or keeping track of things you need to do.
If you are a student, or anyone thinking about a lot of things at once, there are tons of ways a sticky note could help you out. You can write down the things you need to remember to do, the items on your back-to-school shopping list, notes about what you're learning or thinking, and so much more.
If you enjoy using paper sticky notes, perhaps you might also be interested in giving digital sticky notes a try. In this tutorial, you'll learn how to build a digital sticky notes application, using Python and Flask for the backend API, JavaScript and Svelte for the UI, and Twilio Sync to store the notes.
Prerequisites
- A free Twilio account. (Sign up here to try Twilio for free.)
- Python 3.9+.
- Node.js v16+ and npm installed on your machine.
Build the project structure
To start, open a new terminal window and navigate to where you would like to set up your project. Once you have done this, run the following commands to create a new directory called sticky-notes and change into this directory:
Create a Flask application
Inside the new project directory, create a Python virtual environment where you will install the dependencies for this project. If you are working in a Mac or Unix environment, run the following commands:
If you are working in a Windows environment, run the commands below instead:
For this project, you will be using the following Python modules:
- Flask, to create the web application
- python-dotenv, to import environment variables
- The Twilio Python Helper Library, to work with the Twilio SMS API
Run the following command in your terminal to install these modules in your virtual environment:
Next, run the following commands to create a server directory for your backend code:
Create and open a new file inside the server directory called app.py, paste in the following code to scaffold your Flask application:
From the server directory, run the following command, making sure your virtual environment is still activated:
You will see logs letting you know the server is running on port 5000:
Create a Svelte app
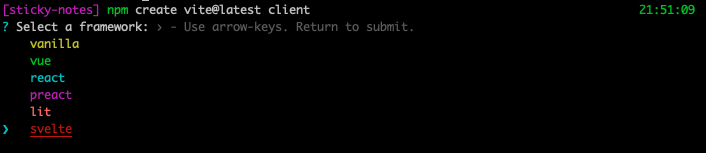
Now that you've set up the server side of the app, it's time to scaffold the client side. Open a new terminal tab, navigate back to the sticky-notes directory, and run the following command to create a new Svelte app:
In the list of frameworks, select svelte from the list and then svelte again from the variants list in the next prompt.
This will create a new Svelte project in a directory called client. Change into the client directory and install dependencies with the following commands:
Then, in the client/package.json file, add a comma after at the end of the preview script definition, and then add the following autobuild script just below it:
This script will rebuild your Svelte app when file changes are detected.
Run the command now by entering the following command in your terminal:
You will see log statements like the following, letting you know that the app was built, and the Vite build tool is watching for changes:
Now that the structure of your app is set up, it's time to configure your Sync service and the list where you'll keep your sticky notes.
Set environment variables
Leave the two terminals running the Flask and Svelte applications, and in a third terminal, return to the server directory, and create a new file called .env. Open this file in your text editor and add the following environment variables and their placeholder values:
Log in to your Twilio Console, and scroll down to your Account Info section:
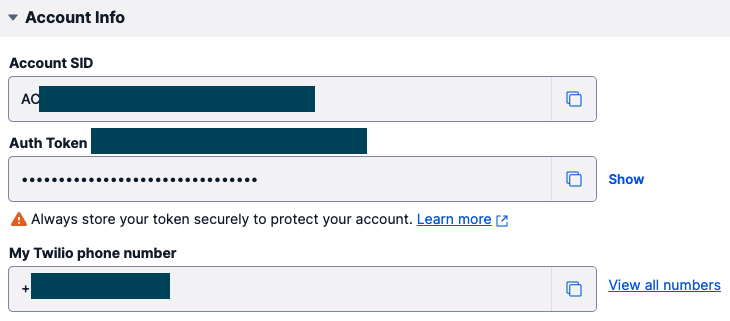
Here you will find your Account SID and Auth Token. Copy these values and replace the placeholder text for TWILIO_ACCOUNT_SID and TWILIO_AUTH_TOKEN with these values.
Next, navigate to Sync > Services and click the Create new Sync Service button:
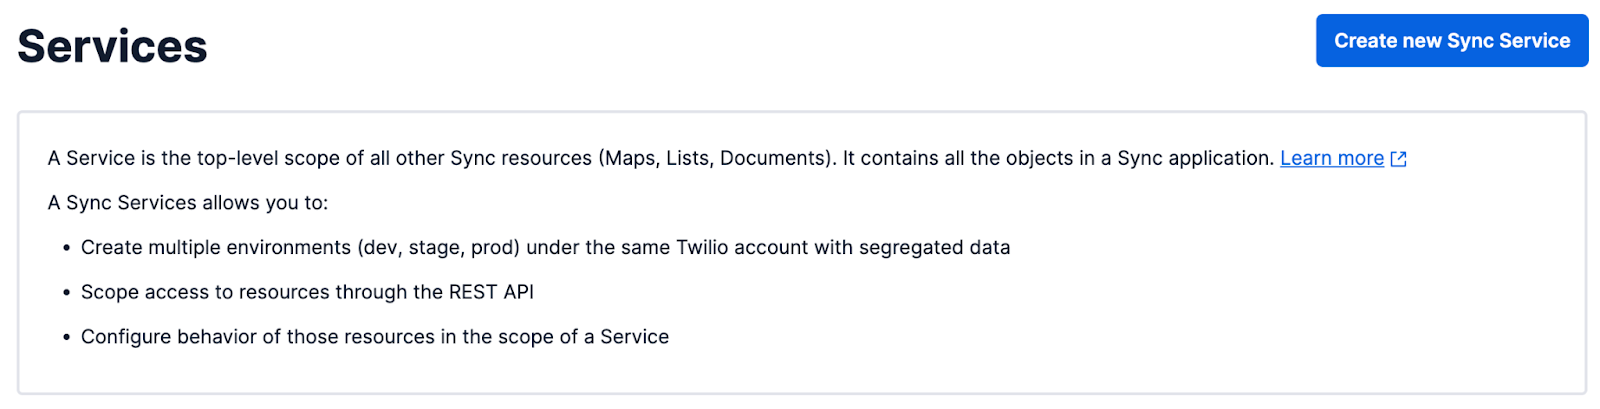
In the modal that appears, enter sticky-notes or your preferred friendly name in the form, then click the Create button:
Once you have done this, you will be taken to the Service Configuration page that shows the details of your new Sync service.
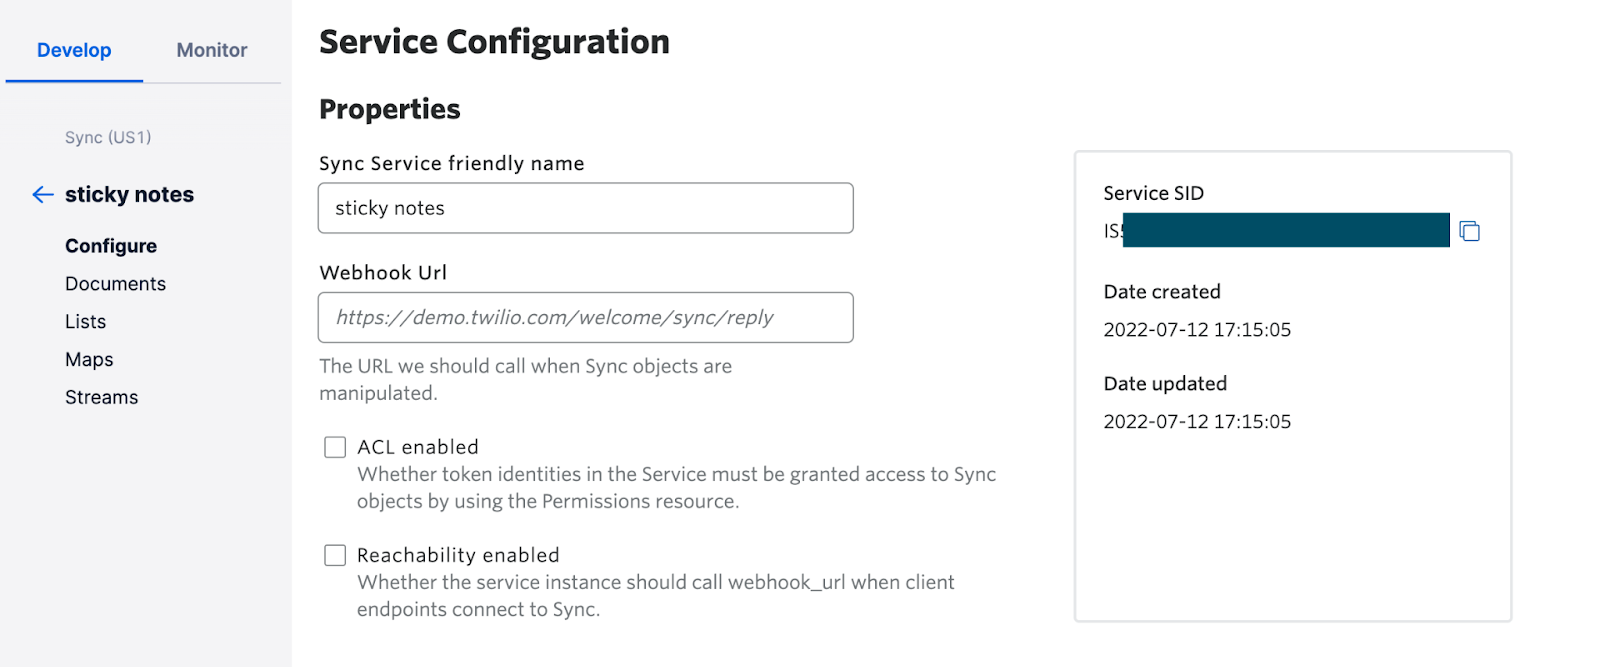
Copy the Service SID and paste this into the .env file as the value for TWILIO_SYNC_SERVICE_SID.
Now that you have a Sync service, the next step is to create a Sync List. A Sync List is an ordered collection of individual items, and each sticky note in your list will be stored as a Sync ListItem.
To create the Sync List, navigate to the Lists item in the left-hand menu.
Then, click the Create new Sync List button.

In the form that appears, add a friendly name for your Sync List, like "sticky notes list". (Feel free to name it something more creative, if you like!)
Click the Create button, and the new Sync List will be shown in your Sync Lists menu. You can find the SID right next to the Sync List's name:
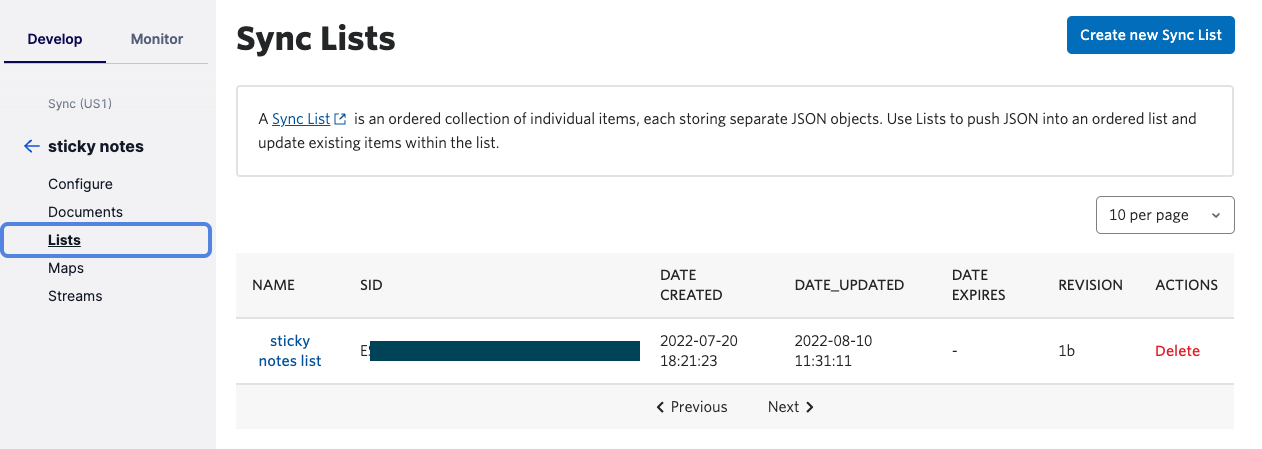
Copy this SID, and paste it into your .env file as the value for TWILIO_SYNC_LIST_SID.
Now you have all of the environment variables you need for this project.
Configure the server to manage sticky notes
Open server/app.py in your text editor. In the file, add the following code, which imports the dependencies you need for this part of the project and loads the environment variables you declared in the previous step:
Next, paste the following code just below your environment variables:
In this code, you create a new Twilio Client instance using the Python helper library. Then, you create a sync_list variable that stores the method for retrieving a specific Sync List. This variable is useful for readability, since you'll need to call the API in a few different functions you'll write later in the tutorial. Just below the sync_list variable, there is a get_sync_list() function, which will call the Twilio API to retrieve the sync list and arrange its list items into a Python dict.
Next, since you'll be using Flask to serve your Svelte application, add the following two functions that will help you do this:
The root() function uses Flask's send_from_directory() method to send the index.html file built from your Svelte code, while the assets() function will send your Svelte app's other static files. Remember when you ran npm run autobuild earlier? These functions will let your application serve the files built during that build process.
Now that you can serve the Svelte files, it's time to write the code for interacting with the Twilio Sync API to list, create, and delete sticky notes.
To list the items in the sticky notes Sync List, add the following code just below the assets() function:
Here, when the client side makes a GET request to the /notes endpoint, the get_sticky_notes() function will get and return the list of sticky notes in a JSON response.
Next, to create a new sticky note list item, paste in the following create_sticky_note() function:
When the client side makes a POST request to the /notes endpoint, the data that is sent along with that request will be used to create a new Sync ListItem, and some data from that item will be returned to the client side.
If you can create sticky notes, you probably also want to be able to delete them. Just below create_sticky_note() add the following delete_sticky_note() function:
Here, when the client side makes a DELETE request to the /notes/<index> endpoint, the delete_sticky_note() function will use the index to find the specified sticky note in the Sync List and delete it.
Now that you have the API side working, it's time to create the UI for the sticky notes to appear in the browser.
Create Svelte components to display sticky notes
Add code to App.svelte
Navigate to sticky-notes/client/src, and you will see that there is already an App.svelte component. Replace the code in that file with the code below:
When this component first renders, the Svelte onMount() method will call getStickyNotes(), and the list items in the response from the server will be stored in stickyNotesList. The variable currentText holds the value of the text currently typed into the form at the bottom of the code snippet above. After a user enters some text into the input field, they will click the Sticky Note + button, and the createStickyNote() function will be called to create the new note.
Next, fill in the code for the other functions: getStickyNotes(), createStickyNote(), and deleteStickyNote():
In getStickyNotes(), you make a GET request to the /notes endpoint to retrieve the list of sticky notes and then save it to the stickyNotesList.
Next, in createStickyNote(), you make a POST request to the /notes endpoint with the currentText entered by the user. Once the new sticky note is successfully created, the app will call getStickyNotes() again to get the updated list of notes.
In deleteStickyNote(), the application will make a DELETE request with the index of the note that is to be deleted. Once that note has been deleted, the app will retrieve the updated list again.
Set up some initial CSS styles
Next, replace the CSS in client/src/app.css with the styles below:
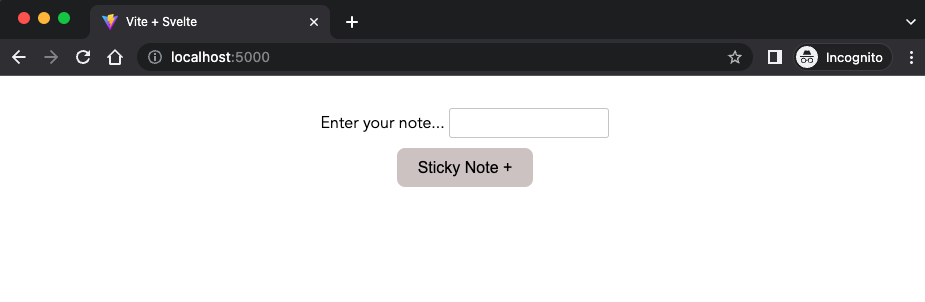
If you navigate to http://localhost:5000/ in your browser, you will be able to see what the application looks like so far:
Create StickyNote.svelte and Wall.svelte
Create two new components in the sticky-notes/client/src directory: StickyNote.svelte and Wall.svelte.
In StickyNote.svelte, paste the following code:
The StickyNote component will be rendered for each sticky note in the list. The location of the sticky note on the page is set when the new sticky note appears on screen. Notes initially appear in a stack on your screen. However, each note can be dragged and dropped anywhere in the window.
Once a user clicks to drag a specific sticky note, the handleMouseDown() function is called, and inMotion is set to true. While the user moves the mouse to drag the component, handleMouseMove() keeps track of the location of the sticky note on screen. Once the user stops pressing the mouse button, handleMouseUp() sets inMotion to false, and the sticky note will be dropped where the user moved it.
Each sticky note also has a little x button in the top right corner that when clicked, will call deleteNote() for that sticky note. When deleteNote() is called, a remove event is dispatched, which is forwarded through the Wall.svelte component and passed up to the App.svelte component, where deleteStickyNote() gets called.
Now, add some style to this component at the end of the file, so that the sticky notes look a bit more like the paper ones many people are familiar with:
Now it's time to move on to the last component: Wall.svelte. Open the file and add the following code:
This is the component that acts as a sticky notes board, displaying a new StickyNote for each of the notes in the stickyNotesList.
Open src/App.svelte again, and import the Wall component here:
Then, at the end of the file, add a <Wall /> component that will render the notes in the stickyNotesList:
This also lets the App component listen for the remove event, which will contain the index of the note to be deleted in its detail property.
Test the application
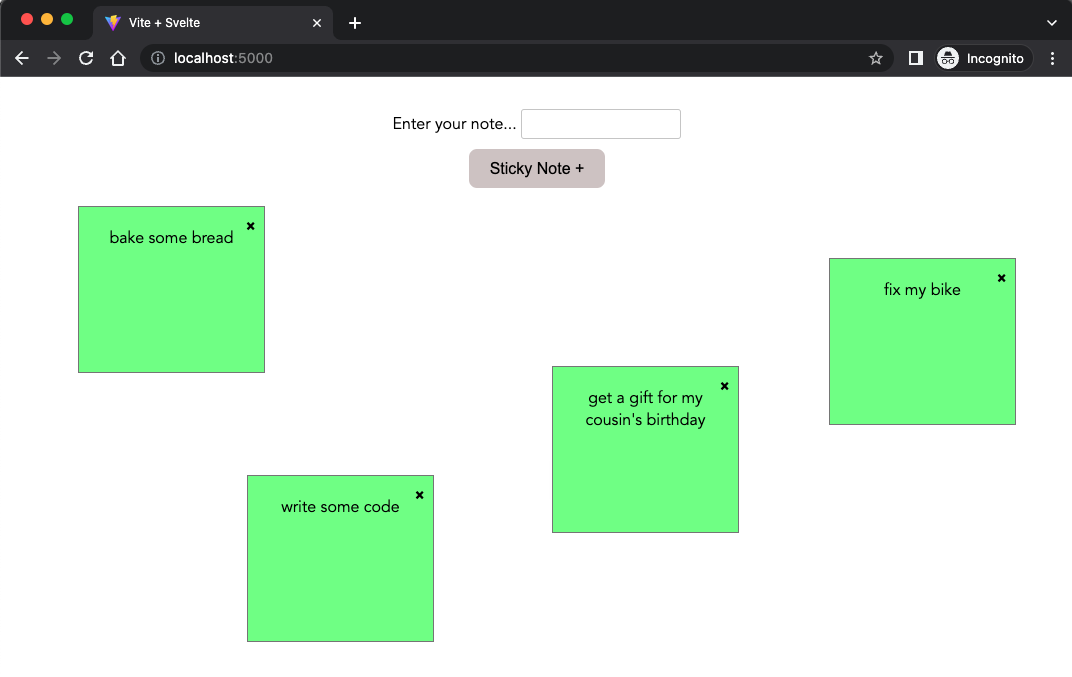
Navigate to http://localhost:5000/ to see how the application looks. It's time to test the app and create some sticky notes.
Enter some text into the input field. Click the Sticky Note + button, and you will see your new sticky note appear. Try dragging and dropping the note somewhere else on the screen, or try deleting one. Now you have a handy sticky notes app you can use for whatever's on your mind.
What's next for digital sticky notes?
I hoped you enjoyed building this sticky notes project. You can continue to customize it to your liking — perhaps you might like to change the colors of the sticky notes, or change the user experience for managing them.
If you're a person on the go, you could also deploy this project and use it on multiple devices. Or, make the notes editable by making an update request to a Sync ListItem.
If you're interested in other fun Svelte projects, why not try planning a trip or building a chat app? Or, if you're interested in other projects that use Python and Twilio Sync, perhaps you might be interested in building a kanban board or a collaborative whiteboard?
Maybe you could even brainstorm your project ideas on the sticky notes you just created. Happy coding!
Mia Adjei is a Software Engineer for Technical Content at Twilio. They love to help developers build new project ideas and discover aha moments. Mia can be reached at madjei [at] twilio.com.


Related Resources
Twilio Docs
From APIs to SDKs to sample apps
API reference documentation, SDKs, helper libraries, quickstarts, and tutorials for your language and platform.
Resource Center
The latest ebooks, industry reports, and webinars
Learn from customer engagement experts to improve your own communication.
Ahoy
Twilio's developer community hub
Best practices, code samples, and inspiration to build communications and digital engagement experiences.