Build a Halloween SMS App with PHP and Twilio's Programmable Messaging API
Time to read: 12 minutes
October 27, 2022
Written by
Reviewed by

Halloween. It's the second-most celebrated festival in the US after Christmas!
People of all ages dress up as ghosts, ghouls – often the scarier the better. Pumpkins are carved with spooky faces. And kids go trick-or-treating, coming home with so many sweets and candies that you'd think their tummies will explode.
It's a wonderful time of year and a fascinating tradition. Let's join in the festivities, and build a small web application that can SMS a Halloween-themed image stored in a DigitalOcean Space to your friends and family using Twilio's Programmable Messaging API.
If you want to trick them, you can send a scarier image and a scary message. If you want to treat them, you can send them a friendly image along with a fun, light-hearted message.
Here's what the app will look like when you're finished.

Sounds good? Let's begin.
Prerequisites
To follow this tutorial you need the following components:
- PHP 8
- Composer installed globally
- A free Twilio account
- A DigitalOcean account, with a Space available to upload images. Feel free to use a different service or a publicly accessible server of your own, if you prefer.
- A mobile phone with an active phone number
Create the project's directory structure
The first to do is to create the project's directory structure and switch into it, by running the commands below.
If you're using Microsoft Windows, run the following commands instead.
The new directory structure will look as follows:
It's a minimalist version of the typical directory structure you'd see in most modern PHP apps, especially in Symfony and Laravel. index.php, the core PHP file for the application, will be stored in the public directory. The CSS file, styles.css, will be stored in public/css. And the application's Twig template files will be stored in the templates directory.
Install the required dependencies
With the project's directory structure created, it's time to install the seven required dependencies. These are:
| laminas-inputfilter | laminas-inputfilter combines two packages, laminas-validator and laminas-filter. It simplifies the effort required to validate and filter information, such as user input, query and post information. |
| PHP Dotenv | As I do so commonly, in most of the apps that I build for my Twilio tutorials (and other apps), I use PHP Dotenv to keep sensitive configuration details out of the code (and version control). |
| PHP-DI Slim Bridge | This package configures Slim to work with the PHP-DI container. |
| Slim PSR7 | In addition to SlimPHP, we're using this library to integrate PSR-7 into the application. It's not strictly necessary, but I feel it makes the application more maintainable and portable. |
| Slim Twig View | We're using this package to render view content using the Twig templating engine; such as the forms to request a verification code, and upload an image and the simpler views, such as the success output. You could use template engines, such as Plates and Blade, but Twig is one of the oldest and most powerful, while still being pretty straightforward to use. You may have noticed that Twig isn't in this list. This is because Slim Twig View requires it as a dependency. |
| SlimPHP | Naturally, if we're basing the application on SlimPHP, then we have to make it available. |
| Twilio’s PHP Helper Library | As we're communicating with Twilio, we'll use this package to reduce the effort required. |
| Spaces-API | This package simplifies accessing the Digital Ocean Space. |
To install them, run the command below in your terminal, in the top-level directory of the project.
Add src to Composer's autoloader
To ensure that the class that you'll create, in src/HappyHalloween/Filter, towards the end of the tutorial will be autoloaded, you next need to add a PSR-4 autoloader to composer.json.
To do that, add the JSON below after the require element to composer.json.
Then, run the following command in the terminal.
Set the required environment variables
The next thing that you need to do is to set four environment variables, which the application requires. These are:
- Your Twilio Account SID, Auth Token, and phone number
- The base URL of your DigitalOcean Space.
To do this, first, create a new file named .env in the top-level directory of the project.
Set your Twilio credentials
Start off by retrieving and setting your Twilio credentials. To do that, paste the code below into .env.
Next, retrieve your Twilio credentials and phone number, so that the code can make authenticated requests to Twilio's Programmable SMS API and knows which phone number to send the SMS from.
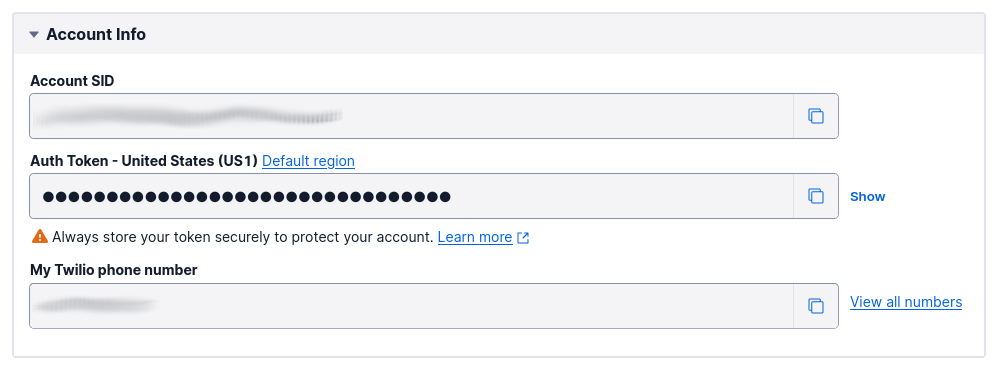
To do that, from the Twilio Console's Dashboard, copy your Account SID, Auth Token, and phone number and paste them in place of the respective placeholder values (TWILIO_ACCOUNT_SID, TWILIO_AUTH_TOKEN, and TWILIO_PHONE_NUMBER) in .env. You'll set the IMAGE_BASE_URL in the next section.
Set your DigitalOcean Space details
Next, it's time to set the DigitalOcean (DO) Space's details.
Add the following code to the bottom of .env.
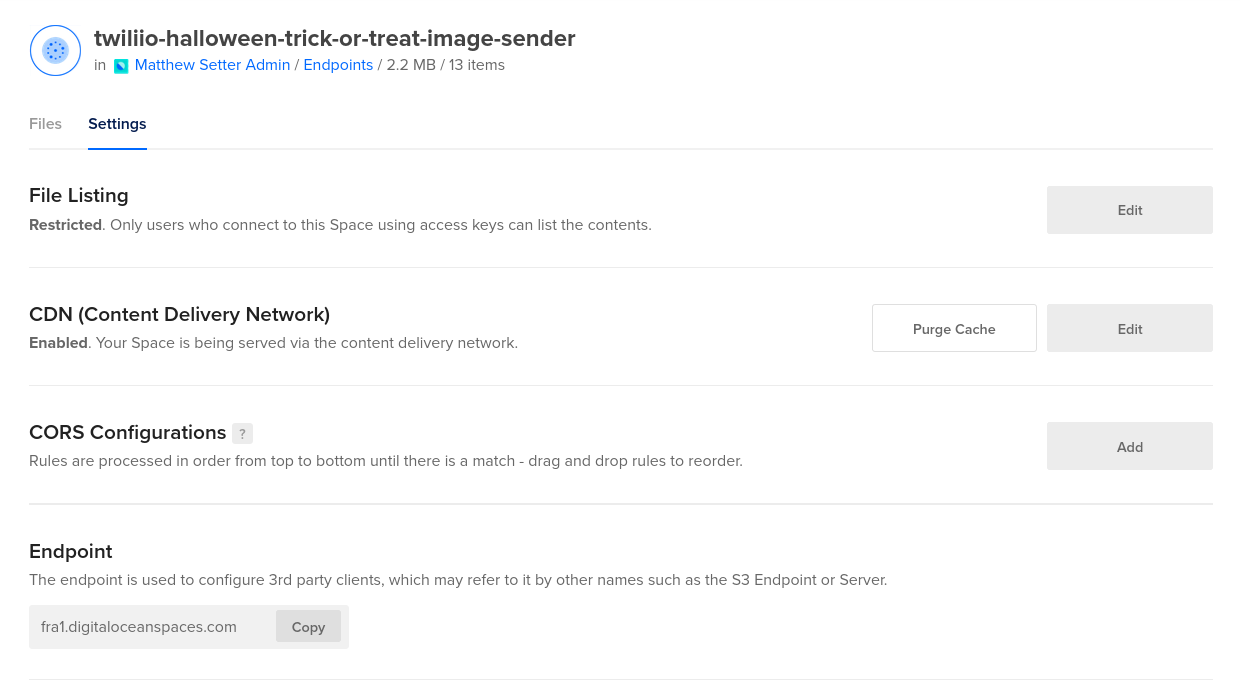
Log in to your DigitalOcean account and navigate to your empty Space, Replace the placeholder for SPACE_NAME in .env with the Space's name.
Next, click the Settings tab and retrieve the Space's region. This is the text before ".digitaloceanspaces.com" in the Endpoint field. Replace the placeholder for SPACES_REGION with this value.
Finally, you need to create a Spaces access key and secret. To do that, click API in the left-hand side navigation bar. Then, in the "Spaces access key" section, on the right-hand side, click Generate New Key.
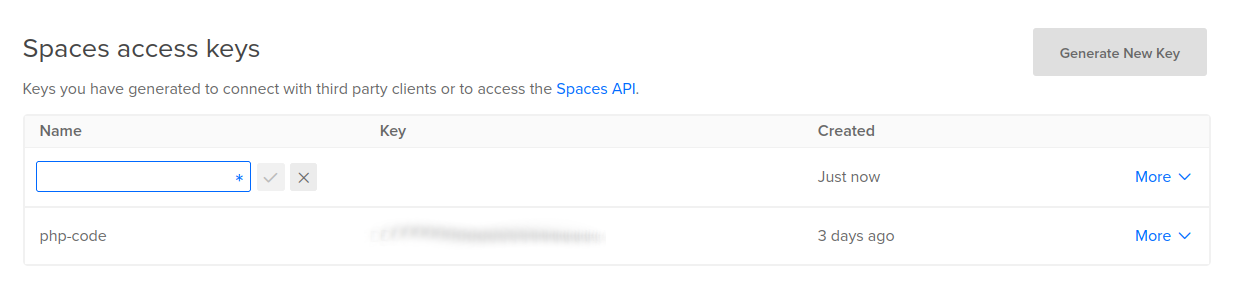
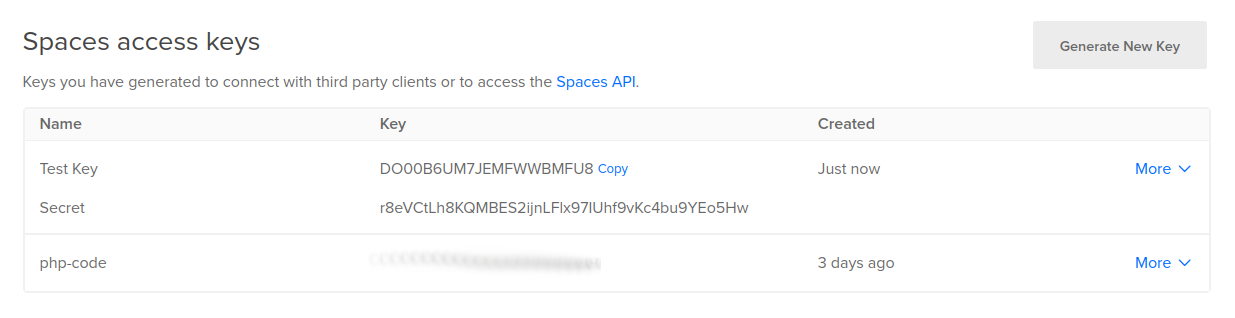
After that, enter a name for the new key, such as "halloween-sms-app", and click Enter. You'll then see a key and a secret. Copy them in place of SPACES_KEY and SPACES_SECRET respectively.
Upload the Halloween images to your DigitalOcean Space
Then, you need to upload Halloween images to your file host. I've created a small image
SPACES_KEY="xxxxxxxxxxxx"
SPACES_SECRET="xxxxxxxxxxxx"pack which you can use. However, feel free to use a pack of your own if you'd prefer.
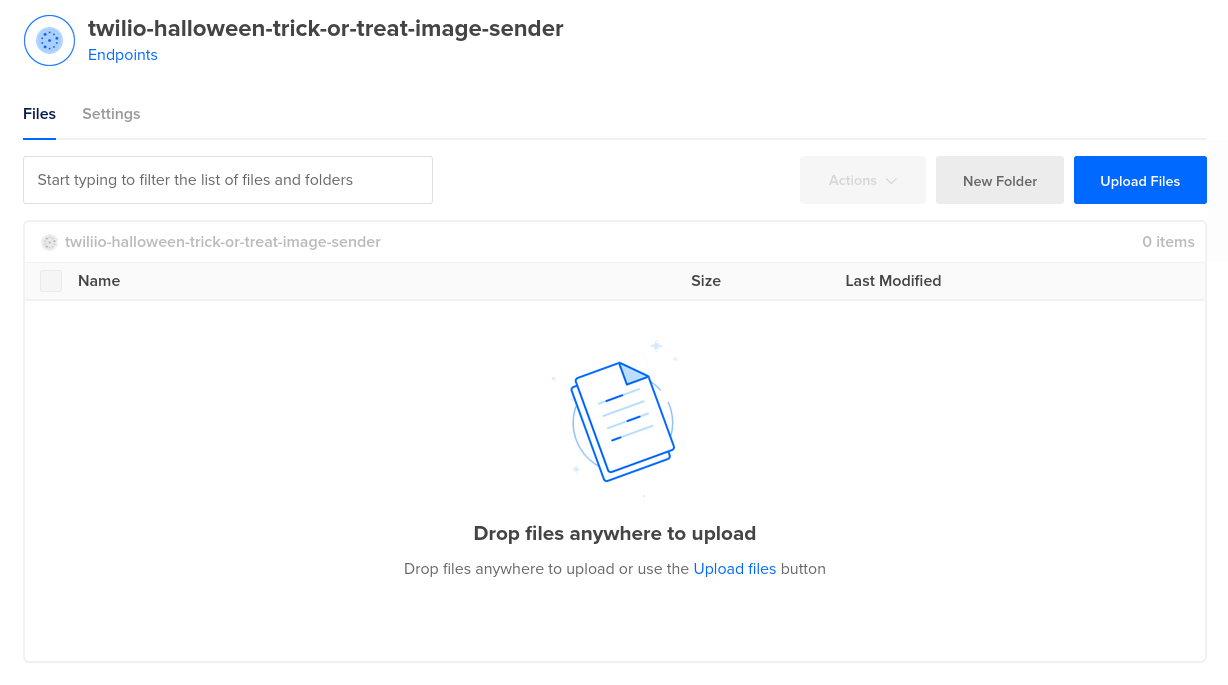
With your images at the ready, click Upload Files on the upper right-hand side and pick the images to upload or drag and drop them onto the Space.
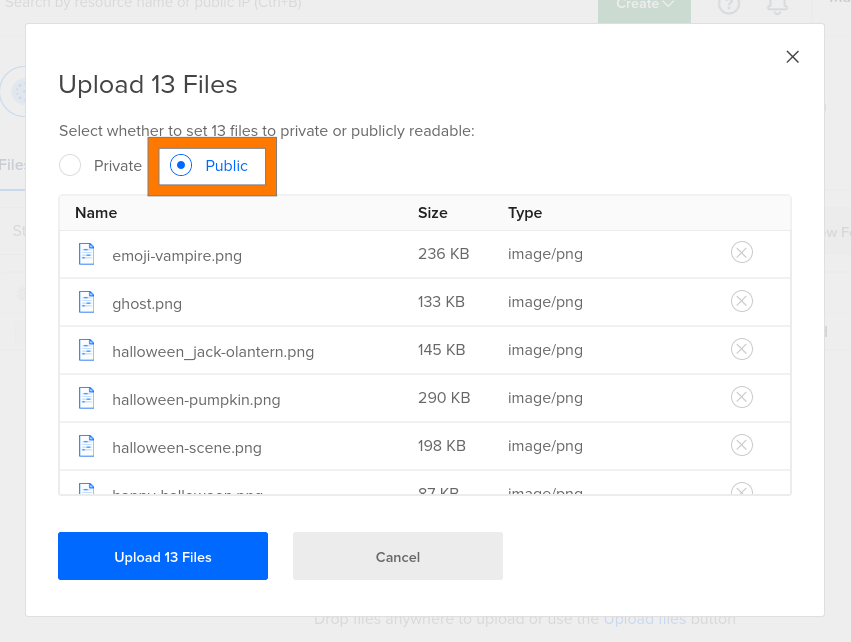
You'll then see an Upload Files dialog appear with the images ready to be uploaded. Before uploading them, above the images list set the files to be Public. If you leave them as Private they won't be publicly accessible.
With that change made, press the Upload Files button at the bottom of the dialog.
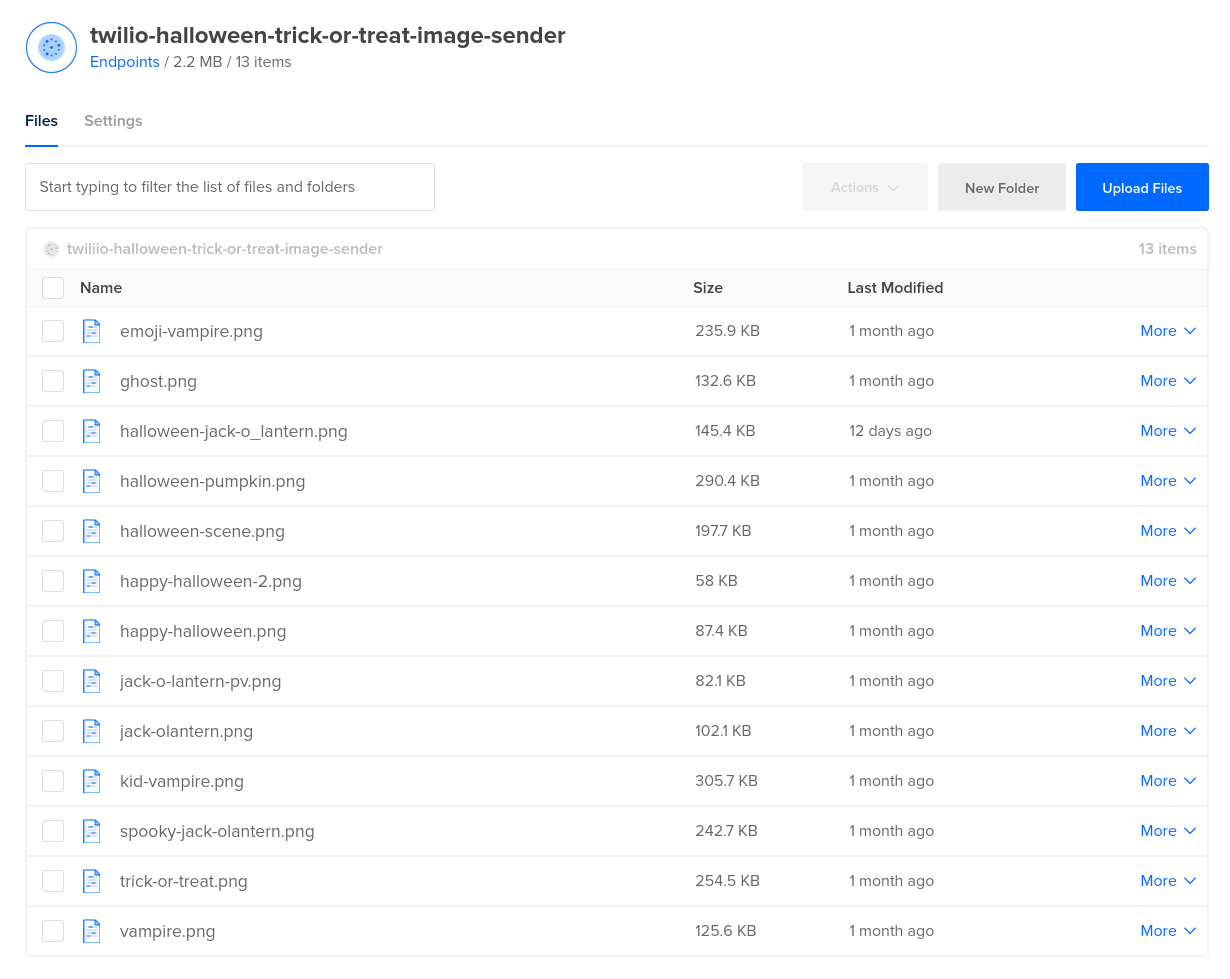
Allowing for the speed of your internet connection, in under a minute you'll see the files uploaded to your Space.
Download the CSS file
Next, you need to download the CSS file to public/css, keeping its existing name of styles.css. That way, the project will look like the screenshots throughout the tutorial.
Write the code
With all of the supporting details in place, it's now time to write the application's code. Start by creating a new file in the public directory named index.php. In that file, paste the following code.
The code imports the required classes, then initialises an empty Dependency Injection (DI) container, $container, which is then passed to the initialisation of a new Slim\App object, $app.
Then, the default route is added to the application. The route only supports GET requests. It sets 'Hello World' as the body of the response before returning the response.
Finally, $app-run() is called, which starts the application.
There is a lot more to add, but I didn't want to overwhelm you by having you implement it all at once. Rather, you're going to progressively build the application in stages.
Test that the application works
Now, test that everything is in place. Start the application by running the code below.
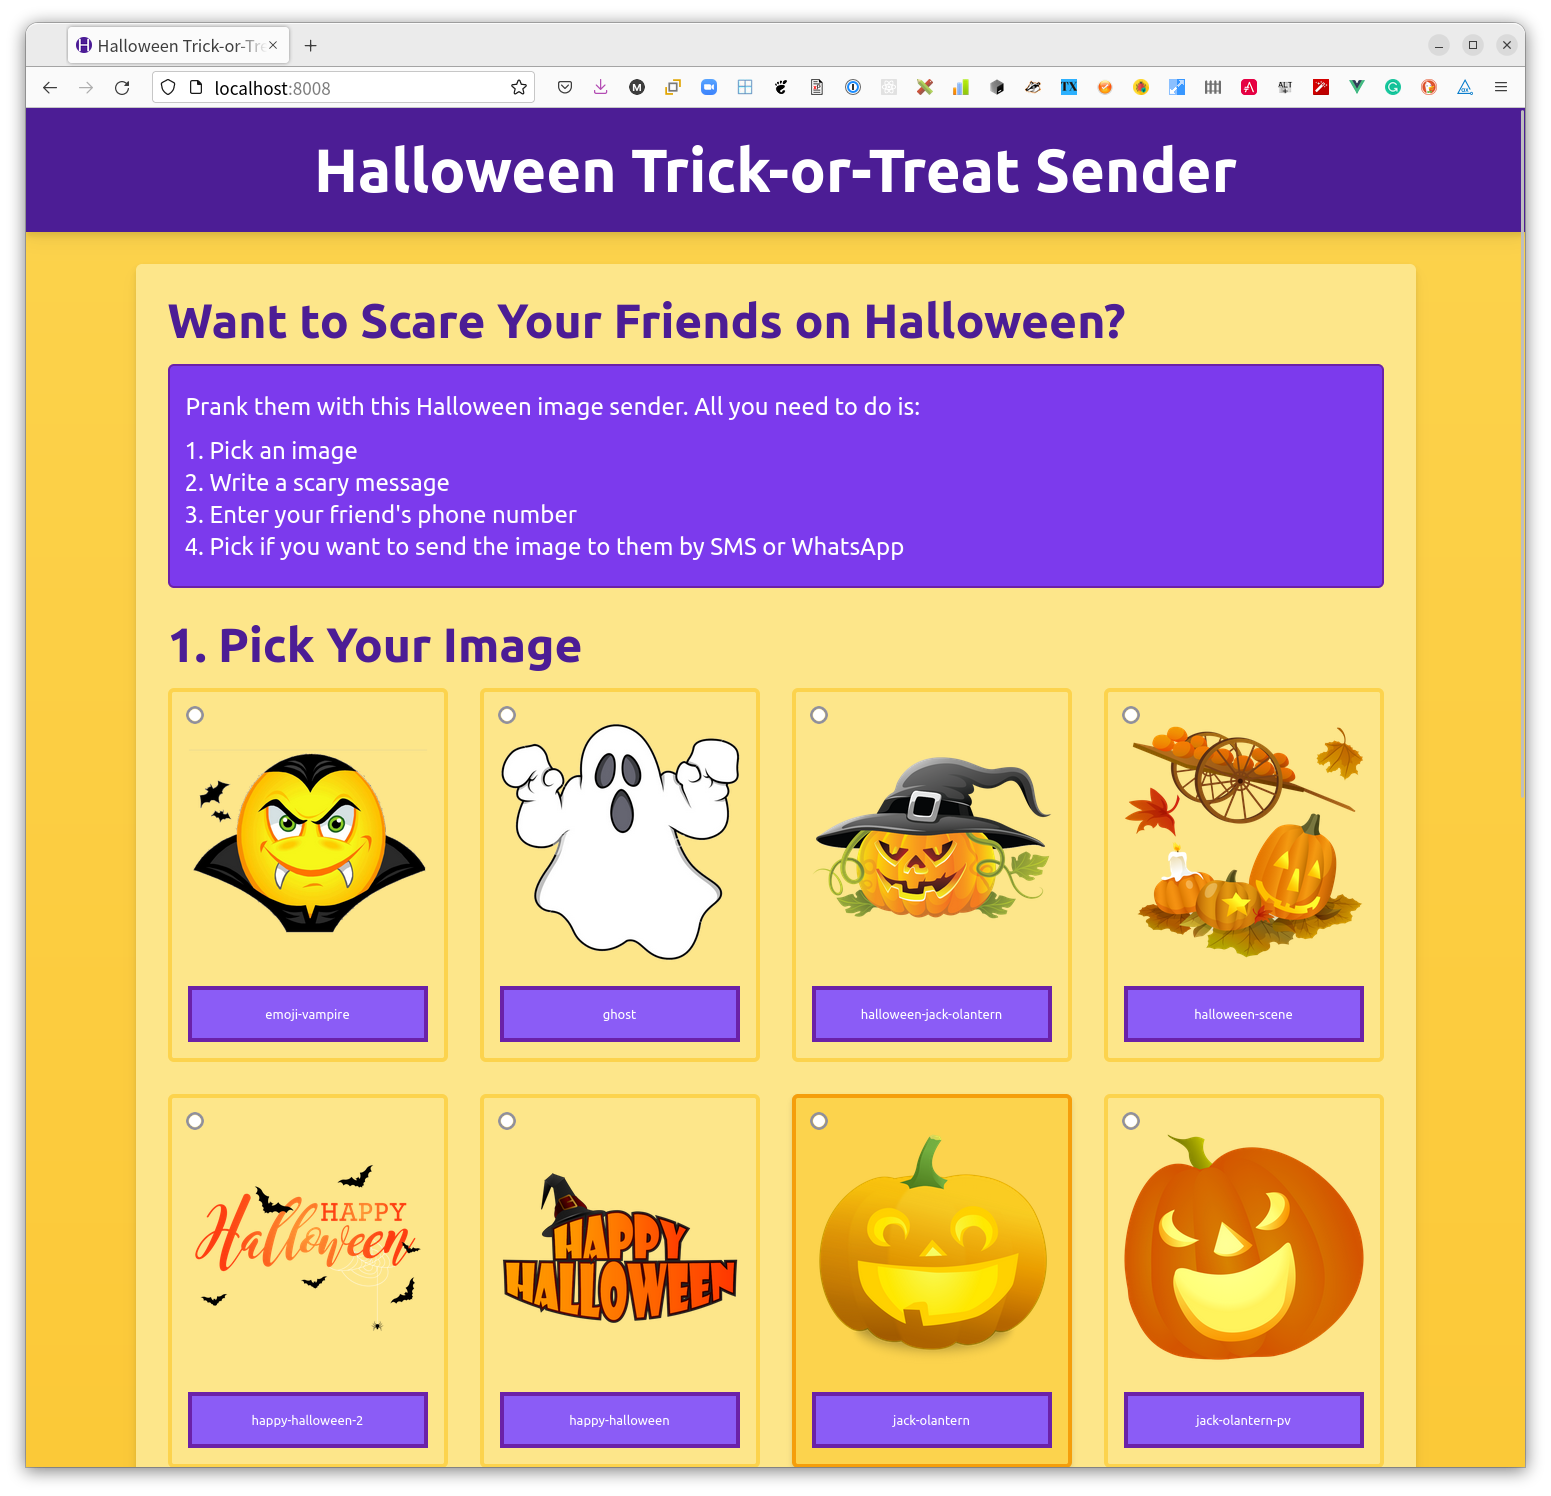
Then, open http://localhost:8008 in your browser. It should look like the following screenshot.
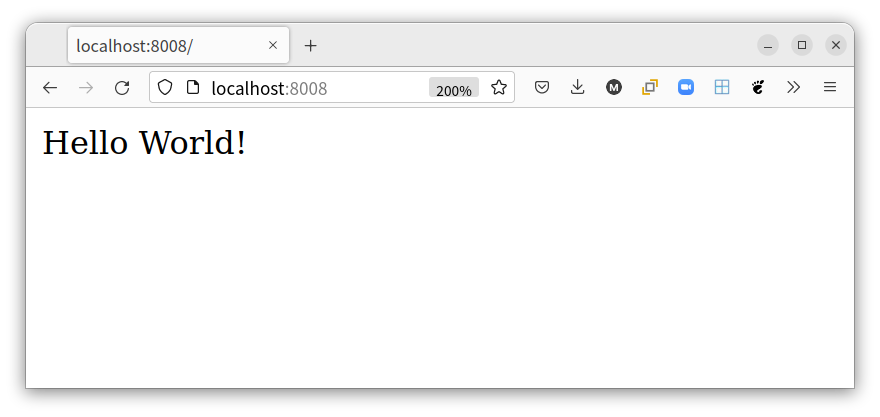
If the site looks as expected, stop the application by pressing Ctrl+c. It's not much to look at, but it works.
Load the environment variables
The first thing to do is to load the environment variables that you created earlier in .env. To do that, add the code below at the top of public/index.php, immediately after the require statement.
If you're not familiar with PHP dotenv yet, the code imports the four variables in .env in the project's top-level directory into PHP's $_ENV and $_SERVER Superglobals.
Add a Twilio Client service
Next, you're going to define a service that provides a Twilio Client object so that the application will be able to interact with Twilio's Programmable SMS API. To do that, add the code below to public/index.php immediately after the call to $container = new Container;.
The service name is the fully-qualified class name of the Client class and returns a Client object, which was instantiated with your Twilio Account SID and Auth Token.
Add a Twig service
Next up, you need to add a Twig object to the request, so that route handlers can retrieve it from the request and build response bodies using Twig templates stored in the templates directory.
To do that, add the code below to public/index.php immediately after the call to $app = AppFactory::create();
If you're not familiar with Twig, it's a template engine for PHP. The reason for using it is because templates often require significantly less effort to create than hand-crafted, interpolated PHP strings and can get messy over time.
Now, add the following use statements to the top of the file.
Finally, overwrite the body of the default route to match the version below.
In the new version of the default route, the Twig object is retrieved from the request. Then, the response body is created by rendering the contents of templates/default.html.twig, before returning the response.
Add a service for the Halloween images
The next thing to do is to add a service containing the Halloween images. To do this, add the code below to public/index.php, immediately after the call to $container = new Container;.
The code creates a service named images that retrieves a new Space object that has access to your DigitalOcean Space. Internally, it uses an Amazon S3 client to interact with the Space, as Spaces are fully S3-compatible.
The connection is authenticated using the Spaces key (SPACES_KEY) and secret (SPACES_SECRET) which you set in .env earlier, and determines the Space to connect to with SPACE_NAME. A list of all files in the Space are returned which are then filtered by SpaceFilenamesFilter::filter().
Add the SpaceFilenamesFilter class
Now, it's time to define the SpaceFilenamesFilter class. To do that, in src/HappyHalloween/Filter/ create a new file named SpaceFilenamesFilter.php. Then, in that file, add the code below.
The core method, filterFilenames() accepts an array of files in the DO Space, and iterates over them, and creates an array containing three keys, name, label, and image, for each one.
The values of each are described in the table below.
| Key | Description |
| name | This is the file's name, converted to read in a more human-readable way. Any dashes in the file's name are converted to spaces, and underscores are converted to commas, and the file's extension is removed. Finally, the first letter of each word in the name is uppercased. For example, if a file had a filename "halloween-jack-o_lantern.png" its name key would have the value "Halloween Jack O'Lantern". |
| label | The label is the file's name with the extension removed. |
| image | This is the absolute URI to the file. |
Add a service to filter and validate user input
The next thing to do is to add a service providing a laminas-inputfilter object. To do this, add the code below to public/index.php immediately after the call to $container = new Container;.
All good applications filter and validate external input – especially user input. This service initialises an InputFilter object which has three inputs; one named image, one named message, and one named phone_number. Validation and filter rules are defined on those inputs, and the inputs are added to the InputFilter object.
Here are the validation and filter rules for each input:
| Input | Validation and Filter Rules |
| image | The image name cannot be empty. The value entered will be trimmed and all tags will be stripped. |
| message | The message cannot be empty nor longer than 320 characters. The value entered will be trimmed and all tags will be stripped. |
| phone_number | The phone number must match the regular expression: ^\+[1-9]\d{1,14}$, Twilio's official E.164 regular expression. The value entered will be trimmed and all tags will be stripped. |
If this is your first time encountering laminas-inputfilter, I strongly encourage you to explore the laminas-inputfilter documentation to familiarise yourself with the package.
Update the default route
Next, it's time to update the default route. To do that, in public/index.php update the call to $app->get() to match the following.
The updated route definition now accepts both GET and POST requests. If a POST request was made to the route, the InputFilter service is retrieved from the DI container and used to filter and validate the request's POST data.
If the supplied POST data does not satisfy the validation rules, then the validation errors and POST data are stored as template variables, which Twig renders into templates/default.html.twig.
If the supplied POST data does satisfy the validation rules, the Twilio Client is retrieved from the DI container and an SMS containing the form's message and body is sent to the specified phone number.
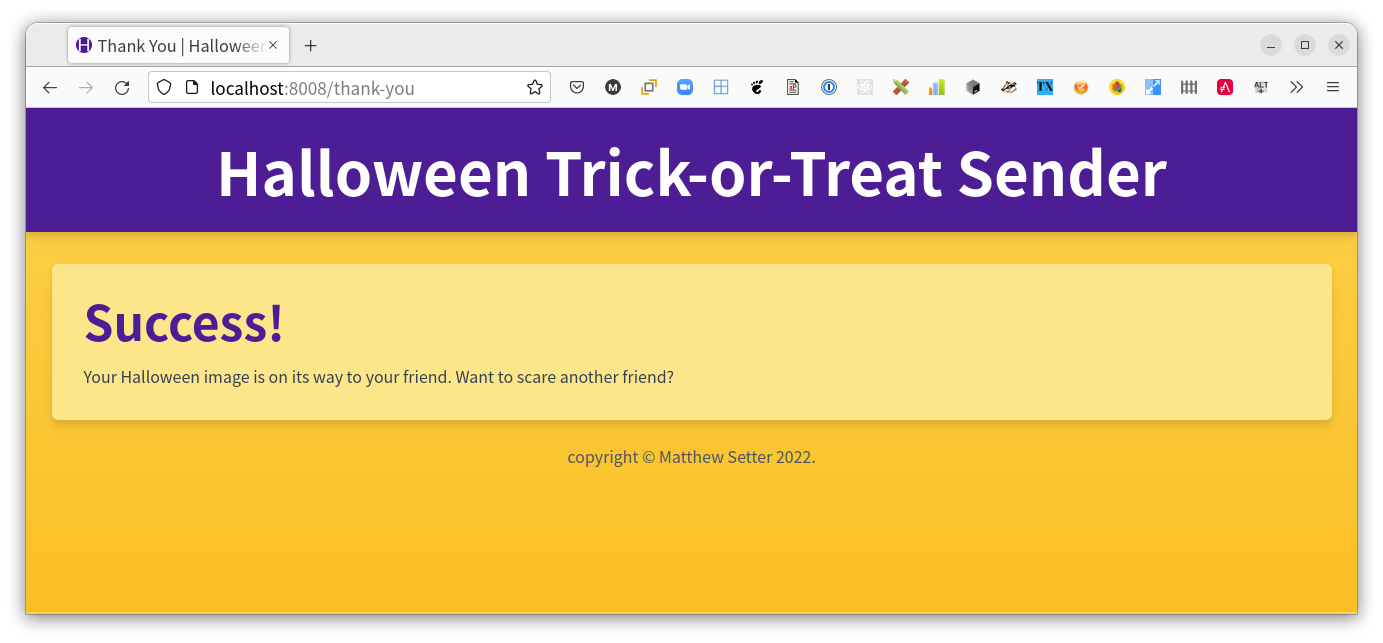
After that, the user is redirected to the "thank you" route (/thank-you) using a 302 redirect.
Import the required classes
Finally, update the imports list at the top of public/index.php to match the list below.
Create the default route's template
The next thing to do is to create the default route's template. To do that, create two new files in the templates directory: base.html.twig and default.html.twig.
The first template provides content common to both the default route's template and the "thank you" route which you'll create later. The second template provides content specific to the default route.
Effectively, the route-specific or "child" templates extend the base template or "parent" template, implementing a Two-Step View.
In templates/base.html.twig, paste the following code.
The head element sets the page's character set, title, and stylesheet.
Note the use of {% block title %}{% endblock %} in the title tag. If you're not familiar with Twig blocks, this is a named element (title) that can be overridden in child templates.
A named block (content) is also used within the main tag. This block will be replaced with the rendered content of the route-specific template.
Now, in templates/default.html.twig, paste the following code.
There's a bit to step through, so please bear with me. The page is composed of two sections:
- A header that provides the instructions for using the application
- A form that contains the fields to fill out and submit.
Let's skip to the form, as the header's pretty self-explanatory. It's comprised of four sections:
- One where you pick the image to send
- One where you write your message
- One where you provide your friend's phone number
- One containing the submit and reset buttons; in a production version, you'd include a CSRF token as well.
The section containing the images is built by iterating over a list of images passed to the template, named images. Each image is rendered with a radio button, so that only one image can be chosen, and a label containing the image's name.
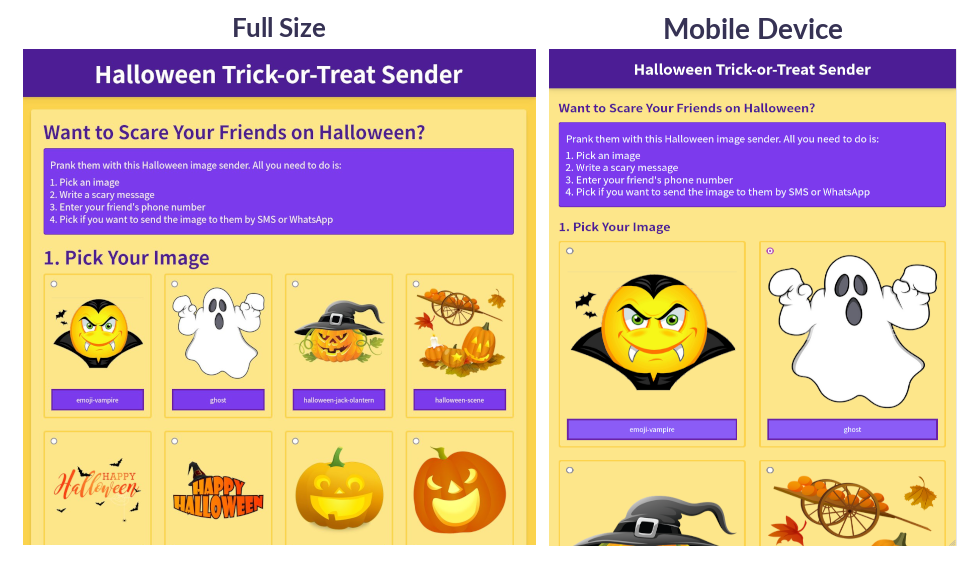
The CSS Grid layout is used to render the images four columns wide on larger displays and one to two columns wide on smaller displays.
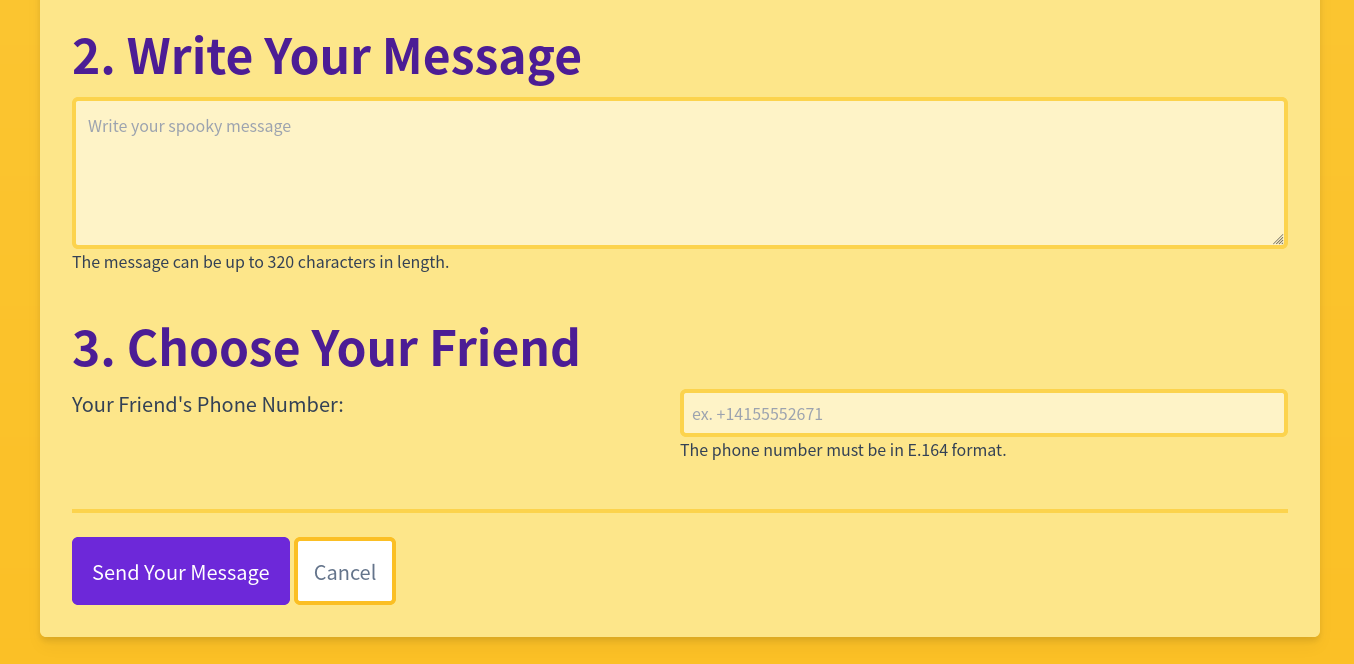
The sections for writing a message and specifying the phone number include textarea and input elements, along with some help text and placeholders, to let the user know what format the phone number should be in and the maximum length of the message.
Like the images section, they will render an error message if the information provided isn't in the expected format or missing.
Now, let's start refactoring the basic application and turn it into the Halloween-inspired Trick-or-Treat image sender.
Add a "thank you" route
Next up, it's time to add the "thank you" route, where users will be redirected after successfully submitting the form. To do that, in public/index.php after the call to $app->map() add the following code.
The code adds a route which only supports GET requests to /thank-you. When requested, it renders templates/thank-you.html.twig and returns it as the response's body.
Create the "thank you" route's template
There's one last thing to do, which is to add the "thank you" route's template. To do that, in the templates directory create a new file named thank-you.html.twig. In it, add the following code.
As with templates/default.html.twig, it extends templates/base.html.twig. It prepends "Thank You | " to the page title, and sets the page's core content to be a confirmation message that the submission was successful. It also provides a link so that the user can send an image to another friend, should they want to.
Test that it works
Now that the application's been built, it's time to use it. Start the application by running the code below.
Then, open http://localhost:8008 in your browser of choice. It should look like the image below.
Pick an image, add a message, enter your friend's phone number, and click "Send Your Message". If successful, you should be redirected to the "Thank You" route, which looks like the screenshot below.
That's how to build a Halloween inspired SMS image sender
Now you can now SMS Halloween-inspired images to your friends and family. Please don't go overboard, though. While fun, please be considerate and don't spam people.
I hope you've seen just how much fun you can have with SMS' and Twilio's Programmable Messaging API. I strongly encourage you to dive into the documentation to learn more about what you can do, as well as to play with the app's code, which is available on GitHub, to improve it.
I'd love to see what you build!
Matthew Setter is the PHP Editor in the Twilio Voices team and a PHP and Go developer. He’s also the author of Deploy With Docker Compose. When he’s not writing PHP code, he’s editing great PHP articles here at Twilio. You can find him at msetter@twilio.com, Twitter, GitHub, and LinkedIn.
Image credits
- “Large Transparent Halloween Pumpkin with Witch Hat Clipart” YoPriceVille Gallery, https://gallery.yopriceville.com/Free-Clipart-Pictures/Halloween-PNG-Pictures/Large_Transparent_Halloween_Pumpkin_with_Witch_Hat_Clipart.
- "Cartoon Halloween Pumpkin" PNGTREE, https://www.pinterest.de/pin/cartoon-halloween-pumpkin--331507222567860355/
- "Vampire Transparent Background #1593308" Clipart Library, http://clipart-library.com/clip-art/vampire-transparent-background-9.htm
- "Vampire kid vector image" VectorStock, https://www.vectorstock.com/royalty-free-vector/vampire-kid-vector-232965
- "Smiley Bilder" MINASAMMY, https://www.pinterest.de/pin/746612444444556569/
- "trick or treat clipart animated" Clipart Craft (CC), https://clipartcraft.com/explore/trick-or-treat-clipart-animated/
- "Happy Halloween with Witch Hat PNG Clipart Image" ClipArtBest.com, http://www.clipartbest.com/clipart-niX6X757T
- "Happy Halloween with Bats PNG" Clipart Library, http://clipart-library.com/clip-art/happy-halloween-transparent-background-5.htm
- "Ghost Cartoon Ghosts Clipart Best Transparent Png - Cartoon Ghost" clipartkey, https://www.clipartkey.com/view/bRTRo_ghost-cartoon-ghosts-clipart-best-transparent-png-cartoon/
- "Jack O Lantern - Gambar Labu Halloween Kartun" netclipart.com, https://i.pinimg.com/originals/f8/98/56/f898568d3be6a1de902d312f0fca9971.png
- "Jack O Lantern Clipart #26270" clipartix.com, https://clipartix.com/jack-o-lantern-clipart-image-26270/
- "Jack O Lantern Clipart #26269" clipartix.com, https://clipartix.com/jack-o-lantern-clipart-image-26269/
- liveinternet.ru, https://www.liveinternet.ru/users/asya_son/rubric/2485487/
- "Orange Halloween Moon with Bats PNG Clipart" Cliparts.co, http://cliparts.co/clipart/2376427
- "Jack-O-Lantern PNG File" PNG Mart, https://www.pngmart.com/image/182984
- castlevaniac.tumblr.com, https://castlevaniac.tumblr.com/post/614362124555255808/the-tepes-family-netflix-ayami-kojima-official
Related Resources
Twilio Docs
From APIs to SDKs to sample apps
API reference documentation, SDKs, helper libraries, quickstarts, and tutorials for your language and platform.
Resource Center
The latest ebooks, industry reports, and webinars
Learn from customer engagement experts to improve your own communication.
Ahoy
Twilio's developer community hub
Best practices, code samples, and inspiration to build communications and digital engagement experiences.