Build a Text to Image Service via SMS

Time to read: 4 minutes
October 25, 2022
Written by
Reviewed by
This past summer, OpenAI announced that Dall•E is open for public beta. Dall•E is a “text to image” service. In it, you tell Dall•E what you want to see, and within a few minutes you receive AI generated images. You’ve probably seen memes where creative users have instructed Dall•E to build silly images like “Yoda as a waiter” or “aliens at the Eiffel Tower”.
At the moment of writing this blog post, Dall•E doesn’t have a public API exposed. However, there are multiple competitors in this space, and some of them have public APIs. In this tutorial we will use a similar API, Stable Diffusion, to generate images when we text in.
Prerequisites
To complete the tutorial, you will need the following:
- Twilio Account SID and Auth Token. If you don’t already have a Twilio account, you can create one for free here.
- Twilio API Key. You can create one programmatically or within the Twilio console.
- Twilio Phone Number. You can buy a local number in seconds either programmatically, or within the console.
- Dream Studio API Key. Dream Studio offers a suite of generative media tools. It’s free to create an account, and when you sign up, you get some free testing credits. 🥳
- Ngrok. Ngrok allows you to publish applications quickly and easily. You can create an ngrok account for free on their website.
- Docker. Docker is a platform designed to help developers build, share, and run modern applications. Download and install the correct Docker version for your operating system.
- Optional to deploy to the cloud. An account with Render (paid).
Bannerbear
- Create a Bannerbear Account.
- After creating the account, add this template to your project.

- Take a note of the Template ID. You will need this later.
- Take a note of the Project API Key. You can find the API Key in your Project → Settings page.
Setup your SMS to image service
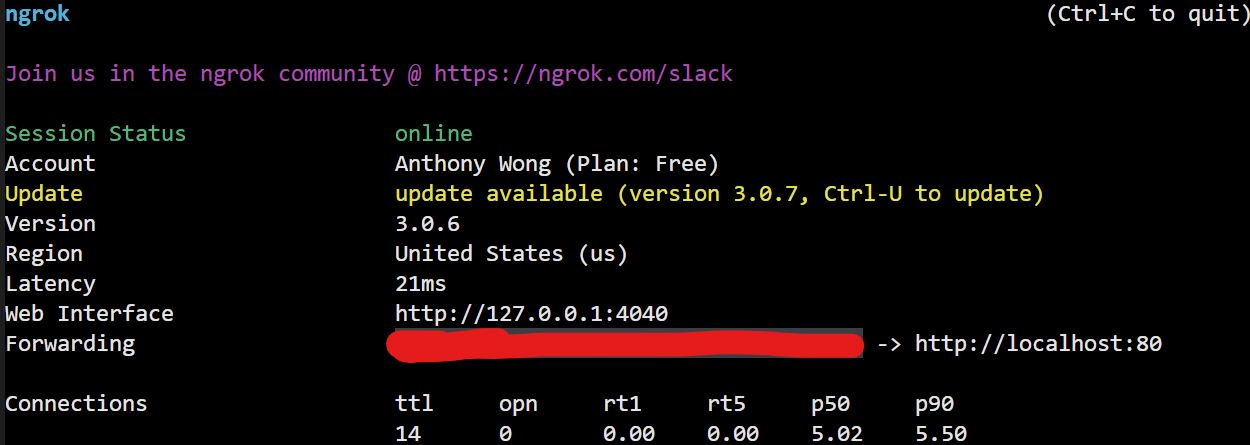
Ngrok
Execute the following command in a terminal window:
Take a note of the Forwarding URL.
Twilio
- Navigate to your Twilio Phone Numbers.
- Select one of your phone numbers.
- Scroll down to the Messaging section.
- Add your Forwarding URL with
/smsappend to it. It should look something like this:https://1337.ngrok.io/sms

- Click Save.
Docker
1. Execute the following commands in your CLI:
2. Open the .env file in your favorite text editor and update your credentials accordingly.
3. Execute the following command:
4. Start texting to your phone number!
How does the text to AI image app work?
Here is a high level diagram on how the whole application works:
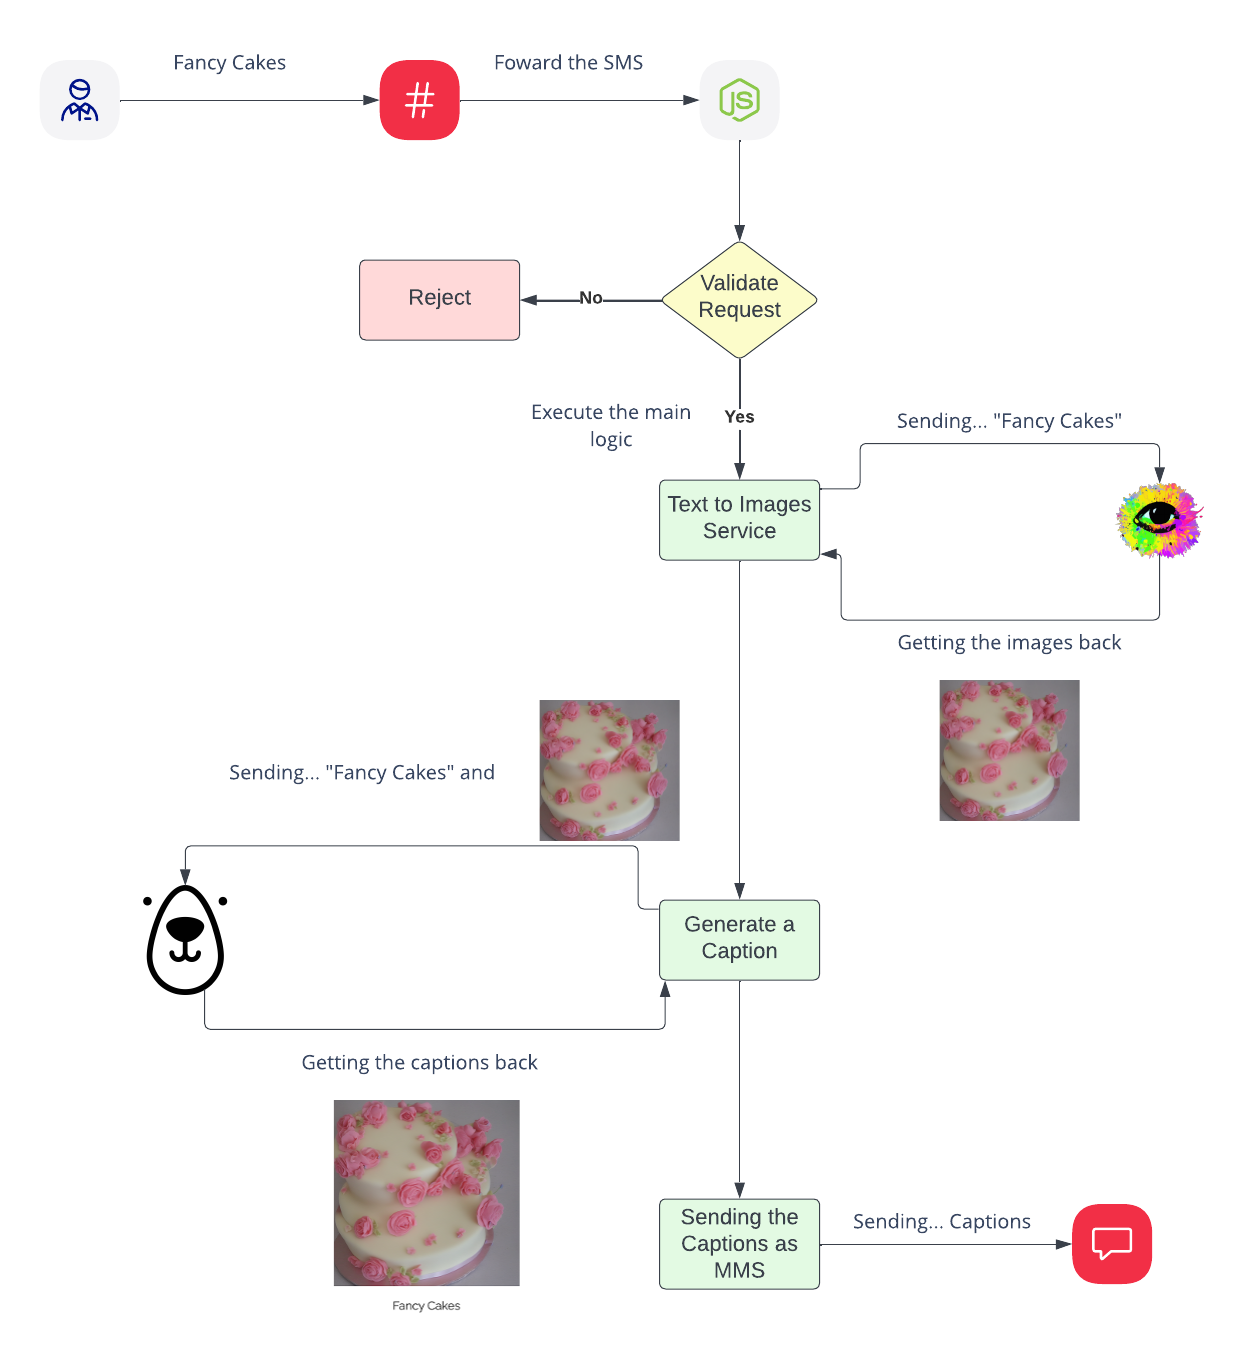
Now let’s take a closer look at the code. The main code is in index.js.
When Twilio receives the SMS, it will forward the response to our Node JS Application. This endpoint will check to see if that request came from Twilio by validating the x-twilio-signature. Once we have confirmed that the request came from Twilio, we will move forward to the main logic.
We take the user's responses and forward it off to the unofficial stability-ts sdk.
After getting all the images from Dreamstudio, we want to stitch the image with the text together so it will be easier to share. We use the service Bannerbear to do this.
This function is pretty straightforward, we pass in the public facing url of the images, the text from the user, and our Bannerbear Template Id.
Once we get a response back from Bannerbear, we clean up the results to get a list of PNG URLs and UIDs.
Next, we need to iterate through the array of PNG URLs and start sending SMS:
And we are done! The final flow should look like this:
Optional: Deploy the app to the Cloud
In the Github, I also offer a one click deploy to your Render. Render is an alternative to Heroku. The only thing you should keep in mind is it will cost you money. 💸
- Create a Render Account.
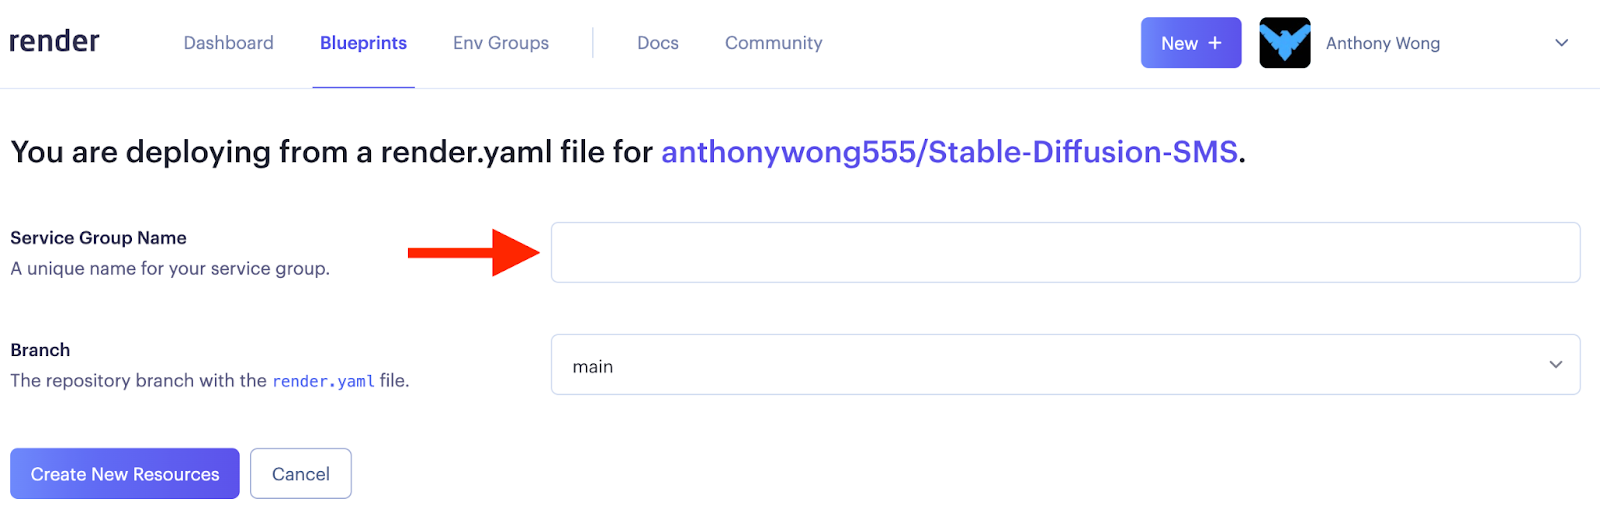
- Click Deploy To Render Button.
- Set your Service Group Name to be “stable-diffusion-sms” and click on the Create New Resource button.
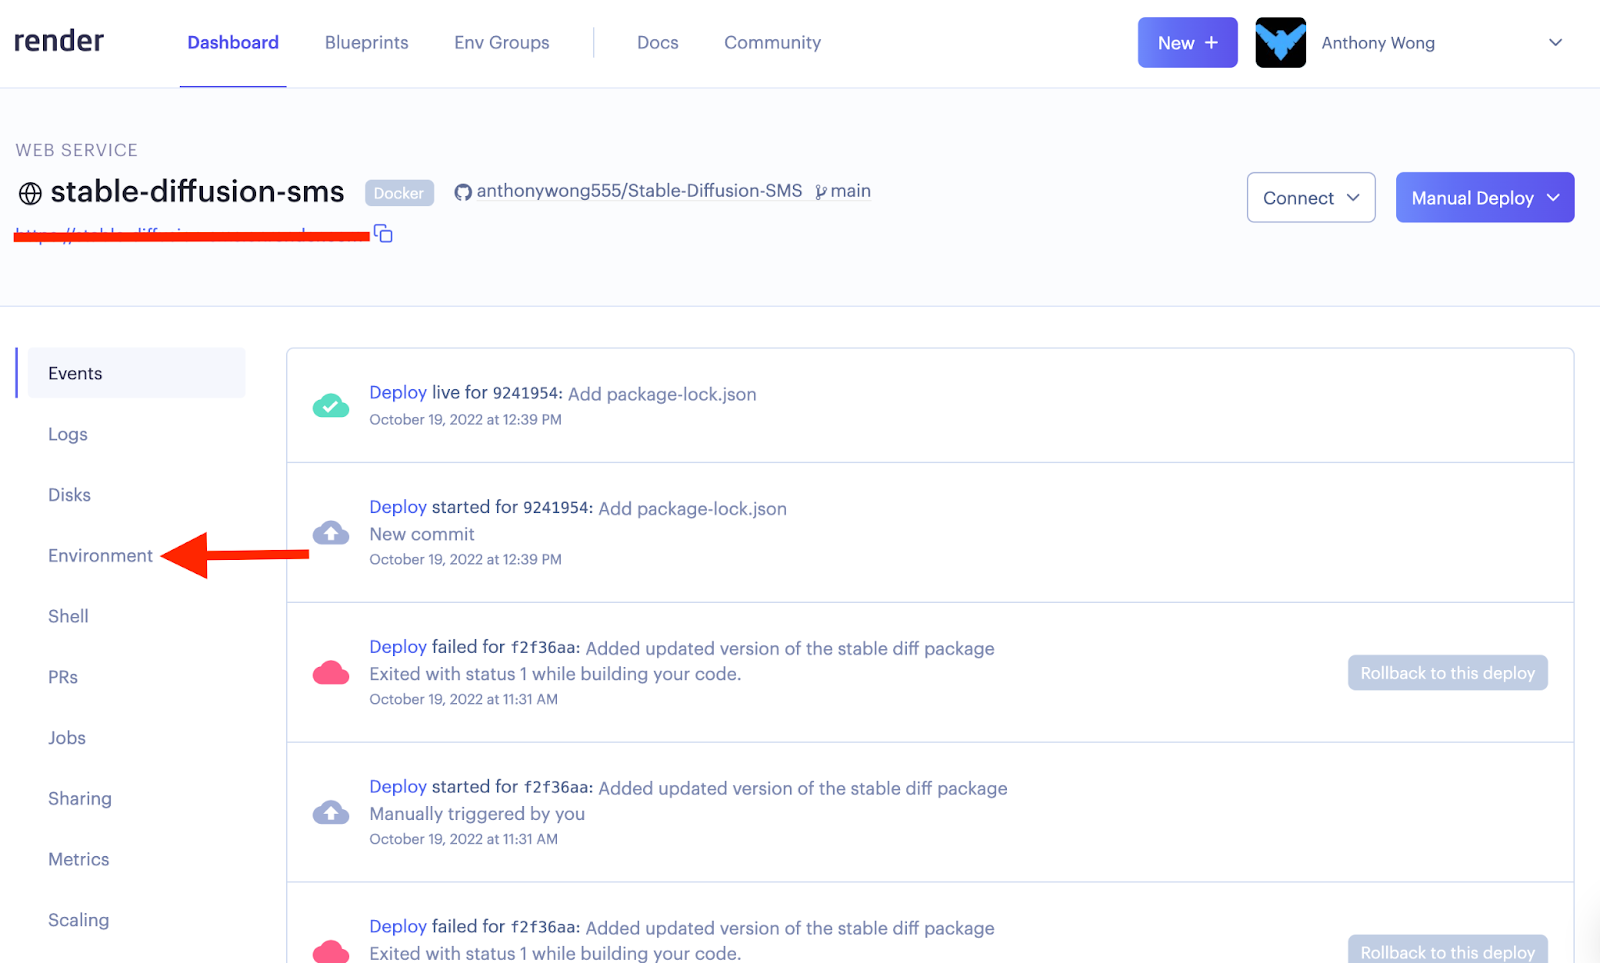
- Click on Environment
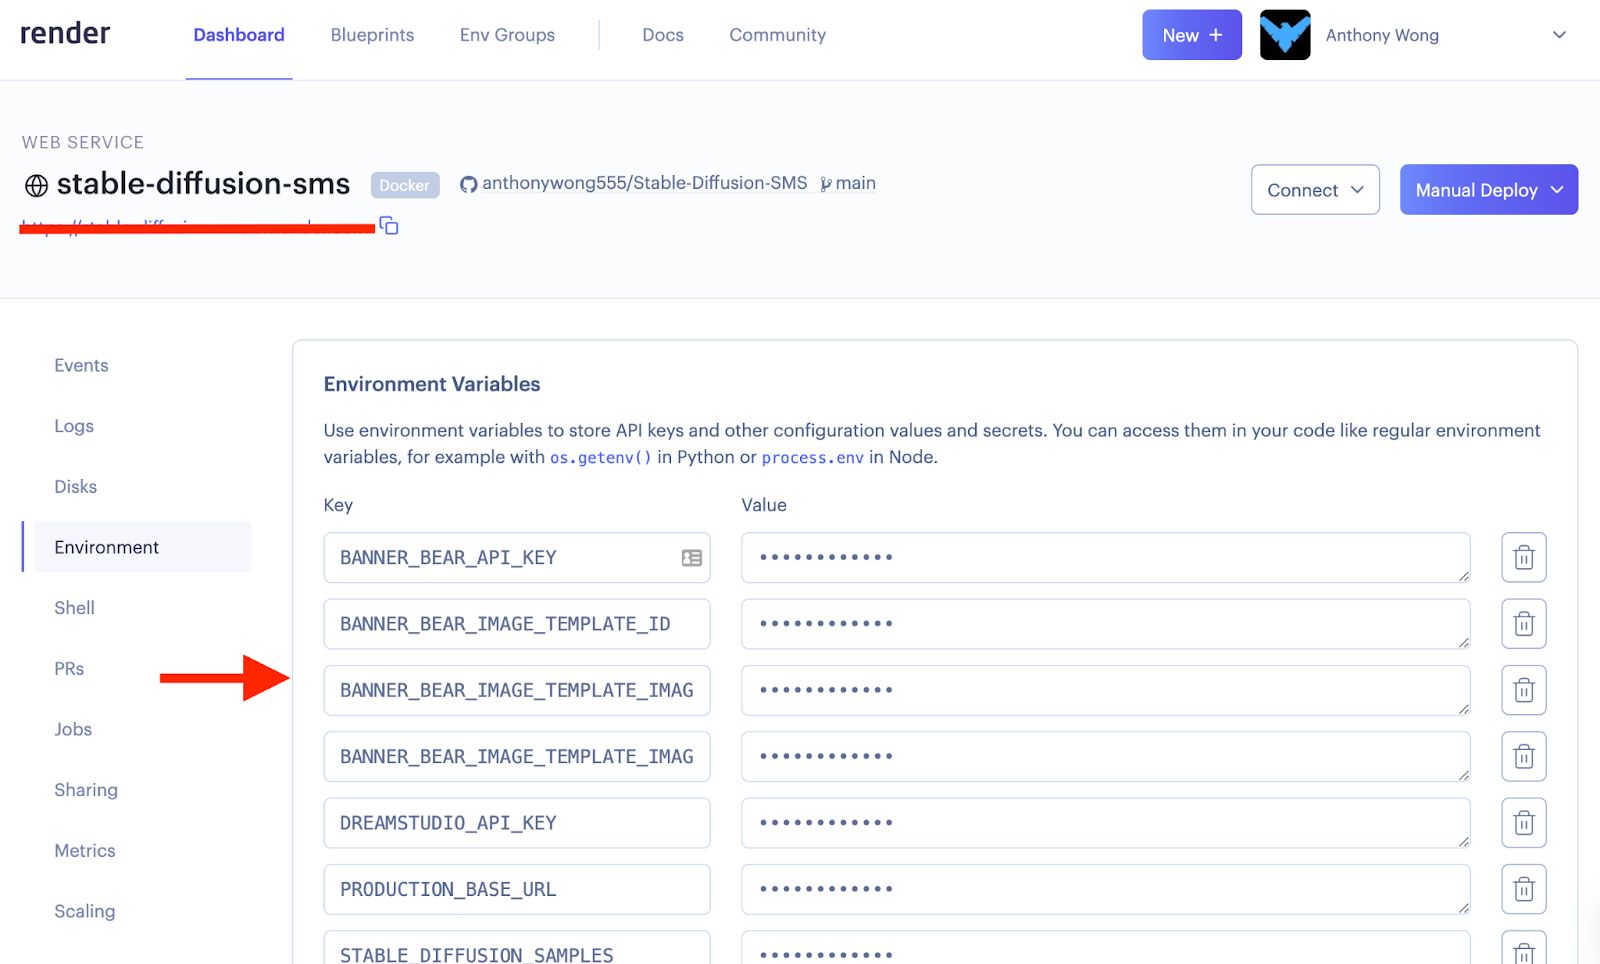
- Add all the environment variables values from the .env-example to here, and click the Save Changes button.
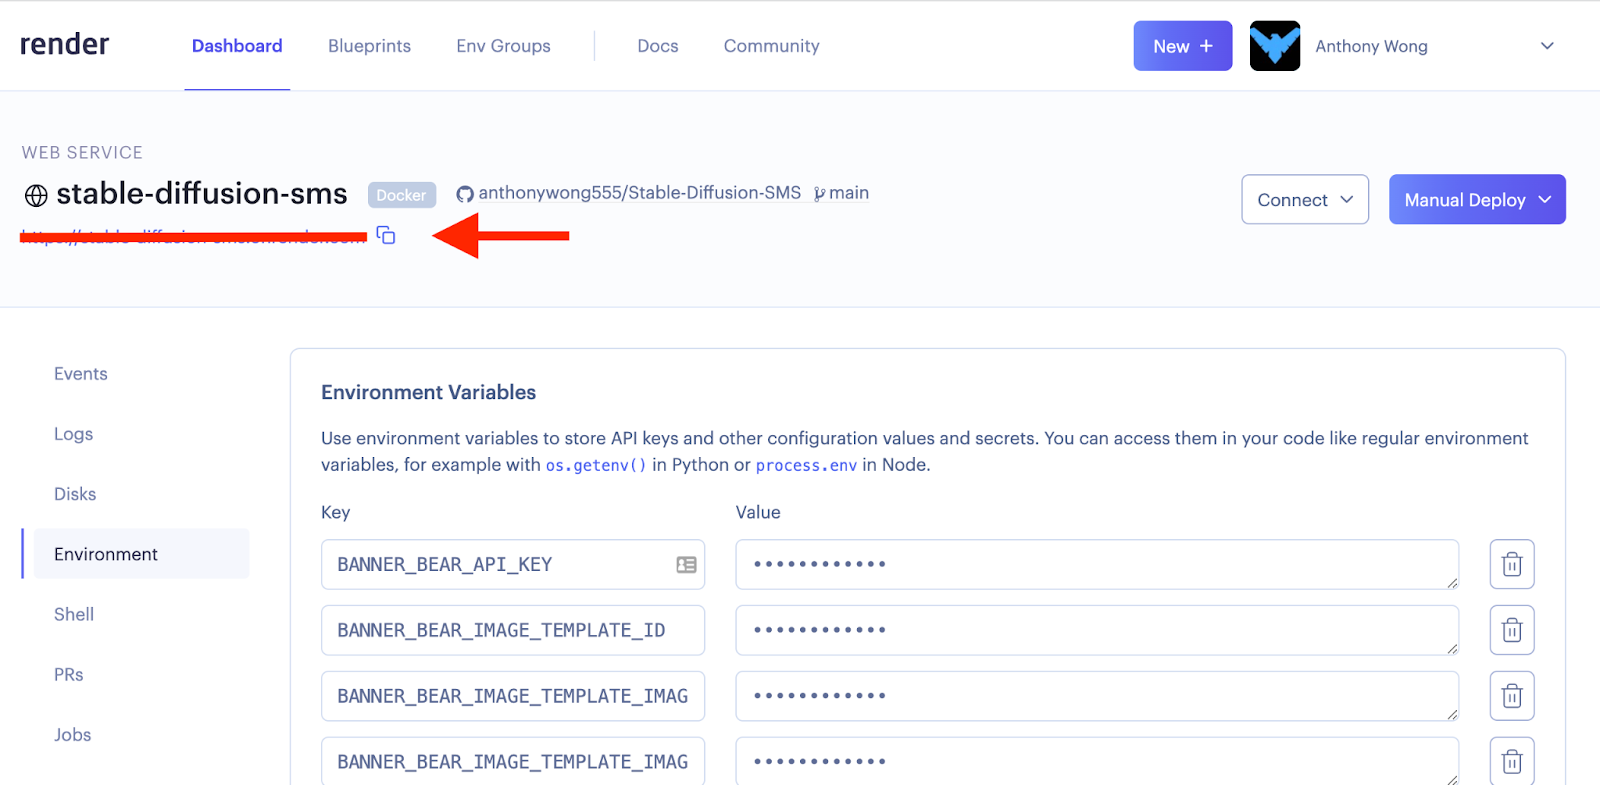
- Copy the URL, append the
/smsat the end, and paste in the Twilio Phone Number SMS Webhook
Conclusion
Congratulations! Now you can share this phone number with all your friends and family to try out. There are two points I want you to take note of:
- As more “text-to-images” services become available you can swap out the existing service with a different one and keep the existing logic.
- Since we didn’t hard code the Twilio Phone Number, we can buy additional Phone Numbers to connect to our application. This way you can add your own custom logic to limit who can access this service.
If you want to learn more about integrating AI services with Twilio, please check out the following blog posts:
- Integrate Discord and Sentiment Analysis with Twilio Flex
- Voice Biometrics Using Twilio Serverless and VoiceIt
Anthony Wong is a Principal Solutions Engineer at Twilio. He’s focused on building cool and fun demos using Twilio. He is best known for his Salesforce expertise. He can be found at anwong [at] twilio.com


Related Resources
Twilio Docs
From APIs to SDKs to sample apps
API reference documentation, SDKs, helper libraries, quickstarts, and tutorials for your language and platform.
Resource Center
The latest ebooks, industry reports, and webinars
Learn from customer engagement experts to improve your own communication.
Ahoy
Twilio's developer community hub
Best practices, code samples, and inspiration to build communications and digital engagement experiences.