Build a Video Application with Breakout Rooms Using Twilio Programmable Video, React, TypeScript, and Express — Part 2
Time to read: 11 minutes
May 17, 2021
Written by
Reviewed by

In the previous tutorial, you built out the server side of a video application that will also allow you to create breakout rooms. Now it’s time to build out the client side of your application using React and TypeScript.
By the end of this tutorial, you will be all set up to create and use breakout rooms in your video application.
Let's get started!
Prerequisites
You will need:
- A free Twilio account. (If you register here, you'll receive $10 in Twilio credit when you upgrade to a paid account!)
- Node.js (version 14.16.1 or higher) and npm installed on your machine.
- HTTPie or cURL.
- The code from the previous tutorial. (See the following step for details.)
Get the starter code
If you have just completed the previous tutorial, you already have the updated server-side code you need and can skip to the next section.
However, if you do not already have the code, you can find it on the updated-server branch of the react-video-breakouts GitHub repository. To get the code, choose a location on your machine where you would like to set up the project. Then, open up a terminal window and run the following command to clone the updated-server branch of the repository:
Then, change into the root directory of the project and install the needed dependencies by running the following commands:
Set up a .env file for your environment variables by running the following command in your terminal:
Then, open .env in your code editor and replace the placeholder values for TWILIO_ACCOUNT_SID, TWILIO_API_KEY, and TWILIO_API_SECRET with your own credentials, which can be found in the Twilio Console. For more detailed instructions on how to find these credentials, check the previous tutorial's Install dependencies and set environment variables section.
Once you have set up your environment variables, you are ready to move to the next step.
Run the Express server and the React application
To get started with building out your client-side application, start by making sure your Express server is running. If you’ve just arrived here from the previous tutorial, you may already have this server running in a terminal window. If not, you can start the Express server by opening a terminal window and running the following command:
Once the server starts, you will see a log statement in the terminal window that lets you know the server is running:
Now, if you take a look at the src directory in react-video-breakouts, you’ll see that there is a bare-bones React application already set up for you. Open up a second terminal window and run the following command to start the React application:
Once the application has started, a browser window will open, pointing to http://localhost:3000/. The initial application will look like this:
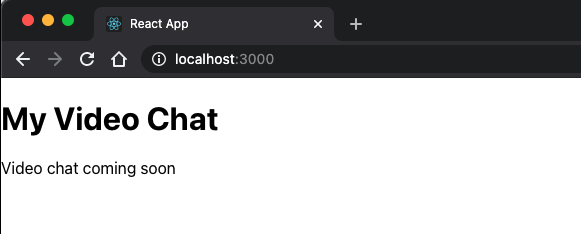
Clearly there is a lot more to add here before you can start a video chat.
Update the App component and server.ts
Get started by opening up src/App.tsx in your code editor. In this tutorial, you’ll be using React Hooks, so update your import to include the useEffect and useState hooks. Additionally, since you'll be using Twilio Video, you'll also want to import the connect function and the Room class.
The updated imports should look like the code below:
Next, create interfaces for MainRoom and BreakoutRoom to store the video room details you’ll be pulling from the server side. Add the following code just below your import statements:
Then, update the state with a few variables you’ll be using in this component:
Here is what these variables correspond to:
- identity: the identity of the user
- room: a video room
- roomList: list of rooms from your server
- showControls: whether or not to show the room creation controls in the UI
- newRoomName: the name of a new room you wish to create
- parentSid: the
sidof the main room that a breakout room will be associated with
Add real-time communication with Socket.IO
Now that you have the beginnings of the client side set up, it's time to add Socket.IO, a library that enables real-time, event-based communication between the browser and the server. In the upcoming sections, you'll be using this library on the server side to emit events when new rooms are created, and on the client side to receive these events and take action to get an updated list of rooms.
Add Socket.IO to your project by running the following command in your terminal:
Then, open your .env file and add a client-side variable for REACT_APP_SOCKET_URL just below your other environment variables:
This new environment variable will allow your React app to receive the emitted events from localhost:5000, which is where your server is running.
Since you've changed an environment variable, you'll need to stop your React application and restart it again so the new environment variable is accessible. In the terminal window where your React application is running, press Control + C on your keyboard, then run npm run start again.
Add Socket.IO to your Express server
Next, open server.ts in your code editor and add the following import statement to your list of imports:
Scroll to the bottom of server.ts and update your app.listen block. Pass your Express server as an argument to create the Socket.IO server, as shown in the following code:
Then, update the function for createRoom to emit a Main room created event when a new main room has been created. Change the following lines of code as described below:
You will also need to emit an event when a breakout room is created. Change the following code in createBreakoutRoom as well, as described below:
Add Socket.IO to your React application
Now it's time to set up Socket.IO on the client side. Add the following line to your list of imports in src.App.tsx:
Then, add another state variable for Socket.IO to the list of other state variables in src/App.tsx:
Next, add a useEffect block to your App component just below the list of state variables. This will set up the socket instance when the component mounts and set the socket in the component's state:
Now that you have Socket.IO set up, it's time to create some video rooms.
Create and display a new video room
To create a video room, you'll need a way to input a name for your room and submit this information so that your server side can create the room.
Inside App.tsx, replace the code inside the return statement with the following code:
With this code, you have created a place where users can input the name for the video room they want to create. This new room name will be stored in the component's state. You can also see from the code above that if a room name is not present in the input field, the Create Room button will be disabled.
You may be wondering what this line is about: {room ? 'Create Breakout Room' : 'Create Room'}. What's happening here is that if the user is already inside of a video room, the text here will change to say Create Breakout Room so that they can create breakout rooms associated with the main room they have already joined. Cool, right?
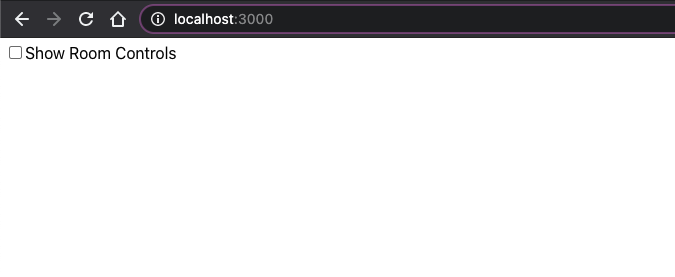
Whether this input field is visible or not depends on the showControls variable. If you take a look at your application in your browser window right now, you will see that the checkbox next to Show Room Controls is not checked, and the input field is not visible:
Attempting to check the checkbox also currently has no effect on the UI. Add the code below just under the useEffect block you wrote earlier:
Next, update the input for Show Room Controls to call onCheckboxChange when someone tries to check the checkbox:
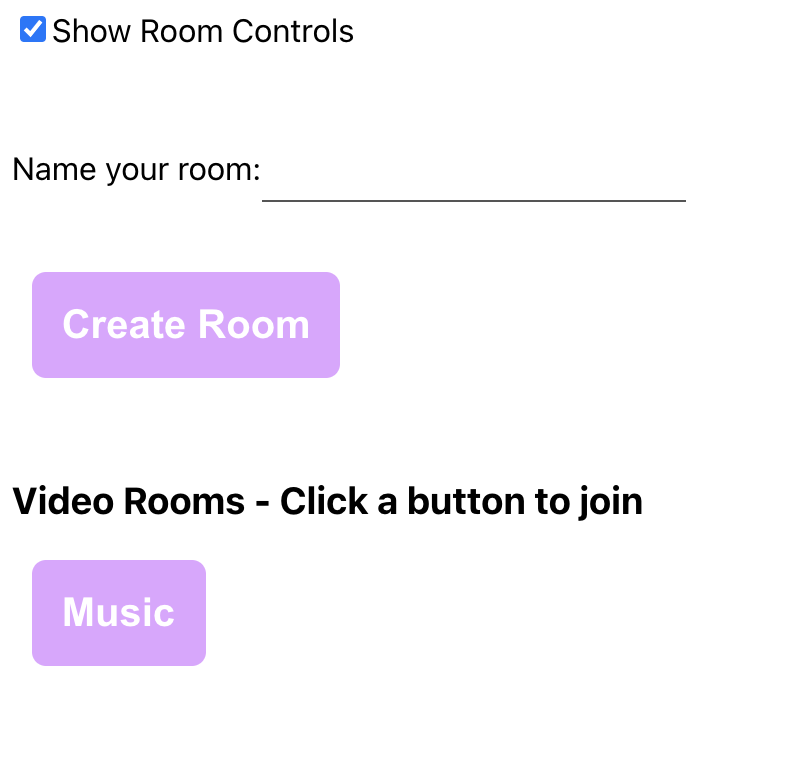
Now, if you look at the UI in your browser and click the checkbox, you will be able to see the input field and the Create Room button:

Before you create a new video room, however, you'll want to be able to display any rooms that have already been created. To do this, you can add a function that will list these video rooms.
Just below your onCheckboxChange function, add the following code for the listRooms function that will call your server's /rooms endpoint:
With this code, you can fetch the list of active video rooms from the server and save them in the component's state as roomList.
When a user first reaches this page, you'll want this function to be called right away on load so the user can see which rooms are available. To make this possible, update the useEffect hook you created earlier to call listRooms when the component first renders:
Next, it's time to add functions for creating a new main room and creating a new breakout room. Add these two functions below your code for listRoom():
With this code, the room name that a user enters in the input field will be used to create the new video room on the server side. Once the room is created, the details of this room will be returned to the client side.
In order actually use these functions, update the <button> element to call the createRoom function for a main room, or, if a video call is already in progress, call createBreakoutRoom to create a new breakout room:
Now, add some code to this component to display the created video rooms. Above the final closing <div>, add the following code:
Before you try out creating a video room, there is another section you'll need to update. Do you remember when you added code to emit Socket.IO events when a room was created? It's time to add some code to allow your client side to respond to those events.
Inside the useEffect block you added earlier, add some lines to listen for when the Main room created and Breakout room created events take place. After anyone creates a room from your React application, have the app call listRooms again to retrieve the most updated list of video rooms. You also want to include a cleanup function here that will remove the listeners when the component is about to unmount:
You now have enough code to try creating a video room. Try creating a room called "Music" by typing this name in the input field and then clicking the Create Room button. Once you've done this, you should see a button appear with this new room's name! The button will be disabled until a future step, but you're one step closer to your goal.
It's very exciting that you can create video rooms now!
Add functions for users to join and leave a video room
Now that you can successfully create a video room, it's time to add code to let a user join one of these rooms.
First, update the component to include a way for a user to enter their identity. In this example project, the identity will just be a user's name that will show up alongside their video during the chat. Add the following code just above <div className='video-rooms-list'>:
This function will call the /token endpoint you created on the server side. When a user clicks a button to join a room, the application will fetch an access token for them that will allow access to that room. To make this happen, update the <button> element for the rooms in the roomList to call joinRoom when a button is clicked:
Now that you've created a way for users to join rooms, you'll also want to create a function that lets them leave a room. After all, you wouldn't want your user to be trapped in a video room forever, right? 😉
To create the leaveRoom function, add the following code below your joinRoom() function:
With this function, when a user leaves a video room, any audio or video that is being shared with the others in the room will be stopped, and the user will be disconnected from the room.
It's very exciting that you can create video rooms now. In order to actually start sharing audio and video in these rooms, however, you'll need to do some work in the Room.tsx and Participant.tsx components. Let's work on that now.
Update the Room component
Open the src/Room.tsx file in your code editor. Inside this file, add the following code to update the import statements and create an interface for the props you'll be passing to the Room component:
Next, replace the empty Room component with the following code:
This component will show the room's name and any breakout rooms it has. Additionally, the changeRoom() function will allow a user to switch to a different breakout room, or if they click the Leave Video Call button, will allow them to leave the call altogether.
Before you're ready to display the participants in your video application, however, you'll need to update the Participant.tsx component.
Update the Participant component
Open up src/Participant.tsx in your code editor. At the top of the file, add the following code to update the imports and create an interface for the props you'll pass to this component:
Then, replace the empty Participant component with the code below. Check out the comments at each part to see what the code is doing:
In this component, you attach the audio and video elements for a participant, as well as display the participant's identity. This way, each participant in the video chat will know who is who.
Bring it all together
Now that you have a component that will display each participant's video and audio, it's time to bring all the pieces of this application together.
Return to Room.tsx in your code editor. At the top of the file, import the Participant component you just worked on in the previous step:
Then, add the following code inside the Room component, just above the changeRoom function:
In the code above, you're storing the remote participants in the component's state, as well as setting up event listeners to listen for whenever a participant joins or leaves the room.
Lastly for this component, update your return statement to fill in the currently empty participants <div> that will display each participant in the video room, including their names, audio, and video:
Alright, this component is ready to go. You just need to make a few changes to App.tsx before you'll be able to try out your video application.
In App.tsx, add the Room component to your list of imports:
Just below your function for leaveRoom, add a helper function that will get the breakout rooms for the main room that is in progress:
Lastly, in your return statement, replace <div>Room</div> with the Room component, passing in the needed props:
Your application is complete!
Test out your application!
Now is a great time to test out your application to see it in action.
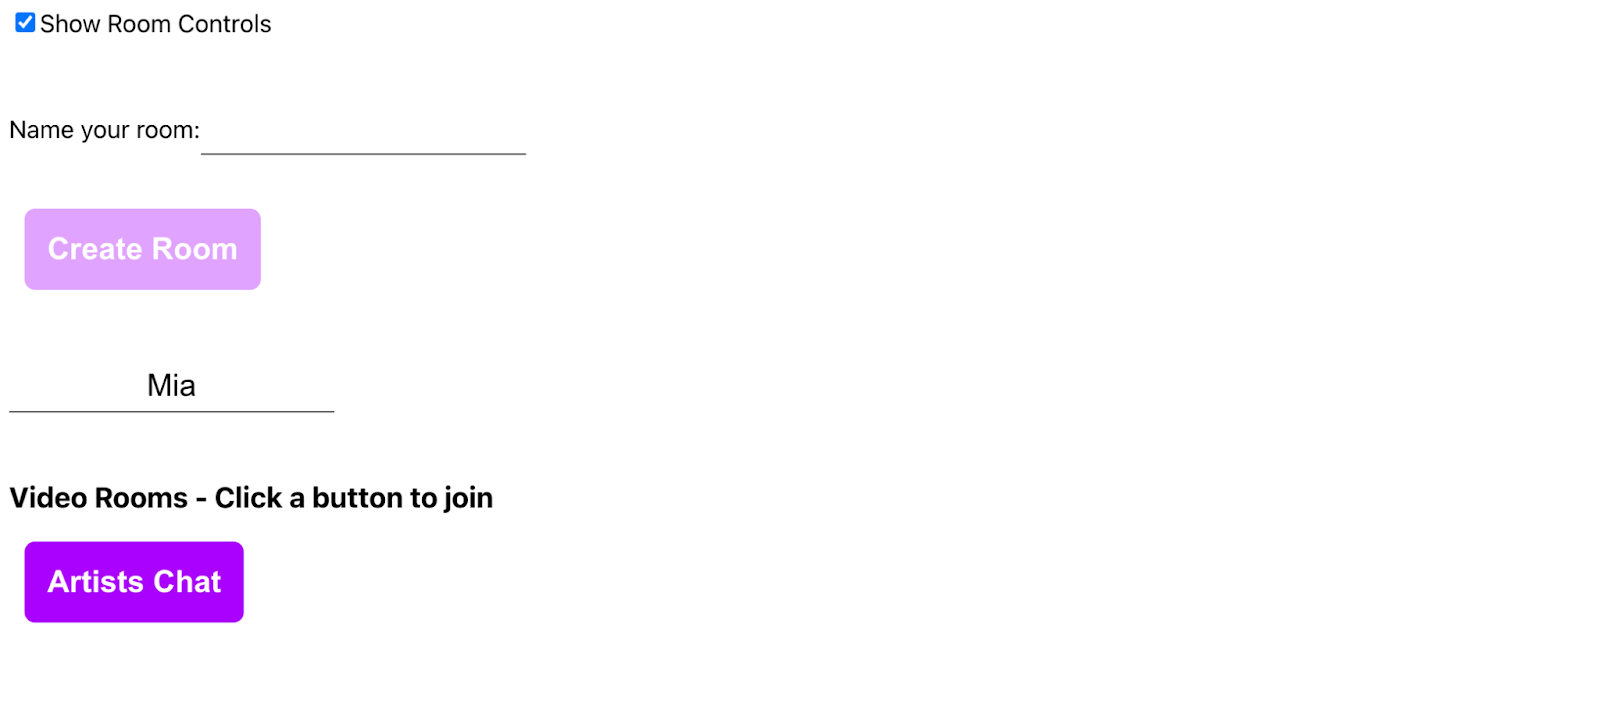
Make sure the checkbox for Show Room Controls is checked. Then, enter a name for the room you want to create, and click Create Room. Once you've done this, a button for joining the new video room will appear on your screen:
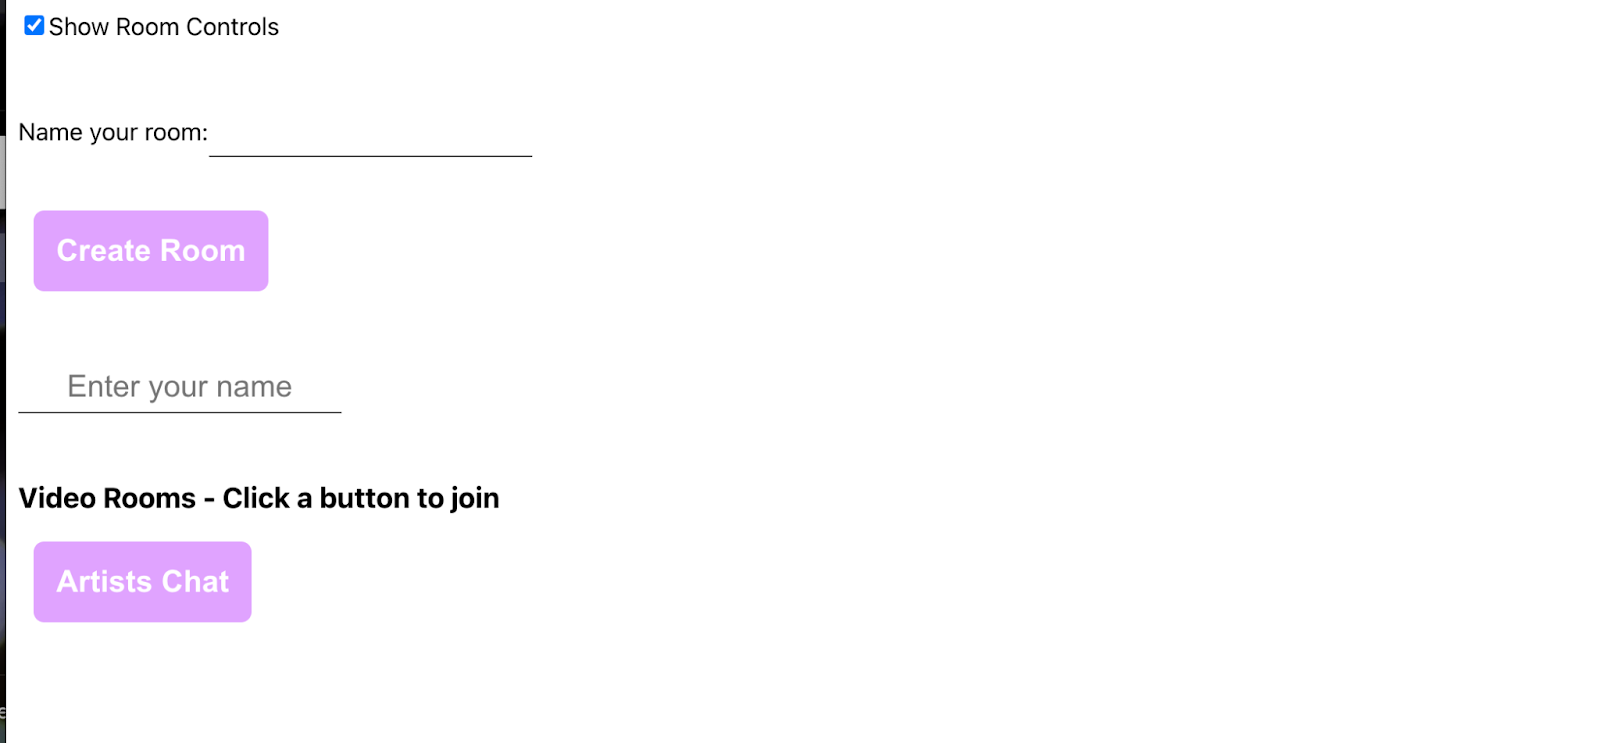
As you can see, I've named my room "Artists Chat", but you can choose whatever name you wish.
You'll notice that the button for your new room is disabled. This is because you haven't yet entered your name in the identity input. Enter your name in the name input, and you'll see that the button has changed color to let you know it is active:
Now, click on the button with your room's name to join the video call. Your video will appear on your screen, and you'll also notice that the text for Create Room has changed to Create Breakout Room. The button you created for Leave Video Call is also visible:
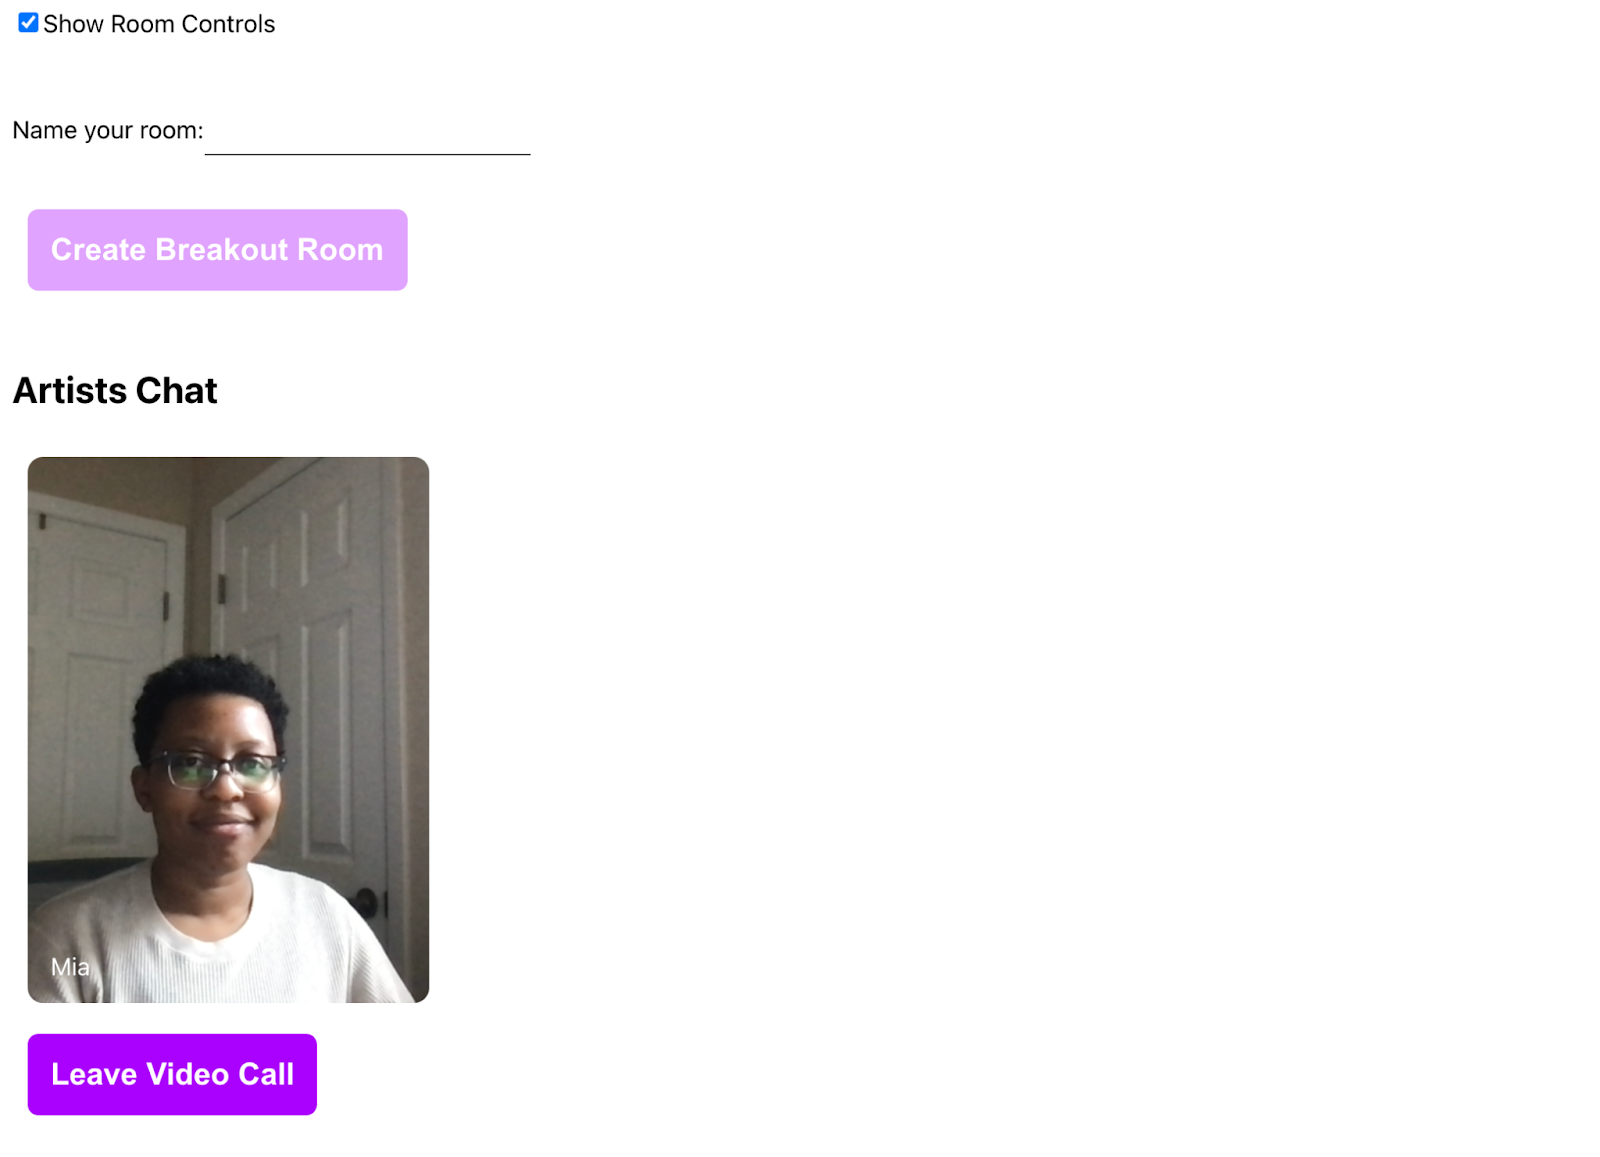
It's time to try creating some breakout rooms! Enter the name of the breakout room you wish to create, then click the Create Breakout Room button.
For my application, since I've created an artists chat, I've added a few different rooms for the types of artists who might join the call:
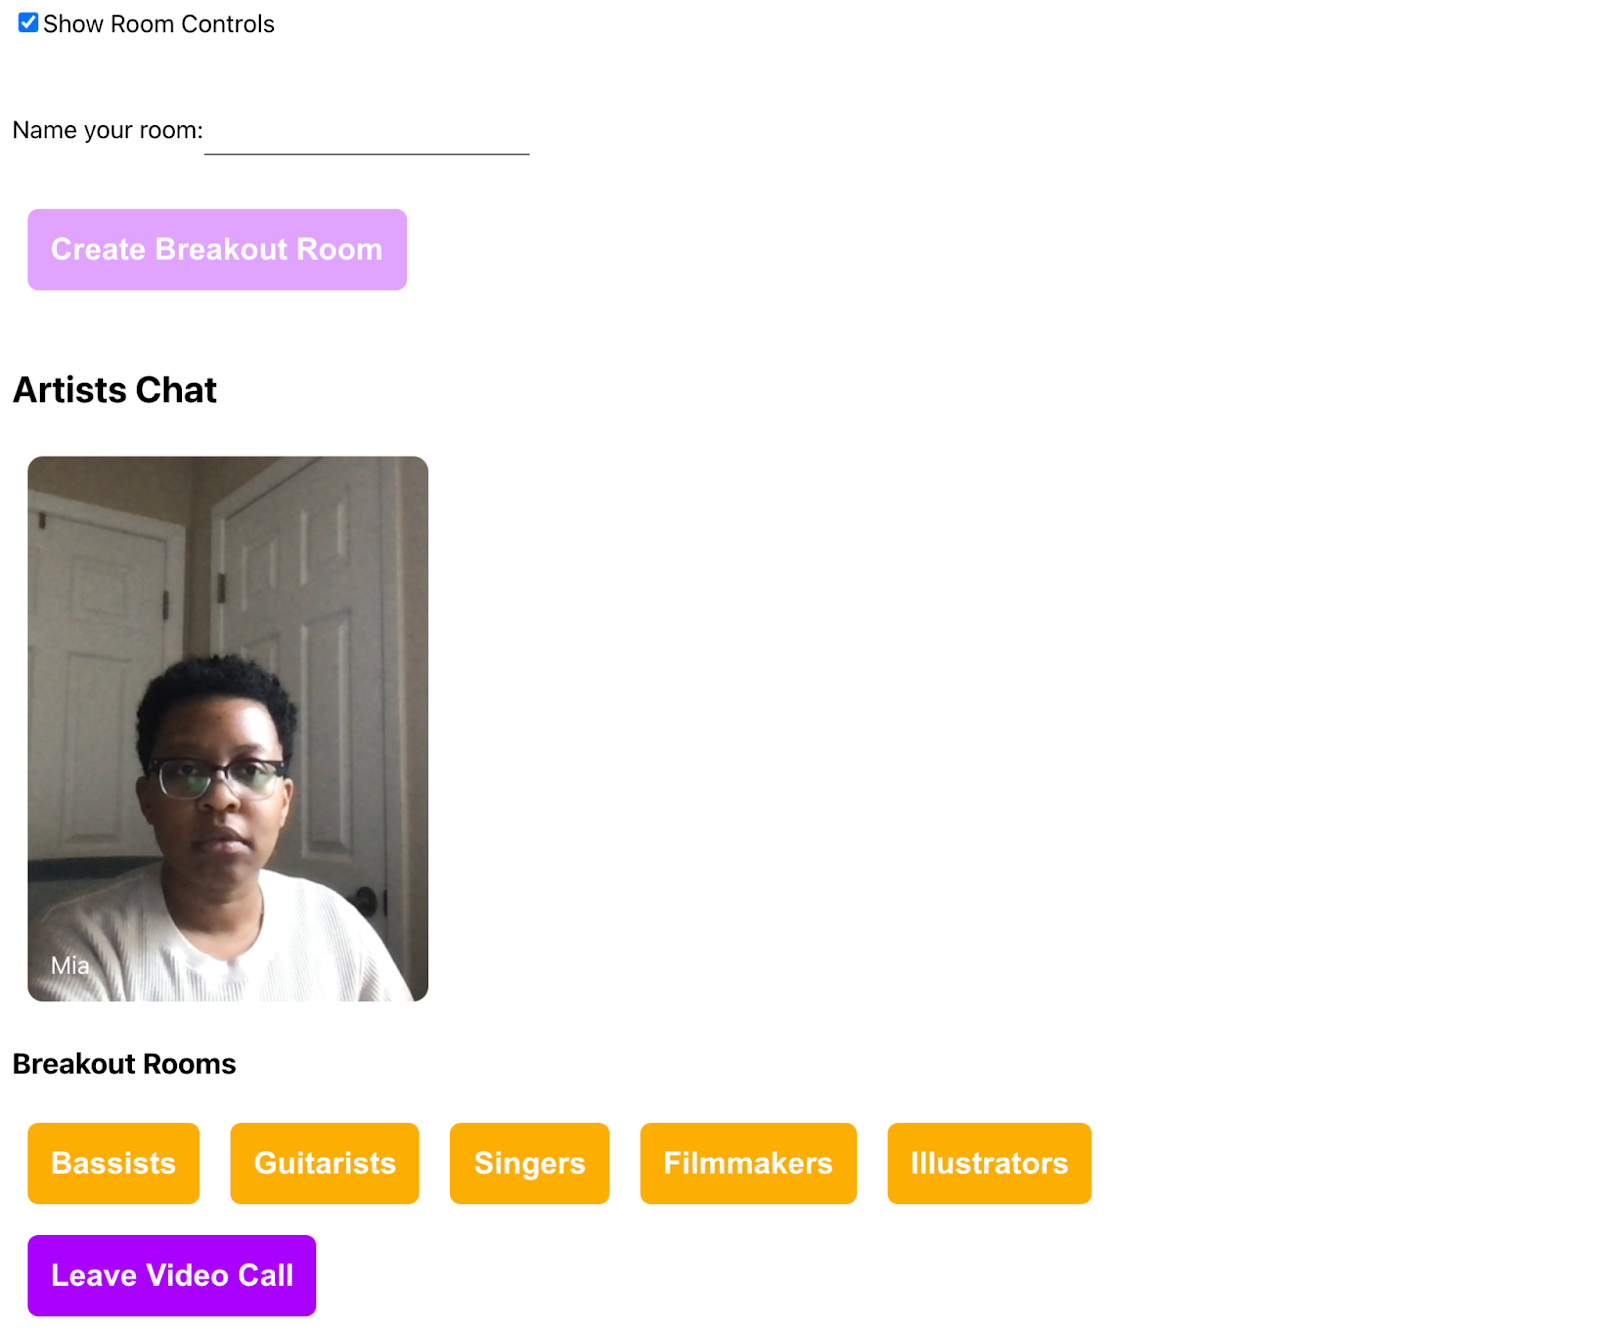
As you can see, I've created five different breakout rooms, and their names appear in orange.
Clicking one of the breakout room buttons will take you to that room. So, if I click on the room for Bassists, I can join this chat with my bass guitar:
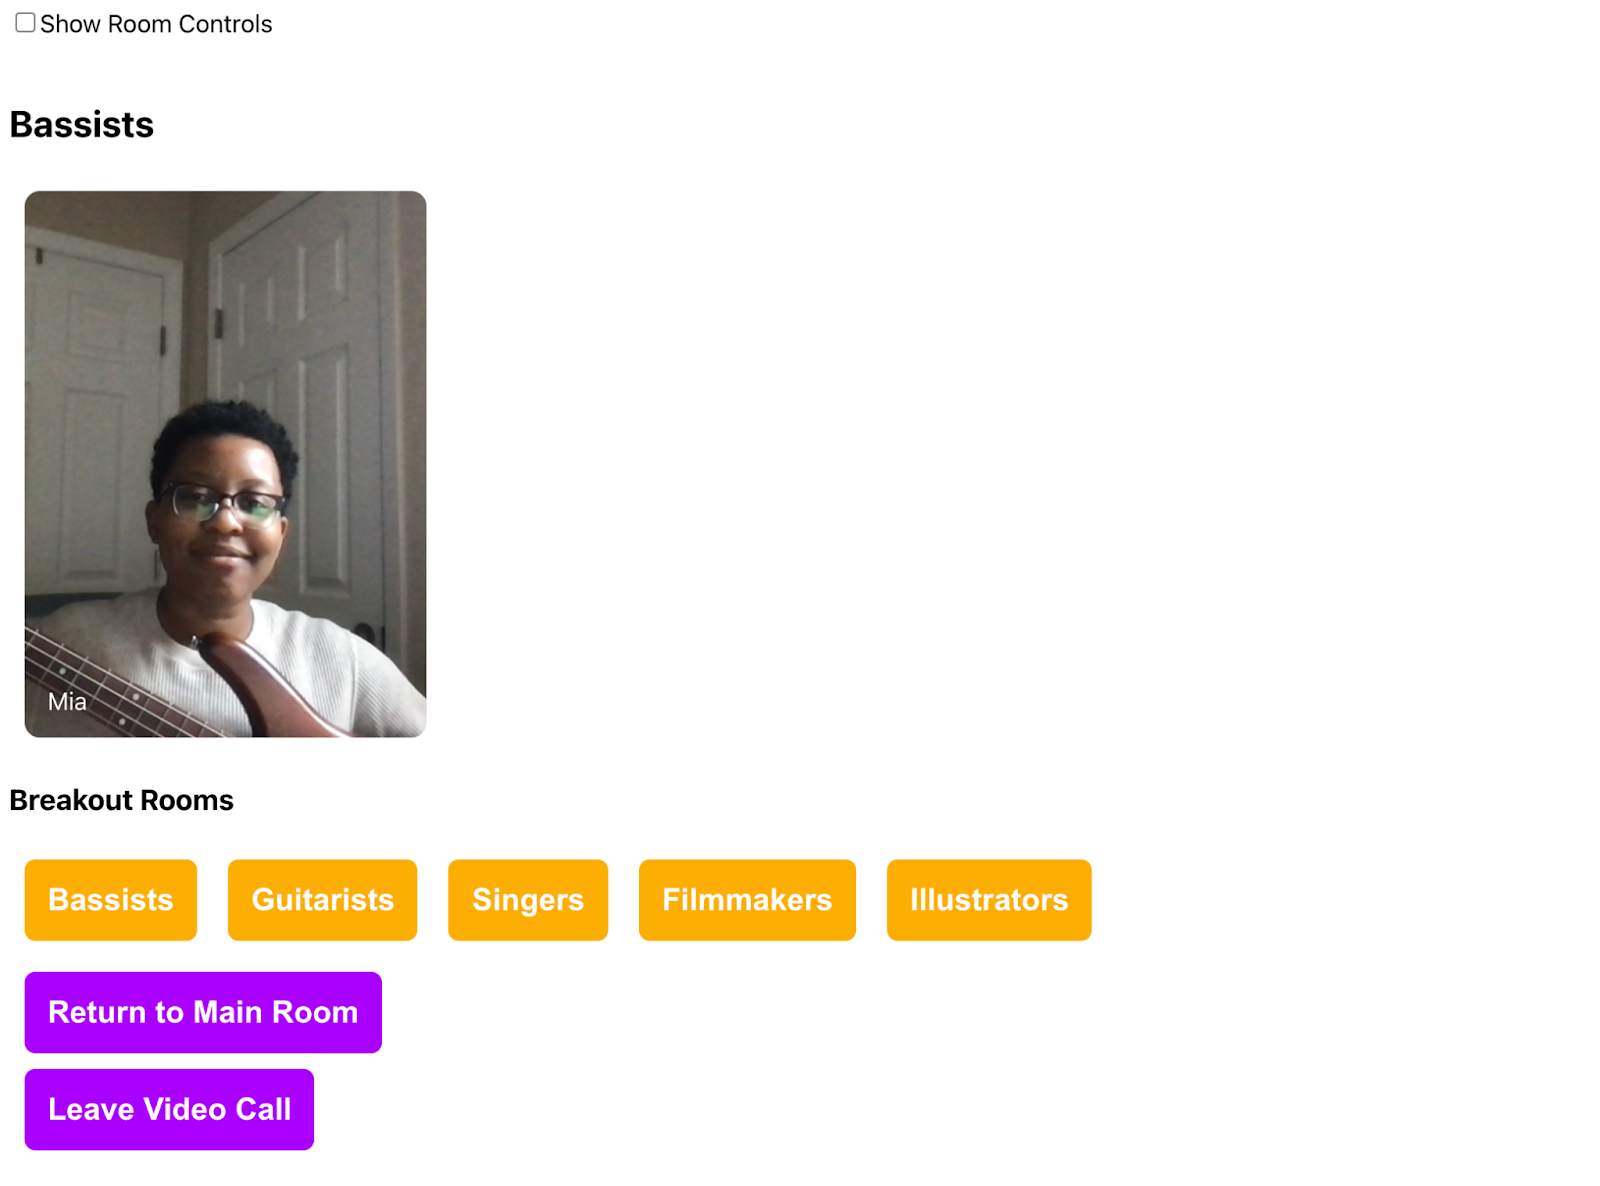
On entering a breakout room, you'll see that the name of the current room has changed. Additionally, the Return to Main Room button is now visible, and you can click that button to return to the larger-group room.
To see how this works with multiple participants, you can navigate to http://localhost:3000/ in a second browser tab and join the video chat with a different identity. In the example below, I've joined the Artists Chat and then joined the Bassists breakout room as "Another Bassist":

You can try joining and leaving breakout rooms as your two different identities and see what the experience is like. Cool, right?
What's next for your video application with breakout rooms?
Now that you've got a video application that can create breakout rooms, what will you build next? Perhaps you'd like to try building a video application with a text chat feature? Or maybe you would like to add a feature for your participants to mute and unmute their audio?
If you would like to check out the entirety of the code from this tutorial, check out the updated-client branch of this GitHub repository.
There are so many cool ideas out there. I can't wait to see what you build!
Mia Adjei is a Software Developer on the Developer Voices team. They love to help developers build out new project ideas and discover aha moments. Mia can be reached at madjei [at] twilio.com.


Related Resources
Twilio Docs
From APIs to SDKs to sample apps
API reference documentation, SDKs, helper libraries, quickstarts, and tutorials for your language and platform.
Resource Center
The latest ebooks, industry reports, and webinars
Learn from customer engagement experts to improve your own communication.
Ahoy
Twilio's developer community hub
Best practices, code samples, and inspiration to build communications and digital engagement experiences.