Building A Group Messaging App with Meteor, MongoDB and Twilio
Time to read: 18 minutes
July 28, 2015
Written by

There’s been a lot of buzz around the Meteor framework, and with their adoption of ES6 coming later this summer now is a better time than ever to try it out!
In this post, we are going to build a simplified GroupMe clone using Meteor, MongoDB, and Twilio. The app will serve as an SMS group messenger that will let us create groups of phone numbers and blast a text message to every member of that group. We will also expand its functionality to allow groups and individual numbers to be toggled on or off depending on who we want to receive a particular text.
If at any point you are receiving errors and feel lost, or you just want to run this application without building it, you can obtain the finished source code here.
Otherwise, prepare to explore the Meteor universe.
Building Your Space Ship
The first step of any space endeavor is to build a sturdy ship. We will start by installing Meteor. Open a terminal and run this command:
To generate a new Meteor project, navigate to the directory where you keep your code and run this:
This will create a folder with three files inside of it. We will soon be modifying each of these files. But first, run your new app:
You’ll see the following output in your terminal:
=> Started proxy.
=> Started MongoDB.
=> Started your app.=> App running at: http://localhost:3000/
Open a browser and navigate to http://localhost:3000/. You’ll see a basic web application like the one below.
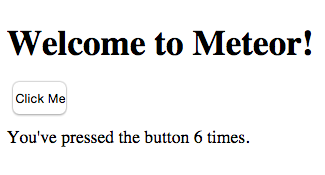
Congratulations! You’ve created your first Meteor application.
Next, we need to install some dependencies. Kill your Meteor server and run the following command:
- http allows us to send HTTP requests to the Twilio API.
- accounts-password and accounts-ui make it unbelievably easy to integrate user accounts and a login interface into our application.
- grigio:babel allows us to write ES6. This package will not be necessary after the release of Meteor 1.2.
- msavin:mongol is a helpful MongoDB tool to inspect our database from the browser.
Preparing For Launch
It’s time to suit up and jump into some code. We will start by getting our front-end work out of the way. Open GroupMeteor.html in your favorite text editor. This page will serve as our ship’s launchpad.
We’ll first add some code and then I’ll describe what it does. Replace everything inside the tags with the following:
One thing you’ll notice are the {{ and }} tags. This is our first encounter with Spacebars, Meteor’s templating language. If you’ve ever worked with Handlebars, this concept will be familiar to you. Anything within a pair of double braces is part of a template. The templates will allow us to generate HTML based on the Javascript we will write in our GroupMeteor.js file.
- {{> loginButtons}} will insert a login and user creation interface from the accounts-password and accounts-ui dependencies we added earlier.
- The {{#if currentUser}} block will check to see if a user is logged in before displaying the elements inside of it.
- Outside of our
we have a
{{#each groups}} block. This unordered list will display all of the groups that a user adds to his/her collection. The
{{> group}} tag tells the page that we will be inserting a specific template named group. We do not need this list inside of the {{#if currentUser}} block because our database will be configured to only display the groups belonging to the user that is logged in.
Next, we need to create the group template that will define how each group in our
{{#each groups}} block is displayed. Add the following code to your GroupMeteor.html file after the
tag:
Let’s go over what we just added. Everything inside of our tags defines a Meteor template.
- The {{name}} and {{number}} fields will be generated from items in our MongoDB collection, which we will be creating soon.
- The {{#each this.numbers}} is included because each group can contain multiple numbers and we need to display all of them.
Where this data is coming from will make more sense after we write our JavaScript in the next section.
Fire up your application again by running meteor in your terminal. In your browser you should see a barren webpage that looks as such:

This spaceship needs a paint job. We can do that with CSS. Paste the contents of this file into GroupMeteor.css and save it. Much of the styling is borrowed from Meteor’s getting started tutorial. If your application is still running, you’ll notice that the page was updated without needing to refresh. That’s because Meteor automatically pushes the changes you make to every client currently using the application. Your app should be looking much better now.
You probably encountered this warning about Meteor’s autopublish package being on:
Kill your server and enter this command:
autopublish is a default package that will automatically publish all database data to the client. As you will see in the next section, this is undesirable.
Countdown…
Now that our front-end is all laid out, our rocket needs some boosters. Open up your GroupMeteor.js file. You’ll see two conditional blocks:
if (Meteor.isServer) and
if (Meteor.isClient). These blocks are important for determining where code will run. Code within the
.isClient block will only run in the client’s browser and code within the
.isServer block will only run on the server side. In production, you should still avoid entering any sensitive information (account credentials, API keys, etc.) in your
.isServer block, as this code can still be seen by the client, it’s just not executed. See the documentation for more info about this topic.
At the top of your file, outside of the client and server blocks, define your Groups collection with the following line:
Collections are used to store persistent data. This MongoDB collection can be accessed by both the server and the client. By default, the entire database is present on the client. This would be an issue if we wanted to store privacy-sensitive data. Since we removed the autopublish package, we must fix this by adhering to Meteor’s publish and subscribe paradigm.
Replace the contents of your Meteor.isServer block with the following code:
Inside your Meteor.isClient block, replace the contents with the following:
Groups.find({owner: this.userId}) is a MongoDB query that will return a list of groups that contain the current user’s userId. Every group we create will have a user associated with it and we only want a user to see the groups that they created. The Meteor.publish() method registers a new Meteor publication named groups. When the client subscribes to the groups publication using Meteor.subscribe(), it will receive any changes made to the data in that publication in real time. (This convention can be very confusing to a beginner. Feel free to take a break from this tutorial and read more about it here.)
T-Minus 10 Seconds
Our ship is ready for takeoff. Let’s add a flight crew.
We need to define some helper functions and event handlers so that our front-end can interact with our backend. These functions will be defined in the .isClient block, and they will call functions in the .isServer block.
First let’s add a helper to our page’s body that will generate the HTML in the
{{#each groups}} block. Inside of your
.isClient block, add the following code.
This helper will query our Groups collection and return a list with the newest groups first. Remember that since our .publish() method is only publishing groups with an id that matches the current user, the user will only see the groups that they created.
Next we need event handlers. Below the helper we just added, insert the following:
Let’s review what these methods are doing.
- "submit .new-group" is listening for a submit event on the form named new-group. It will grab the text from the group textbox and send it to the addGroup function, which we will be writing next.
- "submit .new-number" is the same as above but calls the addNumber function.
- "submit .new-text" is also the same as above but calls the sendMessage function.
In our .isServer block, we need to add the methods that our new event listeners are calling. Use this code to do that:
- addGroup will insert a new group into our Groups collection. By default, new groups will be empty and will not be selected.
- addNumber will insert a new number into a group’s numbers array. By default, new numbers will be selected.
Let’s add the rest of our event handlers. These ones are contained in a Template.group object instead of Template.body because they are listening to events coming from within the group template we wrote in our HTML file. The following should also be placed in our .isClient block:
These four methods make up the toggling functionality that will allow a user to select/deselect individual groups or numbers when blasting out a text. We need to add their corresponding methods into the .isServer block before we forget. Inside of the Meteor.methods block add the following:
What is all of this code doing? We are using MongoDB queries to manipulate our database, which will change what the user sees.
- deleteGroup removes a group from our Groups collection.
- deleteNumber removes a number from a particular group by updating its numbers array and removing the selected entry.
- toggleGroup selects/deselects a group from our collection and selects/deselects every number in that group. This method is perhaps the most complex in the entire application, due to a MongoDB query that has not yet been added. Instead of a simple .update query, we are looping through every number in a group’s numbers array and making a new query to update its checked value to match that of its group.
- toggleNumber selects/deselects an individual number in a particular group.
T-Minus 5 Seconds
We’ve made it so far, and intergalactic travel is within our reach. If you need a break, now is a good time to create a Twilio account if you don’t already have one. You’ll need to upgrade your account to harness the full power of this application, otherwise you’ll only be able to send texts to phone numbers you’ve verified with Twilio. You will also need to purchase a Twilio phone number.
The next section requires you to set your Twilio credentials as environment variables. Since Meteor is built on top of NodeJS, process.env is used to access environment variables. To obtain your credentials, login to your Twilio account and click the Show API Credentials dropdown on your account dashboard. You’ll need to set TWILIO_NUMBER, TWILIO_ACCOUNT_SID, and TWILIO_AUTH_TOKEN in your working environment. To do this, use the following commands in your terminal, replacing the variables with your actual credentials and a Twilio phone number you purchased:
All we have left to do is make our call to the Twilio REST API. Place the following code at the bottom of your Meteor.methods block.
Here we are making HTTP requests to the Twilio REST API.
- At the top of the method we are grabbing every phone number that is currently selected (meaning checked is set to true). These numbers are being placed into a Set object so that every number we text is unique.
- We are iterating through our set and making a POST request for every number in the set.
- Our account credentials are set as environment variables to avoid sending them to the client when a user loads the application.
One final optional step:
At the bottom of our
Meteor.isServer block, outside of the
.events blocks and
.helpers block, add the following code:
This will make creating an account easier by requiring only a username and not an email address.
Blast Off!
All of our code is now in place and we are ready for launch! Start up your server if it isn’t already running and create a new account. Once you log in, you can start creating new contact groups and adding phone numbers to them. When you are ready, type a message into the textbox at the top and hit enter. Every number you have selected will receive your message via SMS. Congratulations, your ship has made it to orbit!

If you want to deploy your application, kill your Meteor server and run the following command:
Once it finishes uploading, you can navigate to http://my_app_name.meteor.com and see a live instance of your application running.
Back to Earth
As we wrap up this tutorial and head back down to Earth, there are some important points to keep in mind:
- Be careful when testing this application if you have several phone numbers saved across your groups. There is no rate-limiting in place so many texts can be sent very quickly. Avoid spamming your friends when using this app, as it is annoying, and can use a lot of Twilio credit very quickly.
- In a production environment, files are typically separated into /client and /server directories instead of using .isClient and .isServer blocks. See this section of the Meteor documentation for more info on structuring Meteor applications.
- There is no error handling to check for valid phone numbers or if groups exist before sending out texts. Feel free to add this in and send me a pull request!
Thanks for sticking with me through this journey into the great unknown. If you ran into any issues or have feedback on this tutorial, please don’t hesitate to leave a comment below or reach out to me via Twitter @brodan_. See you starside!


Related Resources
Twilio Docs
From APIs to SDKs to sample apps
API reference documentation, SDKs, helper libraries, quickstarts, and tutorials for your language and platform.
Resource Center
The latest ebooks, industry reports, and webinars
Learn from customer engagement experts to improve your own communication.
Ahoy
Twilio's developer community hub
Best practices, code samples, and inspiration to build communications and digital engagement experiences.