How to Create a High Converting Sales Page Using PHP, Twilio Messaging, Google's App Engine, and Stripe's API
Time to read: 9 minutes
March 15, 2022
Written by
Reviewed by

Today's fast-paced, digital economy has created a culture where people want to know how to compete in the global market, what skills are emerging, and how best to learn them.
Consequently, more and more people are choosing educational resources, such as ebooks and video tutorials, to help us fill the knowledge gap necessary to improve our lot in life.
And why not? Whether it's resume writing, DIY, or personal budgeting, there's a guru ready to take you from novice to ninja — "in just seven days!"
Forecast to be worth $350 Billion by 2025, the online learning industry has not only taken the world by storm, it has also created new opportunities for everyday people to become digital entrepreneurs.
With the abundance of e-commerce platforms, website builders, email marketing platforms, and content management systems readily available, just about anyone can launch a sales page and start selling e-courses or ebooks.
How does all this relate to sales pages?
A sales page is a web page designed to persuade your visitors to buy your ebook or enroll in your online course. In other words, a sales page has one specific goal: to convert.
The copy and images must both align with your core offer because this is the point in your visitor's journey where they'll decide whether or not they want to buy your product.
The sales page can make or break the success of your products. Poor execution will result in little to no sales, but get the formula right, and you won't be able to stop hitting refresh on your Stripe account.
That said, the yearly cost of renting other people's platforms often runs into the thousands, making this method of earning unattainable for most, until now.
In this tutorial, I'll be leveling the playing field by showing you exactly how to create and host a high-converting sales page, so that you can launch a potentially lucrative business teaching your skills to others.
Prerequisites
This tutorial assumes a basic understanding of HTML, CSS, Bootstrap, and PHP. In addition, to follow along, you need the following:
- PHP 7.4. Version 8 is preferrable.
- Composer installed globally.
- A free Google Cloud account with billing enabled.
- The Google Cloud CLI. To successfully install the Google Cloud CLI on your system, you need Python 2.7.9 or higher, although the recommendation is version 3.5 - 3.8.
- A free Stripe account.
- A free or paid Twilio account. If you are new to Twilio, click here to create a new account now and receive a $10 credit when you upgrade to a paid account
- A smartphone
Anatomy of a high converting sales page
There are two main types of sales pages: short and long-form. Although each has its appropriate use case, they follow a similar structure to the one below.
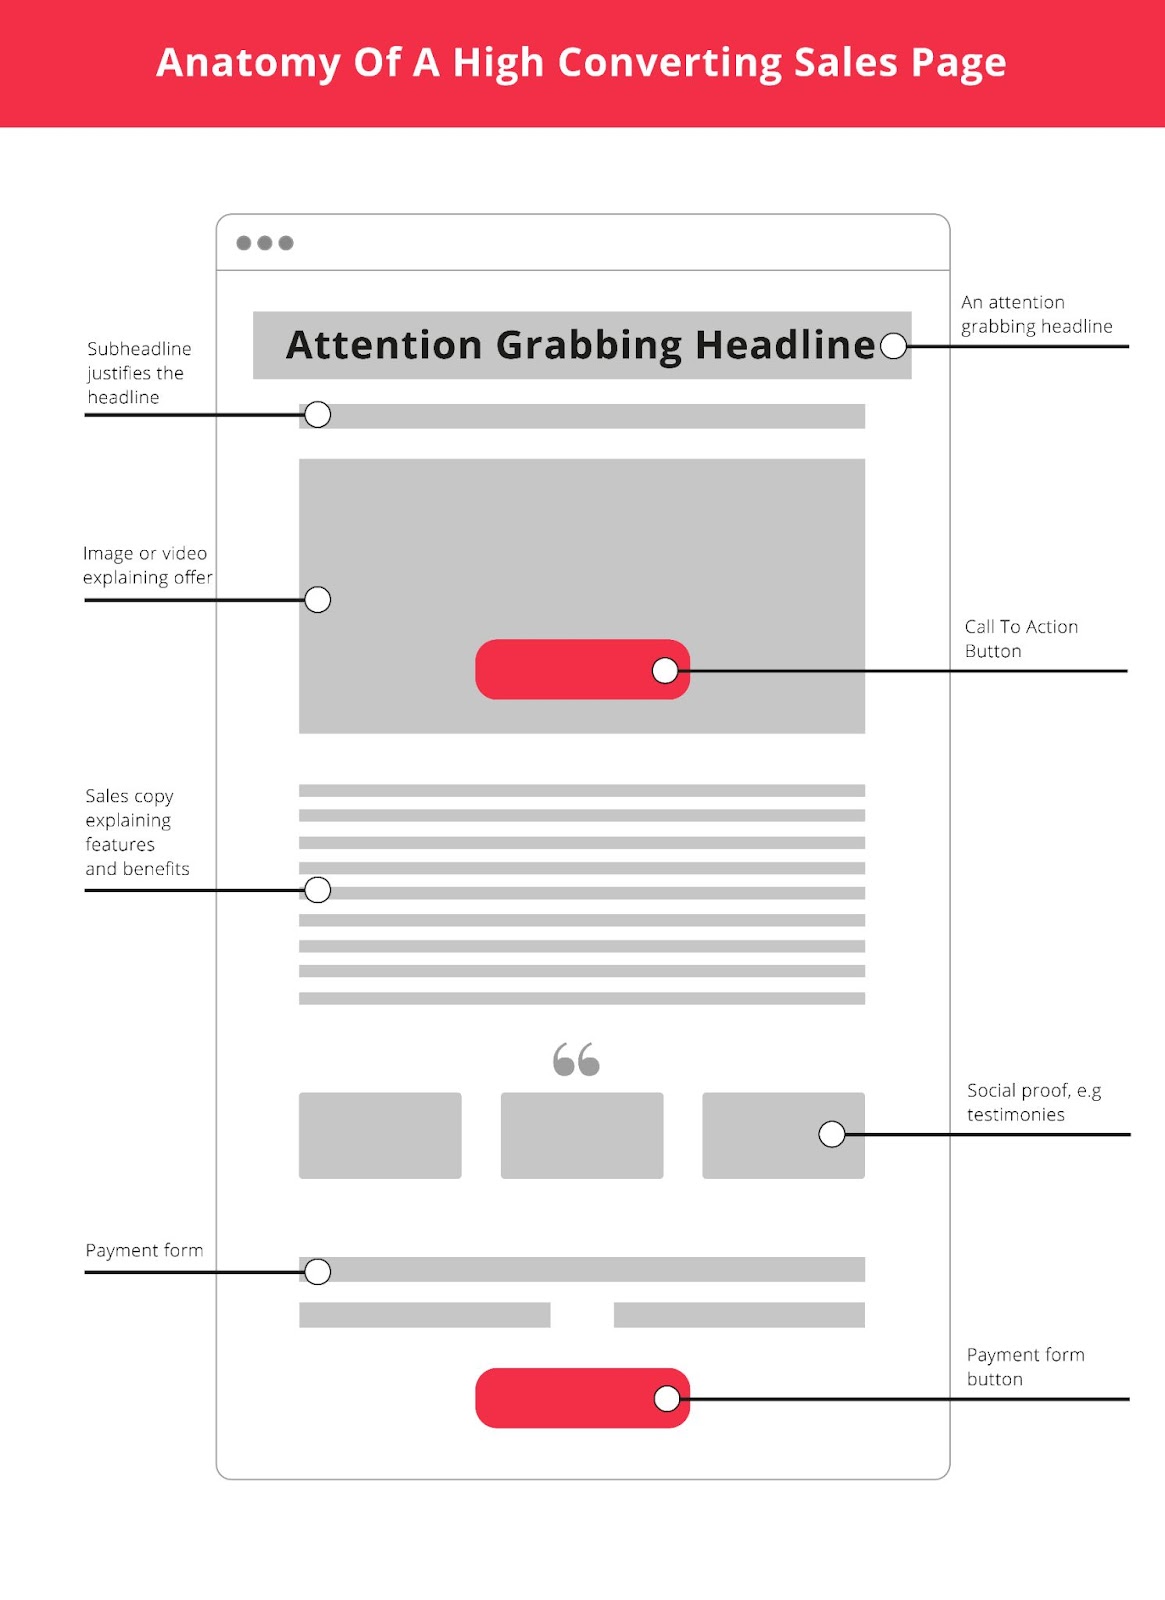
The sales page begins with a compelling headline followed by a sub-headline. Then comes a primary image or video which explains the offer, followed by an accompanying Call To Action (CTA) button.
The sales copy section comes next, closely followed by testimonies as social proof. Lastly, you have the payment form with the CTA payment button.
Now that you know what a high converting sales page is, it's time to create one.
Create the project
To start, you need to create the project’s root directory, named salespage and then switch to it. Do this by running the following commands.
Next, you need to create some additional files and directories inside the top-level directory:
- A directory for the JavaScript, CSS, and image files
- index.php: which will contain the code for the sales page
- payment.php: which will contain the code that processes the payment form and triggers the Twilio messaging API
- success.php: where the payment form will redirect to once the payment is successful
To do all of this, run the following commands in the terminal.
Install the required dependencies
Next, run the following commands to install the Stripe and Twilio SDKs as the project’s dependencies.
Create the sales page
Open index.php in your preferred code editor and paste the following code into it.
The structure of the page is similar to the annotated diagram above. First, there is a container element that contains five sections:
- The hero section
- The problem section
- The solution section
- The testimonials section
- The payment section
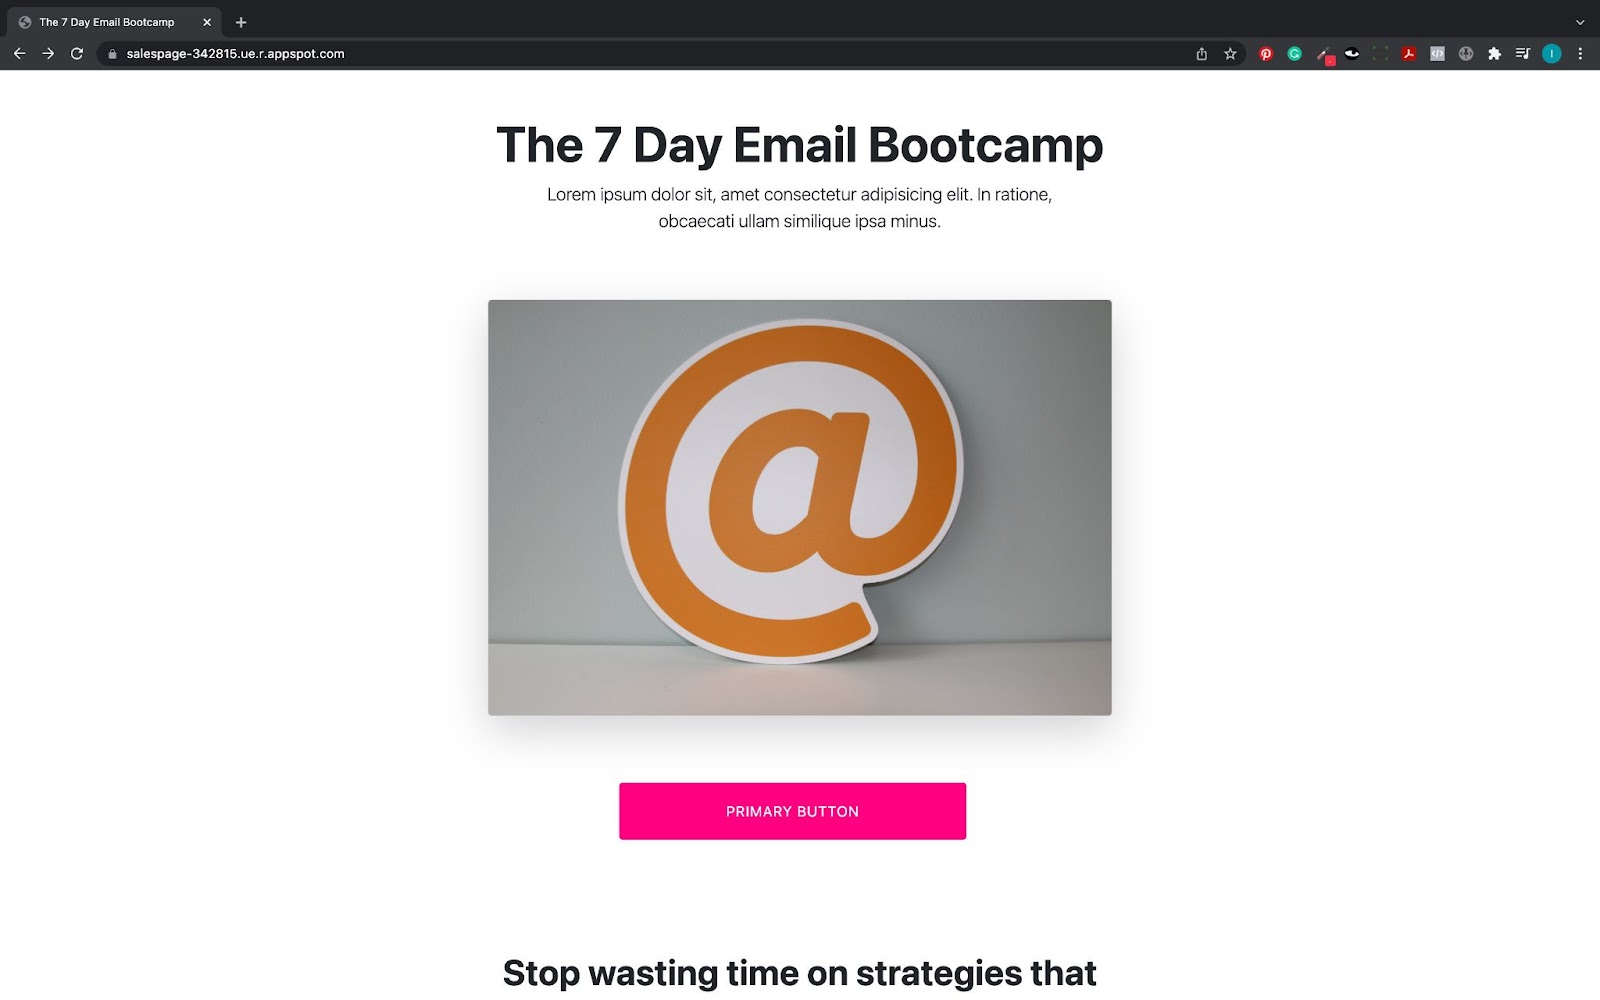
The hero section
The "hero" section is the first thing your visitors will see when they land on your sales page, it contains the attention-grabbing headline and sub-headline that will excite your audience and encourage them to read further.
The problem section
The next part is the "problem" section. Here, you will identify with and explain to your customer why their current strategy is not working. This is where you tell your own story of how you struggled with the same problem your customer is struggling with and how you finally overcame the issue to find victory.
The solution section
You then follow this narrative with the "solution" section. Here, you introduce your customer to your product and show how it is the answer to the problem you identified in the "problem" section.
The social proof section
Next comes social proof. Here, you prove that you’re legitimate by showing testimonies of your past clients, or the results you’ve achieved by using your product. This part is absolutely essential to the page's final section: the payment section.
The payment section
This last part is your final opportunity to turn your visitor into a happy customer, so it’s also a good idea that you remove any doubts they may still have by offering some kind of "risk-free" guarantee just before you ask for their payment details.
This design gives you a lot of flexibility because you can easily add as many additional sections, as needed. The general rule of thumb for sales pages is that the more expensive your product, the longer your copy. However, it may need to do some A/B testing to discover the formula that works best.
Download the hero image
With the main template in place, download the hero section's hero image, from Unsplash, to the img directory, and name it email_marketing.jpg.
Add the page styling
To give the page some styling, paste the following CSS code into css/style.css.
Add the required Javascript
Now, add the code for the Stripe payment, by pasting the following code into js/payment.js.
The code initializes a Stripe object with your client-side key. To get your key, go to your Stripe developer’s dashboard and switch to test mode, by enabling it in the top right-hand corner.
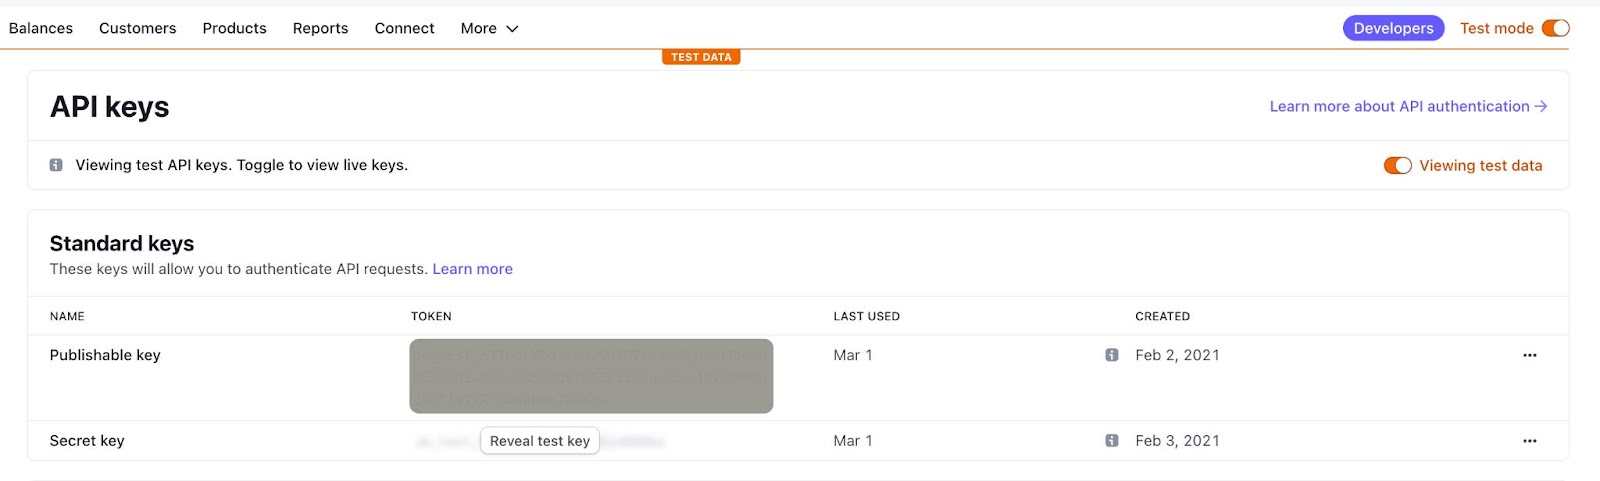
Then, click on the Publishable key to copy it and paste it into js/payment.js, in place of pk_test_ADD_YOUR_PUBLISHABLE_KEY_HERE.
The code starts by instantiating an instance of Stripe Elements. These are:
a set of pre-built UI components for building your web checkout flow.
The document.querySelector adds some CSS classes to the button for styling it with CSS. Then, a set of custom styling is created and passed to elements.create, which is then saved to the card variable.
The card is mounted to the HTML element with the id of card-element. Card.addEventListener checks that the card is valid, otherwise it throws an error. The submission is handled and a token is passed to stripeTokenHandler, and then the form is finally submitted.
With the Javascript file created, next, create the PHP script to handle form submission, by pasting the following code into payment.php.
With the code in place, you need to replace the various placeholders. Start off by replacing 'sk_test_ADD_YOUR_SECRET_KEY_HERE' with your Stripe Secret Key. As before, you can get this from your developer’s dashboard.
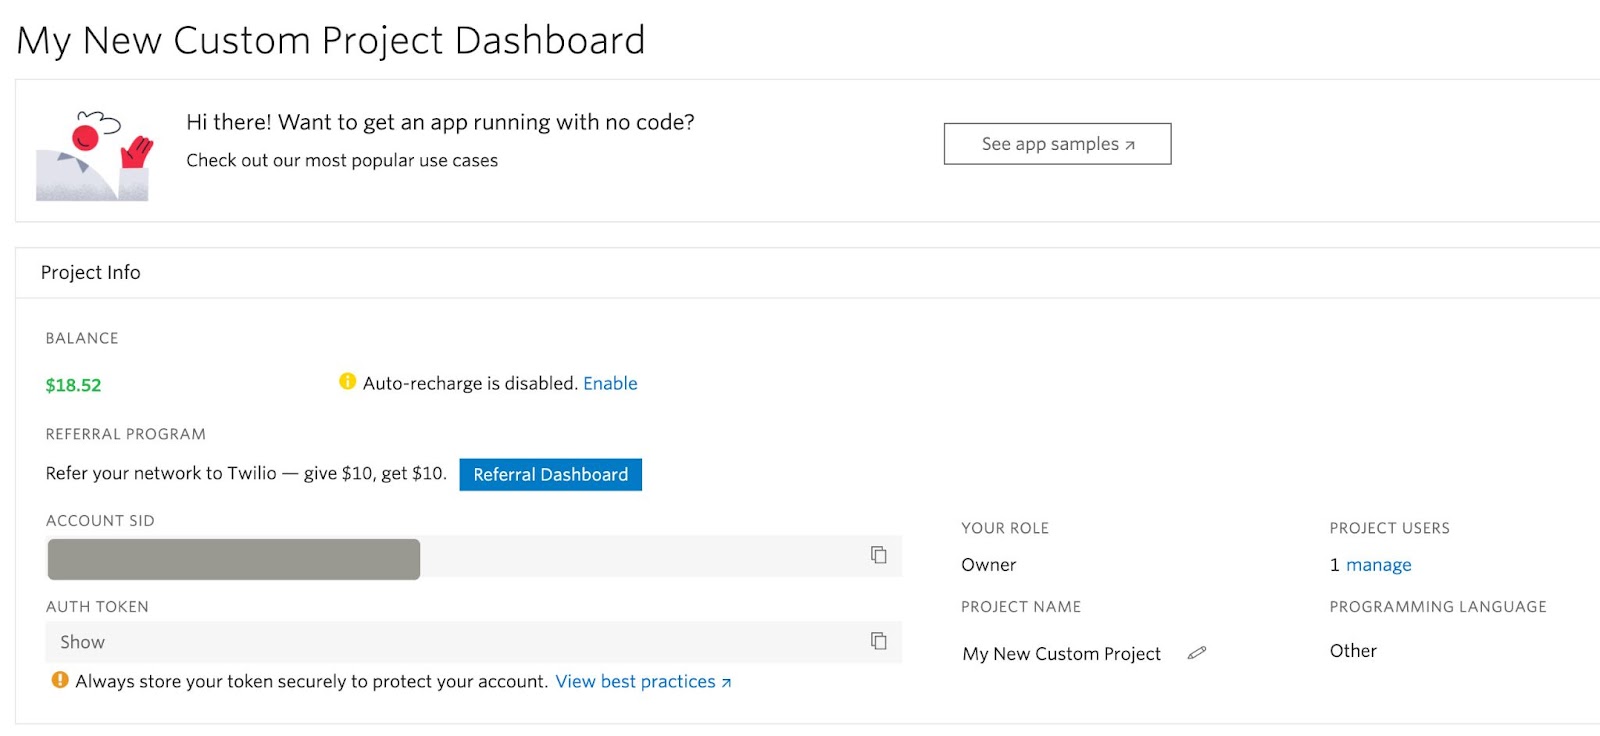
Then, open the Twilio console, retrieve your Twilio Account SID and Auth Token, and paste them in place of TWILIO_ACCOUNT_ID and TWILIO_TOKEN respectively.
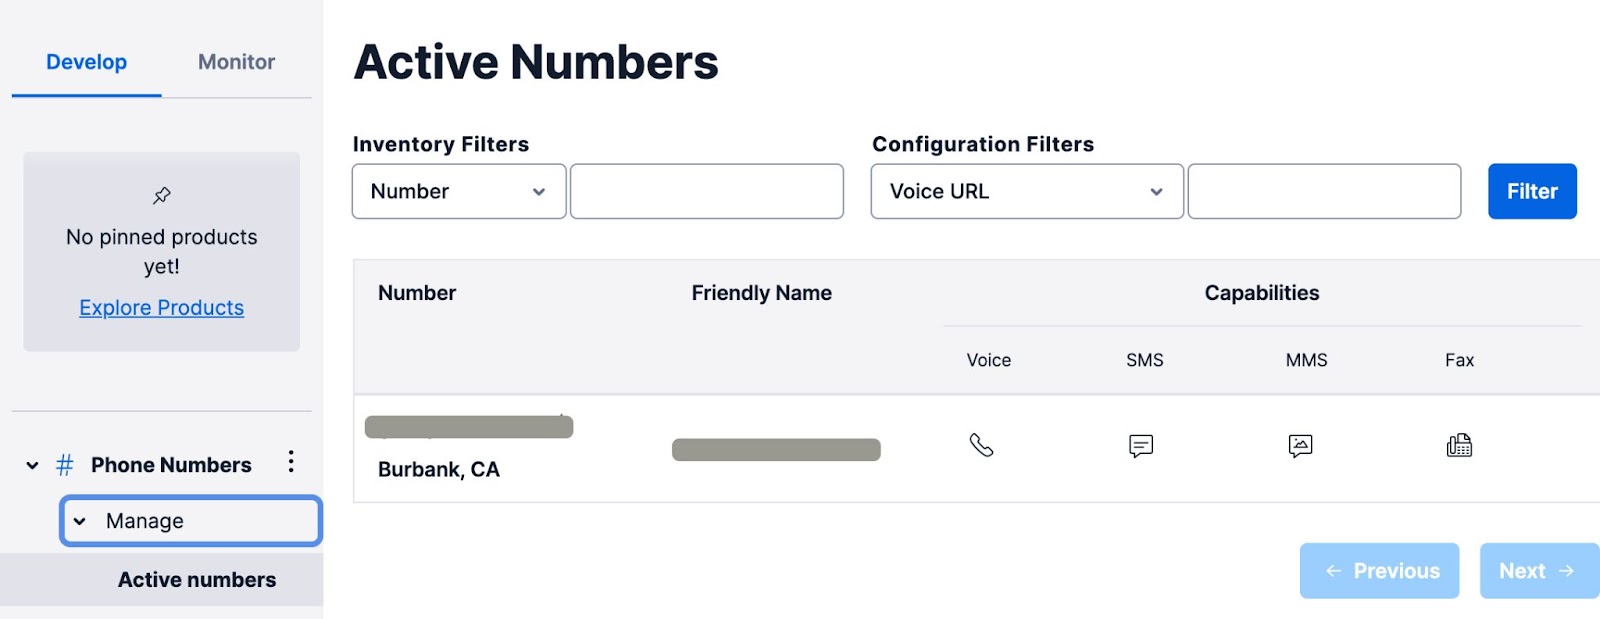
To locate your Twilio phone number, click on "Explore Products". Then, scroll to the bottom of the page, and under "Super Network" click on "Phone numbers". Then, under Manage, click "Active numbers". Copy the phone number and paste it in place of TWILIO_NUMBER.
Finally, replace the YOUR_PHONE_NUMBER placeholder with your, personal, phone number.
The code starts off by sanitizing the $_POST data with the filter_var_array() function and uses the result to initialize a new variable, named $POST.
Then, it initializes a new Stripe Customer object, named $customer, with the customer's email, token, and first name.
To charge the customer, it creates a Stripe Charge object, named $charge_customer, with the amount, currency, description, and customer id.
Then, the header() function redirects the user upon successful submission. The first argument is the location of the file, which is success.php, followed by the customer's id, product, and product description.
Lastly, Twilio’s SMS API sends a sales notification message to your mobile number, alerting you to the sale. To do this, it uses three variables: $account_sid, $auth_token, and $twilio_number.
After that, a Twilio Client object, named $client, is initialized with the Twilio Account SID and Auth Token, and sends a confirmation SMS to your phone number.
Create the success page
Now, it’s time to create the success page, the final part of the customer’s journey, by pasting the following code into success.php.
It begins by getting the parameters from the submitted form, via the $_GET superglobal. It checks that the submission is not empty and, if not, uses filter_var_array($_GET) to filter the $_GET superglobal array.
Afterwards, the tid and product values are retrieved from the $_GET array and set to the variable $tid and $product. If tid and product are missing, the page redirects to index.php.
In the HTML section, we place the variables received with the accompanying message to the customer. Here, it thanks the customer for their purchase, giving them their order number, and directing them to where they can download the course.
That’s it! You’ve completed the sales page. It’s now time to host it on Google App Engine.
Create an instance on Google App Engine
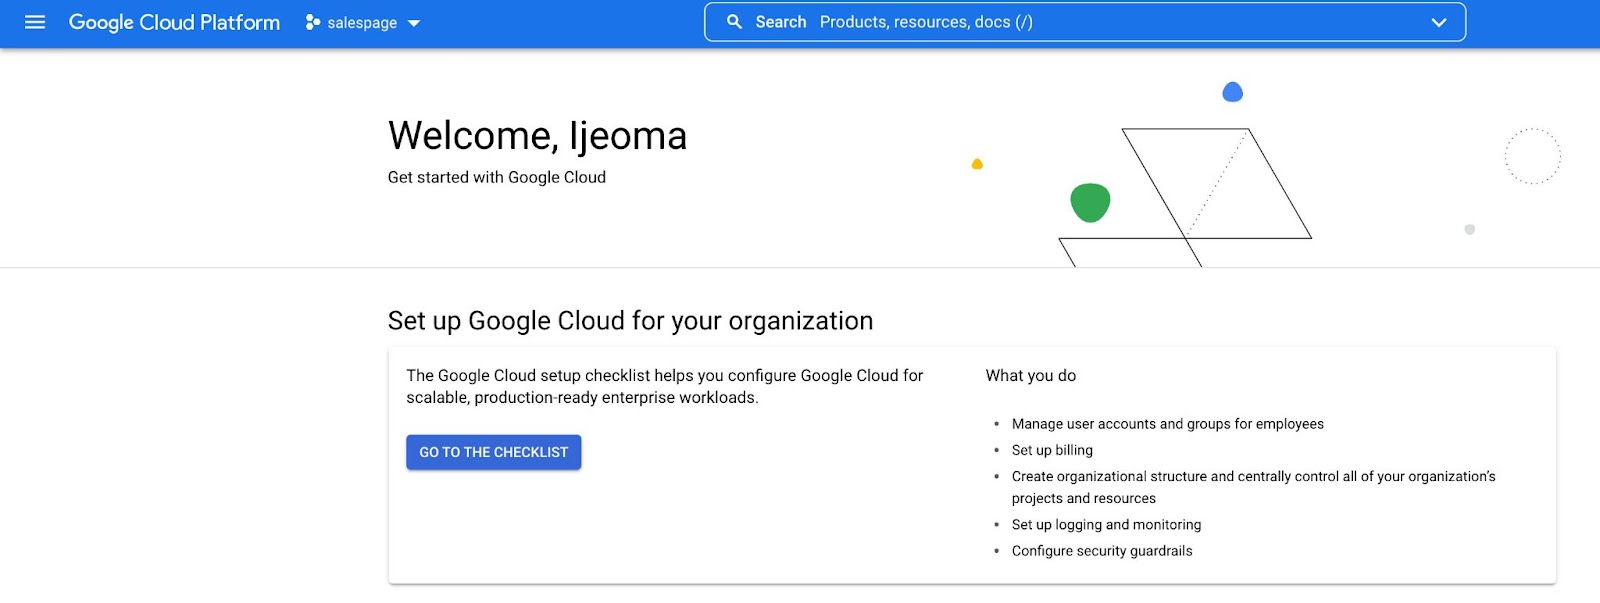
You need to create a new project on the Google Cloud Platform. To do this, open your Google Cloud Console, click on “Select a project > New Project” and enter the project name, the organization that you wish to attach the project to, and location.
Then, click Create. After the project's created, click Select Project.
Next, you need to create a VM instance on the App Engine. To do this, click on the hamburger icon on the top left corner of your console, select App Engine, and then click on Dashboard.
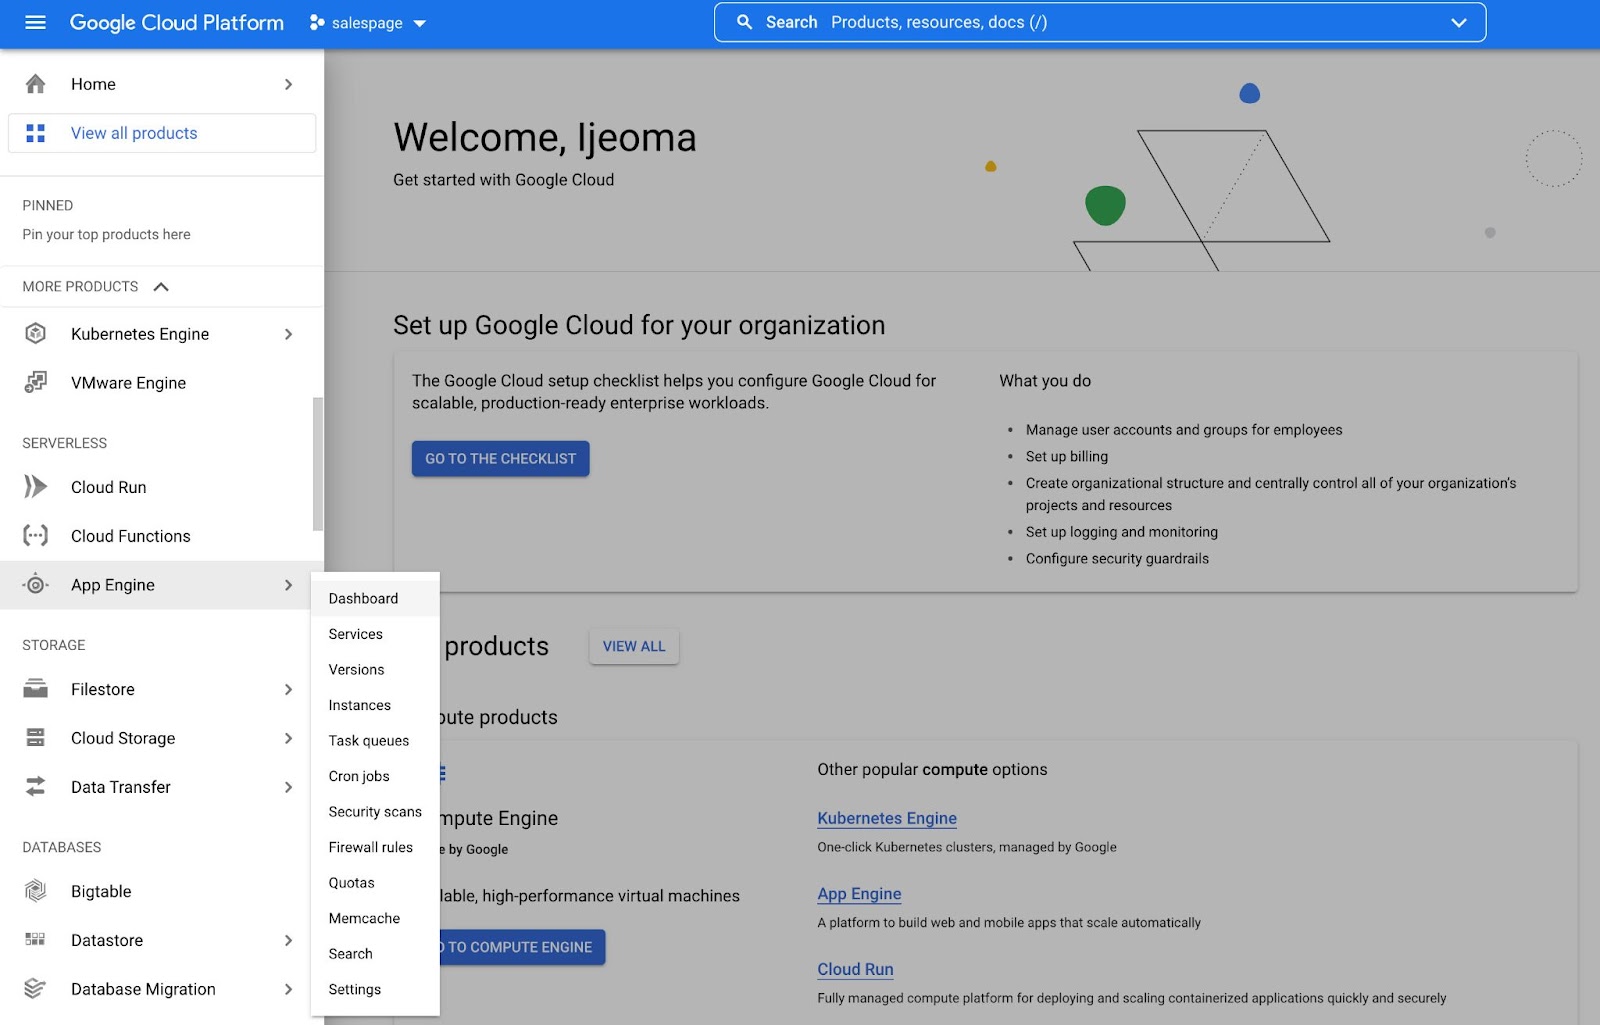
After that, click CREATE APPLICATION, select the region closest to you, and then click NEXT. Then, when the application's created, at the bottom of the page, click I'LL DO THIS LATER.

To check that an application has successfully been created, click the hamburger menu once more. Select Cloud Storage (under Storage), and then click Browser, as in the image below.
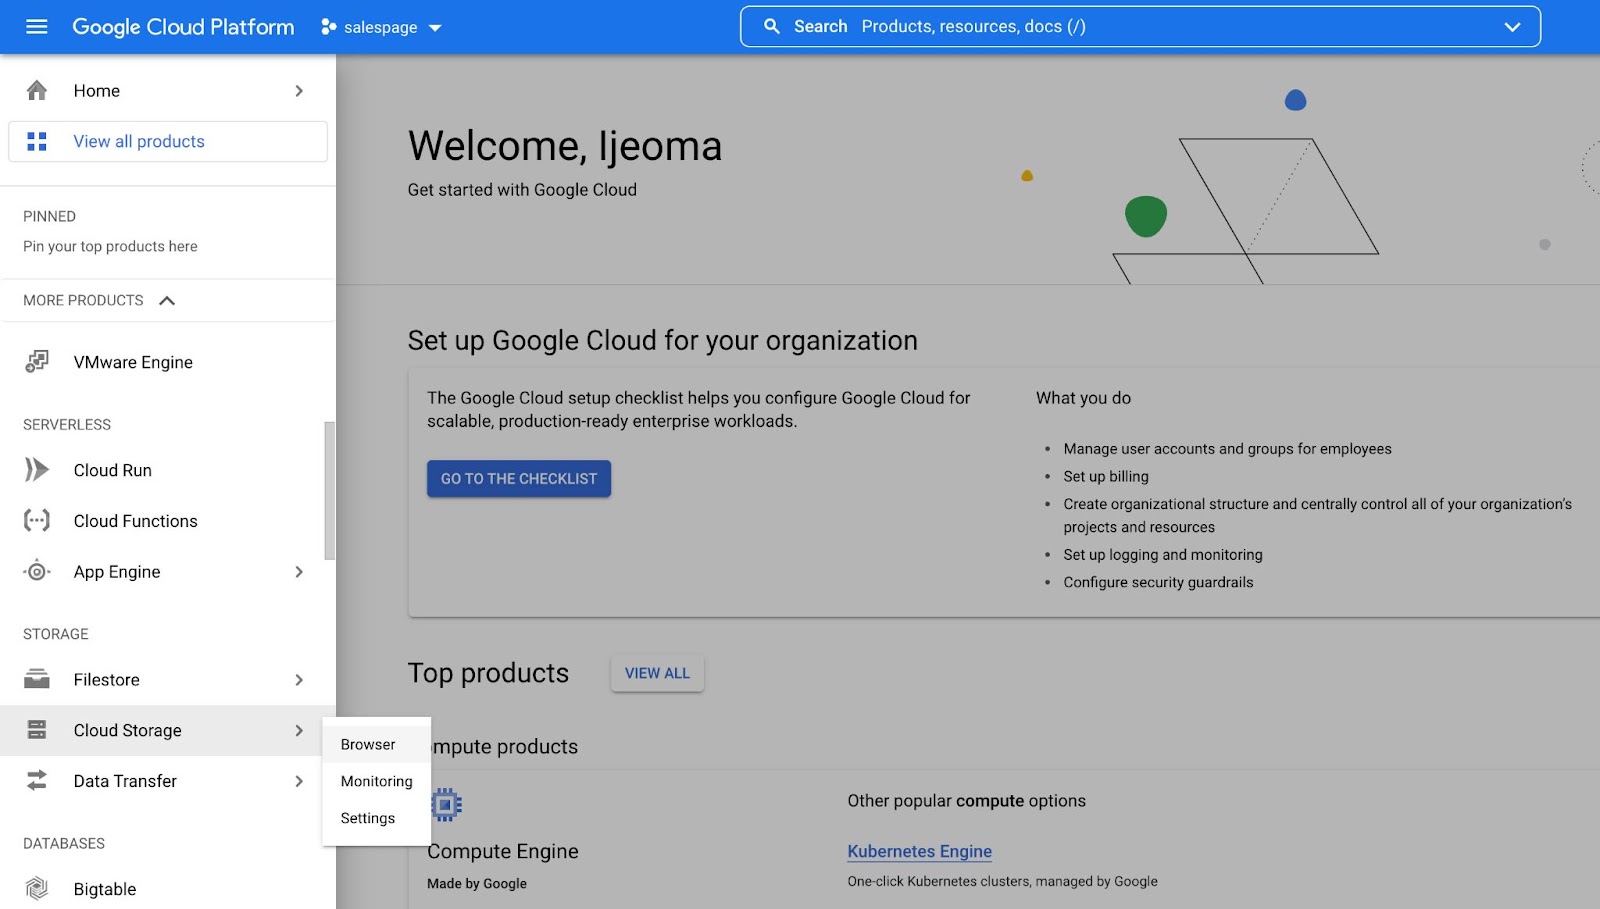
Two buckets should have been created for you. The bucket prefixed with the name of the project you just made will be your sales page URL.

Now, it’s time to deploy the application.
Deploying to the App Engine
Before you can deploy to App Engine, you need to configure your App Engine app’s settings. To do this, create a new file, in the project's root directory, named app.yaml. This file contains information about your app’s code, such as the runtime environment, and it also acts as a descriptor for its deployment.
Then, paste the following code into app.yaml.
Here, setting runtime to php sets PHP as the language runtime to use. Setting env to flex enables the App Engine's flexible environment. This will scale your app up or down automatically whilst simultaneously balancing the load. And document_root specifies the relative path from the project root directory.
Now, you need to initialize the project. Whilst you’re still in the project’s root directory, run the following commands in the terminal.
Follow the prompts until you complete the initialization phase, where you'll see "You are now authenticated with the gcloud CLI!".
The next thing is to deploy the app on the App Engine. To do this run the following command.
You'll see output similar to the following in the terminal.
Press Enter to accept the default answer (Y).
When the deployment has been completed — which may take a few minutes — run the command below to visit your brand new sales page.
Test the application
Fill in the payment form using the test credit card number “4242 4242 4242 4242”. Use any, random, numbers for the expiry date and the postcode. Then, submit the form.
Assuming it all works as expected, your Twilio account should populate with the customer’s details, and a text message will be sent to your phone. And, if you check your Stripe account, you'll see a payment registered, as in the image below.

Congratulations on finishing this project. You now possess a lucrative set of skills!
If you want, you can further extend this project by adding an SSL certificate to your custom domain. If you’re really ambitious, you can create signup and login features, turn it into a “minimum viable product” and invite others to use it.
The important thing to remember is that your options are limitless. Go for it, build something awesome and send me a link so that I can celebrate your success with you.
Ijeoma Nelson is a former Deloitte software and cloud engineer. She discovered a hidden passion for programming after winning Startup Weekend Silicon Valley. These days she can be found planning her travel adventures for 2022 whilst building cool stuff with code. You can reach her via LinkedIn or Twitter.


Related Resources
Twilio Docs
From APIs to SDKs to sample apps
API reference documentation, SDKs, helper libraries, quickstarts, and tutorials for your language and platform.
Resource Center
The latest ebooks, industry reports, and webinars
Learn from customer engagement experts to improve your own communication.
Ahoy
Twilio's developer community hub
Best practices, code samples, and inspiration to build communications and digital engagement experiences.