How to Host a Python and Flask Facebook Messenger Bot on Heroku
Time to read: 5 minutes
February 06, 2018
Written by

With the rise of bots, people can create new tools to help make people’s lives easier. In the first part of this bot series, we discussed how to make a Facebook Messenger bot using Python, Flask, and Ngrok. However, for a bot in production, having all the requests processed on your personal computer won’t work well. That’s where a hosting service like Heroku can come in. Services like Heroku’s allow you to host your program on their servers making it available for people to access 24/7. In this guide, we will talk about how to migrate a Facebook Messenger bot from being run on Ngrok to Heroku. For the purposes of this guide, we’ll use Heroku’s free hobby tier.
Register an Account with Heroku
Get started with Heroku by first making an account. Once you’ve verified your email address, log into the Heroku dashboard and make a new app.
You can enter your own App Name or leave it blank and have Heroku randomly assign one to your app. In either case, the app name also represents the subdomain that you can use to access your app once it is deployed to Heroku’s servers. For example, if you name your app blackgirlmagic, once deployed, you can access your creation at blackgirlmagic.herokuapp.com.
Prerequisites to Deploy a Flask App on Heroku
In order to deploy a Flask app on Heroku, there are three specific files we need to include: a requirements.txt, a Procfile, and a runtime.txt. For this guide, we’ll use the code for Black Girl Magic Bot, which can be found here.
For our requirements.txt file, we need to tell Heroku which Python libraries our program depends on. Using your favorite text editor, you need to include every library included in your program that is not included in the Python standard library. To quickly generate the items for your file, type “pip3 freeze > requirements.txt” into the command line to get the list of libraries and their versions. This will output the results into the file for you and should look similar to the code below:
For our Procfile, we need to tell Heroku what to do in order to run the program. Be sure the file is just titled Procfile (it should have no file extension) and drop in this bit of configuration. If you’re interested in learning more about how these files work, visit Heroku’s guide on them.
And finally, we need to tell Heroku that our bot is written in Python 3 by creating a runtime.txt file. All it needs to contain is the Python version you want Heroku to use. In this example, we’ll use
to tell Heroku that it should use this version of Python when compiling and running the code.
Hook up Version Control to Heroku
Next, we want to put our code under version control, a way to save each iteration of edits to our files (called a commit). To do this, we will commit our code to GitHub. You can make a GitHub account here and learn how to commit your code to GitHub here. For the purposes of this article, we will be working to deploy the Black Girl Magic bot. The code for it can be found via this link and you can use this guide to learn how to clone it.
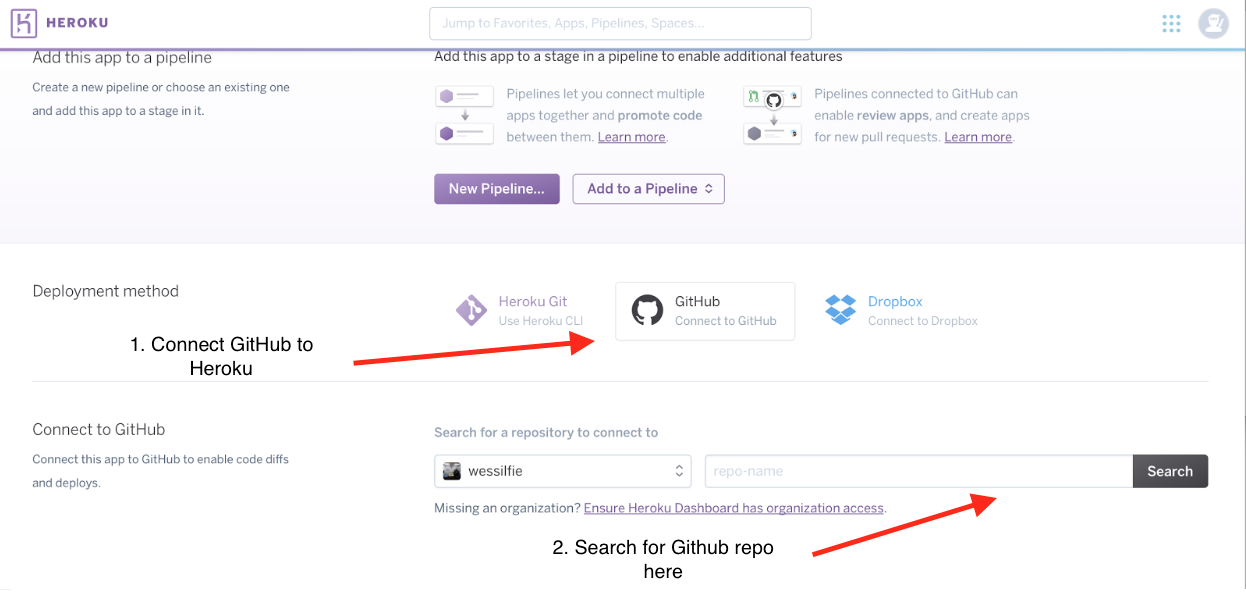
Once you’ve cloned it, go to the Heroku deploy tab and connect your app to your GitHub repository so that Heroku will be able to pull and deploy your desired code. You will need to grant Heroku access to your Github account so that you can search all of your repositories. After connecting your account, search for your repository’s name and then click the “Connect” button to connect it to your Heroku app.
Once you’ve connected the repo to your app, you should see a screen like this:
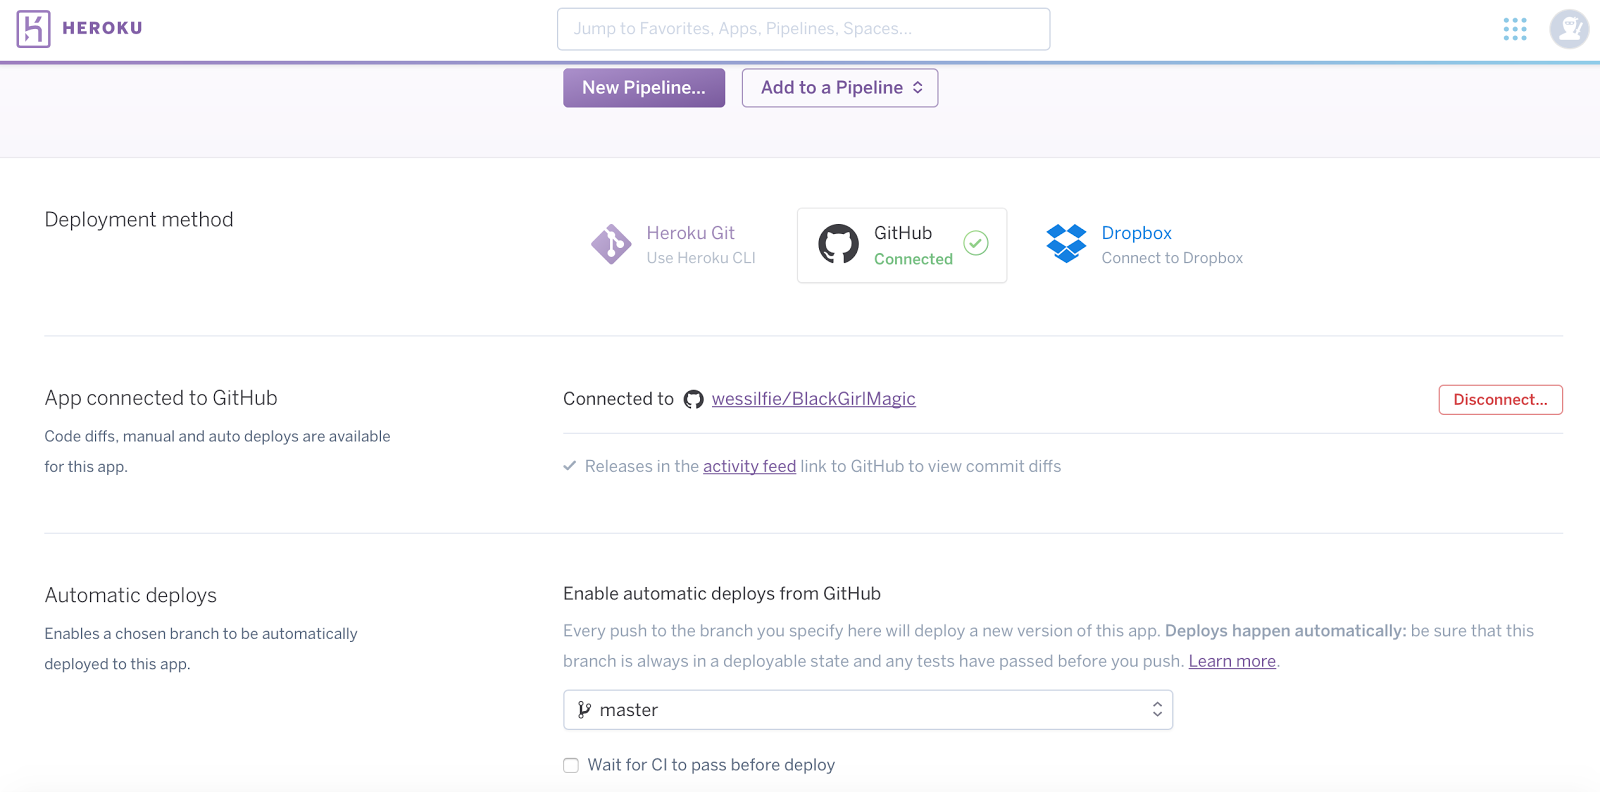
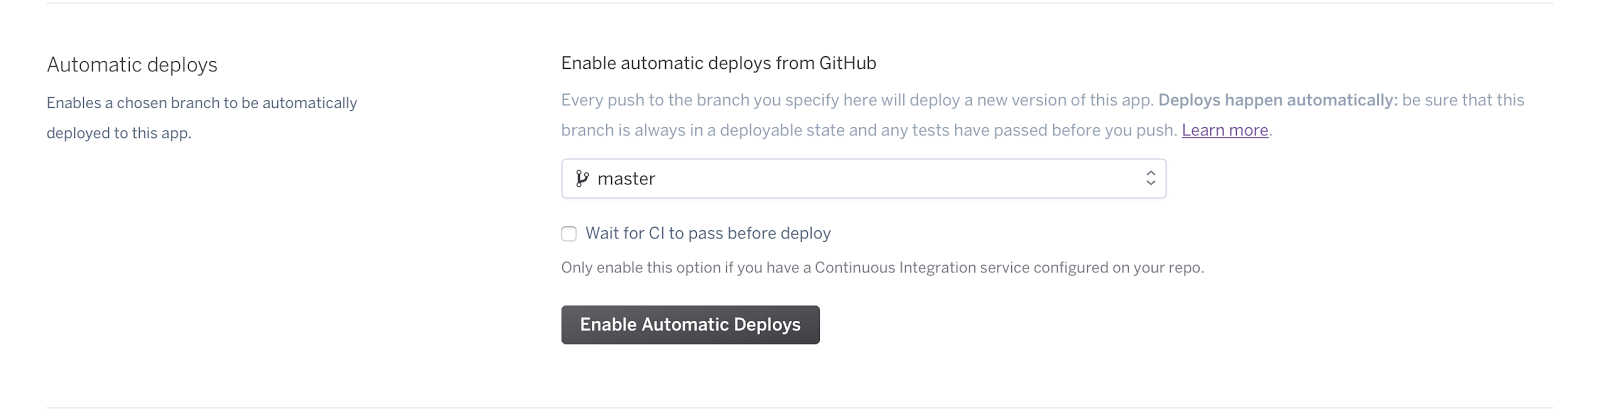
Optional: If you want Heroku to automatically deploy updates to your bot when you make a commit to your GitHub repo, make sure to click the “Enable Automatic Deploys” button.
Now that we have connected our GitHub repository to your Heroku app, we need to deploy it.

Set Environment Variables in Heroku
If you are following this article using the Black Girl Magic bot, you will need to make sure to replace the ACCESS_TOKEN and VERIFY_TOKEN placeholders with actual codes. For information on how to access these codes, see the “Make your Bot on Facebook” section on my earlier blog post about bots. However, just leaving these tokens in your repo is bad practice and makes it easy for people to use your tokens for their own purposes. Thankfully, Heroku can help with this by allowing you to use config variables which allow you to securely keep the codes on Heroku and not in your code.
To do this, go to the “Settings” Tab section of your Heroku app and then click the “Reveal Config Vars.” You’ll need to enter a key/value pair for both the access and verify tokens and add them to make sure they are saved. Below is a good example of what this would look like:

Additionally, if you’re following the example code we’re using in this guide, you’ll need to modify lines 6 and 7 of the app.py file to find the tokens needed by getting them from the environment:
Note: Using this setup requires you to import the Python os library. To do this, at the top of your file include:
Deploy Your Heroku Flask App and View Any Logs
Now that we have added these tokens using config variables, click the “Deploy Branch” button at the bottom of the page. Heroku will deploy your code and your site will start running publicly.
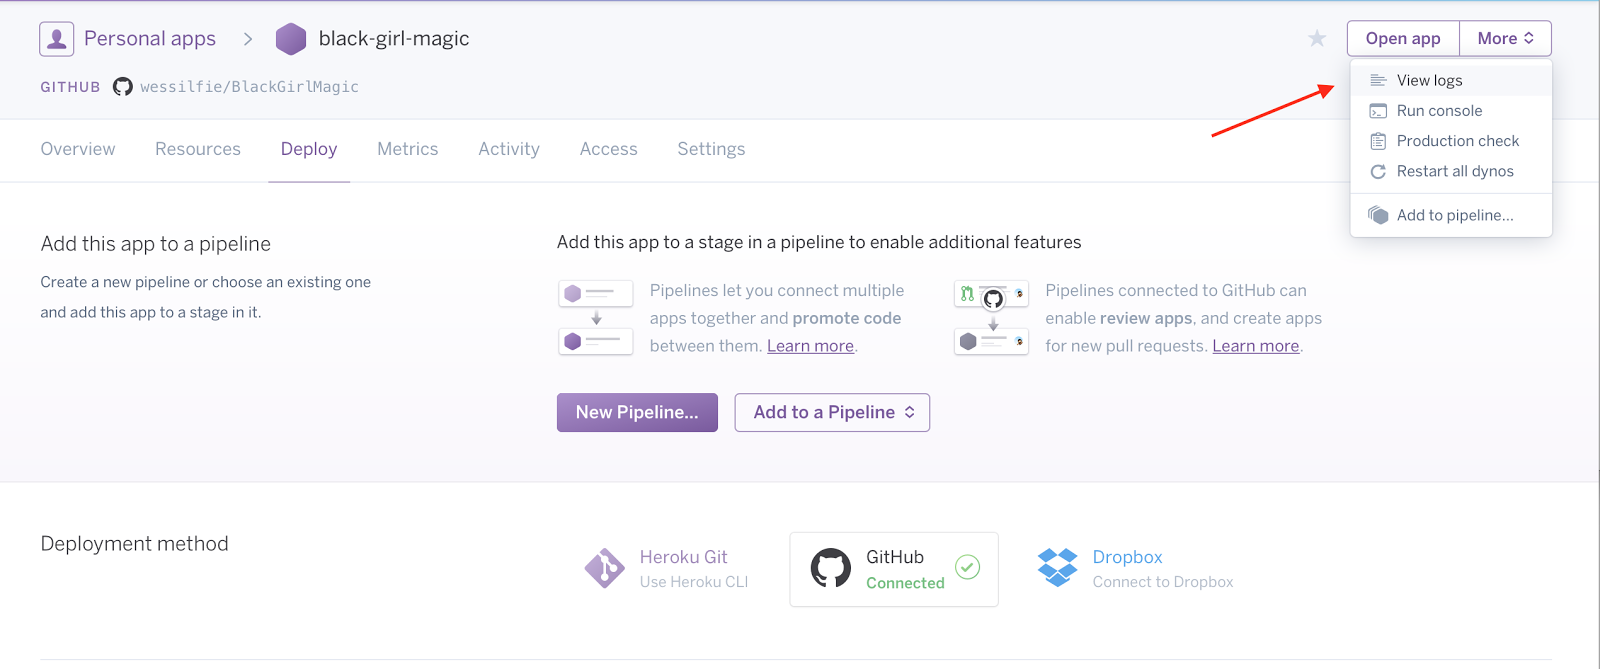
To track the general status of your application and how it’s processing requests, one can use the Heroku CLI or visit the logs online by clicking the “View logs” tab at the top of the deploy page.
After Heroku deploys your app, you’ll be able to visit it at https://www.[yourappname].herokuapp.com. If you’ve followed the steps correctly you should see a page that looks like this:
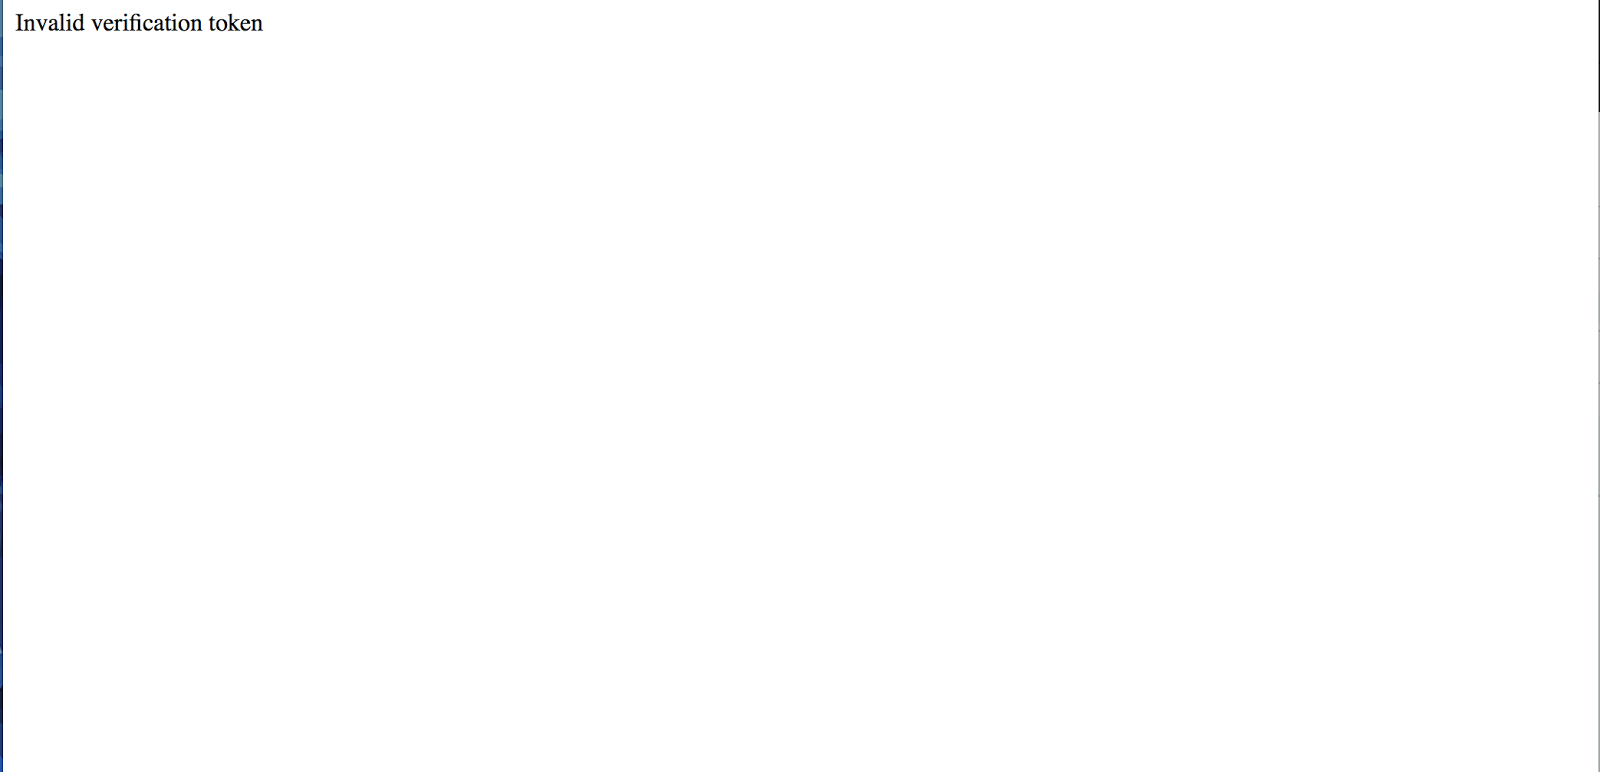
If you have not built the bot discussed in the earlier post, read the last section about verify tokens and Facebook’s general API around bots. In order to make a Messenger Bot, you need to provide Facebook with an endpoint to send all messages to as well as a verification token so your site only processes requests sent by Facebook. When you go directly to the link created by Heroku, you’re not providing the verification token, hence you see the “Invalid verification token” screen.
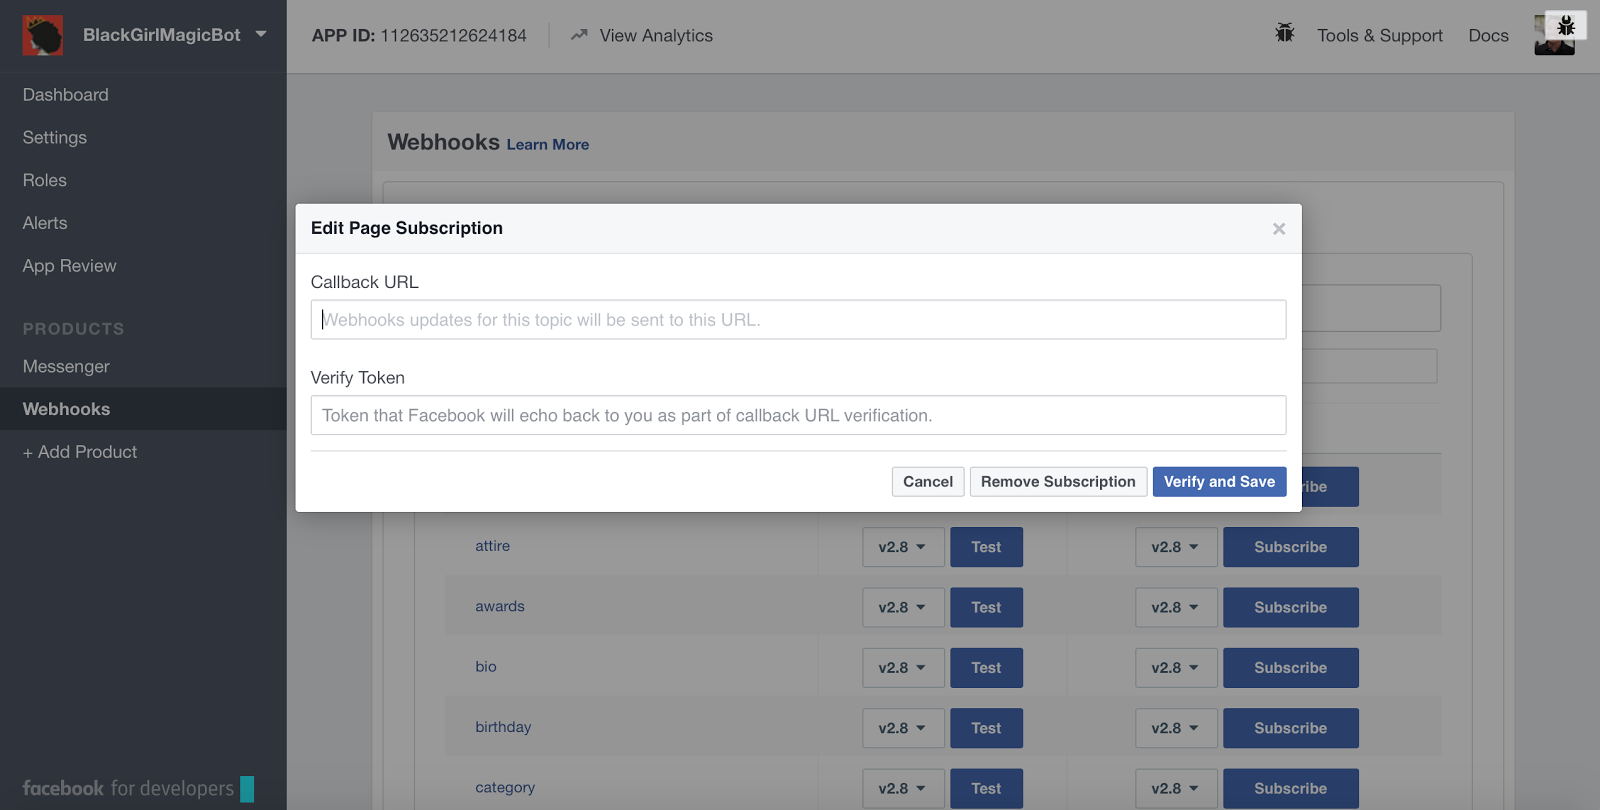
To set up our Messenger bot to communicate with our Heroku app, we need to visit the Facebook for Developers page for our application and revisit the Webhooks tab. Click “Edit Subscriptions” and change the Callback URL to https://www.[yourappname].herokuapp.com and update the verify token.
Testing the Facebook Messenger Bot
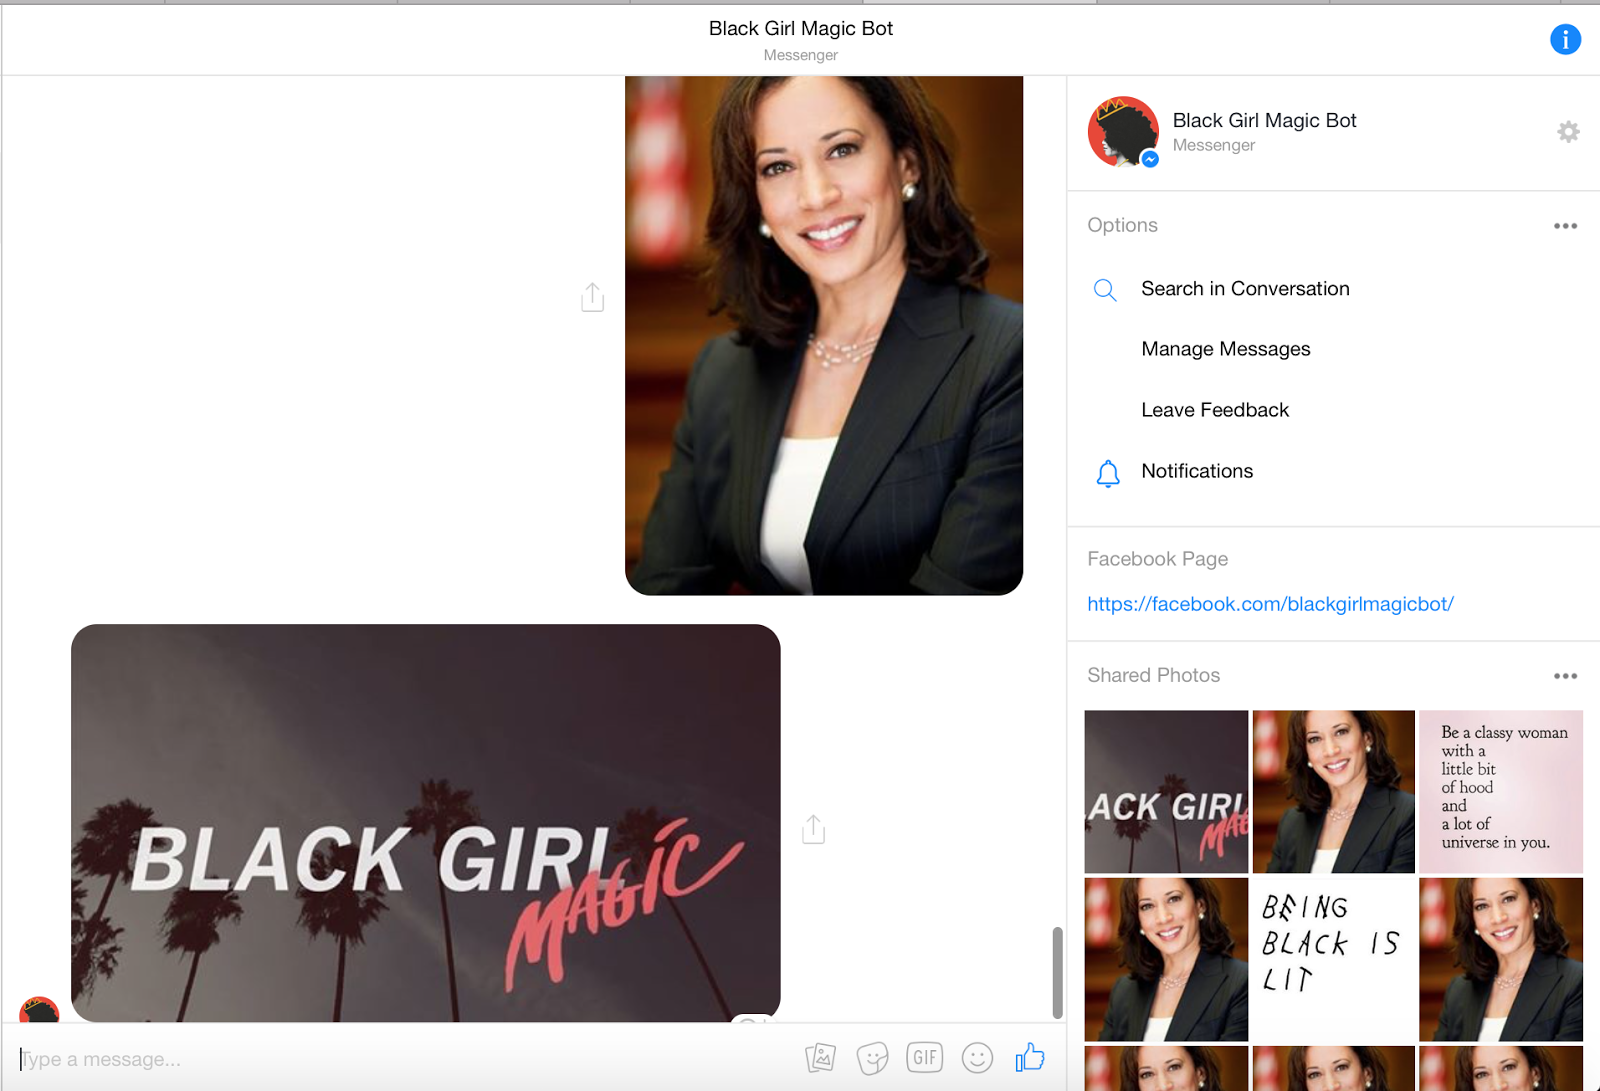
We’re almost done with the steps needed in order to host our bot on Heroku. All that’s left is to test that our bot is working as expected. Go to the Facebook page you made for your bot and send it a message to verify that it still works.
What’s Next?
Woo! You’ve gone from making your first Facebook Messenger bot to hosting it on Heroku. As seen above, now your bot can handle multiple messages from users 24/7 now that it is no longer hosted locally on your computer. With all of this done, you can finish the Facebook Messenger approval process and get your bot approved to send messages to all users.
I hope you’ve enjoyed learning how to make and host a Messenger bot in Python. If you enjoyed this post, you can follow me on GitHub @wessilfie.


Related Resources
Twilio Docs
From APIs to SDKs to sample apps
API reference documentation, SDKs, helper libraries, quickstarts, and tutorials for your language and platform.
Resource Center
The latest ebooks, industry reports, and webinars
Learn from customer engagement experts to improve your own communication.
Ahoy
Twilio's developer community hub
Best practices, code samples, and inspiration to build communications and digital engagement experiences.