Getting started with ASP.NET 5 and Visual Studio Code on a Mac
Time to read: 7 minutes
August 07, 2015
Written by

During Build 2015 Microsoft announced a bunch of new tools aimed at helping developers build cross platform applications. Amongst the announcements, they let us know that ASP.NET was now available and ready to run on Mac and Linux natively.
Up until this point there has been a few different ways to get .NET applications running on Unix systems but none of them were truly native or supported by Microsoft.
With this announcement and the release of Visual Studio Code—Microsoft’s cross platform development tool—you can now develop cross platform .NET applications on your favourite operating system.
Today I will show you how to get started with setting up your .NET development environment on a Mac running Yosemite and show you how to build a Console and an ASP.NET MVC 6 call log application using Visual Studio Code and ASP.NET 5.
Feel free to download all the code from the Github repository if all you want to do is setup your local environment and not worry about writing all the application code.
Our tools
- A Mac computer running Yosemite or above
- Homebrew package manager
- Node.Js
- A Twilio Account and a Twilio Phone Number – Sign up for free!
Setup
To get started we need to make sure all the necessary tools are installed. If you are running on a Mac and still don’t have Homebrew installed you’re missing out, so download and install it from brew.sh.
Once homebrew is installed we can go ahead and download .NET Version Manager. This will install everything we need in order to run .NET as well as some useful tools we will talk about briefly.
When the installation completes the following will have been installed for you:
- DNVM (.NET Version Manager): is a set of command line instructions which allow you to configure your .NET Runtime. We can use it to specify which version of the .NET Execution Framework to use.
- DNX (.NET Execution Framework): is the runtime environment for creating .NET applications for Windows, Mac and Linux.
- DNU (.NET Development Utility): is a set of command line tools that allow us to build, package and publish projects created with DNX.
Make sure that all DNVM goodies are available on your terminal instance by running source dnvm.sh. For any future instances just run the following to permanently add it to your bash profile or equivalent according to your environment.
Let’s go ahead and check that DNVM is actually installed by running the following:

If you see a screen like the above you know you have DNVM properly installed, so let’s install the latest version of DNX.
We know our .NET Virtual Environment is now installed, so it is time to install Yeoman. Yeoman is a command line application that generates project scaffolds. It offers generators for a plethora of programming languages including .NET.
To install Yeoman first we need to make sure we have Node.js installed. You can check that by running the following on terminal. You should see your Node.js version if it’s already installed.
If you don’t have it installed the good news is you can also install it using homebrew by issuing the following terminal command.
Once you have node installed you can install Yeoman using npm – the package manager for Node.js. We will run it with the -g flag to indicate that it is to be installed globally as opposed to only for this project.
We now need to make sure we have the Yeoman .NET generator downloaded by running:
There is just one more thing we need to do, which is install a sweet IDE that will give us all the awesome functionality we get from Visual Studio, but now on a Mac.

Go ahead and download and install Visual Studio Code. You can find more information about extra setup functionalities here.
Building a console application
With all of the necessary tools we installed let’s build a command line application to make sure everything works as expected.
Start by going back to your terminal and running:
It will prompt you to choose a project type and enter a project name. Choose Console Application and call it TwilioCallLogConsole. When you press enter, Yeoman will scaffold a console application project for you. You don’t need to run any of the other commands suggested on the screen at this point.

Open up Visual studio Code and choose File > Open, and select the folder where your project was created. Or if you followed the extra instructions from the Visual Studio Code website you can just run the following:
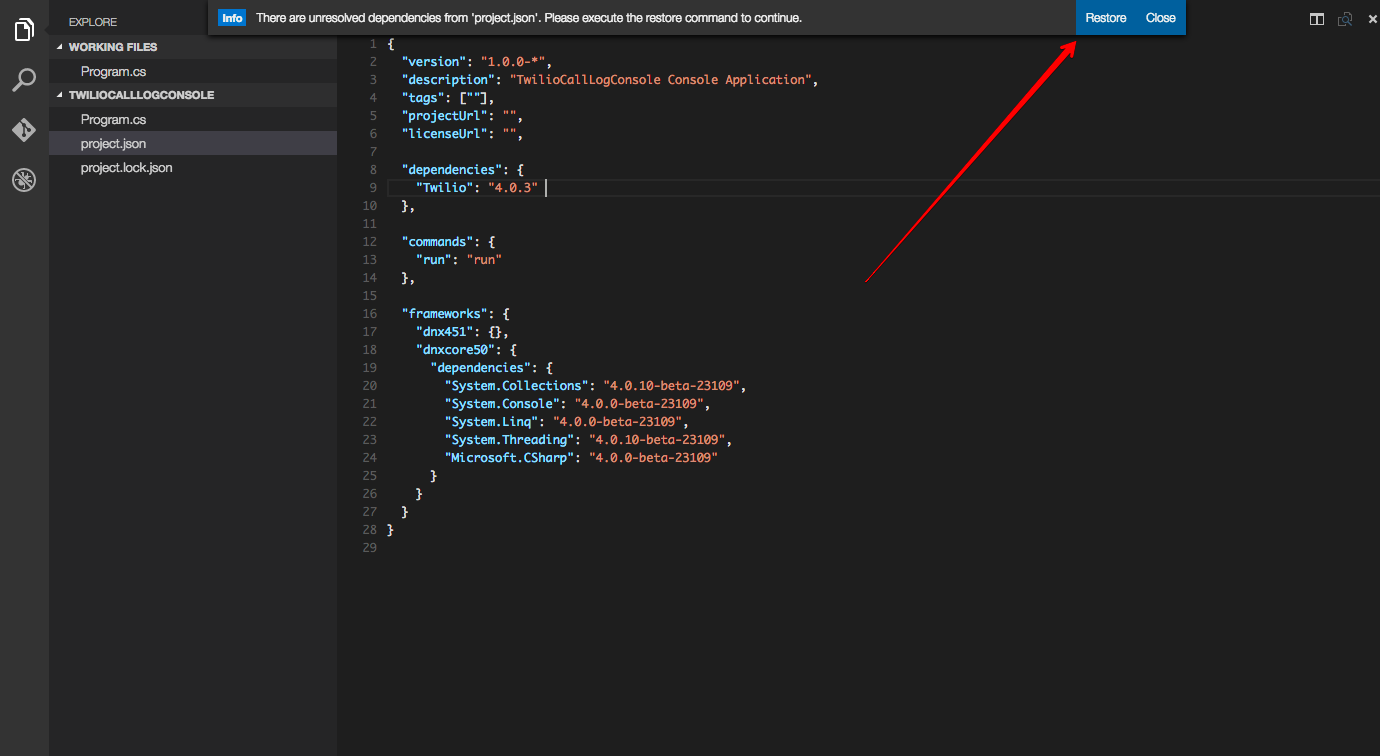
When it finishes loading you will notice a notification at the top of Visual Studio Code will appear telling you about unresolved dependencies. Ignore that until you open up the file project.json and add a dependency to the Twilio .NET Library to it.
Go ahead and click the Restore button and all the dependencies will be installed.
Once that completes we can modify our application to fetch data with Twilio’s REST API.
Open Program.cs and add a reference to the Twilio library at the top.
In that same file change the Main method to the following:
Don’t forget to replace the account sid and auth token with the values from your account dashboard. We’re creating a new object for the Twilio Rest API, listing the calls, looping through each one of them to show who started it and when, and showing how long they took.
Save this, and back on the terminal type:
You can also do this straight from Visual Studio Code by hitting ⇧⌘P and typing dnx run. A new Terminal instance should open and run the application for you.
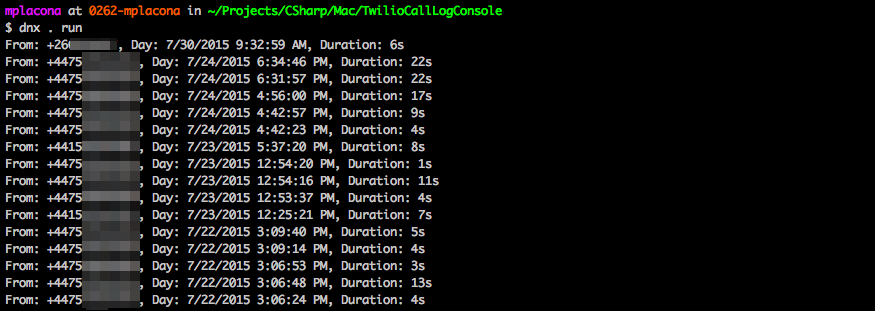
Congratulations, you have just built your first .NET command line application on a Mac and the setup was much easier than it would have been on Windows.
As you saw it’s pretty straightforward to build command line applications on a Mac with .NET, but how about building ASP .NET MVC apps? Stay with me as we’re just about to do that.
Building a .Net MVC application
Back on the terminal let’s get Yeoman to scaffold a new application of type Web Application Basic [without Membership and Authorization] and call it TwilioCallLogMVC.
Now that the application layout has been scaffolded, open it up with Visual Studio Code. Before we do anything we need to make sure all the dependencies are installed, so hold ⇧⌘P and type dnu restore.
Once all packages have been restored hold ⇧⌘P again and type dnx web to start your local webserver. On your browser you can now go to http://localhost:5000.
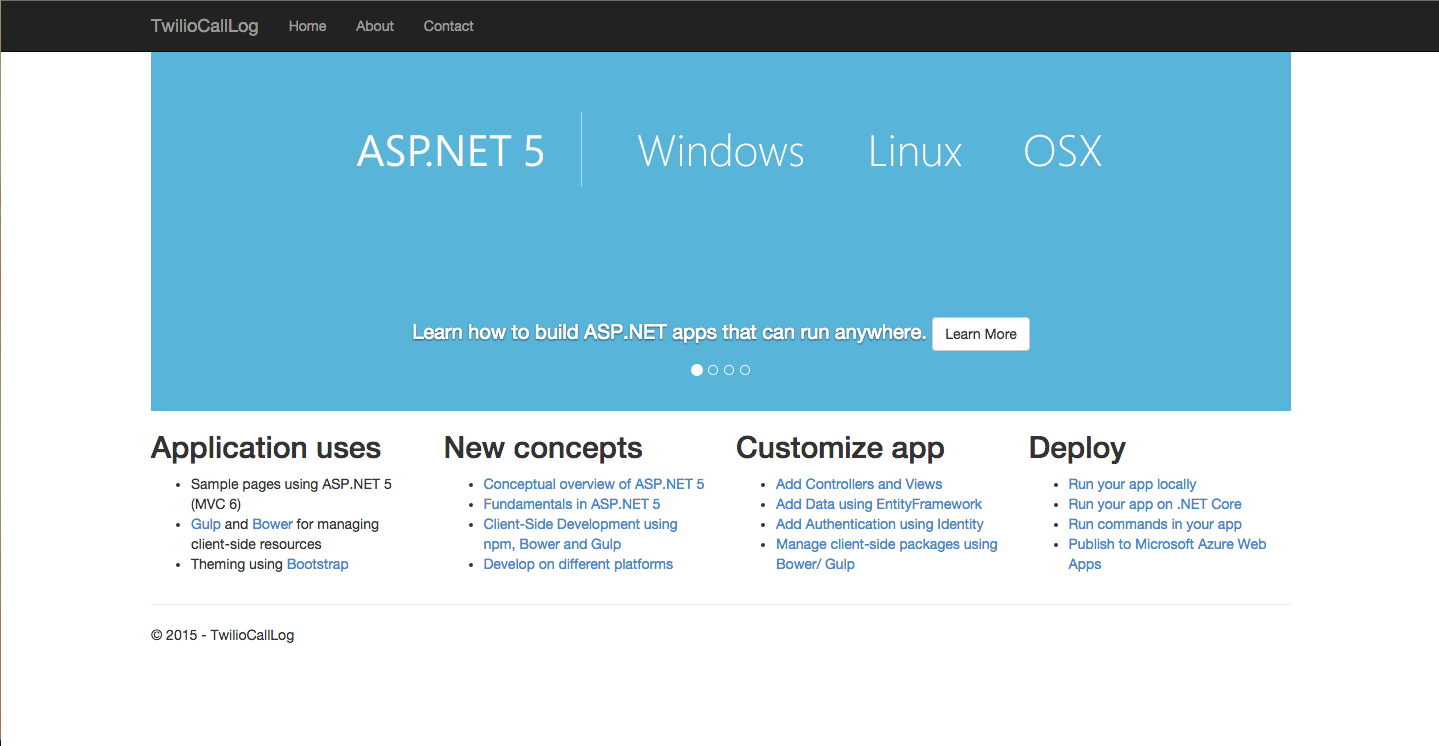
We have a basic ASP .NET MVC application running on a Mac but let’s add some extra functionality to it and reproduce our command line application with it.
Open up project.json and add a Twilio dependency to it. Notice Visual Studio Code finds the dependency for you automatically as soon as you start typing it.

Once that’s done, make sure you run dnu restore again so the dependency is downloaded.
Open Controllers/HomeController.cs and add a reference to the Twilio library at the top.
Change the Index endpoint to accept a string called phoneNumber. Then add the code needed to interact with the Twilio Rest API. Also don’t forget to replace the account sid and auth token with the values from your account dashboard.
We have done one different thing here which is allowing for filtering the results. Now we need to modify the view so it knows how to display information about our calls.
To do that we will bind the view to the Twilio.Call model and show the user a form where they can enter a telephone number to do the filtering.
Open Views/Home/Index.cshtml and replace its contents with the following change:
This will show you a form where you can type a telephone number but we don’t have a way to display the results yet. Let’s change that by adding a table and a loop to go through the results and show one row per entry.
If you now run this again in your browser you should see a form asking you to enter a phone number and some data showing all your call logs. If you enter a phone number you own on the form and press search it will then filter the table to only return entries for that number.
All you need at your fingertips
This is how easy it can be to build .NET applications on a Mac or any other Unix environment. Even though the applications we’ve just built are fairly simple, it was fun and pleasant to build and run them on a Mac.
How about trying to run your existing applications on a Mac and seeing if they’re already cross platform? Chances are you are already closer than you think.
I would love to see what you come up with. Hit me up on Twitter @marcos_placona or by email on marcos@twilio.com to tell me more about it.


Related Resources
Twilio Docs
From APIs to SDKs to sample apps
API reference documentation, SDKs, helper libraries, quickstarts, and tutorials for your language and platform.
Resource Center
The latest ebooks, industry reports, and webinars
Learn from customer engagement experts to improve your own communication.
Ahoy
Twilio's developer community hub
Best practices, code samples, and inspiration to build communications and digital engagement experiences.