How to Build a Slackbot in Socket Mode with Python
Time to read: 6 minutes
August 12, 2021
Written by
Reviewed by

For security purposes, large organizations that utilize Slack often operate from behind a corporate firewall. This makes building a Slackbot a bit more complicated. If your workspace is unprotected, then you might not need to create a bot in Socket Mode. Instead, check out a tutorial on how to build your first Slackbot with Python.
In this tutorial, you will learn how to create a Slackbot that can function from behind a corporate firewall to run internally. We will write the code for the bot in Python and utilize the Slack API.
Prerequisites
- A Slack account. If you don’t already have one, you can create one here.
- Python 3.6 or newer. If you do not have python installed on your computer, you can download it here.
Build A Simple Slackbot
Once you have the materials above, you can get started with building your simple Slackbot. We will walk through the steps to set up your project, create and install a Slackbot, write the code, and test it out!
Set Up Your Project
To begin, start by creating and navigating to a directory for your project. You can do this by running the following commands:
After you have navigated to your project, create a virtual environment. This will provide you with a space to properly install the correct dependencies that will be needed for your project. You can do this with the following:
Now that you have created your virtual environment, you must activate it:
Next, install a few dependencies that you will need to create your bot:
Create the Slackbot
Now that you have set up the basic configuration for your project, it's time to create the Slackbot.
If you would like to build your bot in a new workspace, create one here. If you are already part of a workspace where you would like to build your bot, keep reading!
To start, navigate to the Slack apps dashboard for the Slack API. Here, you should find a green button that says Create New App. When you click this button, select the option to create your app from scratch.
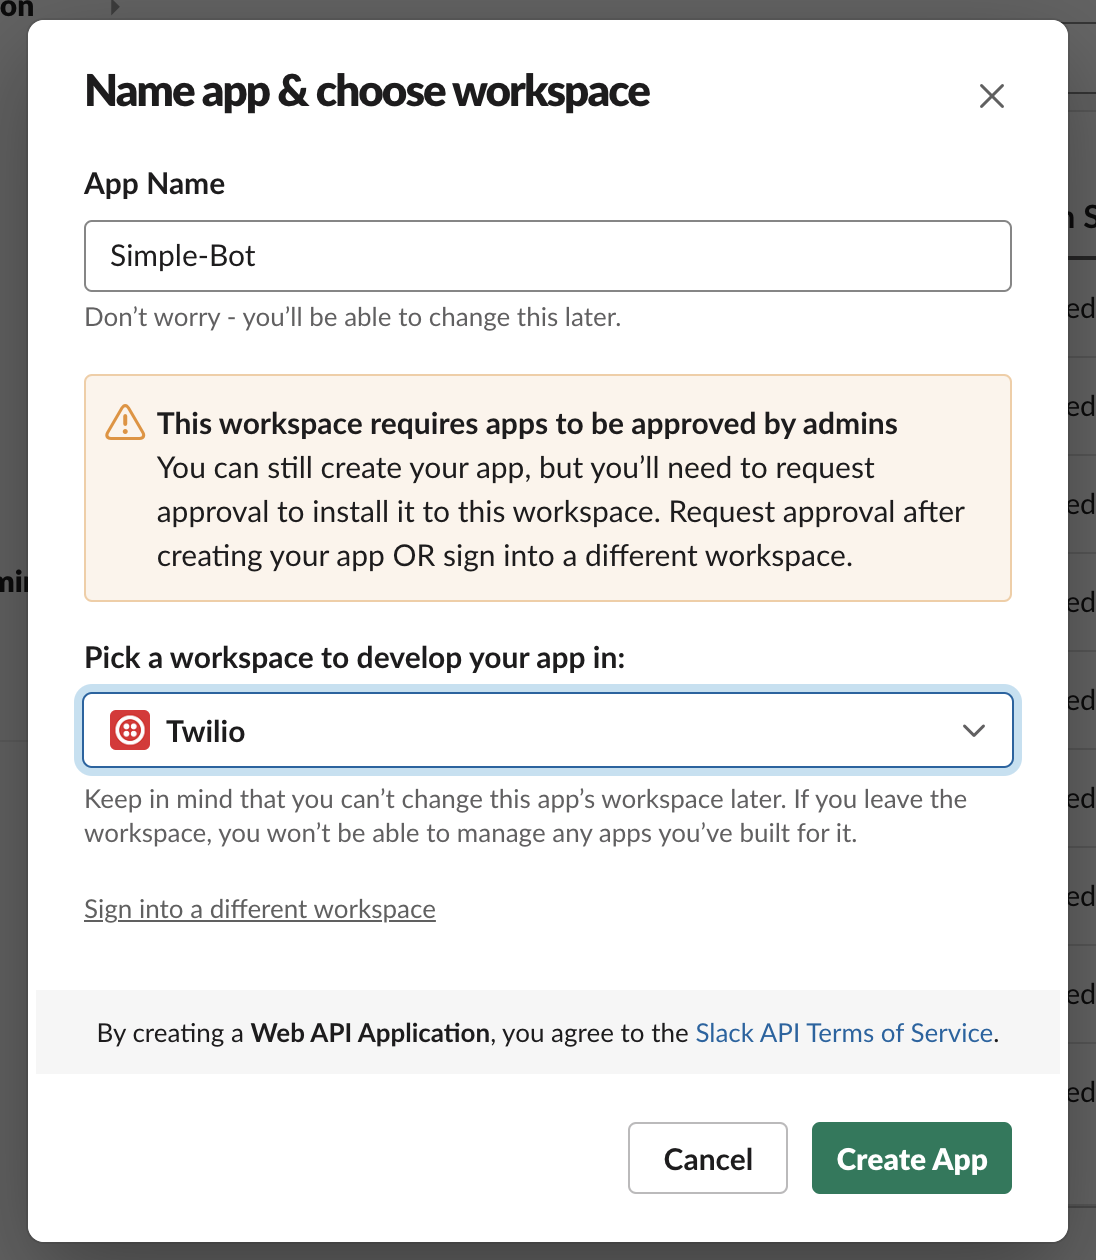
Create a name for your bot, such as "Simple-Bot". Select the workspace you would like your bot to exist in. If your workspace has app restrictions, you will see a yellow warning message similar to the one shown below. This is okay! Click Create App.
Configure the Slackbot
Once you have created your bot, you should see a page like the following.

Here, we will need to configure some settings so that the bot behaves properly. Navigate to the “OAuth & Permissions” tab under Features on the left panel.
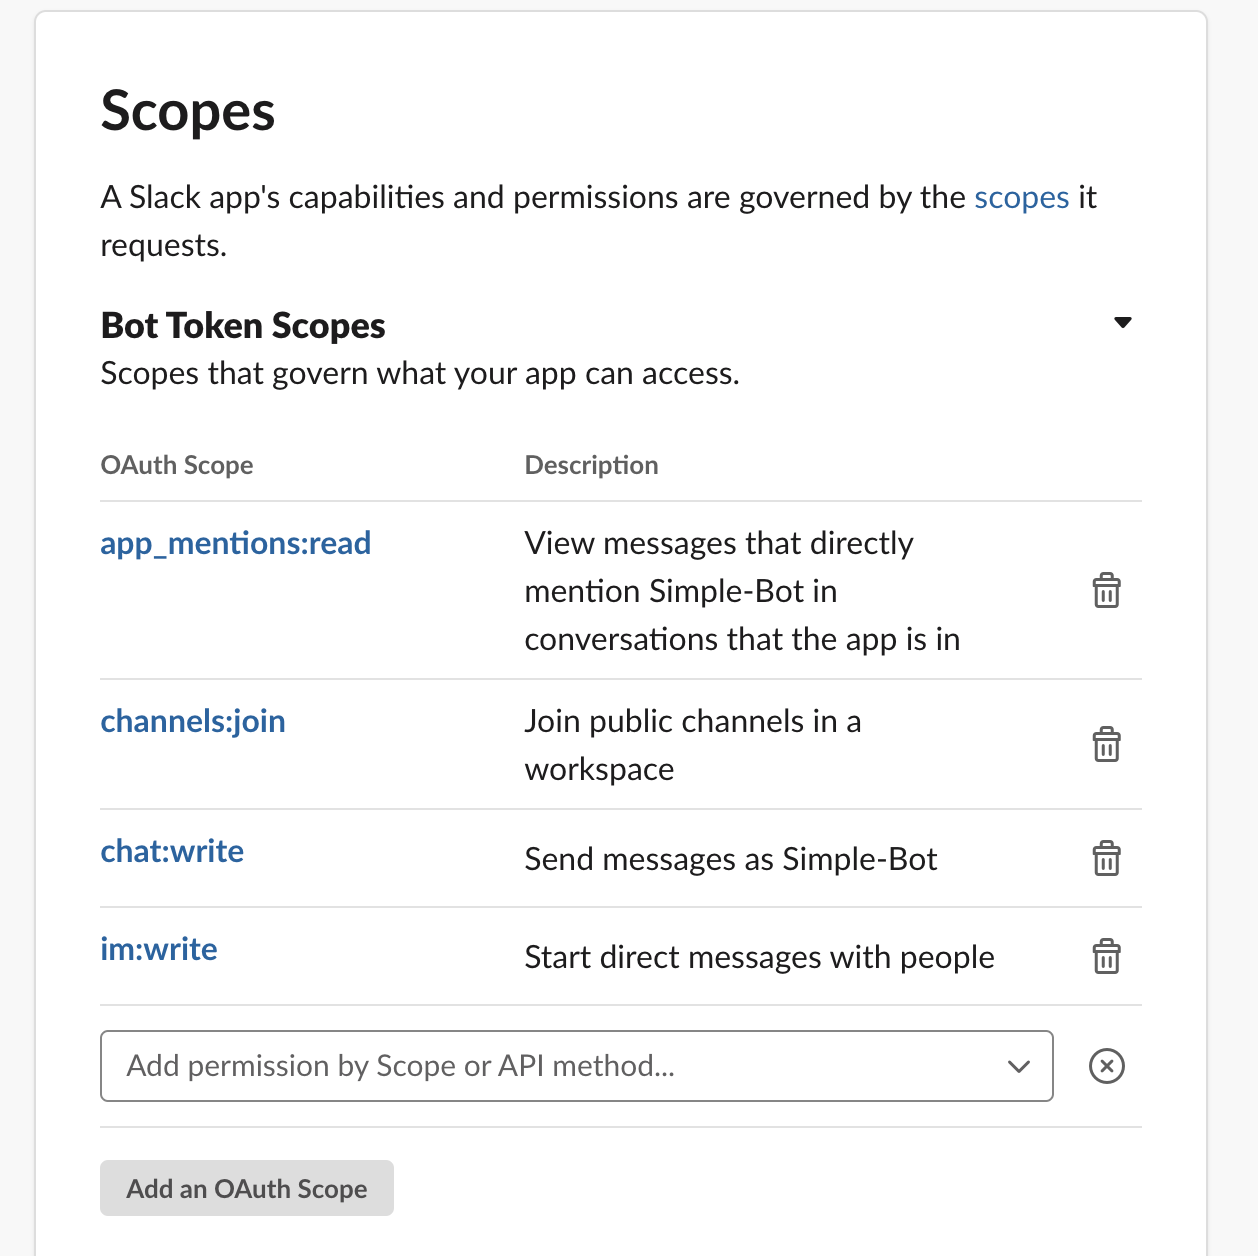
Scroll down, and add the following scopes under Bot Token Scopes:
- app_mentions.read: allows the bot to view messages that mention your bot.
- channels:join: allows the bot to join channels.
- chat:write: allows the bot to post messages in a public channel.
Enable Socket Mode for the Slackbot
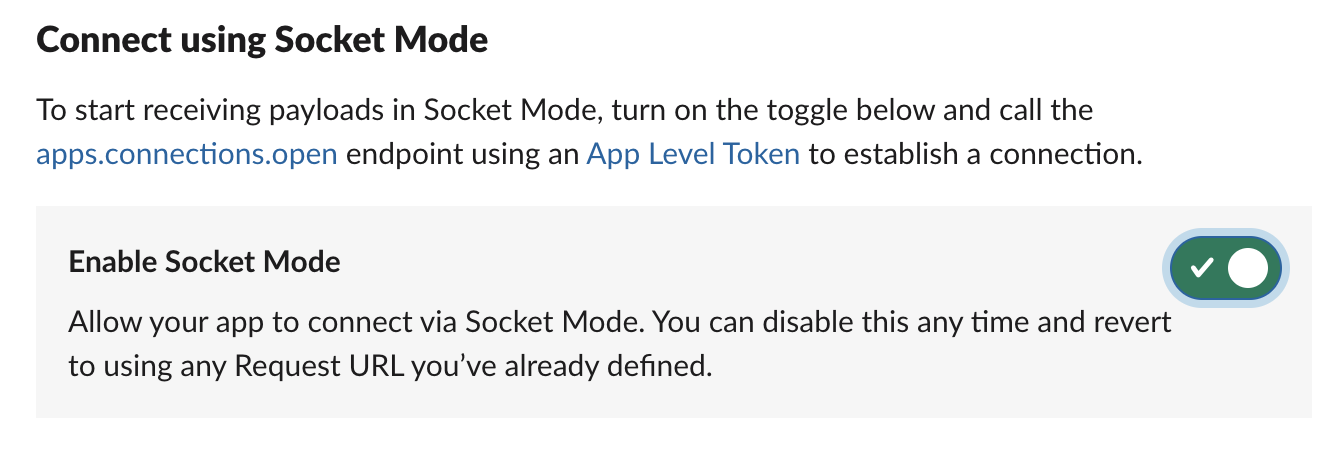
Next, we will enable Socket Mode. Socket Mode allows our bot to interact in our workspace without exposing a public HTTP endpoint, which might not be allowed behind a corporate firewall.
To enable Socket Mode, navigate to the “Socket Mode” tab under Settings in the left panel. Toggle the button next to Enable Socket Mode.
Create an app level token for your bot as shown below. An app level token is connected to your app universally and across each organization that your app is used in. This is different from a bot level token, which will be discussed later. The token name is "simple_bot_app_token" in this example.
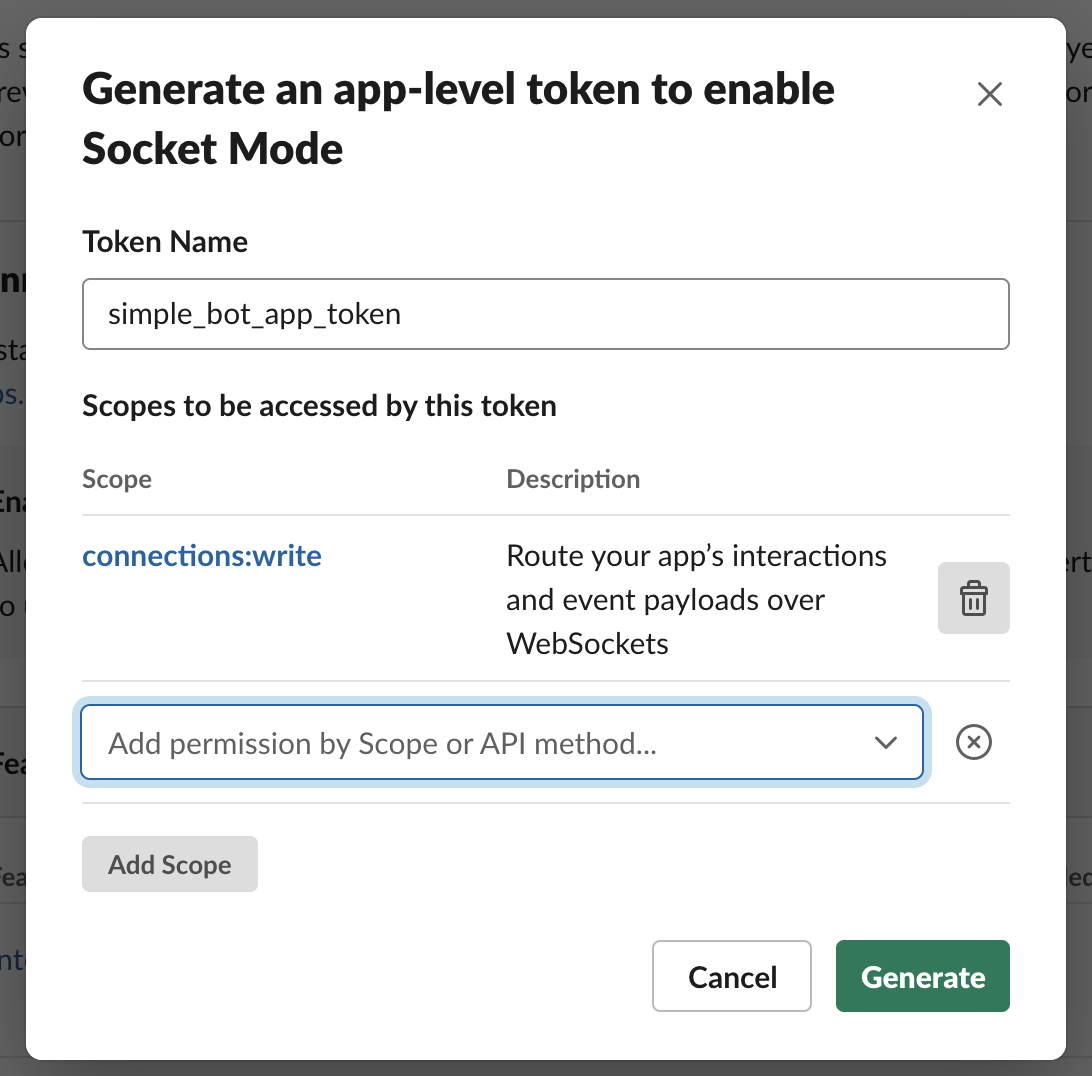
After clicking Generate you will receive an app level token which will be referred to as the SLACK_APP_TOKEN. Copy this token and store it somewhere safe - we will need it later. Click the Done button and make sure Socket Mode is enabled.
Enable Event Subscriptions for the Slackbot
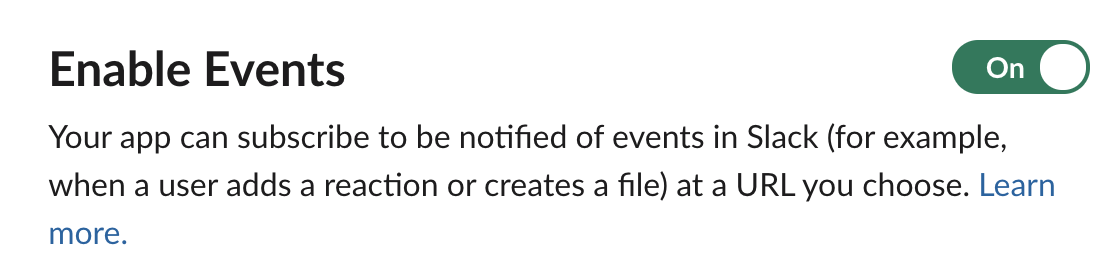
Once we have enabled Socket Mode, we will enable Event Subscriptions. Event subscriptions allow our bot to automatically respond to certain events, such as a mention or direct message. Navigate to “Event Subscriptions” under Features in the left panel. Enable events.
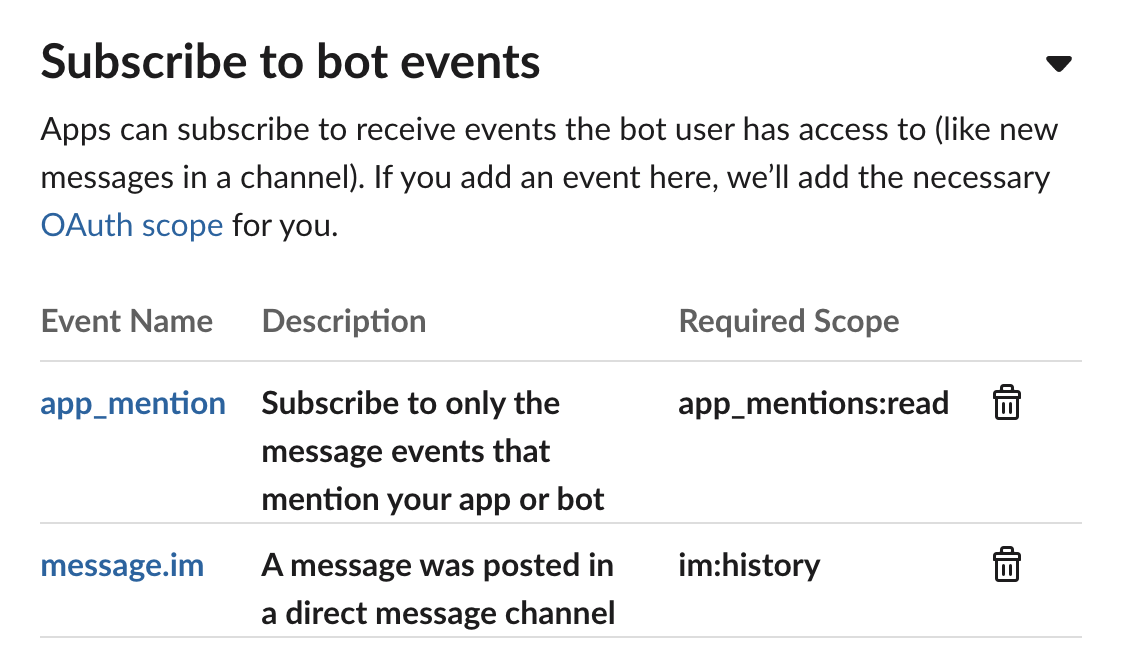
Expand the Subscribe to bot events section and click the Add Bot User Event button. Select the app_mention event to subscribe, then save your changes.
Install the Slackbot to a workspace
Once you have configured your bot, we can install it to a workspace. To do this, navigate to “Install App” under Settings.
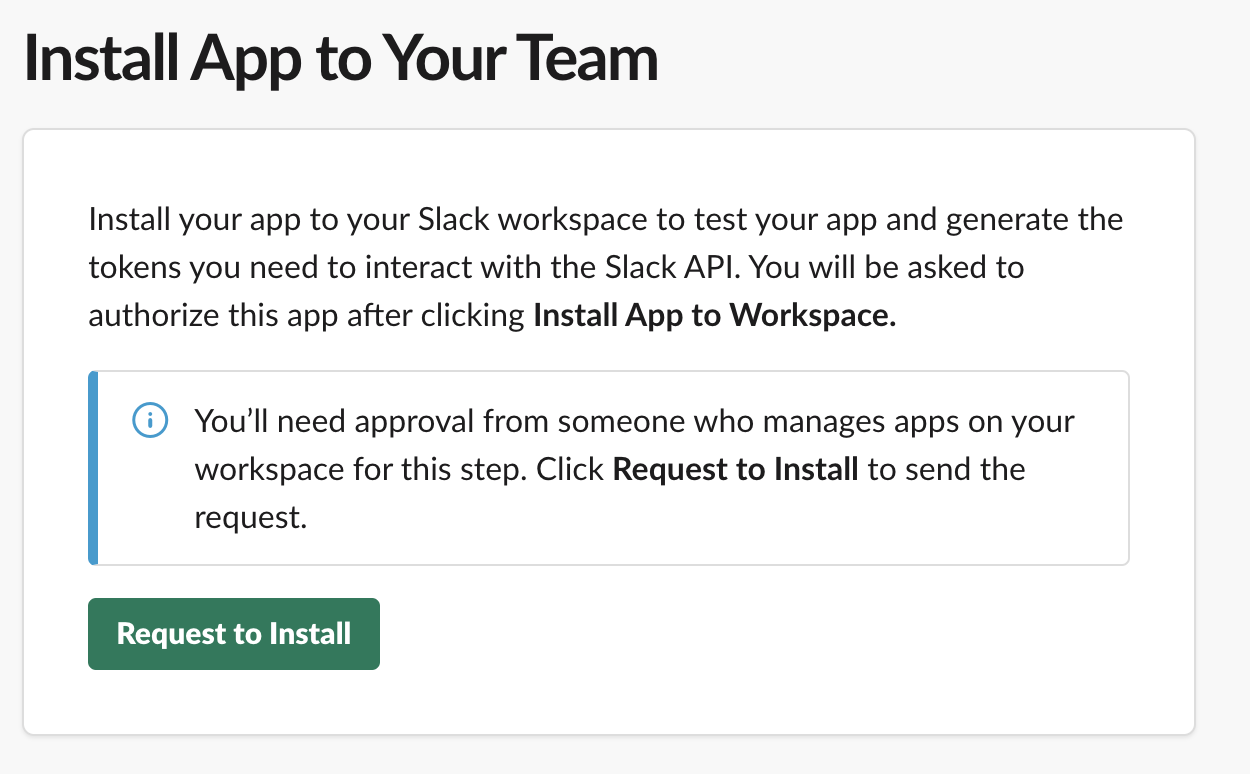
If your workspace is restricted, like Twilio’s and many large organizations, you will need to request to install your app before you can view it in your workspace. This process might look different depending on your organization. At Twilio, after you request to install an app, you will be required to submit a request via the Service Now portal to approve your app.
There might be other cases where you will need to create a request when working from behind a corporate firewall. For example, you might want to use Webhooks to gather real time data for your app. Webhooks require a URL to send JSON data to. You might be able to request a unique URL from your organization for this purpose.
Once your app has been approved, revisit the Install App tab. You should now have access to a Bot User OAuth Token.
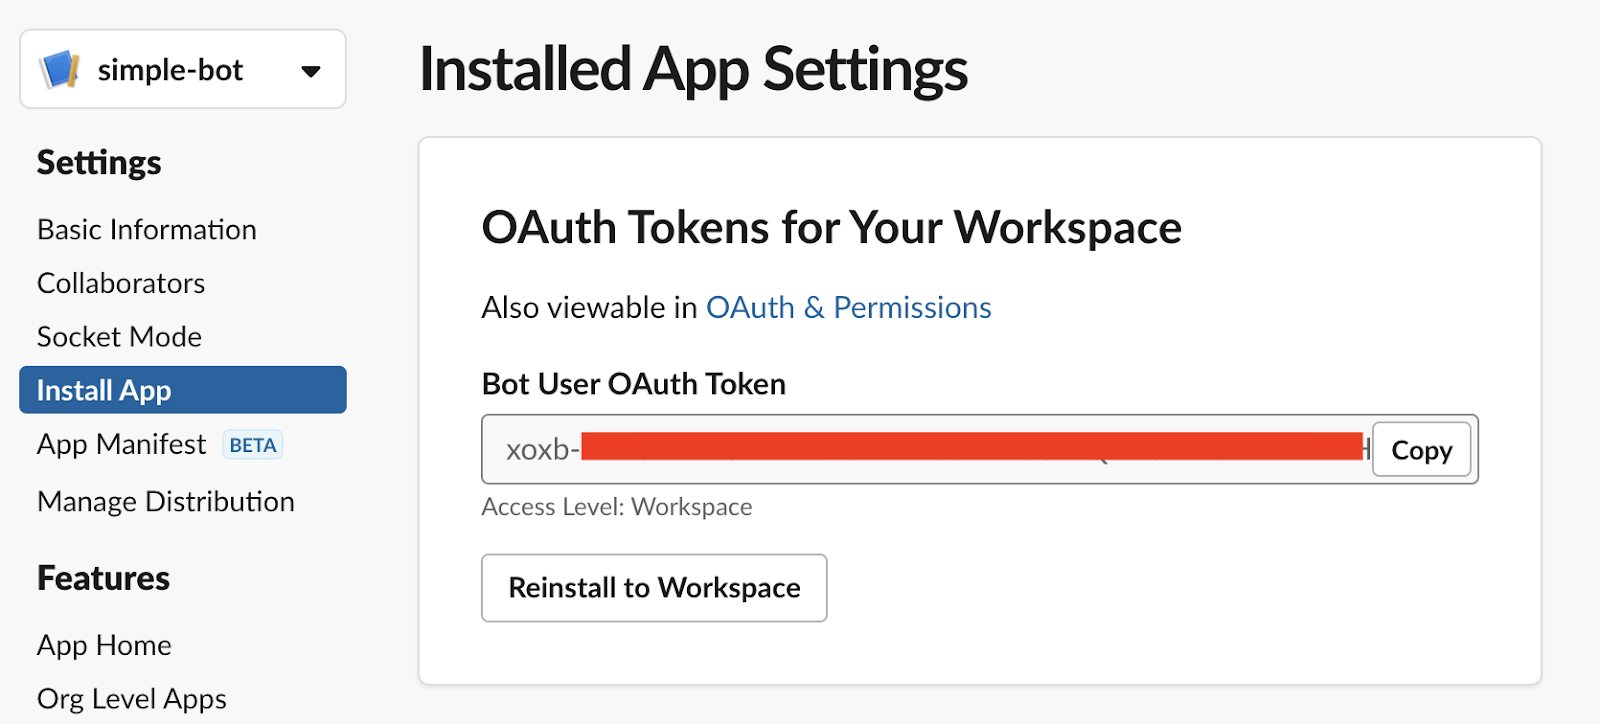
This is your SLACK_BOT_TOKEN. A Slackbot token references a bot user instance of the app you have created, and specifically sets the scopes that your bot has access to.
Write the code to run the Slackbot
Now we will create a "Hello World" program and run the bot. Create a file named .env in the project directory. We will use this file to store the SLACK_APP_TOKEN and SLACK_BOT_TOKEN. This is an important step because it will help us keep our Slack API tokens a secret. Add the following code to your .env file:
Next, create a file called app.py. At the top of the file, include the following code:
The os module reads the tokens from the .env file to establish a connection between the code and the bot you just created.
NOTE: If you will be pushing code to a git repo, you will want to create a file named .gitignore and add your .env file to it. This will ensure that your secret tokens are not made public via git.
We have also created the bolt application. Slack bolt is a framework that allows us to easily build a Slackbot with the most up-to-date features. If you wish to learn more about Slack bolt for Python, check out the Slack API docs.
If you are seeing any import errors or warnings in your IDE with slack-bolt, try typing the following commands in your terminal:
Next, we will allow our bot to respond to messages that it is mentioned in. Add the following code to the file:
The method decorator ensures that the method mention_handler, will be called every time the bot comes across a message that mentions its name. Take note of the method parameters body and say.
Body will return a JSON payload containing information about the message that our bot is responding to. This will include information such as the timestamp of the message, the message text, and the user who sent the message. We won’t be using this information in this tutorial, but it can be very important in future projects.
Say is a method that allows our bot to respond to a message. It takes a string as an argument.
Finally, add the following to the bottom of your app.py file:
This will activate Socket Mode and enable your app to run. By using Socket Mode, you are never accessing a public HTTP endpoint. Instead, your bot will communicate with Slack through a Websocket URL. These types of URLs are generated at runtime, and will be different each time.
Test the Slackbot in a Slack channel
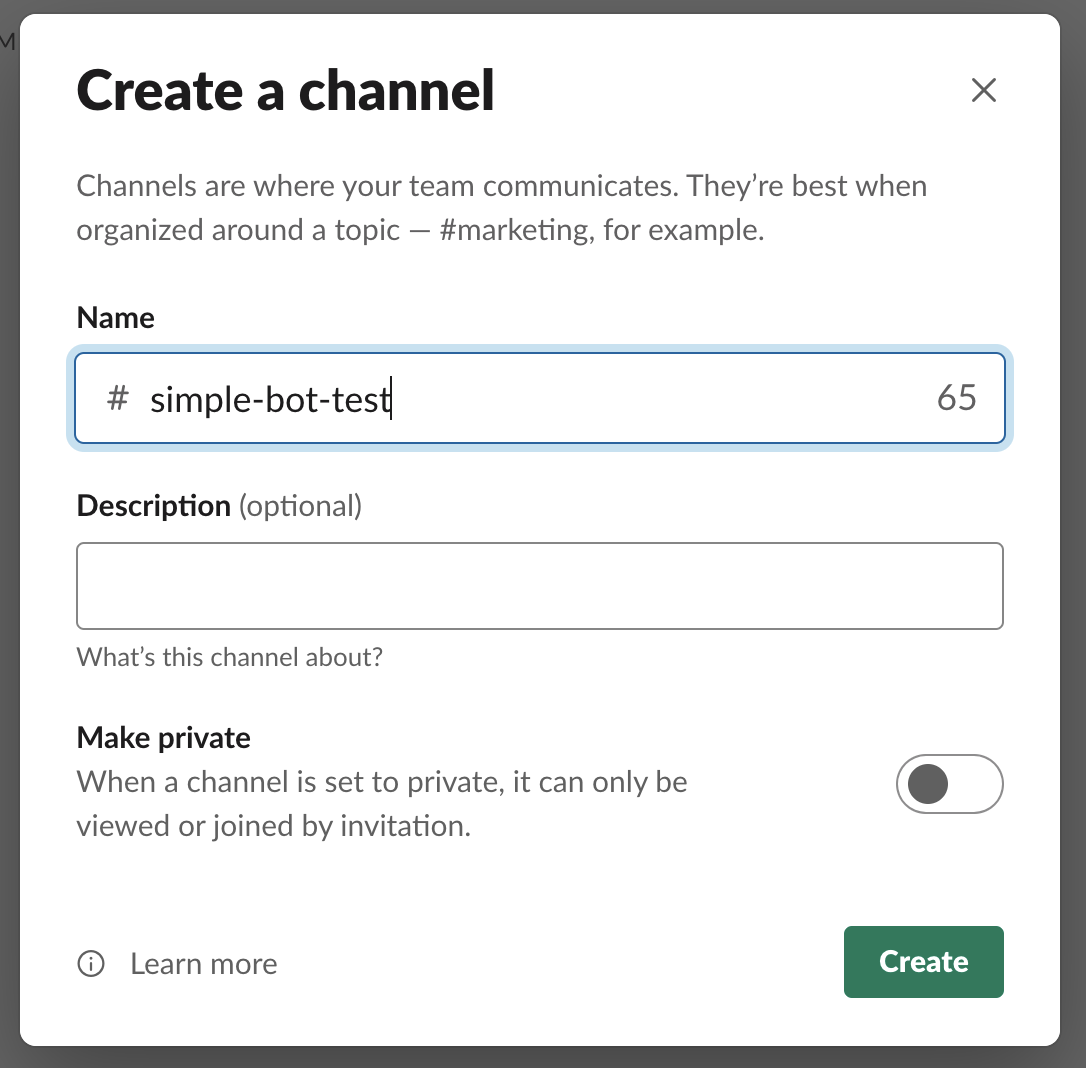
To test your bot, you will want to create a new public channel in your workspace. In the example below, a channel is created with the name "simple-bot-test". You should also ensure that your channel is public. Click the Create button.
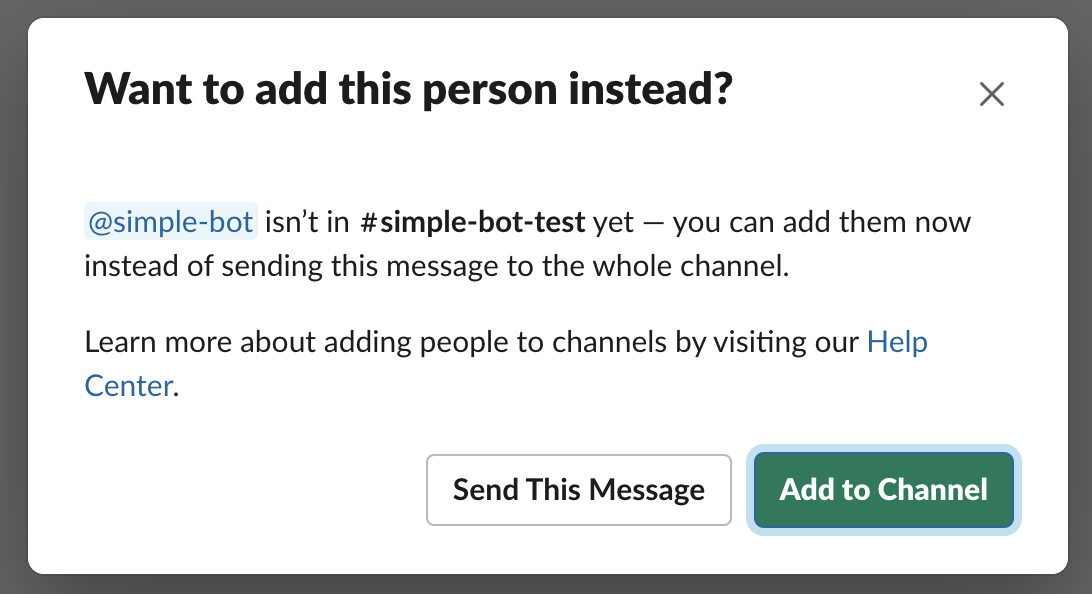
Your channel will now appear in the left panel under Channels in Slack. Add your bot to the new channel by typing a message with the text "@simple-bot" in the channel. When prompted, click the Add to Channel button.
Now, we are ready to test out our bot.
Make sure that your virtual environment has been activated. Run your code by typing the following in your terminal:
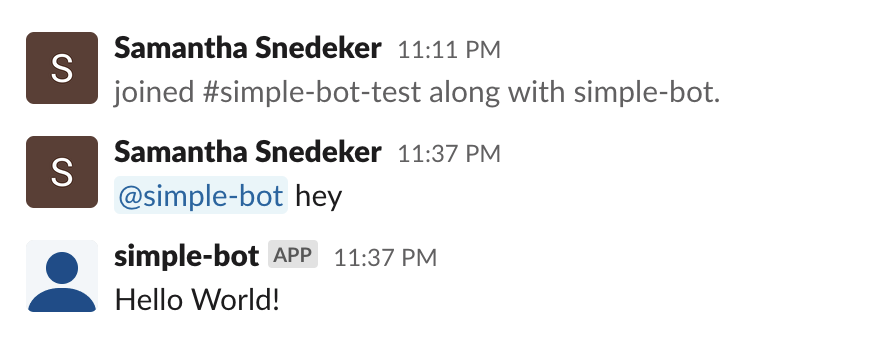
You should see a “Bolt app is running!” response in the terminal. Send a message to your bot in Slack.
What's next for building Slackbots?
Congratulations! You successfully built a working Slackbot using Socket Mode, slack-bolt, and Python. As a next step, you will want to deploy your bot to your workspace so that it can run indefinitely.
There is a whole lot more that you can do with Slackbots beyond the simple "hello world" message. I recommend checking out the Slack API docs if you want to continue building your bot. Or, if you want to try something challenging and new, you might want to build an SMS-to-Slack bridge so you can forward text messages to your Slack workspace using the Twilio-Python package.
You can also collect user input via Slackbot with Twilio Autopilot and Twilio Functions. Alternatively, you can build an SMS bot instead. The options are endless and you can take your newfound knowledge along with you!
Samantha Snedeker is a student at Duke University studying Computer Science, Economics, and Creative Writing. She is interning as a Software Engineer on the Billing Pipeline team during the Summer of 2021. She has been working on developing a Slackbot for her team to use and is happy to share some of the information she has learned along the way!


Related Resources
Twilio Docs
From APIs to SDKs to sample apps
API reference documentation, SDKs, helper libraries, quickstarts, and tutorials for your language and platform.
Resource Center
The latest ebooks, industry reports, and webinars
Learn from customer engagement experts to improve your own communication.
Ahoy
Twilio's developer community hub
Best practices, code samples, and inspiration to build communications and digital engagement experiences.