Implement Two-Factor Authentication With Symfony and Twilio's Authy App and API
Time to read: 13 minutes
March 23, 2021
Written by
Reviewed by

The username and password are dead! Well, not really. But considering the times we live in, it’s dangerous to rely on them alone. Computers are getting faster and better at guessing our passwords. And there are numerous databases containing stolen passwords roaming the web. Consequently, you also need to use Two-factor Authentication (2FA) in order to keep your account safe.
In this article, I will show you how to implement Two-factor authentication in a Symfony application using the Authy app to add an extra level of authentication to the traditional login form.
Prerequisites
- A basic working understanding of PHP and Symfony
- PHP 7.4
- A Twilio account
- The Authy app
- Composer
- Git
- The Symfony CLI
Let's get started
To get started, create a new Symfony project, named 2-fa-demo, and switch to the newly created project’s directory using the commands below.
Next, you need to install the libraries which the project will depend on. For this project we will use the following libraries:
- Doctrine: The Doctrine ORM will help with managing the application database
- Form: The Symfony Form component will be used for the registration form
- Maker: This will help us with creating controllers, entities and the likes.
- Security: The Security bundle will help with authentication and access control in the application
- Twig: Twig will be used to render our HTML templates
- Validator: This will be used by the Form component to validate user input
To install them, run the two commands below.
Next, create a .env.local file from the .env file which Symfony generated during creation of the project. To do that, run the command below.
This file is ignored by Git as it’s automatically added to the .gitignore file which Symfony also generated. One of the reasons for this file is the accepted best practice of storing your credentials there to keep them safe.
Next, you need to update the DATABASE_URL parameter in .env.local to use an SQLite database, instead of the default choice of PostgreSQL. To do that, comment out the existing DATABASE_URL entry, and uncomment the SQLite option, which you can see below.
Note: The database will be created in ./var and be named data.db.
With those changes made, let's run the application to be sure everything is in order. To do that, run the command below.
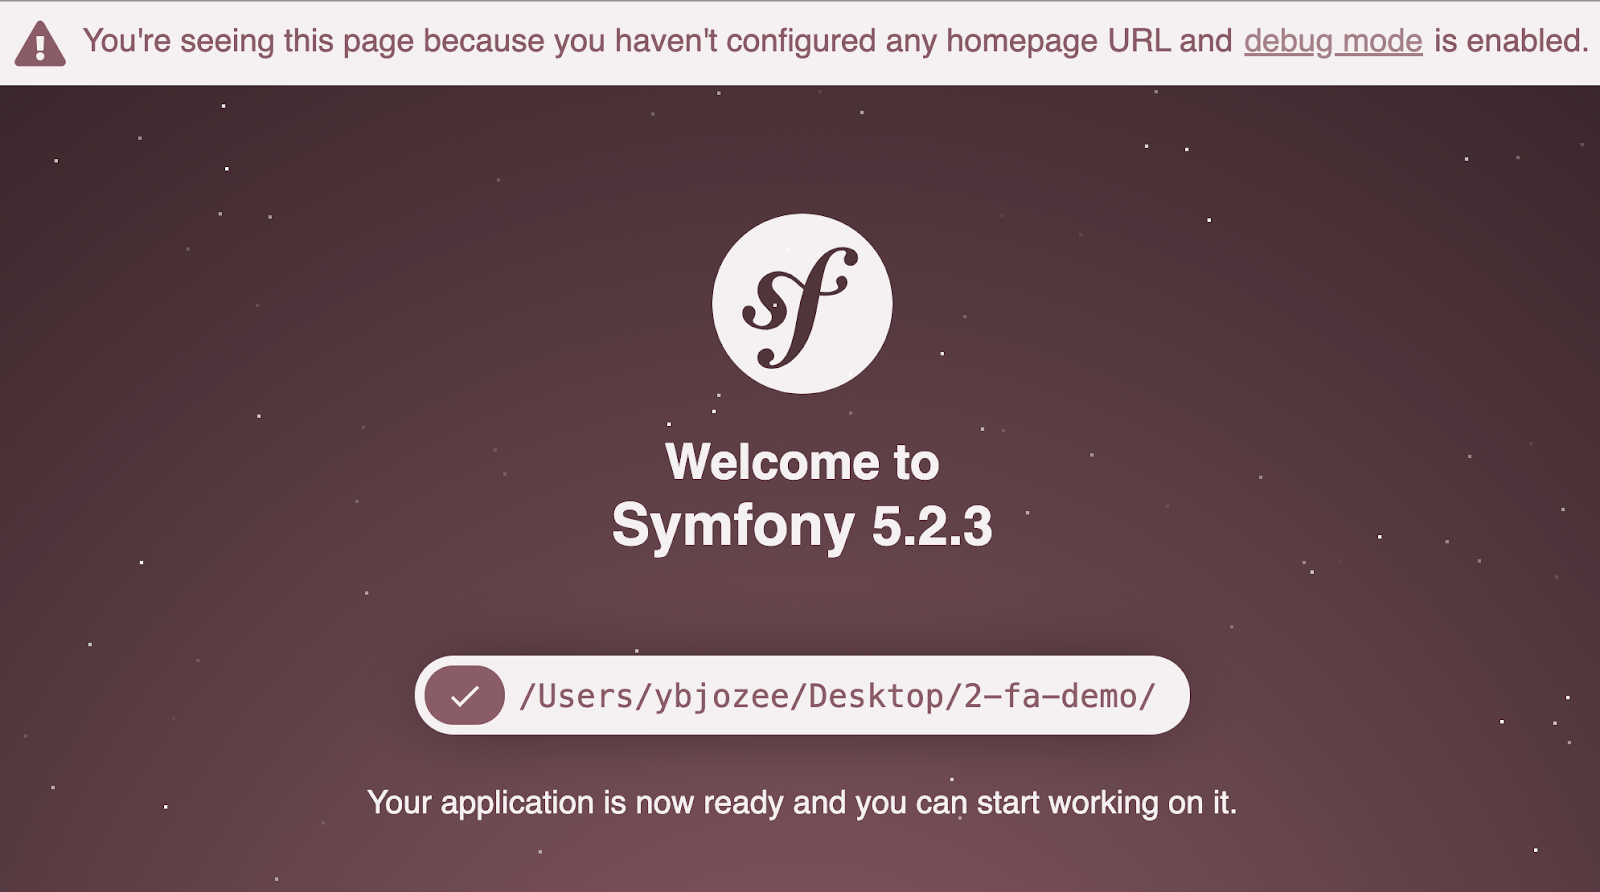
By default, Symfony projects run on port 8000, so navigating to https://localhost:8000/ should show the default Symfony welcome page, which you can see in the image below.
Create the user entity
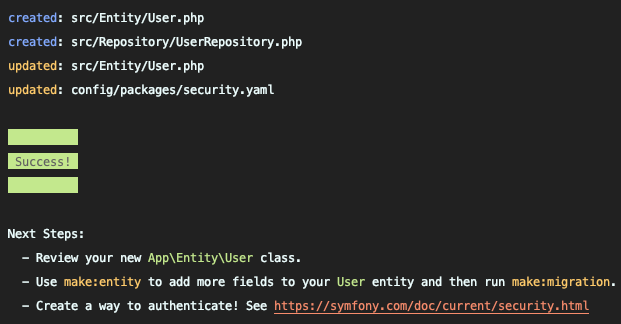
The next thing that we need to do is to create a user entity. This class will hold all the properties and methods which the application will require as it handles user-related activity. Create it by running the command below.
The CLI will ask several questions. Accept the defaults by pressing the “Enter” key for each of them. When the command completes, you should see a message similar to the one below:
The created entity contains almost everything. However, we require the user’s phone number for the second level of authentication. Open src/Entity/User.php and add the code below.
Next, run the migrations to update the database schema by running the commands below.
Create the registration form
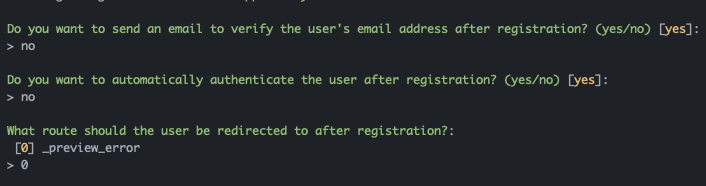
With the User entity in place, you next need to create a registration form. Do that using the command below.
Accept the defaults for the questions asked by the command — except for the 3 below.
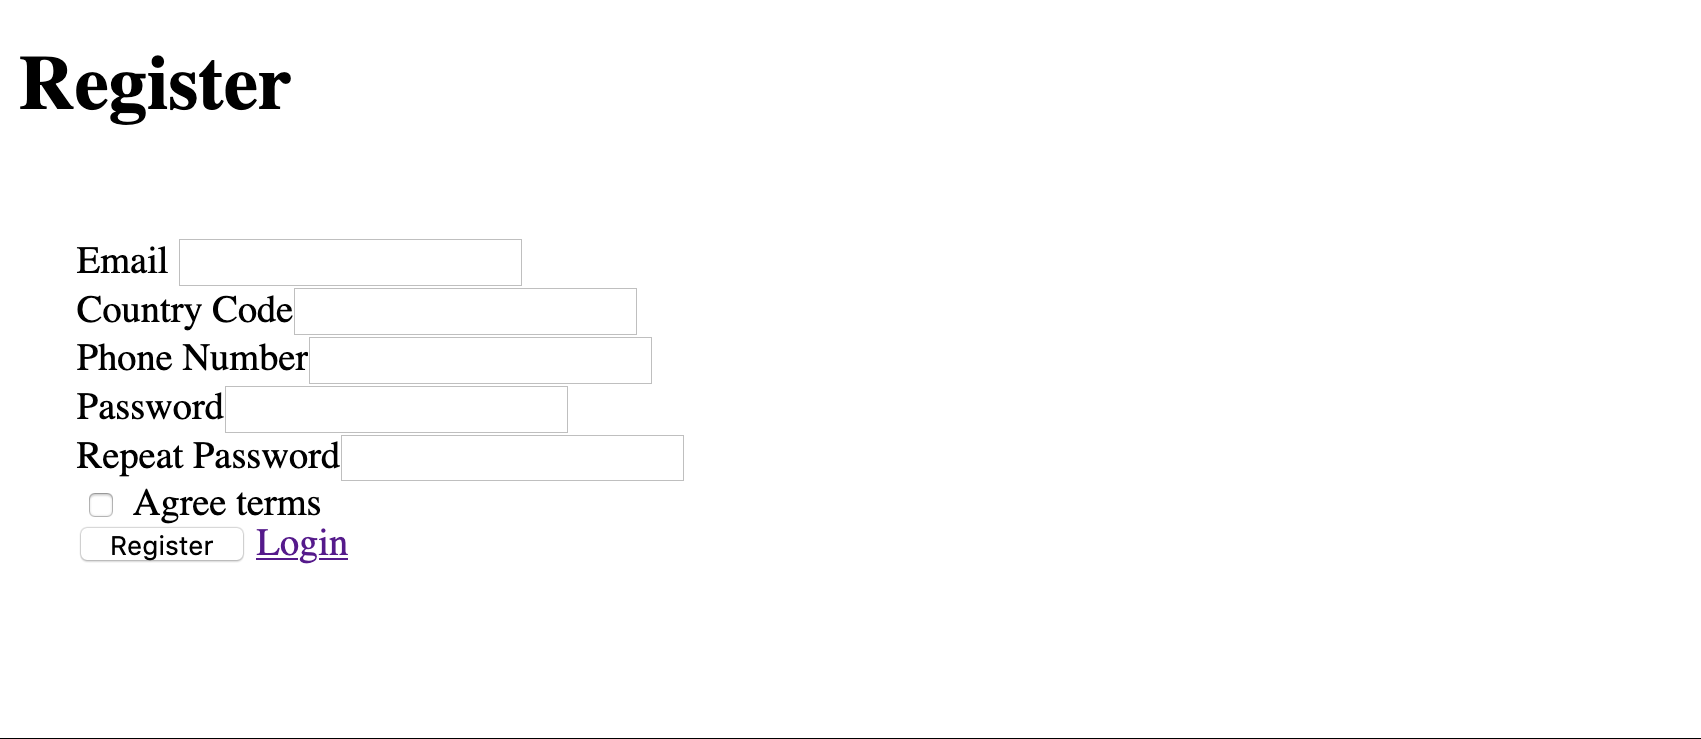
Once the command completes, we will modify the structure of the form. This is because we want the following to be provided (in a valid format), before we can create a new user:
- An email address
- A country code
- A phone number
- A password.
- A check to confirm the user accepts the application’s terms and conditions.
To do that, open src/Form/RegistrationFormType.php and edit it to match the code below.
With the code changes made, navigate to the registration page (/register). Unfortunately, it doesn’t look very good yet, as can be seen in the screenshot below.
Next, update the base template to add Bootstrap via CDN. Open the templates/base.html.twig file and replace its content with the following:
We referenced css/index.css in the code above. So create a new directory, named css in the public directory, then create index.css inside the new cssdirectory. After that, add the following code to index.css:
Next, we need to update the registration Twig file. To do that, open templates/registration/register.html.twig and replace the code in it with the code below.
With those changes made, reload the register route to see the new look. It should look like the screenshot below.

Create the authenticated view
Next, let's create a user dashboard, a view that should only be seen by an authenticated user. It will be a small view showing the user's email address and phone number, as well as a logout button. To do that, first create a controller using the Maker command below:
This command creates a controller (src/Controller/DashboardController.php) and an accompanying view template (templates/dashboard/index.html.twig) for us. In src/Controller/DashboardController.php, replace the code and annotation for the index function with the code below.
Then, replace the content of the templates/dashboard/index.html.twig file with the code below
Add the first layer of authentication
The first layer of authentication is the traditional login form. The user provides an email address and a password which are then checked by the application. We can quickly set this up using Symfony’s MakerBundle. To do so, run the command below.
The CLI will ask several questions. Answer them as shown in the example below:
The command creates an Authenticator called LoginAuthenticator located in the src/Security directory. This class contains all the logic related to authentication including the route to redirect the user to on successful authentication. You can read more about this here.
In src/Security/LoginAuthenticator, update the onAuthenticationSuccess function to match the following
The onAuthenticationSuccess function is called when the user provides a valid email and password combination. When called, this function checks if the user was redirected to the login page from another route. If so, the user is returned to that route. If not, the user is redirected to the dashboard.
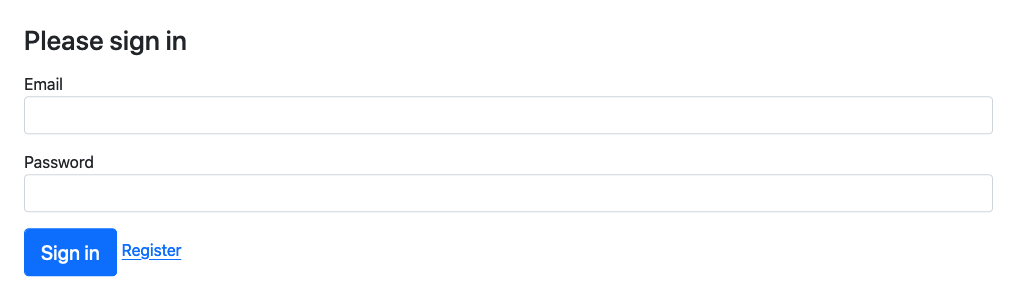
Next, style the login form by wrapping it in a div with a class name form-container. The code in the templates/security/login.html.twig file should match the code below
When the user successfully completes the registration form, the page should redirect to the login page. At the moment it redirects to the _preview_error route. To fix that, modify the register function in src/Controller/RegistrationController.php to match the code below
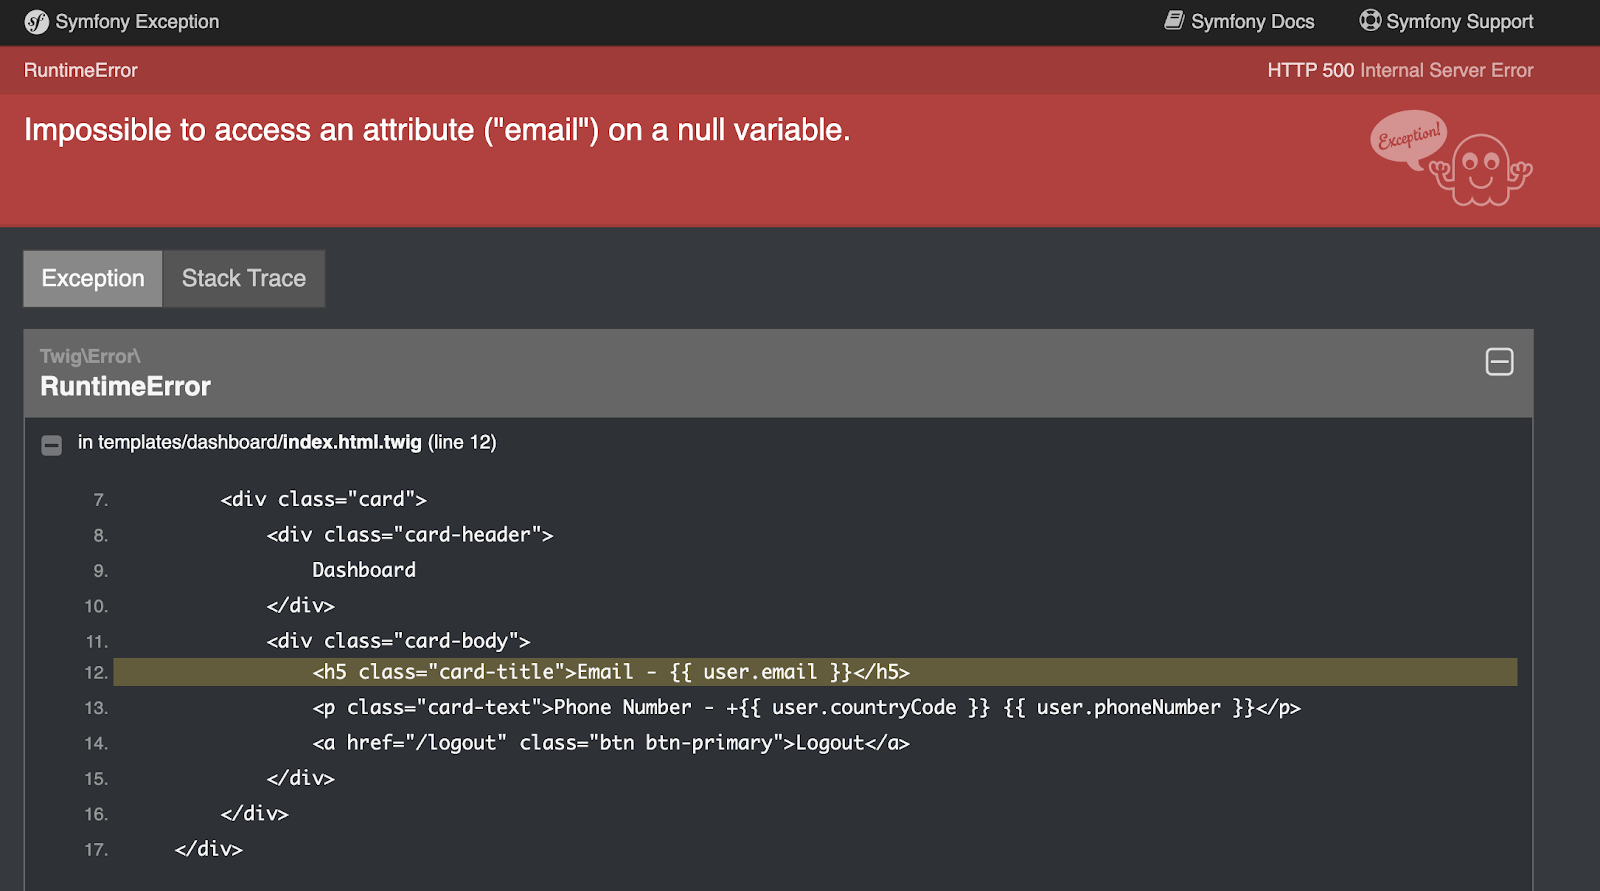
We're getting closer to completing the application, but we're not quite there yet as the index page will throw an exception. This is because the DashboardController expects a logged in user, yet the route is accessible without being authenticated. To fix that, open config/packages/security.yaml and add the code below to the bottom of the access_control key:
With the file updated, reload the index page. This time, you will be redirected to the login page.
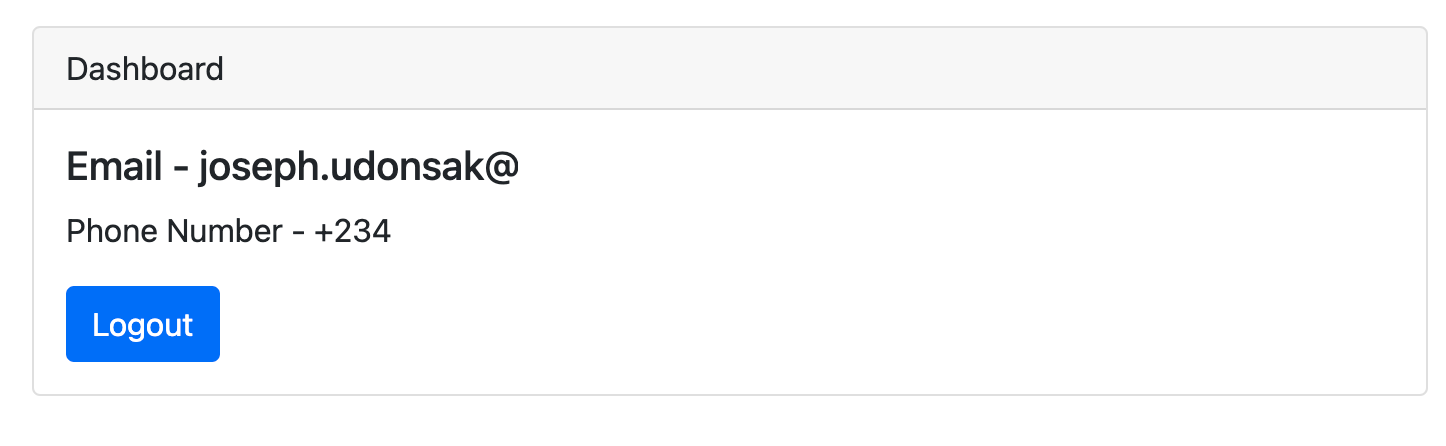
Make sure your application works by registering a new user and logging in. You should see the user's email address and phone number after a successful login, as in the screenshot below.
With everything in place, we’re now set to implement the second layer of authentication. Before we do that, however, you need to recreate the database. This avoids problems when we update the user entity. To do that, run the following commands:
Add the Two-Factor Authentication layer
As part of the second layer of authentication, we want the user to provide a Time-based One-Time Password (TOTP) generated by the Authy app. Our application will verify this with Twilio’s Authy API and only allow the user to view the dashboard if the provided TOTP is valid.
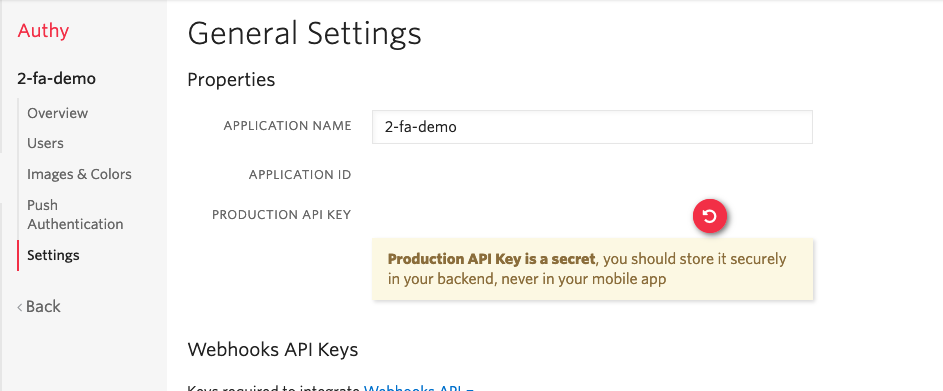
The first thing we need to do is to get an App ID for our application, which will allow our application to interact with the Authy API. To do this, open your Twilio Console and create a new application. You can name your application 2-fa-demo.

Click the “Create” button to view the “General Settings” for your new application. Then, copy the Production API Key.
In your .env.local file, add a new variable, named AUTHY_API_KEY, whose value is the production API key which you just copied.
Next, create a new, key AUTHY_API_KEY, in config/services.yaml. Do this by adding the code below under parameters:
To integrate with the Authy API we’ll use the PHP Authy helper library. To install it, run the command below.
The workflow for our 2-factor authentication process is as follows:
- Register a user on Authy: We create a new user whenever the registration form is submitted. At the end of this stage, we will have the user’s Authy ID which we will use whenever we want to verify a provided TOTP from the user.
- Verify a one-time password: Whenever a user provides a valid email address and password, we will request an OTP which we will verify before redirecting the user to the dashboard, if it is valid.
Note: We do not have to worry about generating a one-time password because this will be handled by the Authy app.
Next, we'll create a service to handle the 2 steps in our workflow, which we just identified. To do that, create a directory called Service in the src directory, and in that directory create a file called AuthyHelper.php. In the new file, add the following:
In this service, the ParameterBagInterface is injected as a constructor dependency. The ParameterBagInterface is used to obtain the AUTHY_API_KEY which is in turn used to initialize an AuthyApi object.
Register a user on Authy
Next, we need to add a function that creates a new user from the user’s email address, phone number, and country code. To do that, add the following two functions to src/Service/AuthyHelper.php file.
The registerUser function takes the user’s email address, phone number, and country-code, and makes a registerUser request to the Authy API. If everything goes well, the function returns the user’s Authy ID. If not, the API returns an array of errors associated with the request.
If the Authy API returns errors, we use the throwRegistrationException function to convert the errors array into a string, a message that can be displayed accordingly.
As part of that process, we need to create a new Exception class called RegistrationException. Create a directory called Exception in src and in it create a file called RegistrationException.php. In the new file, add the following code:
Verify a TOTPTo verify a provided OTP, we need to make a request to the Authy API with the user's Authy ID and the provided OTP. If everything checks out, we will receive an HTTP 200 OK response. If it doesn't, then the application should throw an exception with an appropriate error message.
Let's create an exception called VerificationException which will be thrown whenever an invalid OTP is provided. To do that, in the src/Exception directory, create a new file called VerificationException.php and add the following:
Next, in src/Service/AuthyHelper.php file, add the following functions:
We use the throwVerificationException function to throw a custom exception when an invalid OTP is provided. Also, if the user provides an OTP that is too short (or too long), an AuthyFormatException is thrown, we catch that and return our user friendly exception.
Note: Don’t forget the import statement for the AuthyFormatException class.
With these, we have a service that can interact with the Authy API.
Update a User entity
In order to verify the OTP provided by the user, we need to provide the user’s Authy ID along with the supplied OTP. However, this isn’t, currently, being stored by our application in the database. To fix that, open src/Entity/User.php and add the code below.
The setAuthyId function will be used when we register the user with the Authy API, while the getAuthyId function will be used when a verification request needs to be made for a user. Update your database schema to add the authy_id column using the command below.
Create an Authy ID on registration
At the moment, our users are being saved in our database. However, we need to register the user with the Authy API and get the user’s Authy ID before saving the user to the database. In our application, registration and login are handled in the RegistrationController and AuthenticationController respectively so our next set of modifications will be done there.
In the src/Controller/RegistrationController.php file, modify the register function to match the following:
Note: Don’t forget the import statement for the AuthyHelper class.
With our modifications completed, the user will be registered with the Authy API when the form is submitted with valid data. The user entity is updated with the returned Authy ID and persisted to the database, before redirecting the user to the login page.
This process of registering the user with the Authy API is wrapped in a try-catch block. In the event that our AuthyHelper service throws a RegistrationException, we want to catch that and display a flash message containing the errors in a reader friendly format.
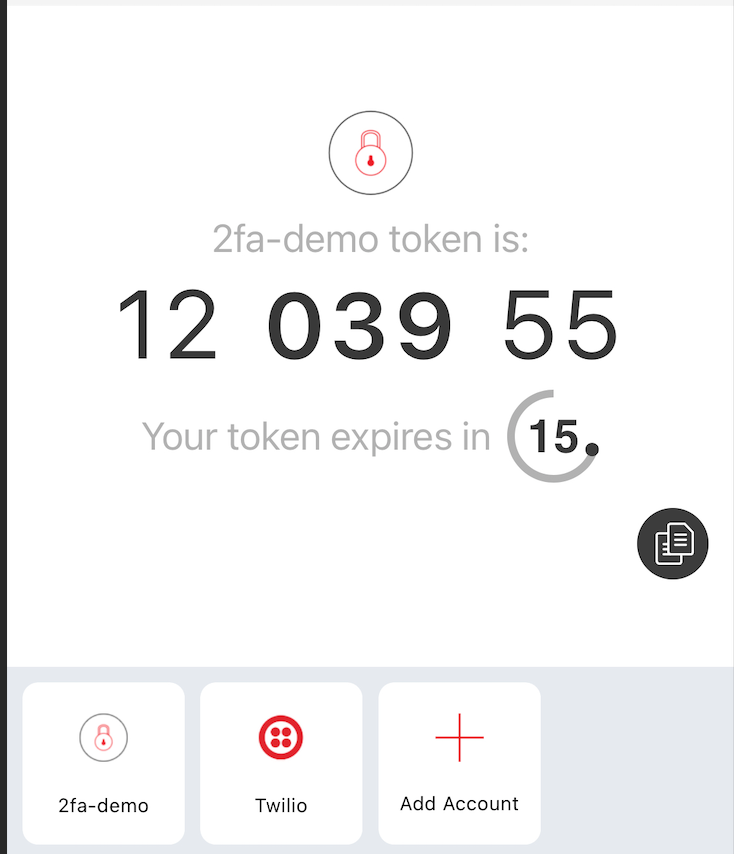
The TOTP verification page
Upon provision of a valid email and password combination during login, we need the user to provide the Authy-generated TOTP, which you can see an example of in the screenshot below.
To do this, we’ll implement a form which will collect the user’s TOTP and verify it with the Authy API. If the TOTP checks out, the user will be redirected to the dashboard. If not, an error message will be displayed and the user will have the chance to provide a valid OTP.
In the templates/security folder, create a file called verify.html.twig and add the code below to it.
Next, open src/Controller/AuthenticationController.php and add the following code.
Note: Don’t forget the import statements, listed in the example below.
The OTP verification request is handled by the verifyOTP function. This function gets the submitted token and the Authy ID of the currently logged-in user. It then makes a verification request to the Authy API.
If a VerificationException is thrown, then the OTP verification page is re-rendered with the error message displayed. Otherwise, the user is redirected to the dashboard - but not before a new session variable, called 2fa-verified, is set to true. We use this session variable later on.
If you try logging in at this point, you are still redirected to the dashboard. To fix that, let’s refactor the authentication logic. At the moment, the onAuthenticationSuccess function in src/Security/LoginAuthenticator.php redirects the user to the dashboard.
However, we need to redirect the user to the OTP verification page we just created. This is because we need the user to provide an OTP before they can access the dashboard. To do that, modify the function to match the code below.
Because we always want the user to be directed to the OTP verification page, we return the same response irrespective of where the user was redirected from.
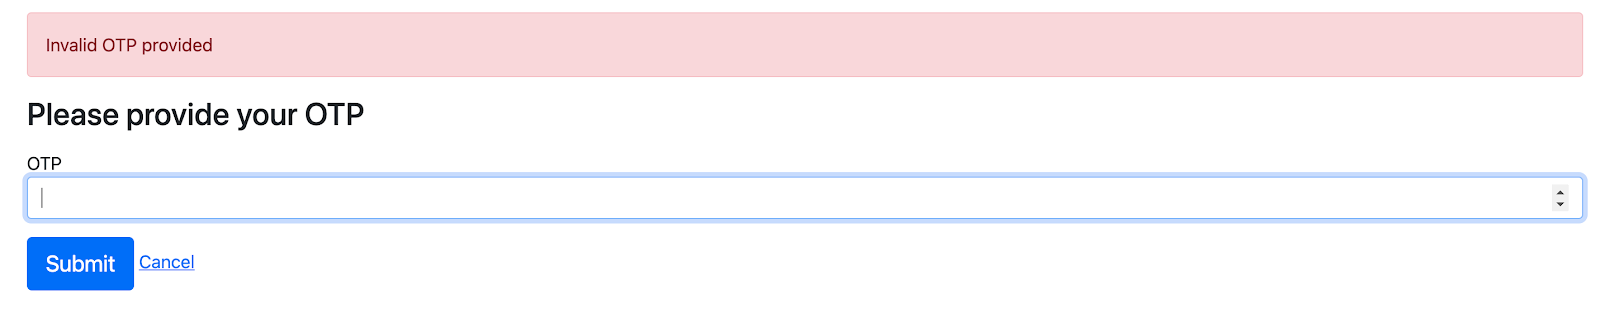
Try logging in again. This time you’ll be redirected to the OTP verification page as expected.

If you type in the OTP generated from your Authy app and click Submit, you will be redirected to the dashboard. If the OTP is invalid, however, you will see an error message as shown below:
Secure the link between both layers
At the moment, because Symfony recognizes the user after login (before OTP verification) it is possible to bypass the verification stage by editing the URL. Try removing the /verify in the URL and you should see your dashboard.
To achieve the expected result, we need to intercept the request before it is handled by the controller. and ensure that the user has passed the second level of authentication. We can do this by subscribing to the ControllerEvent.
According to the Symfony documentation, the ControllerEvent
is dispatched after the controller to be executed has been resolved but before executing it.
If we subscribe to this event, we can determine if the user has passed the second level of authentication (2fa-passed is true) and redirect to the verification page if not.
To do that, create a new directory called Subscriber in the src directory. Next, in the src/Subscriber directory, create a new file called VerificationSubscriber.php and add the code below.
By making the VerificationSubscriber conform to the EventSubscriberInterface, we can specify which event we want to listen to in the getSubscribedEvents function.
This function returns the event we want to listen to and the function to be called when the event is dispatched. In our case, we want to listen to the ControllerEvent. When it is dispatched, we want the onKernelController function to be called.
Before we write this function, let’s write a few functions that will be used by this function. First, we need a function to tell us if a request has passed the verification stage. In src/Subscriber/VerificationSubscriber.php, add the following function:
This function checks if the 2fa-verified session variable is set to true. Next, we need a function to check if a given route requires the verification to have been passed. For routes related to registration, login, logout, and OTP verification, the user is not expected to have passed verification, hence these pages should load even if the 2fa-verified session variable is not set to true.
If the route does not correspond to any of the earlier mentioned routes, then the user is expected to have passed the verification. In the src/Subscriber/VerificationSubscriber.php file add the following function:
Note: the _wdt route was added to the array of permitted routes. This prevents the application from redirecting to the OTP verification page in development mode as a result of the Web Debug Toolbar.
Next, we need a function that determines whether a request should be redirected to the OTP verification page. The request should be redirected if the route to be accessed requires verification and yet the 2fa-verified session variable is not set to true.
In the src/Subscriber/VerificationSubscriber.php file, add the following function:
With these in place, we can finally implement the onKernelController function. Add the following function to src/Subscriber/VerificationSubscriber.php
Note: Don’t forget the import statement for the ControllerEvent, Request, and RedirectResponse classes.
The onKernelController function takes a ControllerEvent and checks if the user to be redirected to the verification page. If the user should be redirected, then the event controller is set to a PHP callable which returns a RedirectResponse to the OTP verification page.
Try bypassing the OTP verification page again. This time you will see that you are returned to the OTP verification page.
That's how you implement Two-Factor Authentication with Symfony and Twilio's Authy App and API
In this tutorial, we looked at an alternative form of 2-factor authentication by using the Authy App instead of an SMS or email. Using the Symfony framework, we were able to upgrade a traditional login form to require a Time-based One-Time-Password generated by the Authy App. We also looked at how we can use ControllerEvents to prevent users from bypassing the OTP verification stage.
You can review the final codebase on GitHub. Until next time, bye for now.
Joseph Udonsak is a software engineer with a passion for solving challenges – be it building applications, or conquering new frontiers on Candy Crush. When he’s not staring at a screen, he enjoys a cold beer and laughs with his friends.


Related Resources
Twilio Docs
From APIs to SDKs to sample apps
API reference documentation, SDKs, helper libraries, quickstarts, and tutorials for your language and platform.
Resource Center
The latest ebooks, industry reports, and webinars
Learn from customer engagement experts to improve your own communication.
Ahoy
Twilio's developer community hub
Best practices, code samples, and inspiration to build communications and digital engagement experiences.