How to send Emails with C# and .NET 6 using the SendGrid API
Time to read: 7 minutes
December 13, 2021
Written by
Reviewed by
Email has been around for decades, but sending emails at scale is still hard. With Twilio SendGrid, you can send emails without worrying about scalability. You can use the SendGrid APIs and SDKs to start sending emails within minutes. You could also use the SMTP protocol if you already have an existing codebase that relies on SMTP. In this post, you will learn how to send emails using the SendGrid .NET SDK and a .NET 6 console application.
Prerequisites
You will need the following things to follow along:
- OS that supports .NET (Windows/Mac/Linux)
- .NET 6 SDK (download)
- A code editor or IDE (Recommended: VS Code with C# plugin, Visual Studio, JetBrains Rider)
- A Twilio SendGrid account (signup)
Everything you will learn applies even if you’re using an older version of .NET (Core), but you will need to make minor adjustments.
Configuring your SendGrid account to send emails
There are two things you need to configure before you can send emails. First, you’ll need to set up Sender Authentication. This will verify that you own the email address or domain that you will send emails from. Second, you’ll need to create a SendGrid API Key with permission to send emails.
Sender Authentication
It is recommended to configure Domain Authentication which requires you to add a record to your DNS host. To keep things simple, you will use Single Sender Verification instead. This will verify that you own the single email address that you want to send emails from. Single Sender Verification is great for testing purposes, but it is not recommended for production.
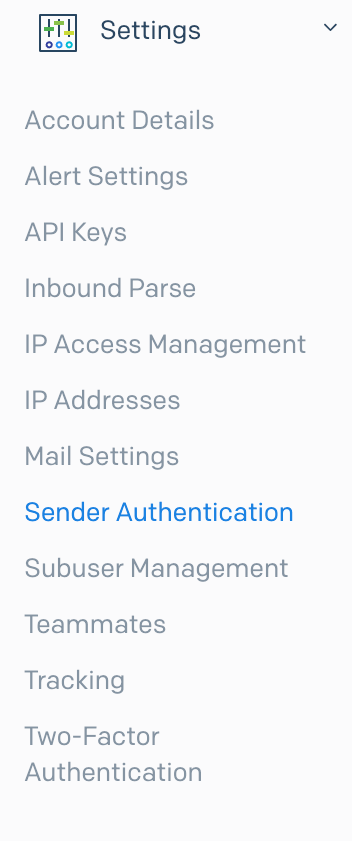
Go to the SendGrid website and log in. Click on the Settings tab in the side menu. Once the settings tab opens up, click on Sender Authentication.
Click on Get Started under the Single Sender Verification section.

This will open a form on the right-side panel. Fill out the form with your information and email address.

Click Create after filling out the form. Another panel will appear on the right asking you to confirm your email address. An email has been sent to the email address you entered.
Go to your inbox, open the email from SendGrid, and click Verify Single Sender.
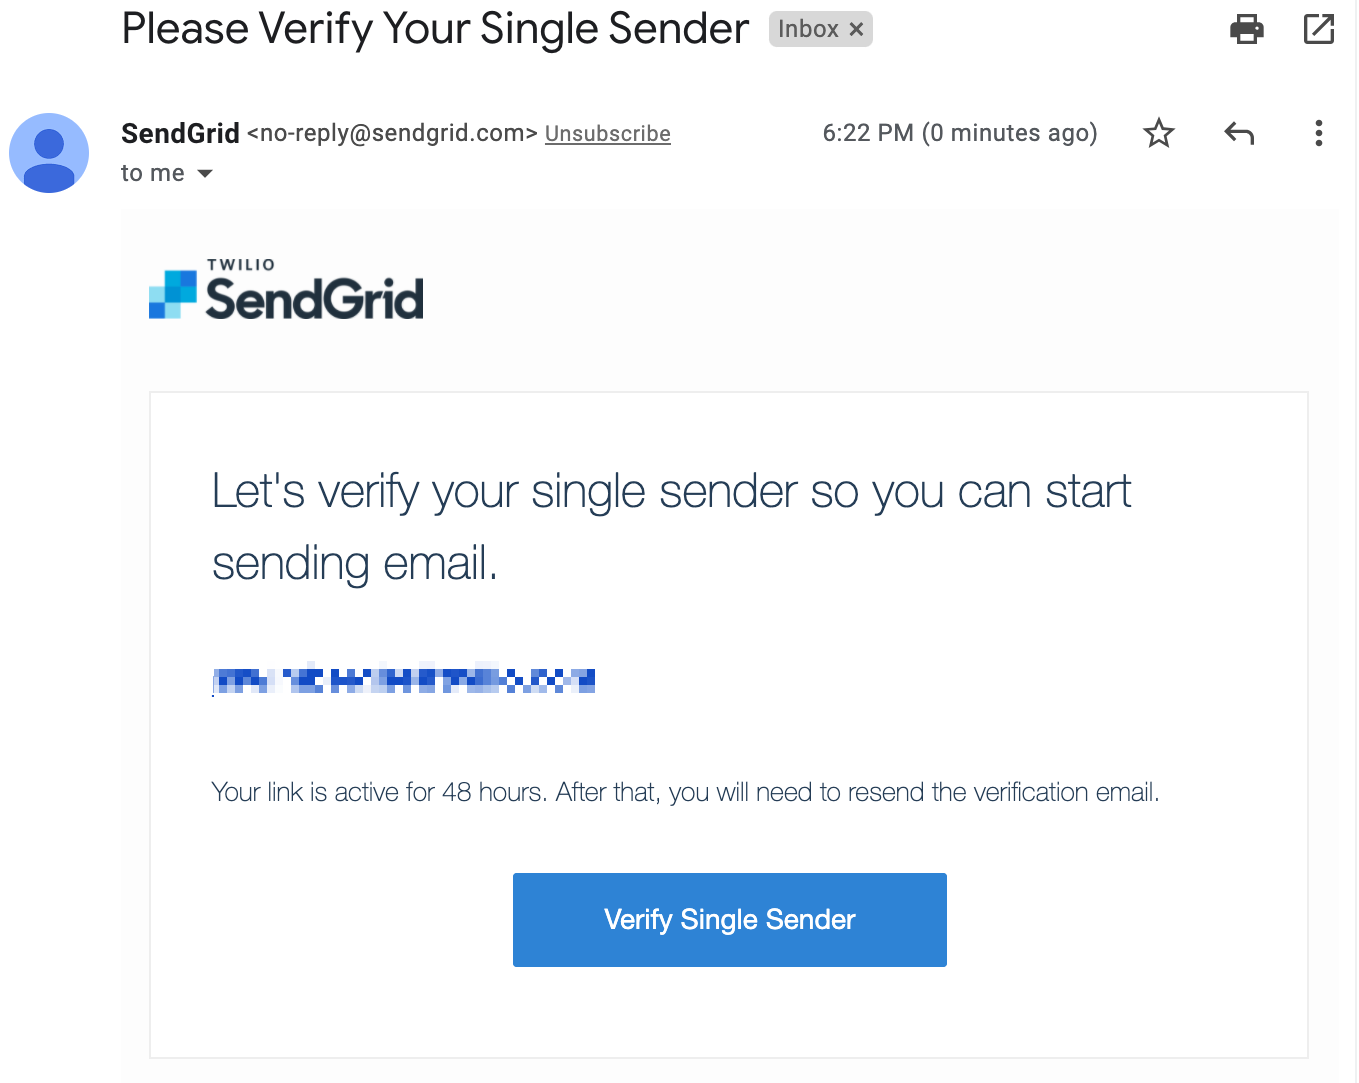
Your email address has been verified and you can now use it to send emails!
Create a SendGrid API key to send emails
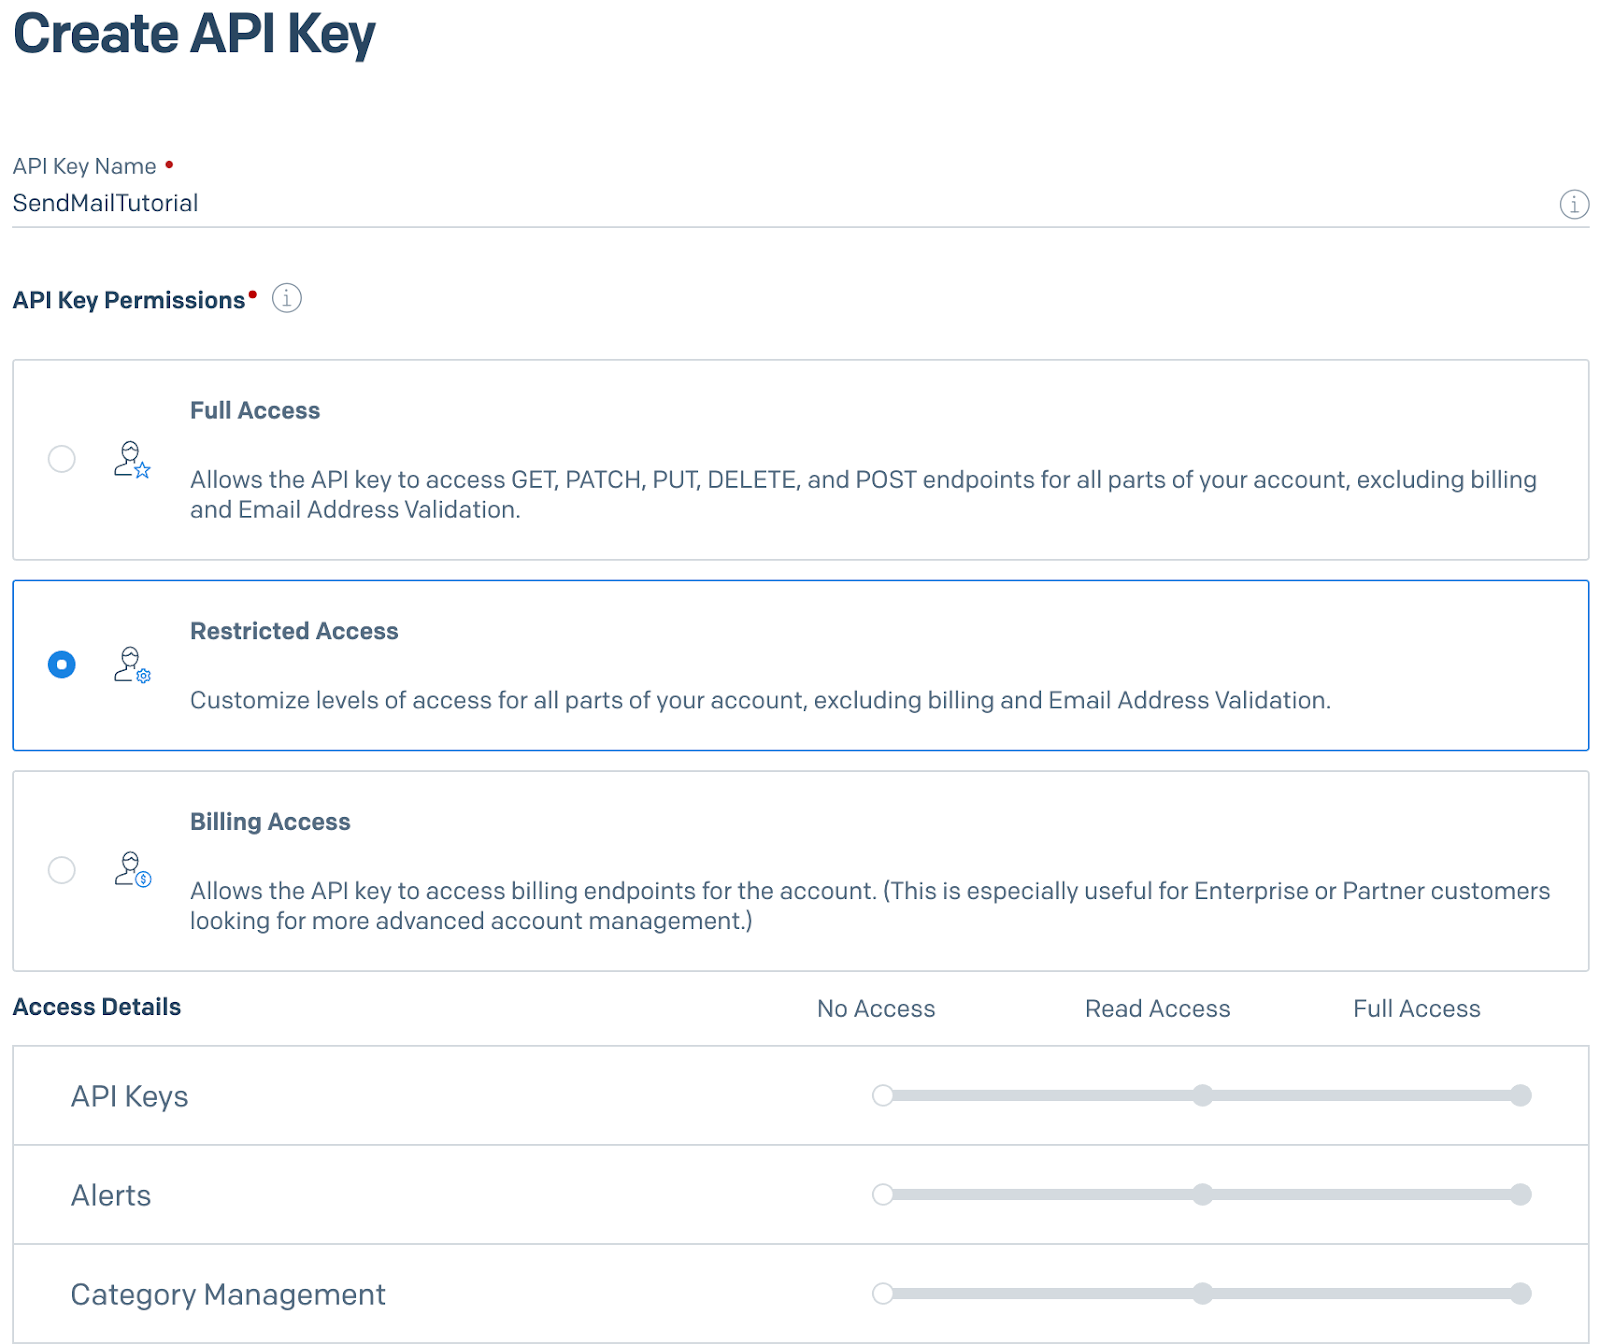
Back on the SendGrid website, click on API Keys under the Settings tab. Click on Create API Key in the top right corner. This will open another form in the right-side panel. Give your API Key a useful name. You can assign different permissions to the API Key. For optimal security, you should only give the minimum amount of permissions that you need.
Click on Restricted Access.
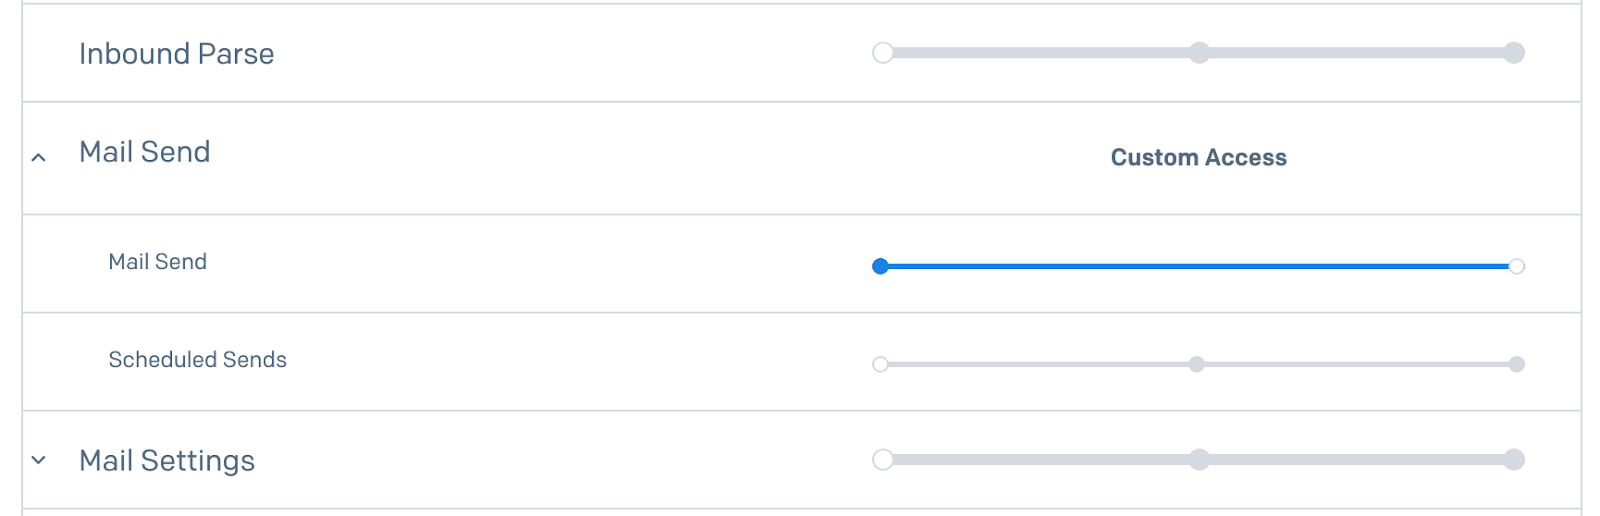
Scroll down to the Mail Send accordion item and click on it to reveal the permissions underneath. Drag the slider to the right for the Mail Send permission.
Scroll to the bottom of the form and click on Create & View. The API key will now be displayed on your screen. You will not be able to retrieve the API key again once you leave this screen.
Copy the secret somewhere safe.
With the sender verified and the API Key created, you’re ready to write some code!
Creating a console app to send emails
Create a new console app
Open a shell on your machine and create a new folder using the following command:
Move into to the new folder:
Create a new console application using .NET CLI:
Run the project using the .NET CLI:
You should see “Hello, World!” output to your shell.
Integrating Twilio SendGrid
Add the SendGrid NuGet package to your project using the .NET CLI:
Open up the console project using a code editor or IDE and replace the contents of the Program.cs file with the following:
Update the placeholder strings:
- replace
"[REPLACE WITH YOUR EMAIL]"with the email address you verified with your SendGrid account. - replace
"[REPLACE WITH YOUR NAME]"with your name. - replace
"[REPLACE WITH DESIRED TO EMAIL]"with the email address you want to send an email towards. - replace
"[REPLACE WITH DESIRED TO NAME]"with the recipient's name.
Save the Program.cs file.
The code above does the following:
- Line 4: Get the API key from the environment variables and store it in the
apiKeyvariable. - Line 5: Construct a new
SendGridClientwith theapiKey. - Line 6 - 11: Create a new
SendGridMessageobject with your email address as sender, and with a subject, and text content. - Line 12: Add a recipient of the email.
- Line 13: Send the
SendGridMessageto the SendGrid API. - Line 18: Verify if the SendGrid API accepted the request by checking if the response status code is in the HTTP 2XX range.
The application expects the API key to be stored in the SENDGRID_API_KEY environment variable.
Run the following command if you’re using a Bash or similar shell:
Run the following command if you’re using PowerShell:
Run the following command if you're using CMD:
The environment variable will be available for the duration of your shell session. You'll have to set the environment variable again when opening a new shell.
Run the project using the .NET CLI:
If all went well, the output should be "Email queued successfully!".
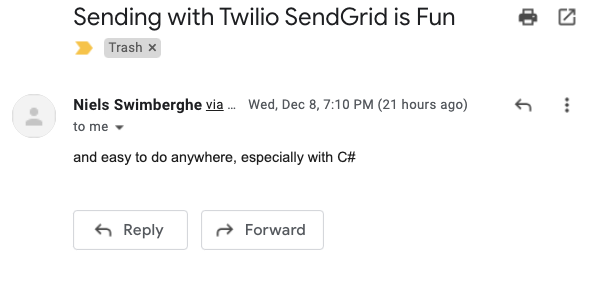
Open the inbox of the recipient to verify you received the email. If you don't have access, you can use the Email Activity Feed to see the status of the email.
Here's what the email should look like:
Bonus 1: Ask for user input
Chances are you don't always want to send the same email. You can ask for user input to make the application more flexible. Update Program.cs to match the content below:
The updated code asks for user input using Console.ReadLine to get the subject, body, and recipient email address. Run the project again and answer the prompts:
Bonus 2: Make the project more configurable
Currently, the sender's email address and the name are hardcoded, and the SendGrid API Key is configured through an environment variable. This is perfectly fine for a proof of concept, but you'll want to make the project more configurable. That's why you'll take advantage of the very pluggable configuration system that ships as part of .NET.
Add the following NuGet packages using the .NET CLI:
Update the Program.cs file to match the content below:
Host.CreateDefaultBuilder(args).Build(); will use multiple configuration sources by default, but most importantly:
- it will load configuration from appsettings.json if it exists
- It will load configuration from .NET user secrets when the project runs with the environment set to "Development".
Read more about the default configuration sources at Microsoft Docs.
Create a new file named appsettings.json and add the following contents:
This file will be used to configure the sender's email and name.
Using a JSON file as configuration works well to configure sender details, but is not a good fit for the API key. You can use user secrets for the API key.
Run the following command to initialize user secrets for your project:
Run the following command to set the API key as a user secret:
You can also set the sender email address as a user secret if you don't want to store your email address in the JSON file:
The user secrets configuration will override the appsettings.json configuration.
As mentioned before, the user secrets will only be loaded when the environment is set as "Development". To do this, you can set an environment variable "DOTNET_ENVIRONMENT" to "Development". You can also pass it in as a command-line argument like this:
The result should be exactly the same, but your application configuration is very flexible now.
If you deploy this console application somewhere else, the configuration can be changed using environment variables, command-line arguments, and JSON files.
Bonus 3: Configure SendGridClient as a service for dependency injection
You've made your application more configurable using the default host builder, but you can also further integrate SendGrid into your application. The SendGrid SDK for .NET has an extra NuGet package that will add the SendGrid client to the dependency injection container.
This is most commonly used for ASP.NET, but as you can see, you can also use ASP.NET's great built-in features by manually adding them into your console applications.
Run the following command to add the SendGrid dependency injection package:
Update the Program.cs file:
You can configure additional services inside of the lambda passed to ConfigureServices.
Inside of this lambda, SendGrid is added as a service. To configure the options of SendGrid, another lambda is used and passed into AddSendGrid. The lambda-inception can be tricky, so make sure to verify all your parentheses match the code above.
Instead of constructing the SendGridClient as you did before, the program now requests an instance of ISendGridClient from the dependency injection container using host.Services.GetRequiredService<ISendGridClient>().
If you extend this application even further, you can also use constructor injection to receive any service.
Run the application again to verify everything still works as expected:
Conclusion
Twilio SendGrid helps you send and receive emails at scale.
You learned how to send emails using the SendGrid API and .NET 6 by following these steps:
- You verified your email address as a single sender to send emails from.
- You created a SendGrid API Key with permission to send emails
- You created a .NET 6 console application and integrated the SendGrid .NET SDK to send emails
- You used the default host builder to set up flexible configuration and extensible dependency injection.
Using what you learned here, you can also start integrating SendGrid into your ASP.NET Core applications. Twilio has a lot of other products you can integrate. Check out this tutorial on how to receive text messages using Twilio Programmable SMS and forward them using SendGrid emails with C# and ASP.NET Core.
Additional resources
Check out the following resources for more information on the topics and tools presented in this tutorial:
SendGrid .NET SDK source code on GitHub – The SendGrid .NET SDK you used in this tutorial is open source! This GitHub repository contains helpful documentation on how to integrate with SendGrid using .NET. You can read the source code to better understand what's happening or submit issues if something isn't working as expected.
Configure Console app on Microsoft Docs – Learn how to configure .NET console applications using the host builder. You can further improve on the existing code by introducing the Options pattern described in the documentation.
Source Code to this tutorial on GitHub - Use this source code if you run into any issues, or submit an issue on this GitHub repo if you run into problems.
Niels Swimberghe is a Belgian software engineer and technical content creator at Twilio, working from the United States. Get in touch with Niels on Twitter @RealSwimburger and follow Niels’ personal blog on .NET, Azure, and web development at swimburger.net.


Related Resources
Twilio Docs
From APIs to SDKs to sample apps
API reference documentation, SDKs, helper libraries, quickstarts, and tutorials for your language and platform.
Resource Center
The latest ebooks, industry reports, and webinars
Learn from customer engagement experts to improve your own communication.
Ahoy
Twilio's developer community hub
Best practices, code samples, and inspiration to build communications and digital engagement experiences.