How to Send SMS Reminders from PHP Symfony Applications
Time to read: 5 minutes
September 25, 2018
Written by

If you have a booking system, making appointments such as massage or other therapist bookings, dental or medical appointments, etc., you’d probably like to remind the client about the booking they made on the day of the appointment. In some cases, you might also want to remind the person offering the service. In this tutorial, you'll learn how to send SMS reminders to clients of their upcoming massage appointments, at a designated time before the appointment, in a Symfony project using Twilio's SMS service.
This post assumes that:
- You have already set up a LEMP, MAMP, XAMPP, or equivalent development environment.
- You are familiar with the
Symfonyenvironment.
Setup
We’ll be using composer (a tool for dependency management) to install Symfony and Twilio's SDK. Composer installation instructions can be found here. Also, be sure to install composer globally, by following the instructions in the global sub-section.
After installing composer, we’ll first need to set up the database for our application before we install Symfony. Click on the links for a simple walk-through on how to create a database using either PHPMyAdmin or SequelPro.
Use your preferred database management tool to create a database for our app and give it the name appointments.
Once the database setup is complete, open the terminal and navigate to the folder where you’ll want to set up your project. Then run the following command to create a new Symfony project (a folder for the project files will be created automatically):
In this case, Appointments will be the name of the project folder, and it will be created automatically by composer.
During the installation, after the project files have been downloaded, composer will prompt you to provide some configuration parameters for the app. The important ones are:
- the database_name (which in this case is appointments).
- the database_user and database_password for accessing the database.
You can leave the default values for the rest of the parameters. In case you need to change the values later, you can do this in the project's app/config/parameters.yml file.
The app should now be ready for use. To test if everything is set up correctly, in the terminal, navigate to the folder of your app (the Appointments folder) and run:
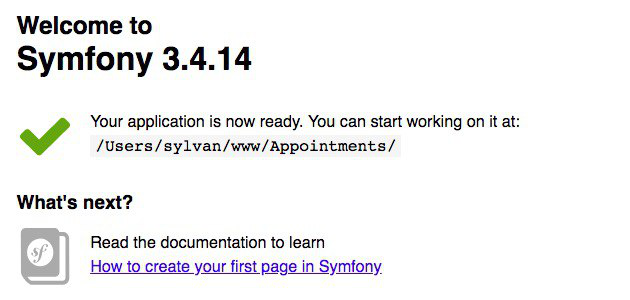
If everything is working OK, the server will run successfully and provide you with a url (usually http://localhost:8000) that you can use to view your app. Open up your browser, navigate to the provided url, and you should see something similar to:
For a refresher on Symfony, check out this up and running tutorial.
Models
Now that we've got our app installed and setup, we'll start by creating the entity models we'll need to capture the users and appointments information.
We'll start by creating an Entity folder inside of the src/AppBundle where we'll put our Entity files. We’ll then create a new file, User.php, and add the following code:
This is our User entity model, that uses Doctrine ORM to map out our User table. In this case, we only store the name, email, and phone number of the user. Depending on the needs of your application, you could end up with more information about the user, such as address, date of birth, gender, etc.
Next, we’ll add the Appointment.php file to our Entity folder for our Appointment entity model. Here we are only interested in the date/time of the appointment, as well as who booked the appointment. As such, the file will look like:
We've added a reference to the user in the appointment table to make lookups easier for us later on.
Next, open a new tab/window in your terminal (since bin/console server:run command will take control of terminal tab/window), and run the following command to create the tables in your database:
Seed Data
The next thing we'll do is add some sample data to work with. We could add a controller with the necessary actions and views to perform CRUD operations of users and appointments, but that is not necessary for our use case. Instead, we can either simply add the data manually in the database, or use Doctrine Fixtures Bundle to load sample data in the database.
Run the following command in the terminal to install the bundle:
Then open AppKernel.php inside the app folder (in the root of the project) and enable the DoctrineFixtures bundle. The DoctrineFixtures bundle is ONLY supposed to be used for testing purposes. This means it should NOT be enabled in a production environment. As such, we shall be enabling it only for development or test environments. This is done by appending a new instance of the bundle to the $bundles array inside of the registerBundlers() function [Line 9], after confirming that we are either in the dev or test environment [Line 22 for a clean install].
Next, we’ll add a DataFixtures folder to src/AppBundle and then add an AppFixtures class to the folder that will define the sample data to be added.
NOTE: Be sure to change the date to the current date for easier testing. You can also add more users or appointments if you wish.
To load our fixtures into the database, execute the following command in the terminal and select y (yes) when prompted:
Install Twilio
Now that we have our entity models set up and our database seeded with some sample data, let's see how we can send the SMS reminders. For this, we'll use Twilio's SDK. You will need a Twilio account and phone number, as well as your account's SID and auth token.
Go here to create a Twilio account and phone number. Once you're done with the account creation, run the following command to install the SDK:
After the SDK has been installed, we'll need to make it accessible in our app. We can achieve this by exposing it as a service. But before that, open parameters.yml and add the following configuration values:
Then, we’ll add a new service in services.yml to expose the Twilio SDK, as follows:
NOTE: Be sure to also include the line that adds an alias for the twilio.client service.
With this, we can now inject the service anywhere into our application. Now we can look at the SMS command.
Create SMS Command
We want the reminder SMS messages to be sent automatically at set times using crons, so we need to be able to execute the sending of SMS messages from the command line. For that, we'll need a command.
Add a Command folder to our AppBundle and create the SmsCommand class with the following code:
The code above checks our appointment table (in the database) for any appointments scheduled for today, then loops through the appointments and sends an SMS (using the Twilio SDK) to each user who has an appointment today. At the end, it prints out a confirmation message to us on the console that the reminders were sent successfully.
Recommendation: For testing purposes, I’d recommend you change the phone numbers of the users (in the user table) to either your own number, or that of someone nearby, so you can actually confirm that the sent SMS is delivered correctly.
We can now test out our command and see if it works as intended. In the terminal, execute:
If there are any appointments scheduled for today, you should see a printout on the console of the number of SMS reminders that will be sent, and a success message once they are sent. If there aren't any appointments, you should likewise see a message informing you of the same.
Create a Cronjob
Now that we have our command configured correctly and we've verified that it's working, we'll finish by scheduling our command to run at a specific time daily.
NOTE: You could also set the command to run at intervals less than a day, depending on your requirements. You'll however need to update the $start and $end times of the appointments to ensure SMS messages are sent accordingly.
To open up the crontab, run the following in the terminal:
Then we'll set the interval (once a day at midnight) for our cronjob, as well as the task to be executed.
NOTE: be sure to set the correct absolute path of bin/console.
Congratulations, you did it! You can now send appointment reminders in Symfony using Twilio SMS. You can find a final version of this app on github.


Related Resources
Twilio Docs
From APIs to SDKs to sample apps
API reference documentation, SDKs, helper libraries, quickstarts, and tutorials for your language and platform.
Resource Center
The latest ebooks, industry reports, and webinars
Learn from customer engagement experts to improve your own communication.
Ahoy
Twilio's developer community hub
Best practices, code samples, and inspiration to build communications and digital engagement experiences.