Push Your Business to the Next Level with Twilio Studio
Time to read: 6 minutes
May 30, 2022
Written by
Reviewed by

Customer satisfaction surveys are an innovative method for gathering the feedback you need to create a loyal and satisfied customer base. Using IVR (Interactive Voice Response) surveys will enable you to collect this crucial feedback while relieving you from unnecessary phone duty.
However, the challenge here is how to prevent your customers dropping out before completion, and this is where you can leverage an IVR. You can start by asking for a customer's consent before initiating the survey. This way, you can minimise dropouts by removing those who do not wish to participate. Or you can call back those who dropped out after giving consent to increase your chances of keeping them engaged.
This blog post will show you how to do that with Twilio Studio, our stateful visual workflow builder. We will start by creating a Studio flow, then build an IVR for a hotline that collects feedback from customers after they speak to an agent. You will learn how these IVR elements can be arranged with the drag and drop user interface, and how you can take your hotline to the next level with the help of low-code elements. Finally, we will deploy our flow with a click of a button without needing a server or dev-ops.
Prerequisites
Before we get started, you will need to have a Twilio account, and a phone number for the IVR. Here are the links if you don’t yet have them:
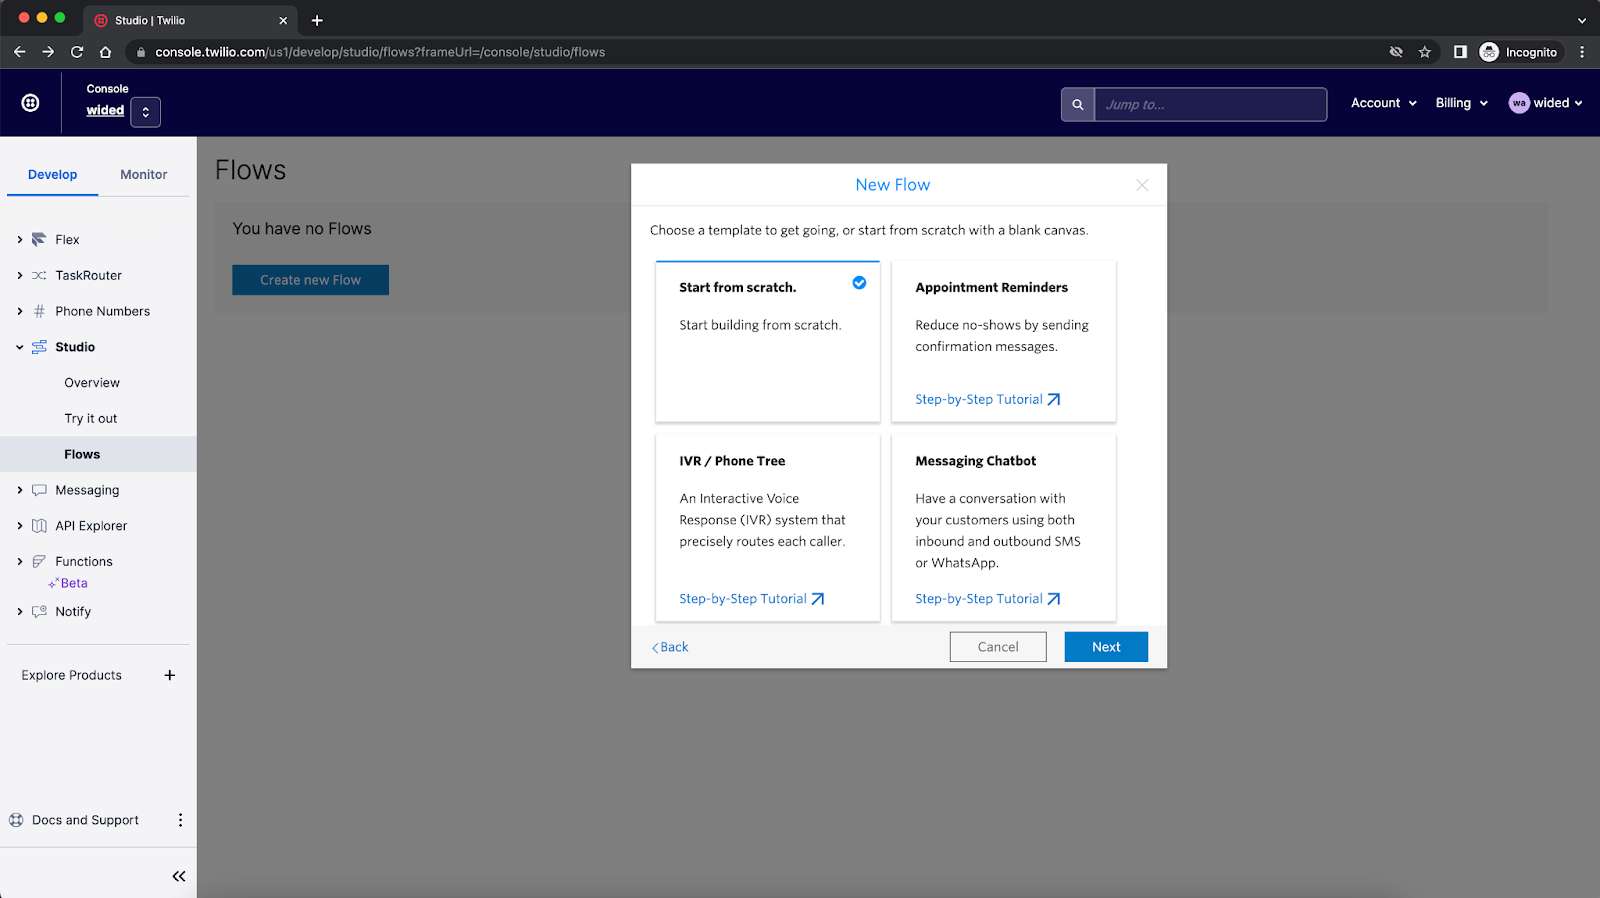
Create a new flow
Head to the Studio Dashboard. Select “Create new flow” or the plus button if you already have one, set the flow's name. Then, choose the “Start from the scratch” template, and click “Next”, which will automatically create and load a new blank flow in the Studio canvas.
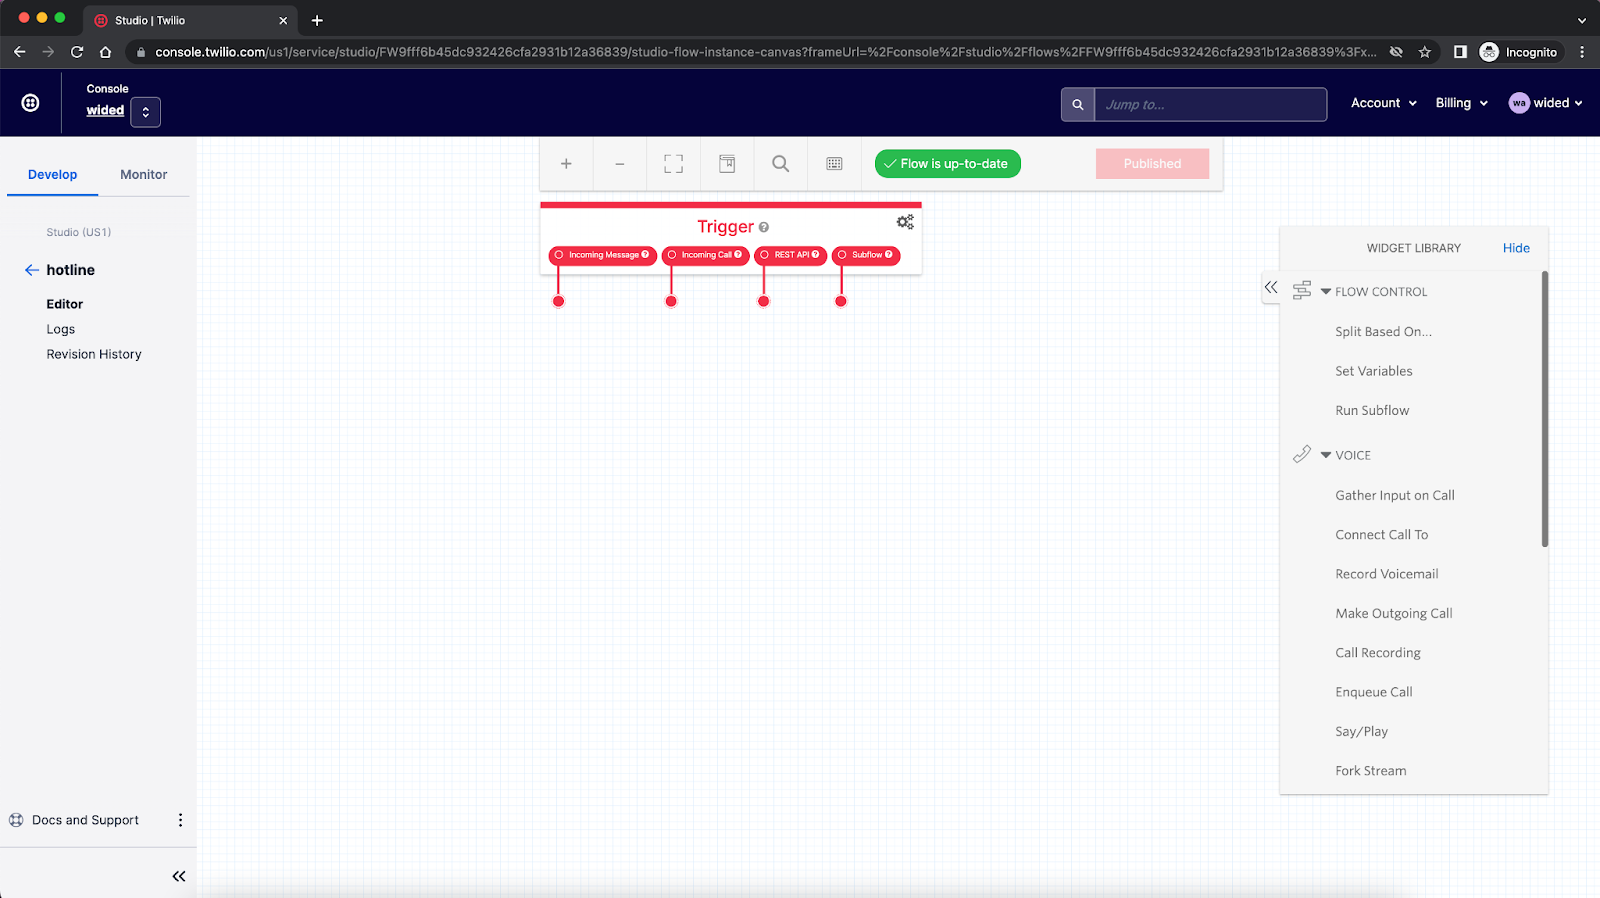
The Studio canvas consists of three main elements:
- Triggers: This widget serves as the entryway to the flow, and contains four leads that can trigger distinct flows – either via an incoming call, SMS, an API request, or a subflow.
- Widgets Library: To begin building the flow, drag and drop widgets from the Widget Library on the right to the canvas. You can configure and edit your widgets. Then you can define how a flow advances using the transitions from one widget to the next based on events and specified conditions.
- Publish: The Studio flow saves automatically after each change. Once you change your flow, you will see a Publish button in the top container. Just one click there, and your flow is sent to production.
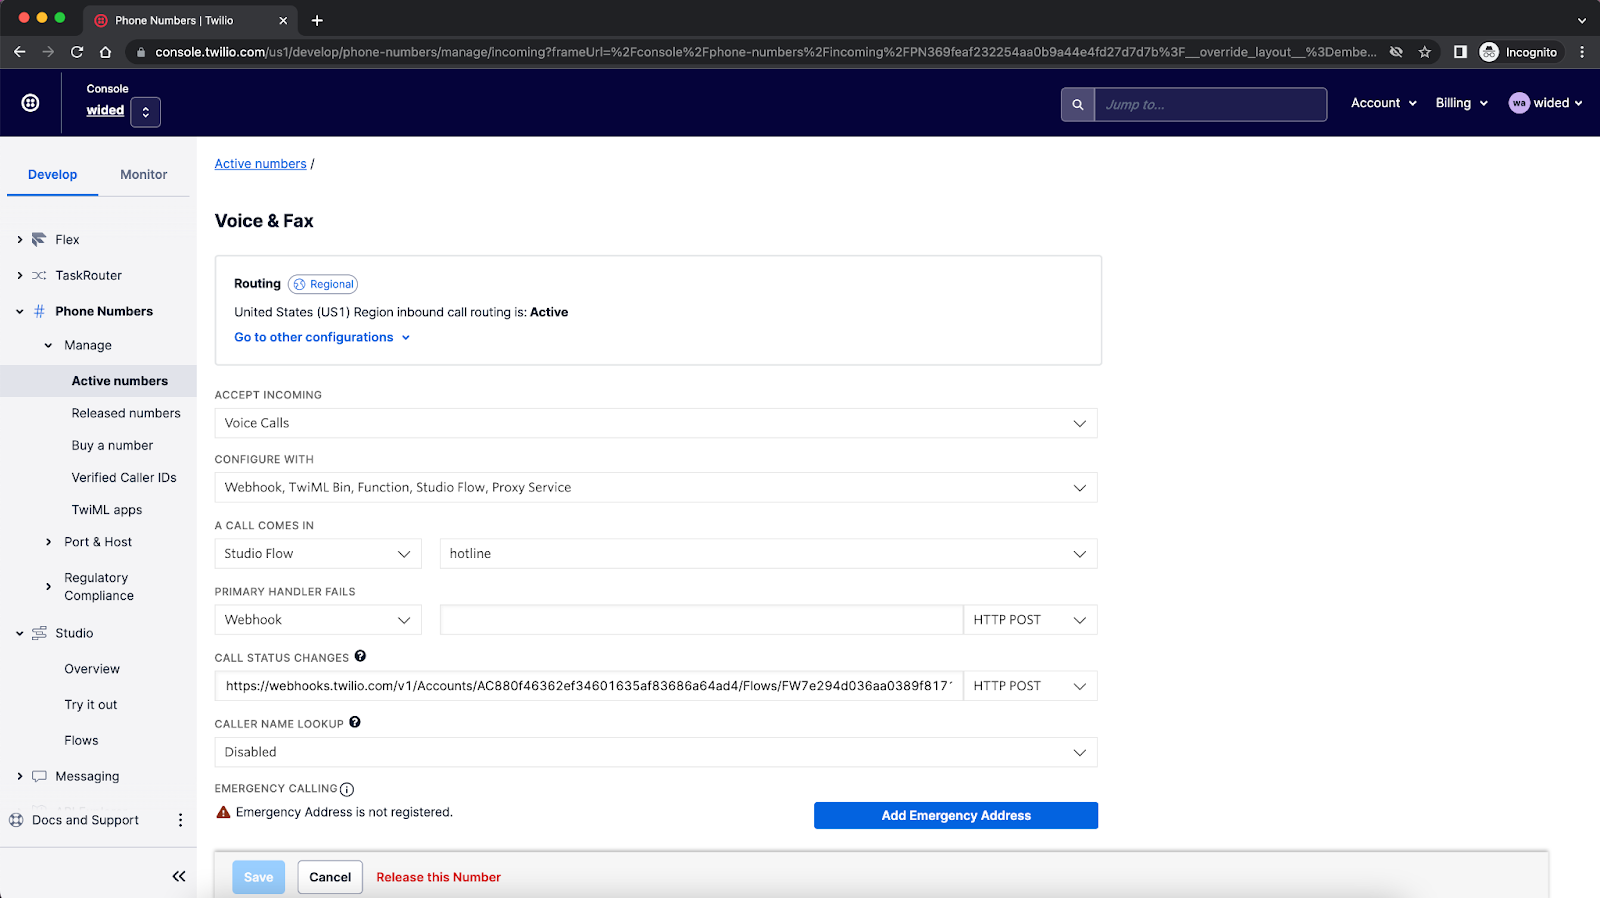
Assign a phone number to your flow
Before you start building the hotline, one last step is to link your Studio flow to your Twilio number. You can access the "Active Numbers" page in the Console, click the desired phone number to modify, scroll to the Voice section, and adjust the phone number's routing by pointing to the Studio flow you created. At last hit the Save button and you’re good to go.
Widgets that make up your flow
We set out with the task of creating a flow to gather customer feedback through a survey and the main ingredient to achieve this is Studio Widgets. Widgets are the building blocks that you can drag and drop onto the Studio canvas to perform specific Twilio tasks.
Greet the user
To begin, the flow starts by expecting a customer to call in and be greeted with a message. To achieve this, use the Say/Play widget.

Add the message that you want the IVR to "say" and attach this widget to the “Incoming Call” of the Main widget. Apart from the multiple languages and dialects you could choose, you can also select the voice type that speaks the text. If you choose to play a message instead of saying a message, you can choose to select the “play a message” from the “Say or Play a message” dropdown. You could add aURL pointing to an audio file that could play a recorded voice or music.
Gather information
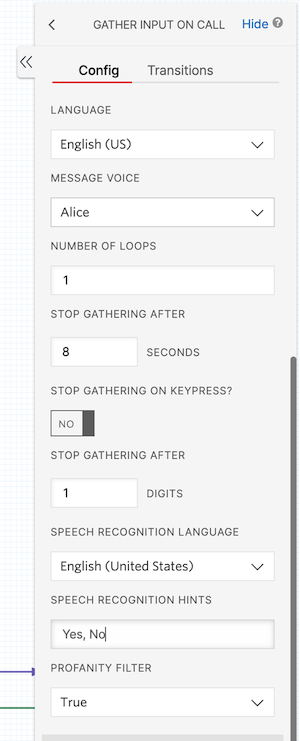
Once we have greeted the user, we ask for their consent to participate in a survey after the call. The information could be either collected through DTMF tones or speech-to-text. We can achieve this by using the Gather widget from the Widget Library.
In this example, we want the user to be greeted in English and gather input through DTMF and voice. However, we would like to restrict the inputs to either "Yes" or "No", and have a profanity filter. We configure our "Gather Input On Call" widget with these considerations:
Pass the call to the agent
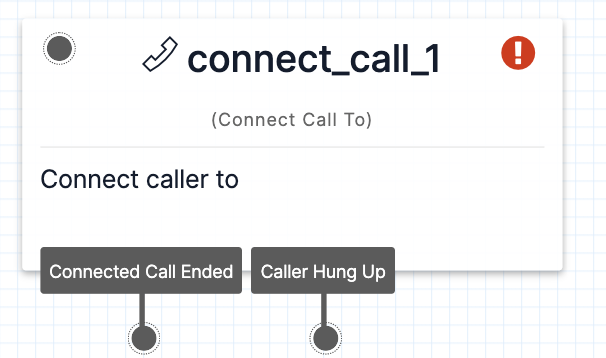
Great, you now have the necessary information collected. Next, you can pass the call to the agent who will answer the call. We have a pool of agents to call, and the first agent to pick up the call gets connected to the customer. This can be achieved by the "Connect Call To" widget and by setting the "Connect Call To" attribute to "Multiple Numbers (Simulring)", we would ring all the agents simultaneously, and the first one to attend would be connected to the customer. Similarly, it's also possible to call a single number or add another user to a conference call (more than 2 people in a single call) with the agent. Once the call is done, you can choose how the flow should proceed, given who disconnected the call, the caller, or the agent.
Bring in some logic
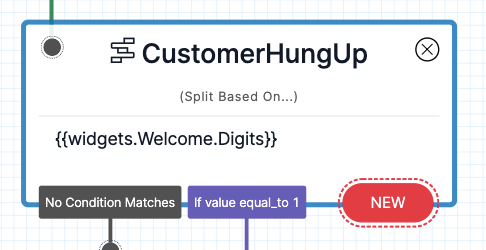
One of the crucial parts is to have some logic in your flow. In this case, it is where the user opts in to the survey (or out!). The next widget accesses the digit that the caller pressed when asked for their consent for the survey, if they had chosen 1, redirects them to the survey, and if not, disconnects the call with a goodbye message. Having logic checks like this helps us keep the flow generic, handle many cases, and make the flow work for multiple use cases. By using the "Split Based On" widget, you can choose to split the flow based on the values set in any of the previous steps.
Call a subflow
Finally, we reach the part where we take the user through our survey. And yes – you guessed right – we also built the survey with a Studio flow. This makes it a lot easier to maintain your customer journey across multiple Studio flows, as it keeps the development work modular and your Studio flows less cluttered. Of course, we can move in and out of flows by using the "Run Subflow" widget. In the “Run Subflow” widget choose your Survey studio flow from the dropdown “Select a flow” and click Save.
With the “Completed” and the “Failed” states, you can choose to connect them to a different widget.

Voila, you now have your entire Studio flow put together by adding everything together! Click on the red “Publish” button, and your IVR is live for everyone to test it.
Thank the customer for the survey with an SMS
Let's end the survey with a message to the customer, thanking them for their time in taking the survey.
We’ll send our message via SMS. Add a "Send message" widget and connect it to the "Completed" part of the Run Subflow widget. Don't forget to add your message to the body property of the widget.
If you have done all the steps above, your entire Studio flow should look like this:
![[Imported from GDocs]](/content/dam/twilio-com/global/en/blog/legacy/2022/serverless-ivr-post-call-feedback/EOOoyhgP9Pr3lef2ZjyZa8UVMu_s_Zfyq4wB5MVvr49Qcd8oqGZVNr7N_FSz0YTfZbJB6aUGZK1a2q.png)
For the developers out there
What about those situations where the user disconnects before taking the survey? It would be great to call them back automatically and start the survey. To accomplish this, we make use of Twilio Serverless.
With Serverless Functions, you can have a Node.js endpoint reachable through a public endpoint, all hosted on Twilio. Check this GitHub repository on how you can quickly get started with the function.
Additionally, all the widgets we saw until now are also programmable by working with TwiML (Twilio Markup Language), an XML document with Twilio commands that perform the actions of the widgets.
And that’s a wrap! We have successfully put together the entire flow. It's time to pull out your phone and test this. Call the number to which you have connected this Studio Flow. You should be able to go through the entire journey.
And with that, you now have a serverless IVR helping you collect post-interaction feedback! If you liked this, you should also read this post by Sarah where she talks more on IVR and the art of creating flows with Twilio Studio.
It’s now your time and as we always say at Twilio, we can’t wait to see what you build!
Developer epilogue: do try this at home
You can always recreate this flow step by step, but if you want to test it out, you can import the flows from a JSON (Hotline, Survey). All you need to do is follow the same steps to create a Studio flow and pick the Import from JSON option. Then click on Next and paste the JSON representation of the flow.

Prashanth Swaminathan is a tech enthusiast with a love for solving problems. He helps teams leverage the power of Twilio and build high-quality products. He can be reached at pswaminathan [at] twilio.com
Wided is a Solution Engineer at Twilio in Berlin. In her role, she brings to life a unique and vibrant intersection between people and technology by helping customers build creative solutions using Twilio. You can reach her at wagrebi [at] twilio.com


Related Resources
Twilio Docs
From APIs to SDKs to sample apps
API reference documentation, SDKs, helper libraries, quickstarts, and tutorials for your language and platform.
Resource Center
The latest ebooks, industry reports, and webinars
Learn from customer engagement experts to improve your own communication.
Ahoy
Twilio's developer community hub
Best practices, code samples, and inspiration to build communications and digital engagement experiences.