Streaming Studio Flow Executions with Event Streams
Time to read: 4 minutes
August 03, 2021
Written by
Reviewed by

In this post, you will learn how to stream Twilio Studio Flow Executions with Twilio Event Streams. With Studio events being fully supported on Event Streams, you can now leverage webhooks to trigger external workflows or log steps in real-time as your Flow executes in Studio.
Before Studio support for Event Streams you had two ways to achieve this:
- Adding HTTP Request widgets throughout your Flows to push events out to your external applications - This added complexity to the Flows and was largely a manual process.
- Polling the API’s Executions and Steps endpoints to retrieve complete logs for reporting - This required running batch jobs on a schedule to page through all the records and was a cumbersome process.
So why is this useful?
- It gives you additional options for triggering programmatic actions beyond a single webhook endpoint
- It removes synchronous dependencies between your services and Twilio API results / responses
- It offers better retry and delivery guarantees than standard webhook responses
- It is an integration approach for the modern microservices architecture as it allows the respective systems to function independently
What’s Required
- A free Twilio account (sign up for free using this link and receive $10 in credit when you upgrade your account!)
- A Twilio Phone Number
- An Executable Studio Flow in your Twilio Account
- The Twilio CLI
- Node.js installation along with express, socket.io, and body-parser modules
This app has four main parts:
- A sink destination configured on your Twilio account
- A Node.js backend listening for events from your Twilio account
- An ngrok tunnel to your local backend server
- A basic front-end to render events from your Twilio account
Build
Create a Webhook Sink
Sinks are the destinations to which events selected in a subscription will be delivered. Twilio Event Streams supports Amazon Kinesis and webhook sinks. We will be using a webhook sink in this blog. While creating a webhook sink, we need to provide a publicly accessible URL to configure the webhook service with. Check out Phil Nash’s post on how to set this up using ngrok.
Run the following command from your command prompt or terminal:
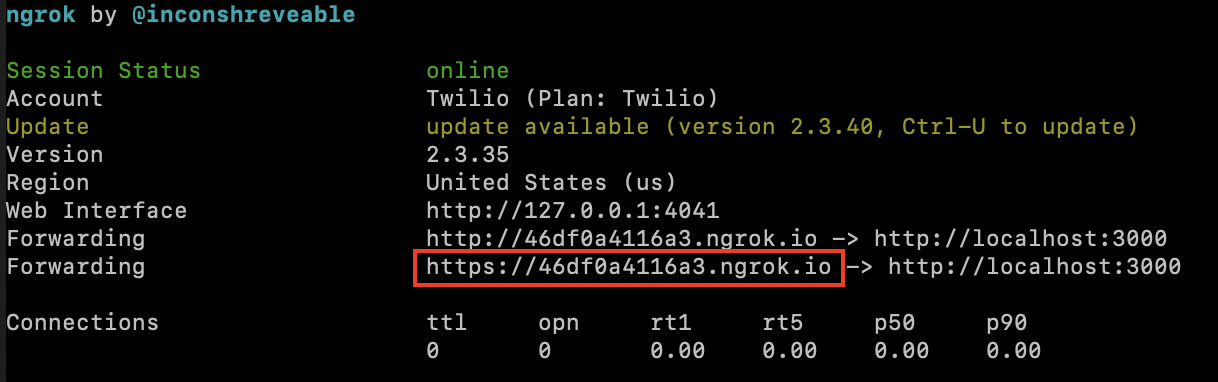
Now that you have your own publicly accessible URL (mine is highlighted within the red box above), it’s time to create a webhook sink in a new terminal session:
While running the above command on your terminal, remember to replace <your publicly accessible URL> with your actual URL. Once you run your command, you will see a response with your sink’s SID. Make sure you save your sink SID!

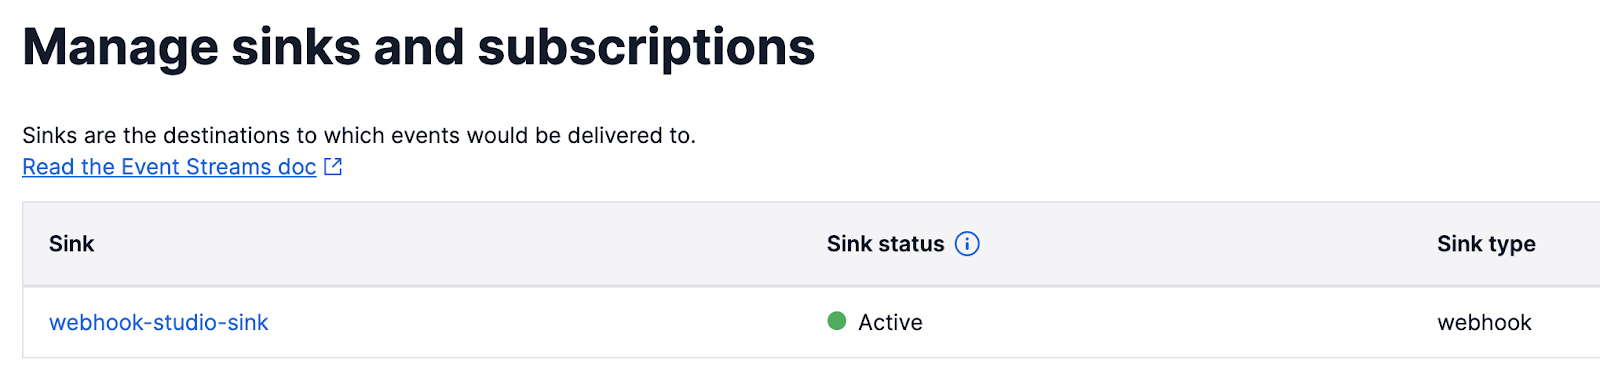
You can also verify that your sink has been created on the Event Streams page of your Twilio Console.
Note that in a production app, you would set up a webhook on a dedicated server that's hosted online, but for testing purposes you will use a local server with an ngrok tunnel. Additionally, if you are using the free version of ngrok, you will need to keep this tunnel session open for the rest of the steps of this blog. This is because with the free version, a new public URL is generated for each session which will no longer be the same URL as our sink’s destination URL.
Subscribe to Studio Based Events
We will now use the Subscriptions API to subscribe to specific Studio events.
Studio Event Streams have 3 types of events we can subscribe to:
- Execution Started: fires at the beginning of each Execution
- Step Ended: fires each time a step is completed in an Execution
- Execution Ended : fires at the end of each Execution
Let’s subscribe to all 3 of them!
In a new terminal session (remember not to close your ngrok session from step 1), run the following command:
Once again, while running the above command make sure to replace <Your sink SID from Step 1> with your actual sink SID from when you created it in step 1.
Set up a backend server to listen for Studio Based Events
It’s time to set up our backend server using Express that will listen on the sink destination address for Event Streams coming as HTTP requests.
Create a folder on your computer called event-streams. This will be your project’s root directory, and will house both your frontend and backend folders.
In the src directory create a file calles app.js and add the following script to this file:
The above script serves as your backend which listens for events being delivered to the /studio endpoint which we specified in our sink destination in step 1.
Wire up the frontend
Back in your command prompt, navigate out to your project’s root directory (event-streams), and run the following commands to create the public directory where we will add our html, css, and javascript files for the frontend:
In the event-streams/public folder create a file called index.html and add the following HTML script in this file:
Next, create a css file and name it styles.css. Add the following style definitions to this file:
Finally, we create a javascript file which uses the socket.io library to enable real-time, bidirectional and event-based communication between the browser and our backend server to render our Studio events.
Test your app
Now that your backend and frontend files have been built, it's time to test them out!
At this point you should be ready to start your server and run your application! In your terminal, redirect to your project directory and type in the following command:
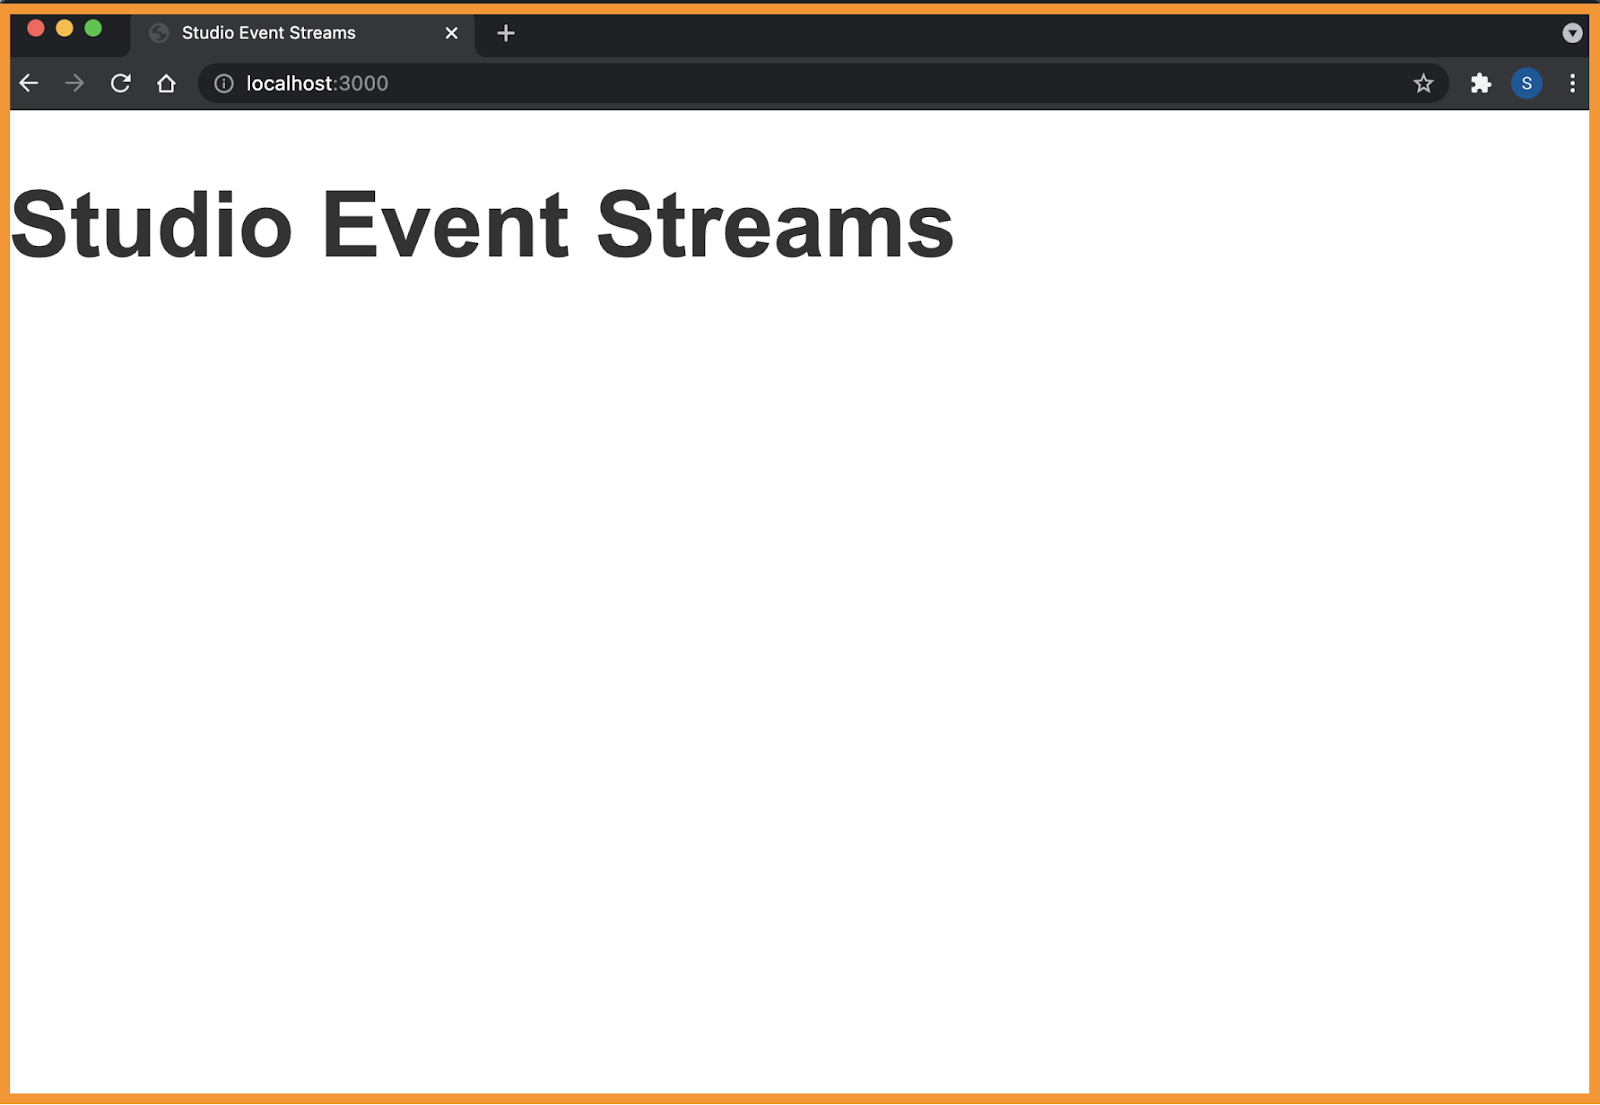
This will start a local server on port 3000, and you’ll be able to view your app at http://localhost:3000.
It will look similar to this:
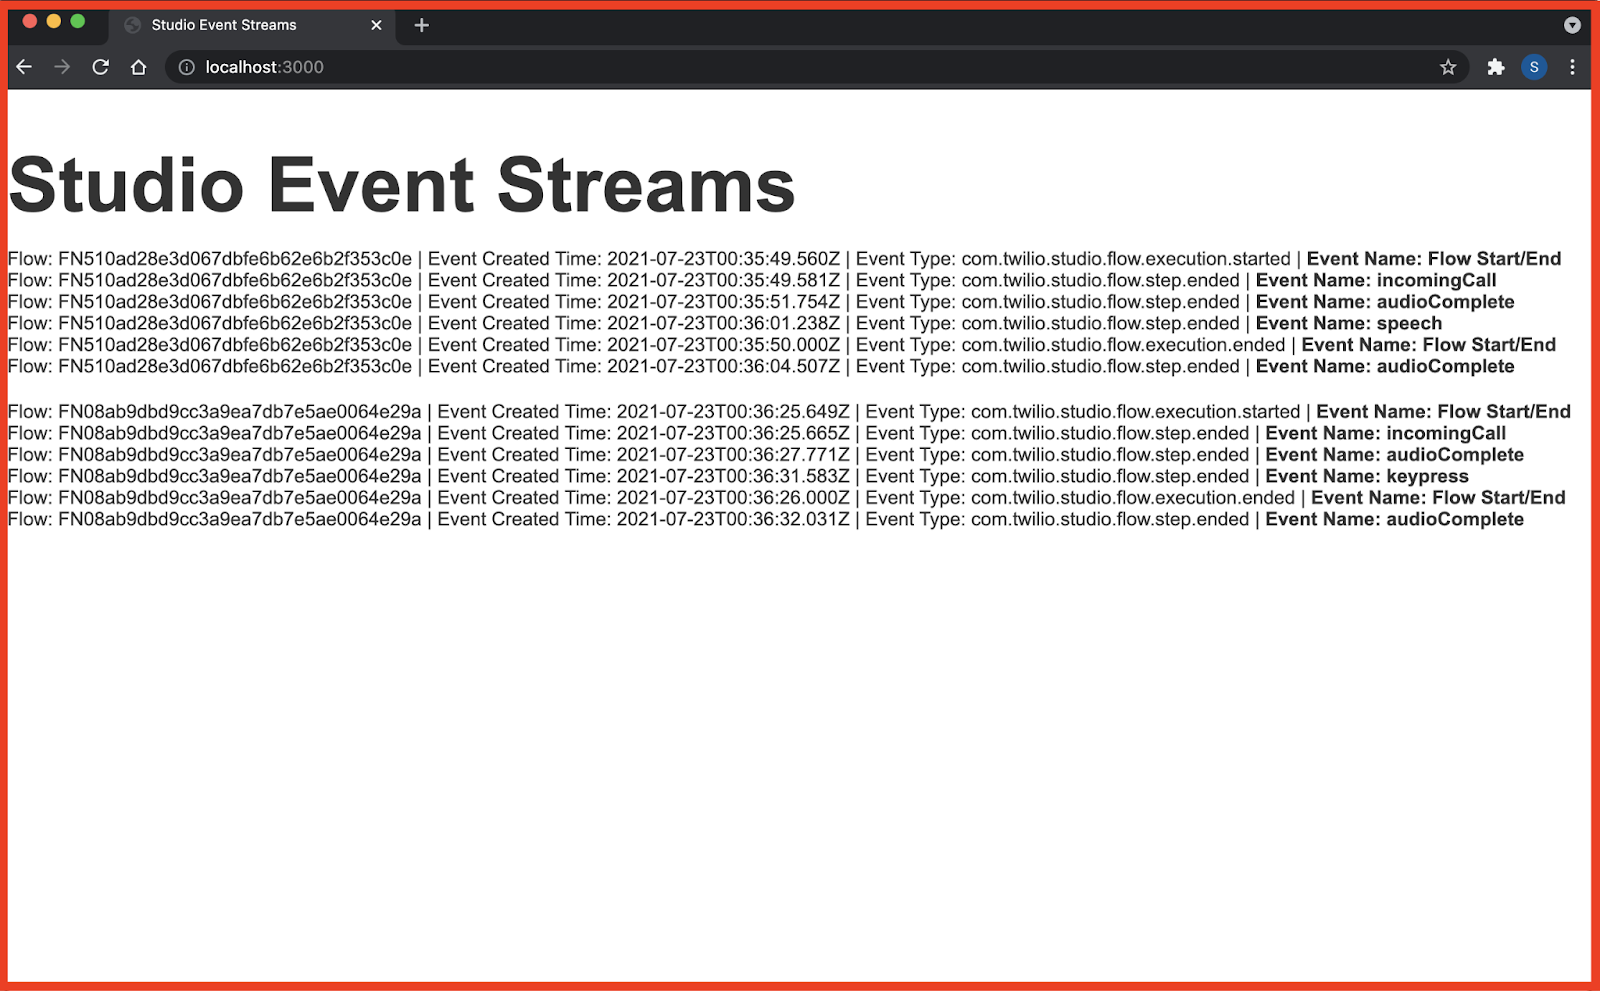
Now is the time to execute a Studio Flow from your account by either calling or texting your Twilio phone number associated with your Studio Flow. You can also trigger a Studio Flow with an API call.
Here is a quick look at what the events will look like once they start rendering to your frontend in real time:
Summary
This tutorial gave a small window into using Twilio Event Streams with Studio. This is the first in a series of blogs. In the second blog, I will illustrate how you can easily create a visual map of Studio Flows. Aside from rendering events, you can also create real-time visualizations that consume these event streams and aggregate them into charts. Perhaps, you can create a dashboard that shows metrics on how users make decisions when interacting with an IVR solution built on Studio.
I can’t wait to see what you build!
Shashwat Johari is a Solutions Engineer at Twilio and a lifelong technology enthusiast currently living in the world of Twilio’s APIs. You can find Shashwat at sjohari [at] twilio.com.


Related Resources
Twilio Docs
From APIs to SDKs to sample apps
API reference documentation, SDKs, helper libraries, quickstarts, and tutorials for your language and platform.
Resource Center
The latest ebooks, industry reports, and webinars
Learn from customer engagement experts to improve your own communication.
Ahoy
Twilio's developer community hub
Best practices, code samples, and inspiration to build communications and digital engagement experiences.