Agent Copilot: configure wrap-up notes (Public Beta)
Public Beta
Agent Copilot is currently available as a Public Beta product and the information contained in this document is subject to change. This means that some features are not yet implemented and others may be changed before the product is declared as Generally Available. Public Beta products are not covered by a SLA.
Not a HIPAA Eligible Service or PCI Compliant
Agent Copilot is not a HIPAA Eligible Service or PCI compliant and should not be used in Flex workflows that are subject to HIPAA or PCI.
Automated wrap-up notes have three features: sentiment, disposition code, and summary.
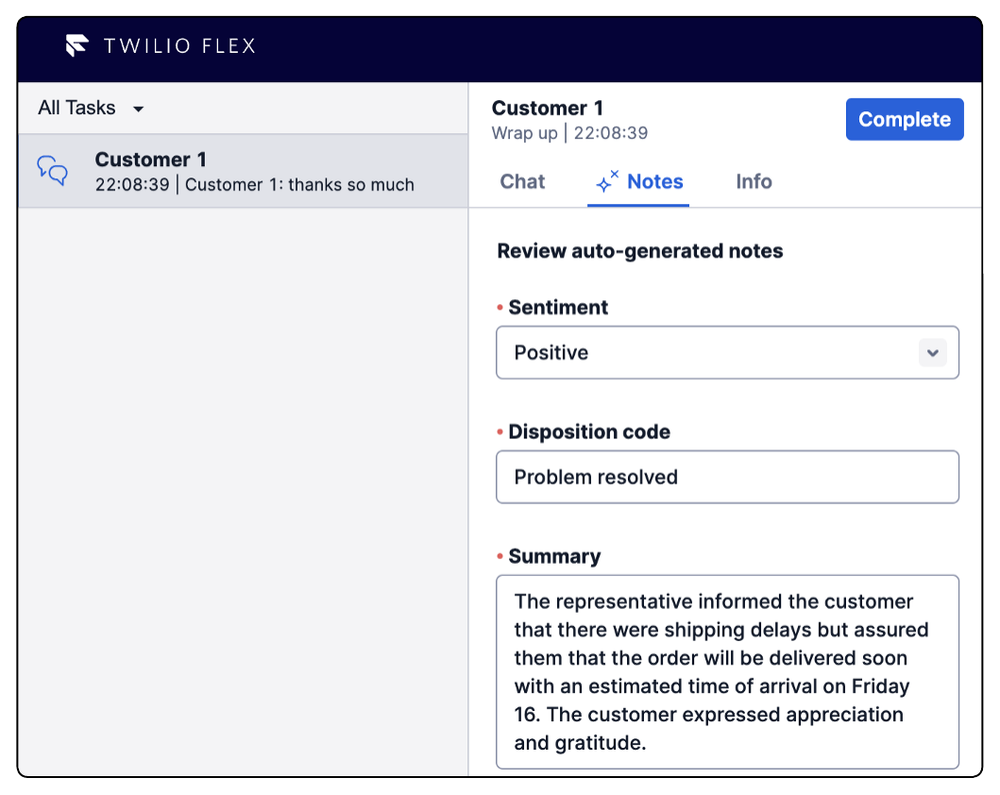
Sentiment describes the customer's overall attitude during the interaction. When an agent ends a conversation task, Agent Copilot uses AI to detect customer sentiment and automatically assigns one of the following:
- Positive
- Neutral
- Negative
As an admin, you can decide whether or not an agent can see and edit this field in the Flex UI component.
Agent Copilot generates a conversation summary during agent wrap-up. You can set the preferred summary length as short, medium, or long. If your settings allow agents to review notes, then agents can also view and edit the summary.
A disposition code describes the outcome of a conversation task. Agent Copilot uses the disposition code name you create, as well as the description you provide, to assign a code to a conversation. By default, Agent Copilot doesn't provide any pre-configured disposition codes. Some examples of codes you could create include:
- Refund processed
- Technical issue resolved
- Not resolved
- Wrong department
- Other
If you don’t configure any disposition codes, or no codes are active, then agents will see a grayed out field in the UI.
- The AI model uses the name of the disposition code to categorize conversations, so make sure the name is clear and descriptive. You can’t change the name once saved.
- We recommend creating an "Other" disposition code as a catchall for the AI to use if no other disposition codes apply.
- If providing additional context:
- Keep context short and concise. Additional context can increase generation time.
- Avoid company-specific knowledge and terms. To help with this, pretend you are talking to an external contractor who's new to the company.
- Agents cannot add their own disposition codes.
- You can have a maximum of 30 active and 200 total disposition codes.
- You cannot delete a disposition code or change its name once created. If you no longer want to use a disposition code, you can disable it, but it will still be included in the total limit.
Make sure you also have:
- Flex UI 2.6.x and above
- Flex Conversations (not legacy Messaging)
- Access control configured
- In Twilio Console , go to Flex > CustomerAI > Agent Copilot .
- Under Wrap-up notes , click Manage auto-generation service .
- Under Auto-generation settings > Disposition code field , click Manage disposition codes .
- Click Create new disposition code .
- Under Disposition code name, enter a name that describes the disposition code. We've included some examples below. For more tips, see Tips for creating disposition codes.
- Refund processed
- Technical issue resolved
- Not resolved
- Wrong department
- Other
- Optionally, under Context for Agent Copilot , add information about the disposition code to help the AI model categorize conversations. The model already uses the information in the disposition name to correctly categorize, so only add additional details to the context field if necessary. See Tips for creating disposition codes for more information.
- Click Create . A unique disposition code SID is created.
- To finish configuring wrap-up notes, return to Agent Copilot in the other tab.
- Under Summary field choose the preferred summary length from short, medium, or long. By default, the summary is set to medium.
Note There may be occasional variation in summary sentence length.
If you'd like to send wrap-up note data to your own system, like a CRM or database, then you can add a webhook URL to receive events. There are two types of note events: note_created and note_updated. For more details, including payload information, see Agent Copilot webhook.
- Under Wrap-up notes webhook URL , enter your URL.
- Select your preferred method: HTTP POST or HTTP GET . Regardless of the request method, Twilio sends the same request headers and payload to your webhook URL.
- To receive data, make sure to validate the request against the signature .
When you are done with configuring wrap-up notes, click Save auto-generation settings.
Info
Before enabling the wrap-up notes service, check your access control settings to make sure Agent Copilot is using the queues you want. Your queue settings apply to all services that use Agent Copilot, not just wrap-up notes.
- In Twilio Console , go to Flex > Manage > Agent Copilot .
- Under Wrap-up notes , click Manage auto-generation service .
- Toggle on Auto-generation service .
- Check Also enable wrap-up notes UI component , if you want agents to see wrap-up notes in Flex UI. If you don’t want to enable the UI component right away, you can enable it later in a separate step.
- Click Confirm .
If you want agents to see and edit wrap-up notes in the Flex UI, follow these steps. Within the UI component, you can choose to hide the sentiment field from agents.
- Under Wrap-up notes UI component , click Manage UI component .
- Under Wrap-up notes fields , you can interact with the preview component. By default, Disposition code and Summary are shown to the agent. However, you can deselect Sentiment if you don’t want agents to see or change the generated customer sentiment.
- Click Save changes .
- Under Component status , click Enable for Flex agents .
Note If you use a custom plugin that affects the End Chat functionality, then wrap-up notes may not work as described in Flex UI.
- Agents cannot add their own disposition codes.
- You can have a maximum of 30 active and 200 total disposition codes .
- You cannot delete a disposition code or change its name once created.
- If you no longer want to use a disposition code, you can disable it, but inactive codes are still included in the total.
- In Twilio Console , go to Flex > CustomerAI > Agent Copilot .
- Under Wrap-up notes , click Manage auto-generation service .
- Under Disposition code, click Manage disposition codes. A new tab will open with all your disposition codes:
- To edit a disposition code, click the pencil icon. Right now, you can only edit Context for Agent Copilot . Once done, click Save .
- To turn a disposition code off, toggle Enable off.
You can turn off Agent Copilot at any time.
- When you disable Agent Copilot, webhook events stop firing for agents in wrap-up.
- Any notes that were generated before disabling will still show under customer history.
- If you disable notes while they're in use, notes will not generate, but agents can still add notes manually. Wrap-up notes won't be disabled until agents refresh Flex UI.
- In Twilio Console , go to Flex > CustomerAI > Agent Copilot .
- Under Enable wrap-up notes , clear Enable .
- Click Save .
To troubleshoot in Twilio Console, go to Monitor > Errors > Error Logs. The error log lists the reason wrap-up notes failed with recommended next actions.