Getting Started with Twilio's Postman Collections
Learning how to use a 3rd party API can be a difficult task. Luckily, visual API development tools such as Postman make the learning journey much easier!
As part of Twilio's rollout of its OpenAPI specification, we now provide a Postman collection which you can use to visually explore and interact with Twilio's API without writing code. In this article, we'll learn how to buy a phone number and send an SMS text message using Twilio's Postman Collection and a Postman Environment.
Before you start, be sure to complete the following prerequisites. You can skip to Getting started with Twilio's Postman Collection if you've already completed these steps and know what Postman is.
- Create a free account with Postman.
- Create a free Twilio account.
Postman is a free development tool for making API calls with a variety of helpful features.
A Postman Collection is a way to group related request templates together in a folder structure. This allows for organization of requests, and even better, Postman allows us to export collections to share with one another.
Instead of referencing the Twilio Docs and creating your own collection, you can visit the Twilio Postman Collection page where you will find the Twilio Developers Workspace.
Click on the Twilio Developers tab to be taken to the collections maintained by the Twilio team.
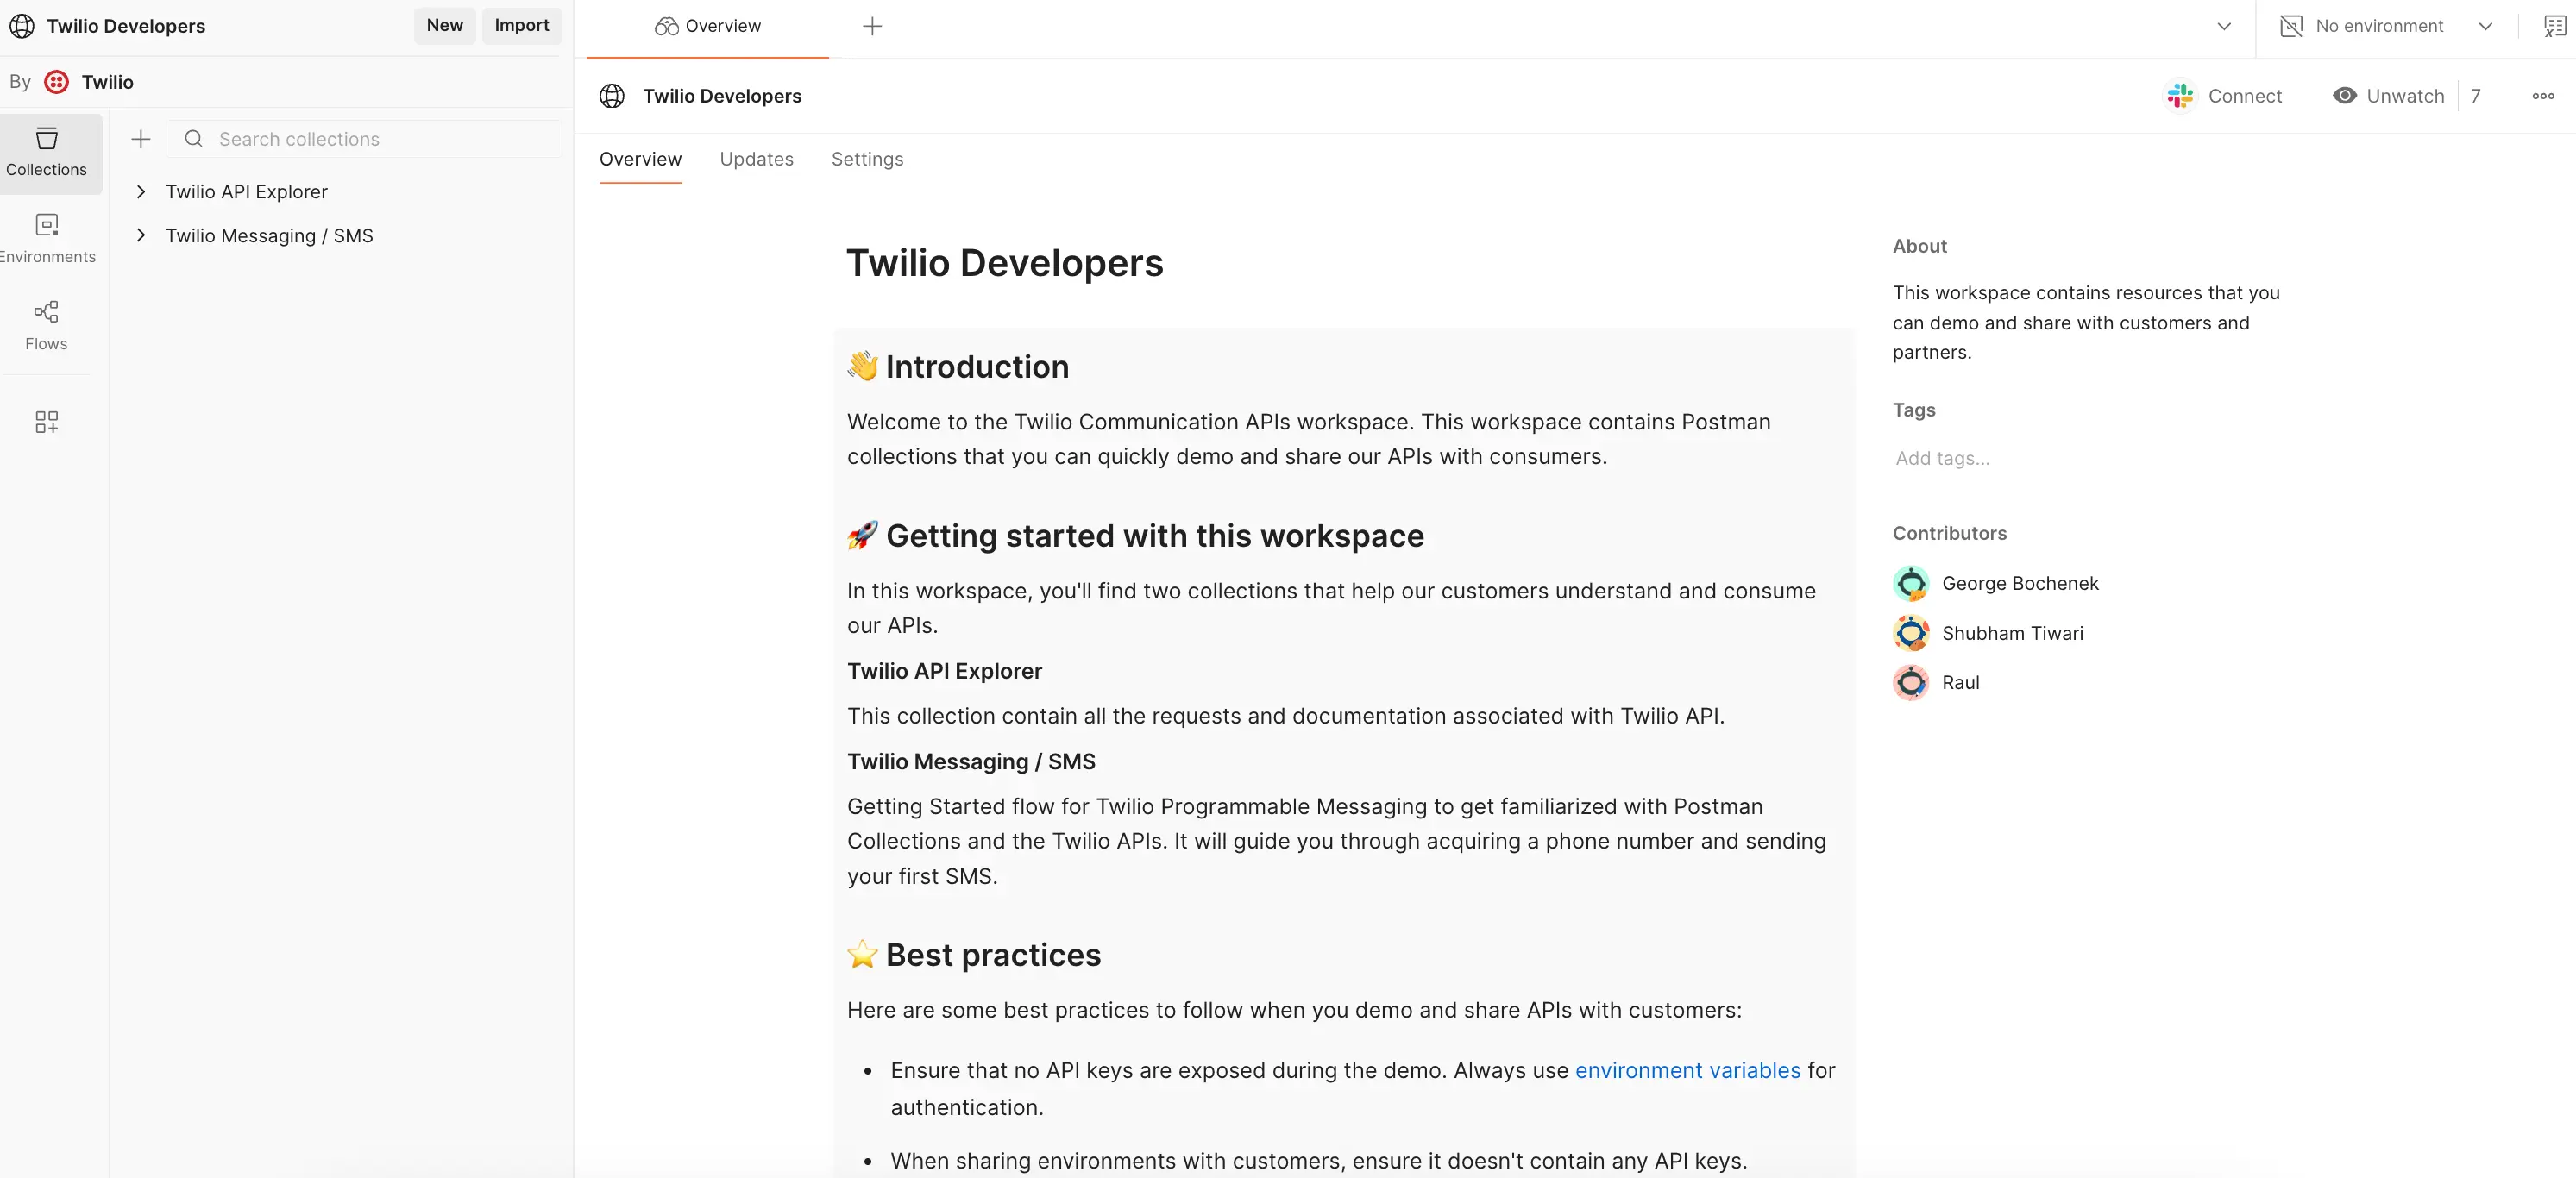
From the Collections tab, click the Twilio Messaging / SMS link to be taken to the Messaging Collection.
Once there, you will see a screen similar to the one below. This page is the Postman web client with the Twilio Messaging/SMS Collection loaded.

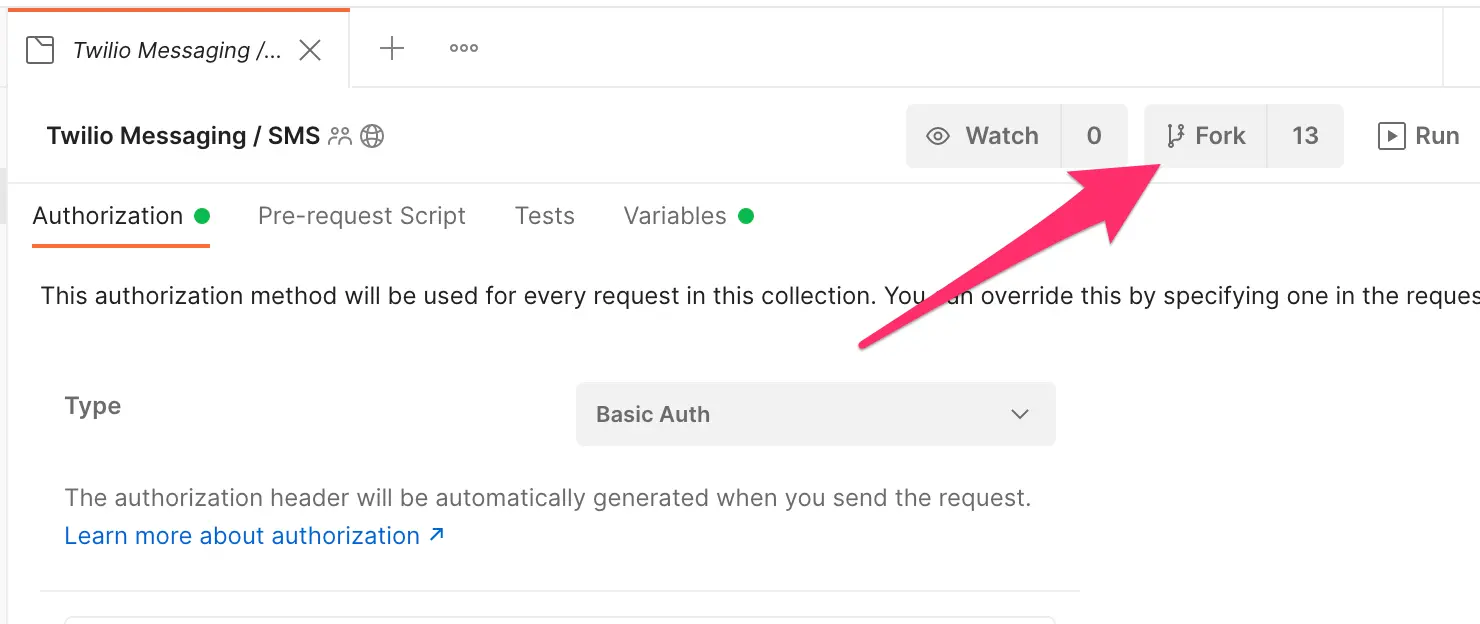
The recommended way to work with a collection is by creating a fork. Doing so enables you to pull in Twilio's changes to the collection over time, and even opens up the option to make changes and submit them as a pull request.
To fork:
-
From the Postman web client, click on the Twilio Messaging / SMS collection in the collections list.
-
Click the Fork button for the collection as shown below.
-
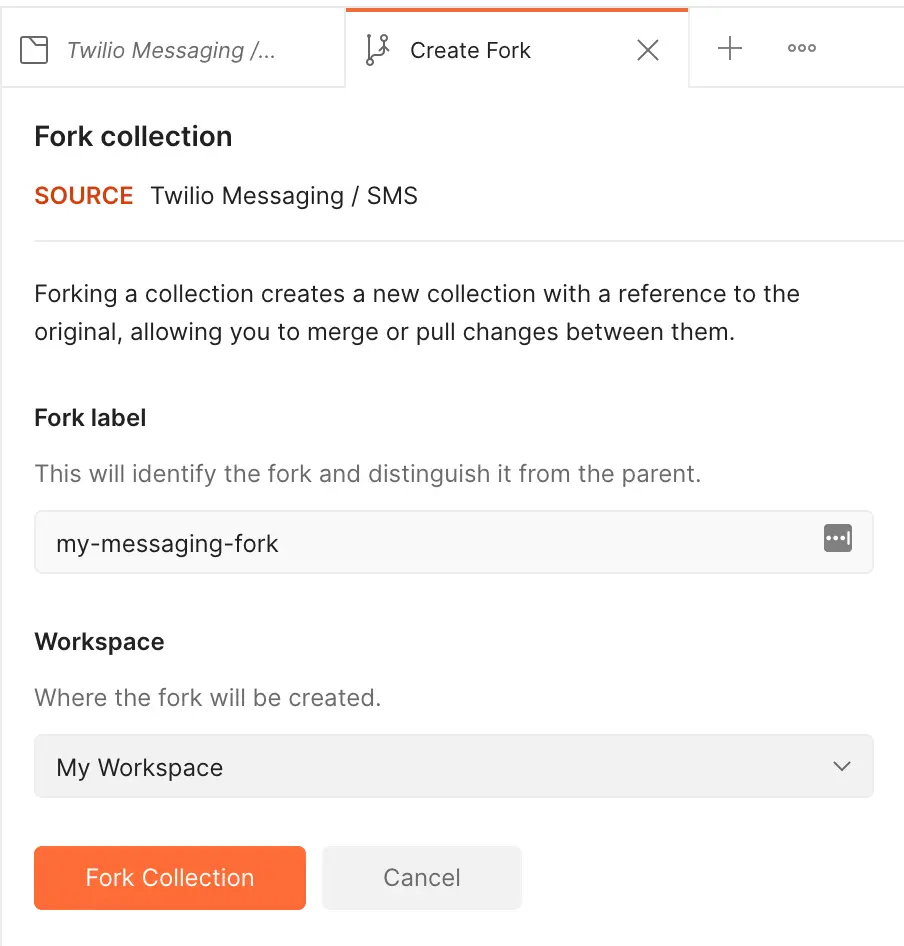
You'll be asked to label your fork. Provide a unique text label for your fork, ensure that the target workspace is yours, then click Fork Collection .
-
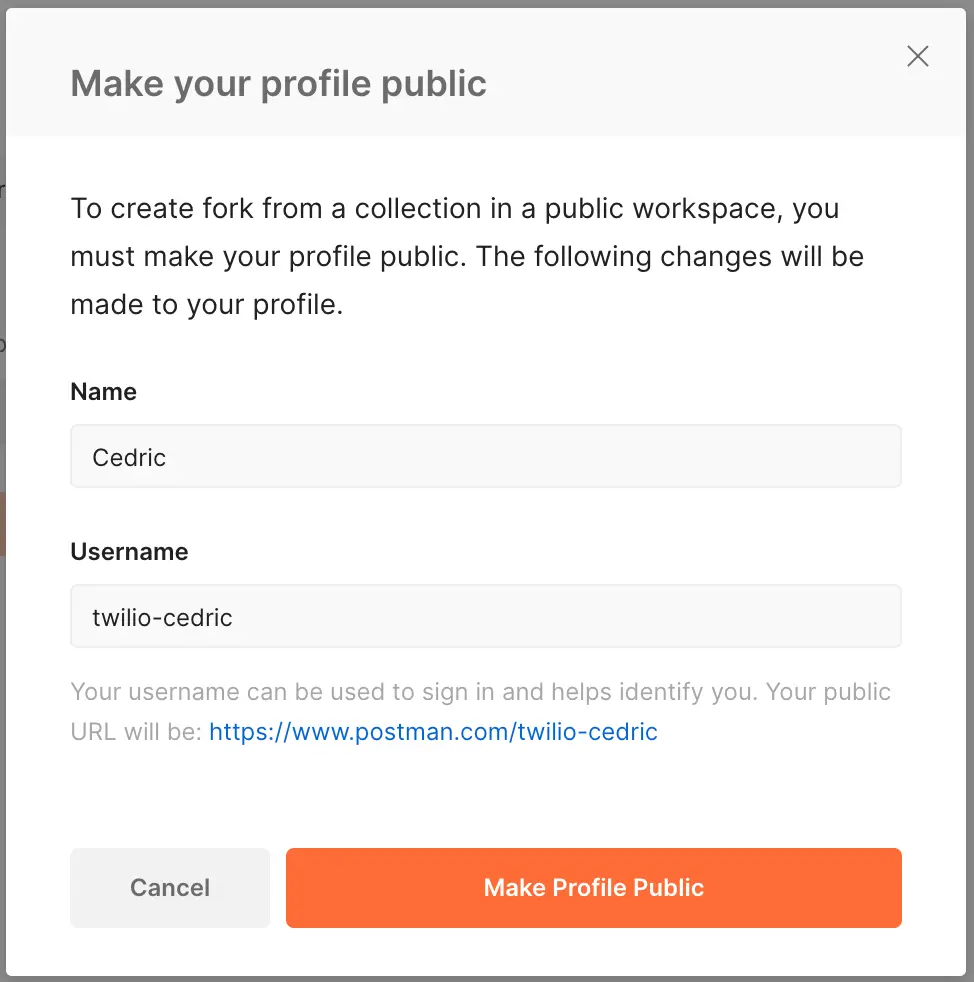
Postman will prompt you to make your profile public. You must provide a name and username to finish creating the fork.
Once the fork is created, you'll be taken to your workspaces, where you will now see your newly minted fork of Twilio Messaging / SMS! If you expand the collection, you'll see a helpful collection of SMS GET and POST requests to explore.
An Environment in Postman is a group of related variables that you can reference when making calls, instead of needing to manually repeat their values throughout your calls.
Similar to collections, you may also create a fork of an Environment. To make the process of setting up your Environment as straightforward as possible, there is a Twilio Environment which you can fork to provide the variables for your forked collection.
To fork the Twilio Environment:
-
On the left-hand side of the Postman web UI click the Environments tab, then select the Twilio Environment.
-
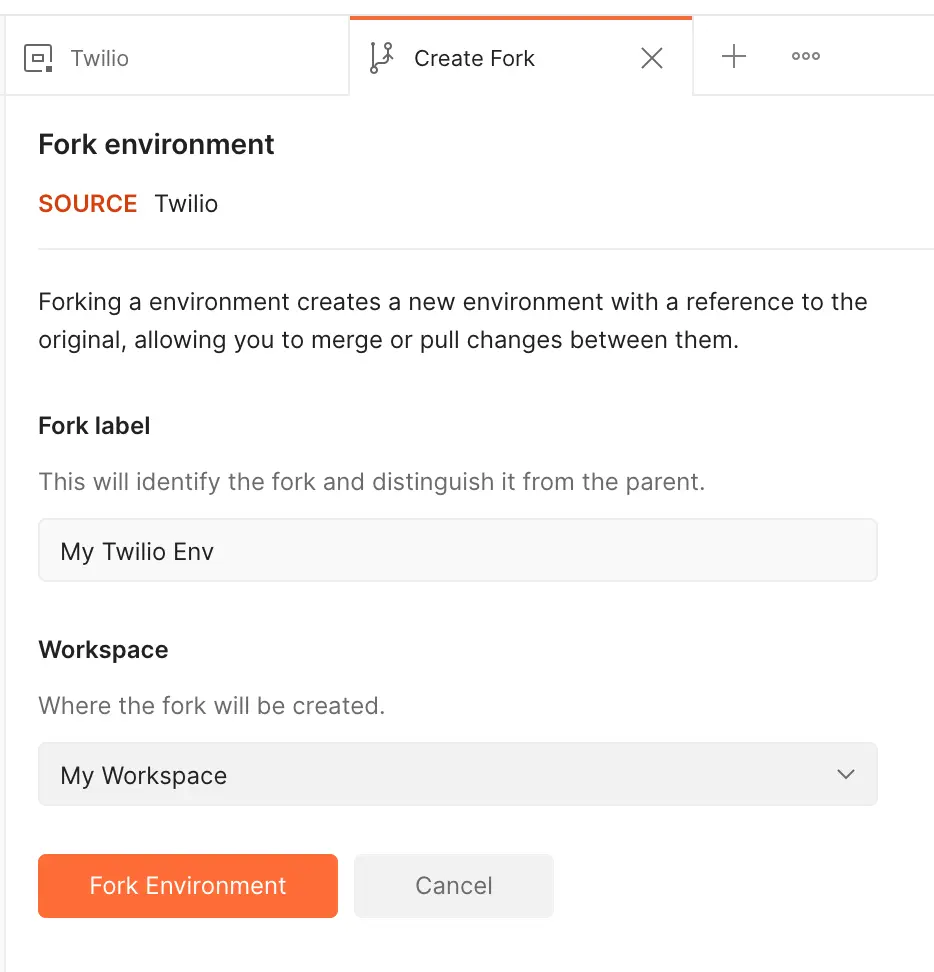
Click the Fork button and fill out the Fork environment form that appears. Provide a fork label and ensure that the Workspace targeted is your own. Click Fork Environment .
Once the fork is created you will be directed to your workspace Environments tab. There you will now see a newly forked Twilio collection with your label. Populate the values for your Account SID, Auth Token, and Twilio phone number (don't worry if you don't already have a number, you'll actually be able to use Postman shortly to get a phone number using only the first two variables!). All of these values can be found from your Twilio Console.
In addition, add a non-Twilio phone number such as your own to send your test text messages to as MY_PHONE_NUMBER. Note that it will need to be in the E.164 format for phone numbers (+1234567890).
This process has created your Twilio Environment, but if you hop directly into your collection and try to make some calls, you'll get errors due to undefined variables such as TWILIO_ACCOUNT_SID and the text of the variable names will appear red wherever they are referenced. Why? Because by default, Postman has no Environment selected.
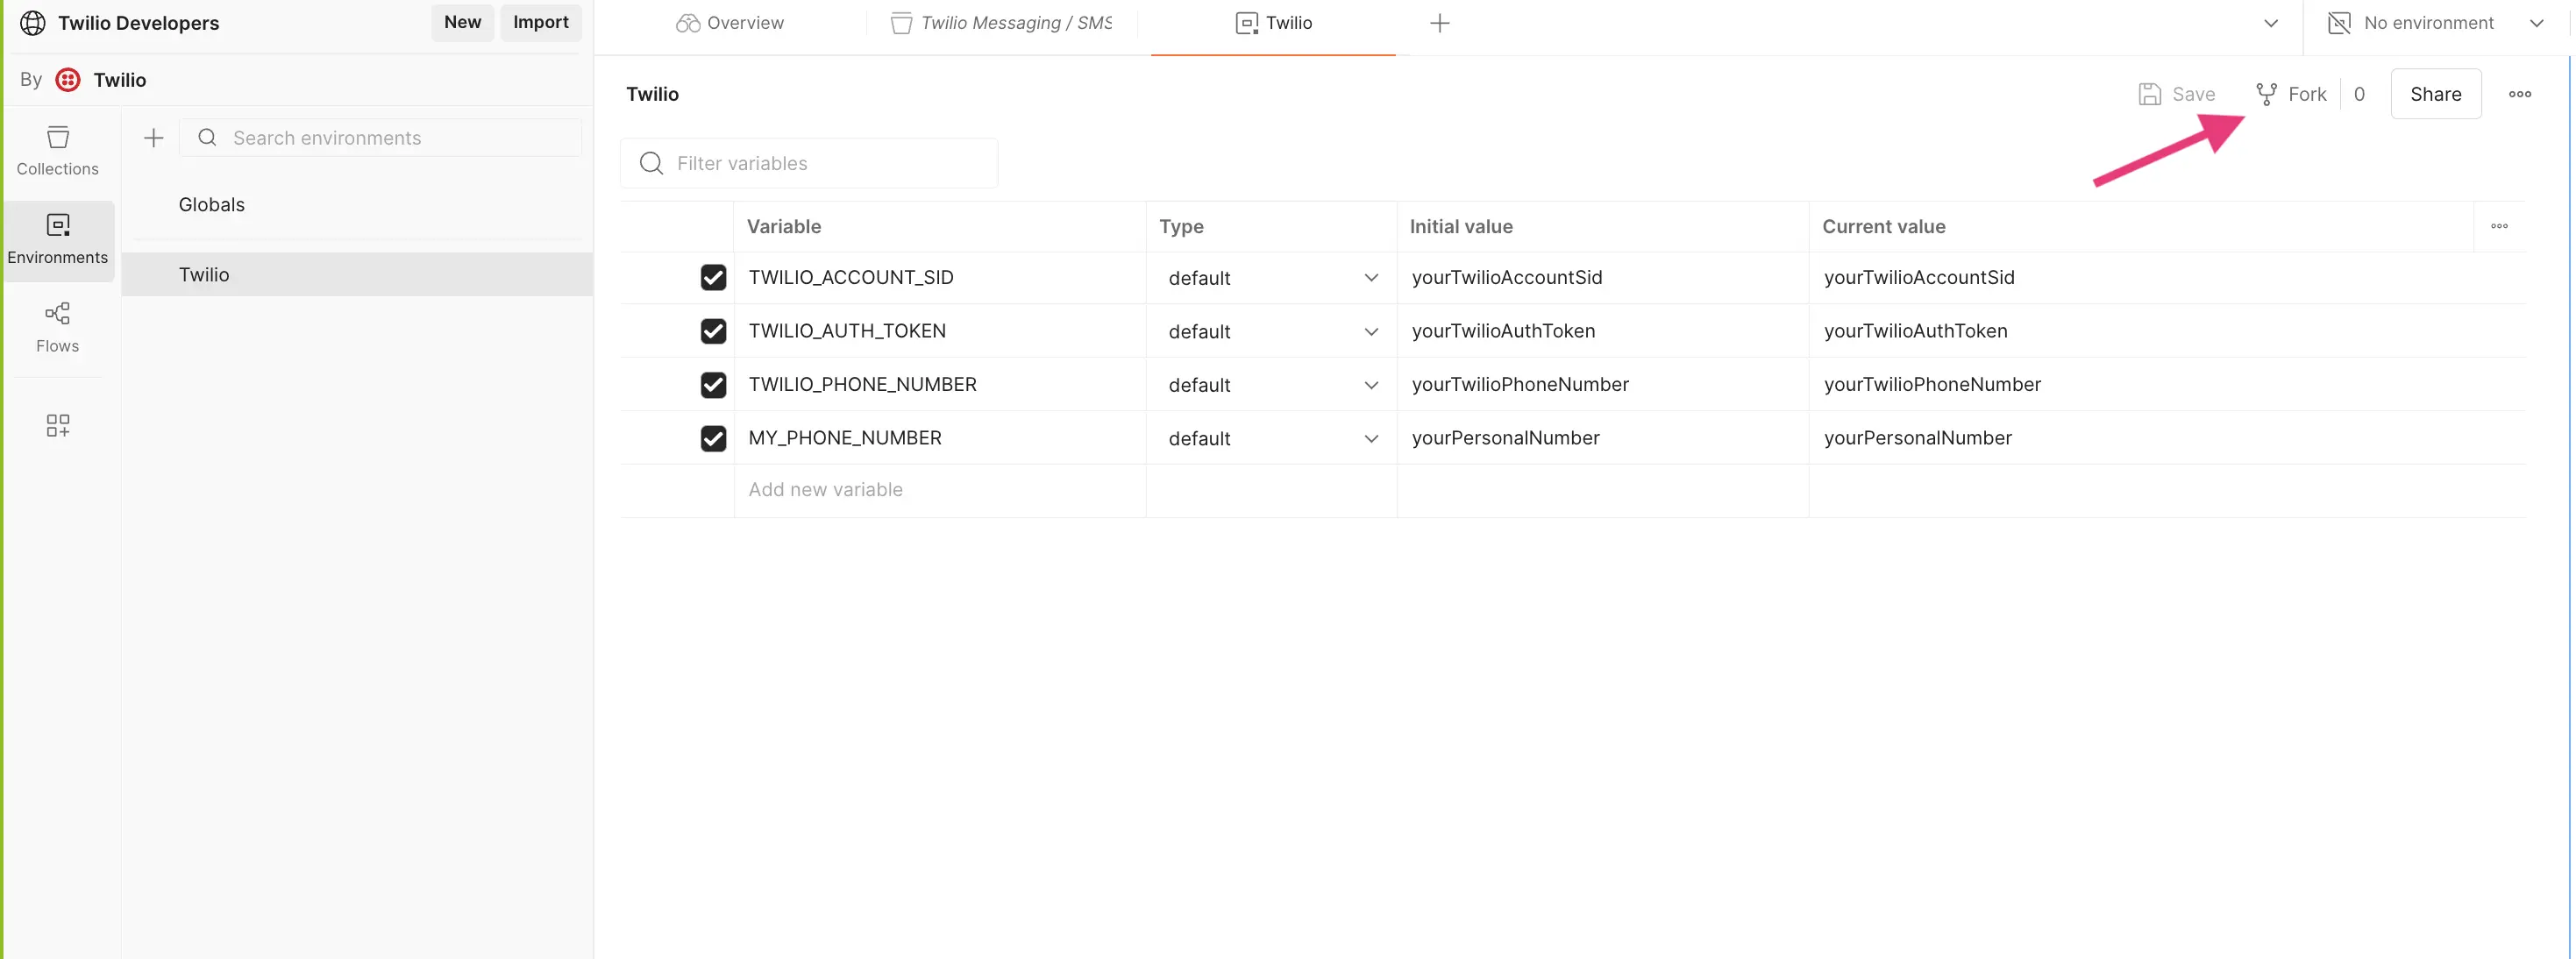
The final step to enabling the Twilio Environment is to find the Environment selector in the top right corner of the Postman UI, click on it, and select your Twilio fork from the list of Environments.
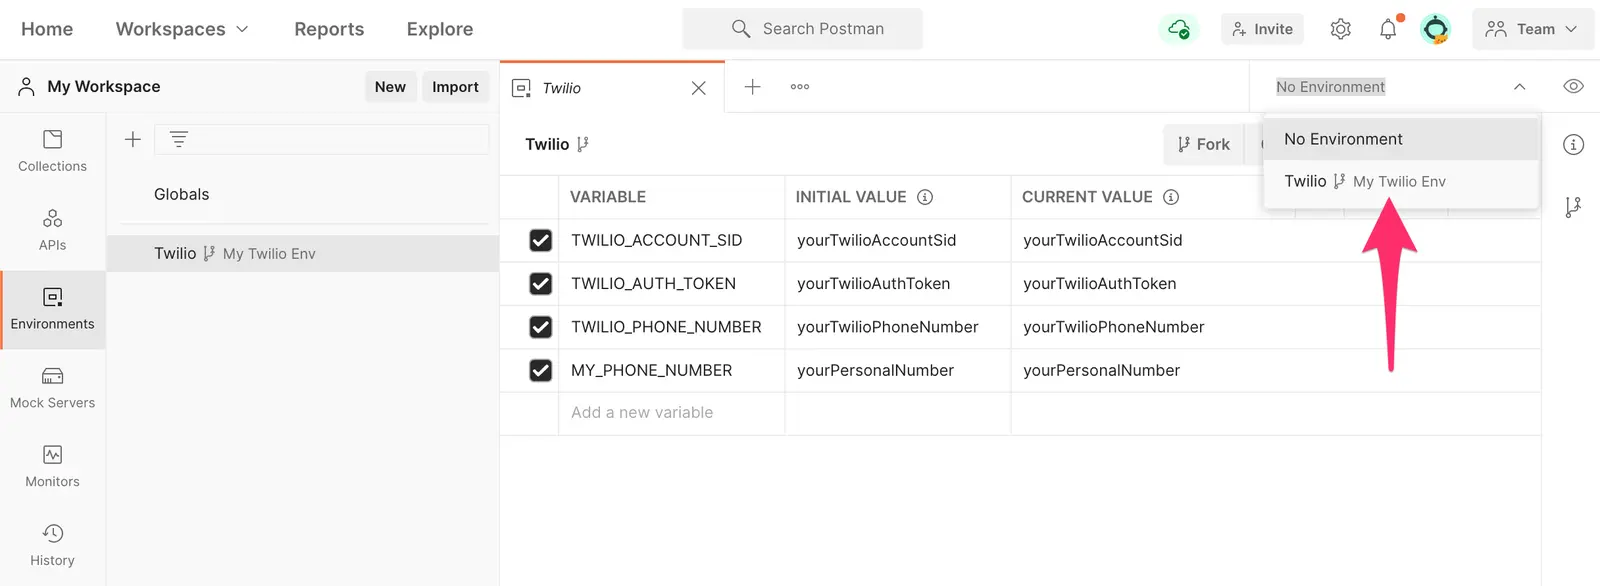
Now, any reference in our Collections to TWILIO_ACCOUNT_SID (and all other variables) will work correctly, and their text color will visibly change from red to orange.
You're all set, now to finally perform some calls to Twilio's API!
Info
If you already have a phone number with Twilio and aren't interested in learning the Postman steps to get a number, you can go ahead and set the Environment variable TWILIO_PHONE_NUMBER to your E.164-formatted Twilio phone number, and skip to the send an SMS message step.
Now that we have our Twilio Collection and Environment setup, let's begin making some API calls. Under Getting Started you'll find four request templates listed in this order:
- Find available phone numbers
- Buy a phone number
- Send an SMS
- List all messages sent from your Twilio number
The first step in our journey is to actually acquire a Twilio phone number that can be used to send SMS and much more. To do this, let's see which potential phone numbers you could acquire. Go ahead and click on the Find available phone numbers call.
Looking at the contents of this call you can see quite a bit of information has already been configured. This is the beauty of Postman Collections! In this case, the following is already set up for you, which otherwise would need to be manually set in a curl command:
- The HTTP [method][],
GET - The URL for listing available phone numbers, along with a template for required route parameters like your Account SID and Country Code
- Values for your route parameters defined through Environment variables, and a pre-populated list of possible query parameters. In this case
SmsEnabledis the only one relevant to this request, and is already selected for you - Authorization is also already handled for you. If you visit the Authorization tab, you'll see that Basic Auth is already configured for you using the credentials defined in your environment variables
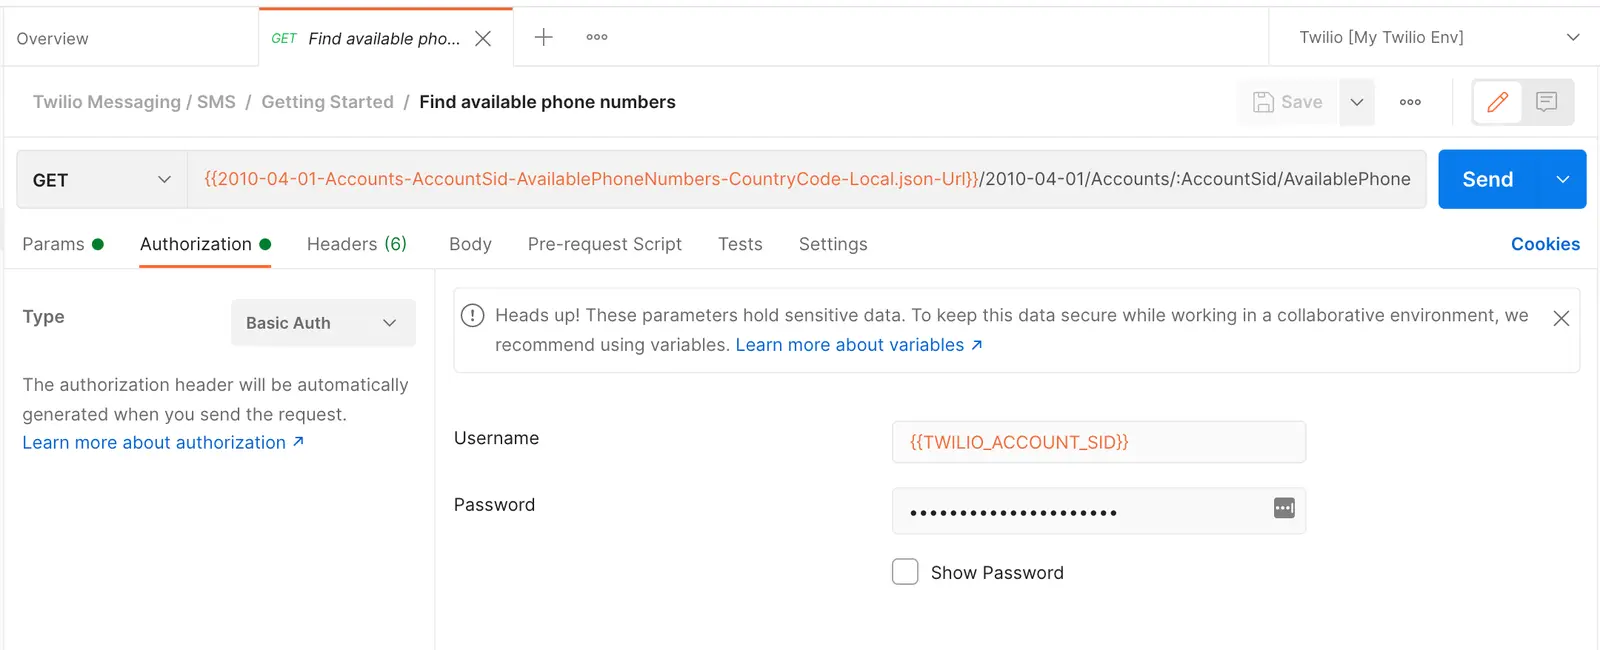
Thanks to all of this setup, all you need to do is hit the big blue Send button! After a few brief ms, you will see a result in the bottom of your Postman client containing a list of available phone numbers to choose from, including some useful metadata such as the response status code, how long the request took, and the size of the JSON you just received. Quite the step up from curl, isn't it?
Once you've decided on an available phone number, go ahead and copy its phone_number value (don't forget the +!) from the response, and let's head over to the next call to Buy a phone number .
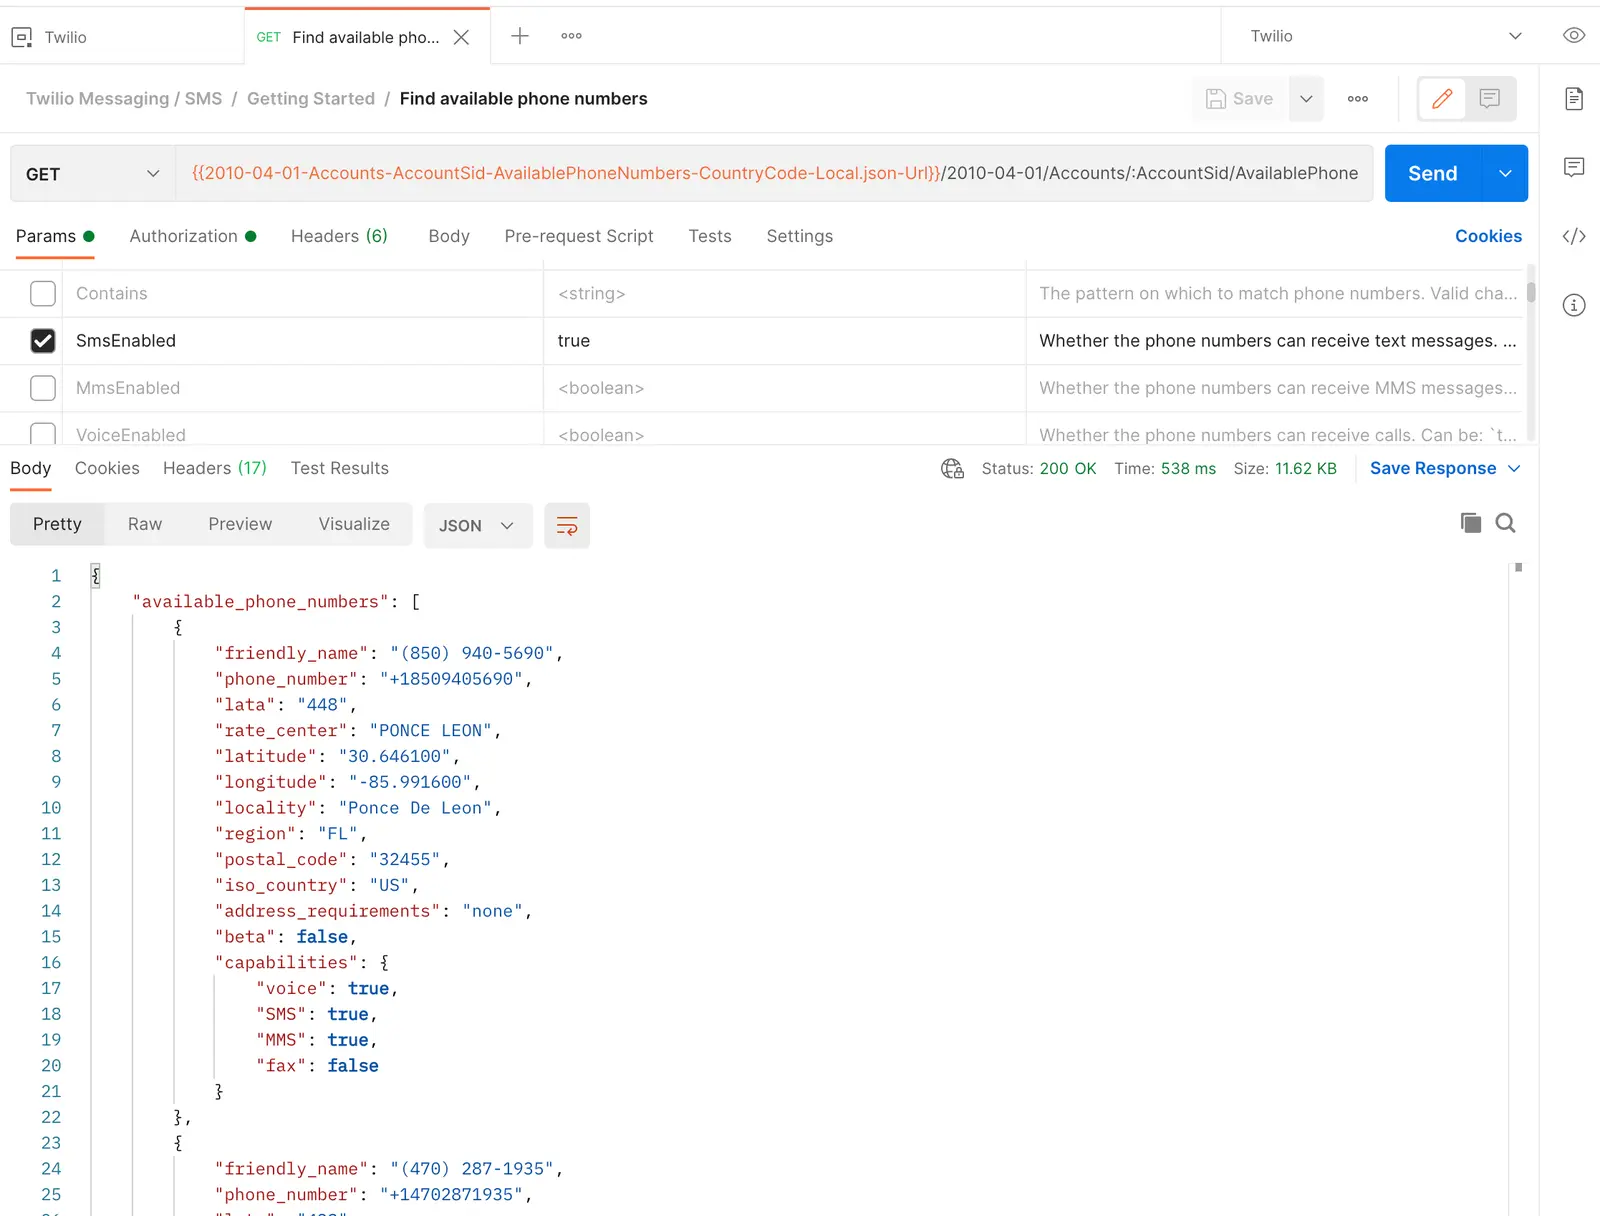
Similar to the previous call, pretty much every necessary detail is set up for you to perform this call, all you need to do is to add the phone number you just selected to the body of this body. Skipping the Params, Authorization, and Headers configurations, click on Body . Here you'll see that this POST request accepts a body in x-www-form-urlencoded format, and at the top of the potential payload is a PhoneNumber field.
Go ahead and paste your E.164 phone number into the spot where the placeholder phone number is currently. All that's left is to, you guessed it, hit Send ! Once the request completes, you will see a 201 Created response in the bottom of the Postman client along with useful information like the phone number's friendly name and which capabilities it has.
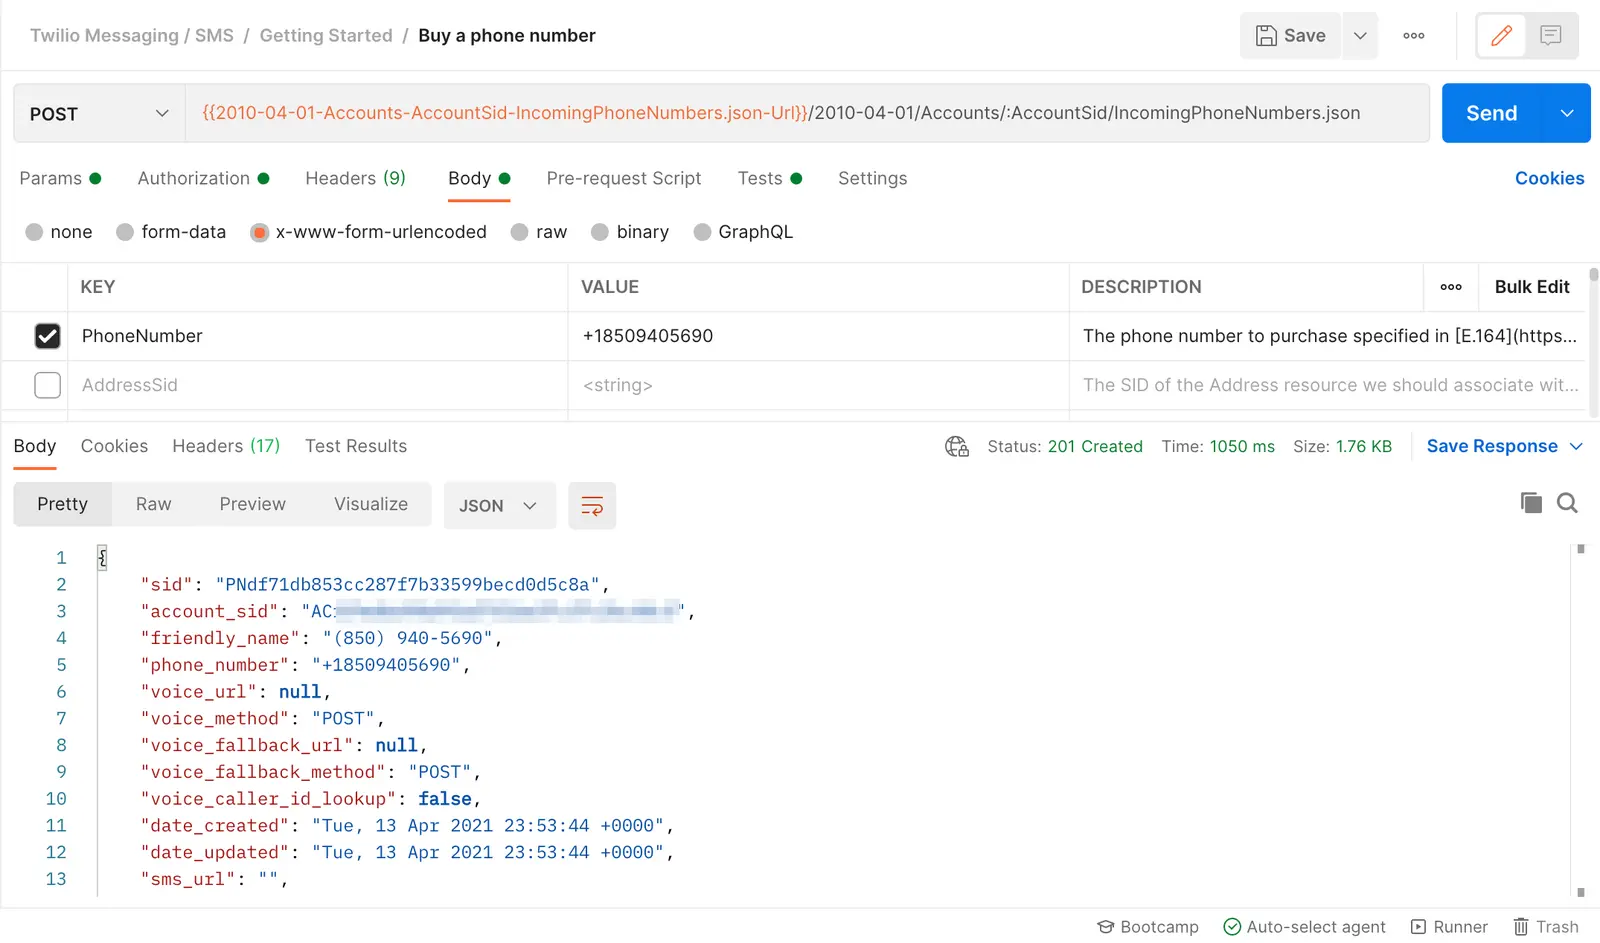
Congratulations, you now have a Twilio phone number that can be used to programmatically send SMSs, make calls, and much more!
Before you rush to copy your newly minted phone number into your Environment, we've got you covered. If you click the Tests tab, you'll notice this snippet of code:
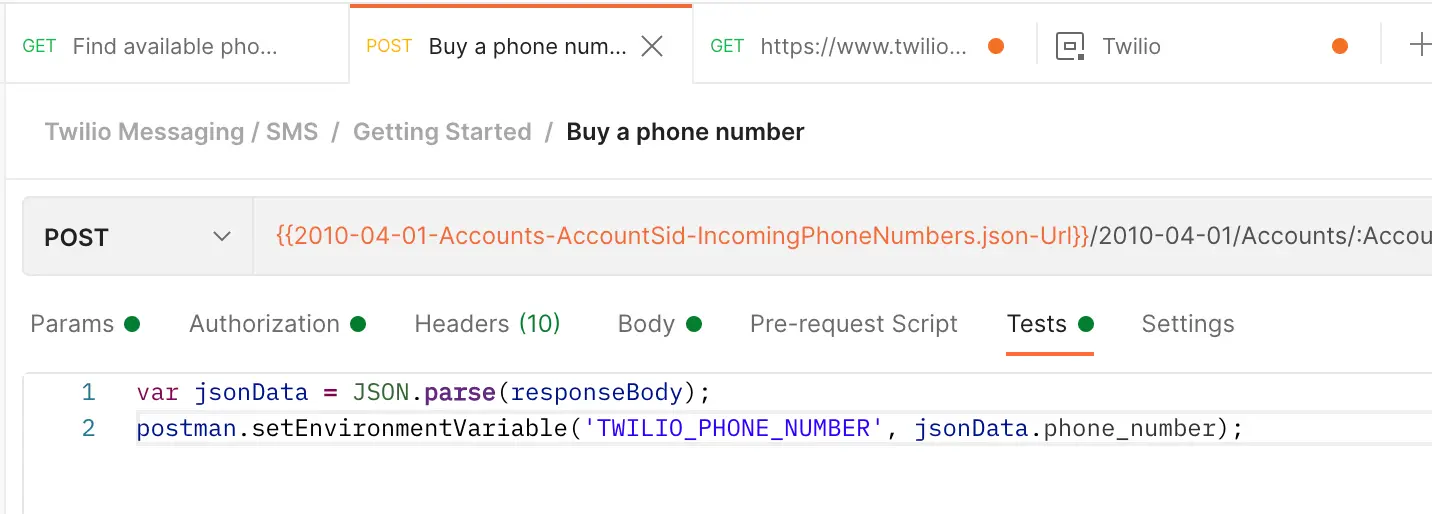
This function is run after completion of the request, and as you can see, it helpfully parses out the phone number from the request and assigns it to the Environment for you.
To send a text message to your phone, select the Send an SMS call, and navigate to the Body tab. Here you'll see that this request is configured to send the text message 'Hello World!' to your personal number, and from your newly acquired Twilio phone number. Feel free to edit the message as you so desire, and hit Send !
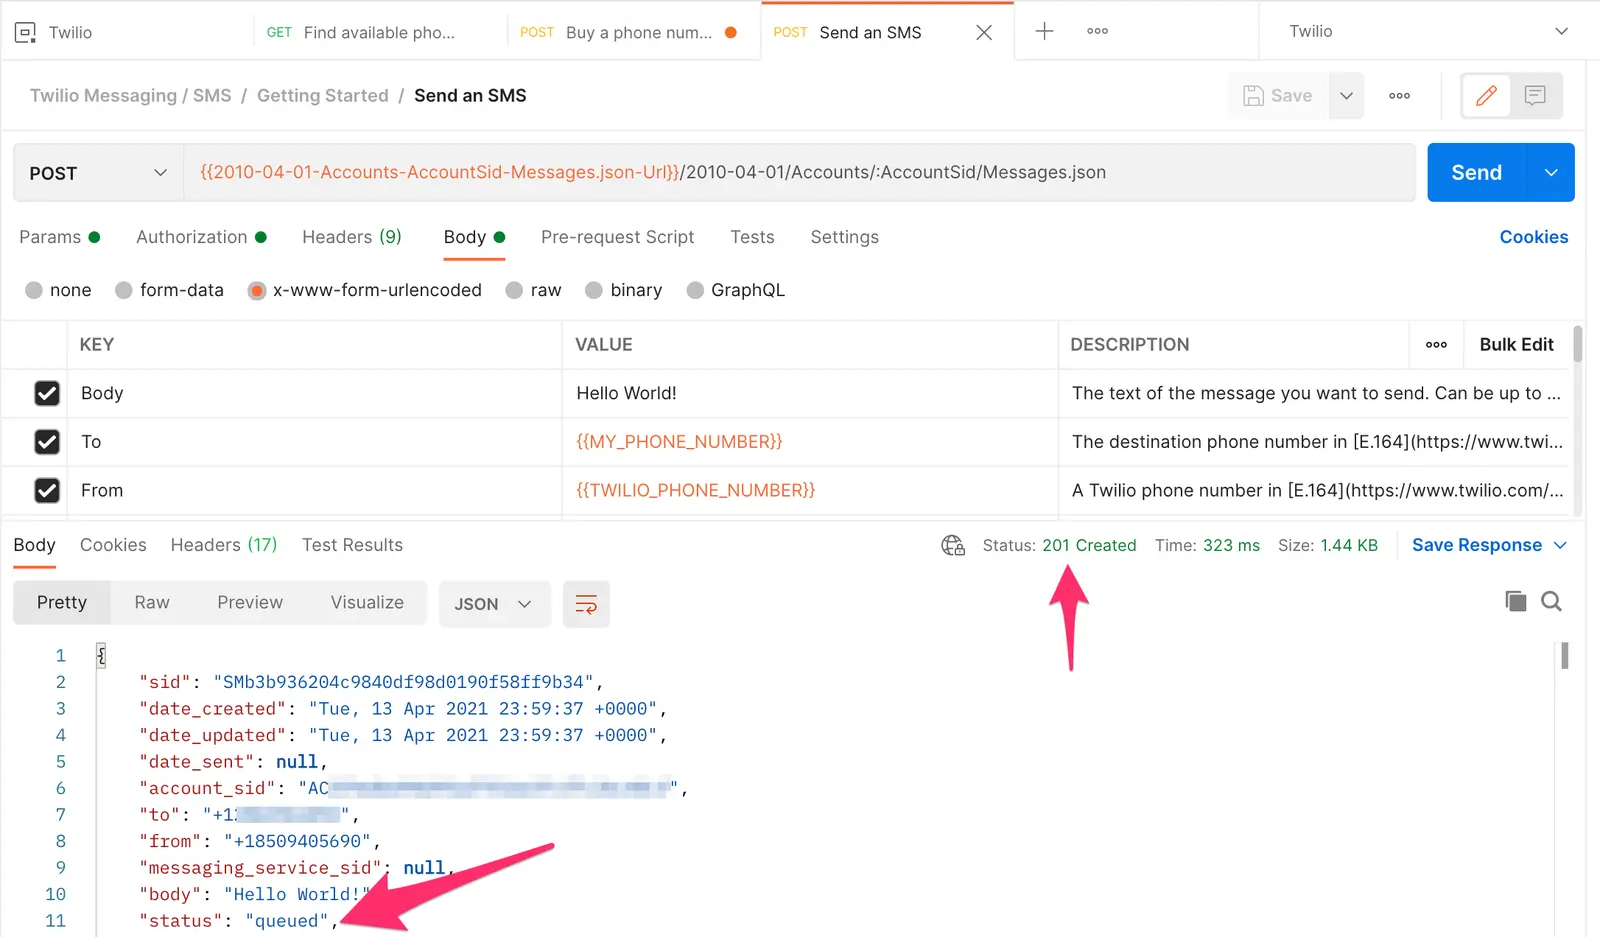
You will be rewarded first by a 201 Created message, and a short time after, a new text message on your phone!
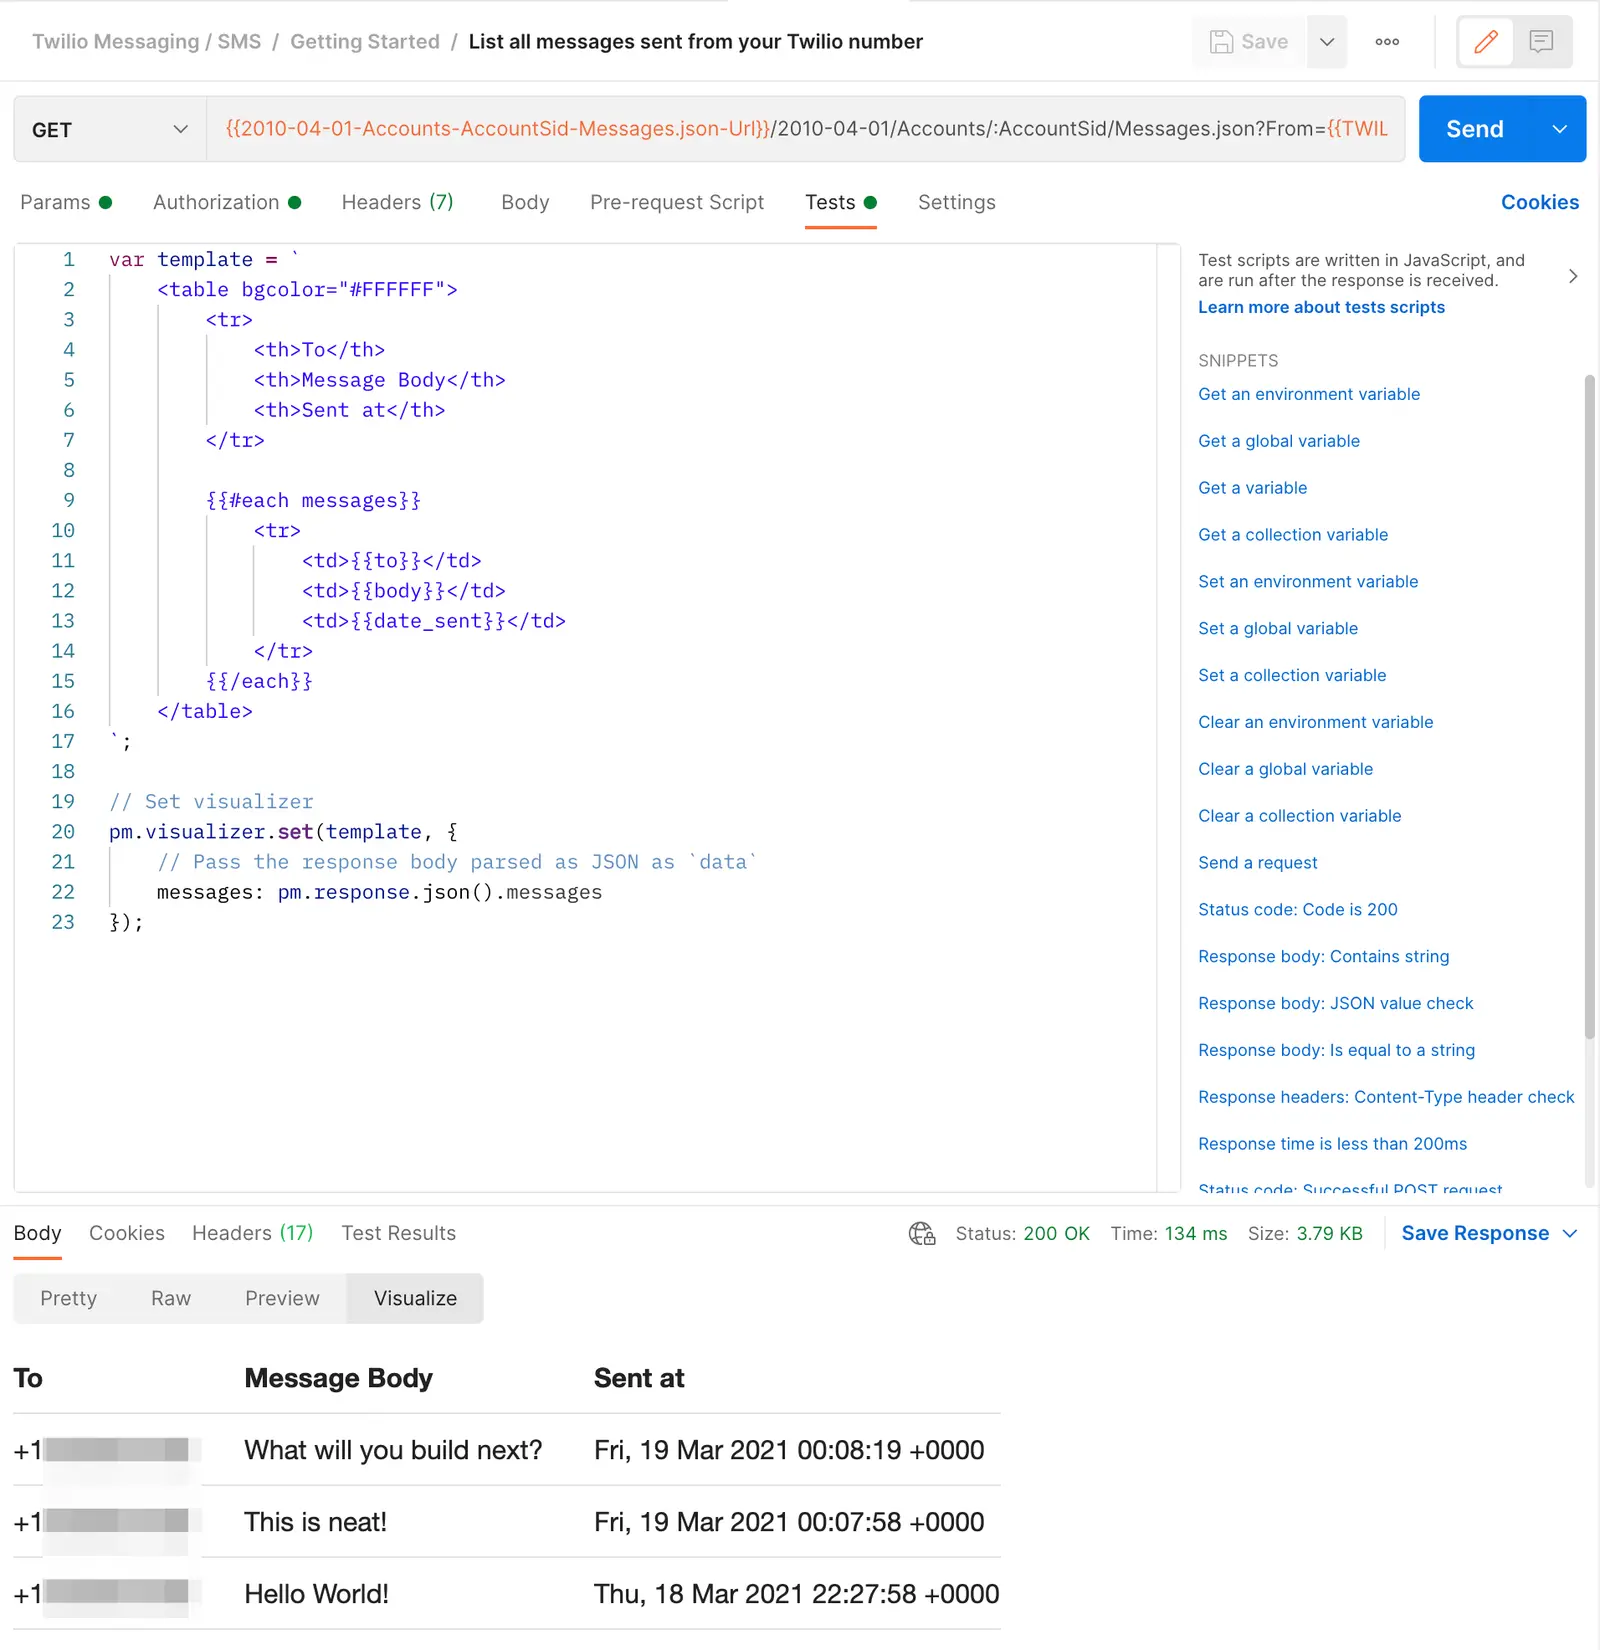
The last API call in this collection is great for seeing a history of messages sent from your Twilio number, including their contents, destination, status, and more. Select the List all messages sent from your Twilio number call to see this in action.
In this case, every aspect of the request is already configured for you, so hit Send !

As you send more messages, this collection will grow from the single message that you just sent. Have more messages and want to see some cool Postman wizardry? Click on the Visualize button right above the results and you will see a nicely formatted table version of your messages log!
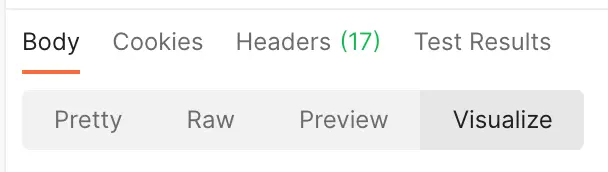
How is this done? If you open the Tests tab, you'll see that it's possible to create an HTML template and pass it to Postman's visualizer to create a visual representation of your response!