SIP Header Manipulation
The expected format of phone numbers in SIP INVITE requests can sometimes differ between on-premise equipment and providers. For example, some private branch exchanges (PBXs) might send numbers in a format other than E.164, the format that Twilio requires. In order to address this issue, Twilio provides a feature called SIP Header Manipulation.
SIP Header Manipulation allows you to automatically modify the user fields in a SIP INVITE for Elastic SIP Trunking termination and/or origination calls. (For Elastic SIP Trunking customers, user fields often contain phone numbers. This page will refer to phone numbers and user fields interchangeably.)
This feature is accessible in the Twilio Console under Elastic SIP Trunking > Settings > SIP Header Manipulation.
The following section will describe the main components of Manipulation Policies, the set of rules that describe if, how, and when a SIP header should be modified.
If you prefer, you can jump down to the Create a Manipulation Policy section to view the steps for implementing this feature.
In order to manipulate phone numbers within SIP INVITEs, you will need to create a Manipulation Policy and assign it to one or more of your SIP Trunks.
Manipulation Policies consist of:
- A Friendly Name: a human-readable name for the Manipulation Policy
- A Policy SID: a unique identifier for the Manipulation Policy
- Request Rule(s): rules that define whether and how SIP INVITEs will be changed
You can check that your Manipulation Policy is working as expected by running a test on it in the Console.
The maximum number of Manipulation Policies per account is 1000. For each Trunk, you can assign one Manipulation Policy for termination and one for origination.
Request Rules contain the logic that determines if and how an INVITE's headers should be manipulated.
- One or more Actions that define how a SIP INVITE will be manipulated (maximum 20 per Request Rule)
- Zero or more Conditions that determine whether or not the Action should be executed (maximum 20 per Request Rule)
An Action specifies which phone numbers (user fields) you want to change and how you want to change them.
An Action is associated with a Request Rule, and a Request Rule can contain up to 20 Actions.
What phone numbers to change
When creating an Action, you will choose the phone numbers you want to modify when the Action executes.
Phone numbers (the user fields in SIP URIs) tend to repeat across several SIP headers within a SIP message. This means that if you need to change a phone number/user in one SIP header, it's likely that it needs to change elsewhere. To minimize the work you need to do to manipulate phone numbers/users in SIP INVITEs, Twilio has grouped related URI user fields together into To Number fields and From Number fields.
To Number fields represent the user who will receive the INVITE:
From Number fields represent the user who initiated the INVITE:
When an Action is executed on To Number fields, the To header's user field will be manipulated first, then copied into the Request-URI's user field.
When an Action is executed on From Number fields the From header's user field will be manipulated first, then copied into the P-Asserted-Identity, Remote-Party-ID, and Contact headers' user fields.
How to change the phone numbers
After choosing which phone numbers to change, you will specify how the phone numbers should change by selecting an action (a text modification) and a value to be used with the text modification.
You can choose from the following text modification actions:
Add prefixAdd suffixRemove prefixRemove suffixRemove number of prefixRemove number of suffixReplace with
The Action's value is the value you want to use with the chosen action. Values are case-sensitive.
Warning
There are restricted and reserved characters within each SIP field. Keep this in mind when defining values in your Actions.
For SIP user fields, only the characters below are allowed. You can refer to RFC 3261 for guidelines on what characters should be escaped for the user fields. Be sure to escape other special characters.
| Allowed characters for SIP users |
|---|
| A-Z | a-z | 0-9 | "-" | "." | "_" | "~" | "!" | "$" | "&" | "'" | "(" | ")" | "*" | "+" | "," | ";" | "=" | "?" | "/" |
| And escaped versions of special characters |
Action Execution:
- If a Request Rule does not contain Conditions, the Action(s) will be executed on every SIP INVITE.
- If a Request Rule does contain Conditions, the Conditions determine whether or not the Action(s) will be executed.
- Actions (if executed) are executed in the order they appear. The order can be modified.
You can conditionally execute the Action(s) in a given Request Rule by defining a group of Conditions and an execution type that determines how to evaluate the Conditions.
The execution type can be:
If any of these conditions are met(this is the default)- If any conditions in the list is true, the Action(s) will be executed.
- If all of the conditions are false, the Action(s) will not be executed.
If all of these conditions are met- All of the conditions must be true in order for the Action(s) to be executed.
- If any of the conditions is found to be false, the Action(s) will not be executed.
If none of these conditions are met- If all of the conditions are false, the Action(s) will be executed.
- If any of the conditions are true, the Action(s) will not be executed.
Each Condition consists of:
- A SIP header field to be evaluated
- A logical operator
- A value to be used when evaluating the SIP header field
The evaluation of Conditions is case-sensitive.
The order of the Conditions (as they appear in the Console) is the order in which they will be evaluated. You can, however, reorder or delete them.
SIP header fields
The SIP header fields that can be evaluated are listed below. Click on a header field or go to the SIP INVITE Glossary page to learn more.
Logical operators
The logical operators that can be used when creating a Condition are:
EqualsDoes not equalStarts withDoes not start withContainsDoes not containEnds withDoes not end with
Warning
Keep in mind that Twilio will evaluate the SIP header exactly as it is presented and will not encode or decode special characters when comparing the SIP header to the value you have set in your Condition.
For example, if the SIP header contains the example%40example.com as the To user, and the value in your Condition contains example@example.com, Twilio will not equate these strings.
You can refer to RFC 3261 for guidelines on what characters should be escaped within each field type of the SIP header. Below is a summary of the characters allowed within each SIP field.
| SIP field type | Allowed characters |
|---|---|
| user | A-Z | a-z | 0-9 | "-" | "." | "_" | "~" | "!" | "$" | "&" | "'" | "(" | ")" | "*" | "+" | "," | ";" | "=" | "?" | "/" And escaped versions of other special characters. |
| host | A-Z | a-z | 0-9 | "-" | "." | ":" | "[" | "]" |
| URI | A-Z | a-z | 0-9 | "-" | "." | "_" | "~" | "!" | "$" | "&" | "'" | "(" | ")" | "*" | "+" | "," | ";" | "=" | ":" | "[" | "]" | "?" | "#" | "/" | "@" | "%" | "`" And escaped versions of other special characters. |
| display name | Ascii characters with decimal values of 0 to 253. |
This section will walk through creating an example Manipulation Policy in the Console.
-
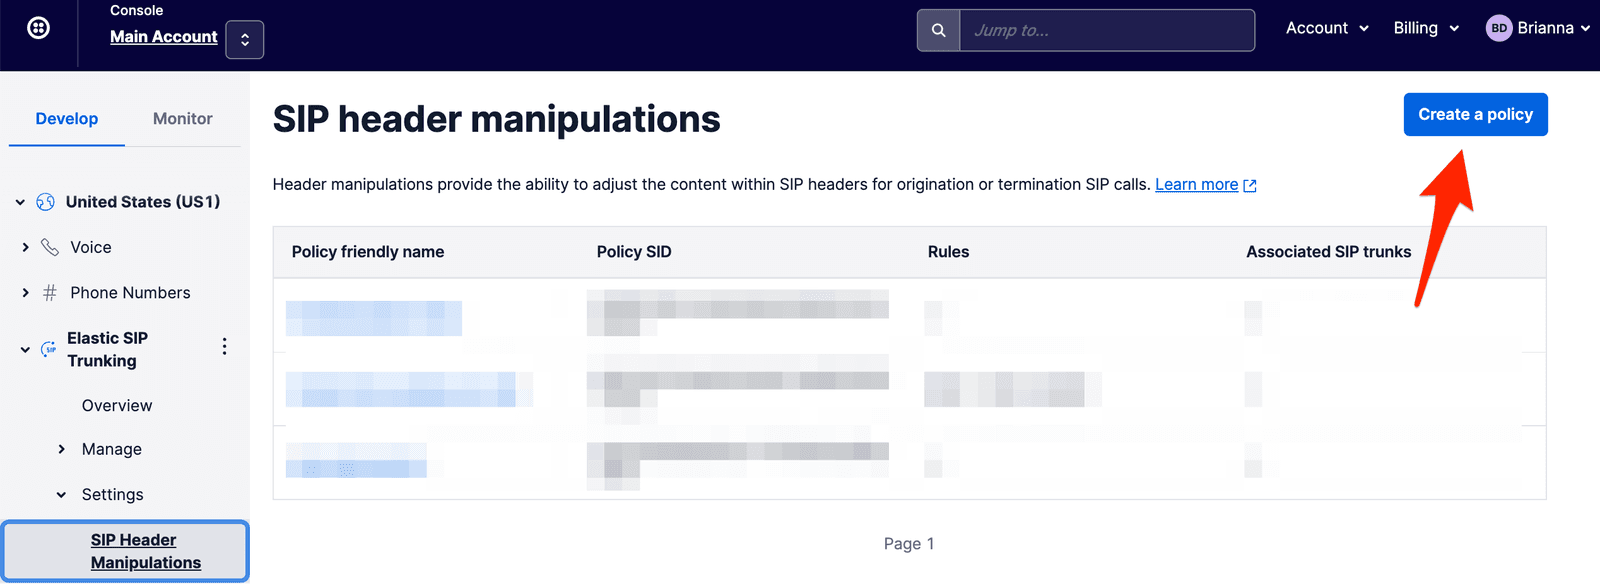
Log in to your Twilio Console. In the left-hand navigation pane, click on Elastic SIP Trunking > Settings > SIP Header Manipulations.
-
On the "SIP header manipulations" page, click on the blue Create a policy button (in the top right corner).
-
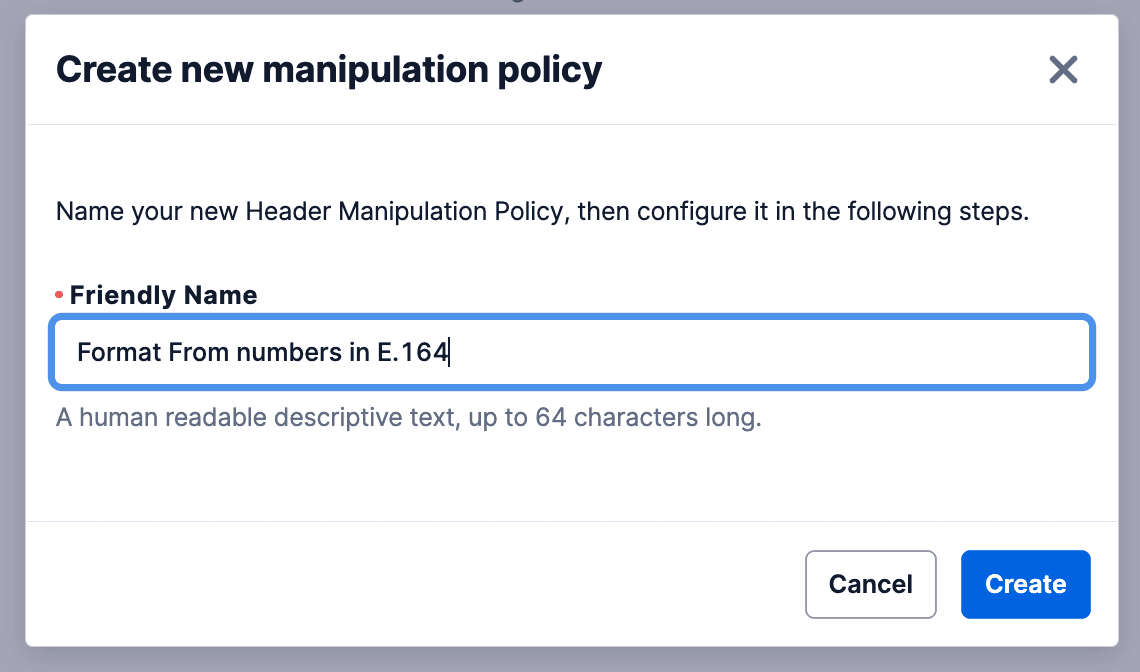
Give your new Manipulation Policy a Friendly Name that helps you remember what the policy does and click on the Create button.
-
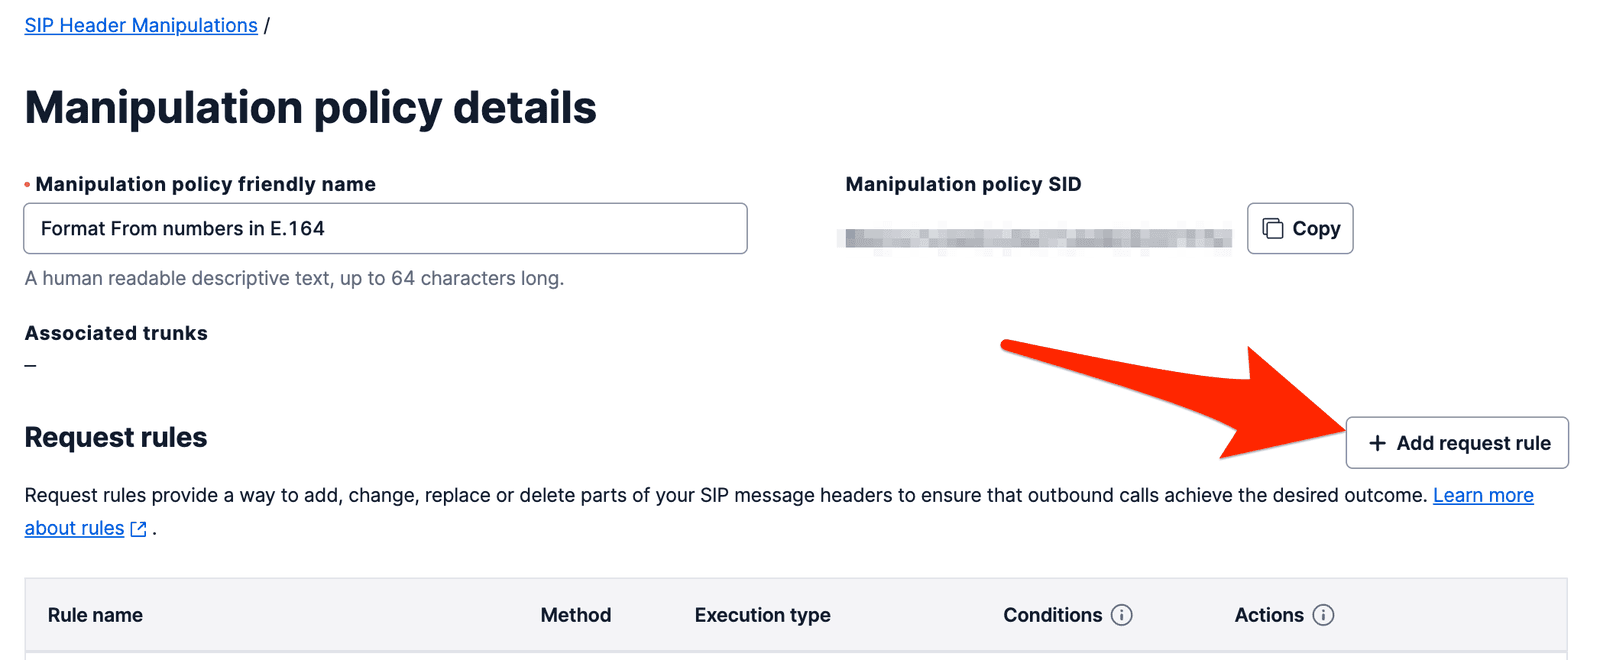
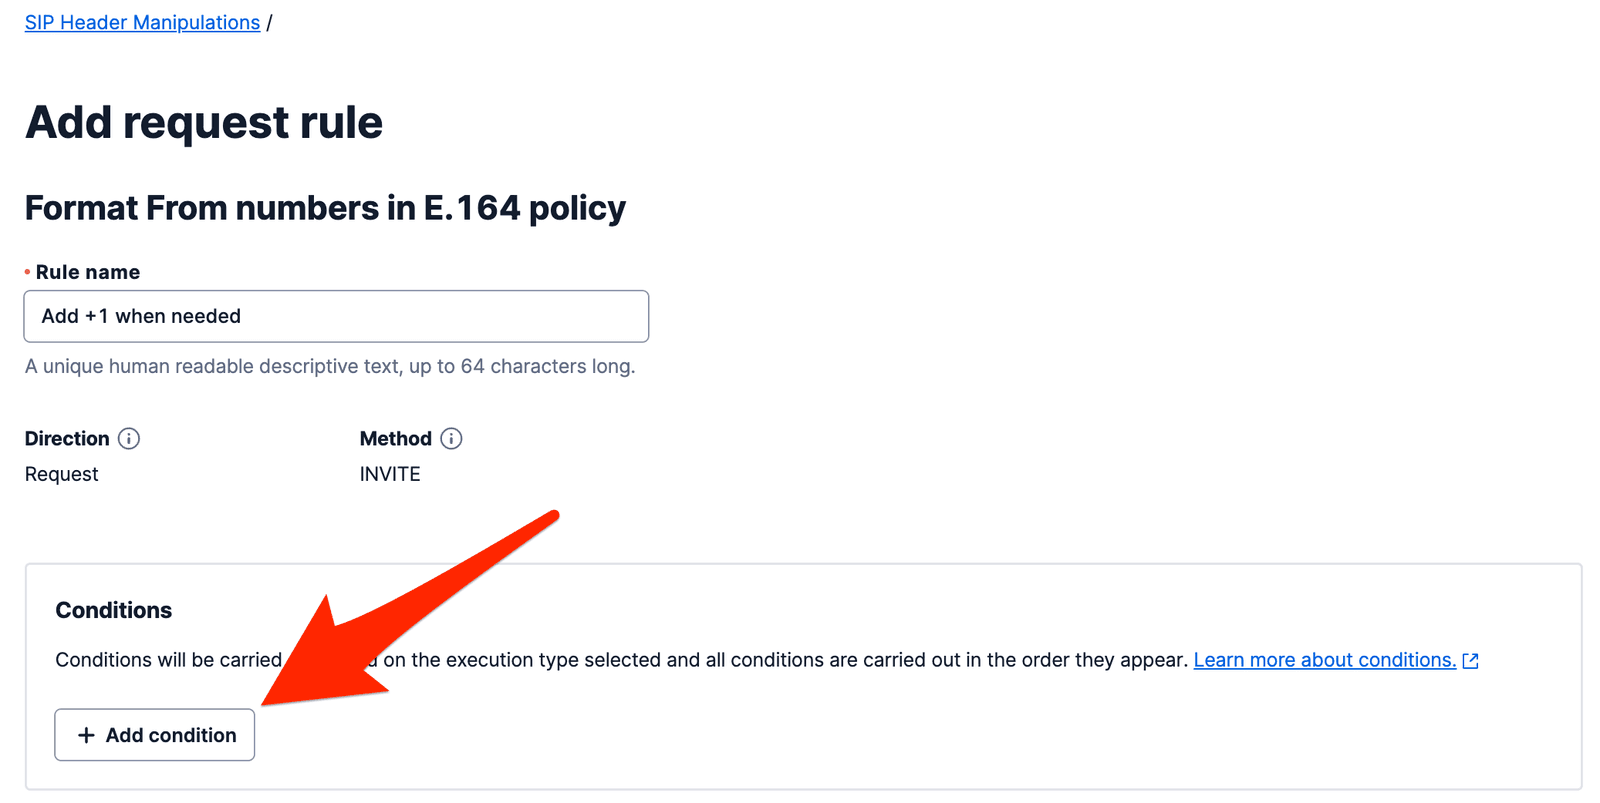
On the "Manipulation policy details" page, find the "Request rules" heading. Click on the + Add request rule button to the right of the heading.
-
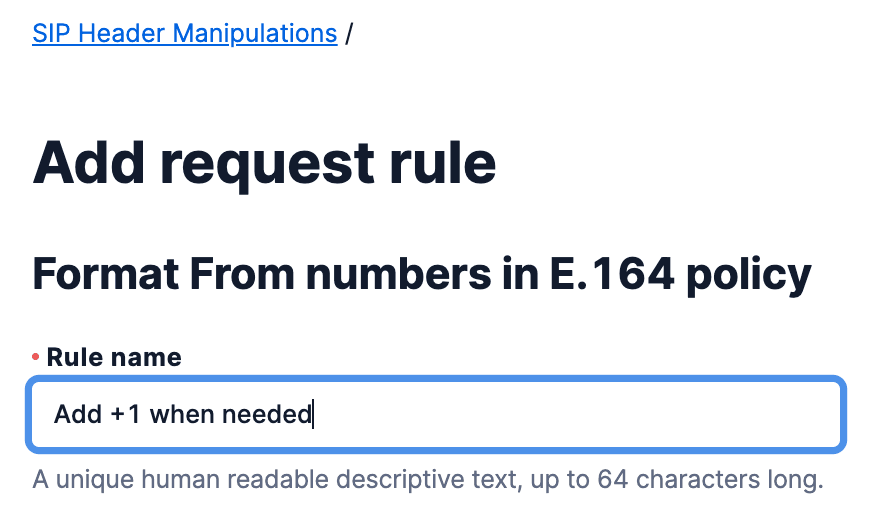
On the Add request rule page, give the rule a name that helps you remember what it does (i.e. when and how the rule should change a SIP header)
-
Add Conditions (optional)
-
Under the "Conditions" heading, click on the + Add condition button
-
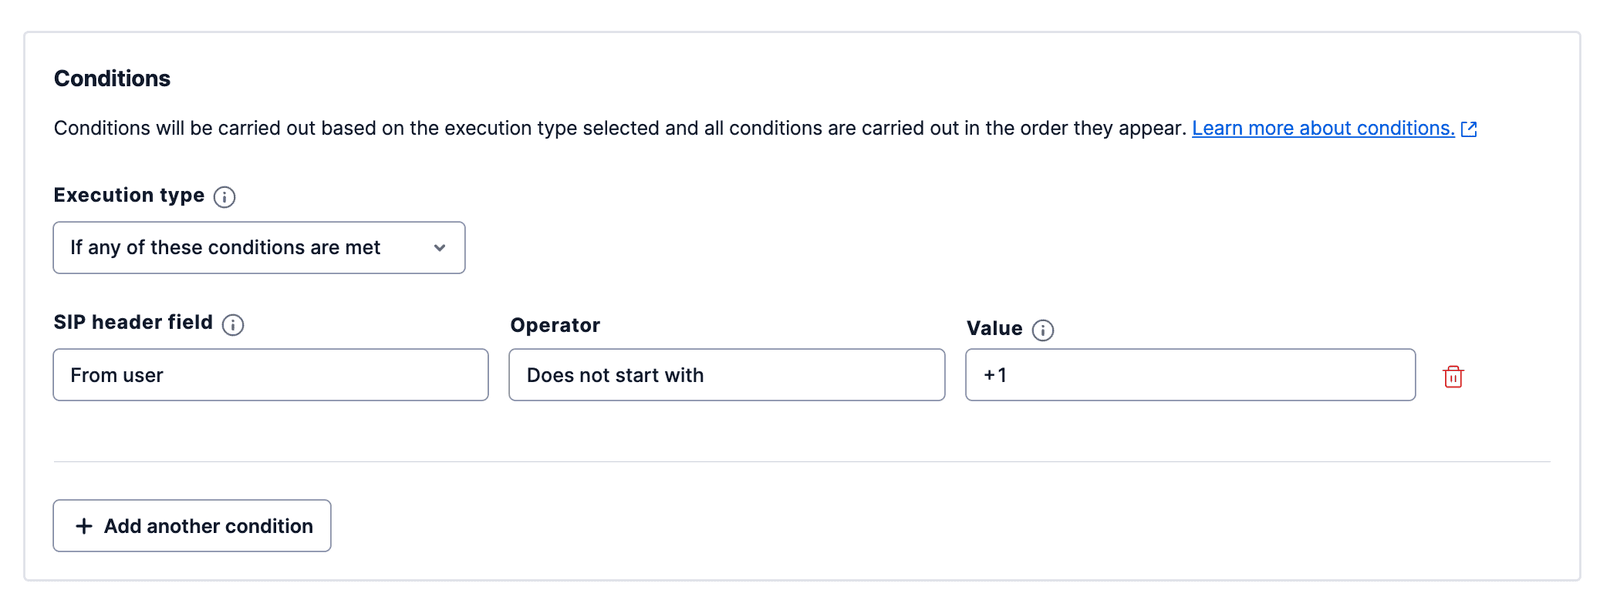
Select an execution type
-
Choose the SIP header field that Twilio should evaluate
-
Select the operator and fill in the value to use with the operator
-
If necessary, click on the + Add another condition button. Use the arrows to the right of the conditions to reorder them.
-
-
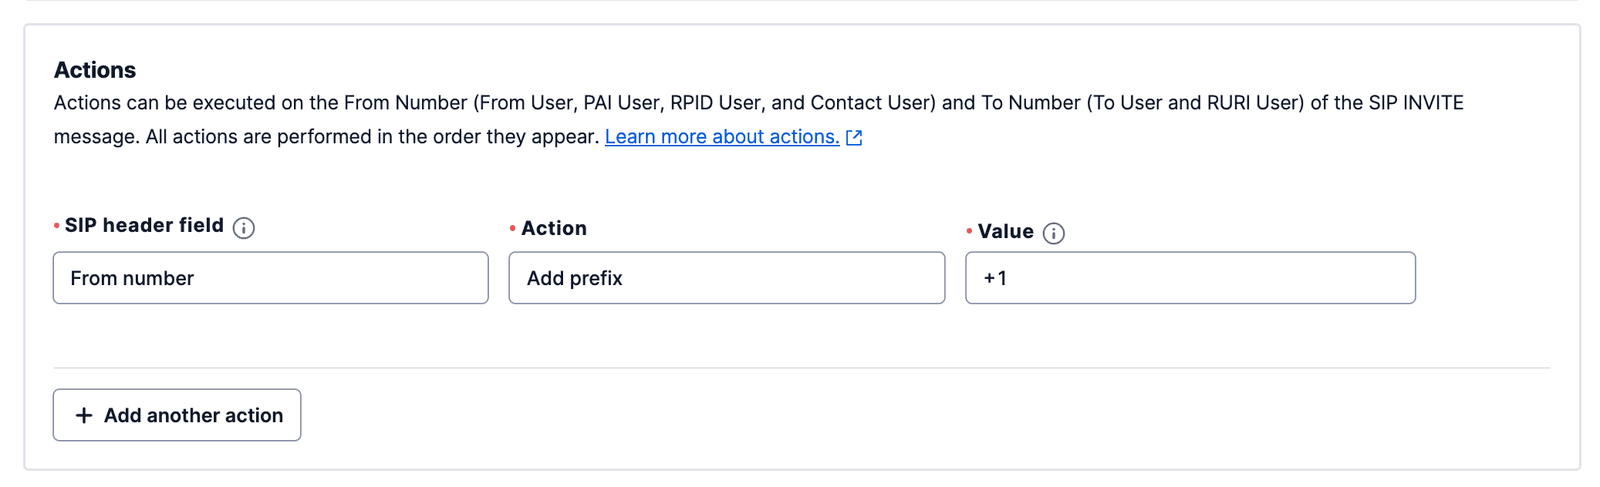
Add Actions
-
Select the SIP header field you want to modify (Either the "To number" fields or the "From number" fields)
-
Select the action and you want to be taken on the SIP header field you selected
-
Fill in the Value that will be used with the action you chose
-
If necessary, click on the + Add another action button. Use the arrows to the right of the actions to reorder them.
-
-
Click on the blue Add rule button to add the rule to your policy.

- If the rule saved successfully, you should now be back on the "Manipulation policy details" page.
-
Test the policy
-
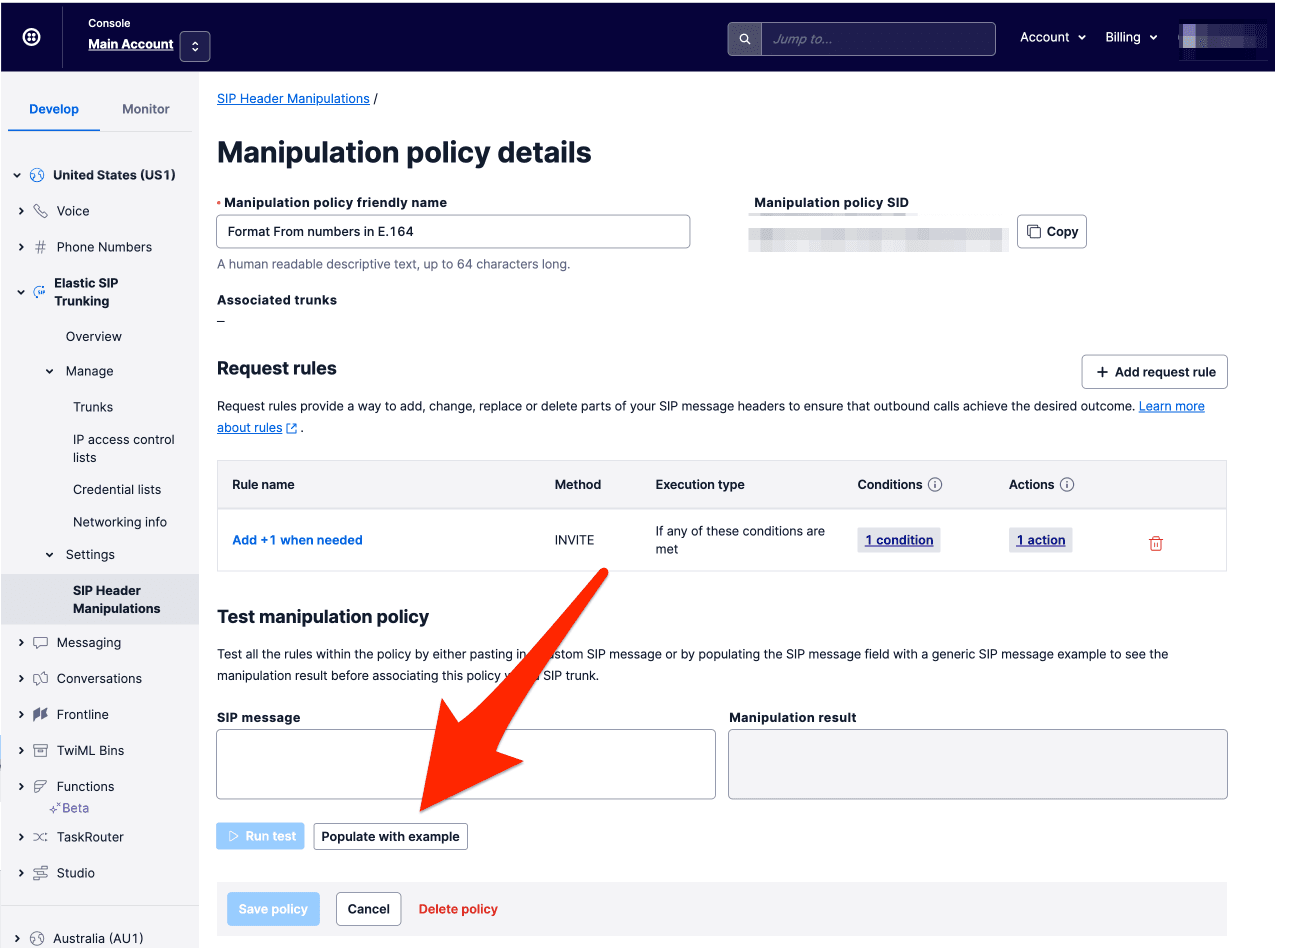
On the "Manipulation policy details" page, find the "Test manipulation policy" heading.
-
You can either paste in your own SIP message in the SIP message input box, or you can click on the "Populate with example" button.
-
Edit the SIP message so that it has the issue you're trying to solve with your policy.
-
Click on the Run test button. The "Manipulation result" box will show you the results of applying your policy on the SIP message.
-
Verify that the expected changes were made and that no unexpected changes occurred. Edit the policy if necessary.
-
-
Save the policy by clicking the blue Save policy button at the bottom of the page.
-
Assign the policy to a Trunk
-
In the left navigation pane, navigate to Elastic SIP Trunking > Manage > Trunks.
-
Click on the name of the Trunk you want to apply the Manipulation Policy to.
-
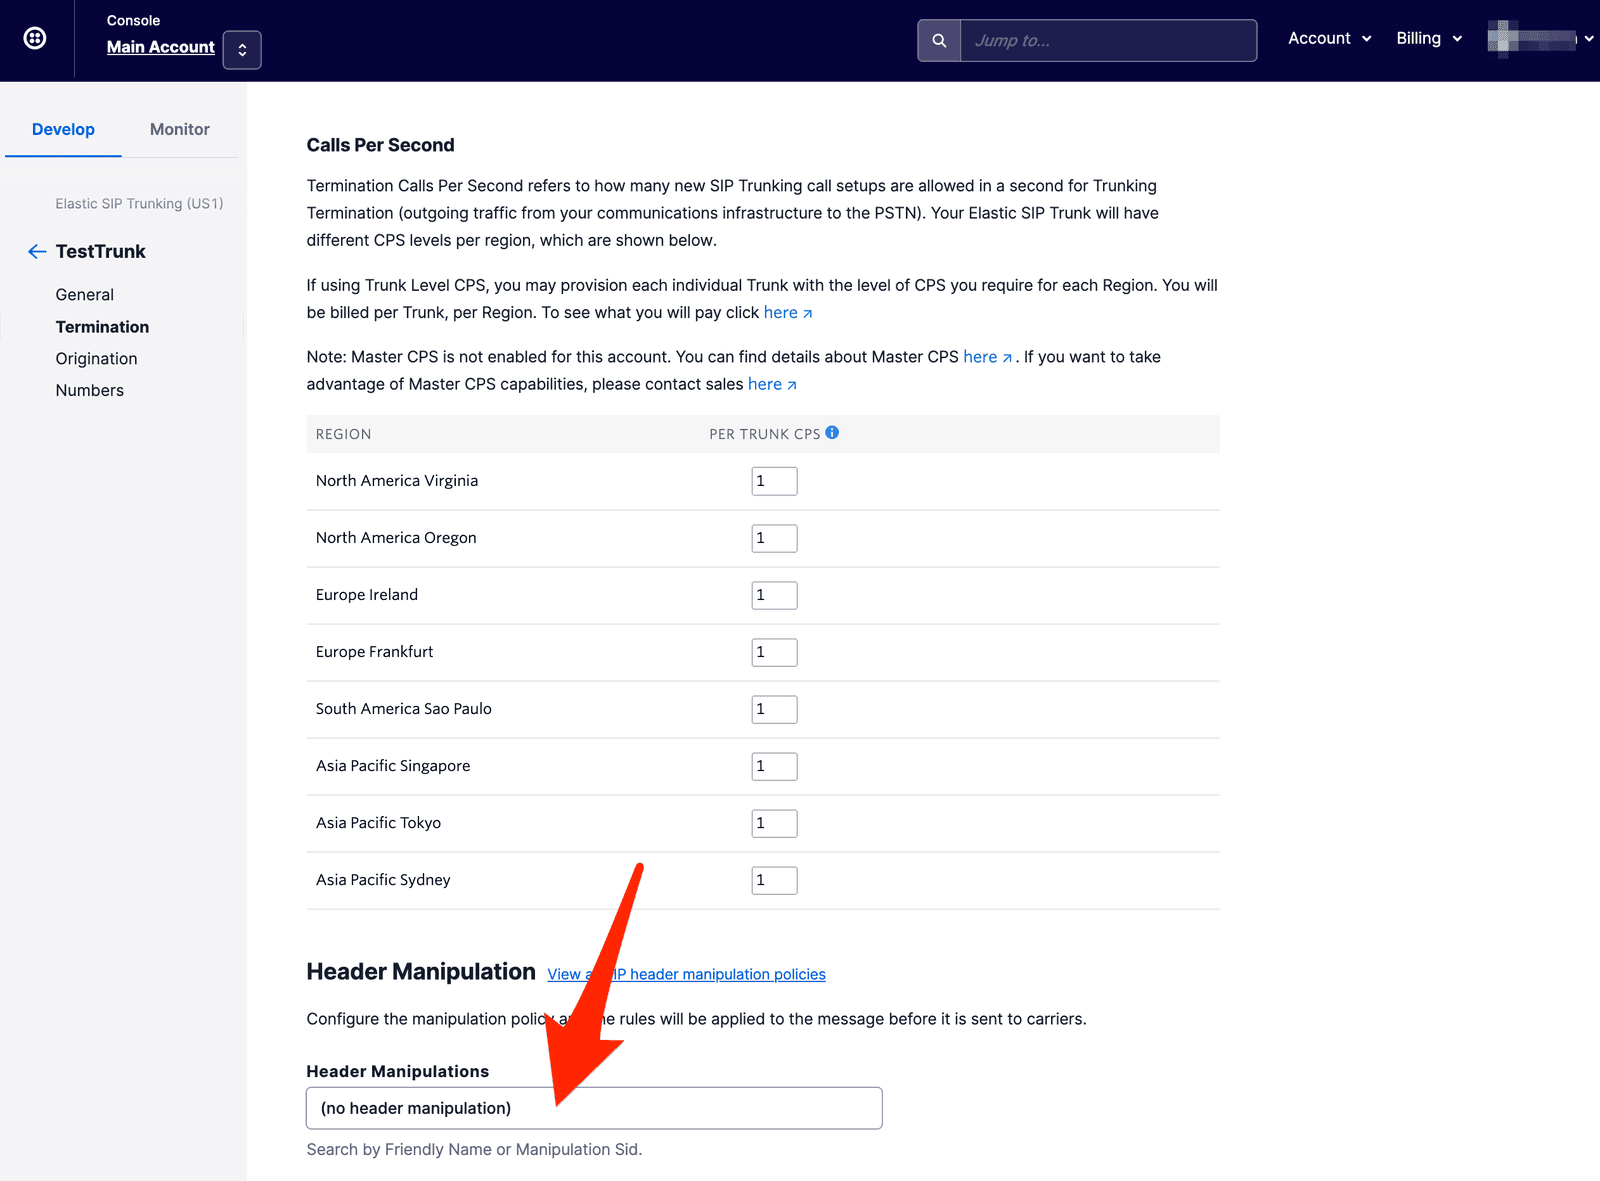
You should now be on the "General Settings" Page. In the left hand navigation select either Termination or Origination (depending on which direction you want your Manipulation Policy to apply to).
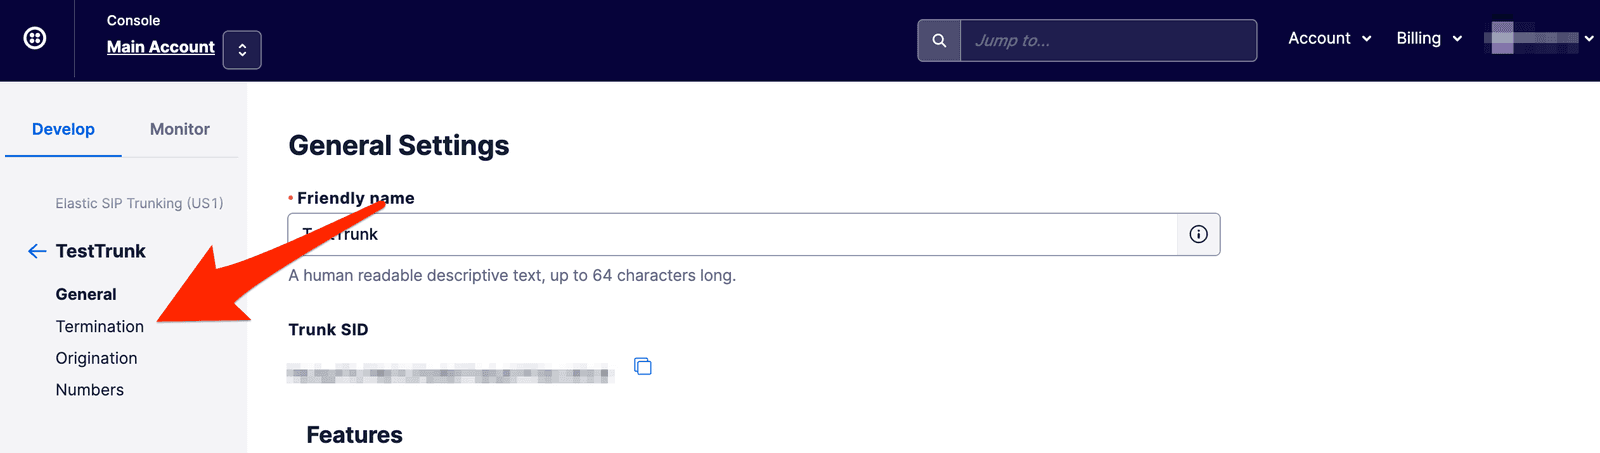
-
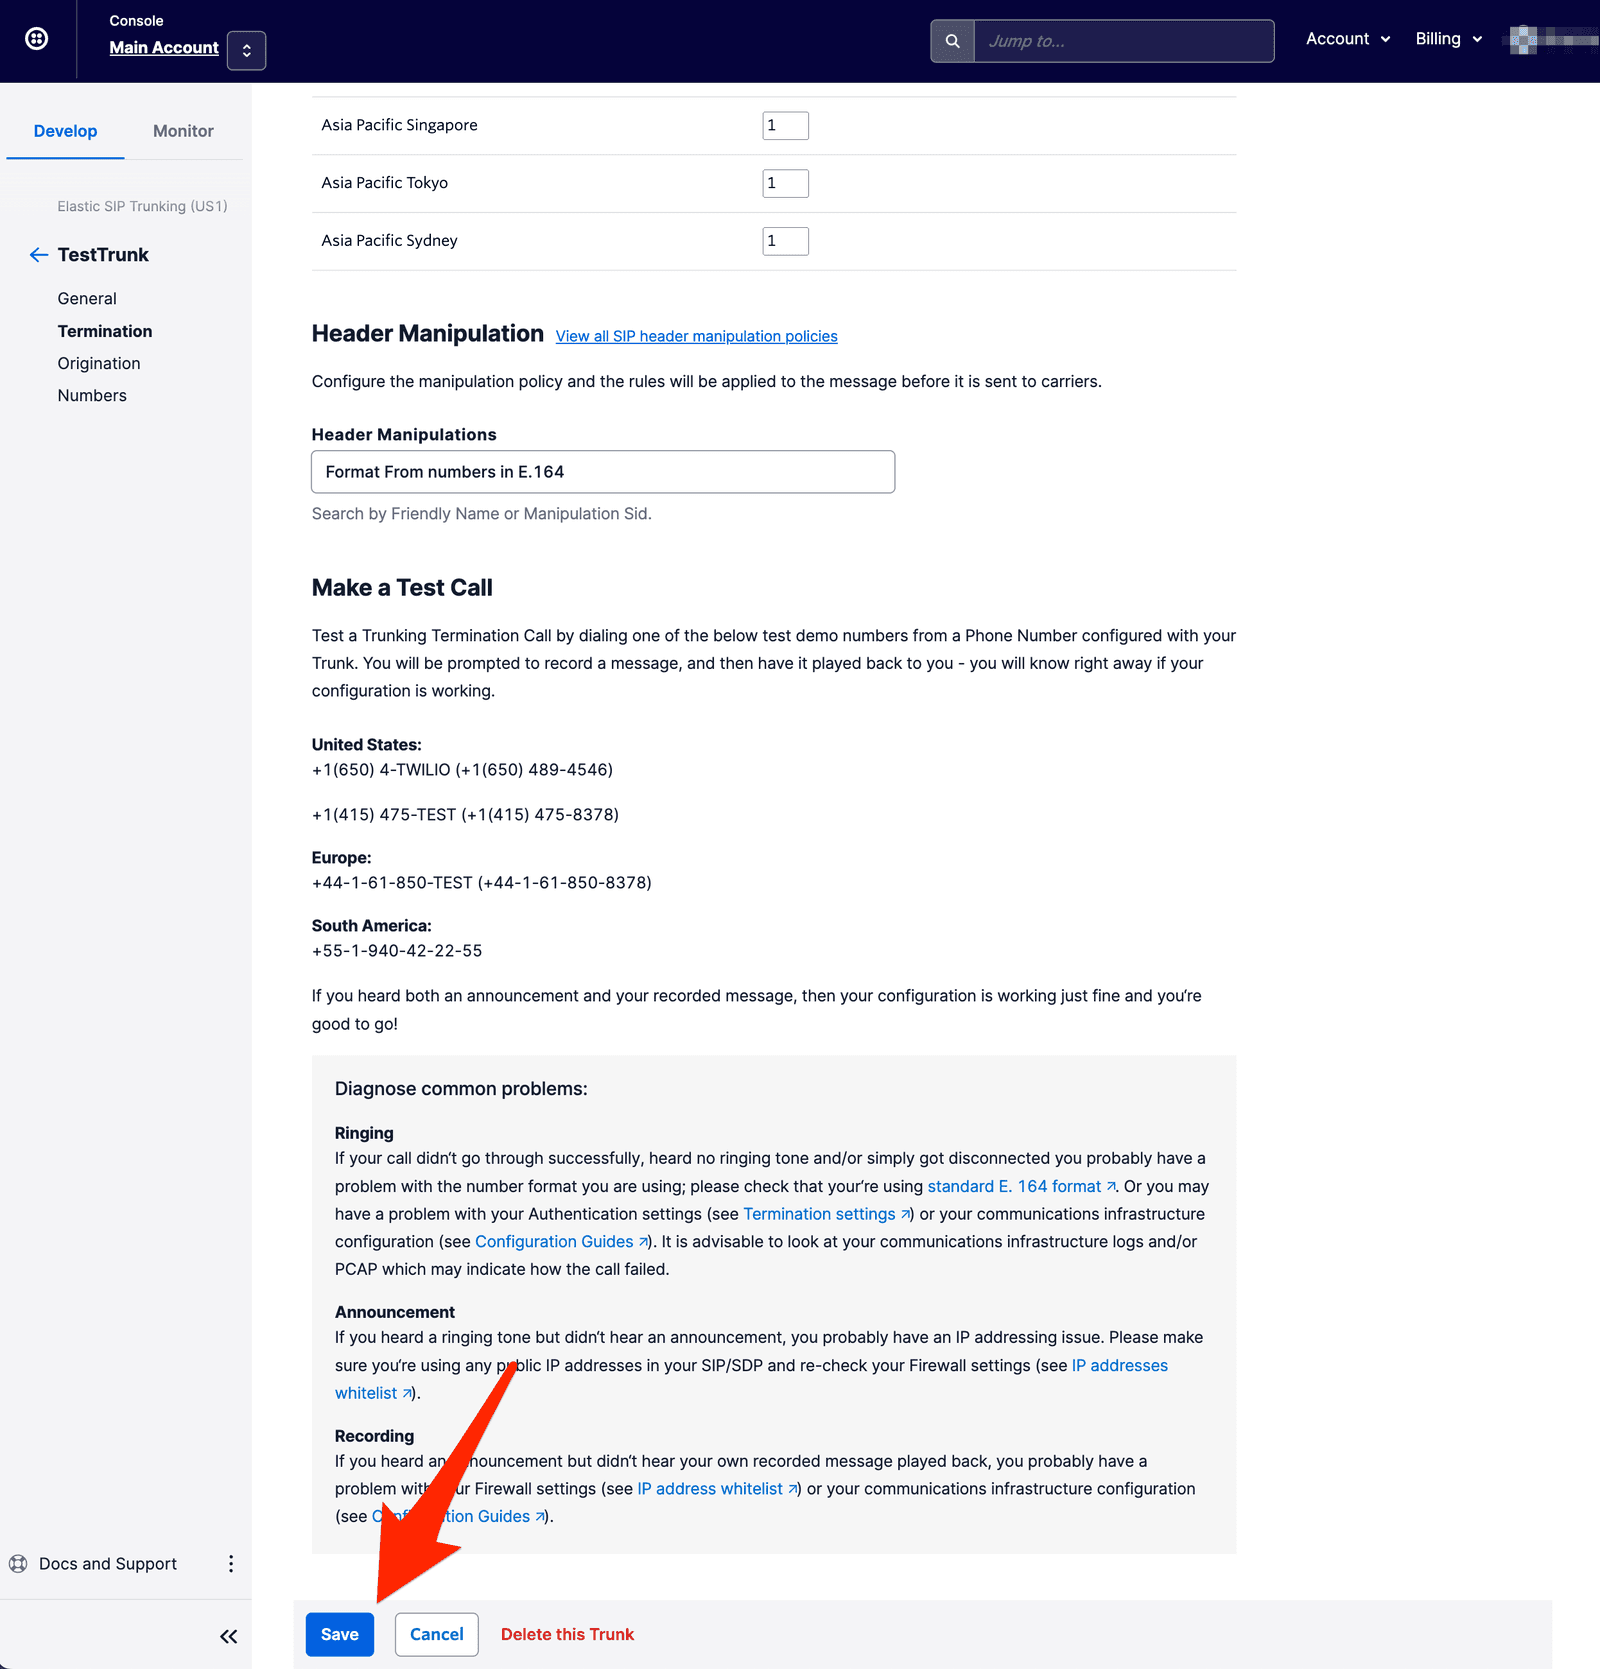
Find the "Header Manipulation" heading and enter the Friendly Name of the Manipulation Policy you just created.
-
Scroll to the bottom of the page and click on the blue Save button.
-
-
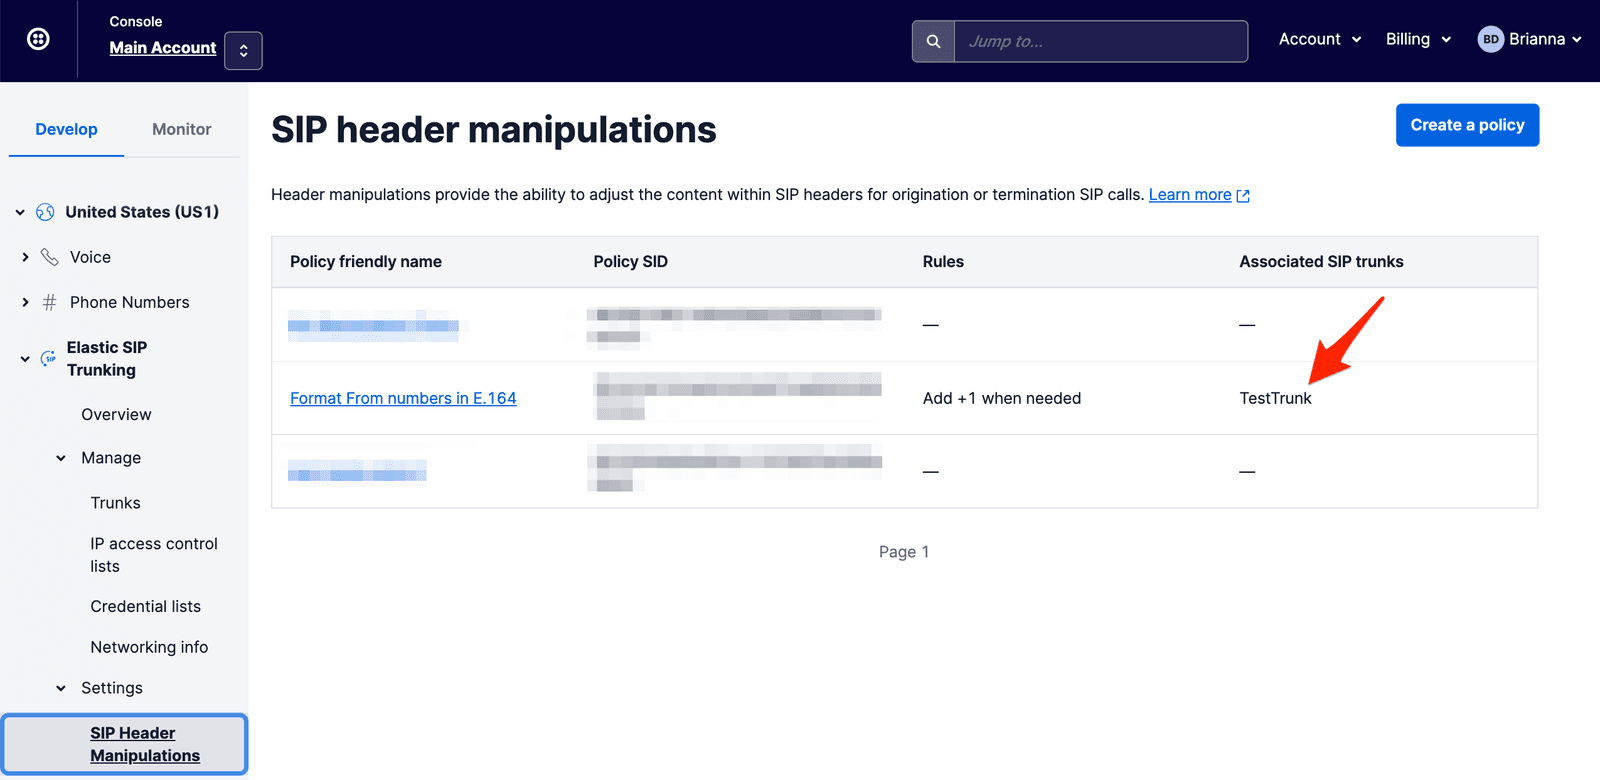
Verify the policy has been applied.
-
Navigate to Elastic SIP Trunking > Settings > SIP Header Manipulations. The policy should now have an "Associated SIP trunk".
-
After you create a Manipulation Policy, you can test it in the Console before using it in production.
- In the Console, navigate to Elastic SIP Trunking > Settings > SIP Header Manipulations and click on the policy that you want to test.
- On the "Manipulation policy details" page, find the "Test manipulation policy" heading.
- You can either paste in your own SIP message in the SIP message input box, or you can click on the Populate with example button.
- Edit the SIP message so that it has the issue you're trying to solve with your policy.
- Click on the Run test button.
- The "Manipulation result" box will show you the results of applying your policy on the SIP message. Verify that the expected changes were made and that no unexpected changes occurred.
If you want to delete a Manipulation Policy that is not associated with any SIP Trunks, complete the following steps:
-
Navigate to Elastic SIP Trunking > Settings > SIP Header Manipulations.
-
Click on the name of the Manipulation Policy you wish to delete.
-
On the "Manipulation policy details page", click on Delete policy (next to the Cancel button).
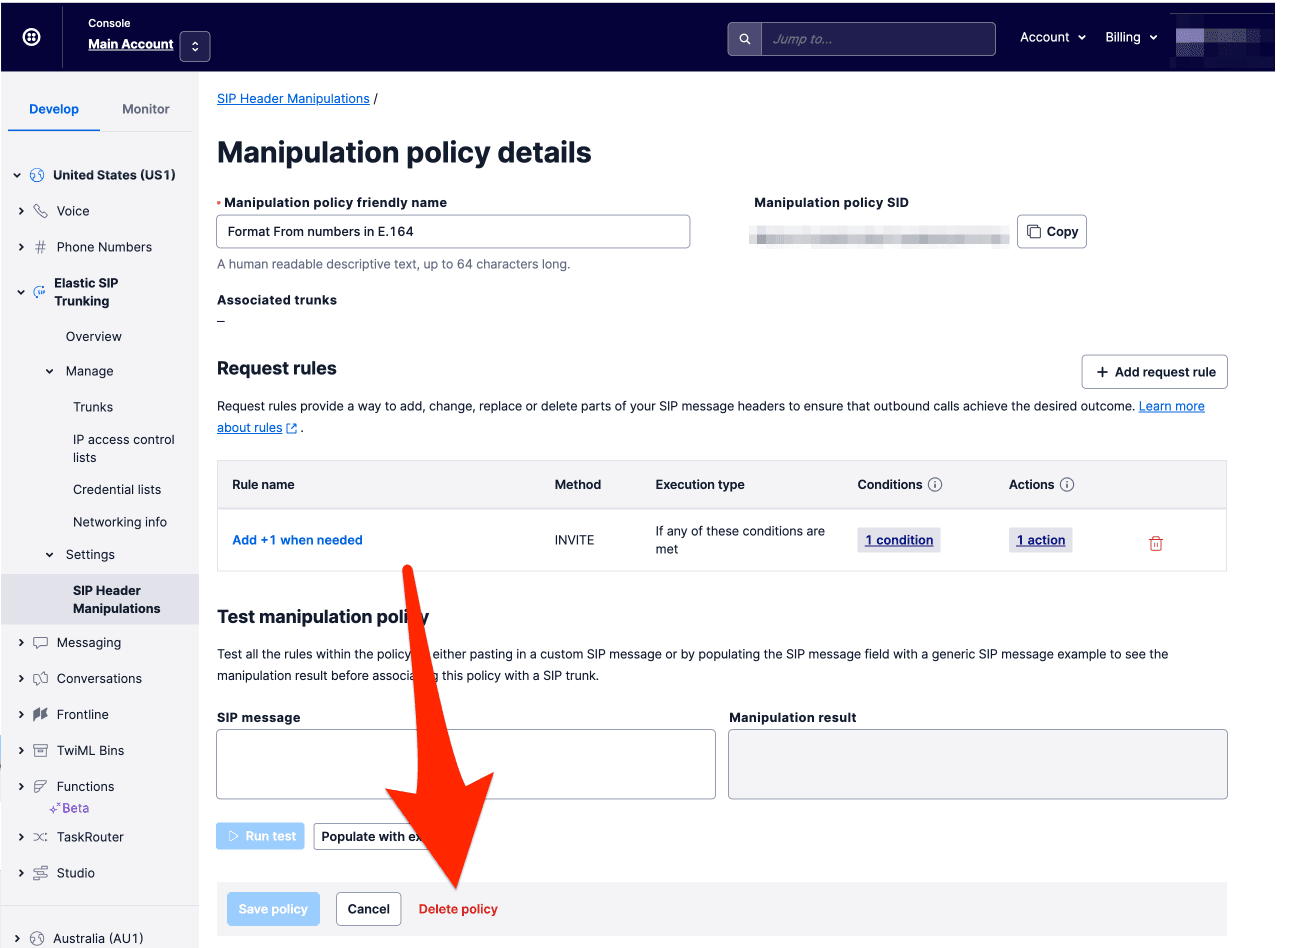
-
Verify that you want to delete the policy by clicking the red Delete the policy button on the modal that pops up.
If you want to delete a Manipulation Policy that is associated with a SIP Trunk, you must first remove the Manipulation Policy from the SIP Trunk before deleting.
-
Navigate to Elastic SIP Trunking > Manage > Trunks
-
Click on the name of the Trunk associated with a Manipulation Policy.
-
In the left navigation, click on either Termination or Origination (depending on the direction your Manipulation Policy was associated with).
-
On the "Origination" or "Termination" page, scroll down to the "Header Manipulation" section.
-
Change the Header Manipulations input box to
(no header manipulation). -
-
Scroll down to the bottom of the page and click the blue Save button.
-
In the left navigation, click on the blue arrow next to the name of the SIP Trunk to be taken back to your "Elastic SIP Trunks" page.
-
Navigate to Elastic SIP Trunking > Settings > SIP Header Manipulations.
-
Click on the name of the Manipulation Policy you wish to delete.
-
On the "Manipulation policy details page", click on Delete policy (next to the Cancel button).
-
Verify that you want to delete the policy by clicking the red Delete the policy button on the modal that pops up.