Customer Support Menu with WhatsApp and Twilio Studio
With Twilio Studio, you can build a Flow to start quickly responding to customer support inquiries over WhatsApp.
In this tutorial, we'll build a Studio Flow that provides a traditional customer support menu via WhatsApp and lets customers respond with their choice. Users can initiate a message to your WhatsApp number by scanning your QR code or sending a message to the number directly. At the end, you'll be set to:
- Provide a customer support menu to start responding to the most common queries. You can use this as a base to build out your customer support presence and increase customer satisfaction.
- Publish your custom QR codes at your physical locations and on products. Customers can scan these QR codes to quickly interact with your business on WhatsApp.
Info
The onboarding guide includes a section on registering message templates. For this tutorial, you will only be responding to incoming messages right away, so you do not need to have message templates approved.
We'll start with a fresh Twilio Studio Flow. Log into your Twilio account and navigate to the Studio Dashboard, then tap the + icon to create a new Flow. A "Flow" is the series of Twilio elements and applications that you orchestrate through Studio.
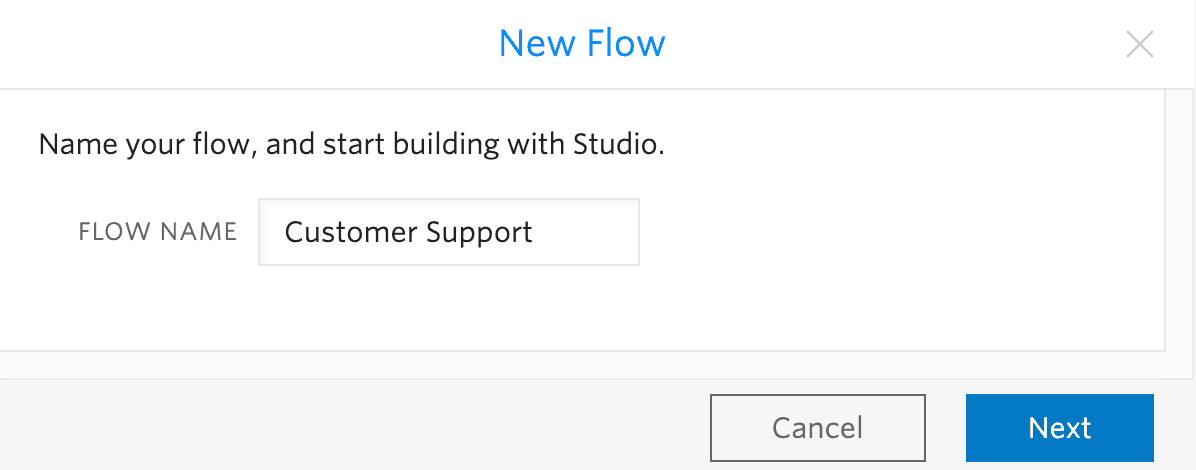
You can name your Flow anything you like — this example will use Customer Support.
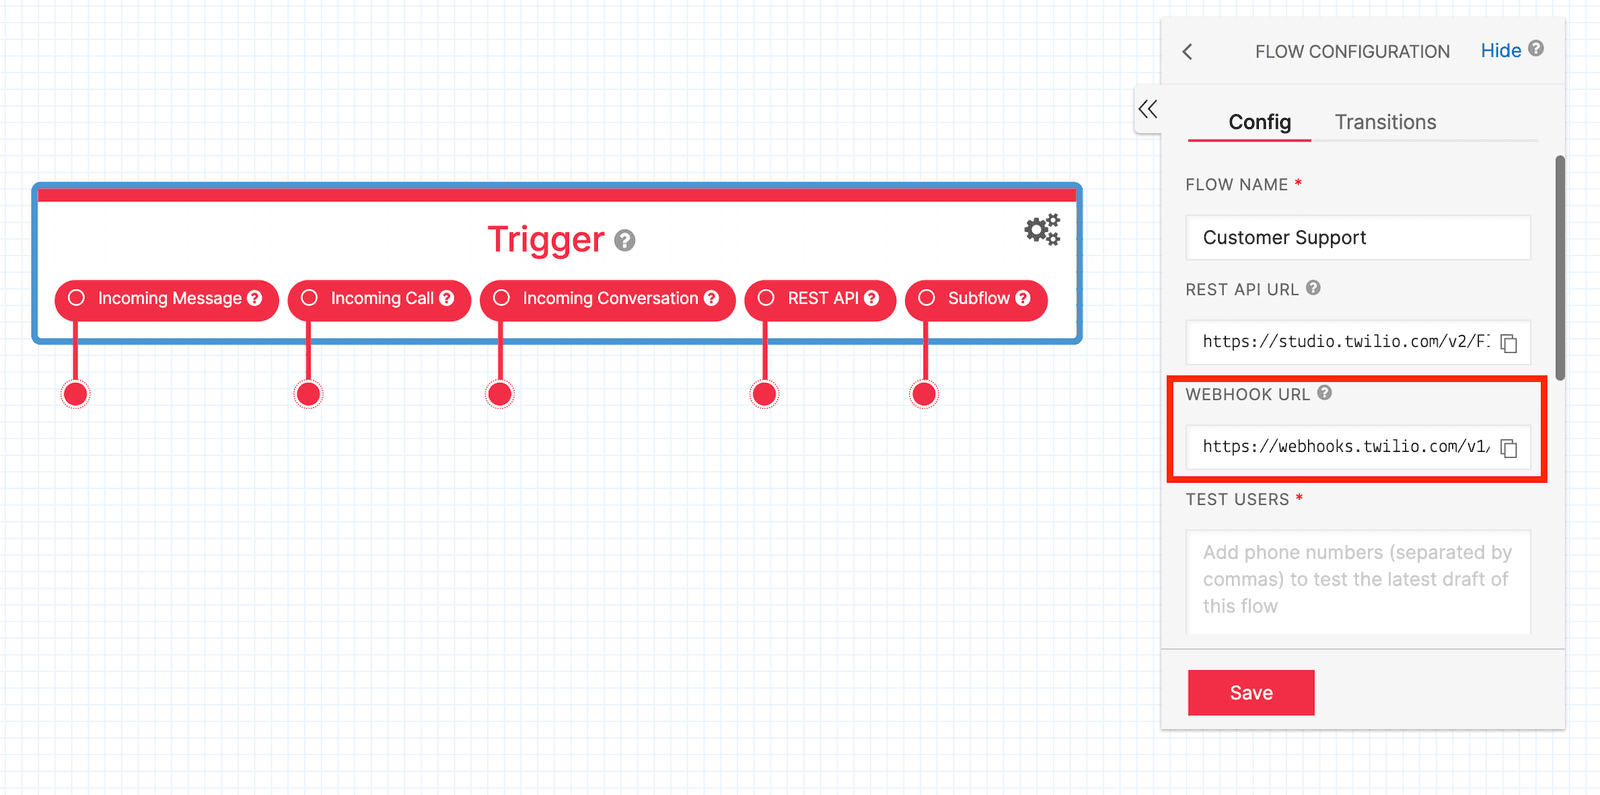
You'll notice that the Studio Canvas comes with a widget already in place. That's the Trigger (Start) widget, which kicks off the Flow when the trigger that is specified is fired.
Next, connect the Studio Flow to your WhatsApp number ("Sender"). Click on the Trigger (Start) widget and locate the Webhook URL field in the right-hand menu. Copy that URL to your clipboard.
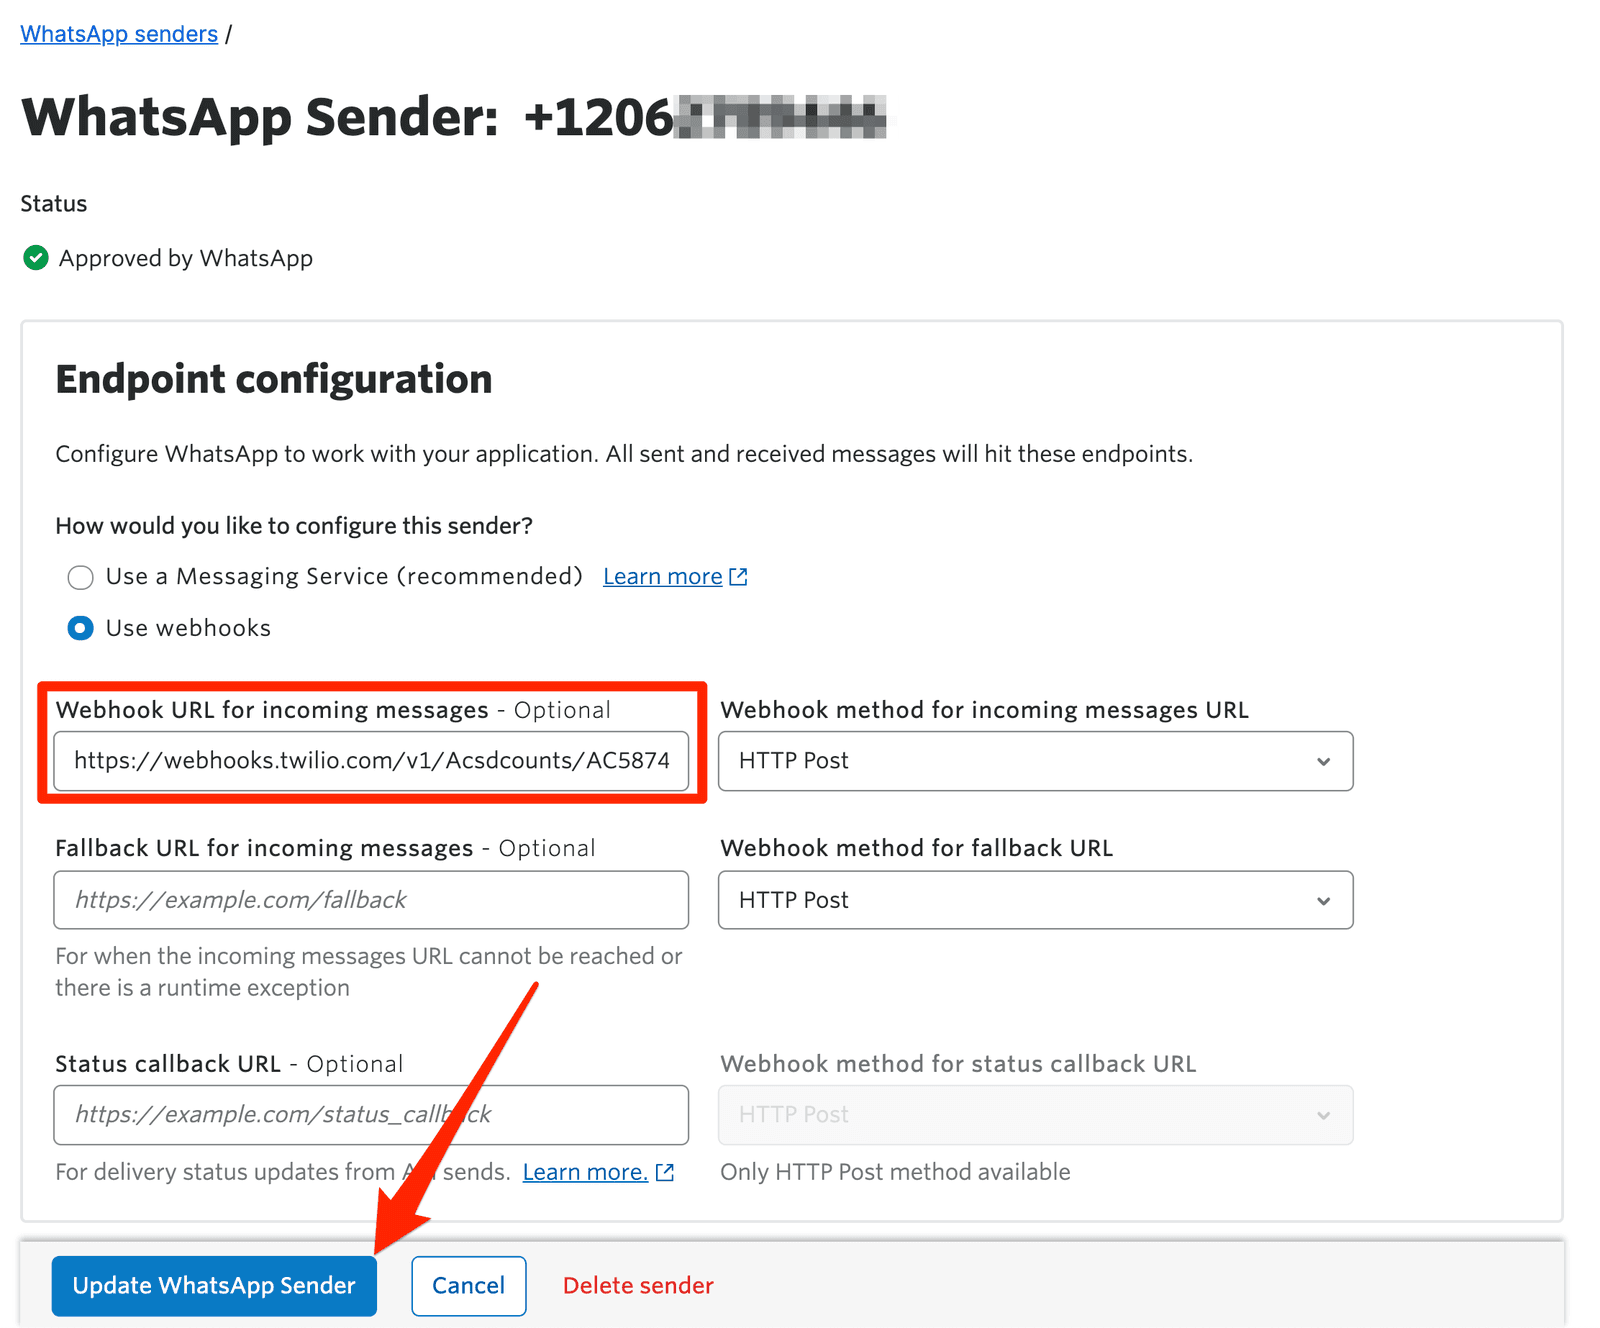
Next, navigate to your WhatsApp Senders in the Twilio console. Click to select the sender that you want to use with this Studio Flow. Paste the Webhook URL that you copied from your Studio Flow into the field Webhook URL for incoming messages. Don't forget to click Update WhatsApp Sender.
Now, any time you receive an inbound message on your selected WhatsApp-enabled sender (number), it will be routed to your new Studio Flow.
Now that you have a Studio Flow, you need to create a menu of options and respond to each option with a custom response. You also need to define a few additional triggers to give your end-users the option to reach a human.
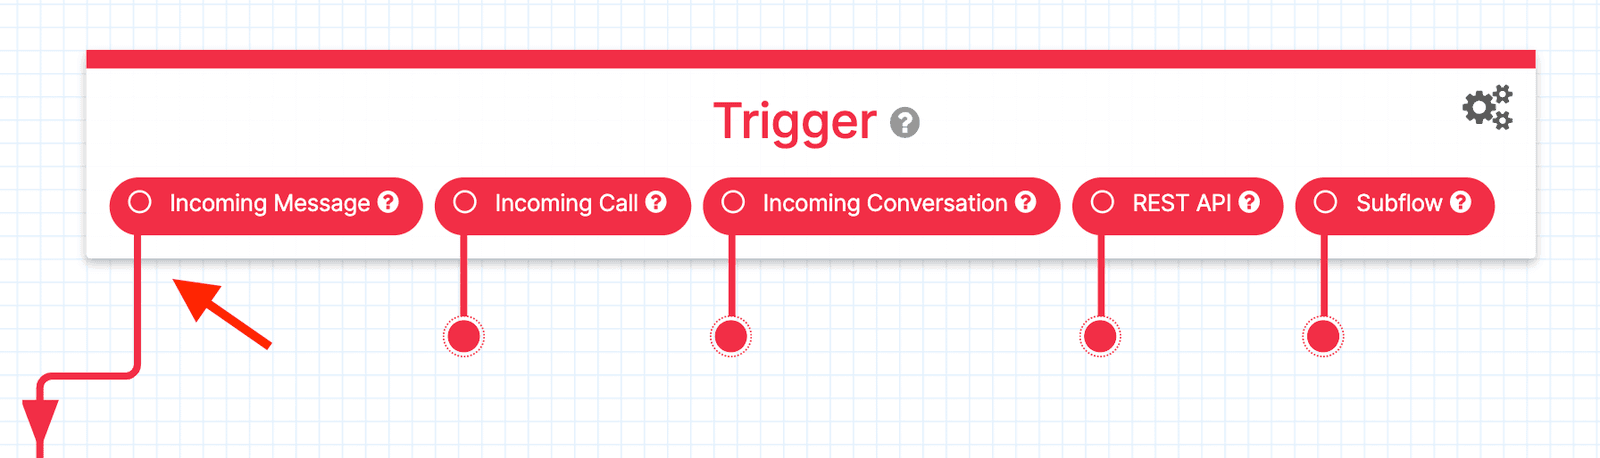
First, capture the messages that come into the Studio Flow and respond to them with a menu. You'll start by setting the trigger in the Trigger (Start) widget to be an Incoming Message.
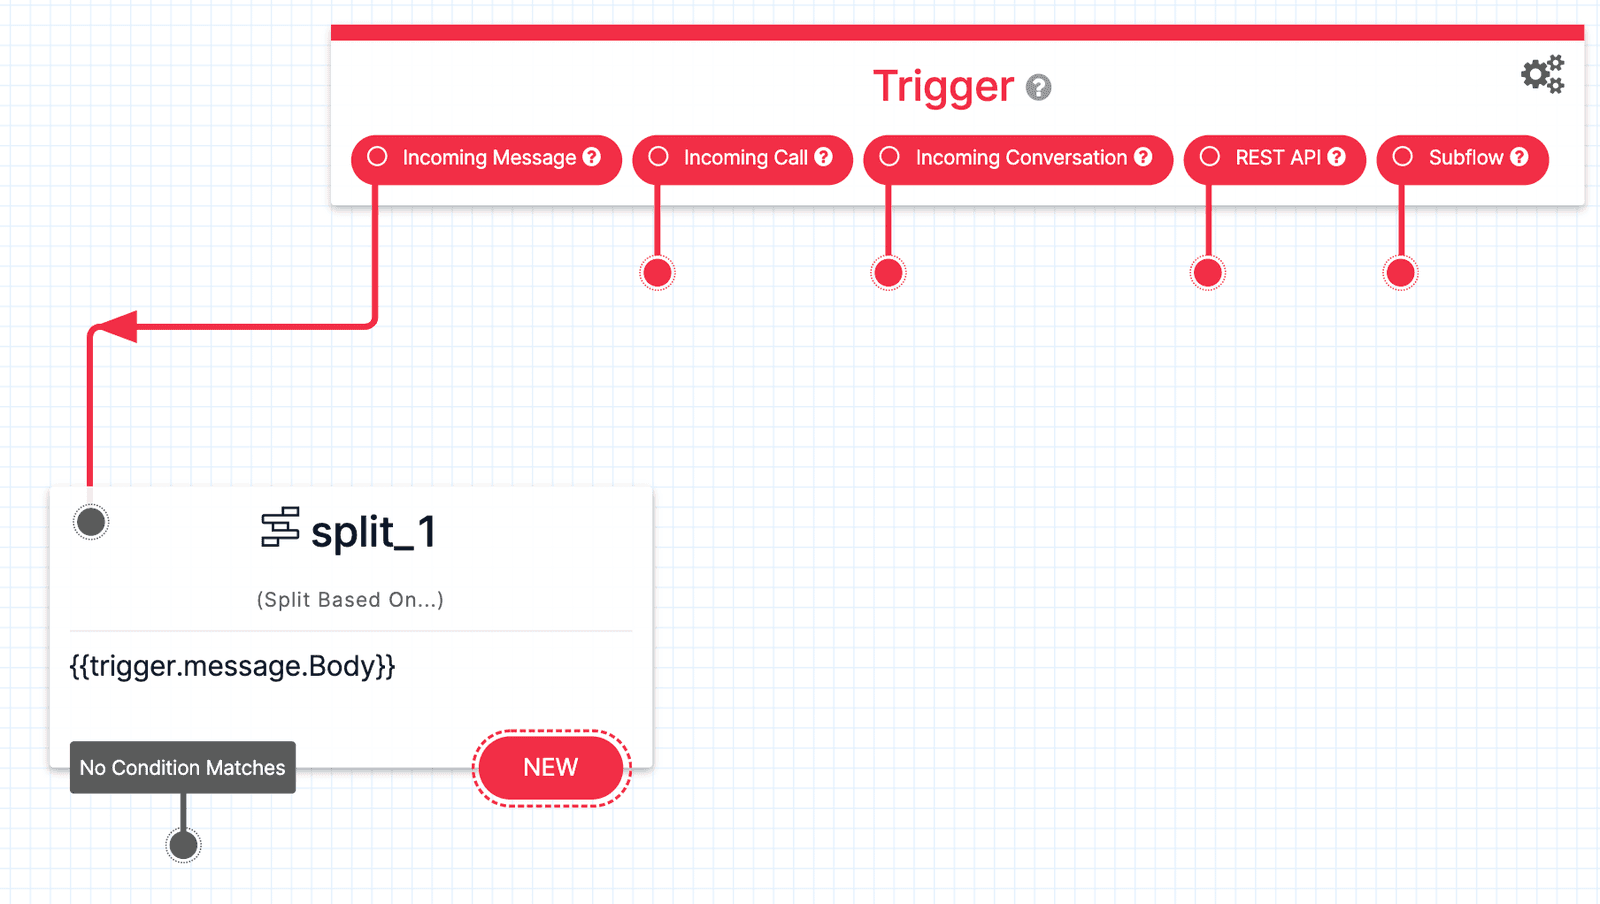
Studio lets you parse incoming messages in a variety of ways. For your customer service Flow, you are going to parse the message body using a Split Based On... widget to figure out what our end-user wants to do.
Drag the Split Based On... widget onto the Studio canvas and connect it to the Incoming Message trigger by dragging the dot to the upper left corner of the new widget. Using this widget, you'll define the conditions to respond to the message. First, let's define what we want the menu response to be.
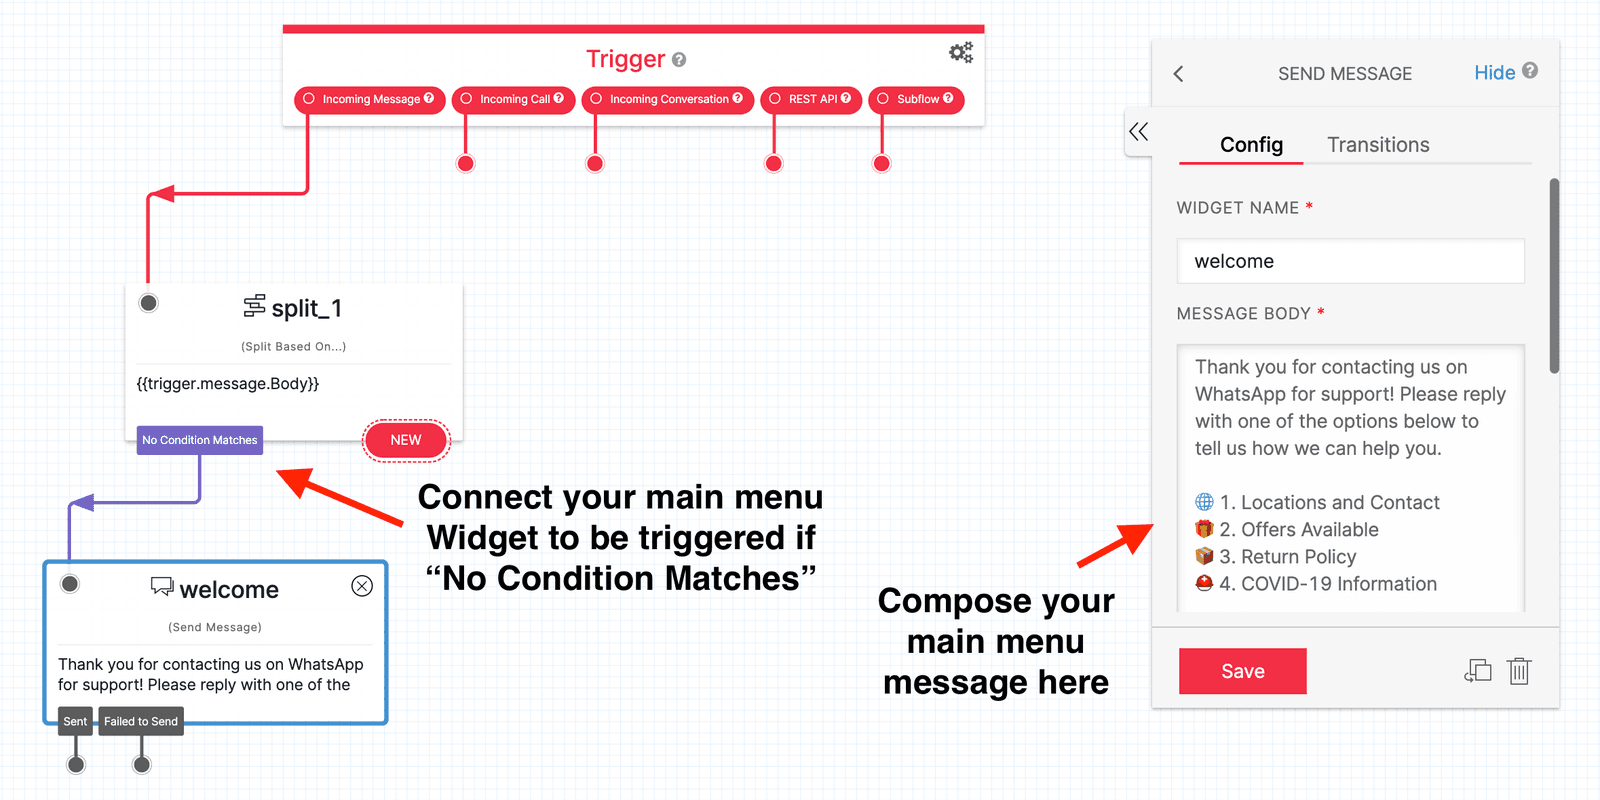
An end-user often starts their message by saying "hi" or "help." However, you cannot always predict what their message body will say, so you will respond with a main menu of options if the message body doesn't match any of the conditions. To do this, first drag the Send Message widget onto the Studio Canvas.
Next, connect the Send Message widget to your Split widget when "No Condition Matches".
Finally, click on the Send Message widget (In this example it has been named welcome) and compose your menu message in the widget's Message Body field. Feel free to create as many options as you'd like. It is recommended to number each menu option so that customers can easily reply with the number of their choice. The message in this example can be copied from below.
1Thank you for contacting us on WhatsApp for support! Please reply with one of the options below to tell us how we can help you.23🌐 1. Locations and Contact4🎁 2. Offers Available5📦 3. Return Policy6⛑ 4. COVID-19 Information
Tip: Add some emojis to make each option stand out more and to make your customer service bot feel more welcoming.
You can now test this first version of your Studio Flow. Click Publish in the top right and send a message to your WhatsApp number. You should receive a response with the message you just defined. Give it a try and come back (We'll be here)!
Next, we need to create a response for our first menu option, "1. Locations & Contact". To do this, we parse the message body, and if it is "1," we send back a response for that option.
To make your first menu option message, drag a new Send Message widget onto the Studio Canvas and write your response in the Message Body.
Tip: Studio flows can quickly get complex. To keep things organized, name your widgets! We are naming this widget option_1.
Next, click on the Split widget, and in the right-hand menu, click "Transitions". Create a new condition by clicking the "plus (+)" button in the New Condition box. You will see a condition appear "If Value Equal_To...", up at the bottom of the menu. Here, select Matches Any Of and define your trigger criteria in the box immediately below.

For our match criteria, you are going to add the following triggers: "1, help, human, agent, support, location, address". Any of these terms will trigger the option that you just created.
WhatsApp requires that every bot provide an escalation path to a human agent. This ensures that your end-users always know how to reach a human. In the response, be sure to provide your support email or number to create a better experience and fulfill WhatsApp's rule.
Twilio also lets you route requests to your team of live agents and respond within the same WhatsApp conversation. For this, explore TaskRouter and Flex for these feature-rich versions of your bot.
At this point, you can test out your new menu option by sending a message to your WhatsApp sender.
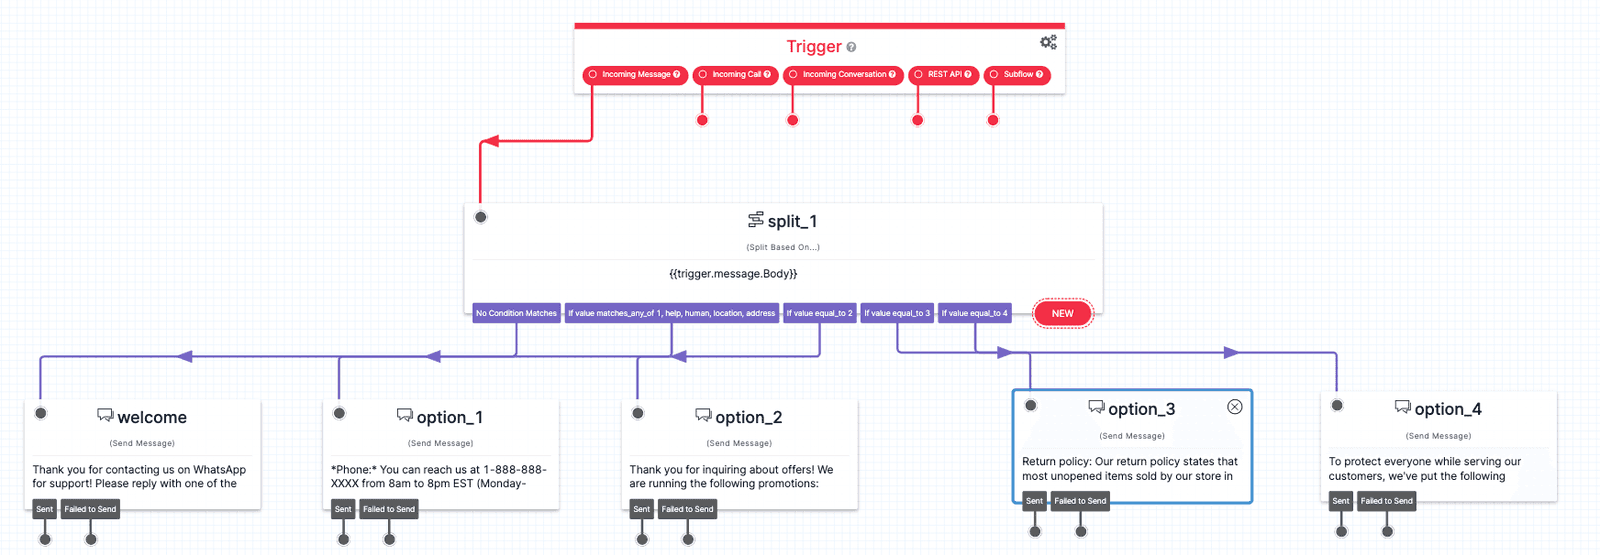
You can now use the same approach to create custom responses for each of your options:
- Create a Send Message widget for each response
- Define a Condition in your Split widget with the appropriate triggers. It is recommended to keep simple numerical triggers: 1, 2, 3, 4, etc.
Once you are done, here is what the flow will look like with four menu options:
Once your bot is done, test it out by sending messages with different options to the number.
Once you confirm that the bot is working, you can publish QR codes to help customers reach out. Twilio and WhatsApp provide custom QR codes that generate pre-populated WhatsApp messages of your choice. This makes it easy for your end users to open the WhatsApp application without having to type in a number.
Here is an example of what a QR code looks like; feel free to scan it:

To get a custom QR code, open a support ticket, as described in our article on rich messaging features in WhatsApp.
And with that, you're now ready to launch with your new customer service flow with WhatsApp.