Analytics-Kotlin Typewriter
Typewriter is a tool for generating strongly-typed Segment analytics libraries based on your pre-defined Tracking Plan spec.
At a high-level, Typewriter can take an event from your Tracking Plan like this "Order Completed" event:
Typewriter uses the event to generate a typed analytics call in different languages:
1// Example client in your web app2const typewriter = require('./analytics')34typewriter.orderCompleted({5orderID: 'ck-f306fe0e-cc21-445a-9caa-08245a9aa52c',6total: 39.997})
1// Example client in your iOS app2SEGTypewriterAnalytics.orderCompleted(3orderID: "ck-f306fe0e-cc21-445a-9caa-08245a9aa52c",4total: 39.995)
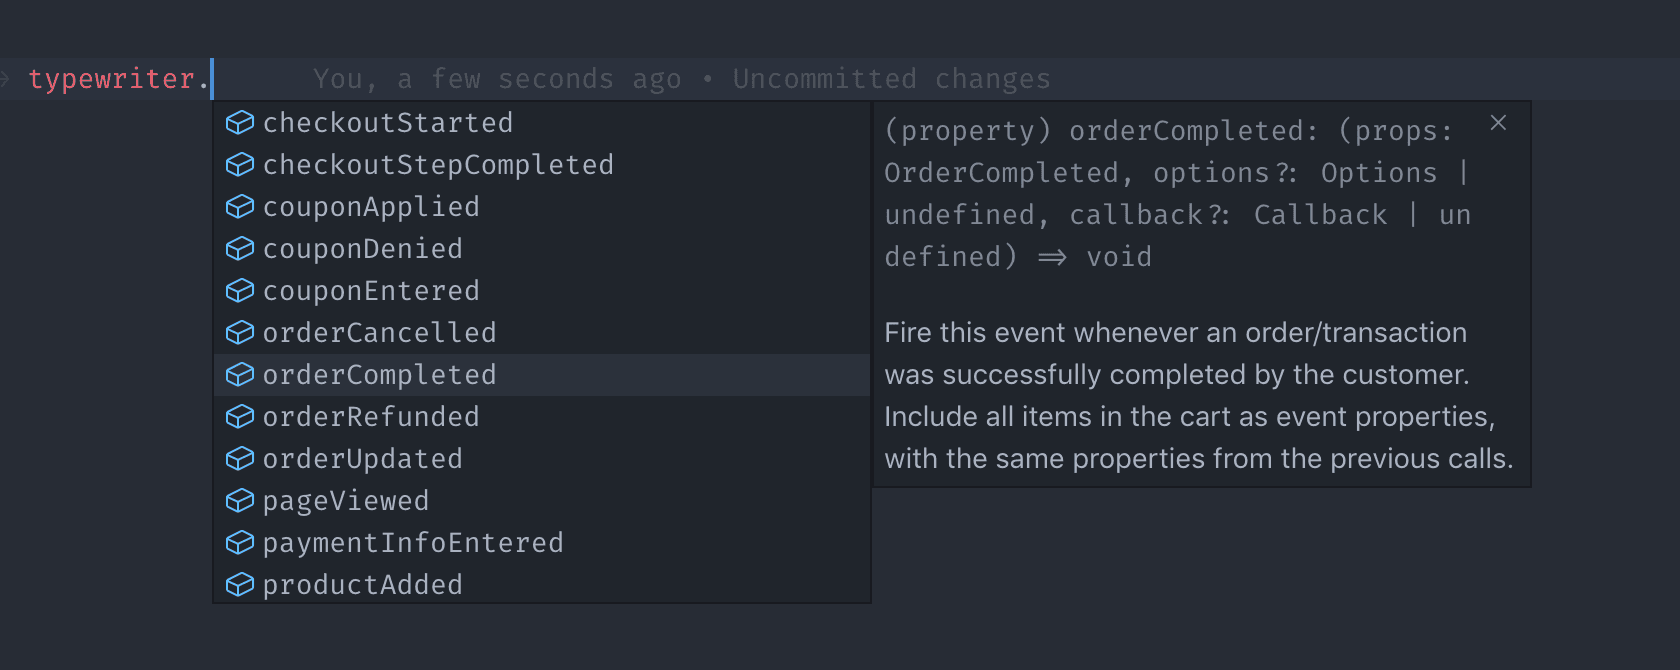
These generated clients are embedded with metadata from your Tracking Plan, which contextualizes your analytics instrumentation, and reduces (or entirely eliminates) incorrect instrumentations in your production environments. In your editor, you can access event names, descriptions, property names, types and more:
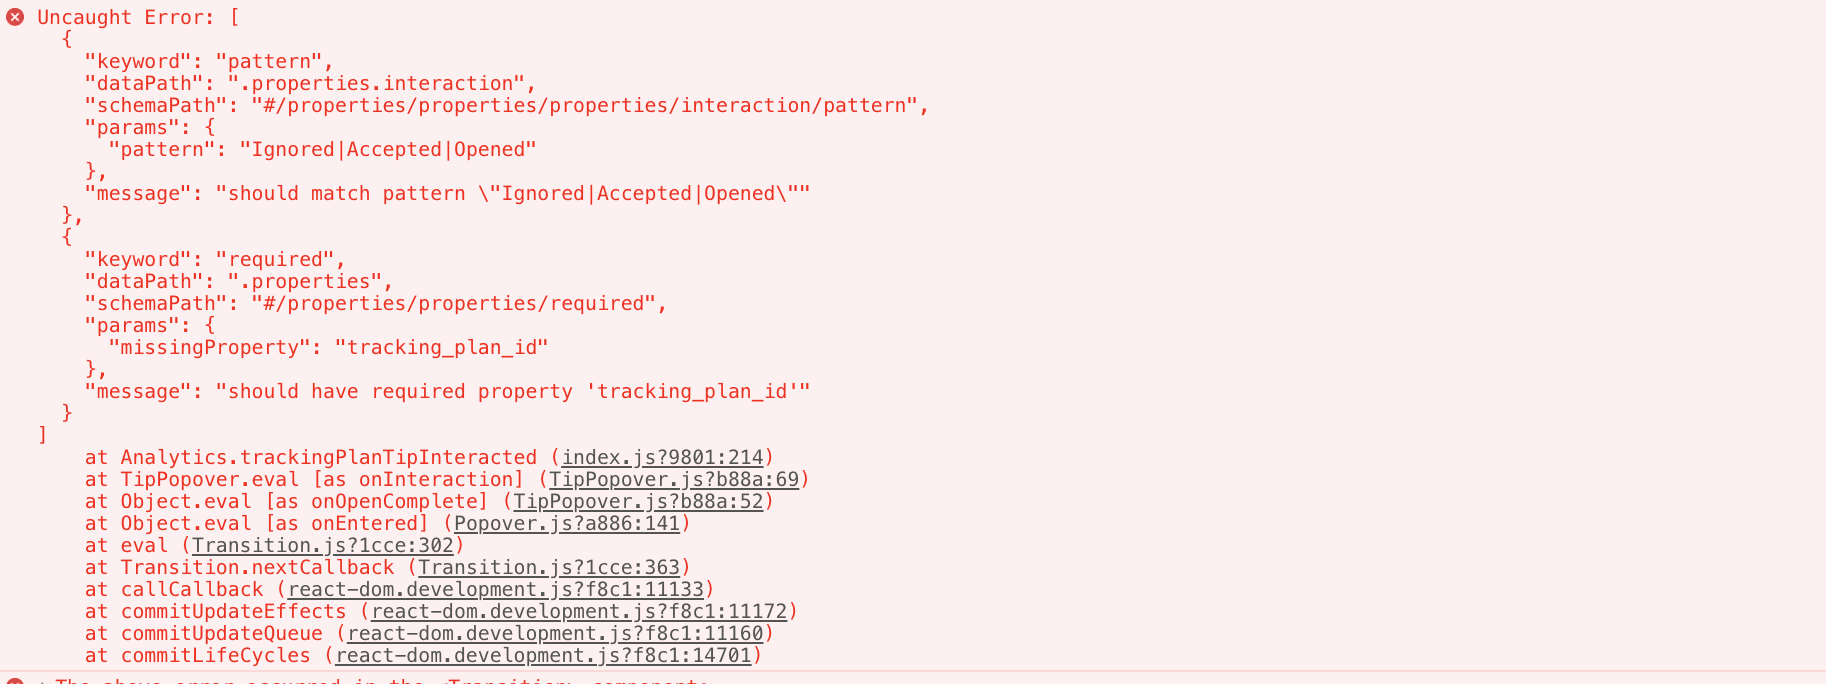
You can also configure Typewriter to validate analytic events at runtime, which can alert you to instrumentation errors during development and testing. Typewriter can warn you about missing required properties, invalid enum values, regex mismatches, and any other advanced JSON Schema you configure in your Tracking Plan.
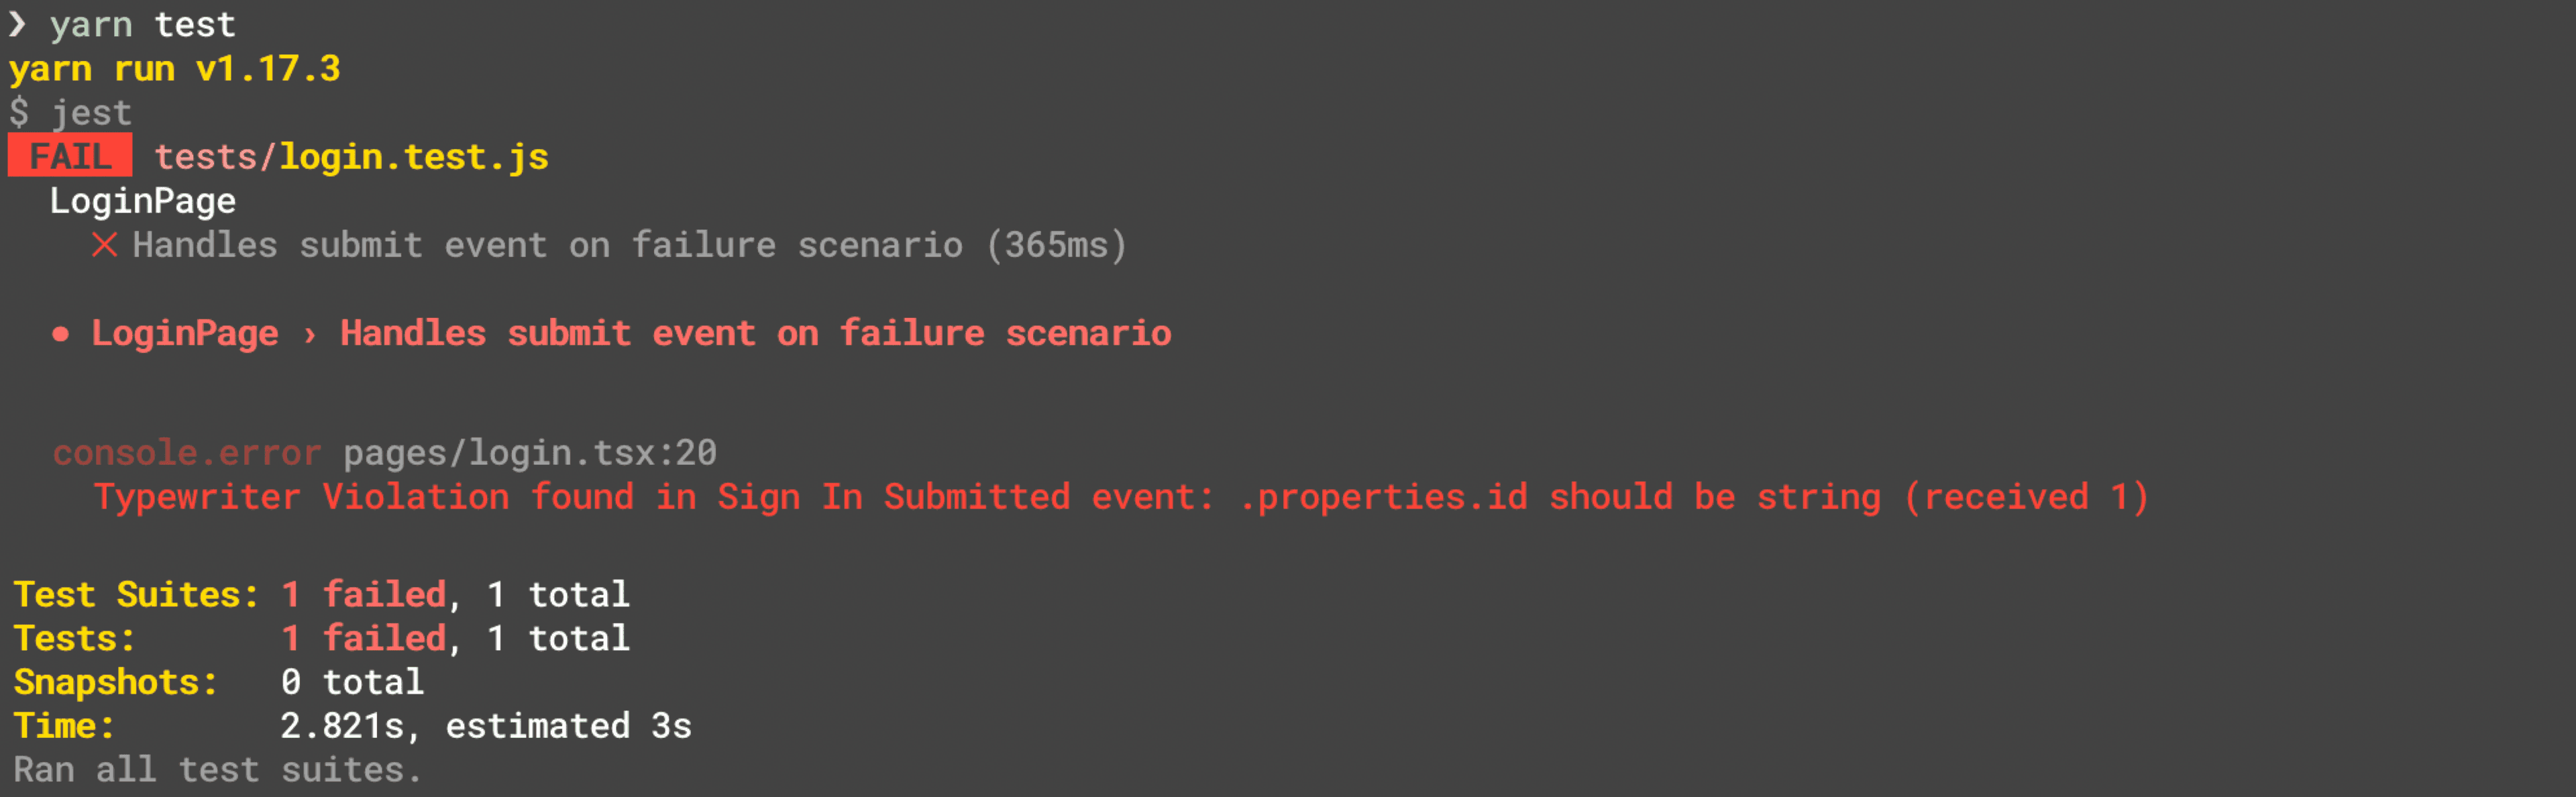
You can use this with a test suite to automatically fail your unit tests if the instrumentation generates any violations:
If you use a statically typed language (such as TypeScript, Java, Objective-C, or Swift), you get access to compile-time warnings about your instrumentation:

Typewriter also helps teams adopt analytics best practices, such as avoiding autogenerated event names, and carefully considering what properties are tracked.
Typewriter is built using Node.js, and requires node@8.x or later, and npm@5.2.x or later to function.
You can check if you have Node and NPM installed by running the following commands in your command-line window:
1$ node --version2v10.15.334$ npm --version56.9.067$ npx --version86.9.0
If you don't have these, install node. Installing node also installs npm and npx for you. If you're on macOS, you can install it with Homebrew:
$ brew install node
Once you've installed Node and NPM, run the --version commands again to verify that they were installed correctly.
Using `analytics-kotlin` SDK
For use with the analytics-android SDK, use Typewriter v7.
To get started using Typewriter with Kotlin:
- Make sure you have
nodeinstalled. Use the instructions in the prerequisites above. - Install
analytics-kotlinin your app. Follow the analytics-kotlin QuickStart Guide. - Run
npx typewriter init. This command enables you to use the Typewriter quickstart wizard that generates atypewriter.ymlconfiguration, along with your first Typewriter client. The command creates atypewriter.ymlfile in your repo. For more information on the format of this file, see the Typewriter Configuration Reference.
Typewriter creates the class file with the package name typewriter. Segment recommends you to enter the right package name during npx typewriter init by choosing to review the Advanced Options for Kotlin. You can also enter the right package name directly in typewriter.yml:
1client:2language: kotlin3sdk: kotlin4languageOptions:5package: com.segment.typewriter
Info
Run npx typewriter to regenerate your Typewriter client. You need to do this each time you update your Tracking Plan.
You can now use your Typewriter client in your Android Kotlin or Java application as extensions to any Analytics object:
Kotlin:
1// Import your auto-generated Typewriter client:2import com.segment.generated.*3analytics.orderCompleted(OrderCompleted(orderID = "110", total = 39.98))
Java:
1// Import your auto-generated Typewriter client:2import com.segment.generated.*34// Issue your first Typewriter track call!5TypewriterAnalytics.with(this).orderCompleted(6OrderCompleted.Builder()7.orderID("ck-f306fe0e-cc21-445a-9caa-08245a9aa52c")8.total(39.99)9.build()10);
To update or add a new event to a Typewriter client, first apply your changes to your Tracking Plan. Then run the following:
1# Run this in the directory with your repo's `typewriter.yml`.2$ npx typewriter
Typewriter requires a Segment API token to fetch Tracking Plans from the Segment Public API.
You must be a workspace owner to create Segment API tokens.
To create an API token:
- Click on the Tokens tab on the Access Management page and click Create Token.
- Choose Segment's Public API.
- Add a description for the token and assign access. If you choose Workspace Member, you only need to select Tracking Plan Read-Only for the Resource Role, as Typewriter only needs the Tracking Plan Read-Only role.
- Click Create.
Typewriter looks for an API token in three ways, in the following order:
- If a token is piped through, it will use that token. For example,
echo $TW_TOKEN | typewriter build. - Typewriter executes a token script from the
typewriter.yml. See Token Script for more information. - Typewriter reads the contents of the
~/.typewriterfile.
The quickstart wizard prompts you for an API token and stores it in ~/.typewriter for you.
Segment recommends you use a Token Script to share an API token with your team. When you use a token script, you can supply your API token as an environment variable (echo $TYPEWRITER_TOKEN), from an .env. file (source .env; echo $TYPEWRITER_TOKEN) or using any other CLI tool for providing secrets.
Segment also recommends you to pipe through your API Token as this will let you keep your token secret, but it also allows you to share it across your team.
Warning
Segment is keeping the Token Script execution for compatibility purposes only in v8 of Typewriter. Segment might deprecate this feature in the future, and encourages you to execute your script and pipe in the token. For example, echo $TW_TOKEN | typewriter build.
Segment strongly recommends that you store your Tracking Plan (plan.json) in a version control system. This guarantees that Typewriter will generate the same client, regardless of any changes you make to your Tracking Plan in the Segment app. Otherwise, changes to your Tracking Plan could lead to broken builds.
Segment recommends that you only check in the plan.json, and generate your Typewriter client during the application build step (by calling npx typewriter). You can do this in git with the following .gitignore:
1# Make sure to update `analytics` to the full path to your Typewriter client.2analytics/*3!analytics/plan.json
If this isn't possible you can also check in the full generated client. Segment, however, doesn't recommend this method.
Typewriter stores its configuration in a typewriter.yml file in the root of your repository. A sample configuration might look like this:
1# Segment Typewriter Configuration Reference (https://github.com/segmentio/typewriter)2# Just run `npx typewriter` to re-generate a client with the latest versions of these events.34scripts:5# You can supply a Segment API token using a `script.token` command. See `Token Script` below.6token: source .env; echo $TYPEWRITER_TOKEN7# You can format any of Typewriter's auto-generated files using a `script.after` command.8# See `Formatting Generated Files` below.9after: ./node_modules/.bin/prettier --write analytics/plan.json1011client:12# Which Segment SDK you are generating for.13# Valid values: analytics.js, analytics-node, analytics-react-native, swift, kotlin.14sdk: analytics-node15# The target language for your Typewriter client.16# Valid values: javascript, typescript, kotlin, swift.17language: typescript1819trackingPlans:20# The Segment Protocols Tracking Plan that you are generating a client for.21# Provide your workspace slug and Tracking Plan id, both of which can be found22# in the URL when viewing the Tracking Plan editor. For example:23# https://app.segment.com/segment-demo/protocols/tracking-plans/rs_QhWHOgp7xg8wkYxilH3scd2uRID24# You also need to supply a path to a directory to save your Typewriter client.25- id: rs_QhWHOgp7xg8wkYxilH3scd2uRID26workspaceSlug: segment-demo27path: ./analytics
At any time, you can regenerate this file by running the Typewriter quickstart wizard:
$ npx typewriter init
Warning
Segment is keeping the Token Script execution for compatibility purposes only in v8 of Typewriter. Segment might deprecate this feature in the future, and encourages you to execute your script and pipe in the token. For example, echo $TW_TOKEN | typewriter build.
If your team has a standard way to supply secrets (passwords and tokens) in development environments, whether that's an .env file or an AWS-backed secret store, you can configure Typewriter to use it to get a Segment API token.
To configure this, create a token script called scripts.token in your typewriter.yml. This script is a string that contains a shell command that, when executed, outputs a valid Segment API token. Here's an insecure, example:
1scripts:2# NOTE: NEVER commit a Segment API token to your version control system.3token: echo "OIEGO$*hf83hfh034fnosnfiOEfowienfownfnoweunfoiwenf..."
To give a real example, Segment stores secrets in segmentio/chamber which is backed by AWS Parameter Store. Providing access to a token in chamber looks like this:
1scripts:2token: aws-okta exec dev-privileged -- chamber export typewriter | jq -r .typewriter_token
To learn more about the typewriter.yml configuration format, see the Configuration Reference.
In your typewriter.yml, you can configure a script (scripts.after) that fires after generating a Typewriter client. You can use this to apply your team's style guide to any of Typewriter's auto-generated files.
For example, if you want to apply your prettier formatting to plan.json (the local snapshot of your Tracking Plan), you can use an after script like this:
1scripts:2after: ./node_modules/.bin/prettier --write ./analytics/plan.json
To learn more about the typewriter.yml configuration format, see the Configuration Reference.
As mentioned in the Best Practices section above, Segment recommends that you only check in the plan.json, and not the generated clients, into your version control. Instead, Segment recommends building these clients as part of the build step for your application.
In your CI environment, this usually involves a step to build the Typewriter client. Make sure to build the production client before deploying the application, as explained in Tracking Plan Violation Handling.
1# An example (simplified) CircleCI configuration:2jobs:3test:4steps:5- npx typewriter development6- yarn run test78deploy:9steps:10- npx typewriter production11- yarn run deploy