Live Plugins
Live Plugins let you modify analytics events in real time, directly on user devices, without rebuilding or redeploying your app. They're JavaScript snippets that you publish from your Segment workspace, where they run on your users' mobile devices to filter or transform data before it's sent to Segment.
Live Plugins work alongside Auto-Instrumentation to give you flexible control over your event data.
Live Plugins is in Public Beta
Live Plugins is in public beta for Swift and Kotlin and available to select Business Tier Customers only. To enable this feature for your workspace, contact your CSM.
You can use JavaScript Live Plugins with Analytics-Swift and Analytics-Kotlin to modify or filter event data directly on user devices. This lets you make real-time updates to your tracking logic without redeploying your app, helping you maintain data quality and consistency across your mobile users.
Because Live Plugins run before data leaves the device, you can apply the same logic to all destinations or target specific destinations as needed.
To use Live Plugins, you first need to set up your mobile app with a one-time configuration.
To configure Live Plugins:
- Include Analytics-Live for Swift plugin and Analytics-Live for Kotlin in your project.
- Add the plugin to your instance of Analytics, using the following code:
1// Import the live plugin2import AnalyticsLive3// Instantiate Analytics4// Add LivePlugins to Analytics5analytics.add(plugin: LivePlugins(null))
After you've completed setup, you can deploy your apps to the Apple App Store and Google Play Store. You can then add new JavaScript plugin code to your mobile apps through the Segment website, and perform updates as often as needed.
To access Live Plugins for your Swift and Kotlin sources:
- In your Segment workspace, go to Connections > Sources.
- Select your Swift or Kotlin source (or create a new one).
- From the source's overview page, click the Live Plugin tab..
Follow the steps in this section to create and deploy your own Live Plugin.
To create your own live plugin, you'll start by subclassing the LivePlugin class and overloading one (or more) of the event-related functions.
For example, suppose you want to correct a field-naming inconsistency in your event data:
1// This UserIdLivePlugin corrects a naming inconsistency in the event data by renaming "user_id" to "userId."23class UserIdLivePlugin extends LivePlugin {4// The execute function is called for every event.5execute(event) {6// Correct the field naming inconsistency from "user_id" to "userId."7event.userId = event.user_id;8delete event.user_id;9return event;10}11}1213// Add the UserIdLivePlugin to the Analytics instance without specifying a target destination (null).14analytics.add(new UserIdLivePlugin(LivePluginType.enrichment, null));
In this example, you've created a UserIdLivePlugin by subclassing LivePlugin and implementing the execute() function. This function gets applied to every event.
After you define your custom Live Plugin, you need to add it to the Analytics instance. The Analytics object is globally accessible, and you can use the add() method to include your Live Plugin.
When you add a new instance, you specify the LivePluginType and the destination to which it applies, or use null to apply it to all destinations.
Here's how you can add the UserIdLivePlugin to your Analytics instance:
analytics.add(new UserIdLivePlugin(LivePluginType.enrichment, "adobe"));
To control when your custom Live Plugin runs during the event lifecycle, you can use LivePluginType enums, which define different timing options for your Live Plugin. Here are the available types:
1const LivePluginType = {2before: "before",3enrichment: "enrichment",4after: "after",5utility: "utility"6}
With these enums, you can select the timing that best fits your custom Live Plugin's target use case. These types align with categories used for Native Plugins.
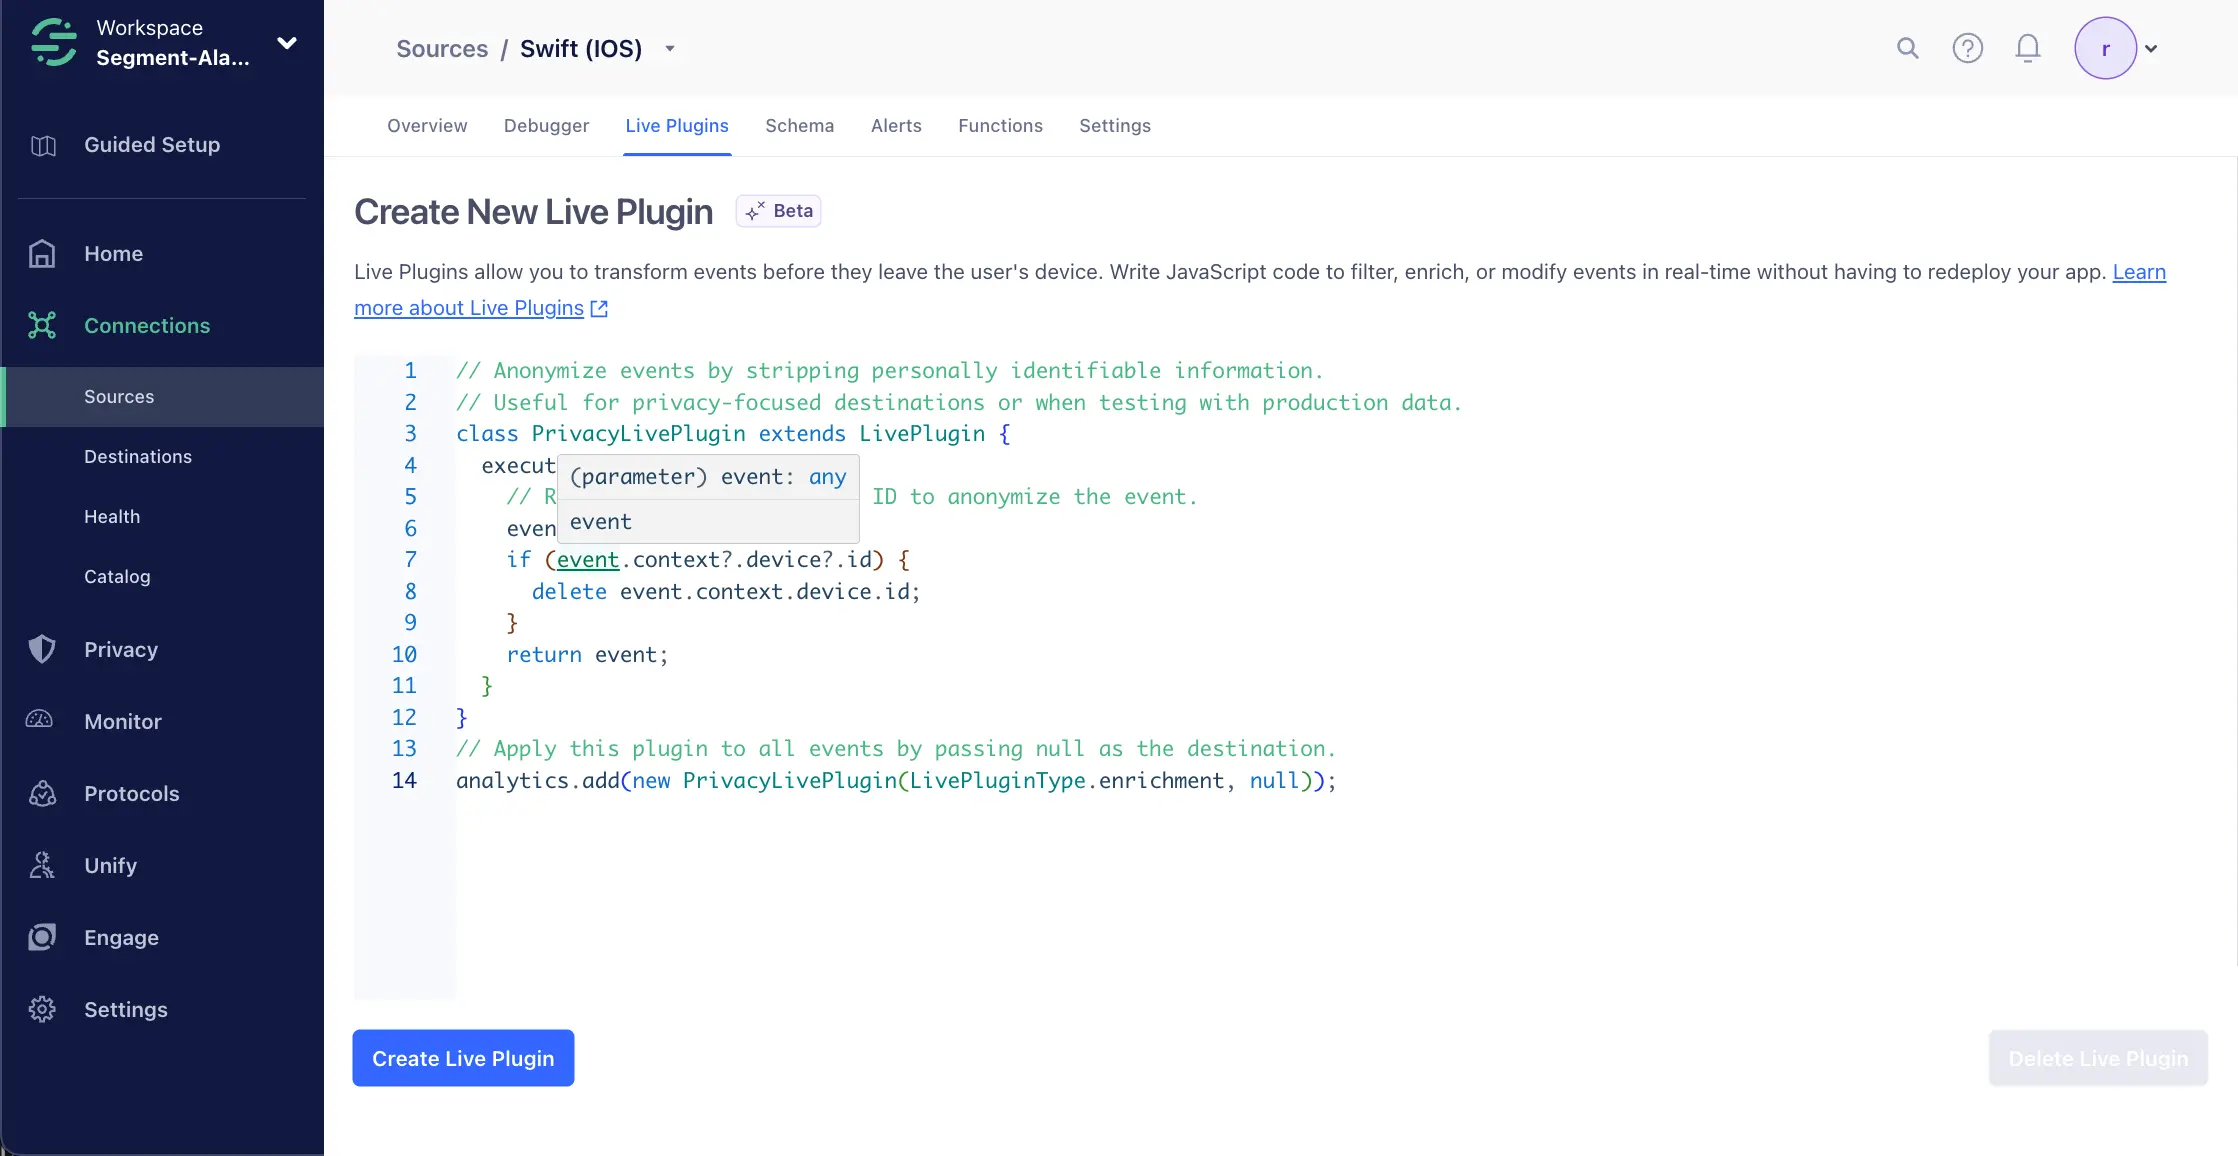
The following live plugin examples address common use cases:
12// This PrivacyLivePlugin anonymizes events by removing user IDs and device IDs34class PrivacyLivePlugin extends LivePlugin {5// The execute function is called for every event.6execute(event) {7// Remove the user ID and device ID from the event to anonymize it.8event.userId = null;9delete event.context.device.id;10return event;11}12}1314analytics.add(new PrivacyLivePlugin(LivePluginType.Enrichment, null));
Live Plugins expose an interface that lets you intercept Segment events and modify their data. This interface includes several functions that you can implement for custom behavior:
1// Interface for Live Plugins:2class LivePlugin {3// Event callbacks4execute(event): event5identify(event): event6track(event): event7group(event): event8alias(event): event9screen(event): event1011// Called when the Analytics instance is being reset.12reset() { }13}
This section covers the primary event callbacks.
The execute callback function serves as the primary entry point for Live Plugins to intercept and modify events. When you implement the execute function in your plugin, you can decide whether to keep the event by returning it or drop it by returning null.
This callback is versatile, as you can use it for various event types when the event type itself is not critical. Additionally, execute lets you invoke more specific callbacks based on the event type.
| Callback | Description |
|---|---|
execute(event): event | Called for every event. Must return the event or null to drop it. If you do return the event, then the more specific callback based on the event type is called. Use this callback if the event type isn't important. Additionally, you can call super.execute() to use one of the event type callbacks for Track, Identify, Screen, Group, or Alias calls. |
The following callback functions are designed for specific event types and let you control event modification:
| Callback | Description |
|---|---|
track(event) | Called for a tracking event. Must return the event to keep it or return null to drop it. |
identify(event) | Called for an identify event. Must return the event to keep it or return null to drop it. |
screen(event) | Called for a screen event. Must return the event to keep it or return null to drop it. |
group(event) | Called for a group event. Must return the event to keep it or return null to drop it. |
alias(event) | Called for an alias event. Must return the event to keep it or return null to drop it. |
There's one non-event function:
| Function | Description |
|---|---|
reset(): null | Called when the Analytics instance is about to be reset. Nothing to return. |