Get Started with TwiML Bins
TwiML Bins is a serverless solution that hosts instructions for your Twilio applications. They're a useful way to prototype and explore Twilio's capabilities without setting up your own web server to respond to requests. Twilio expects your webhook to respond with properly formed TwiML (Twilio Markup Language).
TwiML Bins support templating, so you can include information dynamically in your response. These templates add power to your application, but they have some limitations because they are logic-less by design.
Warning
If your use case requires complex logic or looping, you should check out another one of our serverless offerings, Twilio Functions
This tutorial walks through how to create and use a TwiML Bin that responds to an incoming Voice call, then explores templating with dynamic values.
You can sign up for a free Twilio trial account here. The trial lasts 30 days or until you exhaust your free product units, whichever comes first. If you run out of product units before 30 days, you'll need to upgrade your account to continue. For details on trial free units and restrictions, see Twilio trial account.
- When you sign up, you'll be asked to verify your personal phone number. This helps Twilio verify your identity and also allows you to make calls to your phone from your Twilio account while in trial mode.
- Once you verify your number, you'll be asked to create a project. For the sake of this tutorial, you can click on the "Learn and Explore" template. Give your project a name, or just click "skip remaining steps" to continue with the default.
- Once you get through the project creation flow, you'll arrive at your project dashboard in the Twilio Console. This is where you'll be able to access your Account SID, authentication token, find a Twilio phone number, and more.
If you don't currently own a Twilio phone number with Voice functionality, you'll need to purchase one. After navigating to the Numbers & senders page, click Set up a new phone number and follow the steps to search for a Voice-compatible phone number.
You'll then see a list of available phone numbers and their capabilities. Find a number that you like and click Select to add it to your account.
To create a new bin, head over to your console. You'll find all your TwiML Bins located under the Developer tools section.
If this is your first time here, you'll be prompted with a button to "Create a new TwiML Bin." Otherwise, you'll see a + button above your current list of TwiML Bins.
Our demo application is going to simply respond to a caller with the phrase "Hello, World." A TwiML Bin allows you to set a Friendly Name to later identify it. Let's enter "Hello World" for the Friendly Name.
In the text area, you'll notice that your TwiML Bin is prepopulated with the proper XML declaration. Right after that declaration, let's add some valid Voice TwiML.
1<?xml version="1.0" encoding="UTF-8"?>2<Response>3<Say>Hello, World!</Say>4</Response>
Warning
Remember that TwiML is case-sensitive: <say> is different than <Say>
If you've done this correctly, you'll notice a validation success message directly below your TwiML bin.
Finally, click the Create button. Now that we've got it created, let's go use it!
To use your new TwiML Bin, you'll need to set a handler on one of your phone numbers.
Choose a number from your list of phone numbers to use the instructions you provided in your TwiML Bin with this number. Click on this number, then under the Configuration tab, in the Voice & Fax section, choose TwiML from the "A Call Comes In" dropdown menu.
In the "Select a TwiML Bin" dropdown, you'll see your friendly named TwiML Bin, "Hello World". Choose that, and be sure to Save your phone number. Now go ahead and give your number a call. Hello, world indeed!
You might've noticed while you were choosing your TwiML Bin from the dropdown that there was a plus button. This is a shortcut to quickly add one of these handy bins, right when you need it.
And just like that, you have a hosted solution that you can quickly update to meet your needs. This static TwiML will get you pretty far in building all sorts of applications.
However, there will most likely come a time when you'll want to customize the TwiML based on the specific request coming in.
We've all encountered a static website where the information is always the same and never changes. Some websites offer more customization to their users. Maybe you're logged in and you're greeted by your name. Or maybe the site knows your location and serves location-specific content to you.
Twilio applications can be customized too. You can use information about the incoming request in your TwiML Bin by using the built-in templating language, Mustache.
Mustache is a logic-less templating language - that is to say, there aren't any specific looping constructs, nor are there any branching statements. It's a popular templating solution with various language implementations. The name comes from the curly braces used in its syntax. If you tilt your head sideways, a { does indeed look like a mustache.
Mustache uses what are known as tags to create your dynamic content. You can create a tag with double opening mustaches, followed by a tag key, and then closing mustaches. Your tag key directly references your dynamic data.
For instance, we should make our TwiML a little more personalized. How about instead of saying "Hello, World!", we personalize it with the caller's phone number?
1<?xml version="1.0" encoding="UTF-8"?>2<Response>3<Say>Hello, {{From}}!</Say>4</Response>
With this template, we can render the caller's phone number using an object, or hash, to produce our dynamic content.
Your TwiML Bin will automatically create that object and then apply it to your template. By default, the Twilio Request Parameters are available for use in these templates.
Go ahead and give your number a call. Yikes, it doesn't sound the greatest.
They say nothing is more beautiful than the sound of your own name. It'd be nice to be able to pass a customized name through. Let's do that next.
In addition to the values from Twilio's Request, your object will also contain any query string parameters on the URL. Remember that Twilio applications can have many events occur that will make webhook requests to specific URLs.
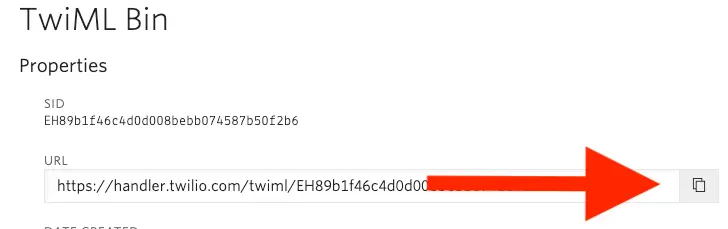
Every TwiML Bin has a unique URL. Go ahead and copy yours now.
When you declared your incoming call webhook, you'll recall we used the TwiML value in the dropdown. This time, just for the sake of demonstrating how to pass in a custom value, let's go ahead and switch the dropdown to Webhook. Now paste in the URL that leads to your TwiML Bin.
To add a query string to a URL, add a trailing question mark followed by key and value pairs, all joined together by ampersands.
For instance:
?CustomerCompany=Acme&CustomerID=8675309
Let's add a query string to our TwiML Bin that sets the value of FirstName to your name.
?FirstName=Charlie
And now let's open your TwiML template and make it use the FirstName variable we passed in the query string.
1<?xml version="1.0" encoding="UTF-8"?>2<Response>3<Say>Hello, {{FirstName}}!</Say>4</Response>
Now save your phone number and give it a call. Wasn't that a beautiful sound? (That is of course assuming the text-to-speech pronounced your name correctly.)
There's a potential problem lurking here. Our template now basically requires that we pass in a FirstName variable on the query string. We should deal with the case where there is missing data.
Even though our templates are logic-less, we can still show and hide parts of a template by using Mustache sections.
In our TwiML template, we want to only say "Hello" when we have a FirstName value. We can define a section for FirstName by including a mustache followed by the pound sign, # (or hashtag if you will).
1<?xml version="1.0" encoding="UTF-8"?>2<Response>3<Say>4{{#FirstName}}5Hello, {{ . }}!6{{/FirstName}}7</Say>8</Response>
The code between the tags is relative to the parent section's data layout. It's possible to use nested objects as your object. However, in our case, FirstName is only at the top level of our object. To access the current value of a section you use the . notation. See how inside the {{#FirstName}} section we are using the dot . to refer to its value.
Great! Now it will only say Hello, FirstName when the value is available. However, we should probably say Hello World by default, in the case that the FirstName value doesn't exist.
Good news! We can also define inverted sections. These sections will only display when a value is missing. To define an inverted section, you use the caret ^ symbol followed by the section name.
1<?xml version="1.0" encoding="UTF-8"?>2<Response>3<Say>4{{#FirstName}}5Hello, {{ . }}!6{{/FirstName}}7{{^FirstName}}8Hello, World!9{{/FirstName}}10</Say>11</Response>
And there you go! Go ahead and change your TwiML Bin's URL to include FirstName as a query parameter. Verify that you hear the first name. Now remove it, and you should hear "Hello World" again.
Even though this example only swaps out text in the body of a TwiML tag, you should note that these sections can also include TwiML tags. Essentially this allows you to optionally include instructions.
You can build many robust solutions using just TwiML Bins. If you need more power while remaining serverless, explore Twilio's other serverless products, Twilio Functions and Assets and Twilio Studio.