Configuring Android Push Notifications
In this guide, we'll go through all the necessary steps to get your Android push credentials configured with Twilio Notify. The end result is a properly configured Android app and a Twilio Notify Push Credential which you can then use to send notifications to your Android app. Let's get started!
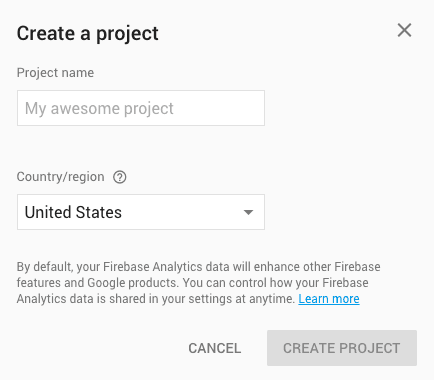
Google has replaced Google Cloud Messaging (GCM) with Firebase Cloud Messaging (FCM). To use push notifications for your Android apps, you will need to create a project on the Firebase Console:
The Firebase Cloud Messaging (FCM) library requires a file called google-services.json in your Android project's app directory to link your app with Firebase services. You can generate this file in the Firebase console or using Android Studio's Firebase integration. We'll use the web-based approach in this guide.
After you create a Firebase project, you can add Firebase to your Android app:
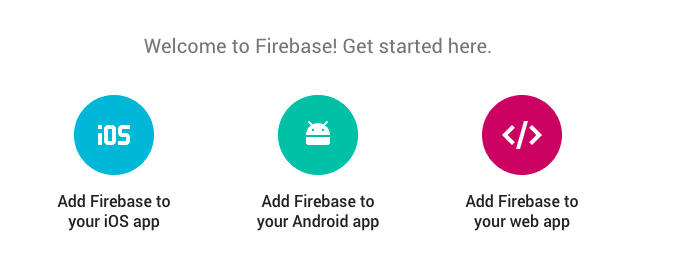
Clicking the middle link will bring up this dialog:
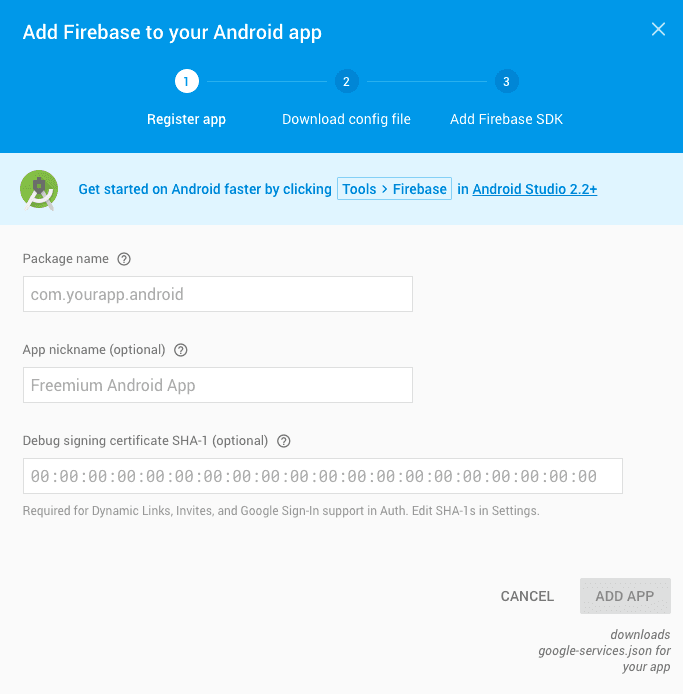
After filling in your Android app's package name, clicking the Add App button will automatically download the generated google-services.json file.
You will need to put that file into the app folder of your Android project, or Gradle won't be able to build your application after you add the Firebase libraries.
The next screen in the Firebase dialog will also explain where to put the file you just downloaded.
Info
You can skip this step if using the Quickstart app.
We have already pre-configured the quickstart app so you can just skip ahead to creating a credential.
Android Studio uses Gradle to parse your credentials from the google-services.json file. Your app has 2
build.gradle files, a project-level one and an app-level one.
Add this line to your project-level build.gradle in the dependencies section:
compile "com.google.firebase:firebase-messaging:10.0.1"
Info
You can skip this step if using the Quickstart app.
We have already pre-configured the quickstart app so you can just skip ahead to creating a credential.
To fully integrate your application with Firebase Cloud Messaging, you'll need to create two application-specific Android Services, and then add them to your AndroidManifest.xml file. Check out the quickstart app for an example of each of these services.
The first service to add is a messaging service that responds to Firebase messaging events. This service must extend com.google.firebase.messaging.FirebaseMessagingService from the Firebase Cloud Messaging library.
1<service2android:name="com.example.ExampleMessagingService">3<intent-filter>4<action android:name="com.google.firebase.MESSAGING_EVENT" />5</intent-filter>6</service>
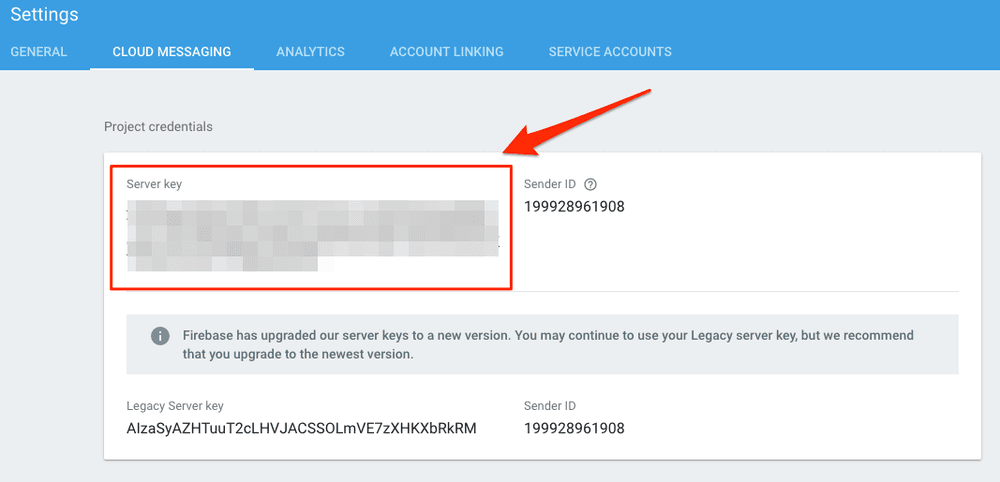
With our app configured to receive push notifications, we'll need to create a matching FCM Credential that our Notify Service can use. In Firebase the secret is called a Server Key, and you can find it in your Firebase console under your Project Settings and Cloud Messaging tab.
Having that, you'll need to create a credential on the Add a Push Credential page on the Twilio Console:
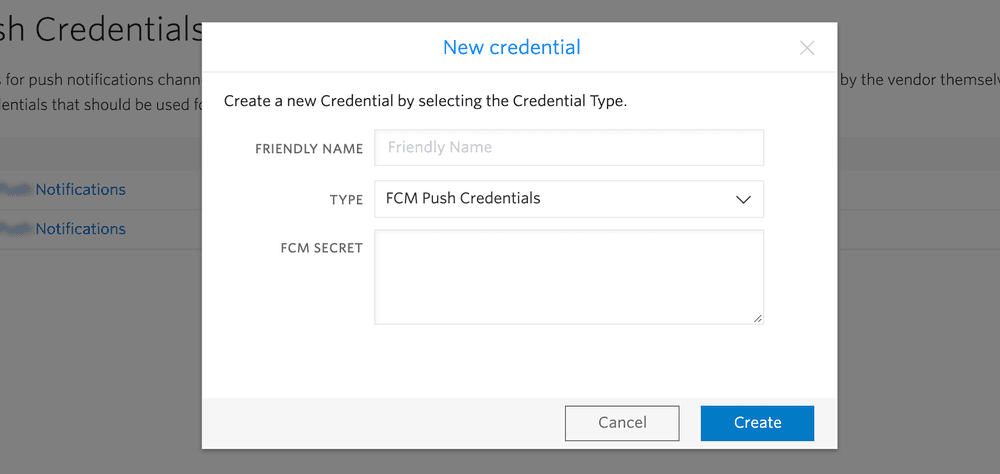
From the drop-down, choose FCM and paste in your server key as the FCM Secret.
Twilio allows you to build multiple applications in a single account. To separate those applications you need to create Service instances that hold all the data and configuration for your application. On the Notify Services page of the Twilio Console, click the blue plus button to create a new Notify Service:
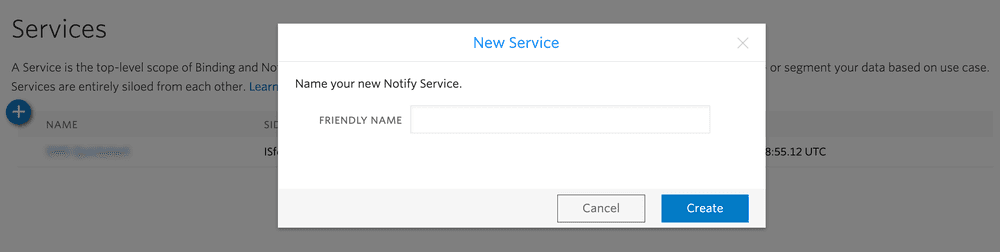
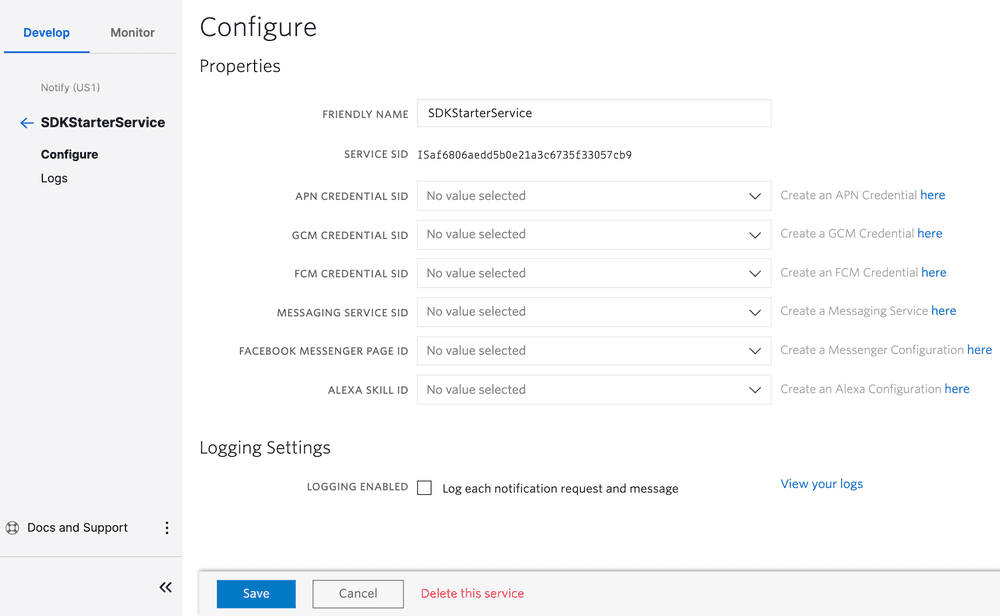
After naming your Notify Service (for instance, with the same name as your app), you can configure the service to use one or more messaging credentials, such as the FCM Credential we created in Step 5:
You're now configured for Firebase Cloud Messaging, ready to write some code and send some push notifications with Twilio. Visit the Android Quickstart guide for the next step!