Getting Started with the Voice Android SDK
Want to add VoIP calling to your Android application?
Start by downloading the Voice Quickstart for Android application source code.
Next, follow the step by step instructions below to get you up and running quickly using Twilio's Programmable Voice SDK.
NOTE: This sample application uses the Programmable Voice Android 6.x APIs. If you are using prior versions of the SDK, we highly recommend planning your migration to the latest version as soon as possible.
- Quickstart - Run the quickstart app
- Examples - Customize your voice experience with these examples
- Access Tokens - Using access tokens
- Managing Push Credentials - Managing Push Credentials
- Managing Regional Push Credentials using Notify Conversations Resource API - Create or update push credentials for regional usage
- Troubleshooting - Debug logging and troubleshooting
- Twilio Voice Android SDK docs - SDK reference documentation
- Reducing APK Size - Use ABI splits to reduce APK size
- Twilio server-side SDKs - TwiML quickstarts
- Issues & Support - Filing issues and general support
- Migration Guide 4.x to 5.x - Migrating from 4.x to 5.x
- New Features 4.0 - New features in 4.0
- Migration Guide 3.x to 4.x - Migrating from 3.x to 4.x
- New Features 3.0 - New features in 3.0
- Migration Guide 2.x to 3.x - Migrating from 2.x to 3.x
The quickstart is broken into two flavors, "standard" & "connection_service", the latter showing how to integrate with the Android Telecom subsystem but requiring Android API 26. To get started with the Quickstart application follow these steps. Steps 1-5 will enable the application to make a call. The remaining steps 7-10 will enable the application to receive incoming calls in the form of push notifications using FCM.
- Generate google-services.json
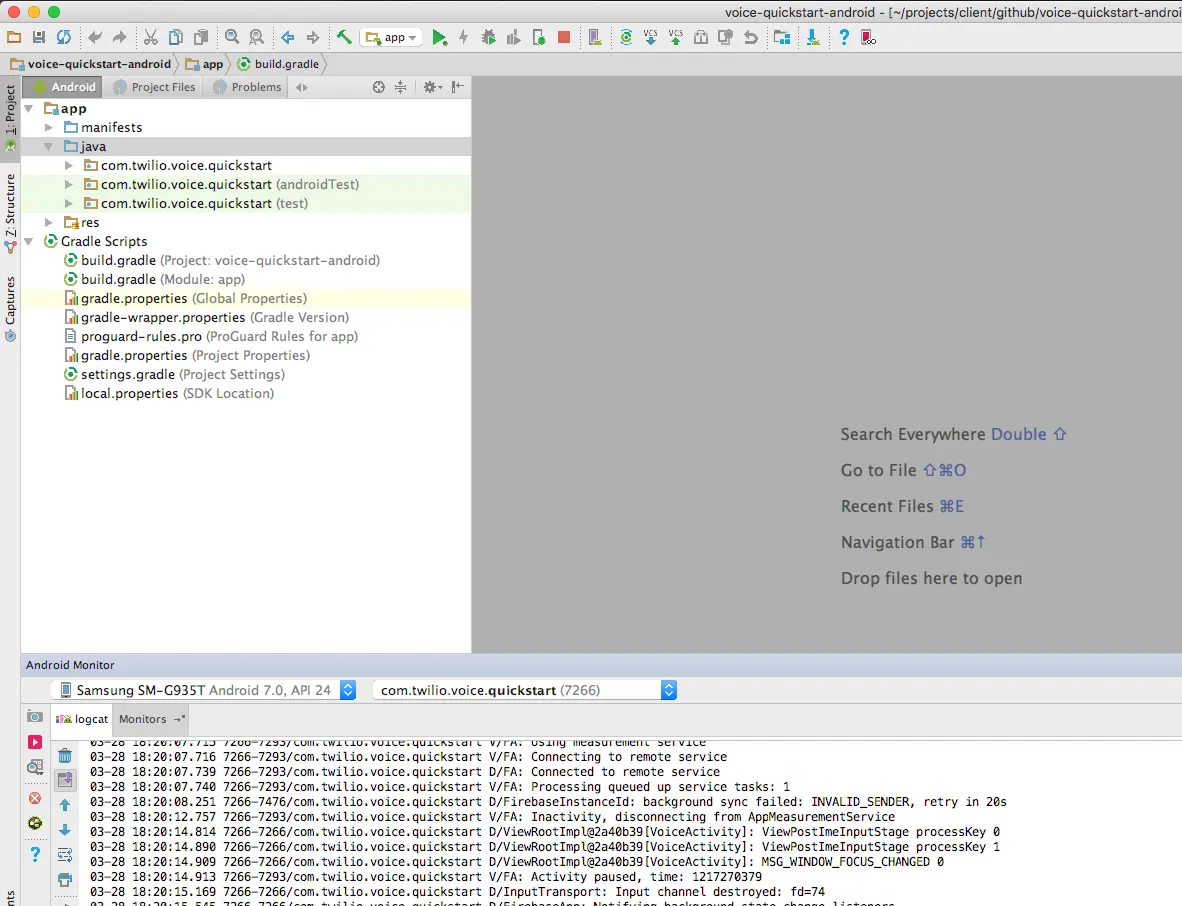
- Open this project in Android Studio
- Use Twilio CLI to deploy access token and TwiML application to Twilio Serverless
- Create a TwiML application for the access token
- Generate an access token for the quickstart
- Run the app
- Create a Push Credential using your FCM Server API Key
- Receive an incoming call
- Make client to client call
- Make client to PSTN call
The Programmable Voice Android SDK uses Firebase Cloud Messaging push notifications to let your application know when it is receiving an incoming call. If you want your users to receive incoming calls, you'll need to enable FCM in your application.
Follow the steps under Use the Firebase Assistant in the Firebase Developers Guide. Once you connect and sync to Firebase successfully, you will be able to download the google-services.json for your application.
Login to Firebase console and make a note of generated Server Key. You will need them in step 7.
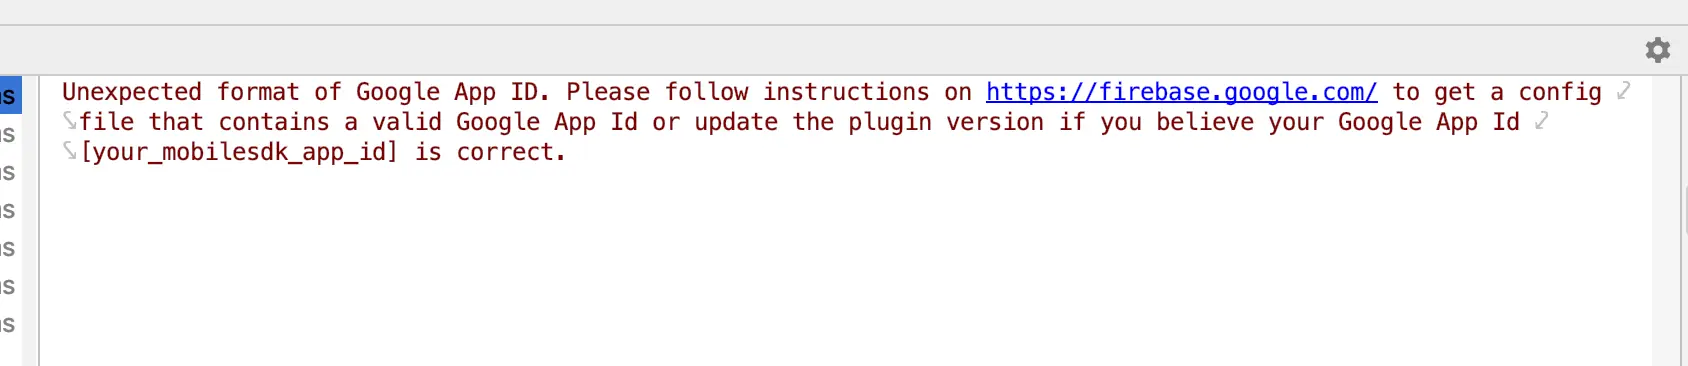
Make sure the generated google-services.json is downloaded to the app directory of the quickstart project to replace the existing app/google-services.json stub json file. If you are using the Firebase plugin make sure to remove the stub google-services.json file first.
Missing valid google-services.json will result in a build failure with the following error message :
You must have the following installed:
- Node.js v10+
- NPM v6+ (comes installed with newer Node versions)
Run npm install to install all dependencies from NPM.
Install twilio-cli with:
npm install -g twilio-cli
Login to the Twilio CLI. You will be prompted for your Account SID and Auth Token, both of which you can find on the dashboard of your Twilio console.
twilio login
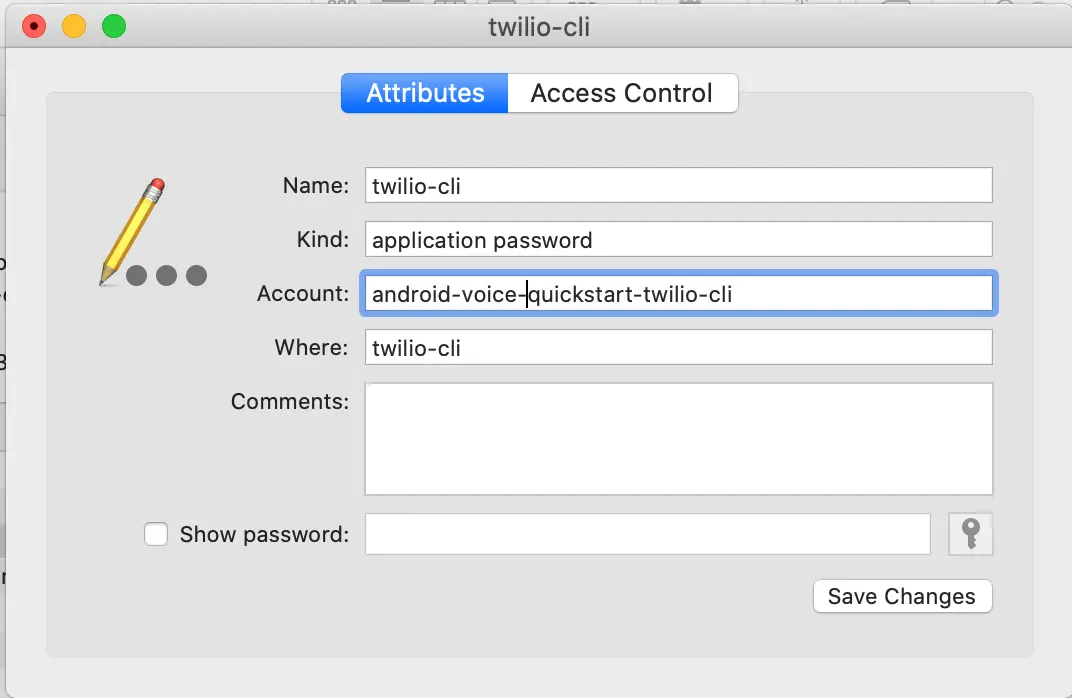
Once successfully logged in, an API Key, a secret get created and stored in your keychain as the twilio-cli password in SKxxxx\|secret format. Please make a note of these values to use them in the Server/.env file.
This app requires the Serverless plug-in. Install the CLI plugin with:
twilio plugins:install @twilio-labs/plugin-serverless
Before deploying, create a Server/.env by copying from Server/.env.example
cp Server/.env.example Server/.env
Update Server/.env with your Account SID, auth token, API Key and secret.
1ACCOUNT_SID=ACxxxx2AUTH_TOKEN=xxxxxx3API_KEY_SID=SKxxxx4API_SECRET=xxxxxx5APP_SID=APxxxx(available in step 4)6PUSH_CREDENTIAL_SID=CRxxxx(available in step 7)
The Server folder contains a basic server component which can be used to vend access tokens or generate TwiML response for making call to a number or another client. The app is deployed to Twilio Serverless with the serverless plug-in:
1cd Server2twilio serverless:deploy
The server component that's baked into this quickstart is in Node.js. If you'd like to roll your own or better understand the Twilio Voice server side implementations, please see the list of starter projects in the following supported languages below:
- voice-quickstart-server-java
- voice-quickstart-server-node
- voice-quickstart-server-php
- voice-quickstart-server-python
Follow the instructions in the project's README to get the application server up and running locally and accessible via the public Internet.
Next, we need to create a TwiML application. A TwiML application identifies a public URL for retrieving TwiML call control instructions. When your QS app makes a call to the Twilio cloud, Twilio will make a webhook request to this URL, your application server will respond with generated TwiML, and Twilio will execute the instructions you've provided.
Use Twilio CLI to create a TwiML app with the make-call endpoint you have just deployed (Note: replace the value of --voice-url parameter with your make-call endpoint you just deployed to Twilio Serverless)
1$ twilio api:core:applications:create \2--friendly-name=my-twiml-app \3--voice-method=POST \4--voice-url="https://my-quickstart-dev.twil.io/make-call"
You should receive an Application SID that looks like this
APxxxxxxxxxxxxxxxxxxxxxxxxxxxxxxxx
Install the token plug-in
twilio plugins:install @twilio-labs/plugin-token
Use the TwiML App SID you just created to generate an access token
twilio token:voice --identity=alice --voice-app-sid=APxxxxxxxxxxxxxxxxxxxxxxxxxxxxxxxx
Copy the access token string. Your Android app will use this token to connect to Twilio.
Now let's go back to the app, update the placeholder of accessToken with access token string you just copied in VoiceActivity.java.
private String accessToken = "PASTE_YOUR_ACCESS_TOKEN_HERE";
Build and run the quickstart app on an Android device.
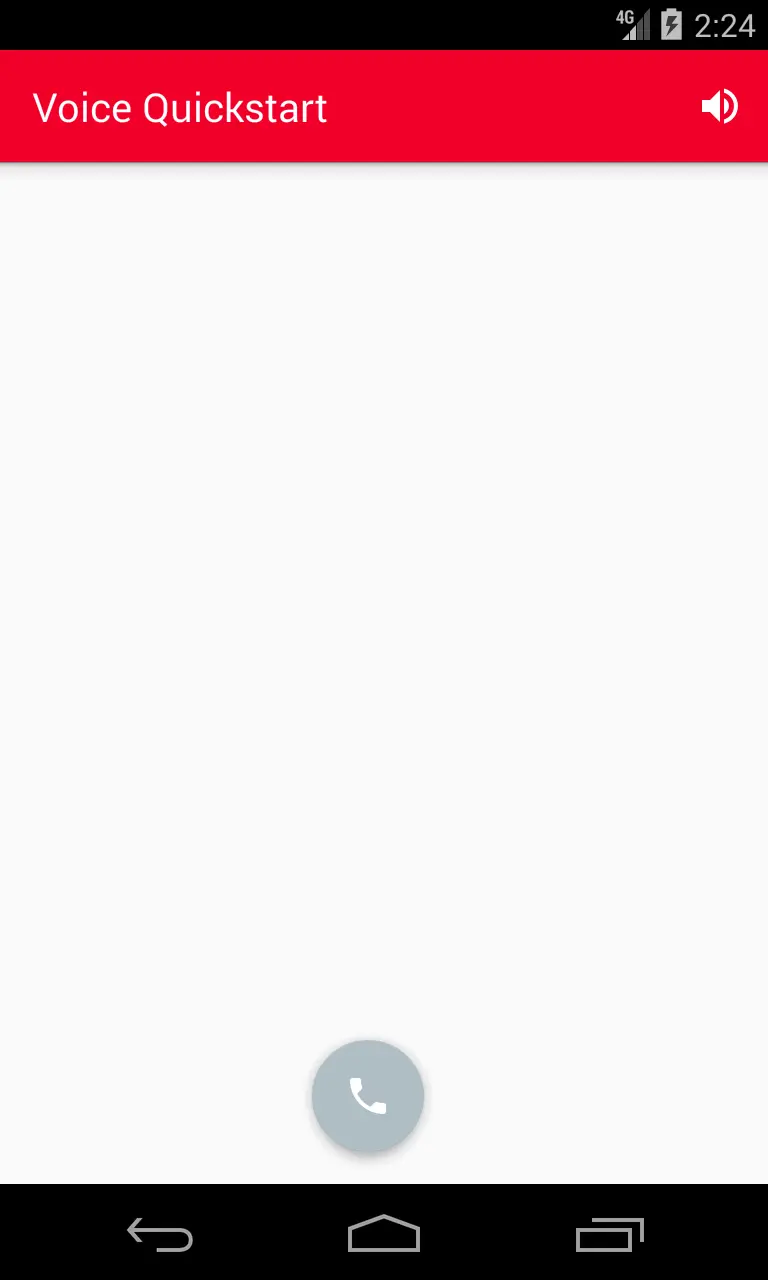
Press the call button to open the call dialog.
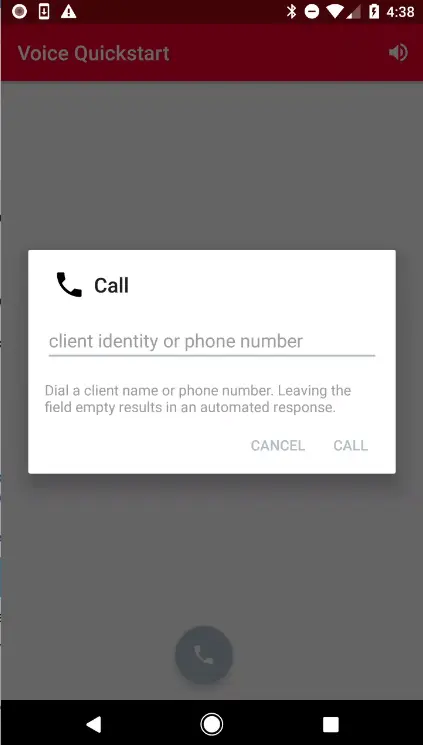
Leave the dialog text field empty and press the call button to start a call. You will hear the congratulatory message. Support for dialing another client or number is described in steps 9 and 10.
You will need to store the FCM Server key (The Server key of your project from the Firebase console, found under Settings/Cloud messaging) with Twilio so that we can send push notifications to your app on your behalf. Once you store the Server key with Twilio, it will get assigned a Push Credential SID so that you can later specify which key we should use to send push notifications.
Use Twilio CLI to create a Push Credential using the FCM Server Key.
1$ twilio api:chat:v2:credentials:create \2--type=fcm \3--friendly-name="voice-push-credential-fcm" \4--secret=SERVER_KEY_VALUE
This will return a Push Credential SID that looks like this
CRxxxxxxxxxxxxxxxxxxxxxxxxxxxxxxxx
Now let's generate another access token and add the Push Credential to the Voice Grant.
1$ twilio token:voice \2--identity=alice \3--voice-app-sid=APxxxx \4--push-credential-sid=CRxxxxs
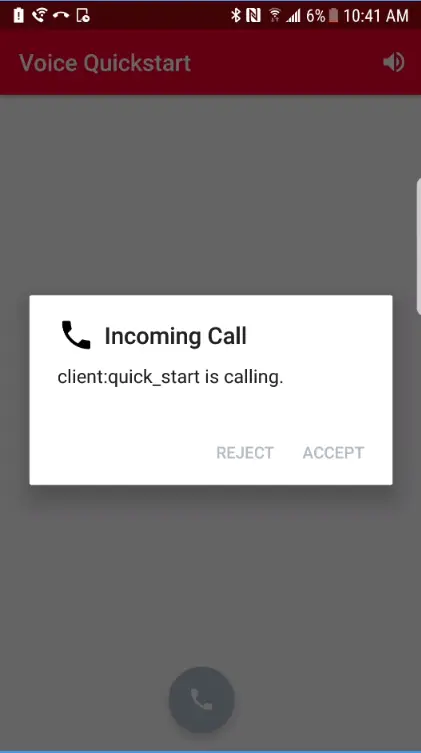
You are now ready to receive incoming calls. Update your app with the access token generated from step 7 and rebuild your app. The Voice.register() method will register your mobile application with the FCM device token as well as the access token. Once registered, hit your application server's /place-call endpoint: https://my-quickstart-dev.twil.io/place-call?to=alice. This will trigger a Twilio REST API request that will make an inbound call to your mobile app.
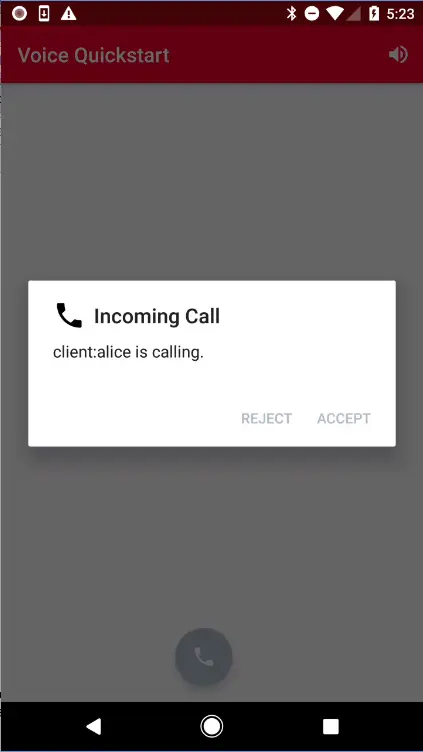
Your application will be brought to the foreground and you will see an alert dialog. The app will be brought to foreground even when your screen is locked.
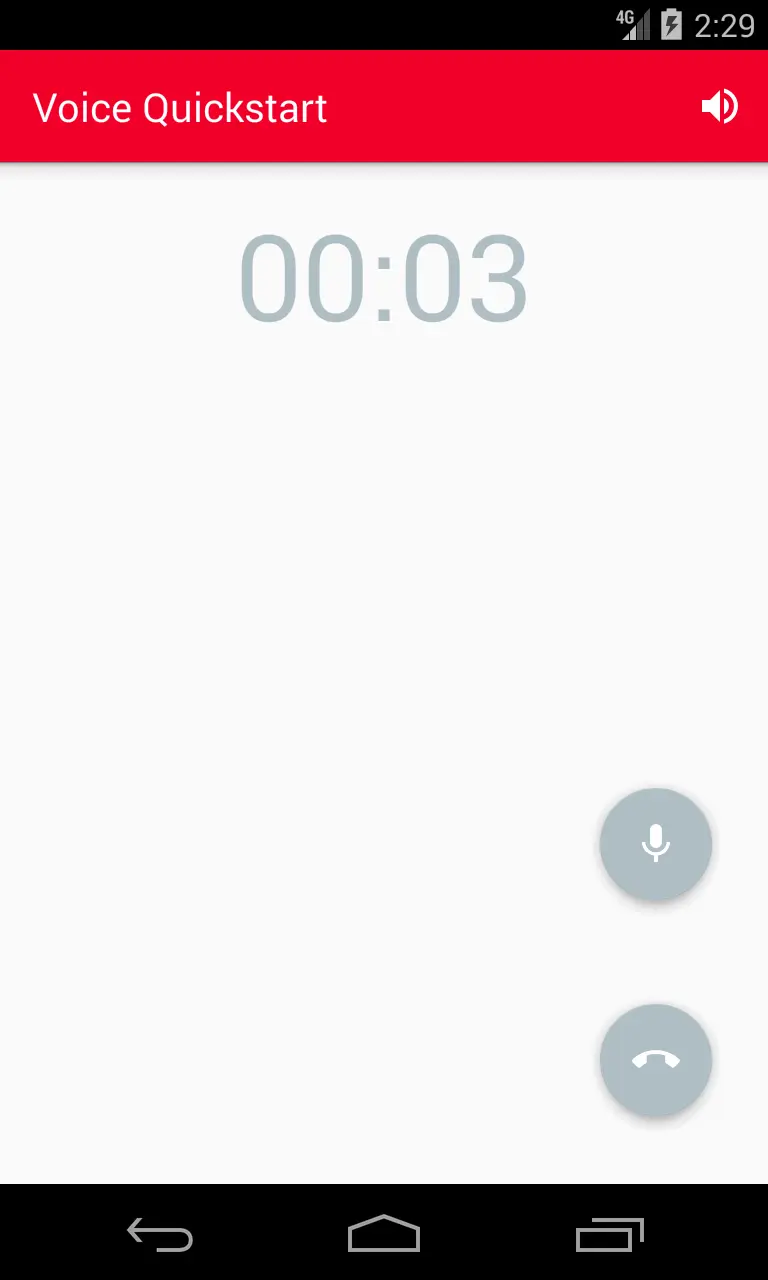
Once your app accepts the call, you should hear a congratulatory message.
To make client to client calls, you need the application running on two devices. To run the application on an additional device, make sure you use a different identity in your access token when registering the new device.
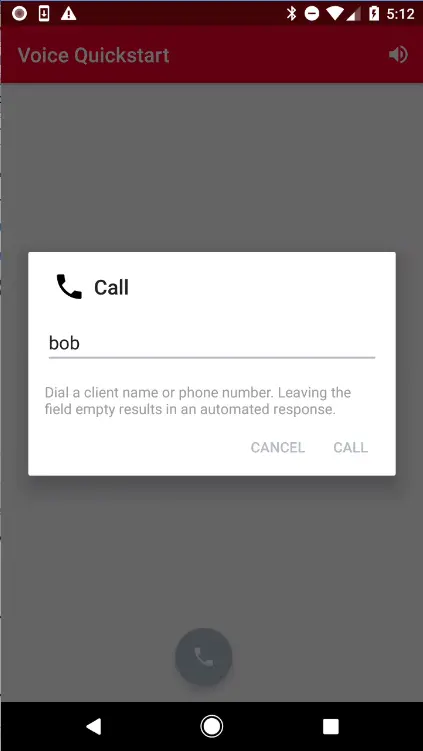
Press the call button to open the call dialog.
Enter the client identity of the newly registered device to initiate a client to client call from the first device.
A verified phone number is one that you can use as your Caller ID when making outbound calls with Twilio. This number has not been ported into Twilio and you do not pay Twilio for this phone number.
To make client to number calls, first get a valid Twilio number to your account via Console. Update your server code and replace the callerNumber with the verified number. Restart the server so that it uses the new value.
Press the call button to open the call dialog.
Enter a PSTN number and press the call button to place a call.

In addition to the quickstart we've also added an example that shows how to create and customize media experience in your app:
- Custom Audio Device - Demonstrates how to use Twilio's Programmable Voice SDK with audio playback and recording functionality provided by a custom
AudioDevice.
To learn more about how to use TwiML and the Programmable Voice Calls API, check out our TwiML quickstarts:
- TwiML Quickstart for Python
- TwiML Quickstart for Ruby
- TwiML Quickstart for PHP
- TwiML Quickstart for Java
- TwiML Quickstart for C#
Please file any issues you find here on Github. For general inquiries related to the Voice SDK you can file a support ticket. Please ensure that you are not sharing any Personally Identifiable Information(PII) or sensitive account information (API keys, credentials, etc.) when reporting an issue.
MIT