Normalize telephone numbers
Twilio's APIs consistently use the E.164 standard for phone numbers. This format is fine within your code, but it presents a couple of user-facing issues:
- E.164 is difficult to understand when presented as plain text, such as in an SMS
- When read aloud by a Twilio Say verb or Say Widget, numbers such as
+15095550100will be read literally as a large number, instead of digit-by-digit. (ex. "Plus fifteen billion, ninety-five million, five hundred fifty thousand, one hundred")
Fortunately, Twilio Lookup enables you to convert a given E.164 phone number into the national format used by that country, which Twilio will read aloud as one would normally say it in their region.
To get started, use the following instructions to create a Function to host your code.
In order to run any of the following examples, you will first need to create a Function into which you can paste the example code. You can create a Function using the Twilio Console or the Serverless Toolkit as explained below:
If you prefer a UI-driven approach, creating and deploying a Function can be done entirely using the Twilio Console and the following steps:
- Log in to the Twilio Console and navigate to the Functions tab. If you need an account, you can sign up for a free Twilio account here!
- Functions are contained within Services. Create a Service by clicking the Create Service button and providing a name such as test-function.
- Once you've been redirected to the new Service, click the Add + button and select Add Function from the dropdown.
- This will create a new Protected Function for you with the option to rename it. The name of the file will be path it is accessed from.
- Copy any one of the example code snippets from this page that you want to experiment with, and paste the code into your newly created Function. You can quickly switch examples by using the dropdown menu of the code rail.
- Click Save to save your Function's contents.
- Click Deploy All to build and deploy the Function. After a short delay, your Function will be accessible from:
https://<service-name>-<random-characters>-<optional-domain-suffix>.twil.io/<function-path>
For example:test-function-3548.twil.io/hello-world.
Your Function is now ready to be invoked by HTTP requests, set as the webhook of a Twilio phone number, invoked by a Twilio Studio Run Function Widget, and more!
The following Function is one which will tell the user their phone number, in the format that they would expect in normal conversation. This will also work for international phone numbers!
To verify this for yourself, paste the code into the Function that you just made, and set it as the A Call Comes In webhook handler for the Twilio phone number you wish to test. The following instructions will show you how to do so.
1exports.handler = async (context, event, callback) => {2// The pre-initialized Twilio client is available from the `context` object3const client = context.getTwilioClient();4// Create a new voice response object5const twiml = new Twilio.twiml.VoiceResponse();67// The From value is provided by Twilio to this webhook Function, and contains the caller's8// phone number in E.164 format, ex. '+15095550100'9const from = event.From;1011// Call Twilio Lookup to get information about the number, including its national format12const result = await client.lookups.phoneNumbers(from).fetch();1314// Read back the caller's phone number in the way it would normally spoken, not as a15// massive integer!16twiml.say(`Your phone number is ${result.nationalFormat}`);17return callback(null, twiml);18};
In order for your Function to react to incoming SMS and/or voice calls, it must be set as a webhook for your Twilio number. There are a variety of methods to set a Function as a webhook, as detailed below:
You can use the Twilio Console UI as a straightforward way of connecting your Function as a webhook:
- Log in to the Twilio Console's Phone Numbers page.
- Click on the phone number you'd like to have connected to your Function.
- If you want the Function to respond to incoming SMS, find the A Message Comes In option under Messaging. If you want the Function to respond to Voice, find the A Call Comes In option under Voice & Fax.
- Select Function from the A Message Comes In or A Call Comes In dropdown.
-
Select the
Service
that you are using, then the
Environment
(this will default to
uiunless you have created custom domains ), and finally Function Path of your Function from the respective dropdown menus.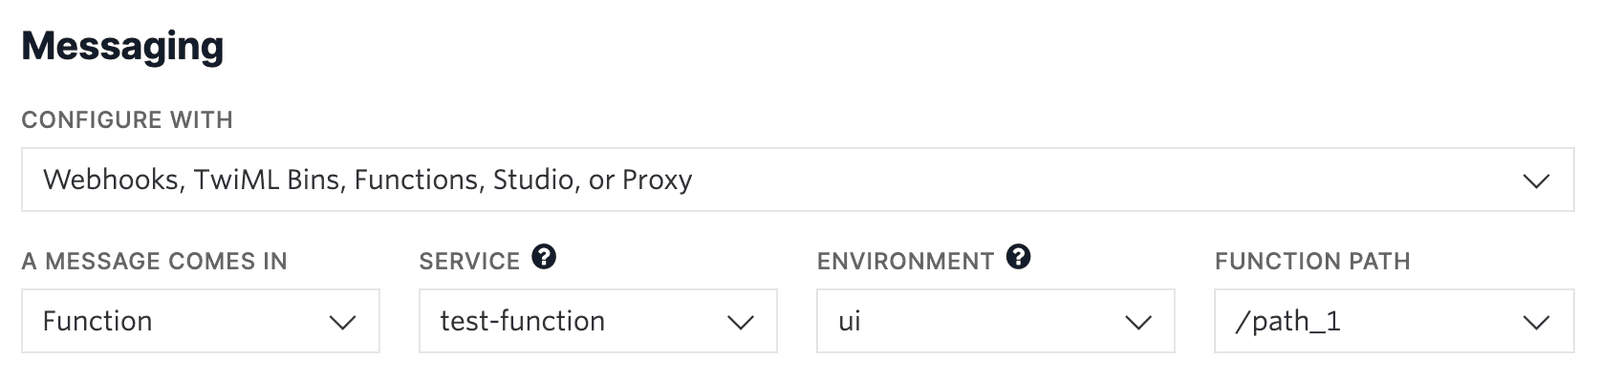
-
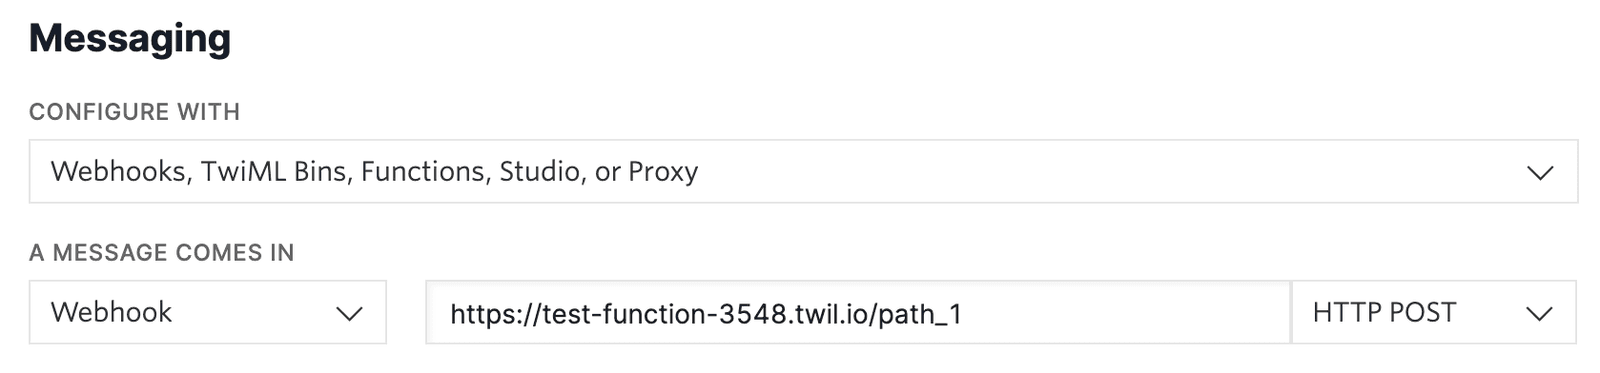
Alternatively, you could select
Webhook
instead of Function, and directly paste in the full URL of the Function.
- Click the Save button.
This functionality also lends itself well to Studio Flows, where you may share a phone number as part of your IVR. The Say widget doesn't natively read E.164 formatted numbers in the national format, but clever use of the Run Function widget with the following sample code will enable this.
First, create a new Studio Flow. We suggest following the Create Your Flow directions from a Studio tutorial.
Once you have created a Flow, drag a Run Function and a Say/Play widget onto the Studio canvas. Connect the Incoming Call trigger to the Run Function widget by dragging from the trigger to on top of the widget, and similarly connect the Run Function widget's "Success" condition to the Say/Play widget.
With the widgets connected, the next step is to configure them.
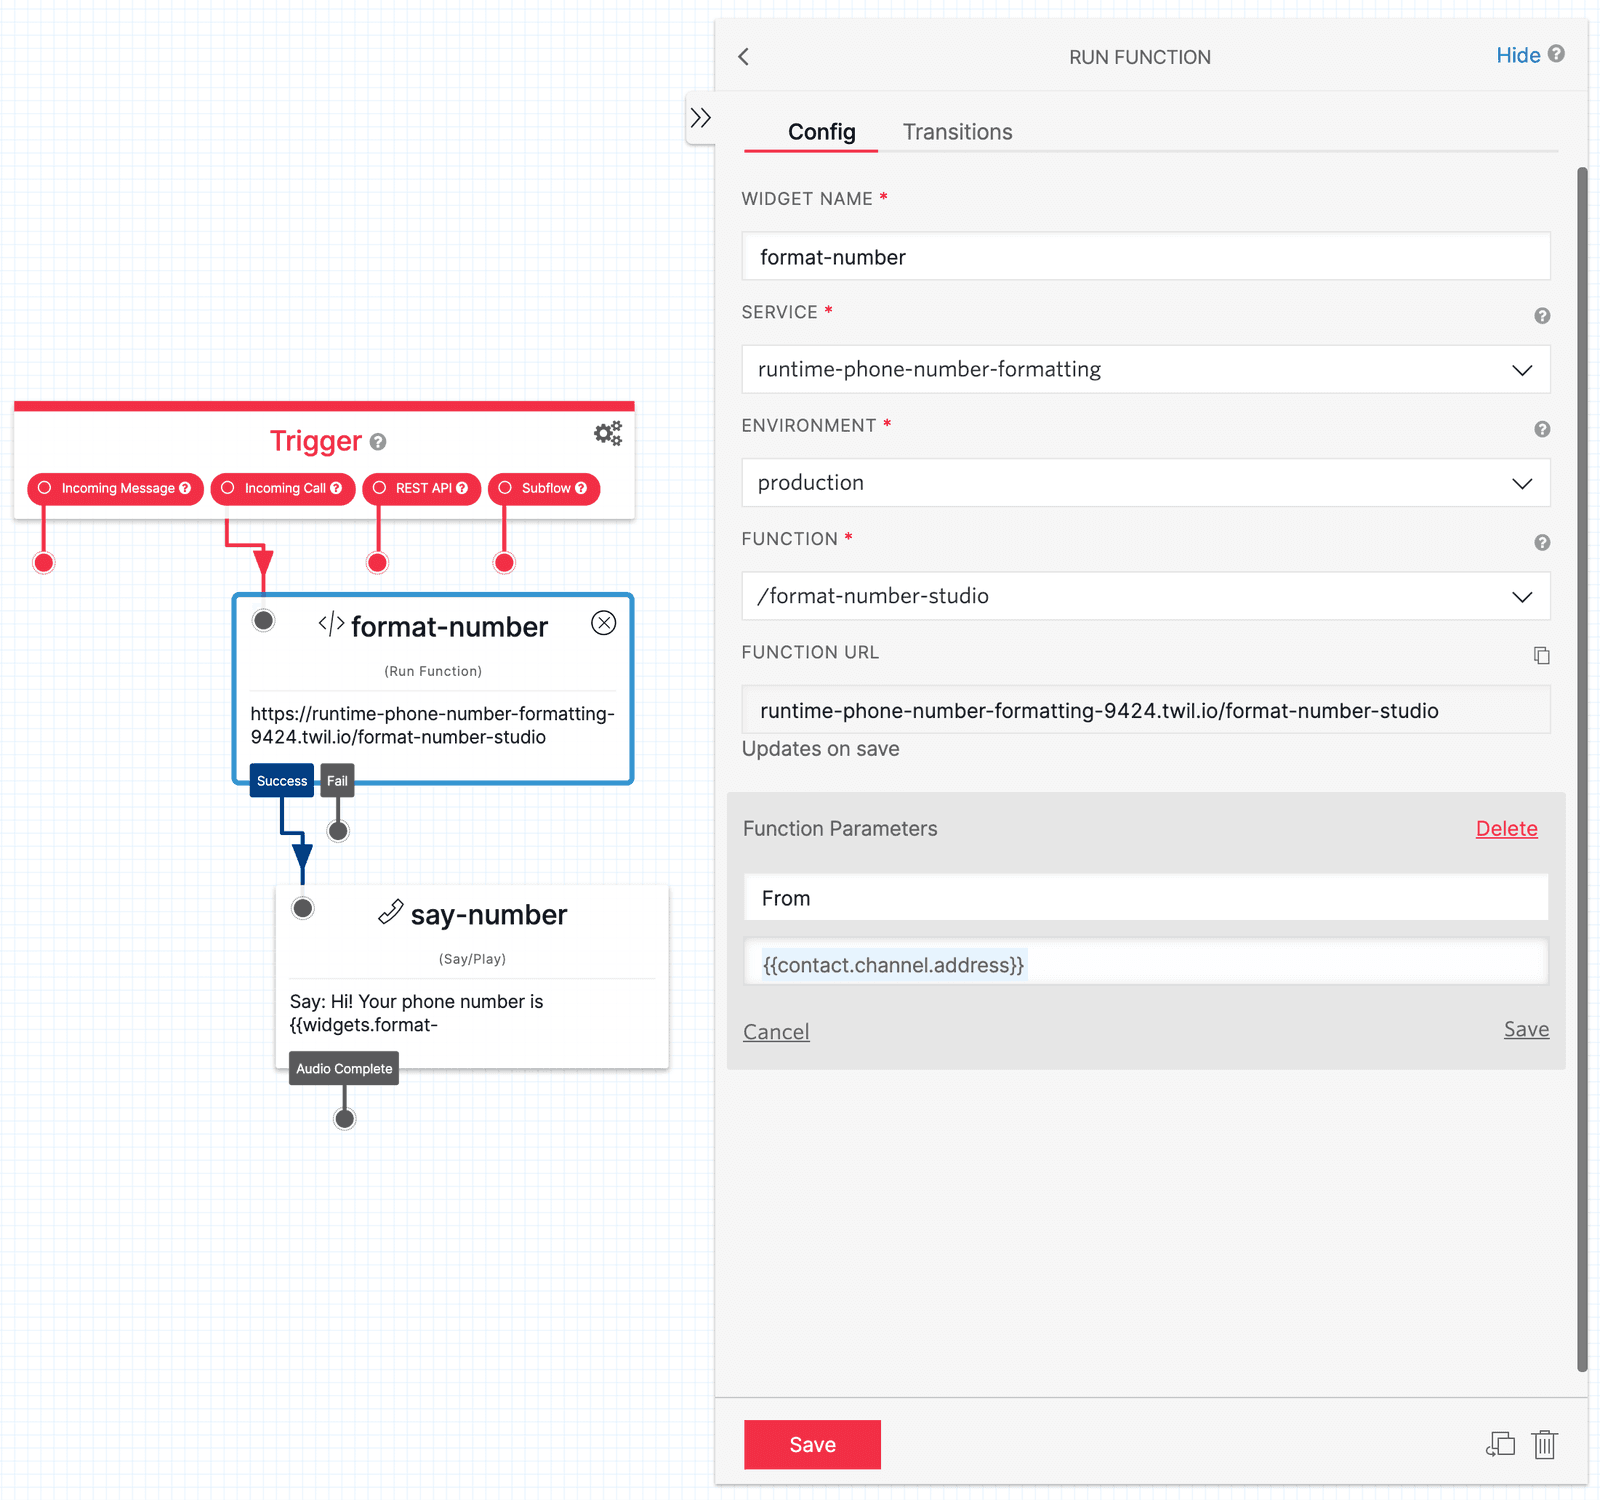
Click on the Run Function widget, which should cause the Widget Library to show the configuration options for the widget. Name the widget as you like, and use the drop-down menus to select the Service and path of the Function that you created previously. To wrap up the configuration, click Add under Function Parameters, set the "Key" to From, and "Value" to {{contact.channel.address}}. This will cause the phone number of the incoming caller to be passed to the Function as a parameter called From.
Your configuration and connections should look similar to this:
Following a similar process, configure the Say/Play widget with your desired name, and paste the following into the "Text to Say" field:
Hi! Your phone number is {{widgets.<widget-name>.parsed.normalizedPhoneNumber}}.
Replace <widget-name> with the name of your Run Function widget. This means the Say/Play widget will access the results of the Run Function widget, retrieve a value named normalizedPhoneNumber, and will attempt to read it back to the caller. You can read here to get more context around the parsed property.
Click Publish to publish your Studio Flow.
With the Studio Flow published and expecting new behavior from your Function, it will need some slight modifications.
Edit or replace the body of your Function with the following sample code. Note that it is returning the normalizedPhoneNumber that is expected by the Say/Play widget.
With your code changes complete, save and deploy your Function.
Provides readable phone numbers to Studio Flows
1exports.handler = async (context, event, callback) => {2// The pre-initialized Twilio client is available from the `context` object3const client = context.getTwilioClient();4// The From value should be provided as a parameter by the Run Function widget, and contains5// the caller's phone number in E.164 format, ex. '+15095550100'6const from = event.From;78// Call Twilio Lookup to get information about the number, including its national format9const result = await client.lookups.phoneNumbers(from).fetch();1011// Return the caller's phone number in the way it would normally spoken12// Access this in a Studio Flow with `{{widgets.<widget-name>.parsed.normalizedPhoneNumber}}`13return callback(null, {14normalizedPhoneNumber: result.nationalFormat,15});16};
To test your Flow, connect your Twilio phone number to the Studio Flow.
With your Twilio phone number connected to the Studio Flow, you can call your Twilio phone number and have a synthesized voice read out the number you are calling from in a human-friendly manner.