Validate Webhook requests from SendGrid
Runtime handler version requirement
This example uses headers and cookies, which are only accessible when your Function is running @twilio/runtime-handler version 1.2.0 or later. Consult the Runtime Handler guide to learn more about the latest version and how to update.
Protecting your Twilio Functions from non-Twilio requests is usually just a matter of setting a Function's visibility to Protected. However, if you'd like to create a Function that's intended to only handle incoming Webhook requests from a product such as SendGrid, validation will require some manual inspection of headers, which are now accessible!
In this example, we'll create a Function which will serve as the Event Webhook for your SendGrid account. The Function will validate if the incoming request came from SendGrid, and send a text message to a designated phone number if an email has been opened.
Before you run any of the examples on this page, create a Function and paste the example code into it. You can create a Function in the Twilio Console or by using the Serverless Toolkit.
If you prefer a UI-driven approach, complete these steps in the Twilio Console:
- Log in to the Twilio Console and navigate to Develop > Functions & Assets. If you're using the legacy Console, open the Functions tab.
- Functions are contained within Services. Click Create Service to create a new Service.
- Click Add + and select Add Function from the dropdown.
- The Console creates a new protected Function that you can rename. The filename becomes the URL path of the Function.
- Copy one of the example code snippets from this page and paste the code into your newly created Function. You can switch examples by using the dropdown menu in the code rail.
- Click Save.
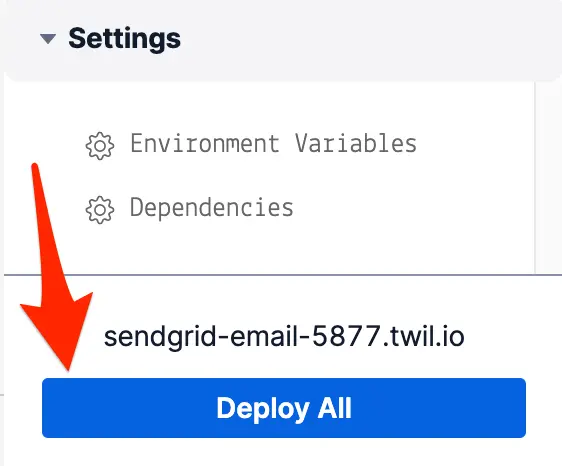
- Click Deploy All to build and deploy the Function. After deployment, you can access your Function at
https://<service-name>-<random-characters>-<optional-domain-suffix>.twil.io/<function-path>
For example:test-function-3548.twil.io/hello-world.
You can now invoke your Function with HTTP requests, configure it as the webhook for a Twilio phone number, call it from a Twilio Studio Run Function Widget, and more.
1const { EventWebhook, EventWebhookHeader } = require('@sendgrid/eventwebhook');23// Helper method for validating SendGrid requests4const verifyRequest = (publicKey, payload, signature, timestamp) => {5// Initialize a new SendGrid EventWebhook to expose helpful request6// validation methods7const eventWebhook = new EventWebhook();8// Convert the public key string into an ECPublicKey9const ecPublicKey = eventWebhook.convertPublicKeyToECDSA(publicKey);10return eventWebhook.verifySignature(11ecPublicKey,12payload,13signature,14timestamp15);16};1718exports.handler = async (context, event, callback) => {19// Access a pre-initialized Twilio client from context20const twilioClient = context.getTwilioClient();21// Access sensitive values such as the sendgrid key and phone numbers22// from Environment Variables23const publicKey = context.SENDGRID_WEBHOOK_PUBLIC_KEY;24const twilioPhoneNumber = context.TWILIO_PHONE_NUMBER;25const numberToNotify = context.NOTIFY_PHONE_NUMBER;2627// The SendGrid EventWebhookHeader provides methods for getting28// the necessary header names.29// Remember to cast these header names to lowercase to access them correctly30const signatureKey = EventWebhookHeader.SIGNATURE().toLowerCase();31const timestampKey = EventWebhookHeader.TIMESTAMP().toLowerCase();3233// Retrieve SendGrid's headers so they can be used to validate34// the request35const signature = event.request.headers[signatureKey];36const timestamp = event.request.headers[timestampKey];3738// Runtime injects the request object and spreads in the SendGrid events.39// Isolate the original SendGrid event contents using destructuring40// and the rest operator41const { request, ...sendGridEvents } = event;42// Convert the SendGrid event back into an array of events, which is the43// format sent by SendGrid initially44const sendGridPayload = Object.values(sendGridEvents);4546// Stringify the event and add newlines/carriage returns since they're expected by validator47const rawEvent =48JSON.stringify(sendGridPayload).split('},{').join('},\r\n{') + '\r\n';4950// Verify the request using the public key, the body of the request,51// and the SendGrid headers52const valid = verifyRequest(publicKey, rawEvent, signature, timestamp);53// Reject invalidated requests!54if (!valid) return callback("Request didn't come from SendGrid", event);5556// Helper method to simplify repeated calls to send messages with57// nicely formatted timestamps58const sendSMSNotification = (recipientEmail, timestamp) => {59const formattedDateTime = new Intl.DateTimeFormat('en-US', {60year: 'numeric',61month: 'numeric',62day: 'numeric',63hour: 'numeric',64minute: 'numeric',65second: 'numeric',66hour12: true,67timeZone: 'America/Los_Angeles',68}).format(timestamp);6970return twilioClient.messages.create({71from: twilioPhoneNumber,72to: numberToNotify,73body: `Email to ${recipientEmail} was opened on ${formattedDateTime}.`,74});75};7677// Convert the original list of events into a condensed version for SMS78const normalizedEvents = sendGridPayload79.map((rawEvent) => ({80to: rawEvent.email,81timestamp: rawEvent.timestamp * 1000,82status: rawEvent.event,83messageId: rawEvent.sg_message_id.split('.')[0],84}))85// Ensure that events are sorted by time to ensure they're sent86// in the correct order87.sort((a, b) => a.timestamp - b.timestamp);8889// Iterate over each event and wait for a text to be sent before90// processing the next event91for (const event of normalizedEvents) {92// You could also await an async operation to update your db records to93// reflect the status change here94// await db.updateEmailStatus(event.messageId, event.status, event.timestamp);95if (event.status === 'open') {96await sendSMSNotification(event.to, event.timestamp);97}98}99100// Return a 200 OK!101return callback();102};
-
First, create a new
sendgrid-emailService and add a Public/events/emailFunction. Delete the default contents of the Function, and paste in the code snippet provided on this page. -
Follow the instructions here to set up a SendGrid Event Webhook. Paste the URL of your newly created Function as the unique URL for the Event Webhook. (it will look like
https://sendgrid-email-5877.twil.io/events/email)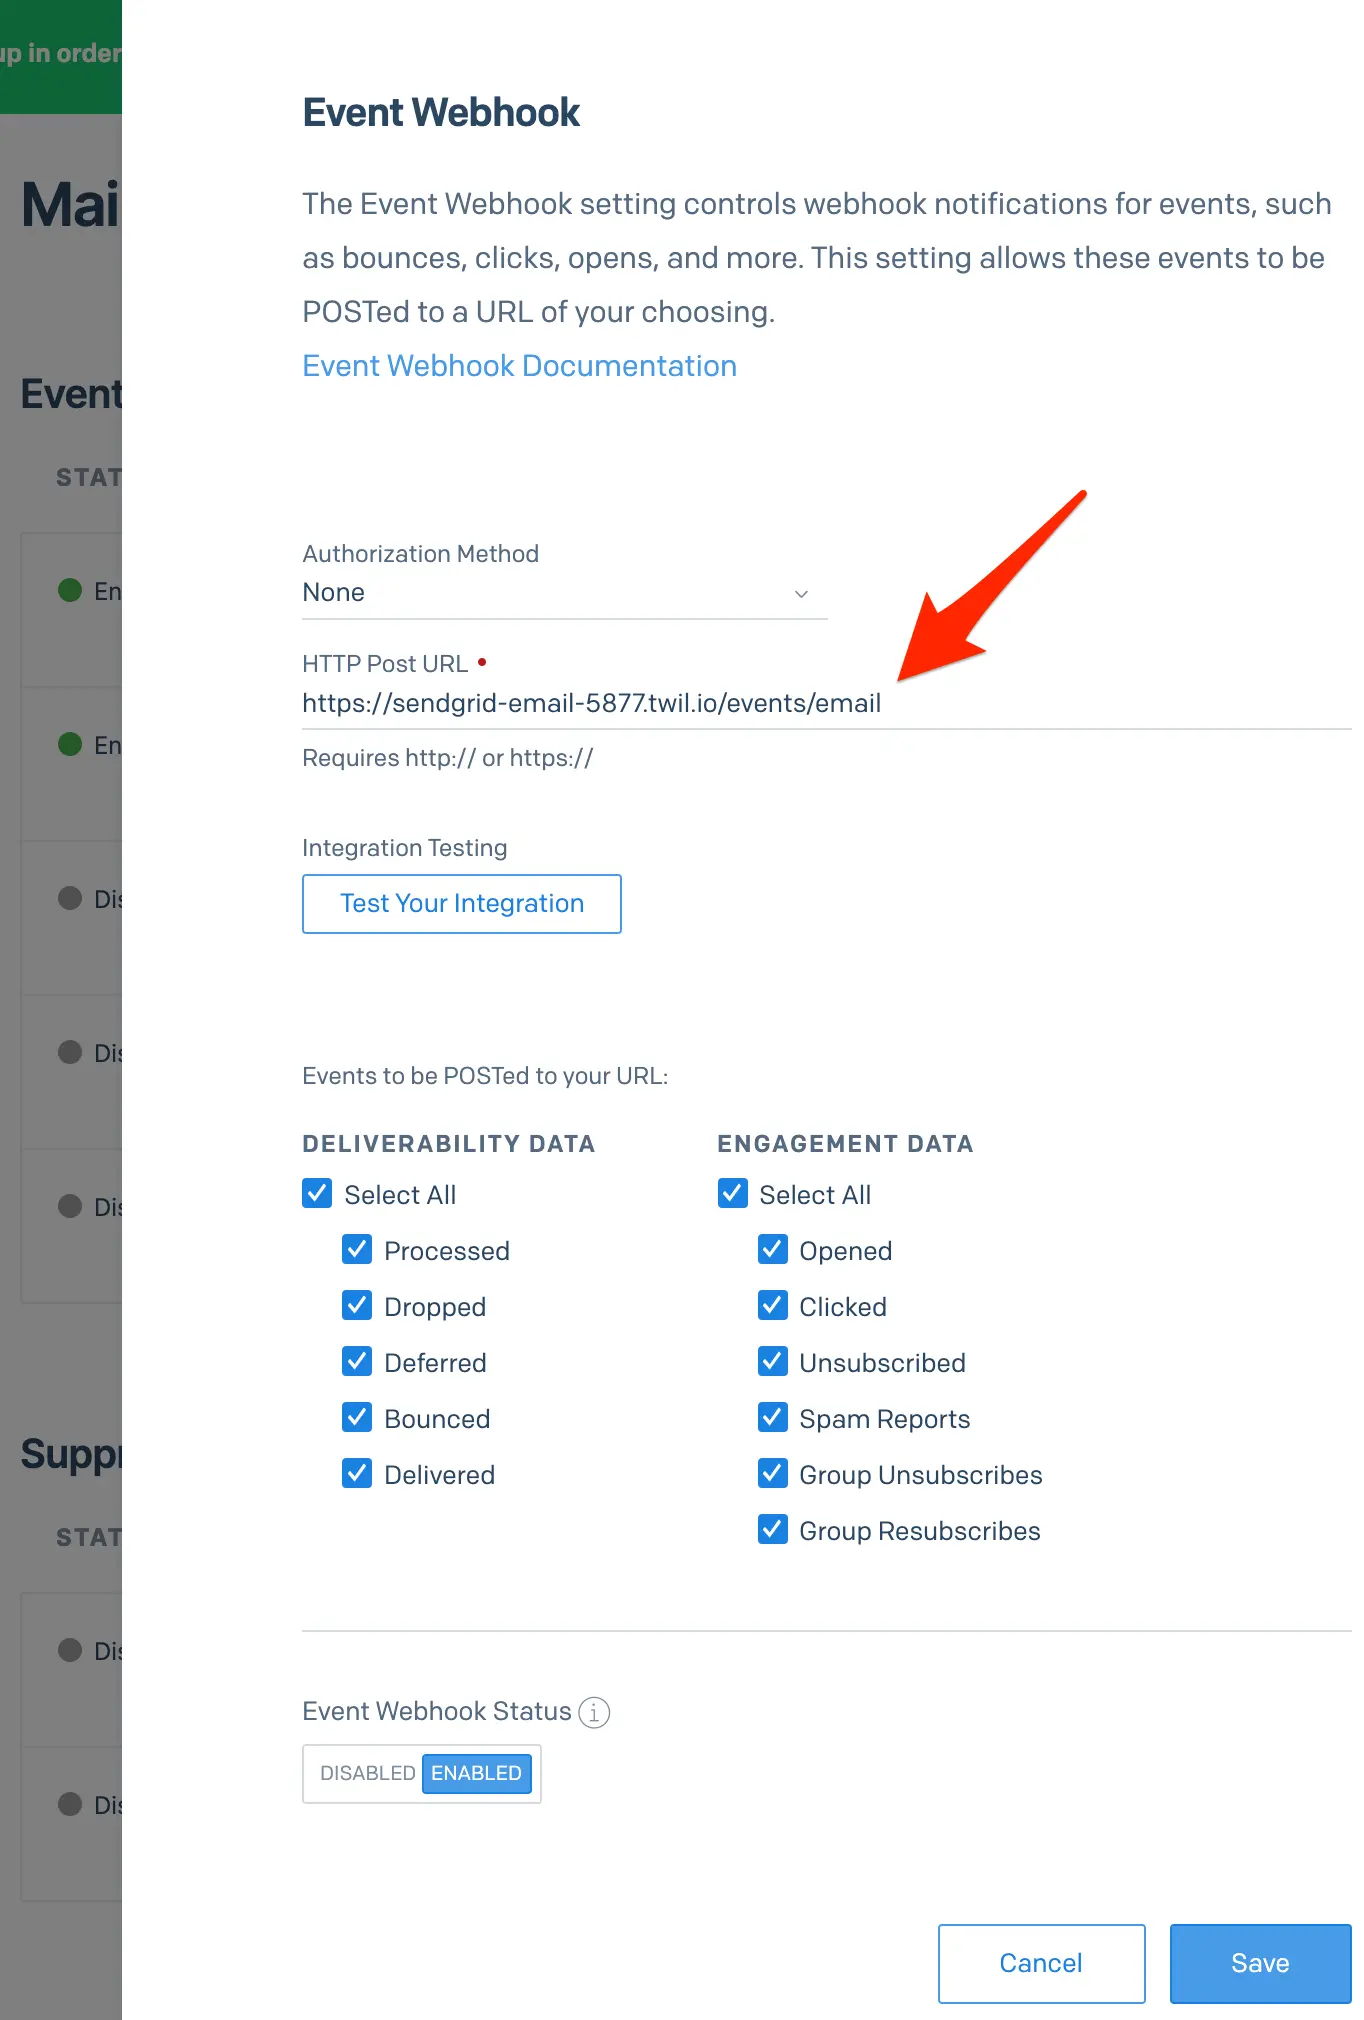
-
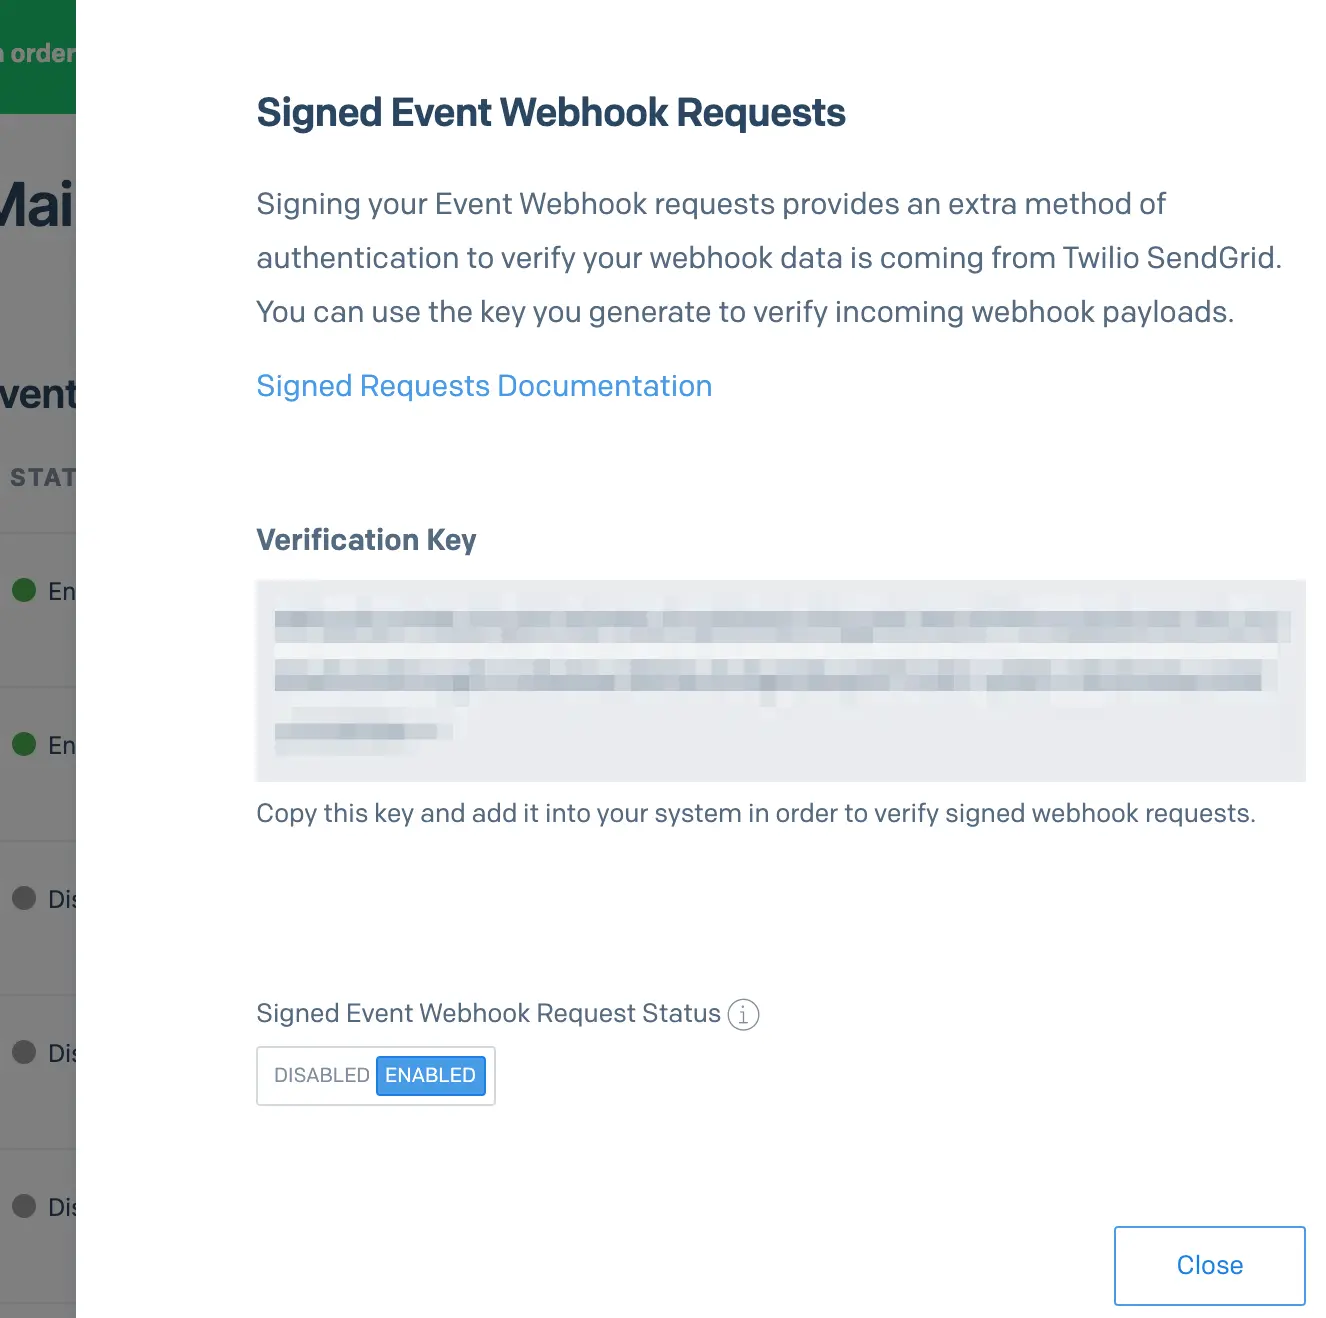
Follow these steps to enable the Signed Event Webhook Requests. This will add signed SendGrid headers to incoming webhook requests, which we can then use to validate requests!
-
Copy the generated Verification Key from the last step, and save it as an Environment variable in Runtime as
SENDGRID_WEBHOOK_PUBLIC_KEY. While here, also save yourTWILIO_PHONE_NUMBER(from the Twilio console) and aNOTIFY_PHONE_NUMBER(this could be your personal phone number for now)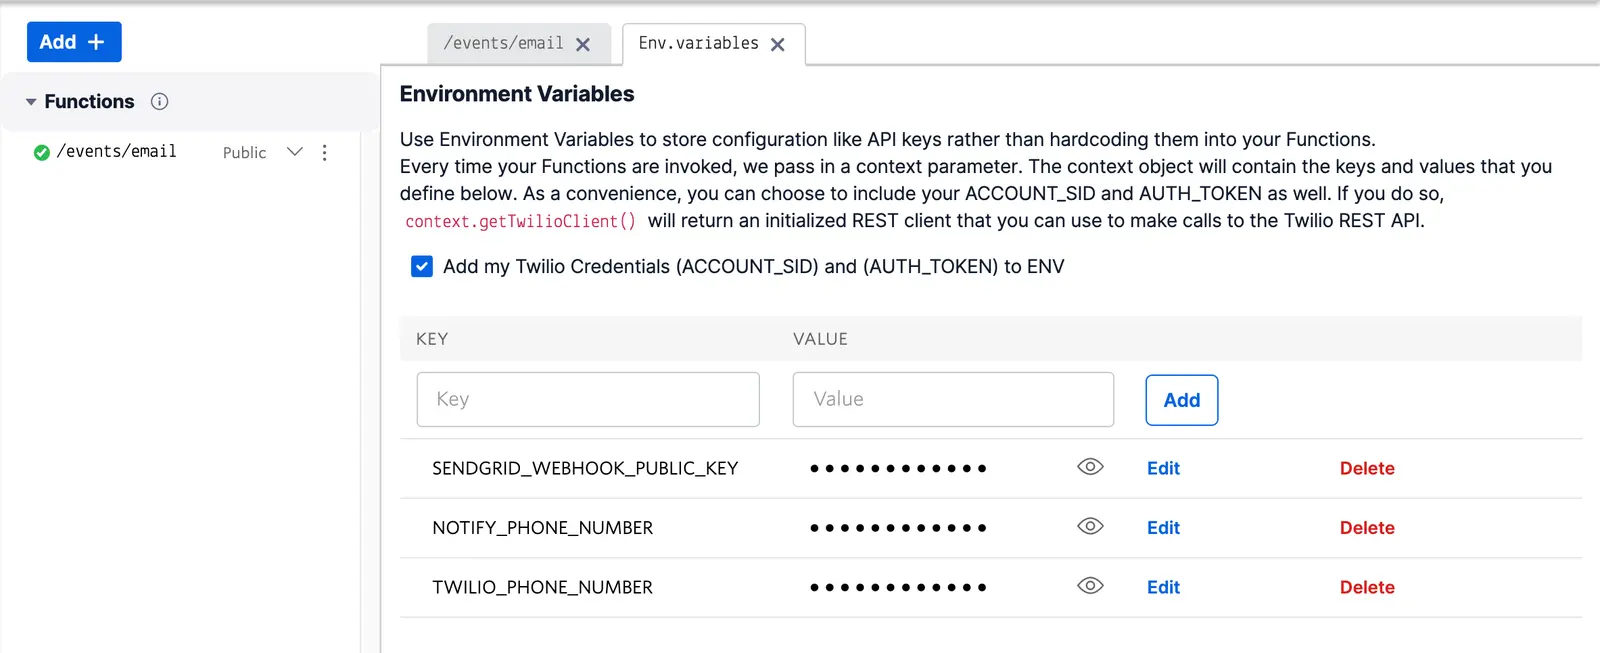
-
Add the
@sendgrid/eventwebhookdependency as*, and ensure that the@twilio/runtime-handlerdependency is set to version1.3.0or later to enable headers.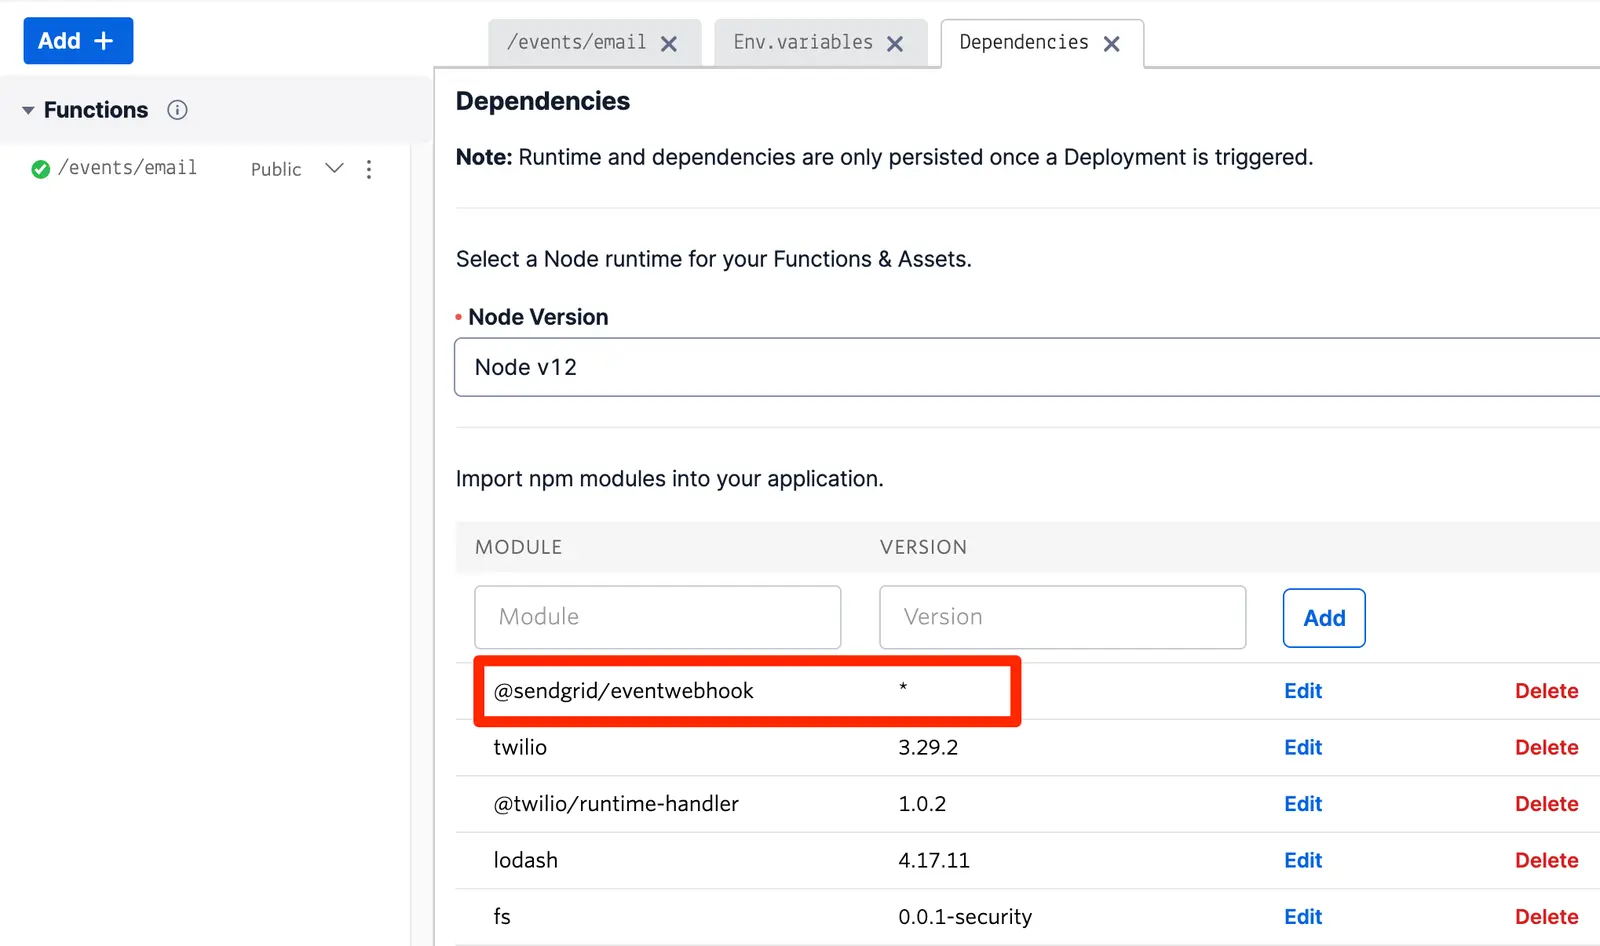
-
Save your Function and deploy it by clicking on Deploy All.
Now that you've deployed your Function, it's time to validate that your code and its integration with SendGrid is working properly. In order to do so, you'll need to generate some email events. This will be accomplished with a short script written in JavaScript and using the @sendgrid/mail library.
First, grab your SendGrid API Key (or create one!). For security, we'll be setting it as an environment variable and using it in our code instead of directly hard-coding it. You can do so by performing the following commands in your terminal, making sure to replace the YOUR_API_KEY placeholder with your own key.
1echo "export SENDGRID_API_KEY='YOUR_API_KEY'" > sendgrid.env2echo "sendgrid.env" >> .gitignore3source ./sendgrid.env
Next, use npm or yarn to install the Node.js SendGrid SDK which will enable you to send emails using JavaScript. If you already have Node.js installed, it's very likely you already have npm available and ready to use.
npm install --save @sendgrid/mail
If you prefer yarn instead:
yarn add @sendgrid/mail
Before you can successfully send an email, you'll need to verify an email address or domain in the Sender Authentication tab. Without this, you will receive a 403 Forbidden response when attempting to send mail.
Once you have prepared your environment variables, installed the SendGrid SDK, and your email has been validated, you're ready to send some emails and create some events.
Create a new file such as send-email.js, and paste in the following snippet. Be sure to replace the from variable with your verified email address from earlier, as well as the to variable (in this case, you can use your verified email address here as well). Save the file.
1// Using Twilio SendGrid's v3 Node.js Library2// https://github.com/sendgrid/sendgrid-nodejs3const sgMail = require('@sendgrid/mail');4sgMail.setApiKey(process.env.SENDGRID_API_KEY);56sgMail7.send({8from: 'test@example.com', // Change to your verified sender9to: 'test@example.com', // Change to your recipient10subject: 'Sending with Twilio SendGrid is Fun',11text: 'and easy to do anywhere, even with Node.js',12html: '<strong>and easy to do anywhere, even with Node.js</strong>',13})14.then(() => {15console.log('Email sent');16})17.catch((error) => {18console.error(error);19});
Once the script is saved, you can send your test email by executing the script with Node.js:
node send-email.js
Once you've received your email and opened it, you should receive a text message from your Function a short time later!
If you would like to expedite this process a bit and not wait for the open event itself, you could modify line 95 of the Function body to instead check for delivered events instead. A delivered event will be emitted and processed by your Function almost immediately after executing the send-email script.