Configuring Azure Active Directory with Twilio SSO
Twilio Editions feature
Single Sign-On is available to all Twilio Editions customers. Learn more about Editions.
This guide covers your Azure ActiveDirectory Identity Provider with Twilio for SSO login to Twilio Console. If you are looking to Configure SSO for Twilio Flex or SendGrid, please refer to the configuration guides for them:
Before proceeding with SSO Configuration make sure that you have satisfied all of the prerequisites.
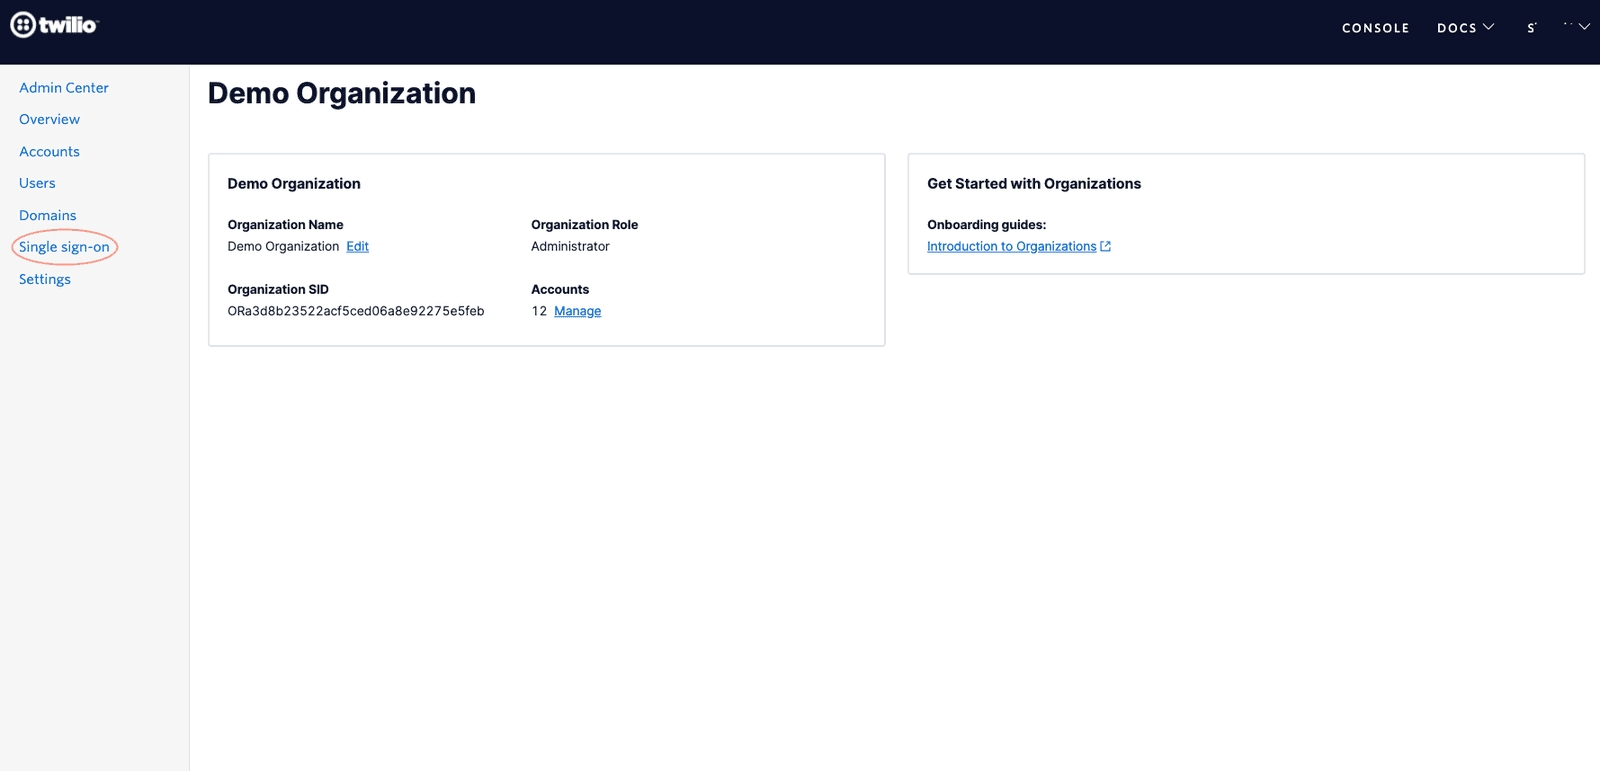
Go to Admin Center and click on the Single Sign-On option in the navigation bar as shown below
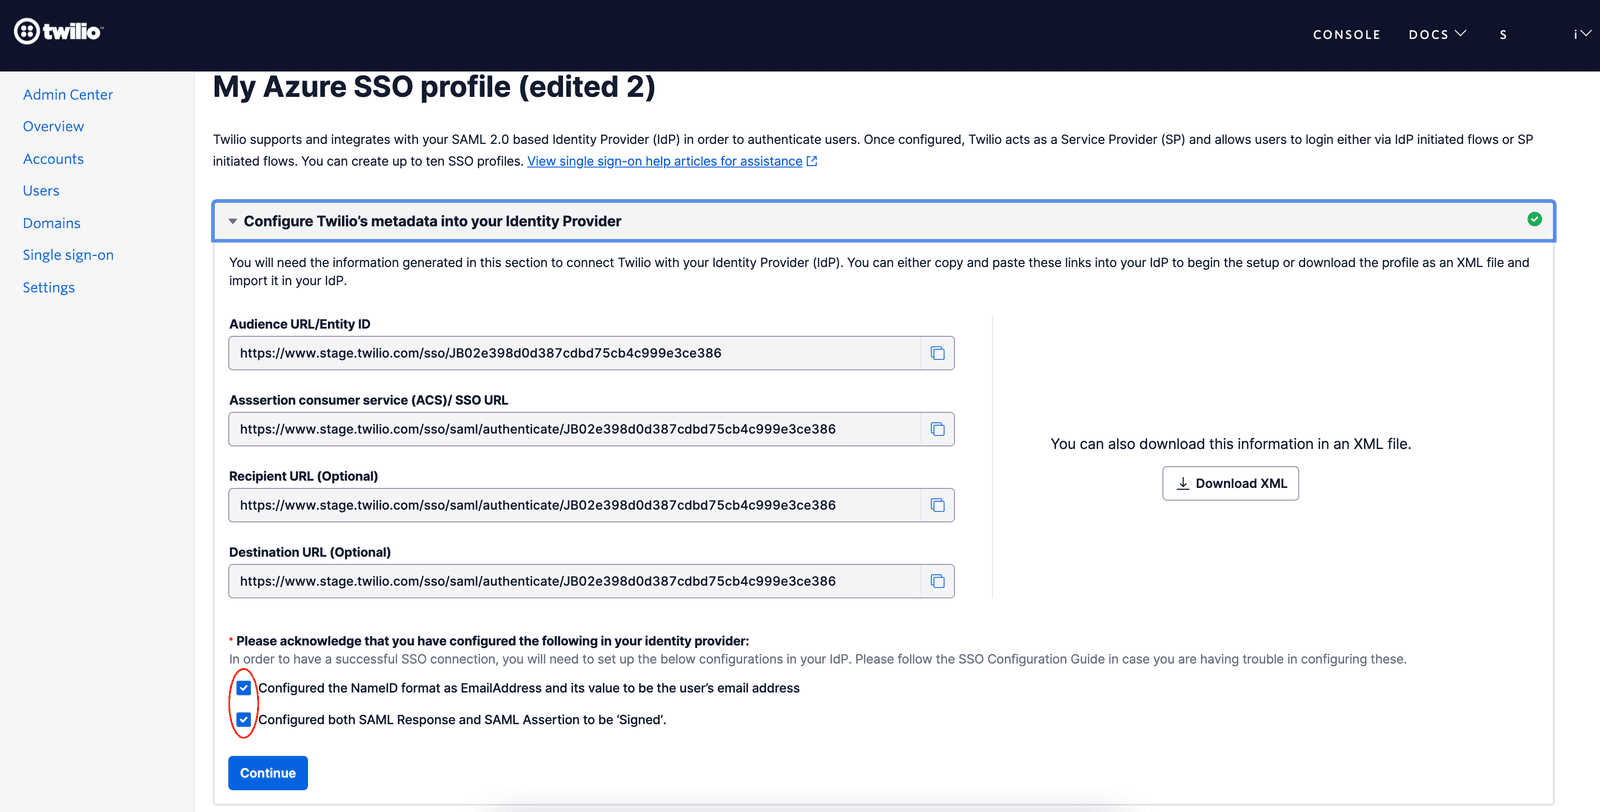
Create a new SSO Profile by clicking the 'Create new SSO Profile ' button. You will land on the below screen where you can copy or download the SP Metadata.
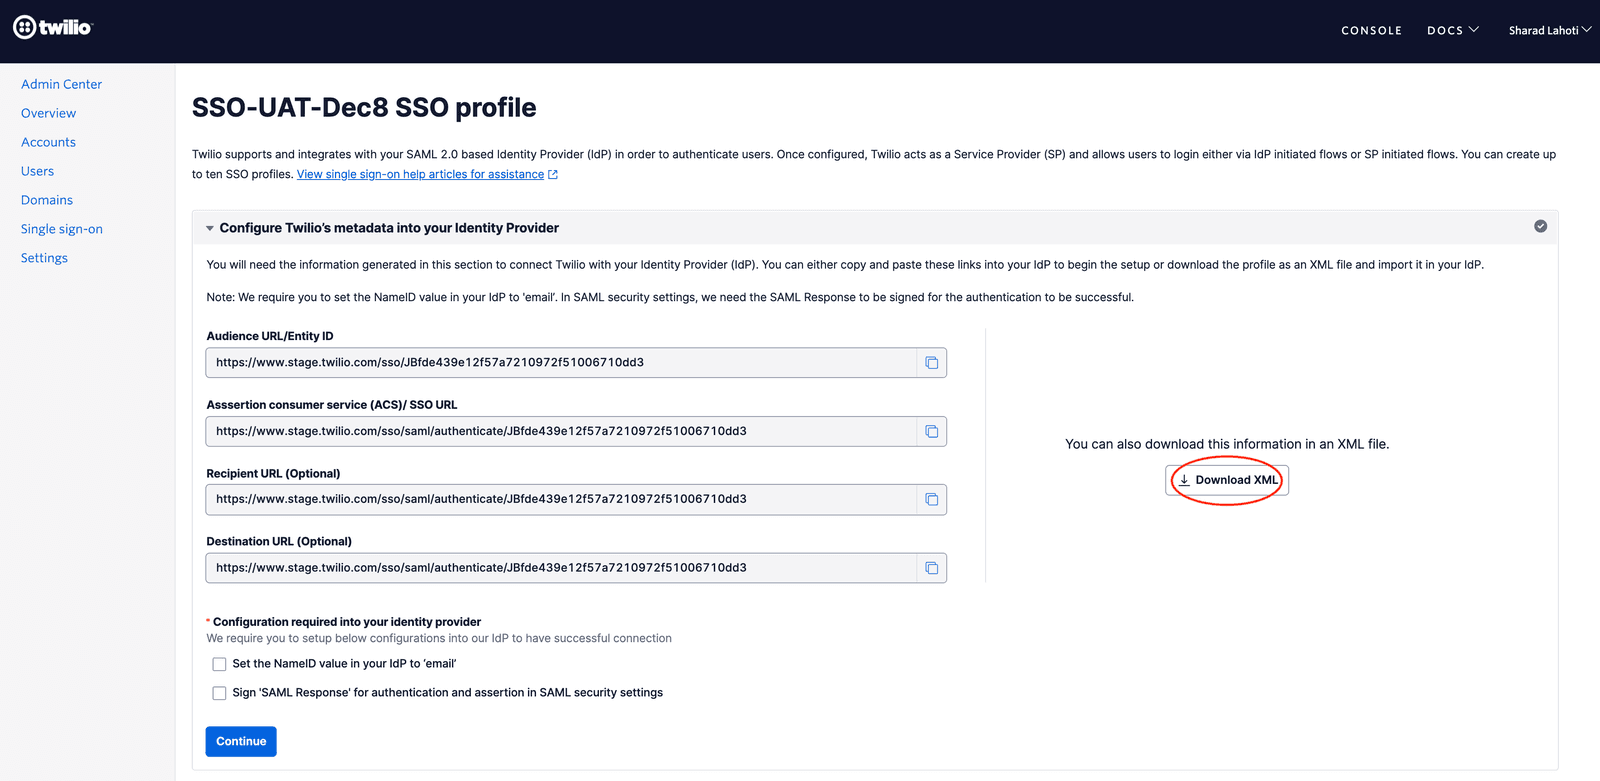
Download Twilio as SP Metadata (XML file) and save this XML file so that you can find and upload it in a subsequent step.
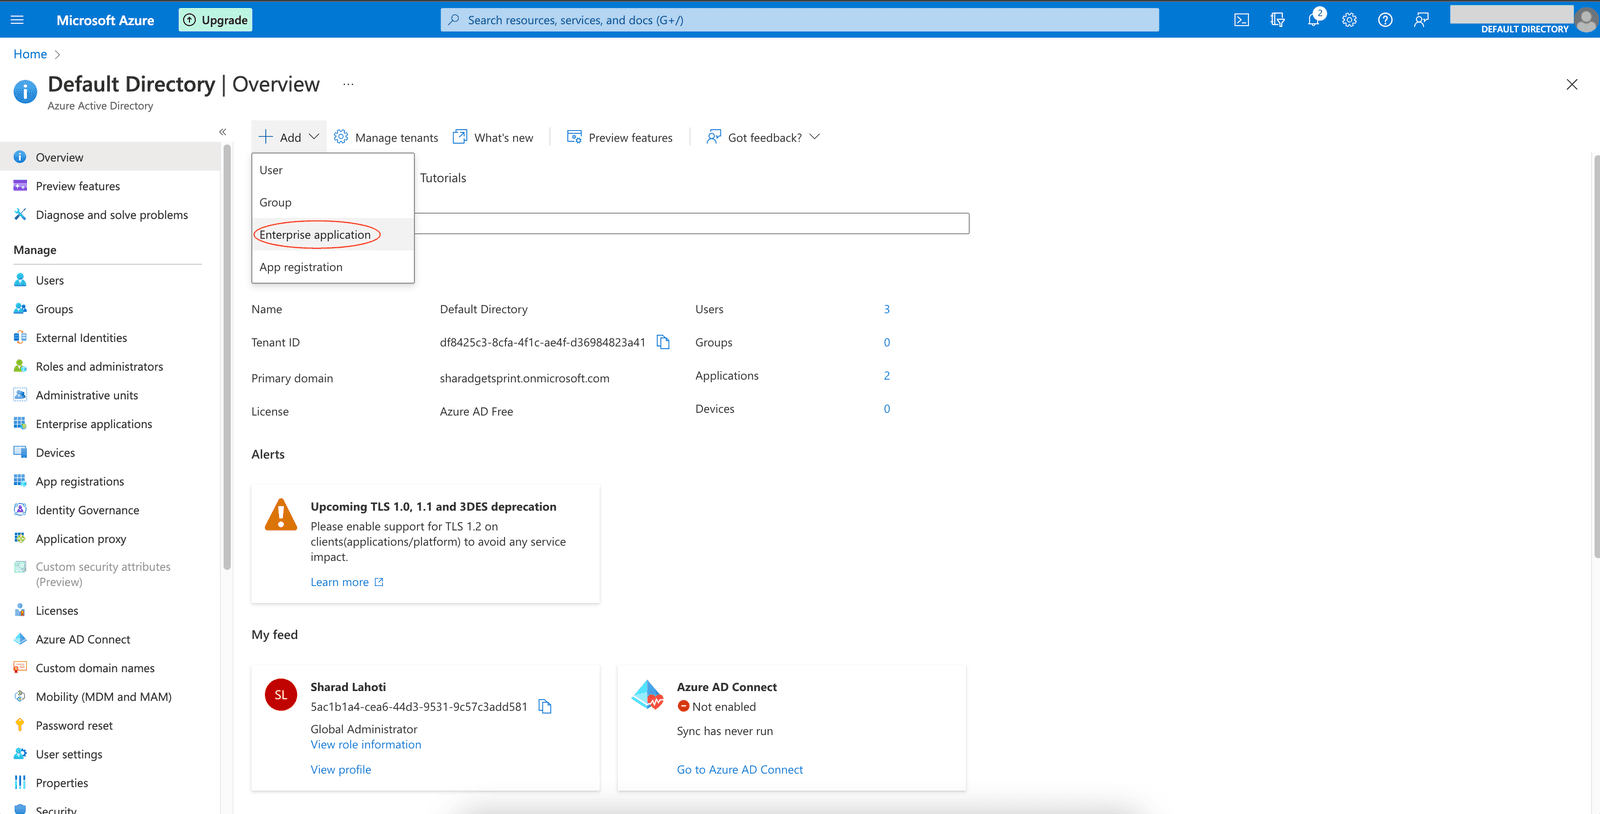
After logging into your Azure portal go to Azure Active Directory, click on 'Add' and select 'Enterprise Application ' from the dropdown
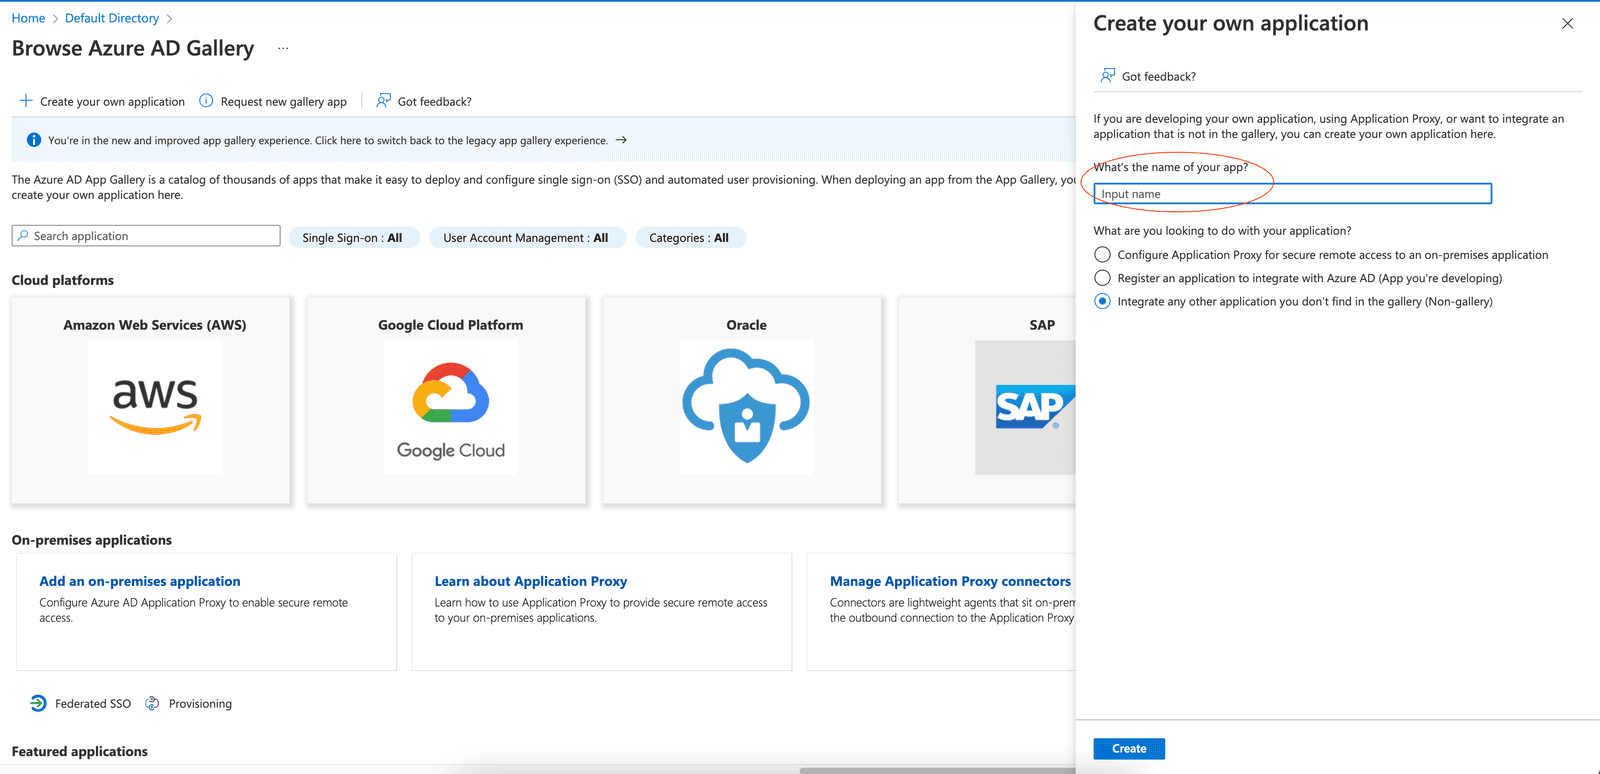
Select 'Create your own Application ' on the next Screen.
Enter a name for identifying this new application and select the option 'Integrate any other application you don't find in the gallery (Non-gallery)'.
Once you have created an Enterprise App, the next step is to configure this application to connect with Twilio for SSO. For this click on the 'Set up single sign on ' link and then select 'SAML ' as the single sign on method.
After selecting SAML, you will see a screen as shown below. This is where we will configure the Twilio as SP metadata. Click on the 'Upload metadata file ' button as shown below and then select the XML file you downloaded in Step 1 above and upload it.
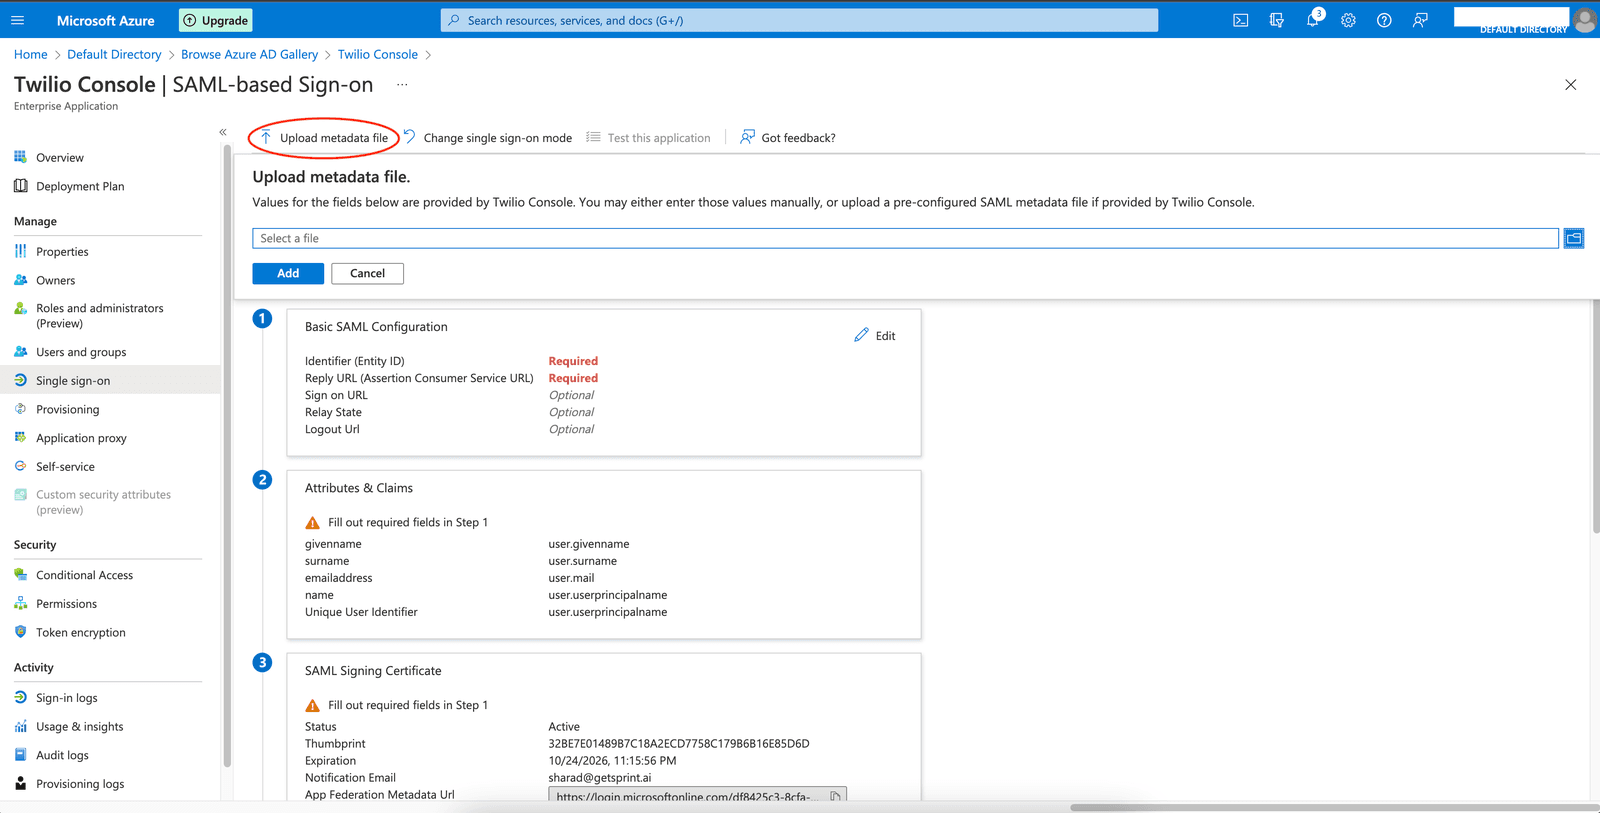
Upon uploading the XML file you will see the values for Basic SAML Configuration fields populated. Hit the save button to save these values
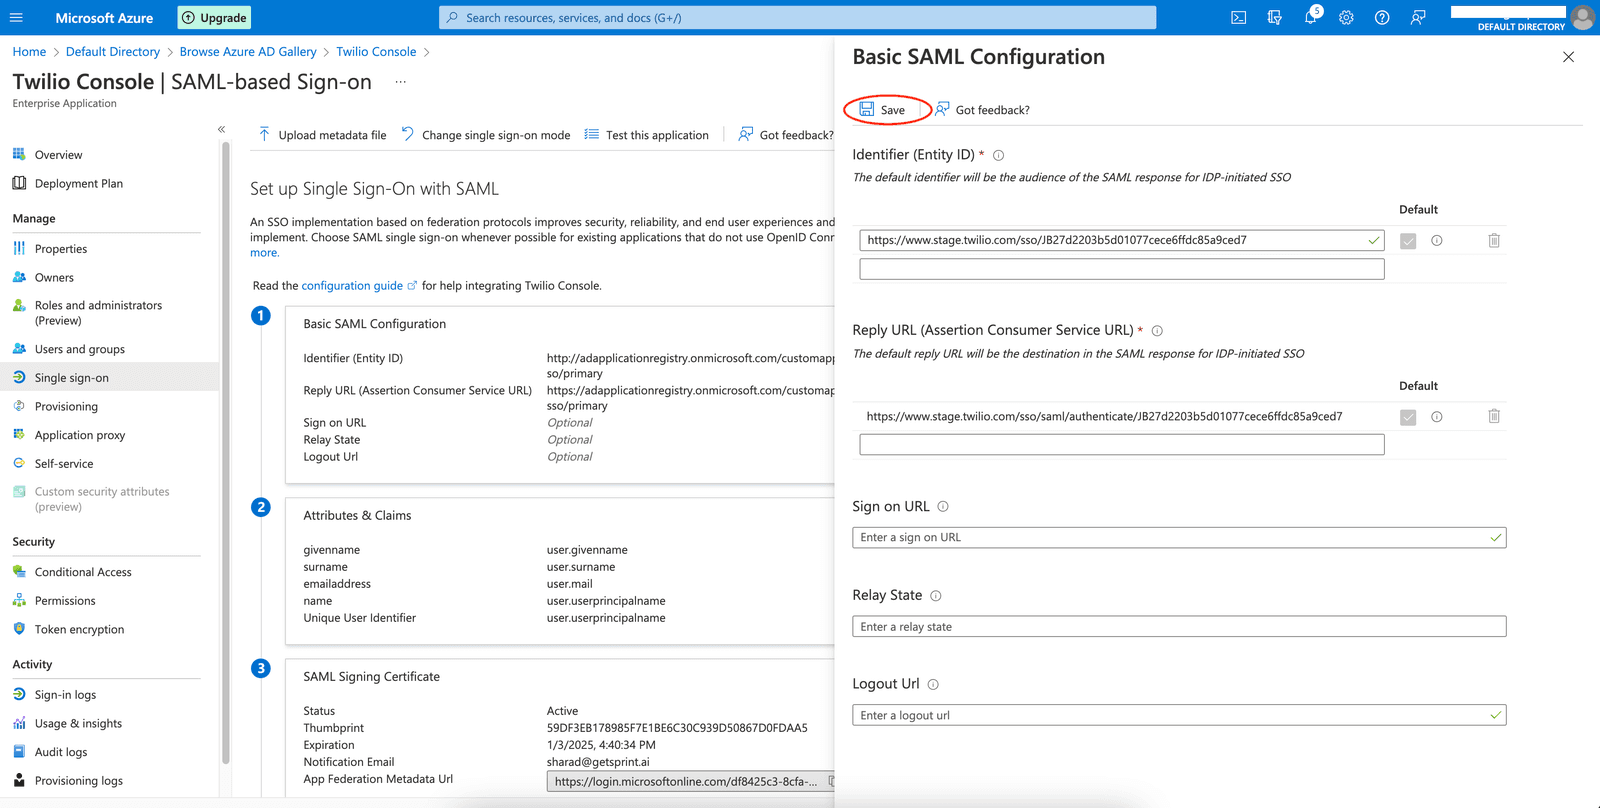
Next, you need to configure the Signing Option and NameID settings.
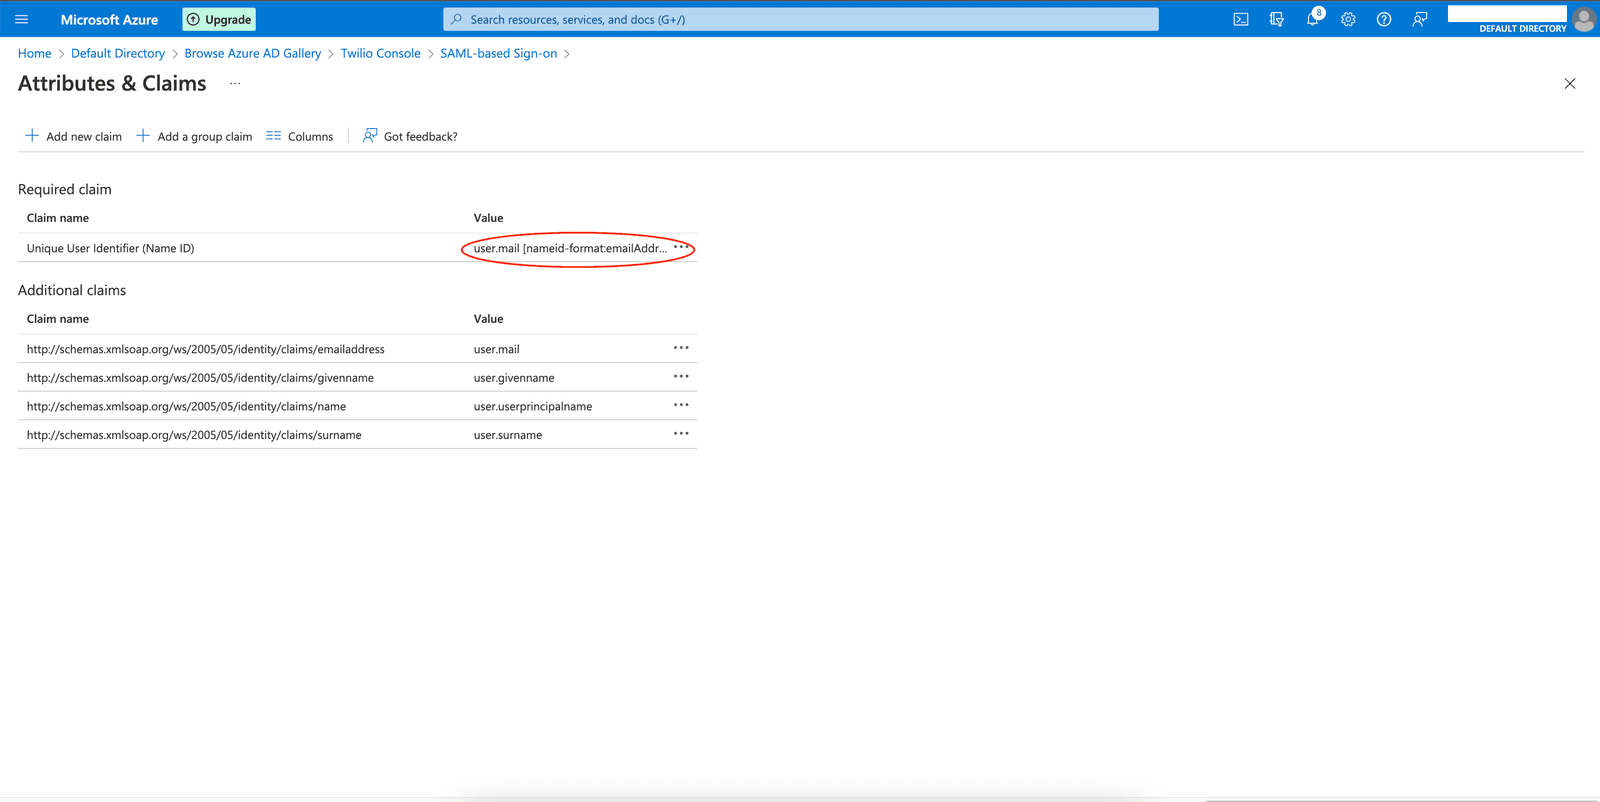
- For NameID, click edit on 'Attributes & Claims'. On the screen as shown below you'll see the Unique User Identifier(Name ID) claim. Confirm that the value is set to the user's email address attribute as per your directory and the format should be EmailAddress.
- It is critical to ensure that the value of the Name ID claim matches exactly with the email address that your users will be signing up within Twilio.
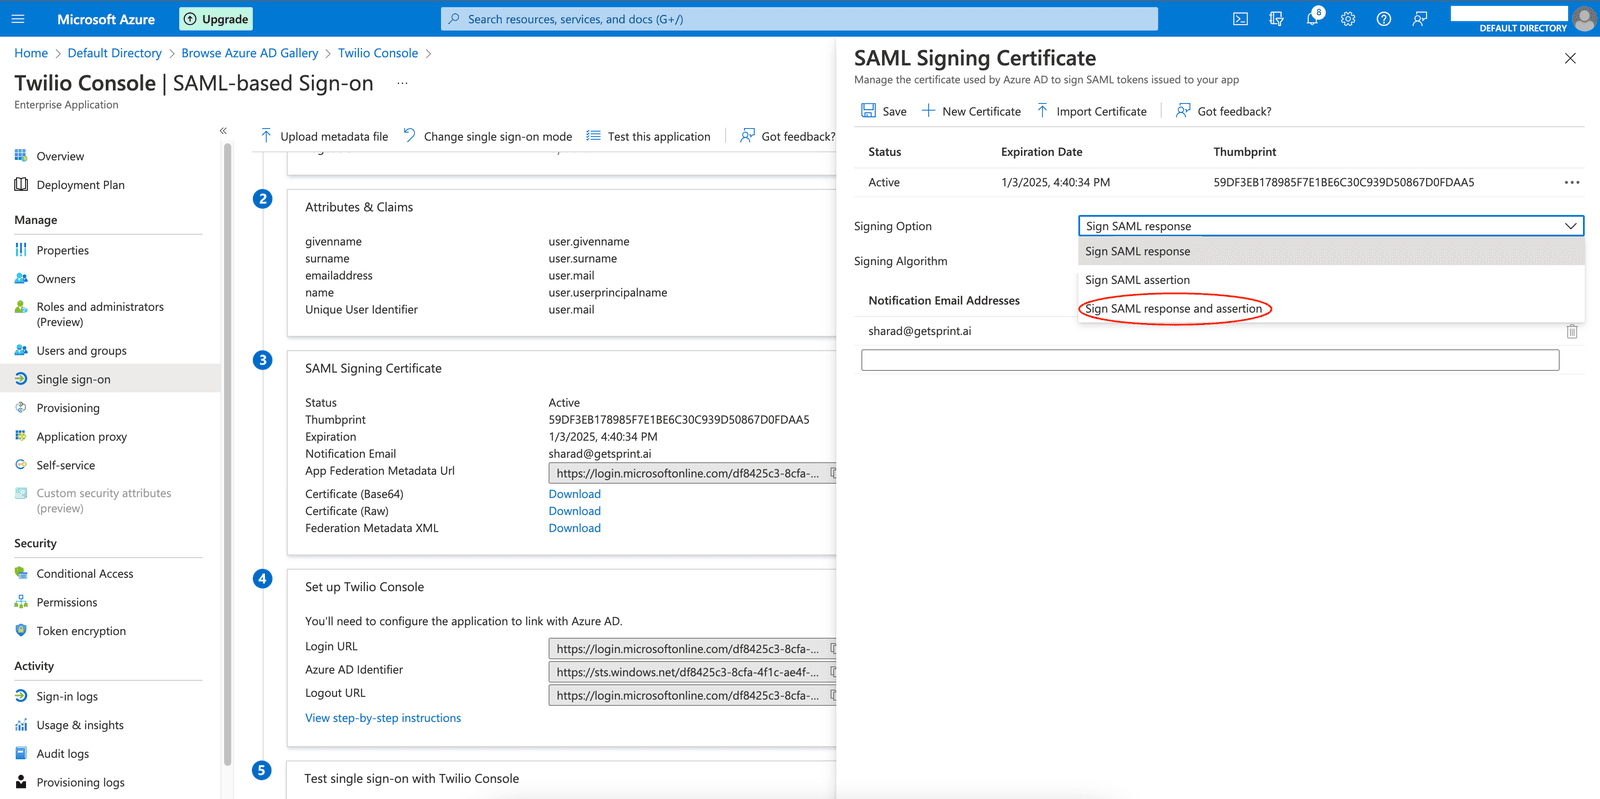
- For the Signing Option, go to the SAML Signing Certificate settings and click Edit. You will see the below page. Here select the option 'Sign SAML response and assertion'.
Once the NameID and Signing Option are configured correctly, you are done with the configurations in your IdP and can now proceed to Configure the IdP metadata into Twilio.
Go to the tab where you have the Twilio Admin Center opened. Confirm that you have configured the Signing Option and NameID settings in your IdP and click on Continue
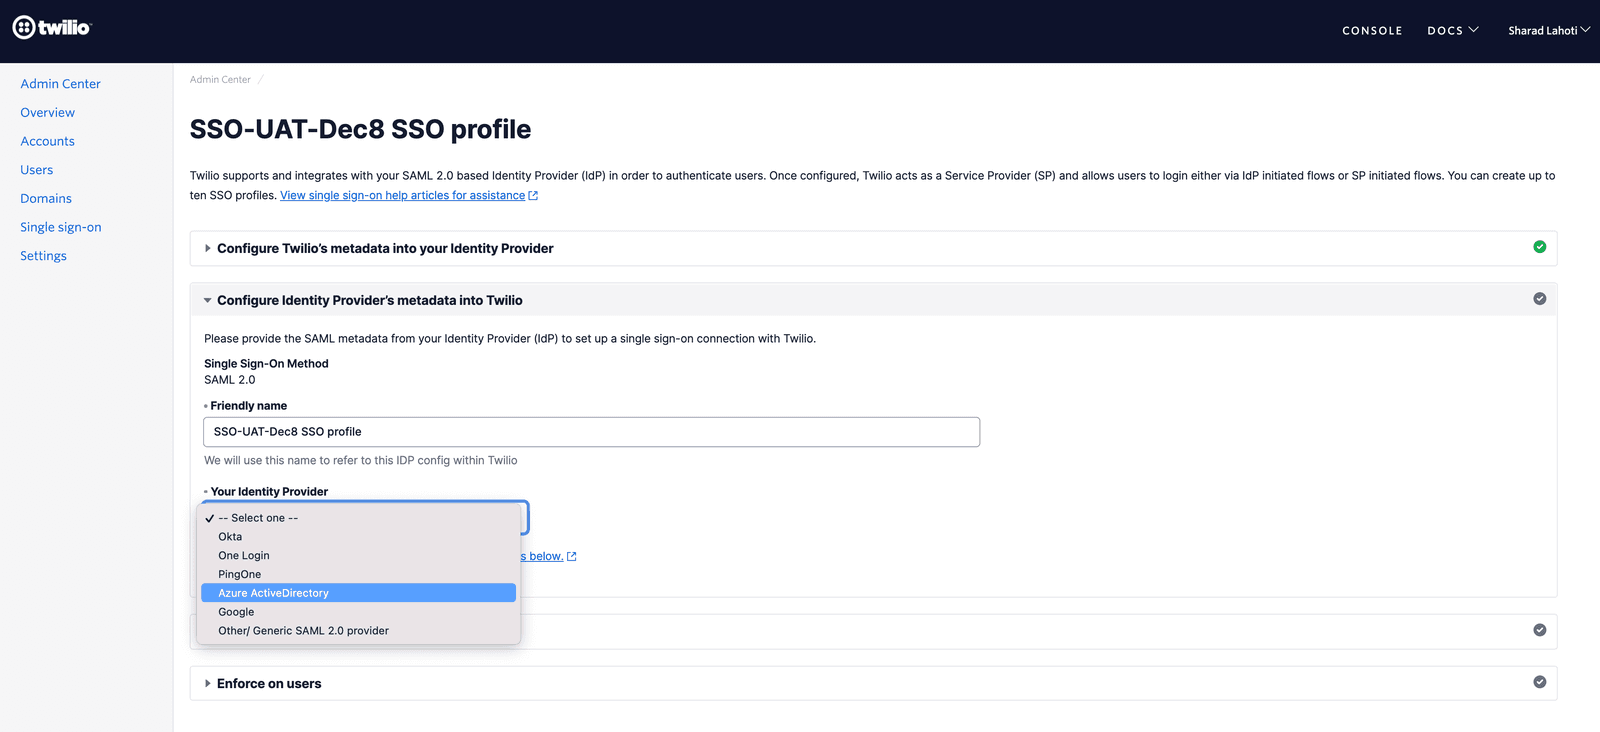
In the next step, please update the friendly name of the SSO Profile to an appropriate value that you can recognize and select 'Azure ActiveDirectory ' as the Identity Provider from the dropdown.
Upon selecting the Identity Provider you will see the IdP metadata fields as shown below.
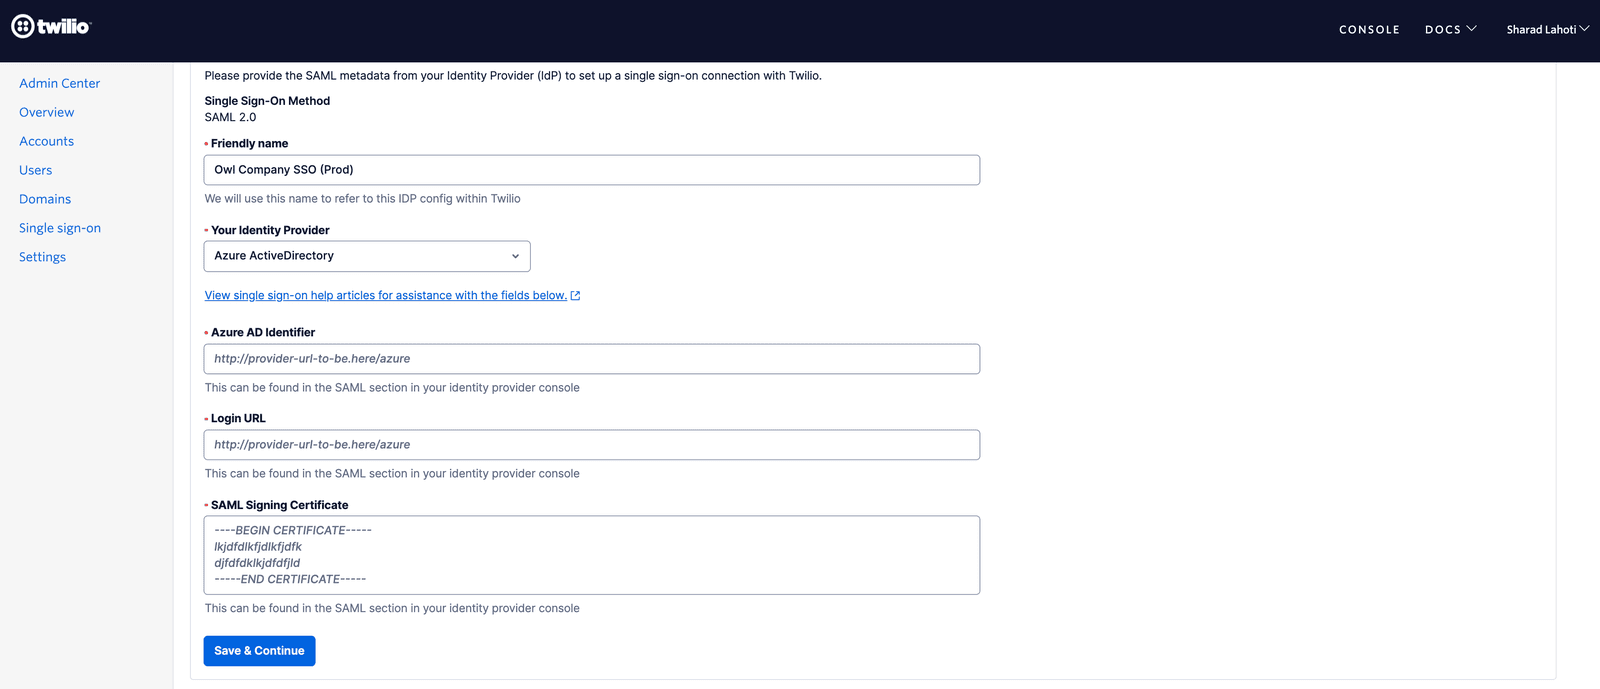
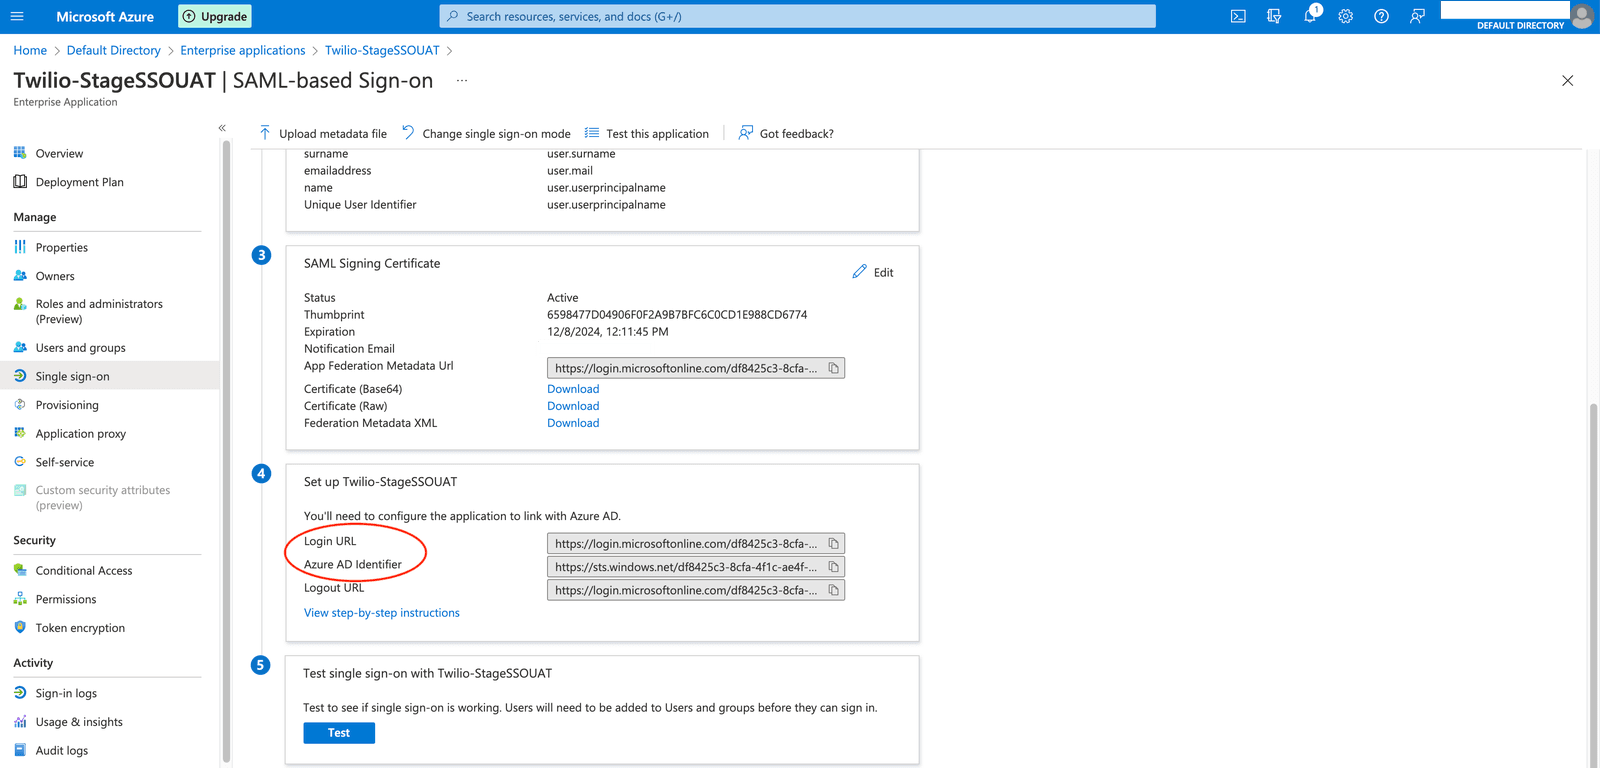
You will need to copy the values of Azure AD Identifier and Login URL from your Enterprise Application into the Twilio SSO Profile. You will find these values in the Setup Single Sign-On page of your Enterprise Application as shown below
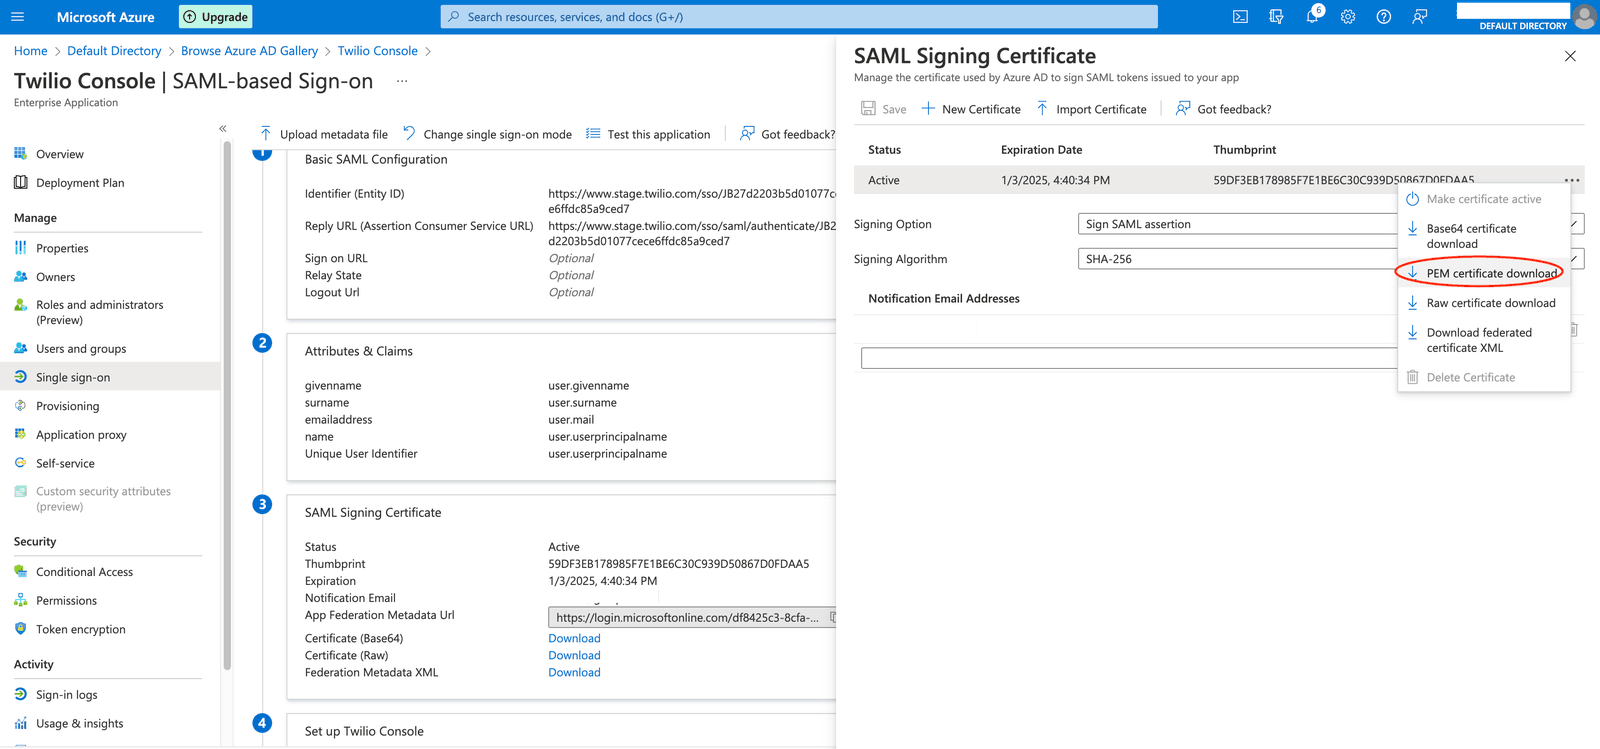
For the SAML Signing Certificate, you will need to click on the 'Edit' button on the SAML Signing Certificate section. Upon clicking the edit button, you will see a screen as shown below. If you have to use a specific certificate you can import or create a new one. Once you have the appropriate signing certificate configured, click on the three dots at the right of that certificate and download the PEM Certificate file.
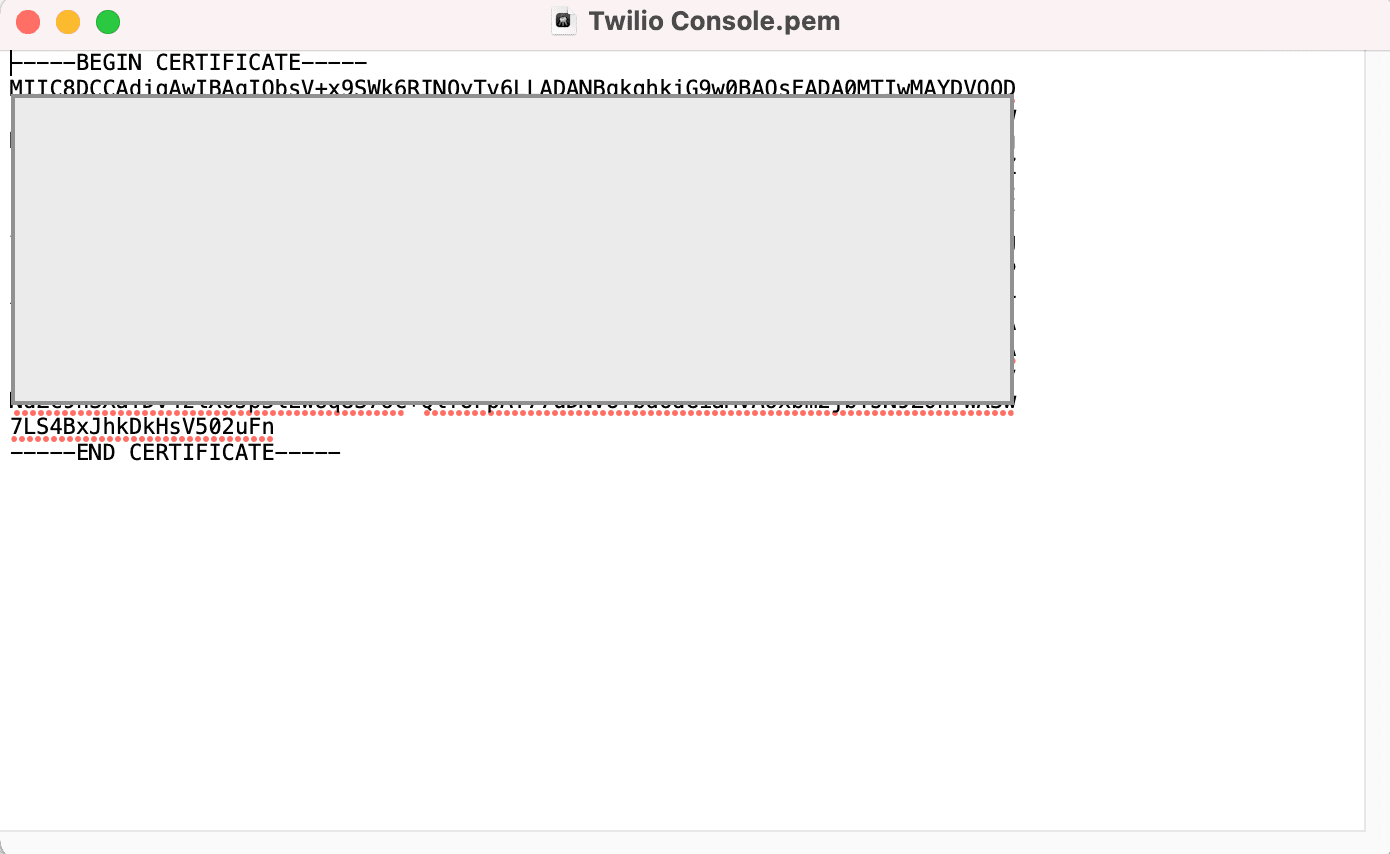
Open the downloaded certificate file in any text editor. It should look like the below screenshot. Copy the entire text (including the -----Begin Certificate----- and -----End Certificate----- part as well) and paste it into the Certificate field for the SSO Profile in Twilio Admin Center
After configuring these 3 values from your Enterprise Application into the SSO Profile, click the 'Continue' button to save the SSO Profile and proceed to the next step to test the SSO Connection.