Account Verification with Authy, PHP and Laravel
Warning
As of November 2022, Twilio no longer provides support for Authy SMS/Voice-only customers. Customers who were also using Authy TOTP or Push prior to March 1, 2023 are still supported. The Authy API is now closed to new customers and will be fully deprecated in the future.
For new development, we encourage you to use the Verify v2 API.
Existing customers will not be impacted at this time until Authy API has reached End of Life. For more information about migration, see Migrating from Authy to Verify for SMS.
Ready to implement user account verification in your application? Here's how it works at a high level:
- The users begin the registration process by entering their data, including a phone number, into a signup form.
- The authentication system sends a one-time password to the user's mobile phone to verify the possession of that phone number.
- The user enters the one-time password into a form before completing registration.
- The user opens a success page and receives an SMS indicating that their account has been created!
To get this done, you'll be working with the following Twilio-powered APIs:
Authy REST API
- Authy Docs: Find quick starts, documentation, and all about the SDKs.
Twilio REST API
- Messages Resource: We will use Twilio directly to send our user a confirmation message after they create an account.
All of this can be done in under a half an hour with the simplicity and power of Authy and Twilio. Let's get started!
If you have already read through the 2FA tutorial, this User Model probably looks very similar:
1<?php23use Illuminate\Database\Schema\Blueprint;4use Illuminate\Database\Migrations\Migration;56class CreateUsersTable extends Migration7{8/**9* Run the migrations.10*11* @return void12*/13public function up()14{15Schema::create('users', function (Blueprint $table) {16$table->increments('id');17$table->string('name');18$table->string('email')->unique();19$table->string('password', 60);20$table->string('phone_number');21$table->string('country_code');22$table->string('authy_id')->nullable();23$table->boolean('verified')->default(false);24$table->rememberToken();25$table->timestamps();26});27}2829/**30* Reverse the migrations.31*32* @return void33*/34public function down()35{36Schema::drop('users');37}38}39
Next, we're going to visit the registration form on the client side.
When we create a new user, we ask for a name, email address, and a password. To validate their account, we also ask them for a mobile number with a country code. We use Authy to send a one-time password via SMS to this phone number.
It is now the controller's responsibility to verify that the user provides the necessary information to create a new user. If the user is created successfully, they will be logged into the system automatically.
1<?php2namespace App\Http\Controllers;34use App\Http\Requests;5use App\User;6use Auth;7use Authy\AuthyApi as AuthyApi;8use DB;9use Hash;10use Illuminate\Contracts\Auth\Authenticatable;11use Illuminate\Http\Request;12use Illuminate\Support\MessageBag;13use Twilio\Rest\Client;1415class UserController extends Controller16{17/**18* Store a new user19*20* @param \Illuminate\Http\Request $request21* @return \Illuminate\Http\Response22*/23public function createNewUser(Request $request, AuthyApi $authyApi)24{25$this->validate(26$request, [27'name' => 'required|string',28'email' => 'required|unique:users|email',29'password' => 'required',30'country_code' => 'required',31'phone_number' => 'required|numeric'32]33);3435$values = $request->all();36$values['password'] = Hash::make($values['password']);3738DB::beginTransaction();3940$newUser = new User($values);41$newUser->save();42Auth::login($newUser);4344$authyUser = $authyApi->registerUser(45$newUser->email,46$newUser->phone_number,47$newUser->country_code48);49if ($authyUser->ok()) {50$newUser->authy_id = $authyUser->id();51$newUser->save();52$request->session()->flash(53'status',54"User created successfully"55);5657$sms = $authyApi->requestSms($newUser->authy_id);58DB::commit();59return redirect()->route('user-show-verify');60} else {61$errors = $this->getAuthyErrors($authyUser->errors());62DB::rollback();63return view('newUser', ['errors' => new MessageBag($errors)]);64}65}6667/**68* This controller function shows the current user status69*70* @param Authenticatable $user Current user71* @return mixed Response view72*/73public function show(Authenticatable $user)74{75return view('showUser', ['user' => $user]);76}7778/**79* This controller function handles the submission form80*81* @param Request $request Current User Request82* @param Authenticatable $user Current User83* @param AuthyApi $authyApi Authy Client84* @return mixed Response view85*/86public function verify(Request $request, Authenticatable $user,87AuthyApi $authyApi, Client $client)88{89$token = $request->input('token');90$verification = $authyApi->verifyToken($user->authy_id, $token);9192if ($verification->ok()) {93$user->verified = true;94$user->save();95$this->sendSmsNotification($client, $user);9697return redirect()->route('user-index');98} else {99$errors = $this->getAuthyErrors($verification->errors());100return view('verifyUser', ['errors' => new MessageBag($errors)]);101}102}103104/**105* This controller function handles the verification code resent106*107* @param Request $request Current User Request108* @param Authenticatable $user Current User109* @param AuthyApi $authyApi Authy Client110* @return mixed Response view111*/112public function verifyResend(Request $request, Authenticatable $user,113AuthyApi $authyApi)114{115$sms = $authyApi->requestSms($user->authy_id);116117if ($sms->ok()) {118$request->session()->flash(119'status',120'Verification code re-sent'121);122return redirect()->route('user-show-verify');123} else {124$errors = $this->getAuthyErrors($sms->errors());125return view('verifyUser', ['errors' => new MessageBag($errors)]);126}127}128129private function getAuthyErrors($authyErrors)130{131$errors = [];132foreach ($authyErrors as $field => $message) {133array_push($errors, $field . ': ' . $message);134}135return $errors;136}137138private function sendSmsNotification($client, $user)139{140$twilioNumber = config('services.twilio')['number'] or die(141"TWILIO_NUMBER is not set in the environment"142);143$messageBody = 'You did it! Signup complete :)';144145$client->messages->create(146$user->fullNumber(), // Phone number which receives the message147[148"from" => $twilioNumber, // From a Twilio number in your account149"body" => $messageBody150]151);152}153}154
Now the user is logged in but not verified. In the next step, we'll learn how to configure Authy to integrate with our application.
In .env.example we list configuration parameters for the application. These are pulled from system environment variables, which is a helpful way to access sensitive values (like API keys). Using environment variables prevents us from accidentally checking them into source control. We also use our Laravel configuration file to load the key and inject Authy\AuthyApi into the application using a service provider.
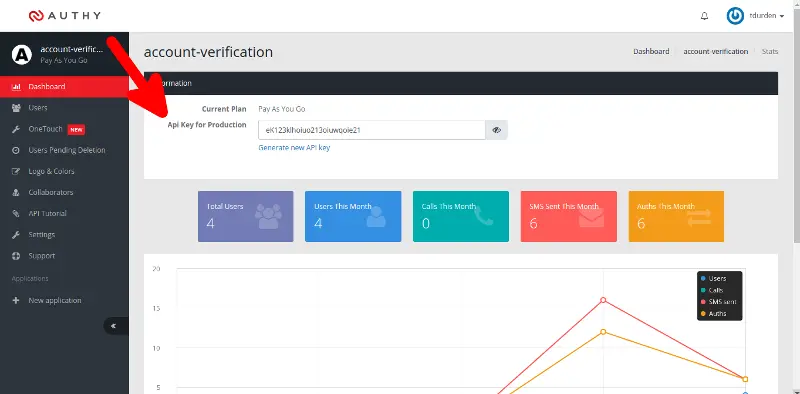
Now we need our Authy production key (sign up for Authy here). When you create an Authy application, the production key is found on the dashboard.
1<?php2namespace App\Providers;34use Authy\AuthyApi as AuthyApi;5use Illuminate\Support\ServiceProvider;67class AuthyApiProvider extends ServiceProvider8{9/**10* Register the application services.11*12* @return void13*/14public function register()15{16$this->app->singleton(AuthyApi::class, function ($app) {17$authyKey = getenv('AUTHY_API_KEY') or die(18"You must specify your api key for Authy. " .19"Visit https://dashboard.authy.com/"20);2122return new AuthyApi($authyKey);23});24}25}26
Now that we've learned how to configure Authy, we need to jump over to the UserController to configure the Authy client and create an instance method to send a one-time password.
Once the user has an authy_id we can actually send a verification code to that user's mobile phone.
When our user is created successfully via the form we implemented, we send a token to the user's mobile phone to verify their account in our controller. Once the code is sent, we redirect to another page where the user can enter the token they received, completing the verification process.
1<?php2namespace App\Http\Controllers;34use App\Http\Requests;5use App\User;6use Auth;7use Authy\AuthyApi as AuthyApi;8use DB;9use Hash;10use Illuminate\Contracts\Auth\Authenticatable;11use Illuminate\Http\Request;12use Illuminate\Support\MessageBag;13use Twilio\Rest\Client;1415class UserController extends Controller16{17/**18* Store a new user19*20* @param \Illuminate\Http\Request $request21* @return \Illuminate\Http\Response22*/23public function createNewUser(Request $request, AuthyApi $authyApi)24{25$this->validate(26$request, [27'name' => 'required|string',28'email' => 'required|unique:users|email',29'password' => 'required',30'country_code' => 'required',31'phone_number' => 'required|numeric'32]33);3435$values = $request->all();36$values['password'] = Hash::make($values['password']);3738DB::beginTransaction();3940$newUser = new User($values);41$newUser->save();42Auth::login($newUser);4344$authyUser = $authyApi->registerUser(45$newUser->email,46$newUser->phone_number,47$newUser->country_code48);49if ($authyUser->ok()) {50$newUser->authy_id = $authyUser->id();51$newUser->save();52$request->session()->flash(53'status',54"User created successfully"55);5657$sms = $authyApi->requestSms($newUser->authy_id);58DB::commit();59return redirect()->route('user-show-verify');60} else {61$errors = $this->getAuthyErrors($authyUser->errors());62DB::rollback();63return view('newUser', ['errors' => new MessageBag($errors)]);64}65}6667/**68* This controller function shows the current user status69*70* @param Authenticatable $user Current user71* @return mixed Response view72*/73public function show(Authenticatable $user)74{75return view('showUser', ['user' => $user]);76}7778/**79* This controller function handles the submission form80*81* @param Request $request Current User Request82* @param Authenticatable $user Current User83* @param AuthyApi $authyApi Authy Client84* @return mixed Response view85*/86public function verify(Request $request, Authenticatable $user,87AuthyApi $authyApi, Client $client)88{89$token = $request->input('token');90$verification = $authyApi->verifyToken($user->authy_id, $token);9192if ($verification->ok()) {93$user->verified = true;94$user->save();95$this->sendSmsNotification($client, $user);9697return redirect()->route('user-index');98} else {99$errors = $this->getAuthyErrors($verification->errors());100return view('verifyUser', ['errors' => new MessageBag($errors)]);101}102}103104/**105* This controller function handles the verification code resent106*107* @param Request $request Current User Request108* @param Authenticatable $user Current User109* @param AuthyApi $authyApi Authy Client110* @return mixed Response view111*/112public function verifyResend(Request $request, Authenticatable $user,113AuthyApi $authyApi)114{115$sms = $authyApi->requestSms($user->authy_id);116117if ($sms->ok()) {118$request->session()->flash(119'status',120'Verification code re-sent'121);122return redirect()->route('user-show-verify');123} else {124$errors = $this->getAuthyErrors($sms->errors());125return view('verifyUser', ['errors' => new MessageBag($errors)]);126}127}128129private function getAuthyErrors($authyErrors)130{131$errors = [];132foreach ($authyErrors as $field => $message) {133array_push($errors, $field . ': ' . $message);134}135return $errors;136}137138private function sendSmsNotification($client, $user)139{140$twilioNumber = config('services.twilio')['number'] or die(141"TWILIO_NUMBER is not set in the environment"142);143$messageBody = 'You did it! Signup complete :)';144145$client->messages->create(146$user->fullNumber(), // Phone number which receives the message147[148"from" => $twilioNumber, // From a Twilio number in your account149"body" => $messageBody150]151);152}153}154
Next, we'll take a look at verifying the code the user provides us.
This controller function handles the submission form. It needs to:
- Get the current user.
- Verify the code that was entered by the user.
- If the code entered was valid, flip a Boolean flag on the user model to indicate the account was verified.
The Authy PHP client provides us with a verifyToken() method that allows us to pass a user id and a token. In this case, we just need to check that the API request was successful and if so, set $user->verified to true.
1<?php2namespace App\Http\Controllers;34use App\Http\Requests;5use App\User;6use Auth;7use Authy\AuthyApi as AuthyApi;8use DB;9use Hash;10use Illuminate\Contracts\Auth\Authenticatable;11use Illuminate\Http\Request;12use Illuminate\Support\MessageBag;13use Twilio\Rest\Client;1415class UserController extends Controller16{17/**18* Store a new user19*20* @param \Illuminate\Http\Request $request21* @return \Illuminate\Http\Response22*/23public function createNewUser(Request $request, AuthyApi $authyApi)24{25$this->validate(26$request, [27'name' => 'required|string',28'email' => 'required|unique:users|email',29'password' => 'required',30'country_code' => 'required',31'phone_number' => 'required|numeric'32]33);3435$values = $request->all();36$values['password'] = Hash::make($values['password']);3738DB::beginTransaction();3940$newUser = new User($values);41$newUser->save();42Auth::login($newUser);4344$authyUser = $authyApi->registerUser(45$newUser->email,46$newUser->phone_number,47$newUser->country_code48);49if ($authyUser->ok()) {50$newUser->authy_id = $authyUser->id();51$newUser->save();52$request->session()->flash(53'status',54"User created successfully"55);5657$sms = $authyApi->requestSms($newUser->authy_id);58DB::commit();59return redirect()->route('user-show-verify');60} else {61$errors = $this->getAuthyErrors($authyUser->errors());62DB::rollback();63return view('newUser', ['errors' => new MessageBag($errors)]);64}65}6667/**68* This controller function shows the current user status69*70* @param Authenticatable $user Current user71* @return mixed Response view72*/73public function show(Authenticatable $user)74{75return view('showUser', ['user' => $user]);76}7778/**79* This controller function handles the submission form80*81* @param Request $request Current User Request82* @param Authenticatable $user Current User83* @param AuthyApi $authyApi Authy Client84* @return mixed Response view85*/86public function verify(Request $request, Authenticatable $user,87AuthyApi $authyApi, Client $client)88{89$token = $request->input('token');90$verification = $authyApi->verifyToken($user->authy_id, $token);9192if ($verification->ok()) {93$user->verified = true;94$user->save();95$this->sendSmsNotification($client, $user);9697return redirect()->route('user-index');98} else {99$errors = $this->getAuthyErrors($verification->errors());100return view('verifyUser', ['errors' => new MessageBag($errors)]);101}102}103104/**105* This controller function handles the verification code resent106*107* @param Request $request Current User Request108* @param Authenticatable $user Current User109* @param AuthyApi $authyApi Authy Client110* @return mixed Response view111*/112public function verifyResend(Request $request, Authenticatable $user,113AuthyApi $authyApi)114{115$sms = $authyApi->requestSms($user->authy_id);116117if ($sms->ok()) {118$request->session()->flash(119'status',120'Verification code re-sent'121);122return redirect()->route('user-show-verify');123} else {124$errors = $this->getAuthyErrors($sms->errors());125return view('verifyUser', ['errors' => new MessageBag($errors)]);126}127}128129private function getAuthyErrors($authyErrors)130{131$errors = [];132foreach ($authyErrors as $field => $message) {133array_push($errors, $field . ': ' . $message);134}135return $errors;136}137138private function sendSmsNotification($client, $user)139{140$twilioNumber = config('services.twilio')['number'] or die(141"TWILIO_NUMBER is not set in the environment"142);143$messageBody = 'You did it! Signup complete :)';144145$client->messages->create(146$user->fullNumber(), // Phone number which receives the message147[148"from" => $twilioNumber, // From a Twilio number in your account149"body" => $messageBody150]151);152}153}154
That's all for token verification! However, our verification form wouldn't be very usable if there wasn't a way to resend a verification code if the message didn't arrive at the end user's handset.
Since the form for re-sending the code is one line, we're going to skip that for this tutorial. Let's just look at the controller function.
1<?php2namespace App\Http\Controllers;34use App\Http\Requests;5use App\User;6use Auth;7use Authy\AuthyApi as AuthyApi;8use DB;9use Hash;10use Illuminate\Contracts\Auth\Authenticatable;11use Illuminate\Http\Request;12use Illuminate\Support\MessageBag;13use Twilio\Rest\Client;1415class UserController extends Controller16{17/**18* Store a new user19*20* @param \Illuminate\Http\Request $request21* @return \Illuminate\Http\Response22*/23public function createNewUser(Request $request, AuthyApi $authyApi)24{25$this->validate(26$request, [27'name' => 'required|string',28'email' => 'required|unique:users|email',29'password' => 'required',30'country_code' => 'required',31'phone_number' => 'required|numeric'32]33);3435$values = $request->all();36$values['password'] = Hash::make($values['password']);3738DB::beginTransaction();3940$newUser = new User($values);41$newUser->save();42Auth::login($newUser);4344$authyUser = $authyApi->registerUser(45$newUser->email,46$newUser->phone_number,47$newUser->country_code48);49if ($authyUser->ok()) {50$newUser->authy_id = $authyUser->id();51$newUser->save();52$request->session()->flash(53'status',54"User created successfully"55);5657$sms = $authyApi->requestSms($newUser->authy_id);58DB::commit();59return redirect()->route('user-show-verify');60} else {61$errors = $this->getAuthyErrors($authyUser->errors());62DB::rollback();63return view('newUser', ['errors' => new MessageBag($errors)]);64}65}6667/**68* This controller function shows the current user status69*70* @param Authenticatable $user Current user71* @return mixed Response view72*/73public function show(Authenticatable $user)74{75return view('showUser', ['user' => $user]);76}7778/**79* This controller function handles the submission form80*81* @param Request $request Current User Request82* @param Authenticatable $user Current User83* @param AuthyApi $authyApi Authy Client84* @return mixed Response view85*/86public function verify(Request $request, Authenticatable $user,87AuthyApi $authyApi, Client $client)88{89$token = $request->input('token');90$verification = $authyApi->verifyToken($user->authy_id, $token);9192if ($verification->ok()) {93$user->verified = true;94$user->save();95$this->sendSmsNotification($client, $user);9697return redirect()->route('user-index');98} else {99$errors = $this->getAuthyErrors($verification->errors());100return view('verifyUser', ['errors' => new MessageBag($errors)]);101}102}103104/**105* This controller function handles the verification code resent106*107* @param Request $request Current User Request108* @param Authenticatable $user Current User109* @param AuthyApi $authyApi Authy Client110* @return mixed Response view111*/112public function verifyResend(Request $request, Authenticatable $user,113AuthyApi $authyApi)114{115$sms = $authyApi->requestSms($user->authy_id);116117if ($sms->ok()) {118$request->session()->flash(119'status',120'Verification code re-sent'121);122return redirect()->route('user-show-verify');123} else {124$errors = $this->getAuthyErrors($sms->errors());125return view('verifyUser', ['errors' => new MessageBag($errors)]);126}127}128129private function getAuthyErrors($authyErrors)130{131$errors = [];132foreach ($authyErrors as $field => $message) {133array_push($errors, $field . ': ' . $message);134}135return $errors;136}137138private function sendSmsNotification($client, $user)139{140$twilioNumber = config('services.twilio')['number'] or die(141"TWILIO_NUMBER is not set in the environment"142);143$messageBody = 'You did it! Signup complete :)';144145$client->messages->create(146$user->fullNumber(), // Phone number which receives the message147[148"from" => $twilioNumber, // From a Twilio number in your account149"body" => $messageBody150]151);152}153}154
This controller loads the $user associated with the request and then uses the same Authy API method we used earlier to resend the code.
To wrap things up, let's implement the last step. We need to confirm that the user's account has been verified with a success page and a text message.
This blade template displays a user name and let's them know they've been verified.
1@extends('layouts.master')23@section('title')4User5@endsection67@section('content')8<h1>{{ $user->name }}</h1>9<p>Account Status:10@if($user->verified)11Verified12@else13Not Verified14@endif15</p>16@if( !$user->verified )17<p>18<a href="{{ route('user-verify') }}">Verify your account now</a>19</p>20@endif21@endsection22
This should suffice for confirmation in the browser that the user has been verified. Let's see how we might send that text message next.
We create a single instance of the Twilio REST API helper, called $client in this example.
To send an SMS to the user's phone, use messages->create() method. To support international numbers, use the user's fullNumber() . The fullNumber() method in the User model returns a combination of the country_code and phone_number that the user provided upon registration.
1<?php2namespace App\Http\Controllers;34use App\Http\Requests;5use App\User;6use Auth;7use Authy\AuthyApi as AuthyApi;8use DB;9use Hash;10use Illuminate\Contracts\Auth\Authenticatable;11use Illuminate\Http\Request;12use Illuminate\Support\MessageBag;13use Twilio\Rest\Client;1415class UserController extends Controller16{17/**18* Store a new user19*20* @param \Illuminate\Http\Request $request21* @return \Illuminate\Http\Response22*/23public function createNewUser(Request $request, AuthyApi $authyApi)24{25$this->validate(26$request, [27'name' => 'required|string',28'email' => 'required|unique:users|email',29'password' => 'required',30'country_code' => 'required',31'phone_number' => 'required|numeric'32]33);3435$values = $request->all();36$values['password'] = Hash::make($values['password']);3738DB::beginTransaction();3940$newUser = new User($values);41$newUser->save();42Auth::login($newUser);4344$authyUser = $authyApi->registerUser(45$newUser->email,46$newUser->phone_number,47$newUser->country_code48);49if ($authyUser->ok()) {50$newUser->authy_id = $authyUser->id();51$newUser->save();52$request->session()->flash(53'status',54"User created successfully"55);5657$sms = $authyApi->requestSms($newUser->authy_id);58DB::commit();59return redirect()->route('user-show-verify');60} else {61$errors = $this->getAuthyErrors($authyUser->errors());62DB::rollback();63return view('newUser', ['errors' => new MessageBag($errors)]);64}65}6667/**68* This controller function shows the current user status69*70* @param Authenticatable $user Current user71* @return mixed Response view72*/73public function show(Authenticatable $user)74{75return view('showUser', ['user' => $user]);76}7778/**79* This controller function handles the submission form80*81* @param Request $request Current User Request82* @param Authenticatable $user Current User83* @param AuthyApi $authyApi Authy Client84* @return mixed Response view85*/86public function verify(Request $request, Authenticatable $user,87AuthyApi $authyApi, Client $client)88{89$token = $request->input('token');90$verification = $authyApi->verifyToken($user->authy_id, $token);9192if ($verification->ok()) {93$user->verified = true;94$user->save();95$this->sendSmsNotification($client, $user);9697return redirect()->route('user-index');98} else {99$errors = $this->getAuthyErrors($verification->errors());100return view('verifyUser', ['errors' => new MessageBag($errors)]);101}102}103104/**105* This controller function handles the verification code resent106*107* @param Request $request Current User Request108* @param Authenticatable $user Current User109* @param AuthyApi $authyApi Authy Client110* @return mixed Response view111*/112public function verifyResend(Request $request, Authenticatable $user,113AuthyApi $authyApi)114{115$sms = $authyApi->requestSms($user->authy_id);116117if ($sms->ok()) {118$request->session()->flash(119'status',120'Verification code re-sent'121);122return redirect()->route('user-show-verify');123} else {124$errors = $this->getAuthyErrors($sms->errors());125return view('verifyUser', ['errors' => new MessageBag($errors)]);126}127}128129private function getAuthyErrors($authyErrors)130{131$errors = [];132foreach ($authyErrors as $field => $message) {133array_push($errors, $field . ': ' . $message);134}135return $errors;136}137138private function sendSmsNotification($client, $user)139{140$twilioNumber = config('services.twilio')['number'] or die(141"TWILIO_NUMBER is not set in the environment"142);143$messageBody = 'You did it! Signup complete :)';144145$client->messages->create(146$user->fullNumber(), // Phone number which receives the message147[148"from" => $twilioNumber, // From a Twilio number in your account149"body" => $messageBody150]151);152}153}154
We've just implemented account verification so your users can confirm their phone number. Where can we take it from here?
If you're a PHP developer working with Twilio, you might want to check out these other tutorials:
Put a button on your web page that connects visitors to live support or sales people via telephone.
Instantly collect structured data from your users with a survey conducted over a voice call or SMS text messages.