Setting up a TaskRouter Workspace: Add and Configure TaskQueues
TaskQueues assign Tasks to Workers based on Worker attributes. For our example, we will use two TaskQueues - one for requests in Spanish and one for requests in English.
With your Workspace open in the TaskRouter console, click 'TaskQueues' then 'Create TaskQueue'.
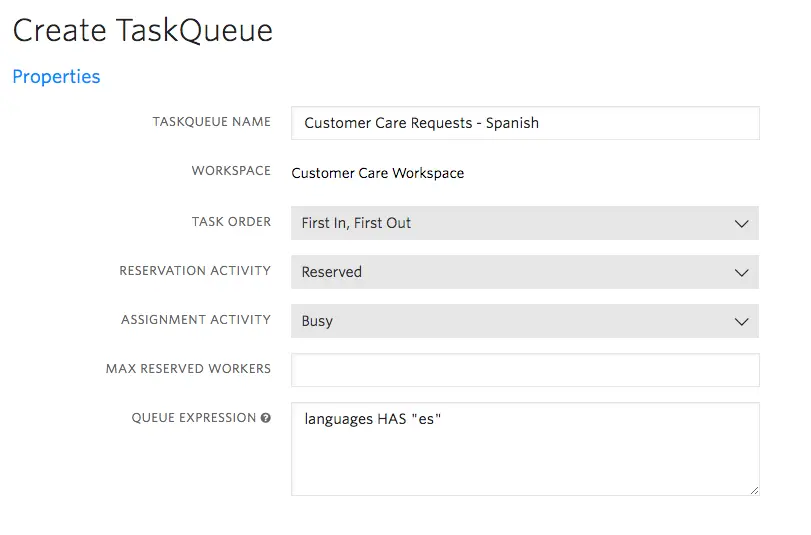
Our first TaskQueue will target Workers like Alice who possess Spanish language skills.
Target Workers are described using an SQL-like syntax which matches against the JSON attributes of Workers. Use the HAS operator to check whether a Worker's languages array includes the value "es":
Be sure to set the Reservation Activity to 'Reserved' and the Assignment Activity to 'Busy'.
Target Workers Expression: languages HAS "es"
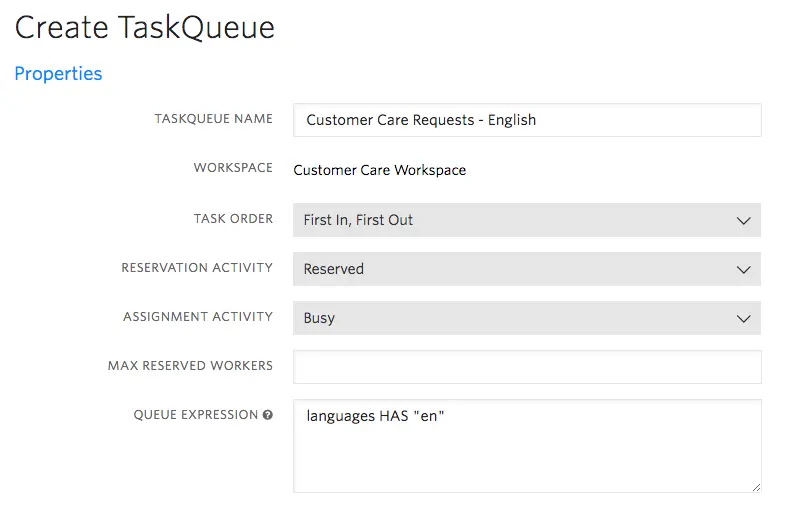
To complete our example of language-based routing, create a second TaskQueue, this time targeting Workers like both Alice and Bob who possess English language skills:
Target Workers Expression: languages HAS "en"
Reopen the 'Customer Care Requests - English' TaskQueue and scroll to the bottom of the page. You should see that both Alice and Bob are eligible to receive tasks from this TaskQueue:

Reopen the Spanish TaskQueue for comparison - only Alice will show in the list of matching Workers:

Wonderful. We have created two TaskQueues to target our Workers. But before a TaskQueue assigns a Task to a Worker, the Task needs to be created and added to the TaskQueue. That's the role of a Workflow.