Creating Tasks and Accepting Reservations: Set up the Assignment Callback URL
The basic lifecycle of a [successful] TaskRouter Task is as follows:
Task Created → eligible Worker becomes available → Worker reserved → Reservation accepted → Task assigned to Worker.
In this part of the tutorial, we'll create Tasks and observe them through each of these stages. We start by creating a Task using the Tasks REST API. First time around we accept the Task using the Reservations REST API, then we create another Task and accept it using assignment callback instructions.
Info
Both the Reservations REST API and assignment callback instructions are valid methods for accepting a Reservation; it's likely that you'll choose one or the other based on the amount of background work that must be performed by your server before it accepts or rejects a Reservation. For example, due to the amount of time required, if you were to build a user interface that allowed human agents to inspect a Task before accepting it, you would need to accept the Reservation asynchronously using the Reservations REST API.
Whether we accept Reservations via the REST API or via assignment callback instructions, we always need an Assignment Callback URL that is reachable by TaskRouter. This is the URL at which TaskRouter will notify us when a Worker is reserved to perform a Task. Before creating any Tasks, let's get the Assignment Callback URL up and running.
First, set up the local Flask server:
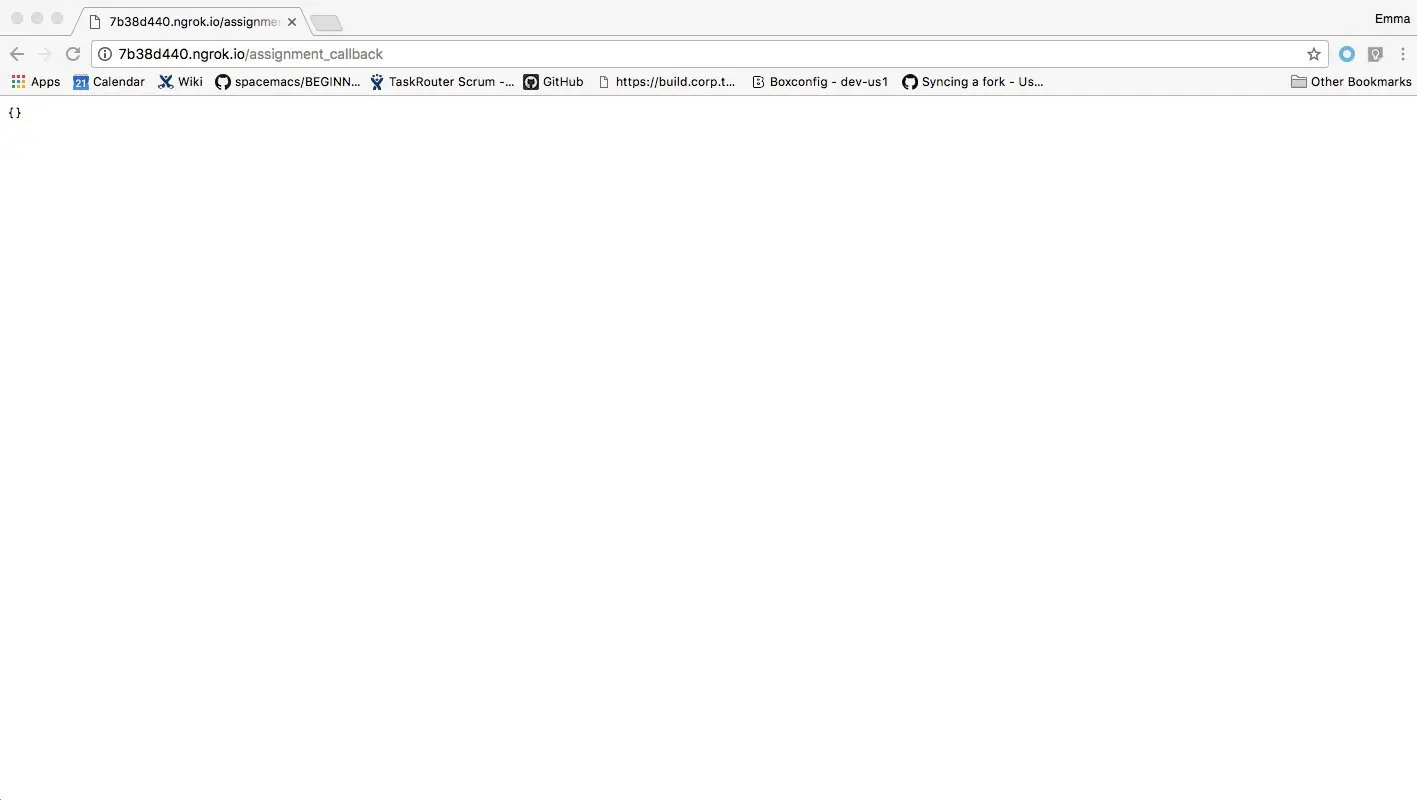
1from flask import Flask, Response2import json34app = Flask(__name__)56@app.route('/assignment_callback', methods=['POST','GET'])7def assignment_callback():8"""For now, we will respond to assignment callbacks with empty 200 response"""9resp = Response({}, status = 200, mimetype = 'application/json')10return resp1112if __name__ == "__main__":13app.run(debug=True)141516
This returns an empty JSON document to TaskRouter with a 200 (OK) response code. This tells TaskRouter that the assignment callback was successfully received and parsed, but that we don't want to take any action on the Reservation right now. Instead, it's implied that we will use the REST API to accept or reject the Reservation when we are ready.
Now, start your Flask server from the terminal:
1python run.py2* Running on http://127.0.0.1:5000/
When you access your server at http://localhost:5000/assignment_callback, you should see an empty JSON document returned with no errors.
To allow Twilio to interact with your development server, we can use ngrok. After installing ngrok to your $PATH, run the following command at your terminal to start listening for requests from the outside world:
ngrok http 5000
Identify your ngrok URL, which should be located where the text is highlighted in the terminal output below.
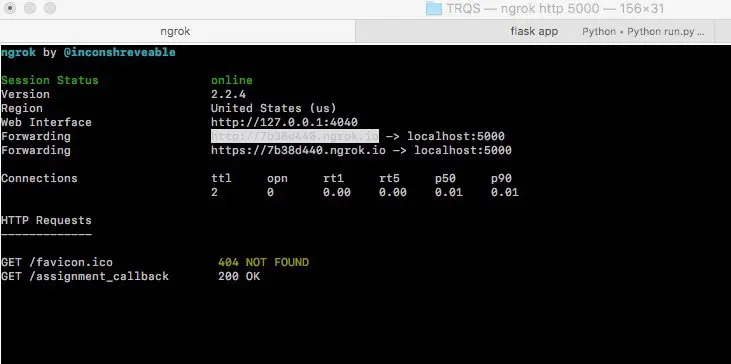
Your local Python server is now accessible to anyone (including Twilio's servers) at your ngrok URL.
If you prefer not to expose your development machine to the Internet, deploy the Python application to an Internet-accessible Web server.
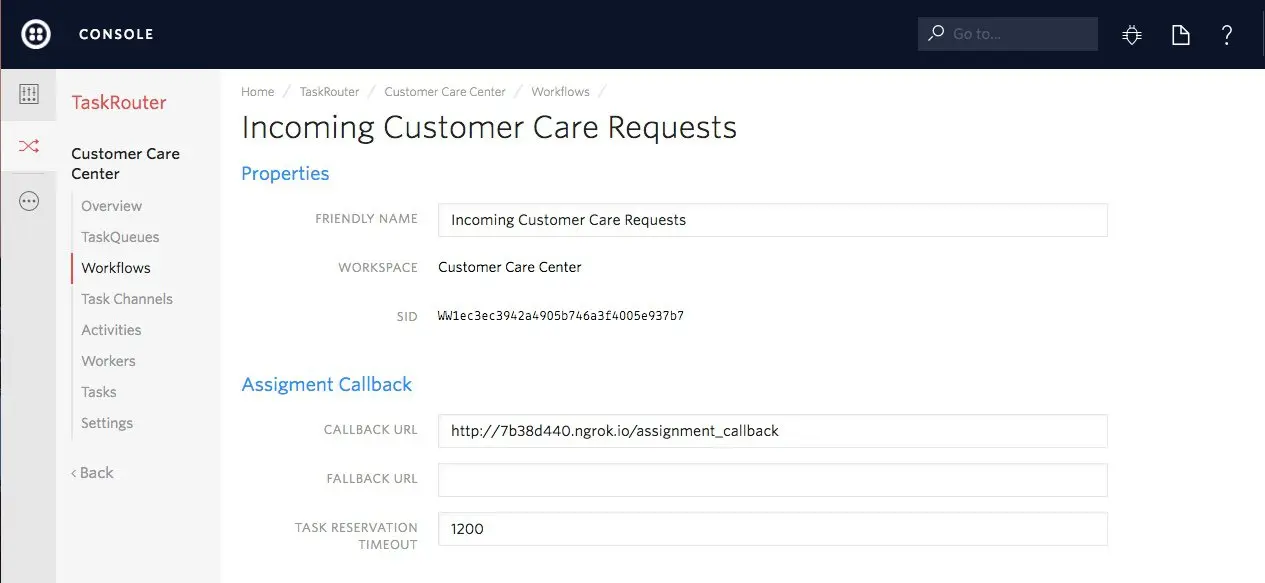
With those things working, edit your "Incoming Customer Care Requests" Workflow to point at the newly implemented Assignment Callback URL:
Excellent. We're ready to create Tasks and accept Reservations.