Account Verification with Authy, Node.js and Express
Warning
As of November 2022, Twilio no longer provides support for Authy SMS/Voice-only customers. Customers who were also using Authy TOTP or Push prior to March 1, 2023 are still supported. The Authy API is now closed to new customers and will be fully deprecated in the future.
For new development, we encourage you to use the Verify v2 API.
Existing customers will not be impacted at this time until Authy API has reached End of Life. For more information about migration, see Migrating from Authy to Verify for SMS.
Ready to implement user account verification in your application? Here's how it works at a high level:
- The user begins the registration process by entering their data, including a phone number, into a signup form.
- The authentication system sends a one-time password to the user's mobile phone to verify the phone number.
- The user enters the one-time password into a form to complete registration.
- The user sees a success page and receives an SMS indicating that their account has been created.
To get this done, you'll be working with the following Twilio-powered APIs:
Authy REST API
- Users Resource: You will need to create Authy users to send and verify one-time passwords.
- SMS Resource: We will ask Authy to send one-time passwords to our user via SMS.
- Verify Resource: Used to verify tokens entered by the user in our web form during registration.
Twilio REST API
- Messages Resource: We will use Twilio directly to send our user a confirmation message after they create an account.
Let's get started!
Our first order of business is to create a model object for a user of our application. We will borrow a lot of the code from the User model in the 2FA tutorial that uses Authy as well. This application uses MongoDB for persistence, but in our code we will primarily interface with Mongoose, a higher-level object modeling tool which is backed by MongoDB.
You'll notice an authyId property on the model - this is required to support integration with the Authy API. We won't use this property right away but we'll need it later for the Authy integration.
One of the properties on the User model is the password. It is not in scope for this tutorial, but take note: you'll probably want it later for logging in a returning user.
models/User.js
1const mongoose = require('mongoose');2const bcrypt = require('bcrypt');3const config = require('../config');45// Create authenticated Authy and Twilio API clients6const authy = require('authy')(config.authyKey);7const twilioClient = require('twilio')(config.accountSid, config.authToken);89// Used to generate password hash10const SALT_WORK_FACTOR = 10;1112// Define user model schema13const UserSchema = new mongoose.Schema({14fullName: {15type: String,16required: true,17},18countryCode: {19type: String,20required: true,21},22phone: {23type: String,24required: true,25},26verified: {27type: Boolean,28default: false,29},30authyId: String,31email: {32type: String,33required: true,34unique: true,35},36password: {37type: String,38required: true,39},40});4142// Middleware executed before save - hash the user's password43UserSchema.pre('save', function(next) {44const self = this;4546// only hash the password if it has been modified (or is new)47if (!self.isModified('password')) return next();4849// generate a salt50bcrypt.genSalt(SALT_WORK_FACTOR, function(err, salt) {51if (err) return next(err);5253// hash the password using our new salt54bcrypt.hash(self.password, salt, function(err, hash) {55if (err) return next(err);5657// override the cleartext password with the hashed one58self.password = hash;59next();60});61});62});6364// Test candidate password65UserSchema.methods.comparePassword = function(candidatePassword, cb) {66const self = this;67bcrypt.compare(candidatePassword, self.password, function(err, isMatch) {68if (err) return cb(err);69cb(null, isMatch);70});71};7273// Send a verification token to this user74UserSchema.methods.sendAuthyToken = function(cb) {75var self = this;7677if (!self.authyId) {78// Register this user if it's a new user79authy.register_user(self.email, self.phone, self.countryCode,80function(err, response) {81if (err || !response.user) return cb.call(self, err);82self.authyId = response.user.id;83self.save(function(err, doc) {84if (err || !doc) return cb.call(self, err);85self = doc;86sendToken();87});88});89} else {90// Otherwise send token to a known user91sendToken();92}9394// With a valid Authy ID, send the 2FA token for this user95function sendToken() {96authy.request_sms(self.authyId, true, function(err, response) {97cb.call(self, err);98});99}100};101102// Test a 2FA token103UserSchema.methods.verifyAuthyToken = function(otp, cb) {104const self = this;105authy.verify(self.authyId, otp, function(err, response) {106cb.call(self, err, response);107});108};109110// Send a text message via twilio to this user111UserSchema.methods.sendMessage =112function(message, successCallback, errorCallback) {113const self = this;114const toNumber = `+${self.countryCode}${self.phone}`;115116twilioClient.messages.create({117to: toNumber,118from: config.twilioNumber,119body: message,120}).then(function() {121successCallback();122}).catch(function(err) {123errorCallback(err);124});125};126127// Export user model128module.exports = mongoose.model('User', UserSchema);129
Now that you've created your user model, let's check out the form template for creating a user.
When we create a new user, we ask for a name, email address, password and mobile number including country code. In order to validate the user account we use Authy to send a one-time password via SMS to this phone number.
views/users/create.jade
1extends ../layout23block styles4link(rel='stylesheet', media='screen'5href='//www.authy.com/form.authy.min.css')67block content8h1 We're Going To Be *BEST* Friends9p.10Thank you for your interest in signing up! Can you tell us a bit about11yourself?1213form(action='/users', method='POST')14.form-group15label(for='fullName') Your Full Name:16input.form-control(type='text', name='fullName',17placeholder='Peggy Carter')1819.form-group20label(for='email') Your email Address:21input.form-control(type='email', name='email',22placeholder='pcarter@ssr.gov')2324.form-group25label(for='password') Your Password:26input.form-control(type='password', name='password')2728.form-group29label(for='countryCode') Country Code:30select(id='authy-countries', name='countryCode')3132.form-group33label(for='phone') Mobile Phone:34input.form-control(type='text', name='phone', placeholder='651-867-5309')3536button.btn.btn-primary(type='submit') Create Account3738block scripts39// Include Authy form helpers and additional helper script40script(src='//www.authy.com/form.authy.min.js')41script(src='/js/create_form.js')
Now the user is logged in but not verified. In the next steps we'll learn how to verify the user using Authy.
In config.js, we list configuration parameters for the application. Most are pulled in from system environment variables, which is a helpful way to access sensitive values (like API keys). This prevents us from accidentally checking them in to source control.
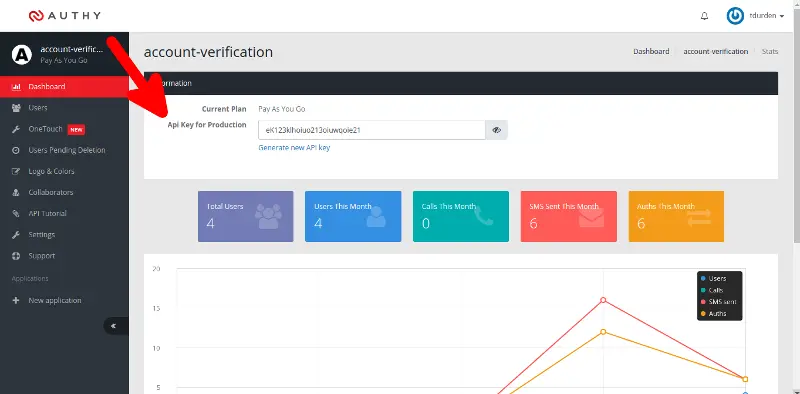
Now, we need our Authy production key (sign up for Authy here). Once you create an Authy application, the production key is found on the dashboard:
config.js
1const dotenvSafe = require('dotenv-safe');23const nodeEnv = process.env.NODE_ENV;4if(nodeEnv && nodeEnv === 'production') {5// If it's running in Heroku, we set MONGO_URL to an arbitrary value so that6// dotenv-safe doesn't throw an error. MONGO_URL is not read in Heroku as7// MONGODB_URI will be set8process.env.MONGO_URL = 'placeholder';9}10dotenvSafe.load();1112const cfg = {};1314// HTTP Port to run our web application15cfg.port = process.env.PORT || 3000;1617// A random string that will help generate secure one-time passwords and18// HTTP sessions19cfg.secret = process.env.APP_SECRET || 'keyboard cat';2021// Your Twilio account SID and auth token, both found at:22// https://www.twilio.com/user/account23//24// A good practice is to store these string values as system environment25// variables, and load them from there as we are doing below. Alternately,26// you could hard code these values here as strings.27cfg.accountSid = process.env.TWILIO_ACCOUNT_SID;28cfg.authToken = process.env.TWILIO_AUTH_TOKEN;2930// A Twilio number you control - choose one from:31// https://www.twilio.com/user/account/phone-numbers/incoming32// Specify in E.164 format, e.g. "+16519998877"33cfg.twilioNumber = process.env.TWILIO_NUMBER;3435// Your Authy production key - this can be found on the dashboard for your36// Authy application37cfg.authyKey = process.env.AUTHY_API_KEY;3839// MongoDB connection string - MONGO_URL is for local dev,40// MONGODB_URI is for the MongoLab add-on for Heroku deployment41// when using docker-compose42cfg.mongoUrl = process.env.MONGODB_URI || process.env.MONGO_URL;4344// Export configuration object45module.exports = cfg;46
Next, we need to jump over to the User model to configure the Authy client and create an instance method to send a one-time password.
When it comes time to actually send the user a verification code, we do that in a User model function.
Before sending the code, an Authy user needs to exist and correlate to our User model in the database. If the authyId for our user instance hasn't been set, we use the Authy API client to create an associated Authy user and store that ID.
Once the user has an authyId, we can send a verification code to that user's mobile phone using the Authy API client.
models/User.js
1const mongoose = require('mongoose');2const bcrypt = require('bcrypt');3const config = require('../config');45// Create authenticated Authy and Twilio API clients6const authy = require('authy')(config.authyKey);7const twilioClient = require('twilio')(config.accountSid, config.authToken);89// Used to generate password hash10const SALT_WORK_FACTOR = 10;1112// Define user model schema13const UserSchema = new mongoose.Schema({14fullName: {15type: String,16required: true,17},18countryCode: {19type: String,20required: true,21},22phone: {23type: String,24required: true,25},26verified: {27type: Boolean,28default: false,29},30authyId: String,31email: {32type: String,33required: true,34unique: true,35},36password: {37type: String,38required: true,39},40});4142// Middleware executed before save - hash the user's password43UserSchema.pre('save', function(next) {44const self = this;4546// only hash the password if it has been modified (or is new)47if (!self.isModified('password')) return next();4849// generate a salt50bcrypt.genSalt(SALT_WORK_FACTOR, function(err, salt) {51if (err) return next(err);5253// hash the password using our new salt54bcrypt.hash(self.password, salt, function(err, hash) {55if (err) return next(err);5657// override the cleartext password with the hashed one58self.password = hash;59next();60});61});62});6364// Test candidate password65UserSchema.methods.comparePassword = function(candidatePassword, cb) {66const self = this;67bcrypt.compare(candidatePassword, self.password, function(err, isMatch) {68if (err) return cb(err);69cb(null, isMatch);70});71};7273// Send a verification token to this user74UserSchema.methods.sendAuthyToken = function(cb) {75var self = this;7677if (!self.authyId) {78// Register this user if it's a new user79authy.register_user(self.email, self.phone, self.countryCode,80function(err, response) {81if (err || !response.user) return cb.call(self, err);82self.authyId = response.user.id;83self.save(function(err, doc) {84if (err || !doc) return cb.call(self, err);85self = doc;86sendToken();87});88});89} else {90// Otherwise send token to a known user91sendToken();92}9394// With a valid Authy ID, send the 2FA token for this user95function sendToken() {96authy.request_sms(self.authyId, true, function(err, response) {97cb.call(self, err);98});99}100};101102// Test a 2FA token103UserSchema.methods.verifyAuthyToken = function(otp, cb) {104const self = this;105authy.verify(self.authyId, otp, function(err, response) {106cb.call(self, err, response);107});108};109110// Send a text message via twilio to this user111UserSchema.methods.sendMessage =112function(message, successCallback, errorCallback) {113const self = this;114const toNumber = `+${self.countryCode}${self.phone}`;115116twilioClient.messages.create({117to: toNumber,118from: config.twilioNumber,119body: message,120}).then(function() {121successCallback();122}).catch(function(err) {123errorCallback(err);124});125};126127// Export user model128module.exports = mongoose.model('User', UserSchema);129
After the user receives the verification code, they will pass it to the application using this form.
Let's check out the controller that handles the form.
This controller function handles the form's submission. It's a little longer than the others, but it has a lot to do. It needs to:
- Load a
Usermodel for the current verification request. - Use an instance function on the model object to verify the code that was entered by the user.
- If the code entered was valid, it will flip a Boolean flag on the user model to indicate the account was verified.
Take a look at the User model to see the instance method that handles verifying the code with Authy.
controllers/users.js
1const User = require('../models/User');23// Display a form that allows users to sign up for a new account4exports.showCreate = function(request, response) {5response.render('users/create', {6title: 'Create User Account',7// include any errors (success messages not possible for view)8errors: request.flash('errors'),9});10};1112// create a new user based on the form submission13exports.create = function(request, response) {14const params = request.body;1516// Create a new user based on form parameters17const user = new User({18fullName: params.fullName,19email: params.email,20phone: params.phone,21countryCode: params.countryCode,22password: params.password,23});2425user.save(function(err, doc) {26if (err) {27// To improve on this example, you should include a better28// error message, especially around form field validation. But29// for now, just indicate that the save operation failed30request.flash('errors', 'There was a problem creating your'31+ ' account - note that all fields are required. Please'32+ ' double-check your input and try again.');3334response.redirect('/users/new');35} else {36// If the user is created successfully, send them an account37// verification token38user.sendAuthyToken(function(err) {39if (err) {40request.flash('errors', 'There was a problem sending '41+ 'your token - sorry :(');42}4344// Send to token verification page45response.redirect('/users/'+doc._id+'/verify');46});47}48});49};5051// Display a form that allows users to enter a verification token52exports.showVerify = function(request, response) {53response.render('users/verify', {54title: 'Verify Phone Number',55// include any errors56errors: request.flash('errors'),57// success messsages58successes: request.flash('successes'),59// Include database ID to include in form POST action60id: request.params.id,61});62};6364// Resend a code if it was not received65exports.resend = function(request, response) {66// Load user model67User.findById(request.params.id, function(err, user) {68if (err || !user) {69return die('User not found for this ID.');70}7172// If we find the user, let's send them a new code73user.sendAuthyToken(postSend);74});7576// Handle send code response77function postSend(err) {78if (err) {79return die('There was a problem sending you the code - please '80+ 'retry.');81}8283request.flash('successes', 'Code re-sent!');84response.redirect('/users/'+request.params.id+'/verify');85}8687// respond with an error88function die(message) {89request.flash('errors', message);90response.redirect('/users/'+request.params.id+'/verify');91}92};9394// Handle submission of verification token95exports.verify = function(request, response) {96let user = {};9798// Load user model99User.findById(request.params.id, function(err, doc) {100if (err || !doc) {101return die('User not found for this ID.');102}103104// If we find the user, let's validate the token they entered105user = doc;106user.verifyAuthyToken(request.body.code, postVerify);107});108109// Handle verification response110function postVerify(err) {111if (err) {112return die('The token you entered was invalid - please retry.');113}114115// If the token was valid, flip the bit to validate the user account116user.verified = true;117user.save(postSave);118}119120// after we save the user, handle sending a confirmation121function postSave(err) {122if (err) {123return die('There was a problem validating your account '124+ '- please enter your token again.');125}126127// Send confirmation text message128const message = 'You did it! Signup complete :)';129user.sendMessage(message, function() {130// show success page131request.flash('successes', message);132response.redirect(`/users/${user._id}`);133}, function(err) {134request.flash('errors', 'You are signed up, but '135+ 'we could not send you a message. Our bad :(');136});137}138139// respond with an error140function die(message) {141request.flash('errors', message);142response.redirect('/users/'+request.params.id+'/verify');143}144};145146// Show details about the user147exports.showUser = function(request, response, next) {148// Load user model149User.findById(request.params.id, function(err, user) {150if (err || !user) {151// 404152return next();153}154155response.render('users/show', {156title: 'Hi there ' + user.fullName + '!',157user: user,158// any errors159errors: request.flash('errors'),160// any success messages161successes: request.flash('successes'),162});163});164};165
Now let's see how we can use Authy to actually verify the code.
This instance function is a thin wrapper around the Authy client function that sends a candidate password to be verified. We call Authy's built-in verify function, and then immediately call a passed callback function with the result.
models/User.js
1const mongoose = require('mongoose');2const bcrypt = require('bcrypt');3const config = require('../config');45// Create authenticated Authy and Twilio API clients6const authy = require('authy')(config.authyKey);7const twilioClient = require('twilio')(config.accountSid, config.authToken);89// Used to generate password hash10const SALT_WORK_FACTOR = 10;1112// Define user model schema13const UserSchema = new mongoose.Schema({14fullName: {15type: String,16required: true,17},18countryCode: {19type: String,20required: true,21},22phone: {23type: String,24required: true,25},26verified: {27type: Boolean,28default: false,29},30authyId: String,31email: {32type: String,33required: true,34unique: true,35},36password: {37type: String,38required: true,39},40});4142// Middleware executed before save - hash the user's password43UserSchema.pre('save', function(next) {44const self = this;4546// only hash the password if it has been modified (or is new)47if (!self.isModified('password')) return next();4849// generate a salt50bcrypt.genSalt(SALT_WORK_FACTOR, function(err, salt) {51if (err) return next(err);5253// hash the password using our new salt54bcrypt.hash(self.password, salt, function(err, hash) {55if (err) return next(err);5657// override the cleartext password with the hashed one58self.password = hash;59next();60});61});62});6364// Test candidate password65UserSchema.methods.comparePassword = function(candidatePassword, cb) {66const self = this;67bcrypt.compare(candidatePassword, self.password, function(err, isMatch) {68if (err) return cb(err);69cb(null, isMatch);70});71};7273// Send a verification token to this user74UserSchema.methods.sendAuthyToken = function(cb) {75var self = this;7677if (!self.authyId) {78// Register this user if it's a new user79authy.register_user(self.email, self.phone, self.countryCode,80function(err, response) {81if (err || !response.user) return cb.call(self, err);82self.authyId = response.user.id;83self.save(function(err, doc) {84if (err || !doc) return cb.call(self, err);85self = doc;86sendToken();87});88});89} else {90// Otherwise send token to a known user91sendToken();92}9394// With a valid Authy ID, send the 2FA token for this user95function sendToken() {96authy.request_sms(self.authyId, true, function(err, response) {97cb.call(self, err);98});99}100};101102// Test a 2FA token103UserSchema.methods.verifyAuthyToken = function(otp, cb) {104const self = this;105authy.verify(self.authyId, otp, function(err, response) {106cb.call(self, err, response);107});108};109110// Send a text message via twilio to this user111UserSchema.methods.sendMessage =112function(message, successCallback, errorCallback) {113const self = this;114const toNumber = `+${self.countryCode}${self.phone}`;115116twilioClient.messages.create({117to: toNumber,118from: config.twilioNumber,119body: message,120}).then(function() {121successCallback();122}).catch(function(err) {123errorCallback(err);124});125};126127// Export user model128module.exports = mongoose.model('User', UserSchema);129
This is a great start, but what if your code never reaches the end user's handset? Authy can help us to re-send a missing code.
This controller function loads the User model associated with the request and then uses the same instance function we defined earlier to resend the code.
controllers/users.js
1const User = require('../models/User');23// Display a form that allows users to sign up for a new account4exports.showCreate = function(request, response) {5response.render('users/create', {6title: 'Create User Account',7// include any errors (success messages not possible for view)8errors: request.flash('errors'),9});10};1112// create a new user based on the form submission13exports.create = function(request, response) {14const params = request.body;1516// Create a new user based on form parameters17const user = new User({18fullName: params.fullName,19email: params.email,20phone: params.phone,21countryCode: params.countryCode,22password: params.password,23});2425user.save(function(err, doc) {26if (err) {27// To improve on this example, you should include a better28// error message, especially around form field validation. But29// for now, just indicate that the save operation failed30request.flash('errors', 'There was a problem creating your'31+ ' account - note that all fields are required. Please'32+ ' double-check your input and try again.');3334response.redirect('/users/new');35} else {36// If the user is created successfully, send them an account37// verification token38user.sendAuthyToken(function(err) {39if (err) {40request.flash('errors', 'There was a problem sending '41+ 'your token - sorry :(');42}4344// Send to token verification page45response.redirect('/users/'+doc._id+'/verify');46});47}48});49};5051// Display a form that allows users to enter a verification token52exports.showVerify = function(request, response) {53response.render('users/verify', {54title: 'Verify Phone Number',55// include any errors56errors: request.flash('errors'),57// success messsages58successes: request.flash('successes'),59// Include database ID to include in form POST action60id: request.params.id,61});62};6364// Resend a code if it was not received65exports.resend = function(request, response) {66// Load user model67User.findById(request.params.id, function(err, user) {68if (err || !user) {69return die('User not found for this ID.');70}7172// If we find the user, let's send them a new code73user.sendAuthyToken(postSend);74});7576// Handle send code response77function postSend(err) {78if (err) {79return die('There was a problem sending you the code - please '80+ 'retry.');81}8283request.flash('successes', 'Code re-sent!');84response.redirect('/users/'+request.params.id+'/verify');85}8687// respond with an error88function die(message) {89request.flash('errors', message);90response.redirect('/users/'+request.params.id+'/verify');91}92};9394// Handle submission of verification token95exports.verify = function(request, response) {96let user = {};9798// Load user model99User.findById(request.params.id, function(err, doc) {100if (err || !doc) {101return die('User not found for this ID.');102}103104// If we find the user, let's validate the token they entered105user = doc;106user.verifyAuthyToken(request.body.code, postVerify);107});108109// Handle verification response110function postVerify(err) {111if (err) {112return die('The token you entered was invalid - please retry.');113}114115// If the token was valid, flip the bit to validate the user account116user.verified = true;117user.save(postSave);118}119120// after we save the user, handle sending a confirmation121function postSave(err) {122if (err) {123return die('There was a problem validating your account '124+ '- please enter your token again.');125}126127// Send confirmation text message128const message = 'You did it! Signup complete :)';129user.sendMessage(message, function() {130// show success page131request.flash('successes', message);132response.redirect(`/users/${user._id}`);133}, function(err) {134request.flash('errors', 'You are signed up, but '135+ 'we could not send you a message. Our bad :(');136});137}138139// respond with an error140function die(message) {141request.flash('errors', message);142response.redirect('/users/'+request.params.id+'/verify');143}144};145146// Show details about the user147exports.showUser = function(request, response, next) {148// Load user model149User.findById(request.params.id, function(err, user) {150if (err || !user) {151// 404152return next();153}154155response.render('users/show', {156title: 'Hi there ' + user.fullName + '!',157user: user,158// any errors159errors: request.flash('errors'),160// any success messages161successes: request.flash('successes'),162});163});164};165
To wrap things up, let's let the user know that their account has been verified via a success page and an SMS to their device.
This controller function renders a Jade template that contains the user's full name, and indicates whether or not they are verified by checking the user's verified property.
controllers/users.js
1const User = require('../models/User');23// Display a form that allows users to sign up for a new account4exports.showCreate = function(request, response) {5response.render('users/create', {6title: 'Create User Account',7// include any errors (success messages not possible for view)8errors: request.flash('errors'),9});10};1112// create a new user based on the form submission13exports.create = function(request, response) {14const params = request.body;1516// Create a new user based on form parameters17const user = new User({18fullName: params.fullName,19email: params.email,20phone: params.phone,21countryCode: params.countryCode,22password: params.password,23});2425user.save(function(err, doc) {26if (err) {27// To improve on this example, you should include a better28// error message, especially around form field validation. But29// for now, just indicate that the save operation failed30request.flash('errors', 'There was a problem creating your'31+ ' account - note that all fields are required. Please'32+ ' double-check your input and try again.');3334response.redirect('/users/new');35} else {36// If the user is created successfully, send them an account37// verification token38user.sendAuthyToken(function(err) {39if (err) {40request.flash('errors', 'There was a problem sending '41+ 'your token - sorry :(');42}4344// Send to token verification page45response.redirect('/users/'+doc._id+'/verify');46});47}48});49};5051// Display a form that allows users to enter a verification token52exports.showVerify = function(request, response) {53response.render('users/verify', {54title: 'Verify Phone Number',55// include any errors56errors: request.flash('errors'),57// success messsages58successes: request.flash('successes'),59// Include database ID to include in form POST action60id: request.params.id,61});62};6364// Resend a code if it was not received65exports.resend = function(request, response) {66// Load user model67User.findById(request.params.id, function(err, user) {68if (err || !user) {69return die('User not found for this ID.');70}7172// If we find the user, let's send them a new code73user.sendAuthyToken(postSend);74});7576// Handle send code response77function postSend(err) {78if (err) {79return die('There was a problem sending you the code - please '80+ 'retry.');81}8283request.flash('successes', 'Code re-sent!');84response.redirect('/users/'+request.params.id+'/verify');85}8687// respond with an error88function die(message) {89request.flash('errors', message);90response.redirect('/users/'+request.params.id+'/verify');91}92};9394// Handle submission of verification token95exports.verify = function(request, response) {96let user = {};9798// Load user model99User.findById(request.params.id, function(err, doc) {100if (err || !doc) {101return die('User not found for this ID.');102}103104// If we find the user, let's validate the token they entered105user = doc;106user.verifyAuthyToken(request.body.code, postVerify);107});108109// Handle verification response110function postVerify(err) {111if (err) {112return die('The token you entered was invalid - please retry.');113}114115// If the token was valid, flip the bit to validate the user account116user.verified = true;117user.save(postSave);118}119120// after we save the user, handle sending a confirmation121function postSave(err) {122if (err) {123return die('There was a problem validating your account '124+ '- please enter your token again.');125}126127// Send confirmation text message128const message = 'You did it! Signup complete :)';129user.sendMessage(message, function() {130// show success page131request.flash('successes', message);132response.redirect(`/users/${user._id}`);133}, function(err) {134request.flash('errors', 'You are signed up, but '135+ 'we could not send you a message. Our bad :(');136});137}138139// respond with an error140function die(message) {141request.flash('errors', message);142response.redirect('/users/'+request.params.id+'/verify');143}144};145146// Show details about the user147exports.showUser = function(request, response, next) {148// Load user model149User.findById(request.params.id, function(err, user) {150if (err || !user) {151// 404152return next();153}154155response.render('users/show', {156title: 'Hi there ' + user.fullName + '!',157user: user,158// any errors159errors: request.flash('errors'),160// any success messages161successes: request.flash('successes'),162});163});164};
This should suffice for confirmation in the browser that the user has been verified. Let's see how we might send a confirmation via text message.
Here, we add another instance function to the model that will send a text message to the user's configured phone number. Rather than just being a one-time password, this can be anything we wish.
models/User.js
1const mongoose = require('mongoose');2const bcrypt = require('bcrypt');3const config = require('../config');45// Create authenticated Authy and Twilio API clients6const authy = require('authy')(config.authyKey);7const twilioClient = require('twilio')(config.accountSid, config.authToken);89// Used to generate password hash10const SALT_WORK_FACTOR = 10;1112// Define user model schema13const UserSchema = new mongoose.Schema({14fullName: {15type: String,16required: true,17},18countryCode: {19type: String,20required: true,21},22phone: {23type: String,24required: true,25},26verified: {27type: Boolean,28default: false,29},30authyId: String,31email: {32type: String,33required: true,34unique: true,35},36password: {37type: String,38required: true,39},40});4142// Middleware executed before save - hash the user's password43UserSchema.pre('save', function(next) {44const self = this;4546// only hash the password if it has been modified (or is new)47if (!self.isModified('password')) return next();4849// generate a salt50bcrypt.genSalt(SALT_WORK_FACTOR, function(err, salt) {51if (err) return next(err);5253// hash the password using our new salt54bcrypt.hash(self.password, salt, function(err, hash) {55if (err) return next(err);5657// override the cleartext password with the hashed one58self.password = hash;59next();60});61});62});6364// Test candidate password65UserSchema.methods.comparePassword = function(candidatePassword, cb) {66const self = this;67bcrypt.compare(candidatePassword, self.password, function(err, isMatch) {68if (err) return cb(err);69cb(null, isMatch);70});71};7273// Send a verification token to this user74UserSchema.methods.sendAuthyToken = function(cb) {75var self = this;7677if (!self.authyId) {78// Register this user if it's a new user79authy.register_user(self.email, self.phone, self.countryCode,80function(err, response) {81if (err || !response.user) return cb.call(self, err);82self.authyId = response.user.id;83self.save(function(err, doc) {84if (err || !doc) return cb.call(self, err);85self = doc;86sendToken();87});88});89} else {90// Otherwise send token to a known user91sendToken();92}9394// With a valid Authy ID, send the 2FA token for this user95function sendToken() {96authy.request_sms(self.authyId, true, function(err, response) {97cb.call(self, err);98});99}100};101102// Test a 2FA token103UserSchema.methods.verifyAuthyToken = function(otp, cb) {104const self = this;105authy.verify(self.authyId, otp, function(err, response) {106cb.call(self, err, response);107});108};109110// Send a text message via twilio to this user111UserSchema.methods.sendMessage =112function(message, successCallback, errorCallback) {113const self = this;114const toNumber = `+${self.countryCode}${self.phone}`;115116twilioClient.messages.create({117to: toNumber,118from: config.twilioNumber,119body: message,120}).then(function() {121successCallback();122}).catch(function(err) {123errorCallback(err);124});125};126127// Export user model128module.exports = mongoose.model('User', UserSchema);
Congratulations! You now have the power to register and verify users with Authy and Twilio SMS. Where can we take it from here?
If you're a Node developer working with Twilio, you might want to check out these other tutorials:
Put a button on your web page that connects visitors to live support or salespeople via telephone.
Instantly collect structured data from your users with a survey conducted over a call or SMS text messages.