Running the Sample App with the sample backend
Warning
The TwilioAuth SDK has been deprecated. This means that while we will continue to provide maintenance support for existing customers and their usage, we discourage new customers and new usage, as we may shut it down entirely in the future. We strongly recommend using the Verify Push SDK instead, which currently supports the Push channel, and will be enhanced to support the TOTP channel in the future.
For instructions on how to get the AUTHY_API_KEY please read this tutorial
https://github.com/twilio/mobile-sdk-sample-android
Step 2: Deploy the sample backend application
We recommend deploying for free with Heroku. You can learn more about how to do that in the Heroku documentation
Download or clone the sample backend here: https://github.com/twilio/authy-sdk-backend
Setup your AUTHY_API_KEY as a Heroku config variable. You can do this via the CLI or in the Heroku dashboard.

Next, we'll create an Authy user.
1curl -XPOST "https://api.authy.com/protected/json/users/new \2-H "X-Authy-API-Key: d57d919d11e6b221c9bf6f7c882028f9" \3-d user[email]="user@domain.com" \4-d user[cellphone]="317-338-9302" \5-d user[country_code]="54"
Follow the instructions to setup the Sample App. Start the application from Xcode and in the simulator you'll be able to enter your USER_AUTHY_ID from step #5 and your sample backend URL from step #2.
In the sample app, enter the USER_AUTHY_ID from step #5 and your sample backend URL from step #2
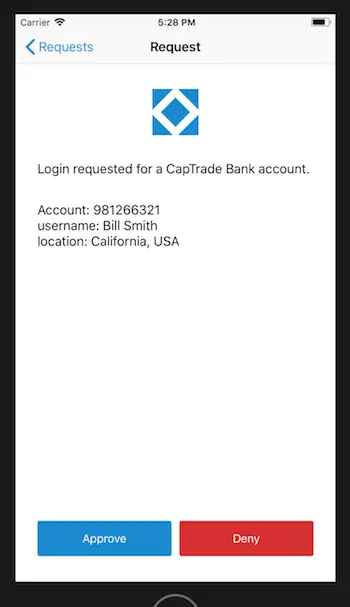
1curl "https://api.authy.com/onetouch/json/users/$USER_AUTHY_ID/approval_requests" \2-H "X-Authy-API-Key: $AUTHY_API_KEY" \3-d message="Login requested for a CapTrade Bank account." \4-d details[username]="Bill Smith" \5-d details[location]="California, USA" \6-d details[Account]="981266321" \7-d hidden_details[transaction_num]="TR139872562346" \8-d seconds_to_expire=1200
More info about creating approval requests
You can also use the sample API scripts available here to create a new approval request.
To check the status of the approval request you can use the sample API script available here. Don't forget to update your environment variables when using the sample API scripts.
If you have configured Twilio to handle the push notification, it will prompt the user to open the app and in turn the SDK will sync the request.
Otherwise, to manually sync the requests to the sample app, refresh the screen. Then, you will be able to Approve or Deny the request in the sample app:
To delete a specific device you can use the sample API scripts available here
To obtain the :device_id call the getDeviceId method of the sdk
If you find any issues while following this guide please file us an issue in the respective Github project: