Using Google Dialogflow CX with Conversations
In this tutorial, we'll show you how to integrate a Google Dialogflow CX agent with Conversations using our native integration.
Private Beta
This feature is in Private Beta. The information in this document could change. We might add or update features before the product becomes Generally Available. Beta products don't have a Service Level Agreement (SLA). Learn more about beta product support.
Before you get started, you will need to have:
- A Twilio account. Sign up for a free account or log into an existing account
- A Google Cloud account
Depending on how you wish to communicate with your agent, you may also want either:
- For SMS: An SMS-capable Twilio phone number. See how to buy a Twilio phone number if you don't have one yet.
- For chat: The Conversations react demo app set up.
We're going to be using the following Twilio products:
- Required:
- Conversations: To relay messages back and forth from your Dialogflow agent and users across multiple channels.
- Studio: To manage Dialogflow agents in your conversations through the Connect Virtual Agent widget.
- Marketplace: Where the integrations configuration lives.
- Optional:
- Functions: To create a Conversations Scoped Webhooks to connect your conversations to Studio Flows.
- Phone Numbers: To enable your Dialogflow agents to communicate with your users via SMS.
If you've never used Twilio Conversations, please navigate to Conversations > Defaults in the Console. Visiting this page will trigger some initial setup on your Twilio account for Conversations. You can skip ahead if you already use Conversations.
If you already have an agent set up, you can skip to the next step.
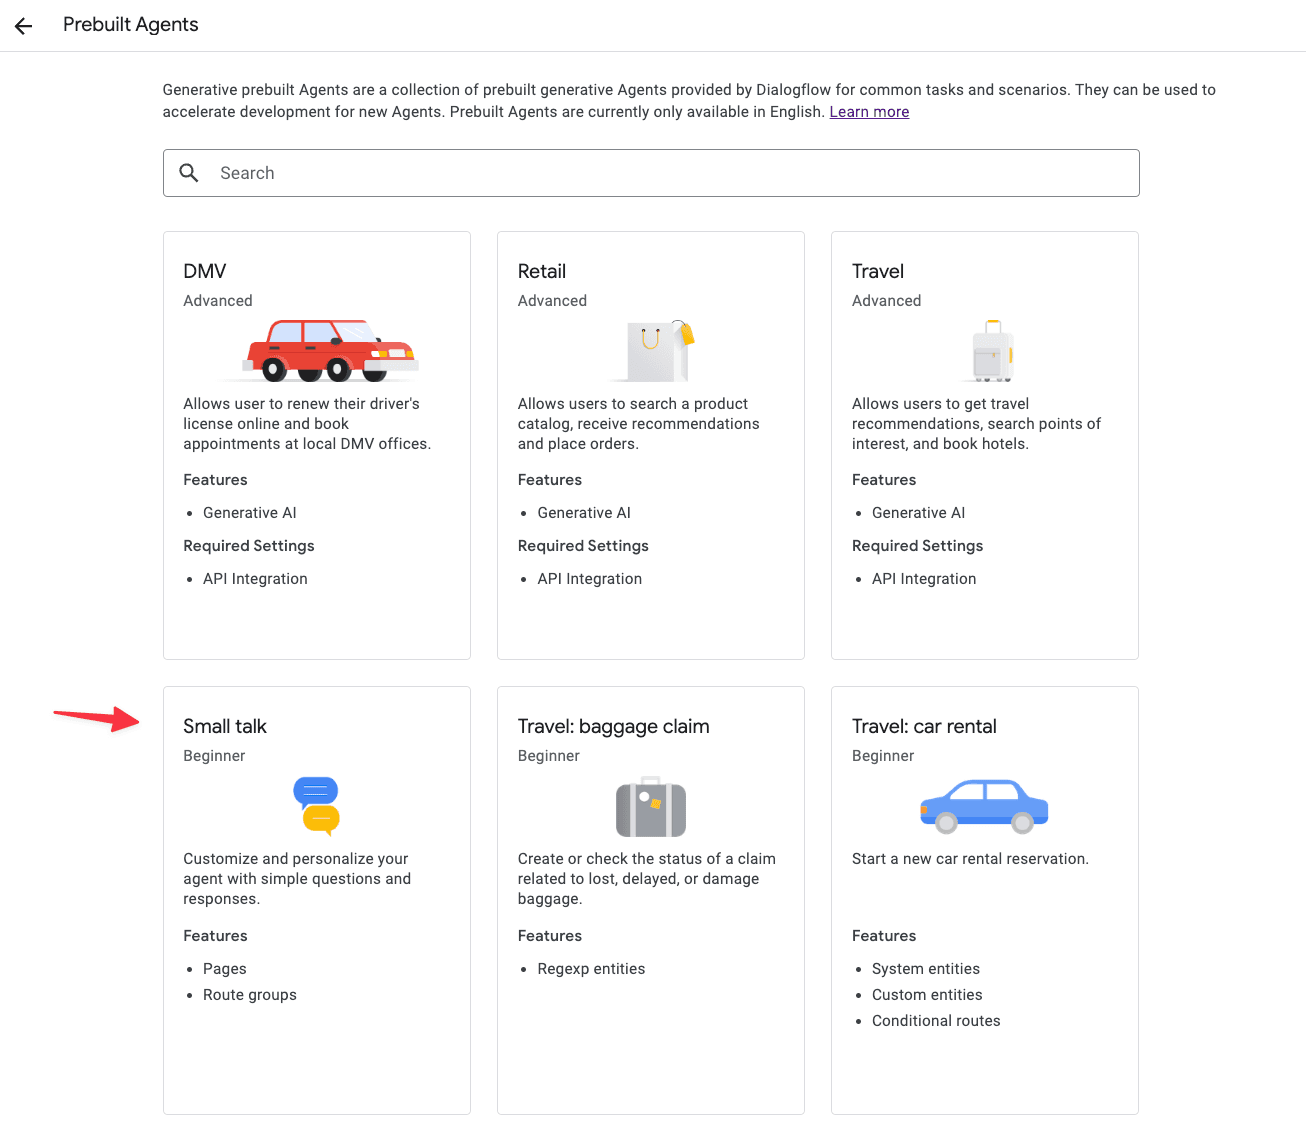
To create a new Dialogflow CX agent, first log in to the Dialogflow Console. Once in the Console, select your Google Cloud Project, then click either:
- Use pre-built agents, the start with a template.
- Create Agent to start from scratch.
For this tutorial, we recommend you use one of the pre-built agents. "Small Talk" is a good one to start with.
Now that you have a Dialogflow CX agent, you can connect it to Twilio via the One-Click Telephony Integration.
To do so, please follow to steps on this Dialogflow CX Onboarding Guide.
When your reach the Configuration steps in the Twilio Console, some of the required fields are only relevant to Voice applications. You can set "Welcome Intent Friendly Name" to "Welcome" and leave "Bot Voice" as "default." If you are only using Conversations for this integration, they will not impact the behavior of your agent.
If you ever need to update this configuration, you can find it in the Marketplace -> Installed section of the Twilio Console.
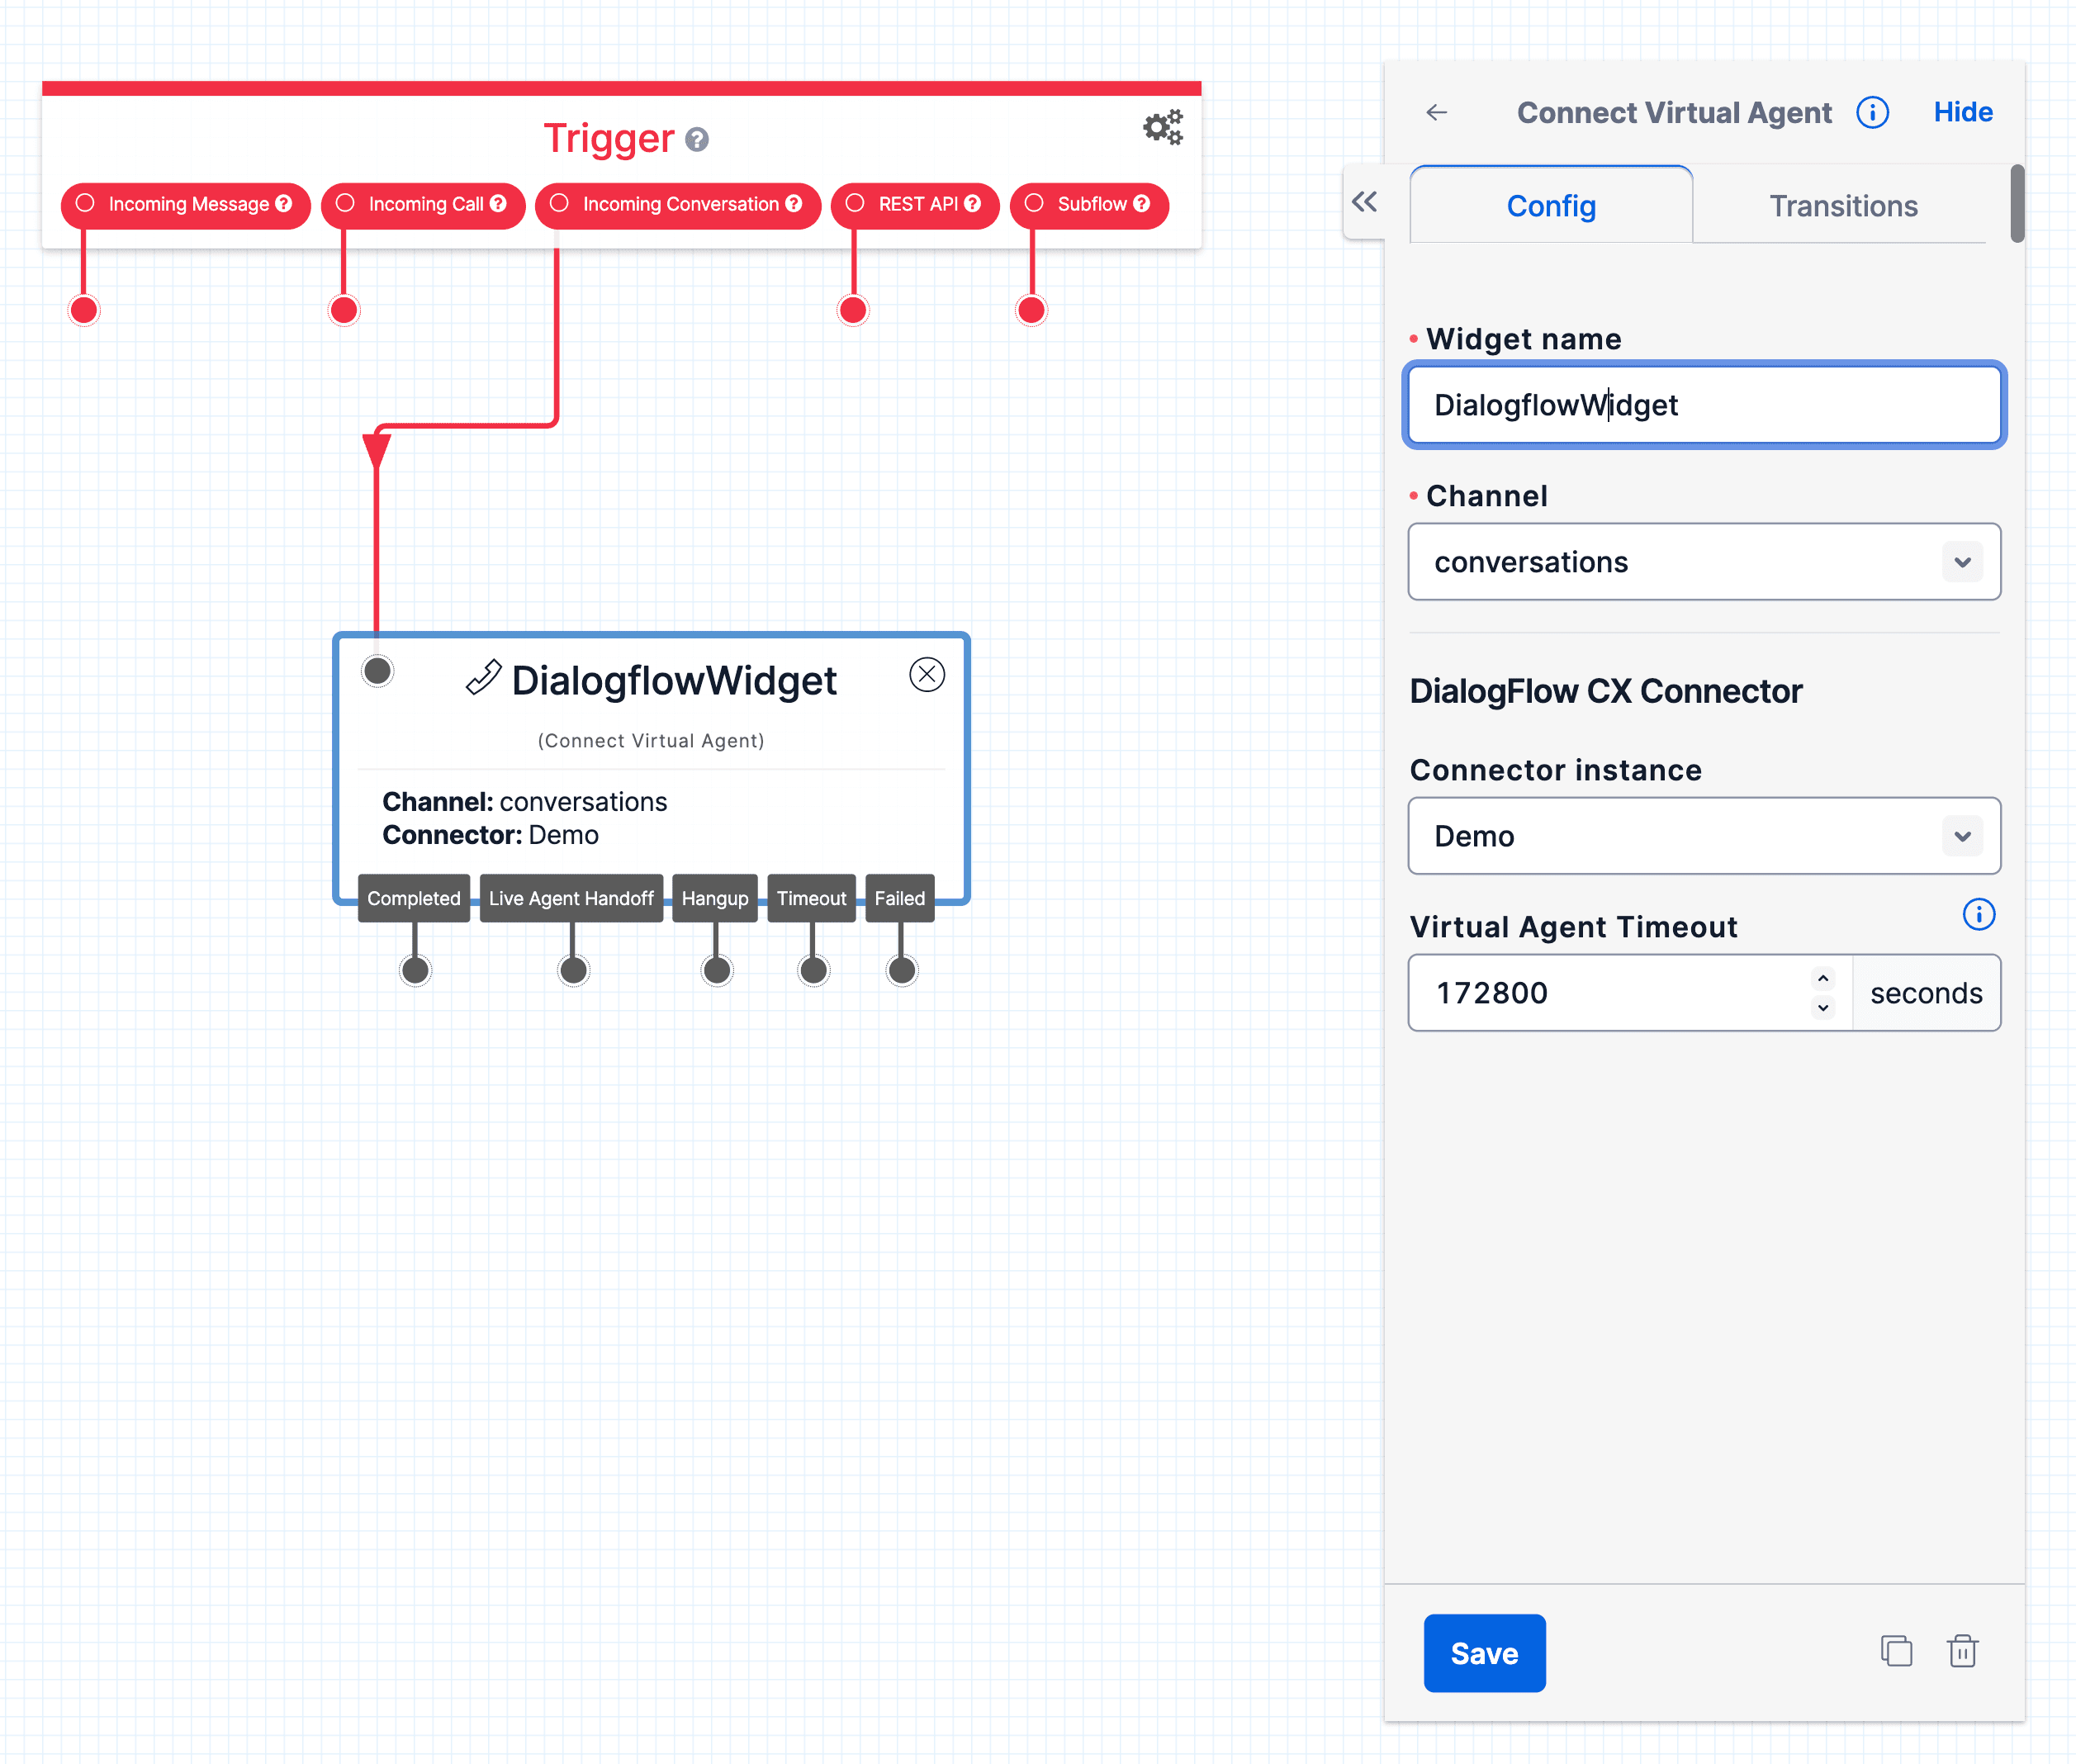
After connecting your Dialogflow CX agent to Twilio, you can create a Studio Flow to add virtual agents to your conversations. To create a new Studio Flow, navigate to Studio.
From a new flow, add the "Connect Virtual Agent" widget from the Voice section of the widget library. On the widget, set the "Channel" to "conversations", select the "Connector Instance" you connected in the previous step, and click Save. Finally, connect the widget to the Incoming Conversation Trigger and Publish the flow.
Depending on the channel you are using to connect users with your agent, you can link incoming messages to your Studio in different ways.
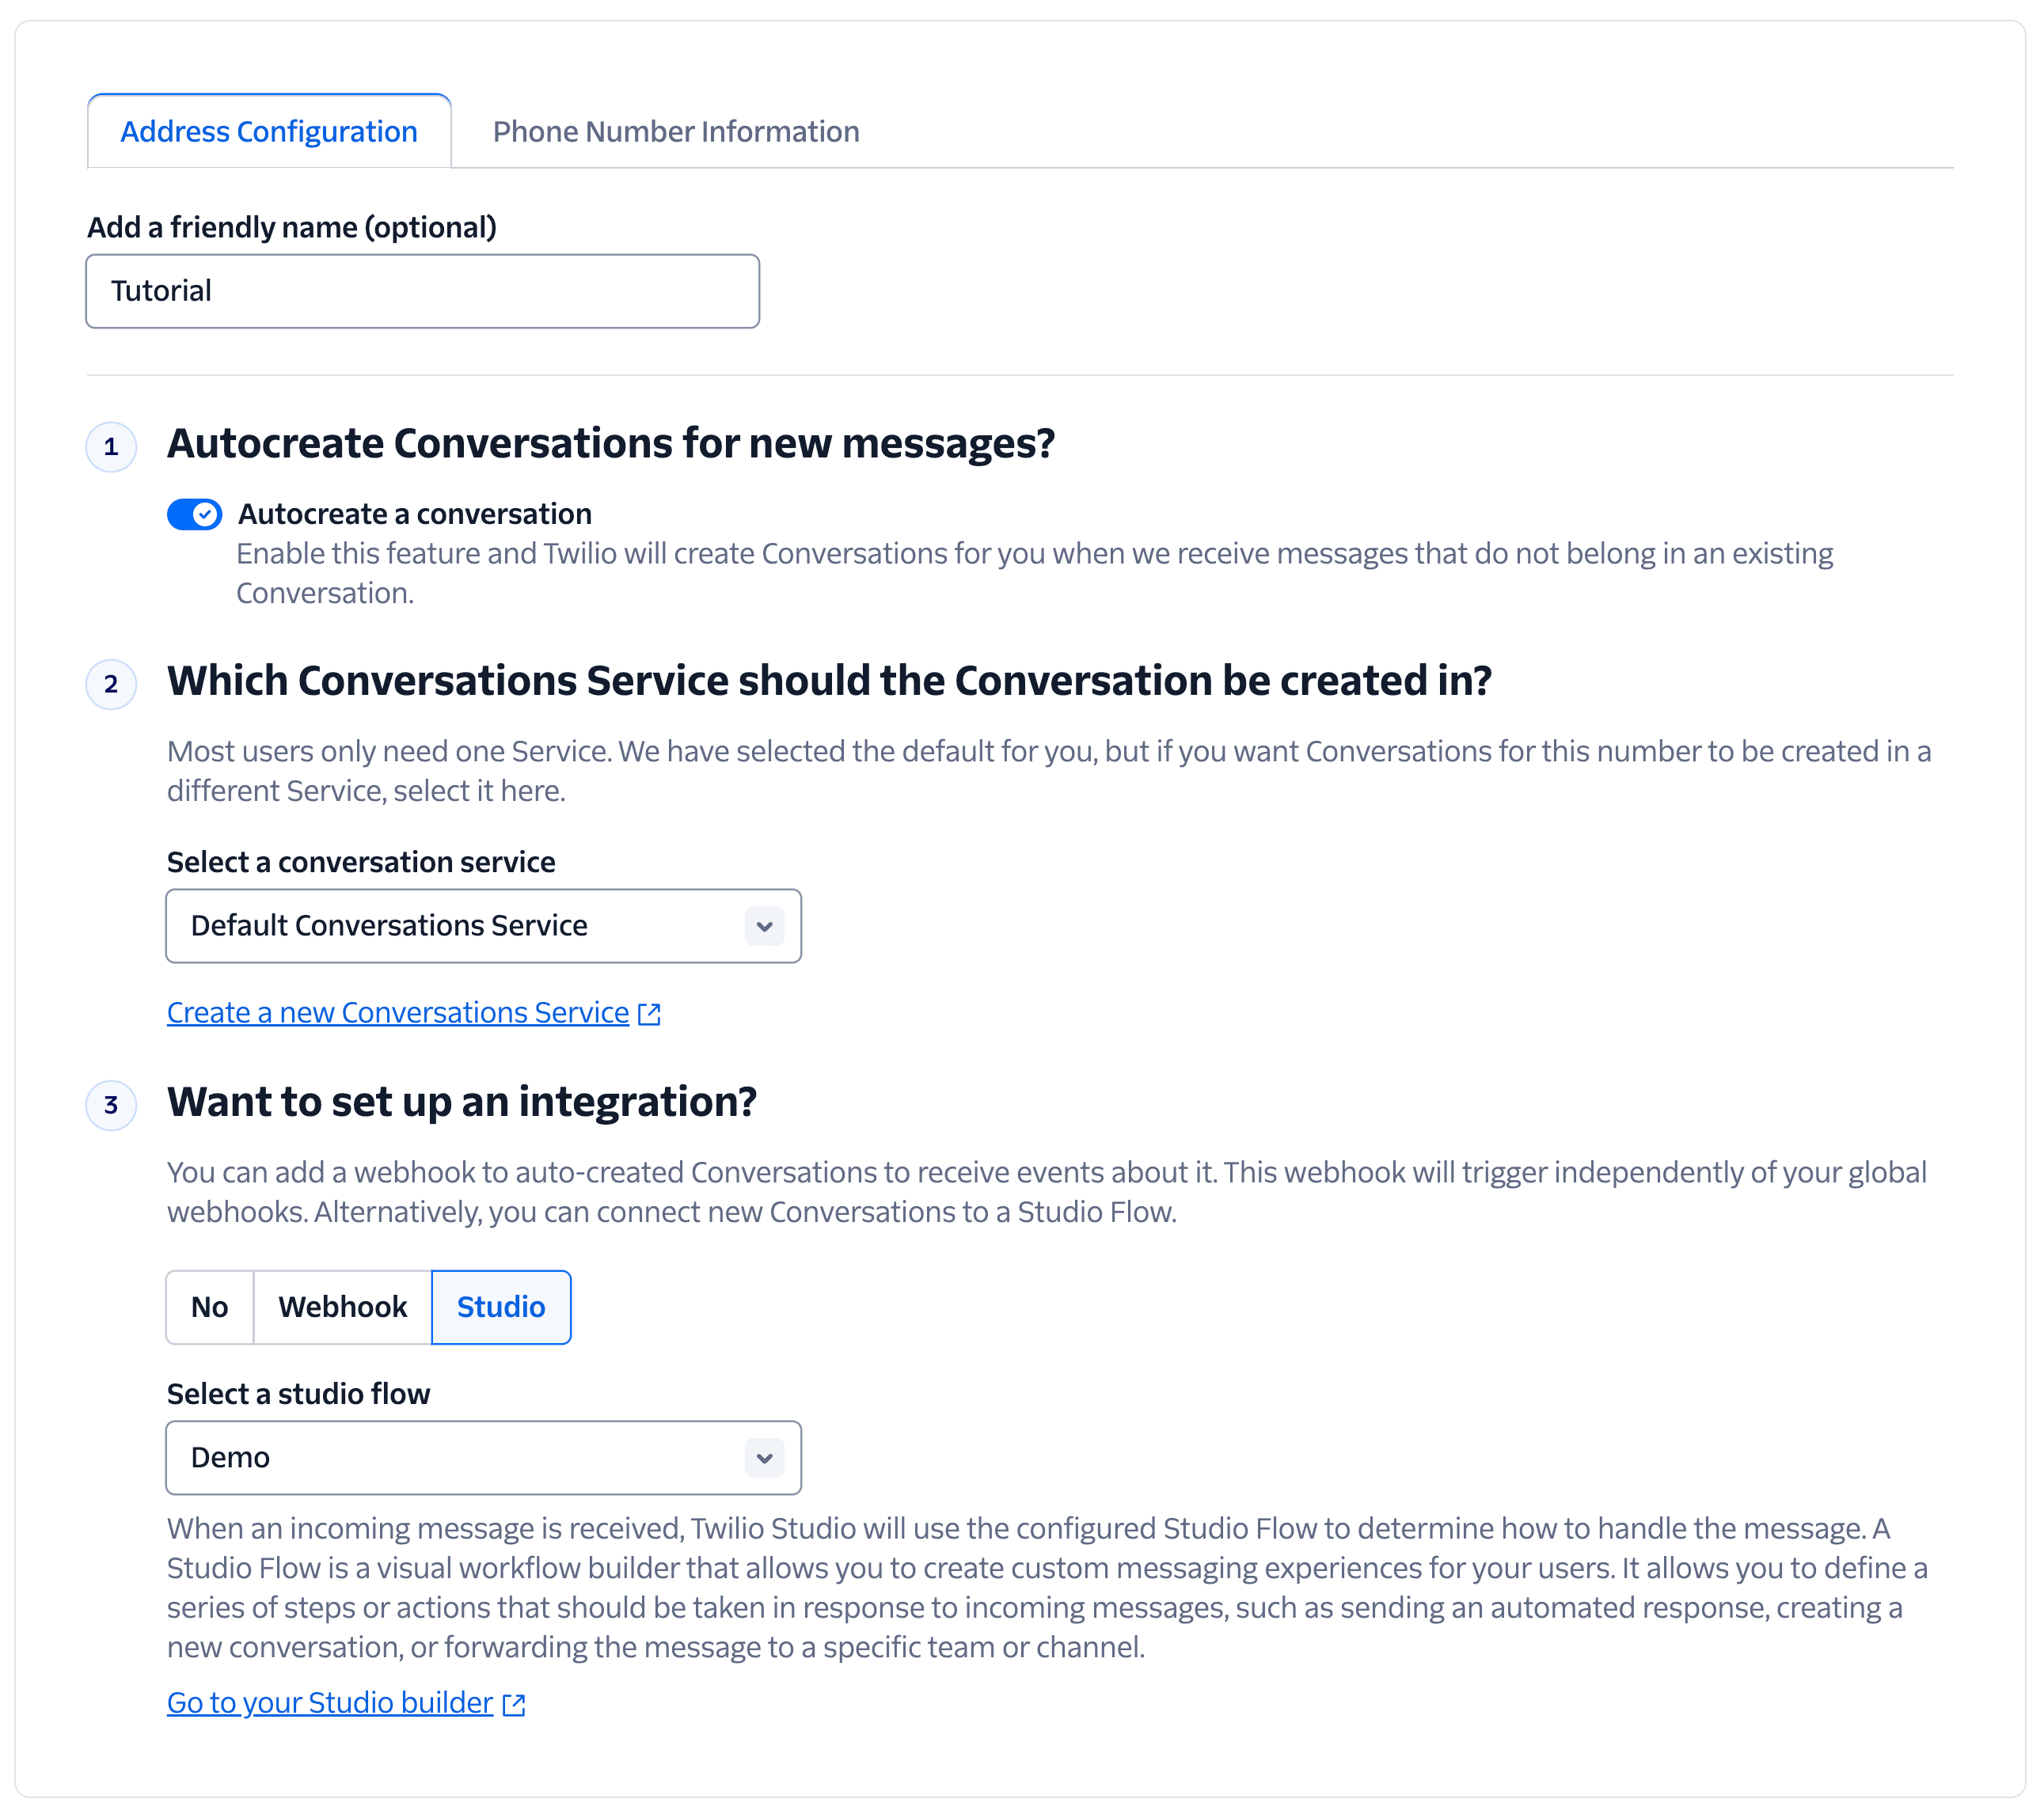
If you are using SMS, you can link incoming messages to your Studio Flow by configuring a Conversations Address. Addresses give you the option to automatically create conversations when a message is sent to a Twilio number and integrate those conversations directly with Studio.
To configure an Address, navigate to Conversations -> Addresses in the Twilio Console and edit one of your existing addresses. Enable "Autocreate Conversations" for new message, set the integration to Studio, and select the flow you created in the previous step.
If you are using the Conversations React demo app or another custom API or SDK integration for chat, you can link incoming messages to your Studio Flow by creating a Conversations-scoped webhook.
We will use Conversations Global (or Service Scoped) Webhook events to create a Conversations Scoped Webhook for each new conversation. In this tutorial, we will use a Twilio Function to create the Conversations-scoped webhook, which conveniently executes the code within your Twilio account, but any backend server will work.
The setup works like this:
- Conversations Global (or Service-scoped) webhooks will trigger a function on the event
onConversationAdded. - The function will create a Conversations-scoped webhook targeted at the Studio flow.
- The Conversations-scoped webhook will send
onMessageAddedevents to the Studio Flow for the virtual agent to handle.
Learn how to get started with Twilio Functions here.
This is the code for the function to set up the Conversations-scoped webhook:
1exports.handler = async function(context, event, callback) {2const conversationSid = event.ConversationSid;3const twilioClient = context.getTwilioClient();4try {56// Creates a webhook for the conversation targeted at our Studio Flow SID7const webhook = await twilioClient.conversations.v1.conversations(conversationSid)8.webhooks9.create({10target: 'studio',11'configuration.flowSid': 'FWfXXXXXXXXXXXXXXXXXXXXXXXXXXXXX', // This is the SID of your Studio Flow12'configuration.filters': ['onMessageAdded']13});1415return callback(null, {});16} catch (error) {17console.error(error);18return callback(error);19}20};
This function uses the Twilio Node.js helper library, which is available by default in Twilio Functions. To set this up in your own server and preferred programming language, check out Twilio's Server Side SDKs.
With your function set up and published, you can now create a Global Webhook in the Twilio Console.
Set the Post-Event URL to the URL of your function and select the event onConversationAdded.
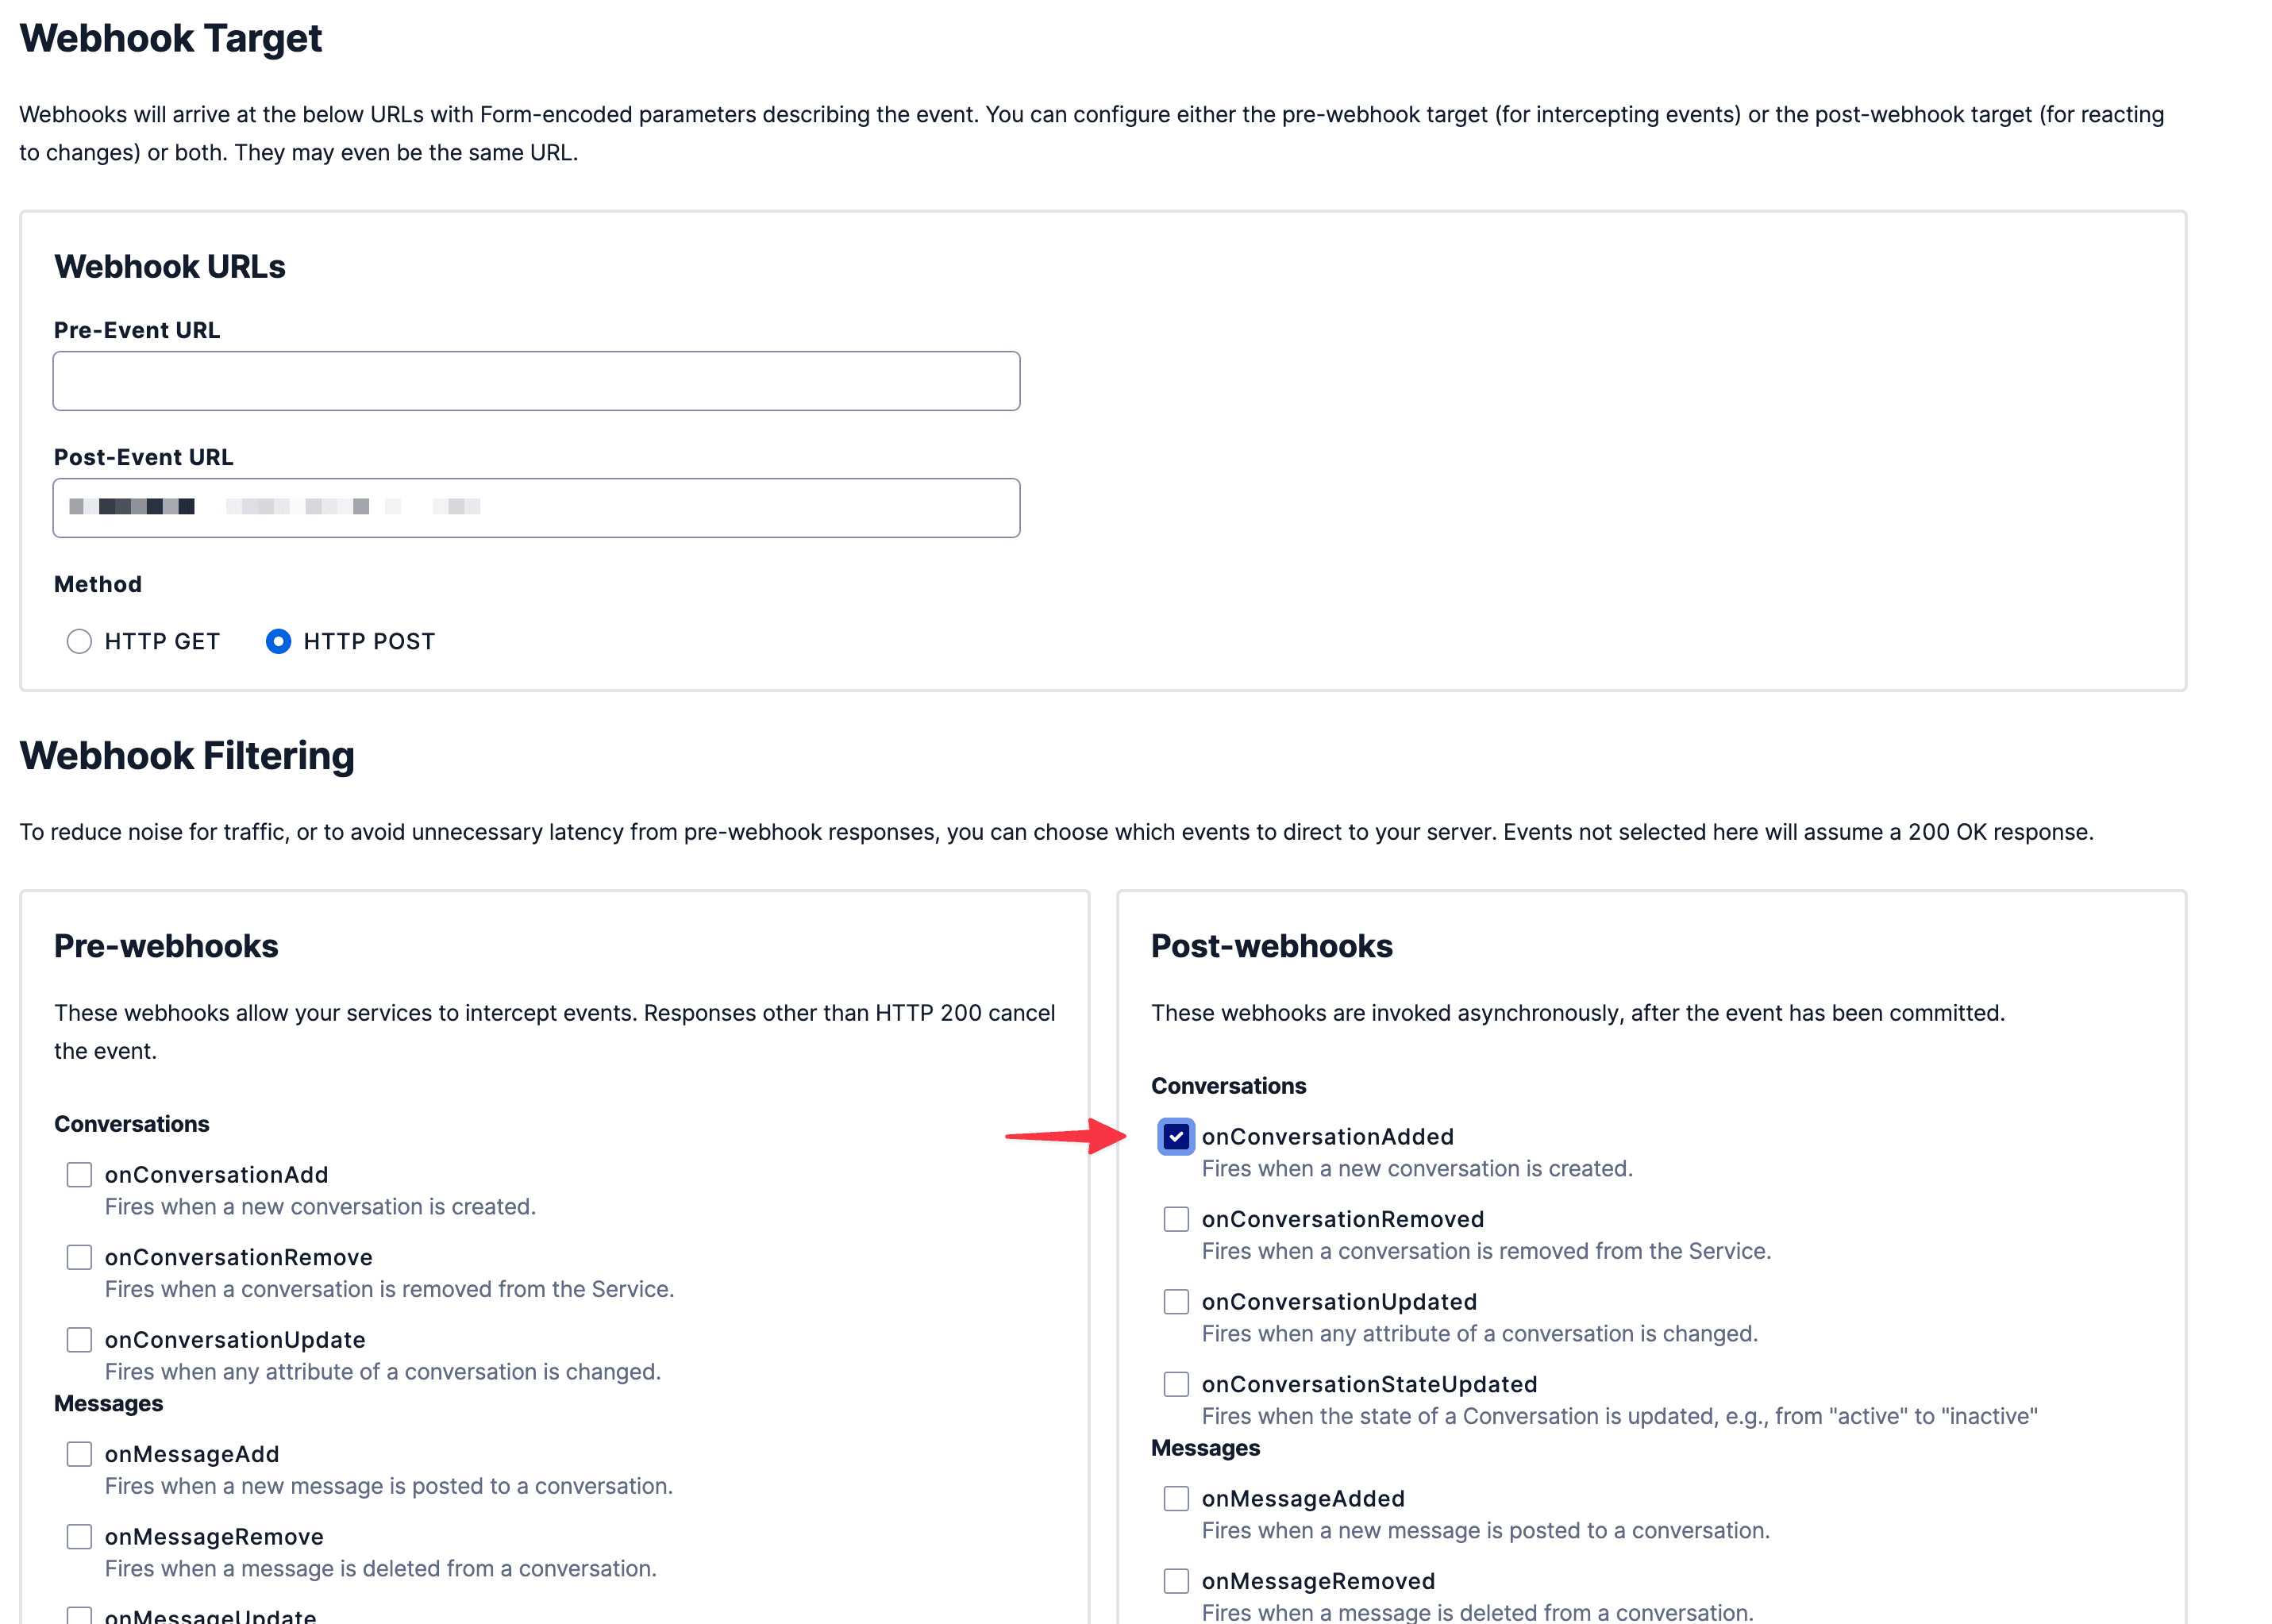
Note: Global Webhooks create events for all conversations available in your account. If you want to limit the scope of the webhook to a specific conversations service, you can create a Service Scoped Webhook instead.
The integration is now ready! 🎉
For SMS: Send a message from any phone to your Twilio phone number to start chatting with your Dialogflow agent.
For Conversations API or SDK: You can create a new conversation and add a message to the conversation to start chatting with your Dialogflow agent.
The Conversations react demo app is a good way to get starting with the Conversations SDK.
For API only integrations, be sure to set the X-Twilio-Webhook-Enabled=true header in your request so that Webhook events trigger.
Here are some ideas for next steps to take your integration further:
- Add a welcome message for chat users: You can add a default welcome message to the conversations before connecting it to the Studio Flow. This creates the effect of the virtual agent greeting the user.
- Live Agent Handoff: Dialogflow CX agents can recognize when user needs to speak to a human. The Connect Virtual Agent Studio widget has a route that is triggered when the agent recognizes this intent. You can use this route to connect the user to a live agent.
- Try other channels: Conversations also supports WhatsApp and Facebook Messenger. You can connect your Dialogflow agent to these channels as well.
- Try Voice integrations: If your Dialogflow agent is configured with voice capabilities, you can connect it to Twilio Voice using the same integration.