How to build an IVR with Twilio Studio
Twilio Studio is a visual, drag-and-drop editor for creating applications. It works by dragging and dropping widgets that represent parts of the Twilio API. Stitching these widgets together creates an application - for example, your very own IVR (Interactive Voice Response) system, with no coding required.
If you've ever said or pressed "1" on your phone to connect to an agent at a call center, you've used an IVR system. An IVR is an interactive phone menu that lets callers navigate by voice or keypress to route calls to a different phone number.
In this tutorial, you'll learn how to create a basic IVR system that gathers key presses from callers and connects their calls to one of two phone numbers (Sales and Support). You will also learn how to accept and route calls based on voice input so that users can use either their voice or keypad.
Info
New to Twilio Studio? We recommend you check out our Getting Started guide for working with Twilio Studio to familiarize yourself with Studio mechanics before you dig into this tutorial.
Before you get started, you'll need:
- A Twilio Account. If you are new to Twilio, create a free account. You can review the features and limitations of a free Twilio account here.
- A Twilio Phone Number. View instructions for purchasing a Twilio Phone Number here.
You'll start by creating a brand-new Studio Flow for your IVR system. All the logic and routing for your IVR will exist in this Flow.
Create a new Flow from scratch using the Twilio Console. If this is your first time working with Studio, you can see how to create a Flow here. You may wish to name this Flow something like "IVR Tutorial."
The first thing you'll need your Studio-powered application to do is gather information from your callers.
Look in the Widget Library for the Gather Input on Call widget. Click on this widget and drag it to your Canvas.
You'll need to connect your Trigger (Start) widget to this widget, so click on the red dot underneath Incoming Call and drag it to connect it to your new widget. This will create a line between the two widgets and tells your Studio application what to do with incoming calls.
Click on the widget you just added to your Canvas. Inside the Gather Input on Call widget's configuration menu (on the right side of the Canvas), you can rename this widget to something more meaningful, like greet_caller
Next, you can tell your program what to say to callers. Double-check that the Say or Play a Message field in the widget configuration is set to "Say a message" - this lets you write whatever message you'd like to have read to your callers. For this tutorial, write something in the text field like "Hello, how can we direct your call? Press 1 for Sales, or say Sales. To reach Support, press 2 or say Support."
The Gather Input on Call widget expects the user to press keys or say something after they hear this message.
You probably don't want to make your IVR program wait after a user has given their keypress response, so scroll down in the widget settings to the section for Stop gathering on keypress?
Make sure that "YES" is selected, and enter "1" in the field for Stop gathering after __ digits. This will tell your Studio-powered IVR to move on to the next step after our user has entered their response.
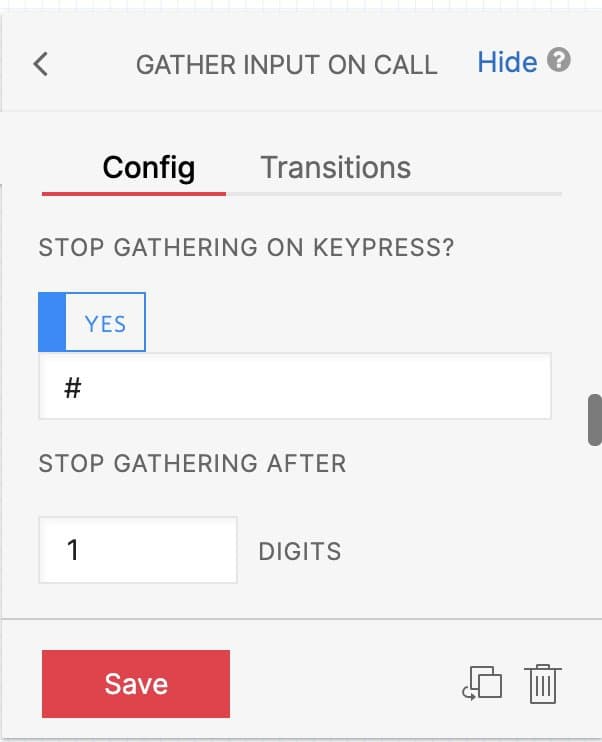
Now that you have a way to gather your first bit of user data it's time to tell your Studio Flow what to do with that data - route the call to Sales or Support. Start out by creating your workflow for users who press a key to route to the correct department.
The Split Based On… widget tells your Studio Flow how to direct a phone call based on some action your user takes. Find Split Based On… in the Widget Library and drag it on to your Canvas, connecting it to the User Pressed Keys option in your greet_caller widget. Re-name this widget to split_key_press.
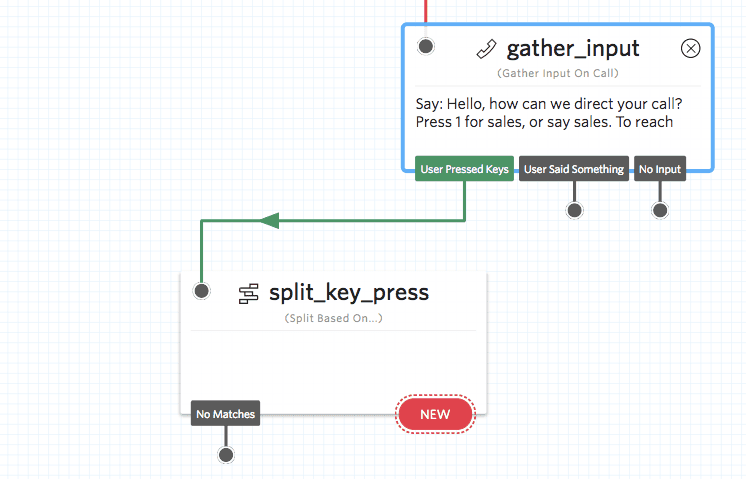
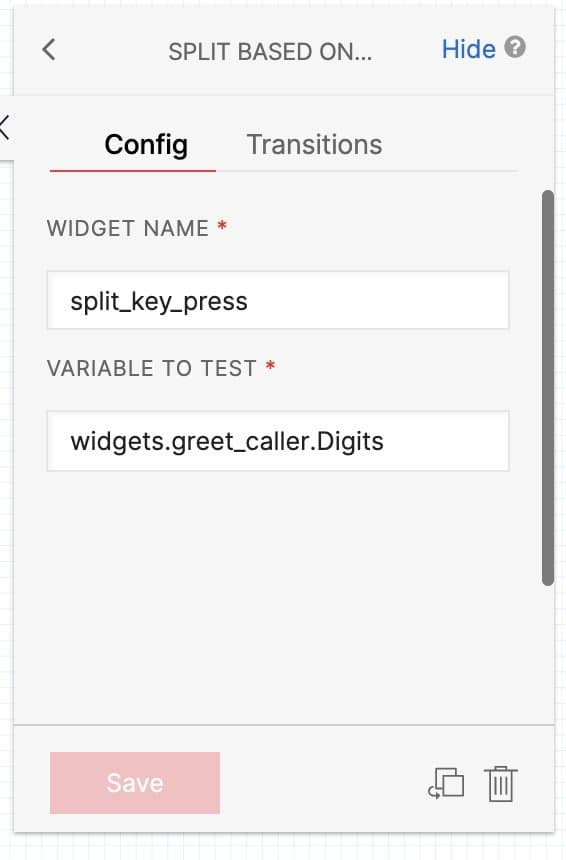
Now you'll need to configure this widget to tell your Flow how to route the call based on your user's input. In this case, you want to work with keys that the user presses, so under Variable to test in the widget Configuration, select Digits under greet_caller from the dropdown.
Next, you'll need to declare the choices you're looking for in those key presses from your users.
Tap the red New button at the bottom of your split_key_press widget to reveal the Transition On... dropdown menu. Select Condition Matches to create a new Transition.
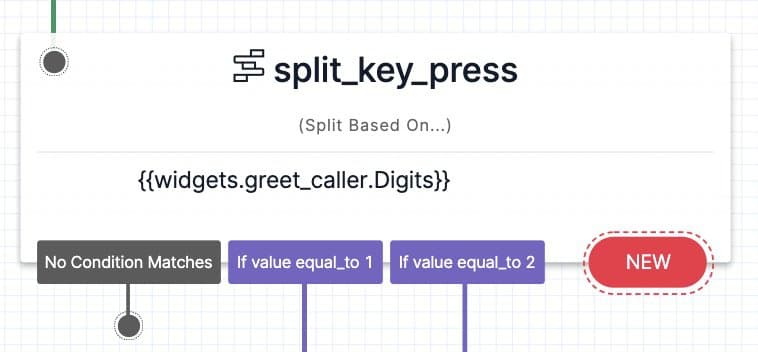
If you look to the widget sidebar on the right of your Canvas, you should see the Transitions tab is now selected for your split_key_press widget. Scroll down in the widget until you see If value equal_to… and set the value to "1" in order to connect your callers to Sales and save the Transition.
Next, you'll need a condition for your users who pressed 2 for Support. Just as with the first Transition, tap New, then select Condition Matches..., then set the value equal to 2 in the Transition Configuration and save.
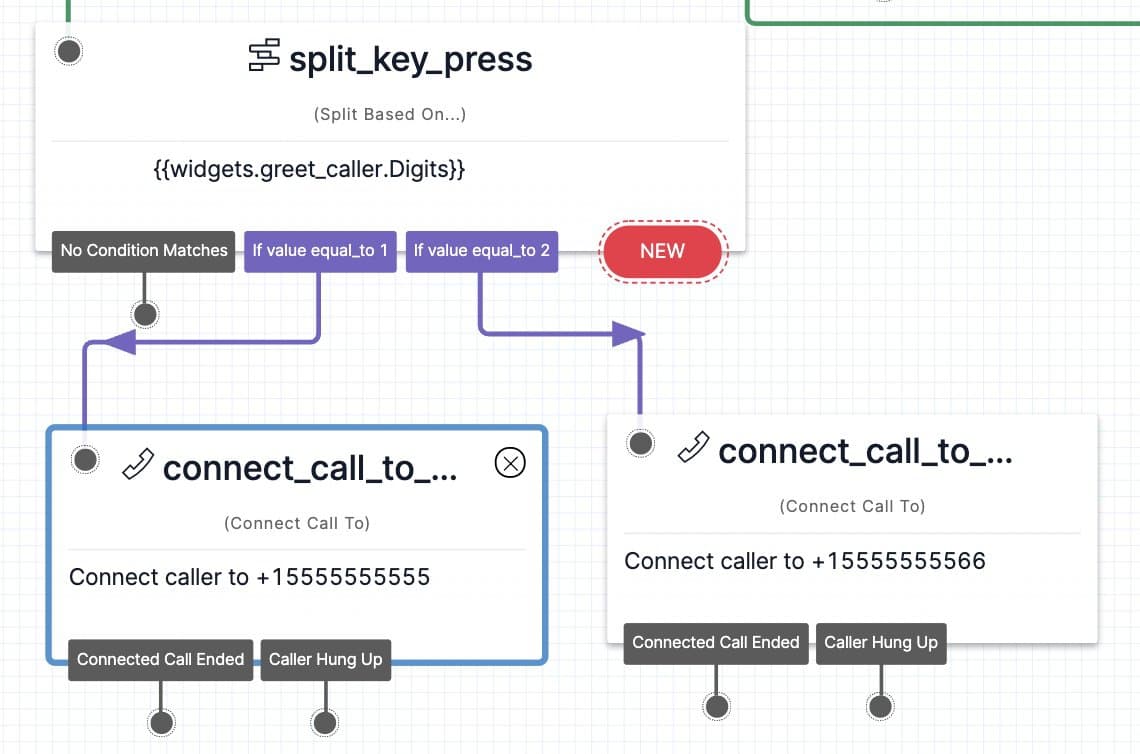
Your widget should now look like this, with No Matches, 1, and 2 dangling from the bottom:
Now all that's left is to connect these users to the appropriate department!
In order to connect your users to Sales or Support, use the Connect Call To widget. You will use one Connect Call To widget for each phone number you need to connect to this flow, so drag two of these widgets to your Canvas - one for Sales and one for Support.
For each Connect Call To widget on your Canvas, you'll need to set up your Sales and Support phone numbers. For the sake of testing, you can use any phone number you have access to. Click on each widget and rename them: one should be connect_call_to_sales and the other should be connect_call_to_support.
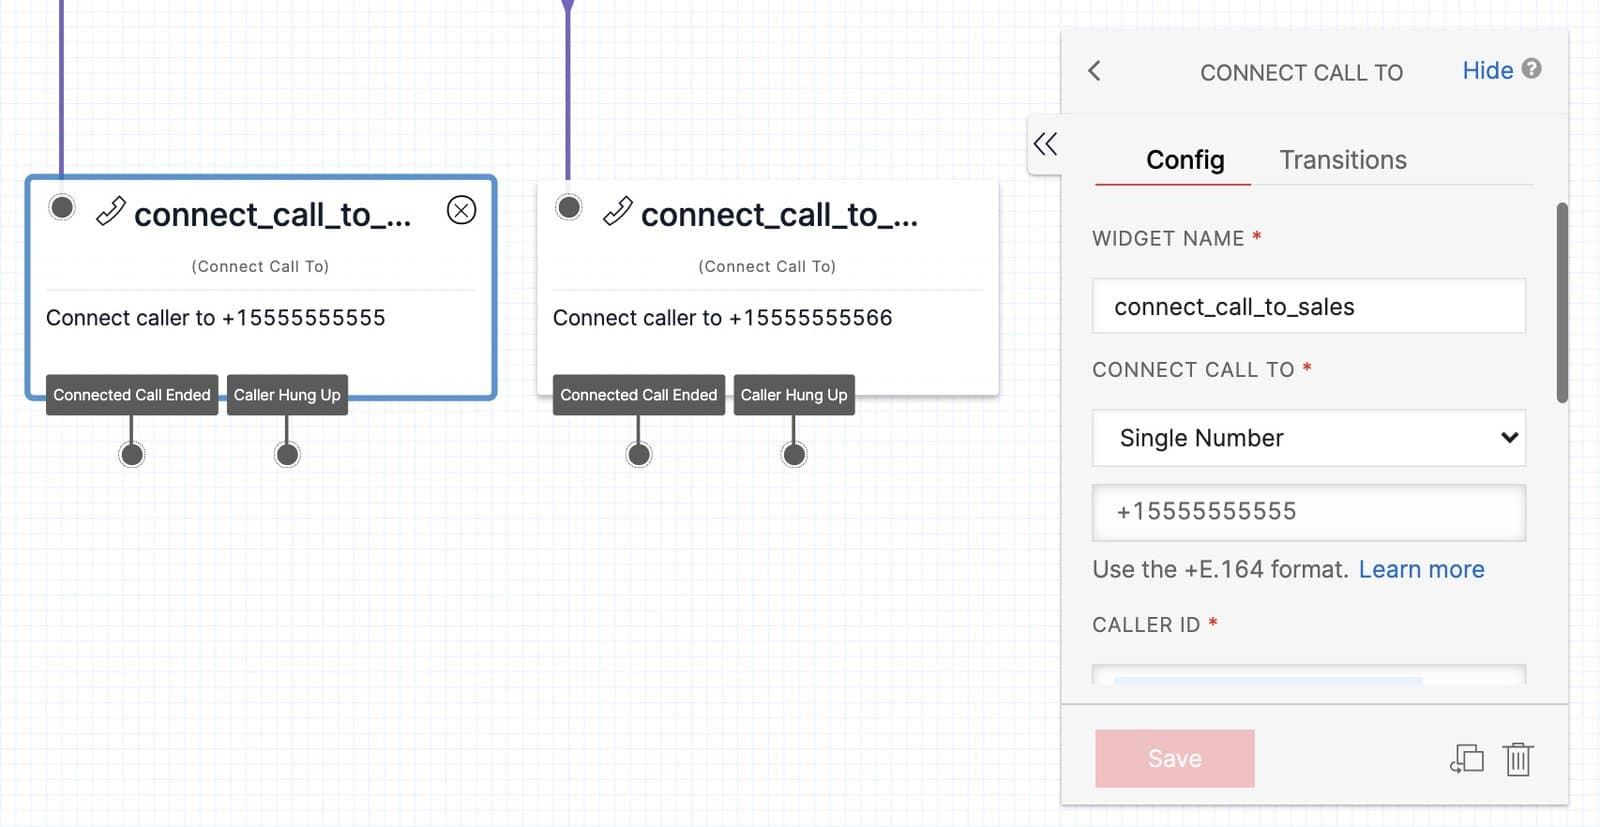
For each of these widgets, connect the call to a single number of your choosing - make sure you're using different numbers for each widget so you can test out the functionality of your IVR's routing!
To connect your caller with the appropriate phone number, match the dangling dot from the Split widget that says 1 to the Connect Call To widget that you've set up for Sales, and the dot for 2 to the widget for Support. Voila! Key presses are now a functional part of your IVR.
The final step for your IVR is to route users who choose to say "Sales" or "Support" rather than press keys on their phone. You'll use a Split Based On… widget again, but you'll configure this one to accept a voice response.
Drag another Split Based On... widget onto the Canvas. Rename this widget to split_voice_input, and for Variable to test, use the SpeechResult variable from the gather_input widget. This will ensure that your users' captured speech is able to route the call.
Next, click on the dot below "User Said Something" in your greet_caller widget and connect it to the split_voice_input widget you just added.
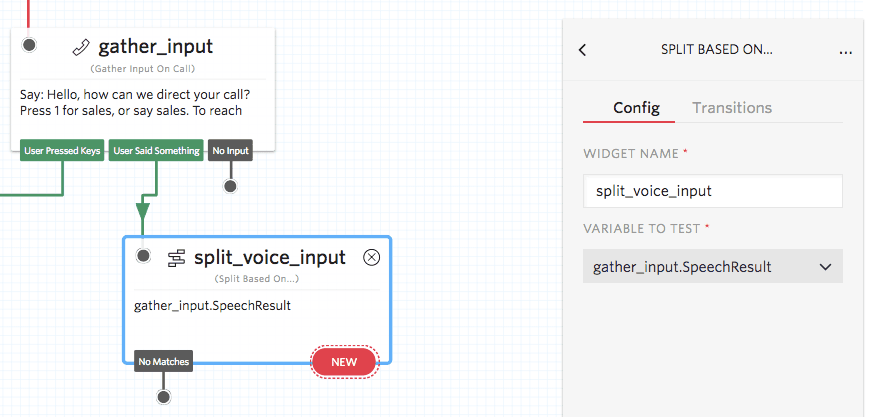
Just as before, add conditions to your split_voice_input widget for Sales or Support. The SpeechResult variable may contain punctuation such as a period at the end of the word. Instead of checking if SpeechResult is Equal To "Sales" or "Support", use the Contains predicate. This will check if the word "Sales" or "Support" is within SpeechResult, which would be evaluated to true even if SpeechResult has a value of "Sales." or "Support.".
Navigate to Transitions within the split_voice_input widget and select the + button to create a new condition. Create conditions for both Sales and Support. Use the Contains predicate for each condition.
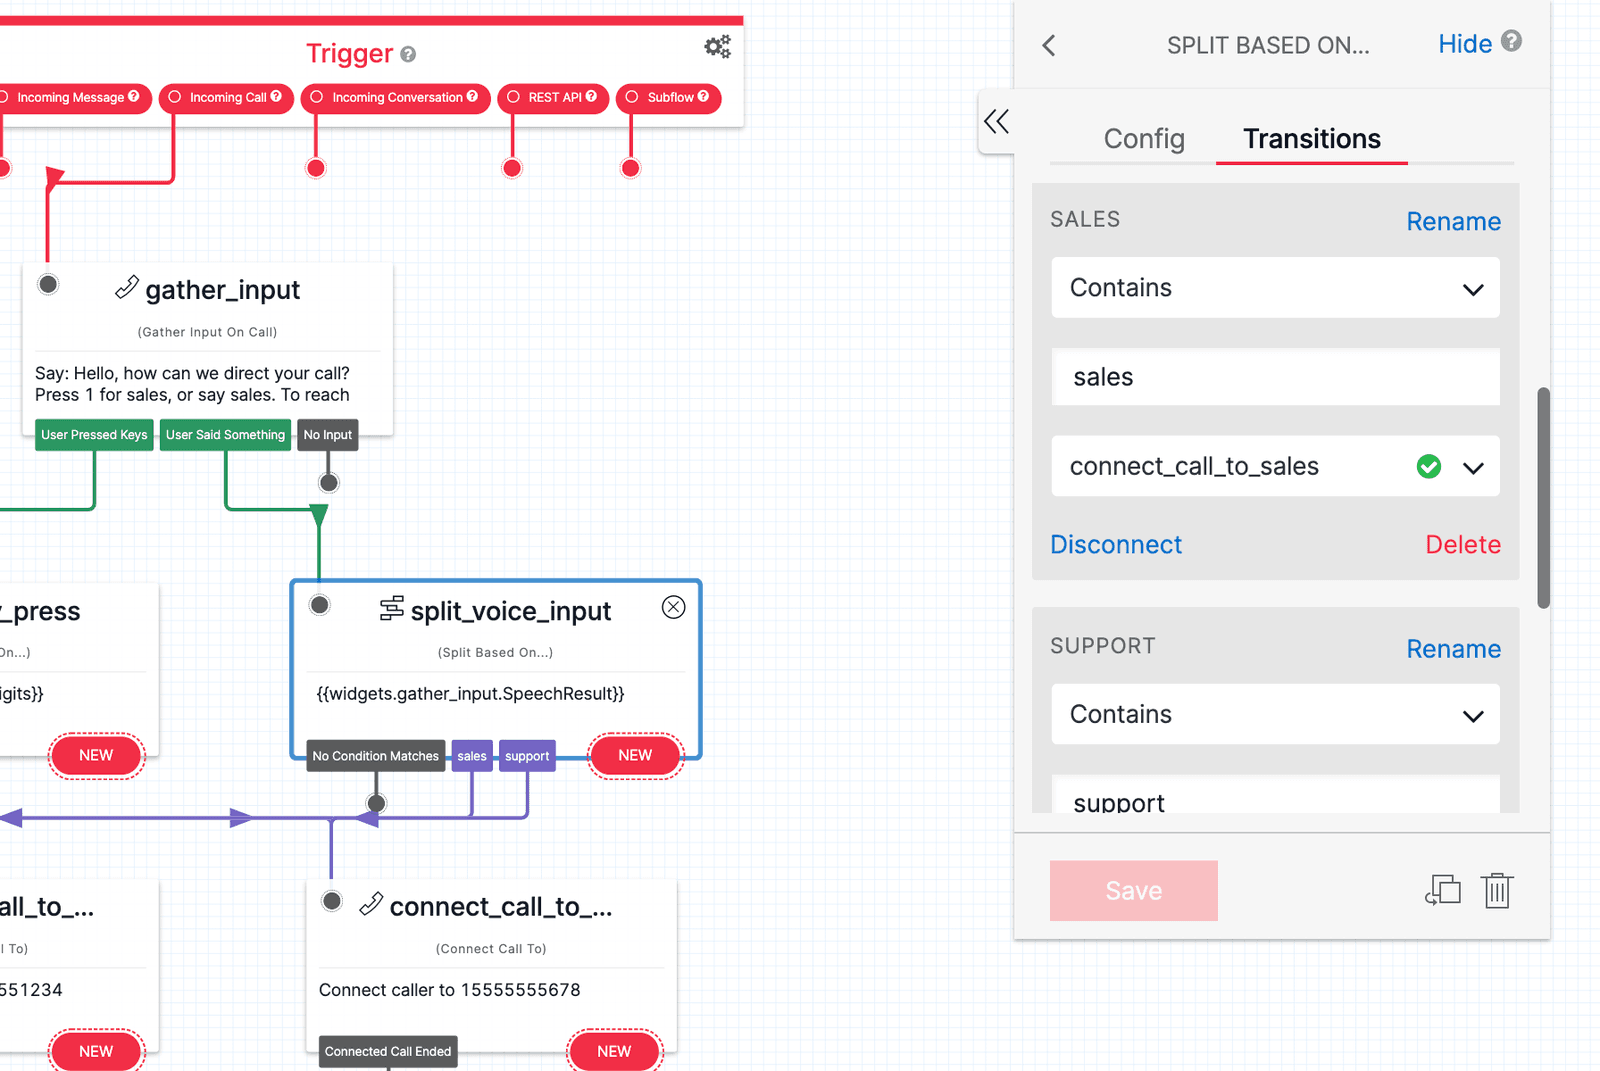
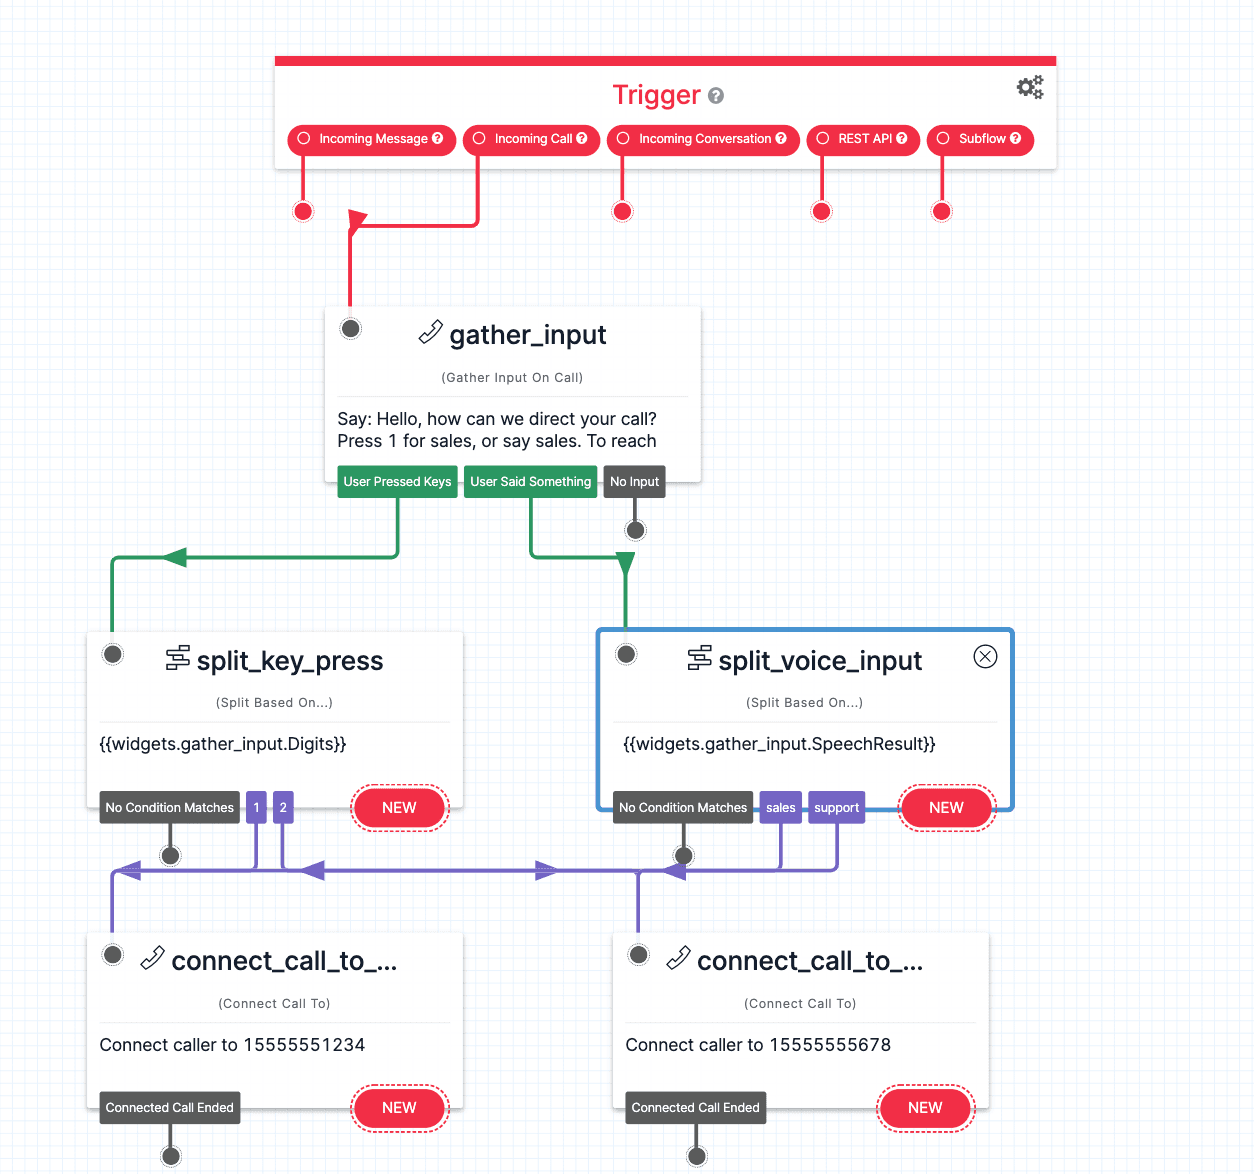
If you take a look at your Canvas now, you should see a Trigger widget that takes an incoming call, connects to the Gather Input on Call widget, then splits to two Split Based On... widgets (one for key press and one for speech result), each of which has condition matching Transitions to route to a Make Outgoing Call widget for Sales or Support.
After you've saved and published the flow, the last thing to do is hook up your flow to a phone number.
Once you're happy with your Flow and you've published all changes, you can connect it to a Twilio Number so people can start interacting with it.
Navigate to the Active Numbers section of the Twilio Console and click on the number you'd like to connect to the Flow. (If you do not have any phone numbers, you can purchase one from the Console.)
After clicking on the number, you will see its configuration menu where you can connect the number to your Studio Flow.
To configure this number to trigger your Studio Flow from an Incoming Call, scroll down to the Voice & Fax section of the configuration menu. Under Configure With, select the dropdown option "Webhook, TwiML Bin, Function, Studio Flow, Proxy Service". Then, under A Call Comes In, select the dropdown option "Studio Flow". You'll see another dropdown menu appear where you can select the Studio Flow you'd like to connect to when a call comes in to this number.

Choose the Flow you'd like to connect the number to, and then press Save to save these changes. Your Flow is now connected to your Twilio number!
Test out your brand new IVR by calling the Twilio number that you've set for your IVR, and enjoy traversing the automated menu!
Now that you've created your first Studio-powered IVR system, why not dig into more of what you can accomplish with Twilio Studio? Learn how to: