Source Functions
Source Functions allow you to gather data from any third-party applications without worrying about setting up or maintaining any infrastructure.
All functions are scoped to your workspace, so members of other workspaces cannot view or use them.
Info
Functions is available to all customer plan types with a free allotment of usage hours. Read more about Functions usage limits, or see your workspace's Functions usage stats.

- From your workspace, go to Connections > Catalog and click the Functions tab.
- Click New Function.
- Select Source as the function type and click Build.
After you click Build, a code editor appears. Use the editor to write the code for your function, configure settings, and test the function's behavior.
Want to see some example functions?
Check out the templates available in the Functions UI, or in the open-source Segment Functions Library. (Contributions welcome!)
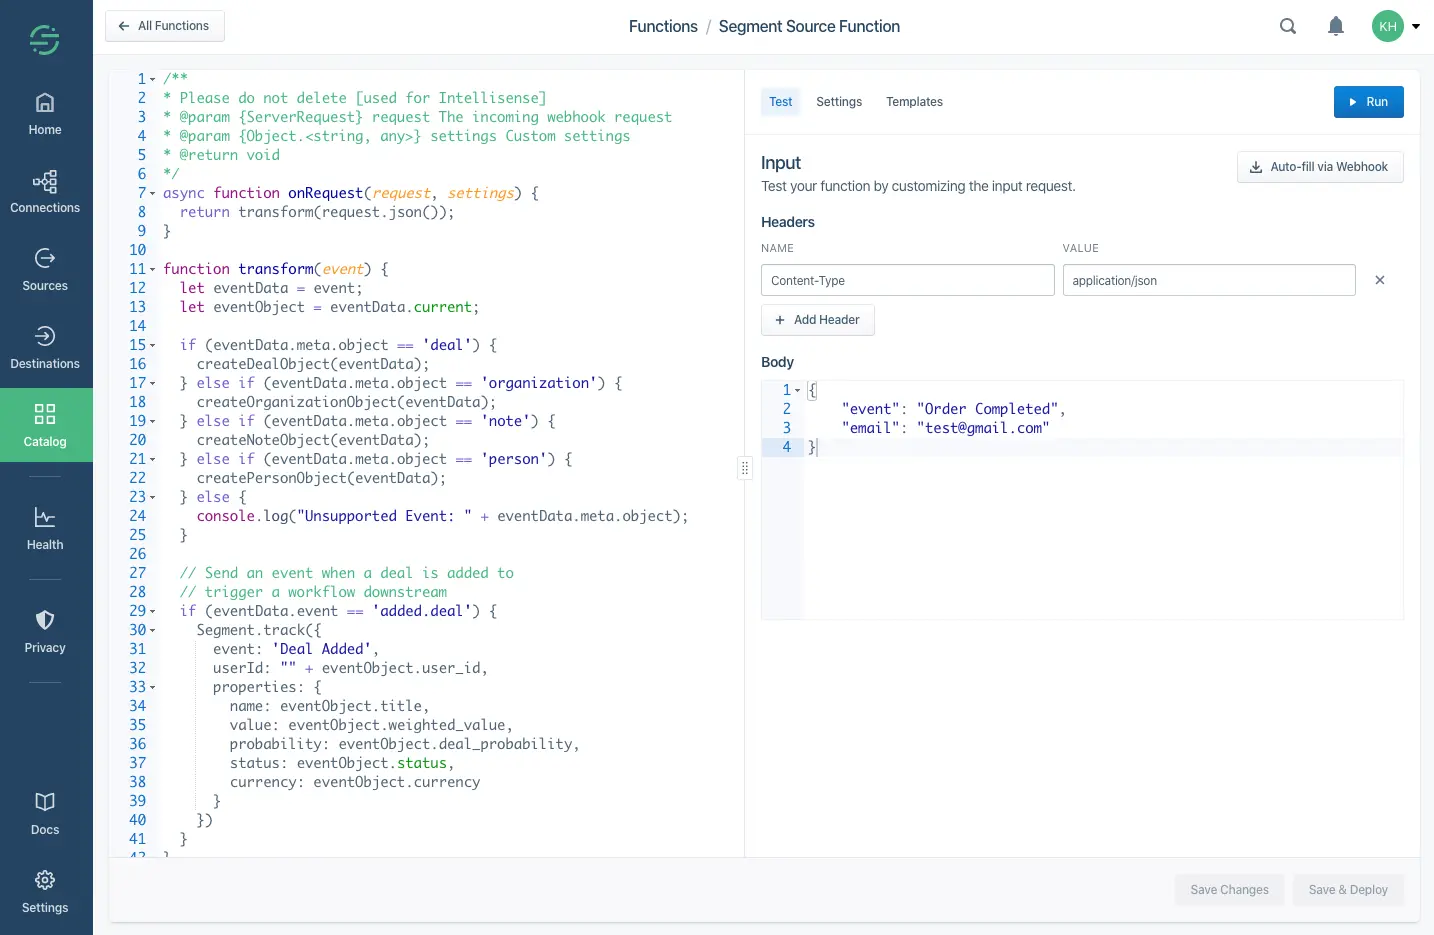
Source functions must have an onRequest() function defined.
This function is executed by Segment for each HTTPS request sent to this function's webhook.
1async function onRequest(request, settings) {2// Process incoming data3}
The onRequest() function receives two arguments:
request- an object describing the incoming HTTPS request.settings- set of settings for this function.
To parse the JSON body of the request, use the request.json() method, as in the following example:
1async function onRequest(request) {2const body = request.json()3console.log('Hello', body.name)4}
Use the request.headers object to get values of request headers.
Since it's an instance of Headers, the API is the same in both the browser and in Node.js.
1async function onRequest(request) {2const contentType = request.headers.get('Content-Type')3const authorization = request.headers.get('Authorization')4}
To access the URL details, refer to request.url object, which is an instance of URL.
1async function onRequest(request) {2// Access a query parameter (e.g. `?name=Jane`)3const name = request.url.searchParams.get('name')4}
You can send messages to the Segment API using the Segment object:
1async function onRequest(request) {2Segment.identify({3userId: 'user_id',4traits: {5name: 'Jane Hopper'6}7})89Segment.track({10event: 'Page Viewed',11userId: 'user_id',12properties: {13page_name: 'Summer Collection 2020'14}15})1617Segment.group({18groupId: 'group_id',19traits: {20name: 'Clearbit'21}22})2324Segment.set({25collection: 'products',26id: 'product_id',27properties: {28name: 'Nike Air Max'29}30})31}
Use Identify calls to connect users with their actions, and to record traits about them.
1Segment.identify({2userId: 'user_id',3traits: {4name: 'Jane Hopper'5}6})
The Segment.identify() method accepts an object with the following fields:
userId- Unique identifier for the user in your database.anonymousId- A pseudo-unique substitute for a User ID, for cases when you don't have an absolutely unique identifier.traits- Object with data about or related to the user, likenameoremail.context- Object with extra information that provides useful context, likelocaleorcountry.
Track calls record actions that users perform, along with any properties that describe the action.
1Segment.track({2event: 'Page Viewed',3userId: 'user_id',4properties: {5page_name: 'Summer Collection 2020'6}7})
The Segment.track() method accepts an object with the following fields:
userId- Unique identifier for the user in your database.anonymousId- A pseudo-unique substitute for a User ID, for cases when you don't have an absolutely unique identifier.properties- Object with data that is relevant to the action, likeproduct_nameorprice.context- Object with extra information that provides useful context, likelocaleorcountry.
Group calls associate users with a group, like a company, organization, account, project, or team.
1Segment.group({2groupId: 'group_id',3traits: {4name: 'Clearbit'5}6})
The Segment.group() method accepts an object with the following fields:
groupId- Unique identifier for the group in your database.traits- Object with data that is relevant to the group, likegroup_nameorteam_name.context- Object with extra information that provides useful context, likelocaleorcountry.
Page calls record whenever a user sees a page of your website, along with any other properties about the page.
1Segment.page({2name: 'Shoe Catalog',3properties: {4url: 'https://myshoeshop.com/catalog'5}6})
The Segment.page() method accepts an object with the following fields:
userId- Unique identifier for the user in your database.anonymousId- A pseudo-unique substitute for a User ID, for cases when you don't have an absolutely unique identifier.name- Name of the page.properties- Object with information about the page, likepage_nameorpage_url.context- Object with extra information that provides useful context, likelocaleorcountry.
Screen calls record when a user sees a screen, the mobile equivalent of Page, in your mobile app.
1Segment.screen({2name: 'Shoe Feed',3properties: {4feed_items: 55}6})
The Segment.screen() method accepts an object with the following fields:
userId- Unique identifier for the user in your database.anonymousId- A pseudo-unique substitute for a User ID, for cases when you don't have an absolutely unique identifier.name- Name of the screen.properties- Object with data about the screen, likescreen_name.context- Object with extra information that provides useful context, likelocaleorcountry.
The Alias call merges two user identities, effectively connecting two sets of user data as one.
1Segment.alias({2previousId: 'old-email@example.com',3userId: 'new-email@example.com'4})
The Segment.alias() method accepts an object with the following fields:
previousId- Previous unique identifier for the user.userId- Unique identifier for the user in your database.anonymousId- A pseudo-unique substitute for a User ID, for cases when you don't have an absolutely unique identifier.
The Set call uses the object API to save object data to your Redshift, BigQuery, Snowflake, or other data warehouses supported by Segment.
1Segment.set({2collection: 'products',3id: 'product_id',4properties: {5name: 'Nike Air Max 90',6size: 117}8})
The Segment.set() method accepts an object with the following fields:
collection- A collection name, which must be lowercase.id- An object's unique identifier.properties- An object with free-form data.
Warning
When you use the set() method, you won't see events in the Source Debugger. Segment only sends events to connected warehouses.
Declare settings variables in the function handler, rather than globally in your function. This prevents you from leaking the settings values across other function instances.
The handler for source functions is onRequest().
Segment Functions run on the Node.js LTS runtime (currently v20). This keeps the runtime current with industry standards and security updates.
Based on the AWS Lambda and Node.js support schedule, production applications should only use Node.js releases that are in Active LTS or Maintenance LTS.
When Segment upgrades the Functions runtime to a new LTS version, existing functions automatically use the new runtime after their next deployment. Segment recommends checking your function after deployment to ensure everything works as expected, since dependency or syntax changes between Node.js versions might affect your function's behavior.
Functions don't support importing dependencies, but you can contact Segment Support to request that one be added.
The following dependencies are installed in the function environment by default:
-
atob v2.1.2exposed asatob -
aws-sdk v2.488.0exposed asAWS -
btoa v1.2.1exposed asbtoa -
fetch-retryexposed asfetchretrylib.fetchretry -
form-data v2.4.0exposed asFormData -
@google-cloud/automl v2.2.0exposed asgoogle.cloud.automl -
@google-cloud/bigquery v5.3.0exposed asgoogle.cloud.bigquery -
@google-cloud/datastore v6.2.0exposed asgoogle.cloud.datastore -
@google-cloud/firestore v4.4.0exposed asgoogle.cloud.firestore -
@google-cloud/functions v1.1.0exposed asgoogle.cloud.functions -
@google-cloud/pubsub v2.6.0exposed asgoogle.cloud.pubsub -
@google-cloud/storage v5.3.0exposed asgoogle.cloud.storage -
@google-cloud/tasks v2.6.0exposed asgoogle.cloud.tasks -
hubspot-api-nodejsexposed ashubspotlib.hubspot -
jsforce v1.11.0exposed asjsforce -
jsonwebtoken v8.5.1exposed asjsonwebtoken -
libphonenumber-jsexposed aslibphonenumberjslib.libphonenumberjs -
lodash v4.17.19exposed as_ -
mailchimp marketingexposed asmailchimplib.mailchimp -
mailjetexposed asconst mailJet = nodemailjet.nodemailjet; -
moment-timezone v0.5.31exposed asmoment -
node-fetch v2.6.0exposed asfetch -
oauth v0.9.15exposed asOAuth -
@sendgrid/client v7.4.7exposed assendgrid.client -
@sendgrid/mail v7.4.7exposed assendgrid.mail -
skyflowexposed asskyflowlib.skyflow -
stripe v8.115.0exposed asstripe -
twilio v3.68.0exposed astwilio -
uuidv5 v1.0.0exposed asuuidv5.uuidv5 -
winston v2.4.6exposed asconst winston = winstonlib.winston -
xml v1.0.1exposed asxml -
xml2js v0.4.23exposed asxml2js -
zlib v1.0.5exposed aszlib.zlib
uuidv5is exposed as an object. Useuuidv5.uuidv5to access its functions. For example:1async function onRequest(request, settings) {2uuidv5 = uuidv5.uuidv5;3console.log(typeof uuidv5);45//Generate a UUID in the default URL namespace6var urlUUID = uuidv5('url', 'http://google/com/page');7console.log(urlUUID);89//Default DNS namespace10var dnsUUID = uuidv5('dns', 'google.com');11console.log(dnsUUID);12}zlib's asynchronous methodsinflateanddeflatemust be used withasyncorawait. For example:1zlib = zlib.zlib; // Required to access zlib objects and associated functions2async function onRequest(request, settings) {3const body = request.json();45const input = 'something';67// Calling inflateSync method8var deflated = zlib.deflateSync(input);910console.log(deflated.toString('base64'));1112// Calling inflateSync method13var inflated = zlib.inflateSync(new Buffer.from(deflated)).toString();1415console.log(inflated);1617console.log('Done');18}
The following Node.js modules are available:
cryptoNode.js module exposed ascrypto.httpsNode.js module exposed ashttps.
Other built-in Node.js modules aren't available.
For more information on using the aws-sdk module, see how to set up functions for calling AWS APIs.
Basic cache storage is available through the cache object, which has the following methods defined:
cache.load(key: string, ttl: number, fn: async () => any): Promise<any>- Obtains a cached value for the provided
key, invoking the callback if the value is missing or has expired. Thettlis the maximum duration in milliseconds the value can be cached. If omitted or set to-1, the value will have no expiry.
- Obtains a cached value for the provided
cache.delete(key: string): void- Immediately remove the value associated with the
key.
- Immediately remove the value associated with the
Some important notes about the cache:
- When testing functions in the code editor, the cache will be empty because each test temporarily deploys a new instance of the function.
- Values in the cache are not shared between concurrently-running function instances; they are process-local which means that high-volume functions will have many separate caches.
- Values may be expunged at any time, even before the configured TTL is reached. This can happen due to memory pressure or normal scaling activity. Minimizing the size of cached values can improve your hit/miss ratio.
- Functions that receive a low volume of traffic may be temporarily suspended, during which their caches will be emptied. In general, caches are best used for high-volume functions and with long TTLs. The following example gets a JSON value through the cache, only invoking the callback as needed:
1const ttl = 5 * 60 * 1000 // 5 minutes2const val = await cache.load("mycachekey", ttl, async () => {3const res = await fetch("http://echo.jsontest.com/key/value/one/two")4const data = await res.json()5return data6})
Settings allow you to pass configurable variables to your function, which is the best way to pass sensitive information such as security tokens. For example, you might use settings as placeholders to use information such as an API endpoint and API key. This way, you can use the same code with different settings for different purposes. When you deploy a function in your workspace, you are prompted to fill out these settings to configure the function.
First, add a setting in Settings tab in the code editor:
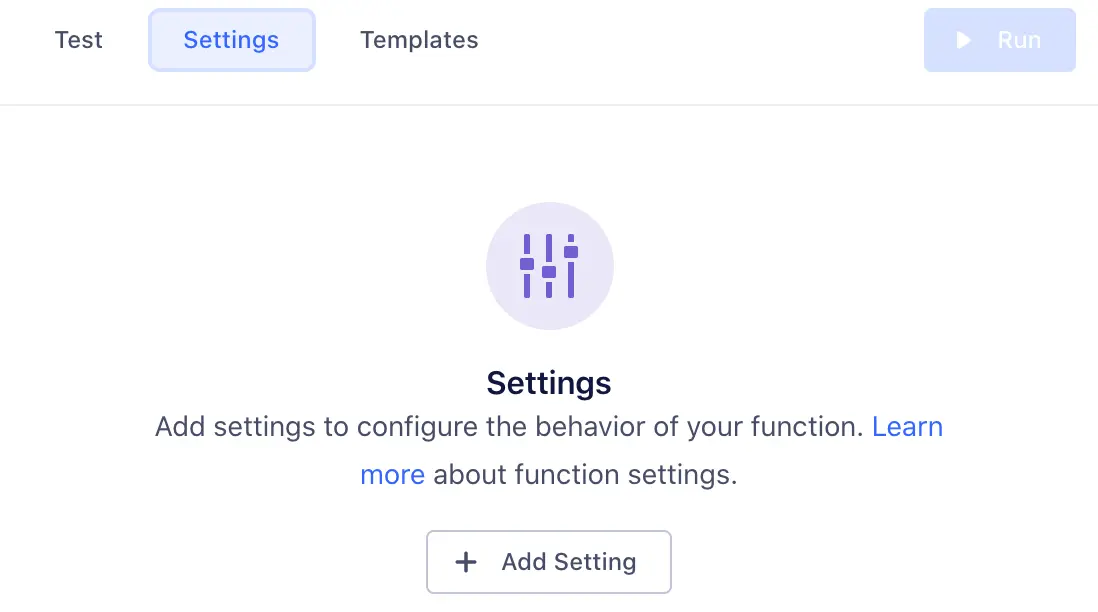
Click Add Setting to add your new setting.
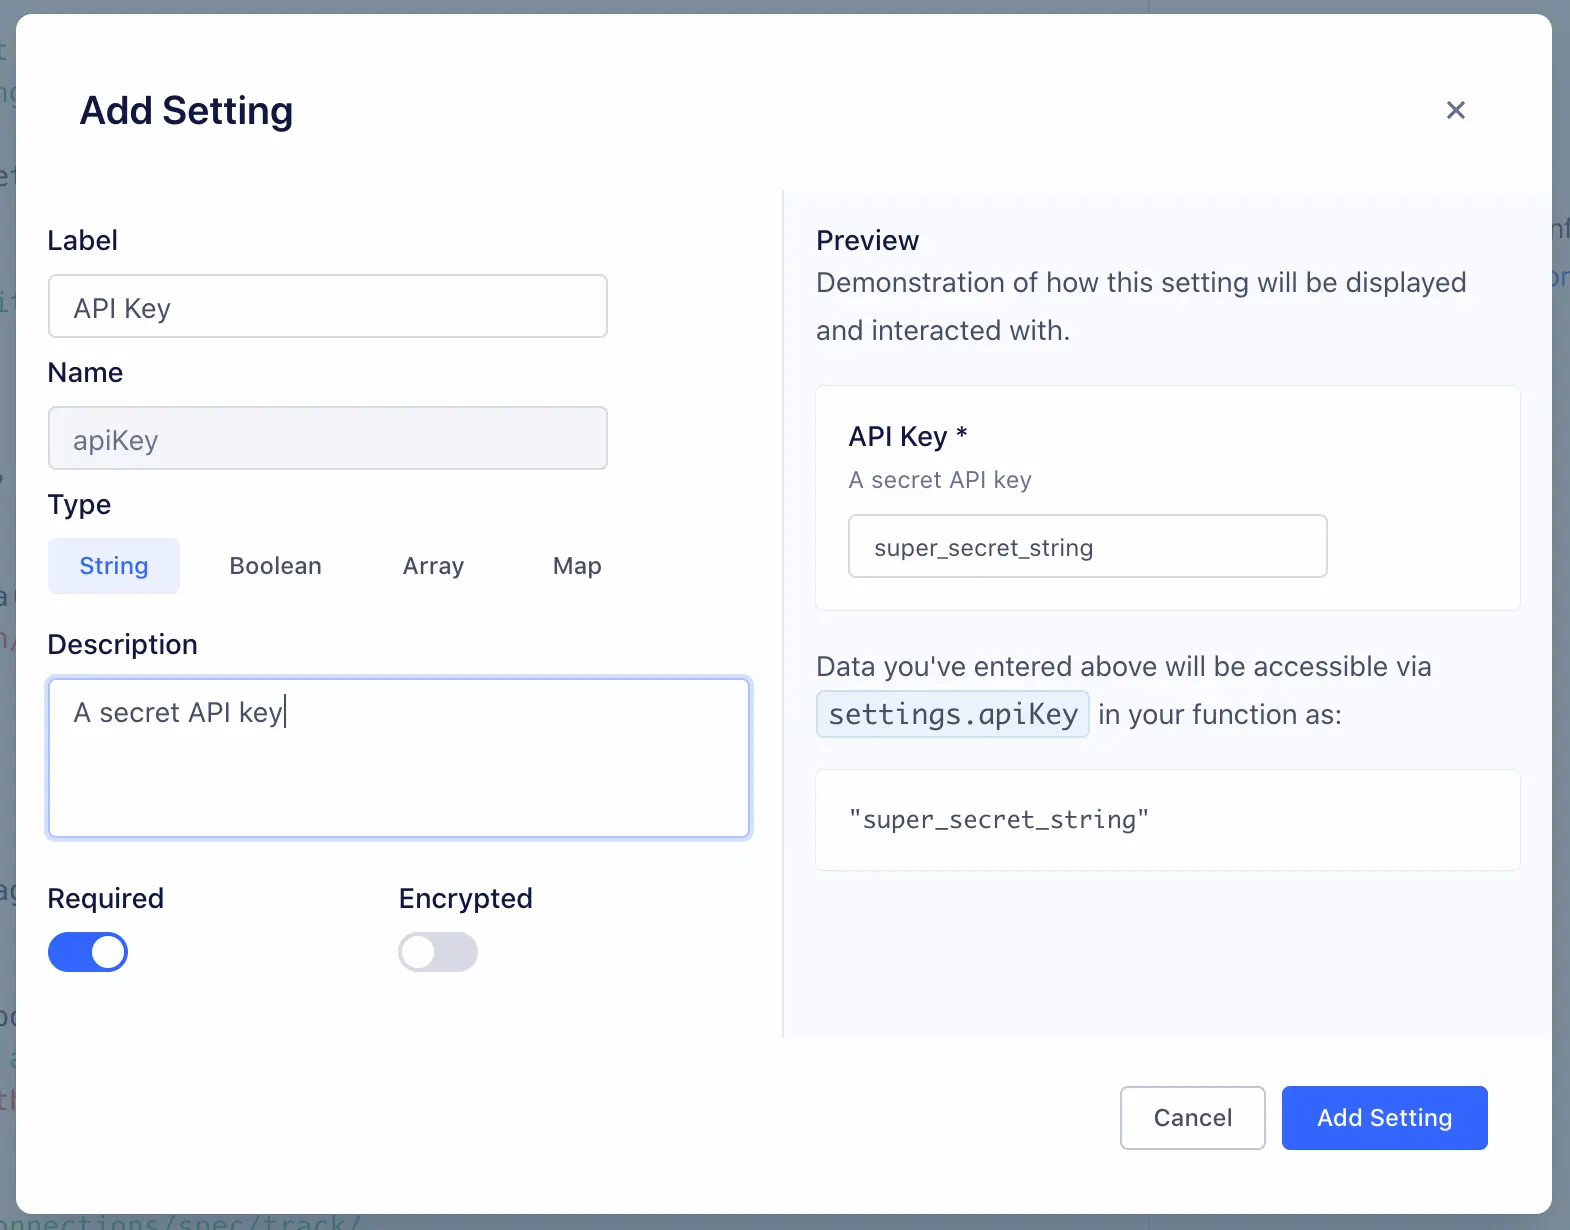
You can configure the details about this setting, which change how it's displayed to anyone using your function:
- Label - Name of the setting, which users see when configuring the function.
- Name - Auto-generated name of the setting to use in function's source code.
- Type - Type of the setting's value.
- Description - Optional description, which appears below the setting name.
- Required - Enable this to ensure that the setting cannot be saved without a value.
- Encrypted - Enable to encrypt the value of this setting. Use this setting for sensitive data, like API keys.
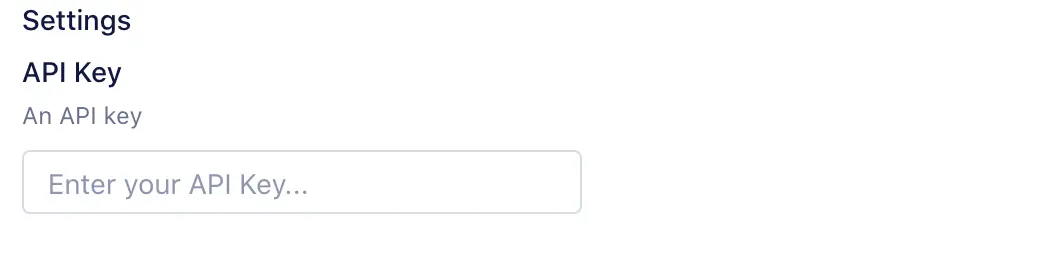
As you change the values, a preview to the right updates to show how your setting will look and work.
Click Add Setting to save the new setting.
Once you save a setting, it appears in the Settings tab for the function. You can edit or delete settings from this tab.
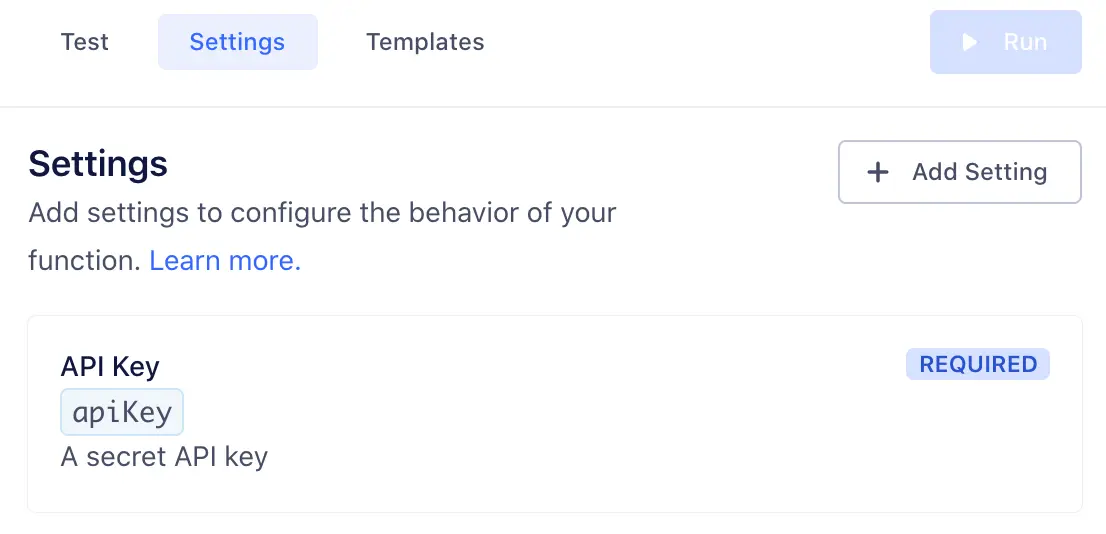
Next, fill out this setting's value in Test tab, so that you can run the function and check the setting values being passed.
Note, this value is only for testing your function.
Now that you've configured a setting and filled in a test value, you can add code to read its value and run the function:
1async function onRequest(request, settings) {2const apiKey = settings.apiKey3//=> "super_secret_string"4}
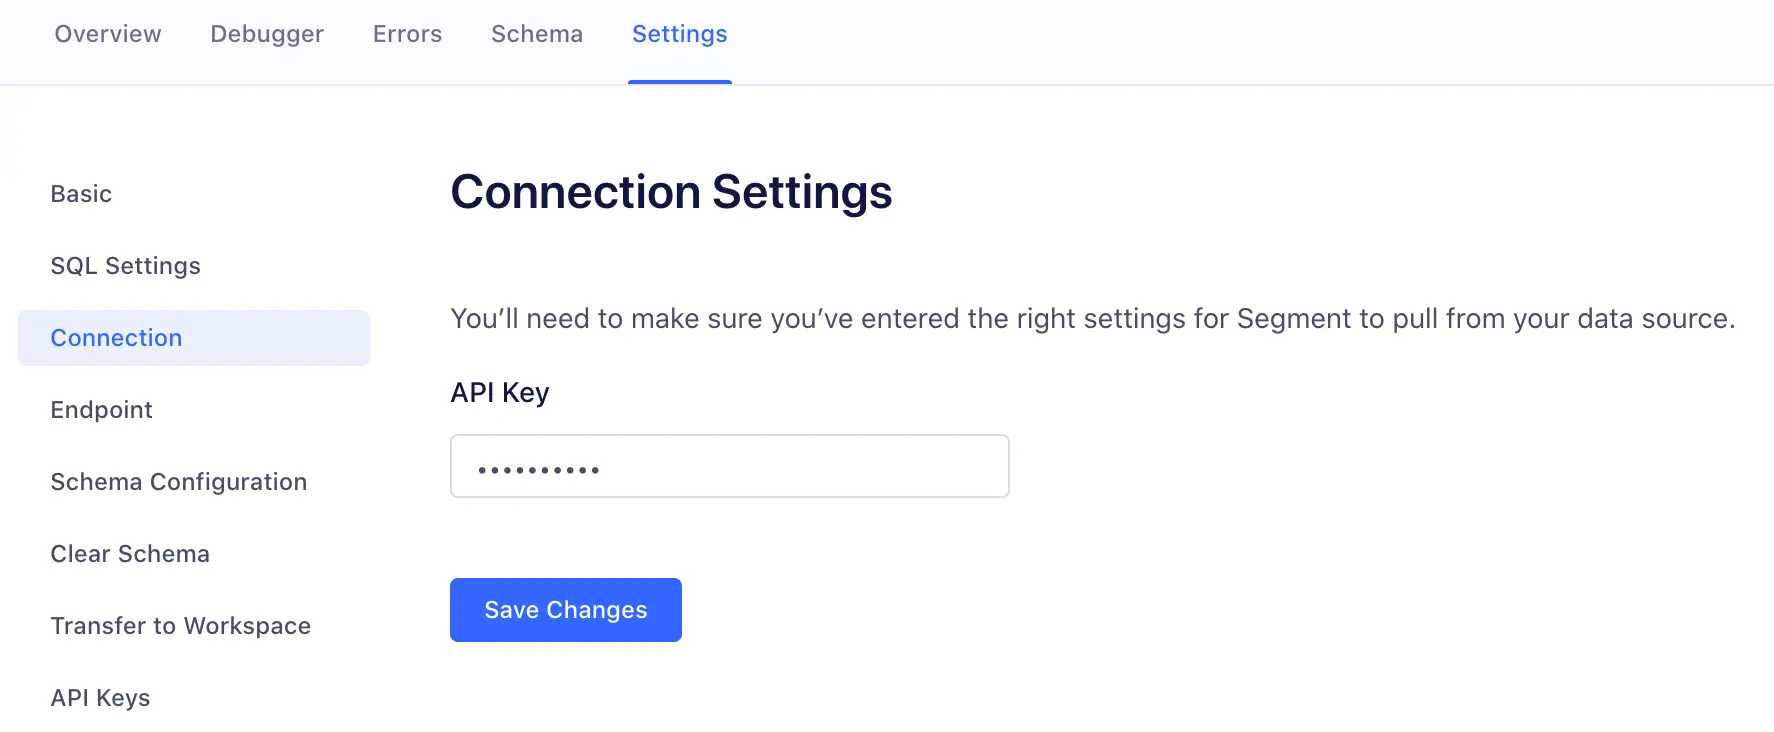
When you deploy a source function in your workspace, you are prompted to fill out settings to configure the source. You can access these settings later by navigating to the Source Settings page for the source function.
You can test your code directly from the editor in two ways: either by receiving real HTTPS requests through a webhook, or by manually constructing an HTTPS request from within the editor.
The advantage of testing your source function with webhooks is that all incoming data is real, so you can test behavior while closely mimicking the production conditions.
The webhook URL is api.segmentapis.com/functions. To use webhooks with your function, you must:
- Generate a Public API token.
- Create a Public API Token, or follow these steps: In your Segment Workspace, navigate to Settings > Workspace settings > Access Management > Token. Click + Create Token. Create a description for the token and assign access. Click Create and save the access token before clicking Done.
- For
POSTcalls, use this Public API token in the Authorization Header, asBearer Token : public_api_token
You can use webhooks to test the source function either by sending requests manually (using any HTTP client such as cURL, Postman, or Insomnia), or by pasting the webhook into an external server that supports webhooks (such as Slack).
A common Segment use case is to connect a Segment webhooks destination or webhook actions destination to a test source, where the Webhook URL/endpoint that is used corresponds to the provided source function's endpoint, then you can trigger test events to send directly to that source, which are routed through your Webhook destination and continue on to the source function: Source > Webhook destination > Source Function.
From the source function editor, copy the provided webhook URL (endpoint) from the "Auto-fill via Webhook" dialog.
Note : When a new source is created that utilizes a source function, the new source's endpoint (webhook URL) will differ from the URL that is provided in the source function's test environment.
To test the source function:
- Send a
POSTrequest to the source function's provided endpoint (webhook URL) - Include an event
body - The request must include these Headers:
Content-Type : application/jsonorContent-Type : application/x-www-form-urlencodedAuthorization : Bearer _your_public_api_token_
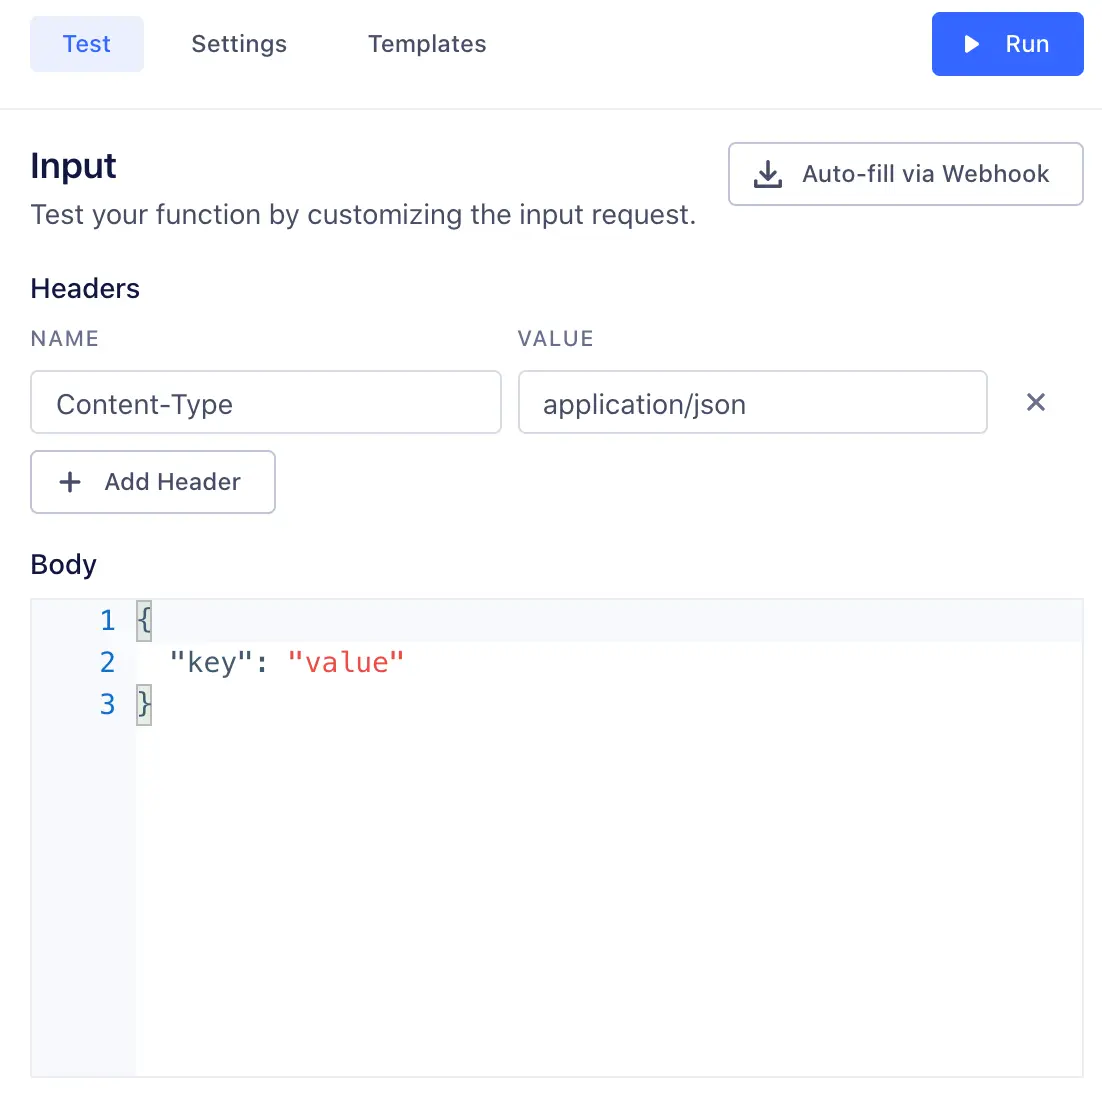
You can also manually construct the headers and body of an HTTPS request inside the editor and test with this data without using webhooks.
The Content-Type Header is required when testing the function:
Content-Type : application/jsonorContent-Type : application/x-www-form-urlencoded
After you finish building your source function, click Configure to name it, then click Create Function to save it. The source function appears on the Functions page in your workspace's catalog.
If you're editing an existing function, you can Save changes without updating instances of the function that are already deployed and running.
You can also choose to Save & Deploy to save the changes, and then choose which already-deployed functions to update with your changes. You might need additional permissions to update existing functions.
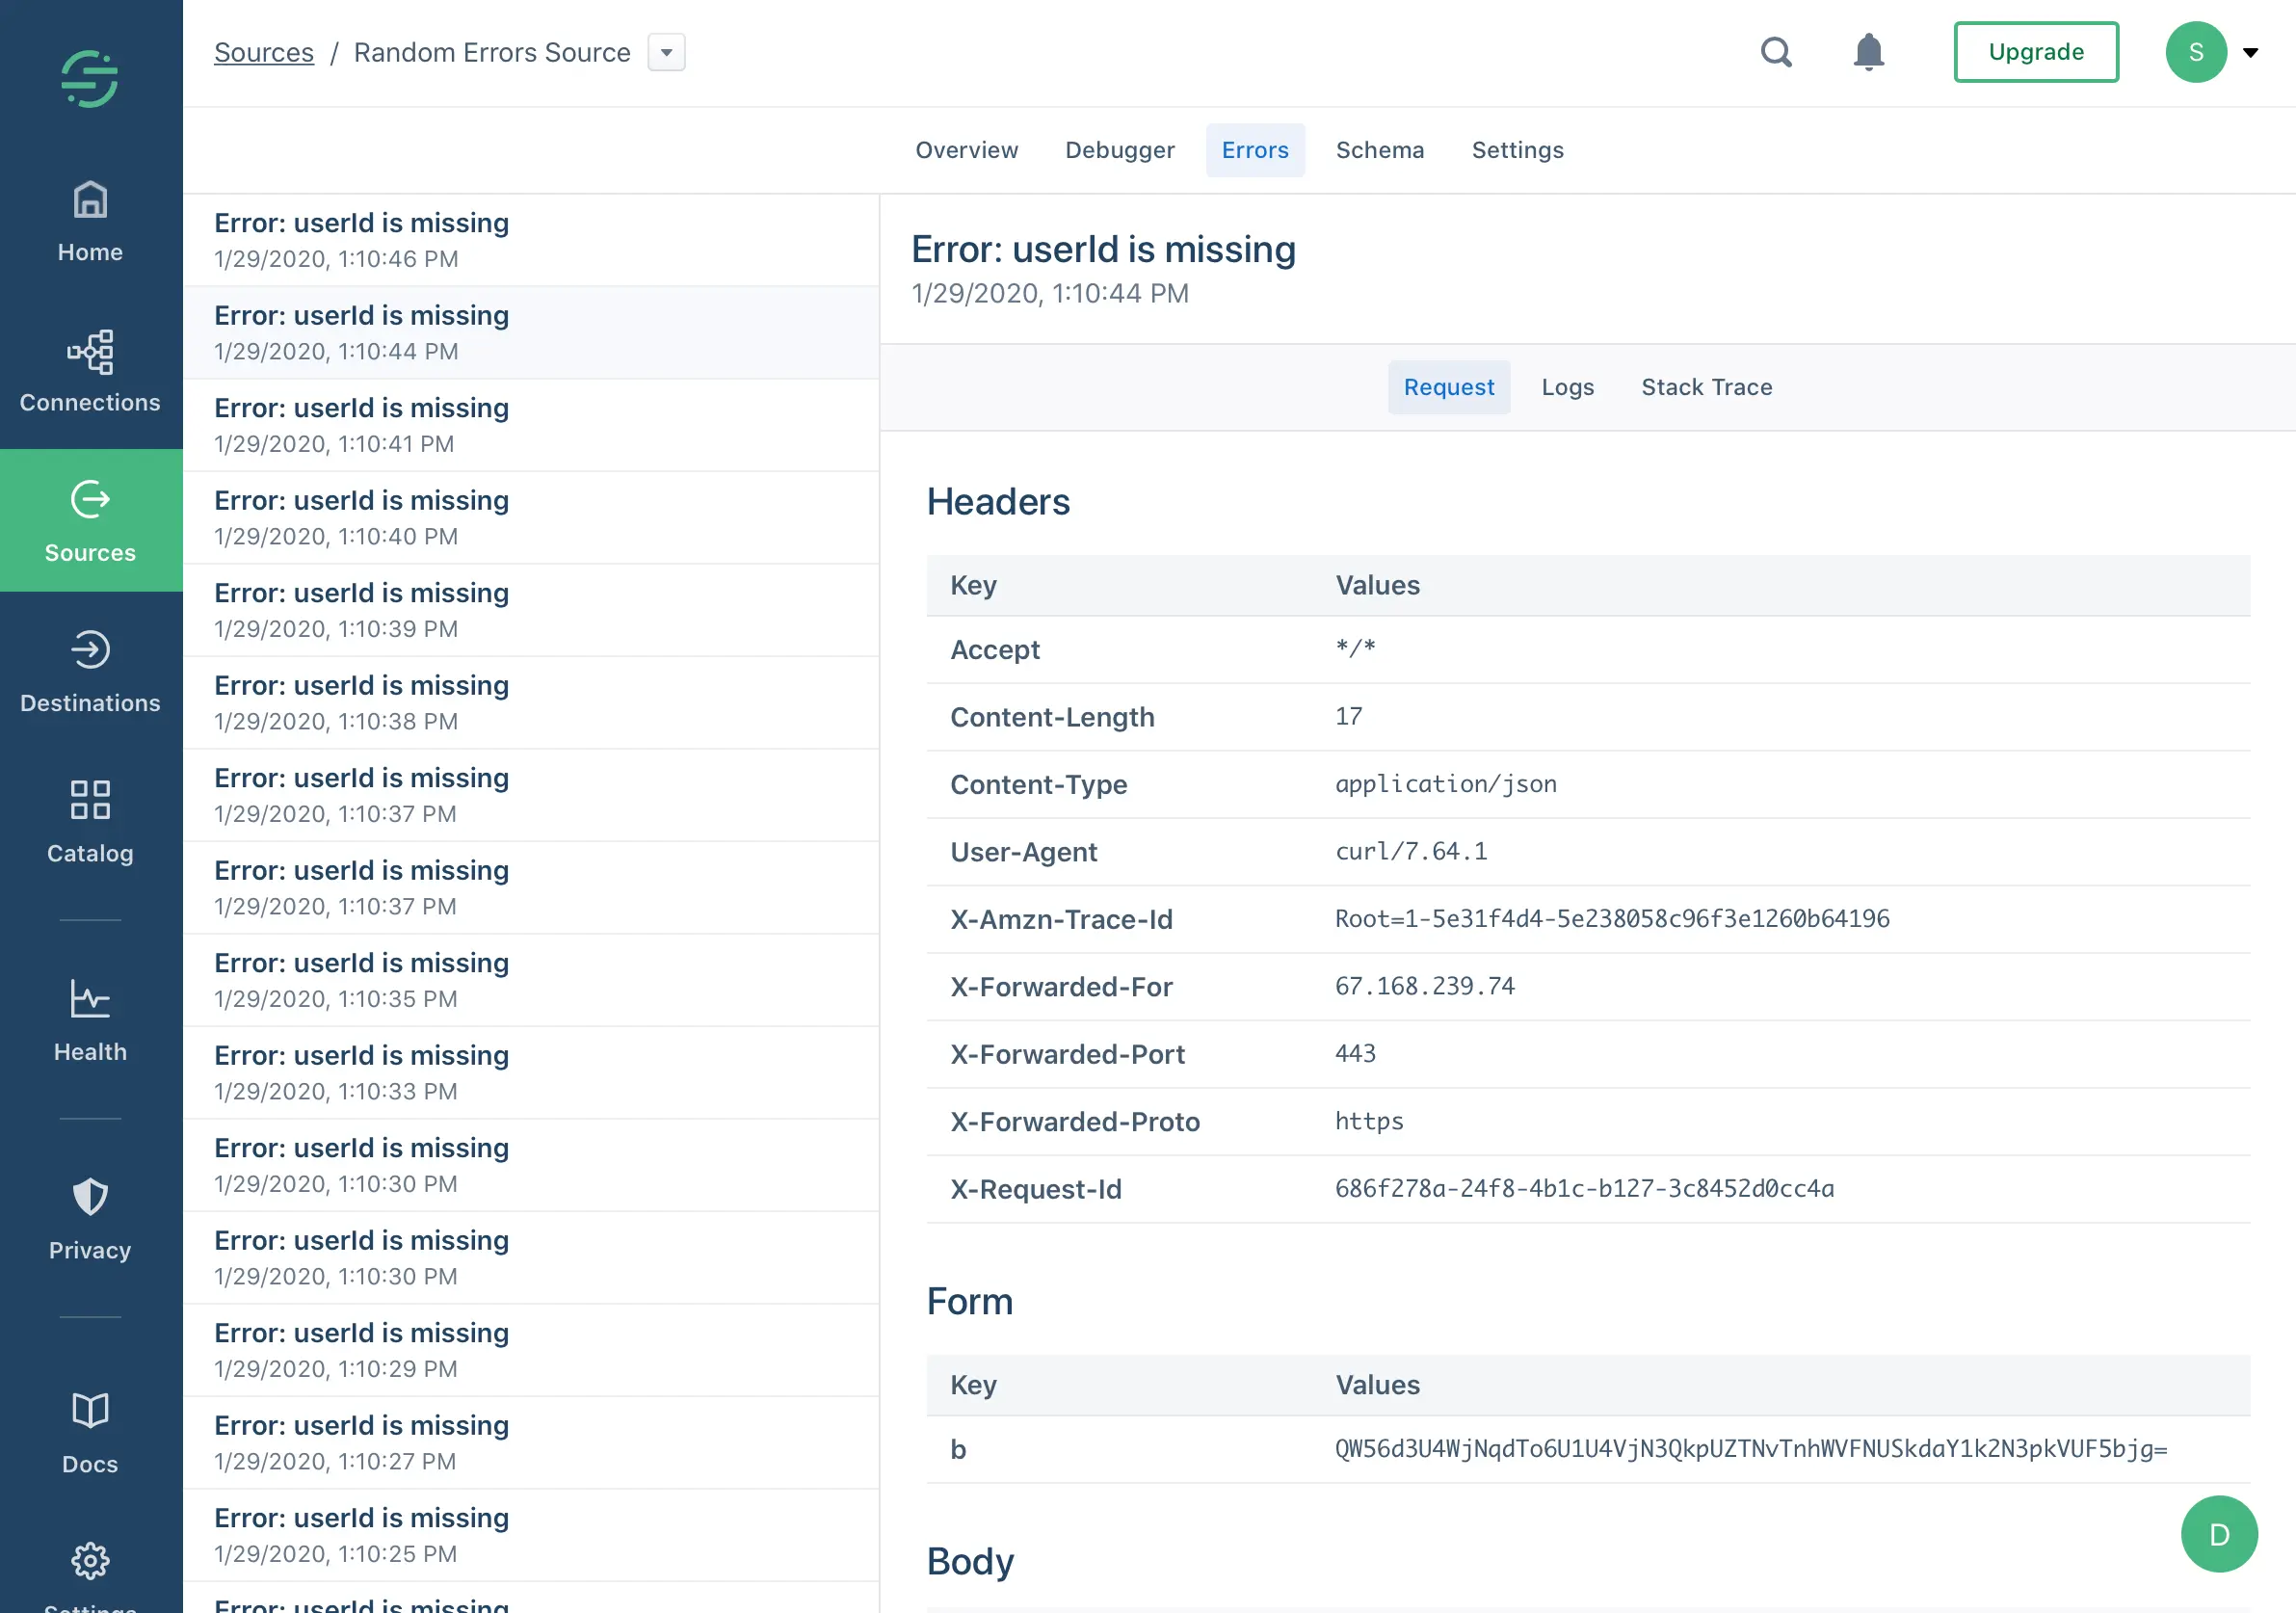
Your function may encounter errors that you missed during testing, or you might intentionally throw errors in your code (for example, if the incoming request is missing required fields).
If your function throws an error, execution halts immediately. Segment captures the incoming request, any console logs the function printed, and the error, and displays this information in the function's Errors tab. You can use this tab to find and fix unexpected errors.
Functions can throw an Error or custom Error, and you can also add additional helpful context in logs using the console API.
For example:
1async function onRequest(request, settings) {2const body = request.json()3const userId = body.userId45console.log('User ID is', userId)67if (typeof userId !== 'string' || userId.length < 8) {8throw new Error('User ID is invalid')9}1011console.log('User ID is valid')12}
Data may be visible to other workspace members
Do not log sensitive data, such as personally-identifying information (PII), authentication tokens, or other secrets. You should especially avoid logging entire request/response payloads.
Segment only retains the 100 most recent errors and logs for up to 30 days but the Errors tab may be visible to other workspace members if they have the necessary permissions.
- Bad Request: Any error thrown by your code not covered by the other errors.
- Invalid Settings: A configuration error prevented Segment from executing your code. If this error persists for more than an hour, contact Segment Support.
- Message Rejected: Your code threw
InvalidEventPayloadorValidationErrordue to invalid input. - Unsupported Event Type: Your code doesn't implement a specific event type (for example,
onTrack()) or threw anEventNotSupportederror. - StatusCode: 429, TooManyRequestsException: Rate Exceeded: Rate limit exceeded. These events will be retried when the rate becomes available.
- failed calling Tracking API: the message is too large and over the maximum 32KB limit: Segment's Tracking API can only handle API requests that are 32KB or smaller. Reduce the size of the request for Segment to accept the event.
- Retry: Your code threw
RetryErrorindicating that the function should be retried.
Segment only attempts to run your source function again if a Retry error occurs.
Functions have specific roles which can be used for access management in your Segment workspace.
Access to functions is controlled by two permissions roles:
- Functions Admin: Create, edit, and delete all functions, or a subset of specified functions.
- Functions Read-only: View all functions, or a subset of specified functions.
You also need additional Source Admin permissions to enable source functions, connect destination functions to a source, or to deploy changes to existing functions.
If you are a Workspace Owner or Functions Admin, you can manage your source function from the Functions tab in the catalog.
Info
You must be a Workspace Owner or Source Admin to connect an instance of your function in your workspace.
From the Functions tab, click Connect Source and follow the prompts to set it up in your workspace.
After configuring, find the webhook URL - either on the Overview or Settings → Endpoint page.
Copy and paste this URL into the upstream tool or service to send data to this source.
Segment retries invocations that throw RetryError or Timeout errors up to six times. After six attempts, the request is dropped. The initial wait time for the retried event is a random value between one and three minutes. Wait time increases exponentially after every retry attempt. The maximum wait time between attempts can reach 20 minutes.
Retry errors only appear in the source function error logs if the event has exhausted all six retry attempts and, as a result, has been dropped.
If an event is successfully ingested after multiple retry attempts, records of any previous retry attempts remain in the source function error log.
The maximum payload size for an incoming webhook payload is 512 KiB.
The execution time limit is five seconds, however we strongly recommend that you keep execution time as low as possible. If you are making multiple external requests you can use async or await to make them concurrently, which will help keep your execution time low.
Segment alphabetizes payload fields that come in to deployed source functions. Segment doesn't alphabetize payloads in the Functions tester. If you need to verify the exact payload that hits a source function, alphabetize it first. You can then make sure it matches what the source function ingests.
GET requests are not supported with a source function. Source functions can only receive data through POST requests.
No. Tracking Pixels operate client-side only and need to be loaded onto your website directly. Source functions operate server-side only, and aren't able to capture or implement client-side tracking code. If the tool you're hoping to integrate is server-side, then you can use a Source function to connect it to Segment.
The test function interface has a 4KB console logging limit. Outputs surpassing this limit will not be visible in the user interface.
No, Source functions can't send custom responses to the tool that triggered the Function's webhook. Source functions can only send a success or failure response, not a custom one.
Why am I seeing the error "Functions are unable to send data or events back to their originating source" when trying to save my Source Function?
This error occurs because Segment prevents Source functions from sending data back to their own webhook endpoint (https://fn.segmentapis.com). Allowing this could create an infinite loop where the function continuously triggers itself.
To resolve this error, check your Function code and ensure the URL https://fn.segmentapis.com is not included. This URL is used to send data to a Source Function and shouldn't appear in your outgoing requests. Once you remove this URL from your code, you'll be able to save the Function successfully.