A Basic Segment Installation
When you implement Segment, you add Segment code to your website, app, or server. This code generates messages based on specific triggers you define.
In a basic implementation, the code can be a snippet of JavaScript that you copy and paste into the HTML of a website to track page views. It can also be as complex as Segment calls embedded in a React mobile app to send messages when the app is opened or closed, when the user performs different actions, or when time based conditions are met, for example "ticket reservation expired" or "cart abandoned after 2 hours".
The best way to learn about how Segment works is to see it in action. This tutorial walks you through an installation using one of Segment's libraries: JavaScript, PHP, or the iOS library.
Before you start your Segment implementation, you need:
- A Segment user account and a workspace. If you're not already part of an organization with a Segment Workspace, you can sign up for a free account and workspace.
- Access to the code for a basic website, PHP website, or an iOS app.
Success!
If you don't have any of those things, consider creating a simple GitHub Pages website.
When you develop and test sources, Segment recommends you create and use separate sources for each of your environments (production, development, staging) to prevent testing and development activities from filling production systems with invalid data.
You can give each source an environment label when you create it, and Segment strongly suggests that you use these labels to sort your sources. When you create a source during the steps below, make sure you enter an environment label.
Warning
Double-check when you enter write keys for dev and production environments to make sure that you send the right data to the right place.
To create a Segment source:
- Go to your Segment workspace, and navigate to the Sources catalog.
- Select your source. You can choose from either the Javascript source, the PHP source, or the iOS source.
- Click Add Source.
- Enter a name for the source. Segment recommends that you include the word
demo,test, orquickstartin the name so you can easily find and delete this source later. - (Optional) Add an Environment label of
devto the source in the Labels field. Segment recommends you do this so that you know this demo source isn't part of a production installation. - (Optional) Add the website URL. Segment provides this field so that you can flag the website being tracked to the source. Segment does not use this URL anywhere else.
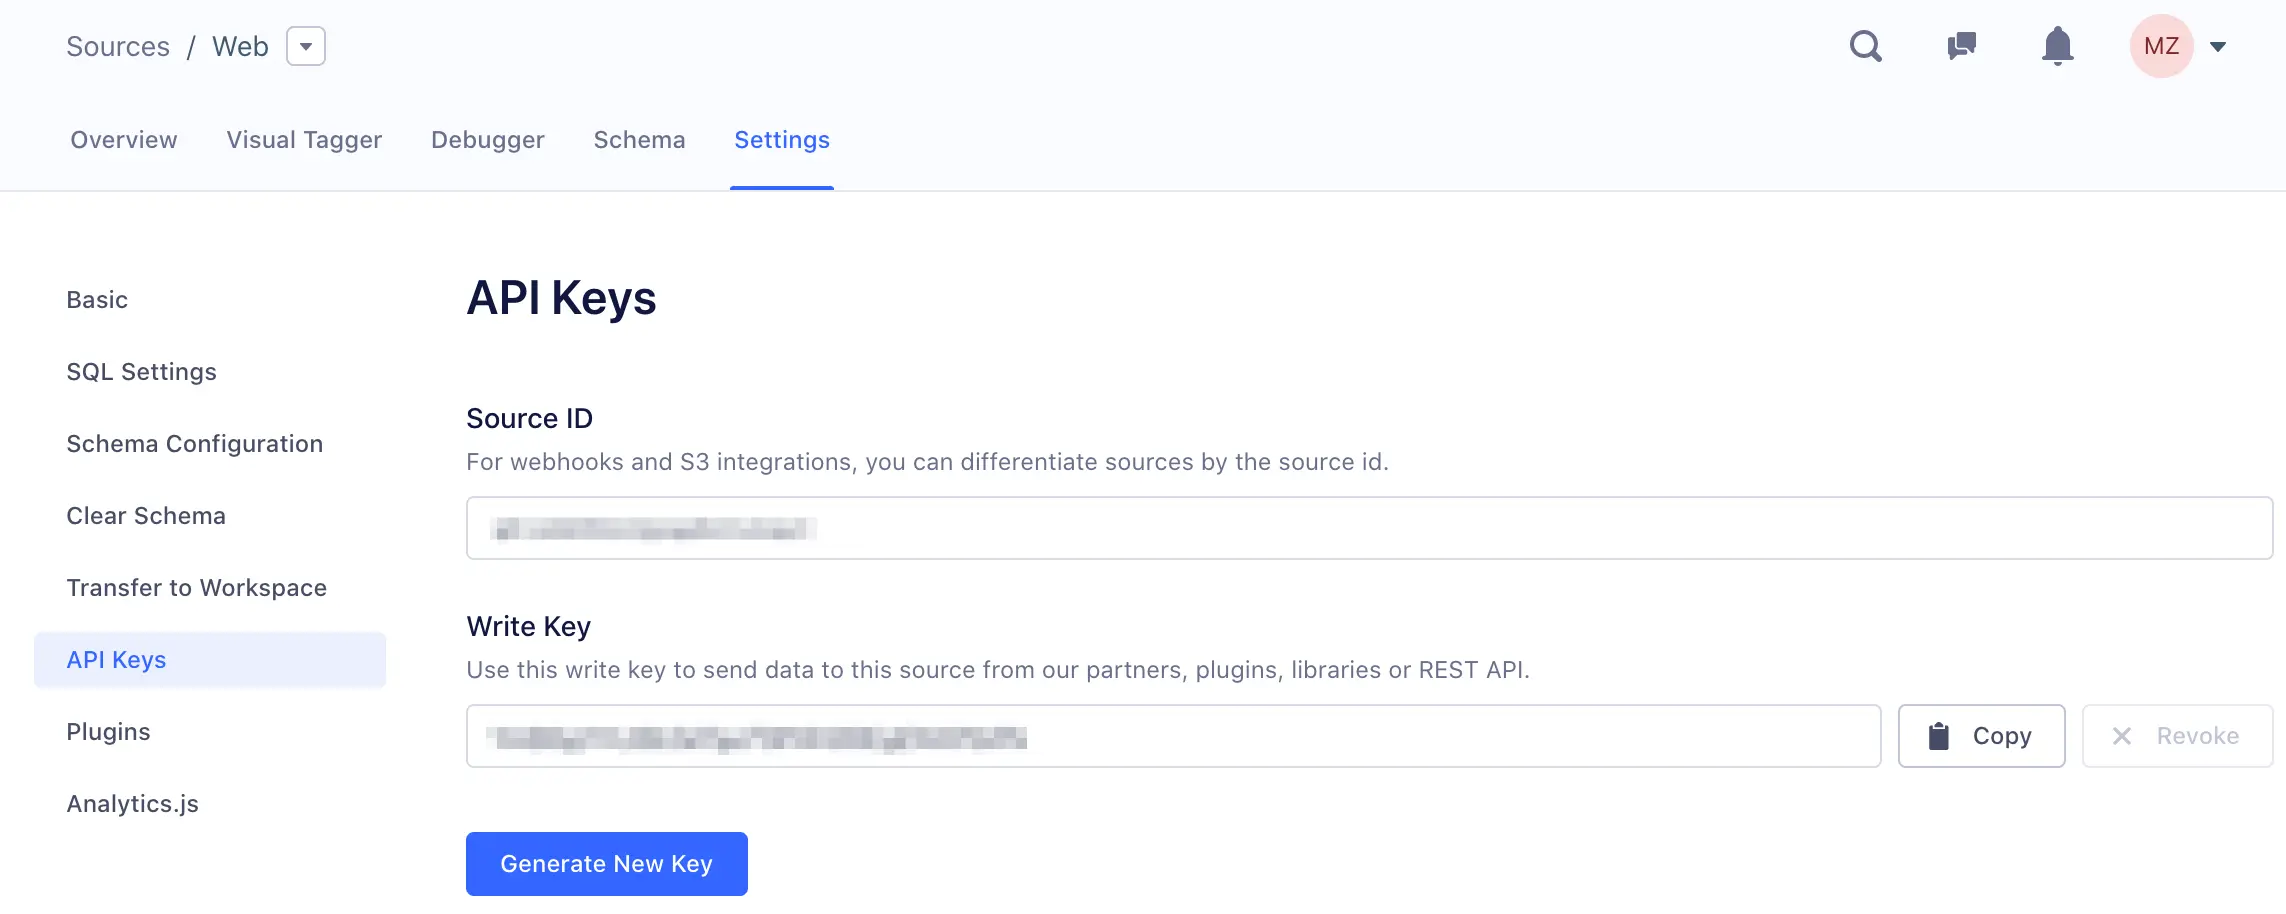
The write key is a unique identifier for a source that tells Segment which source the data comes from, to which workspace the data belongs, and which destinations should receive the data.
To find your write key:
- Go to Connections > Sources and select your source.
- Click the Settings tab for the source and click API Keys.
Make note of the write key, as you'll need it in the next steps.
Any time you change a library's settings in the Segment App, the write key regenerates.
Info
Cloud-sources do not have write keys as they use a token or key from your account with that service. Cloud-sources have other considerations and aren't part of this tutorial.
Click a tab to see the tutorial content for the specific library you chose.
Step 1: Copy the snippet
Navigate to Connections > Sources > JavaScript in the Segment app, copy the snippet from the JavaScript Source overview page, and paste it into the <head> tag of your site.
That snippet loads Analytics.js onto the page asynchronously, so it won't affect your page load speed. Once the snippet runs on your site, you can turn on destinations from the destinations page in your workspace and data starts loading on your site automatically.
Info
The Segment snippet version history available on GitHub. Segment recommends that you use the latest snippet version whenever possible.
Step 2: Identify users
The Identify method tells Segment who the current user is. It includes a unique user ID and any optional traits you know about them. You can read more about it in the Identify method reference.
You don't need to call identify for anonymous visitors to your site
Segment automatically assigns them an anonymousId so just calling page and track works without identify.
Here's an example of what a basic call to identify might look like:
1analytics.identify('f4ca124298', {2name: 'Michael Brown',3email: 'mbrown@example.com'4});
This identifies Michael by his unique userId, in this case, f4ca124298, which is what you know him by in your database. He is labelled with name and email traits. When you put that code on your site, you need to replace those hard-coded trait values with the variables that represent the details of the currently logged-in user.
To do that, we recommend that you use a backend template to inject an Identify call into the footer of every page of your site where the user is logged in. That way, no matter what page the user first lands on, they will always be identified. You don't need to call identify if your unique identifier (userId) is not known.
Depending on your templating language, your actual identify call might look something like this:
1analytics.identify(' {{user.id}} ', {2name: '{{user.fullname}}',3email: '{{user.email}}'4});
With that call in your page footer, you successfully identify every user that visits your site.
Success!
You've completed a basic CRM set up. Return to the Segment app to enable Salesforce, Intercom, or your CRM system of choice and Segment starts sending all of your user data to it.
Step 3: Track actions
The Track method tells Segment about the actions your users are performing on your site. Every action triggers an "event", which can also have associated properties. You can read more about track in the Track method reference.
Here's an example of what a call to track might look like when a user signs up:
1analytics.track('Signed Up', {2plan: 'Enterprise'3});
This example shows that your user triggered the Signed Up event and chose your hypothetical 'Enterprise' plan.
Properties can be anything you want to record, for example:
1analytics.track('Article Bookmarked', {2title: 'Snow Fall',3subtitle: 'The Avalanche at Tunnel Creek',4author: 'John Branch'5});
If you're just getting started, some of the events you should track are events that indicate the success of your site, like Signed Up, Item Purchased or Article Bookmarked. We recommend that you track a few important events as you can always add more later.
Once you add a few Track calls, you're done with setting up Segment. You successfully installed Analytics.js tracking. Now you're ready to turn on any destination you like from the Segment App.
Once you've set up your Segment library, and instrumented at least one call, you can look at the Debugger tab for the Source to check that it produces data as you expected.
The Source Debugger is a real-time tool that helps you confirm that API calls made from your website, mobile app, or servers arrive at your Segment Source, so you can quickly see how calls are received by your Segment source, so you can troubleshoot quickly without having to wait for data processing.
The Debugger is separate from your workspace's data pipeline, and is not an exhaustive view of all the events ever sent to your Segment workspace. The Debugger only shows a sample of the events that the Source receives in real time, with a cap of 500 events. The Debugger is a great way to test specific parts of your implementation to validate that events are being fired successfully and arriving to your Source.
Success!
To see a more complete view of all your events, consider setting up either a warehouse or an S3 destination.
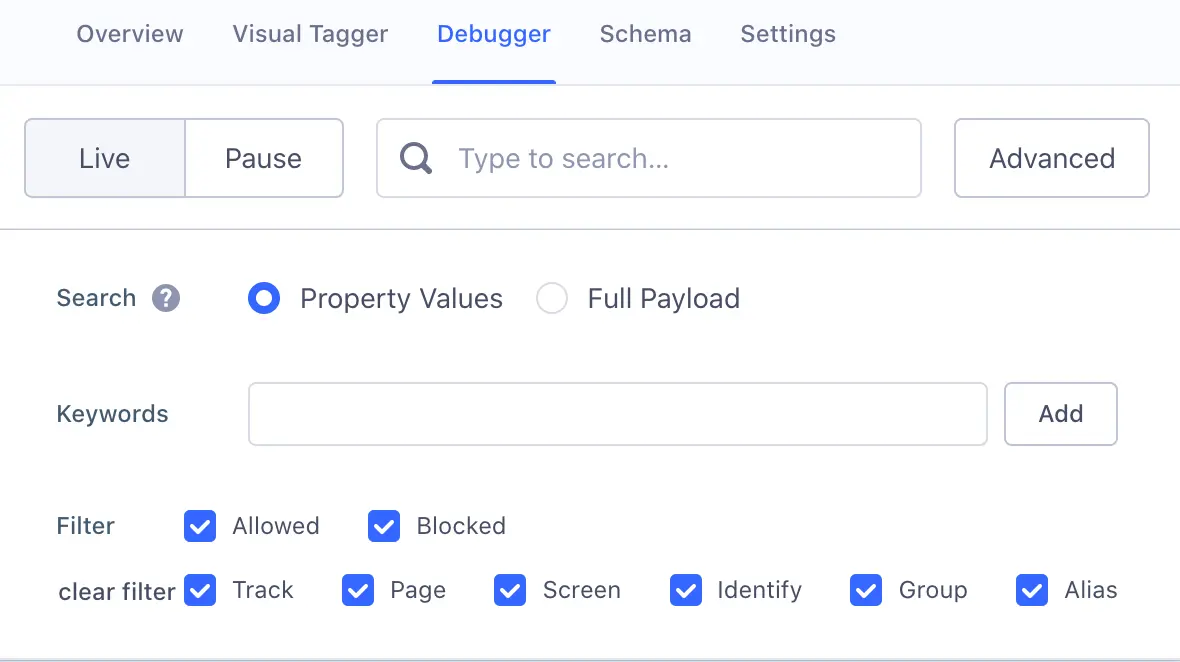
The Debugger shows a live stream of sampled events arriving at the Source, but you can also toggle from "Live" to "Pause" to stop the stream and prevent it from displaying new events. Events continue to arrive to your Source while you Pause the stream, they just are not displayed.
You can search on any information you know is available in an event payload to search in the Debugger and show only matching payloads. You can also use advanced search options to limit the results to a specific event.
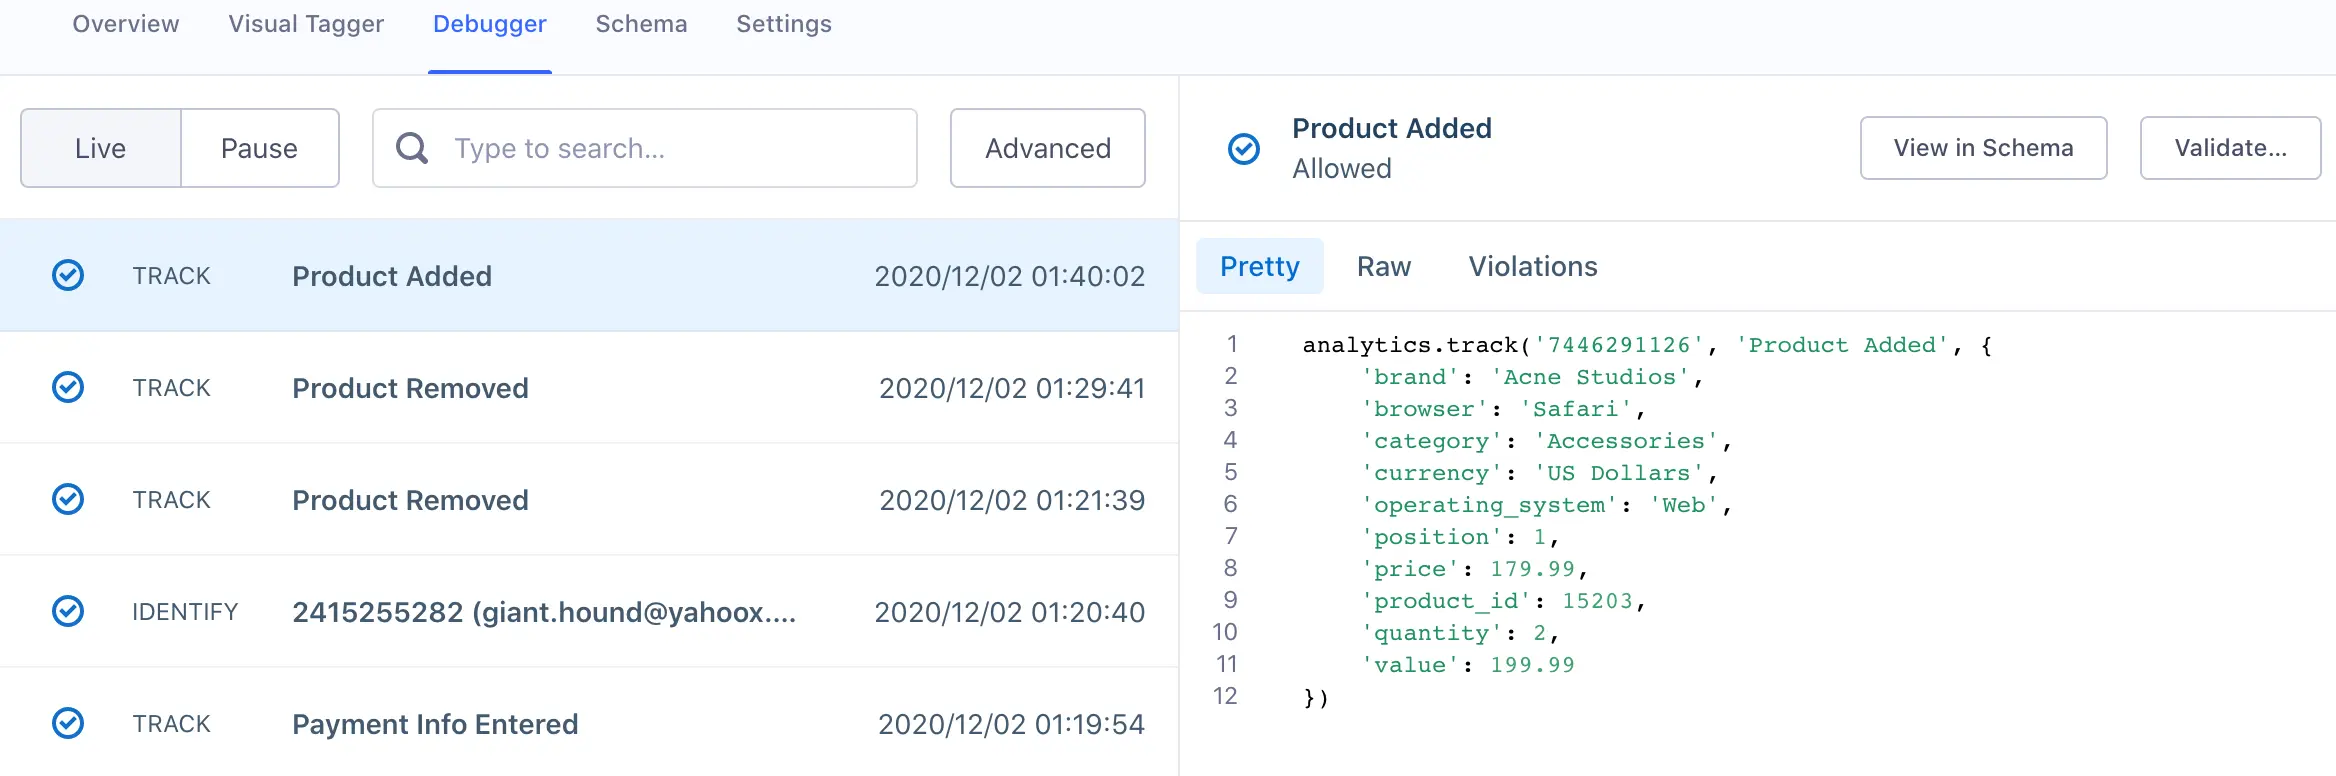
Two views are available when viewing a payload:
- The Pretty view is a recreation of the API call you made that was sent to Segment.
- The Raw view is the complete JSON object Segment received from the calls you sent. These calls include all the details about what is being tracked: timestamps, properties, traits, ids, and contextual information Segment automatically collects the moment the data is sent.
Once you're satisfied that data is arriving from your new source, it's time to set up your first destination. As long as you have page or screen data coming from the source, you can enable Google Analytics to look at the page view statistics.
If you don't have a Google Analytics account, you can either set up a free account, or look at the Destination Catalog for a different destination to enable.
You need a tracking ID for Google Analytics (either a "website" or "serverside" tracking ID), or another API key if you're substituting another destination. Make a note of this ID or key as you need it to connect your destination.
To set up your first destination:
- Go to your Segment workspace, click Destinations, and click Add Destination to go to the Catalog.
- Search for the destination you want to add. In this case, search for
Google Analytics. - Click the tile for the destination to see information about it.
- Click Configure Google Analytics.
- Select the source that you set up earlier in this quickstart, then click Confirm Source.
- On the settings page, locate the setting line for the tracking ID or other API key to connect to your destination.
- Enter the ID or API key and click Save.
- Click Back to Destination, then click the toggle to enable the destination.
Data is now flowing from the source you set up, to the first destination. Do some test browsing on your site or app, then log in to your downstream tool to see the data in place.
You can click around and load pages to see your Segment calls in action, watch them arrive in the Debugger, and see them arrive in the destination tool.
Warning
Note: When you're done with this test source and destination, you can delete them. This prevents you from getting unplanned "demo" data in your production environment later.