How to Create a Subuser with the API
Creating a subuser through SendGrid's API is a multi-step process. To create a subuser account using only API calls, complete the steps in this guide.
The subuser creation API call establishes the new subuser's account and profile settings. This call creates the subuser account, but it does not apply the sending IP, establish a domain authentication entry, or enable website or SMTP access for the subuser.
https://api.sendgrid.com/apiv2/customer.add.json?api_user=ryan.burrer@sendgrid.com&api_key=xxxxxx&username=newsubuser_username&website=example.com&password=newsubuser_password&confirm_password=newsubuser_password&first_name=Ryan&last_name=Burrer&address=555_anystreet&city=any_city&state=CO&zip=80203&email=example@example.com&country=US&phone=555-5555
Success Message

Failure Message
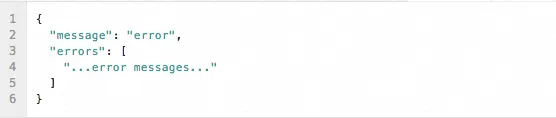
After you create the subuser account, add an IP so that it can send emails. Find an available IP for the subuser with the following call:
https://api.sendgrid.com/apiv2/customer.ip.xml?api_user=ryan.burrer@sendgrid.com&api_key=xxxxxx&list=all
When defining the parameter 'list', there are a few options you can choose:
- All - Will list all of the IPs on your account, taken or available.
- Free - Will list all the free IPs on your account. For instance, if an IP is in use by a subuser or parent account then that IP will not be listed.
- Taken - Will list all of the IP addresses that are assigned to your parent and subuser accounts.
- Available - Will list all of the unassigned IP addresses for the account. If a subuser is deactivated and it is assigned an IP, that IP will show up on this list since that IP address is not technically in use.
Response Example

After you have selected the IP that you wish to assign to your subuser account, make the API call to append the IP address.
https://api.sendgrid.com/apiv2/customer.sendip.json?api_user=ryan.burrer@sendgrid.com&api_key=xxxxxx&task=append&set=specify&user=newsubuser_username&ip[]=255.255.255.250&ip[]=255.255.255.255
When defining this call's 'set' parameter, you have a few options for appending the subuser's IP:
- None - removes all of the IPs on the associated account.
- All - applies all of the possible IPs to the account.
- Specify - Specify the IPs to the subuser
Success Message
Failure Message
After you create the subuser account and append an IP address, you can assign an existing authenticated domain to the account. If you have not yet created the required records for authenticating your chosen domain, skip this step.
First, you should find out what authenticated domains you have associated with your account. This call will list your available authenticated domains:
https://api.sendgrid.com/apiv2/customer.whitelabel.json?api_user=ryan.burrer@sendgrid.com&api_key=xxxxxx&task=list
Response Example
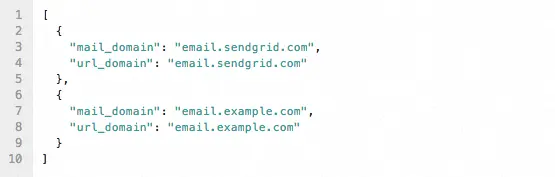
The API response above shows that email.sendgrid.com and email.example.com are both already established domain entries, and can be used by this subuser. If none are displayed then the next step in this process should be skipped.
If you have an authenticated domain entry that you wish to apply to your subuser then you will need to append the authenticated domain entry to your subuser:
https://api.sendgrid.com/apiv2/customer.whitelabel.json?api_user=ryan.burrer@sendgrid.com&api_key=xxxxxx&task=append&user=newsubuser_username&mail_domain=YOUR.ALREADY.EXISTING.AUTHENTICATED_DOMAIN
Success Message
Failure Message
The final step is to activate the subuser account so that it has website and SMTP access.
https://api.sendgrid.com/apiv2/customer.auth.json?api_user=ryan.burrer@sendgrid.com&api_key=xxxxxx&user=newsubuser_username&password=newsubuser_password
Success Message
Failure Message