KORE acquired Twilio's IoT business unit on June 1, 2023.
On this page
Link Your Twilio & KORE Accounts
Unless you were notified otherwise, your IoT product usage will no longer be charged to your Twilio account balance. Instead, your IoT product usage will be charged to your KORE account, which we'll help you set up by following this step-by-step guide.
Any contractual discounts you have on IoT products will continue to apply. How you are billed for using any other Twilio products does not change.
If you have any questions, please contact your IoT sales specialist, Twilio account representative, or contact Twilio customer support.
(warning)
Warning
The guide below assumes you already have a Twilio account. If you don't have one yet, you can create one for free.
You will use the KORE Console to manage your billing. For all other aspects of managing your Twilio IoT products, you will use the Twilio APIs and Console. Once equivalent functionality is available in the KORE Console and APIs, we'll provide you with product updates and transition guides.
Now that KORE has acquired Twilio's IoT business unit and products, your Twilio account balance will not be charged for IoT product usage. Any funds on your Twilio account balance cannot be transferred to KORE or applied towards IoT usage. You still still see IoT usage shown in your Twilio Usage Summary or priced usage in the IoT portion of the Twilio Console but that usage will not appear on your Twilio invoice and will not draw from your Twilio account balance*.
(error)
Danger
You must keep your Twilio active and in good standing to be able to use the Twilio Console and APIs to manage your IoT products. If your Twilio account becomes suspended, which will typically happen if your Account Balance becomes negative, you will be blocked from using the Twilio Console and APIs.
* A handful of existing customers with contractual agreements that could not be immediately transferred to KORE will continue to pay for IoT usage through Twilio until new contracts of executed. The communications sent to you on June 1 notifying you that the acquisition completed would have included information about this if it applies to you. Additionally, KORE and Twilio sales representatives will reach out to you to discuss next steps.
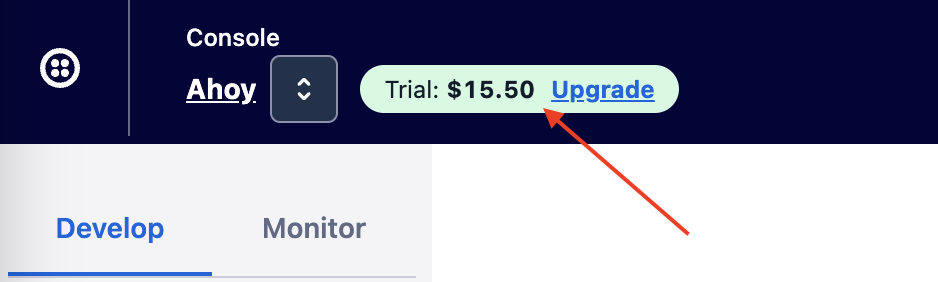
If you don't intend to use other Twilio products, you do not need to upgrade your Twilio trial account to complete the process below and begin ordering and using IoT products. Upgrading your Twilio account requires you to load $20 into your Twilio account balance and may unlock some Twilio products or features that are restricted to trial accounts. Remember though, you will be charged by KORE for all IoT usage regardless of your Twilio account status .
Current or future restrictions to Twilio trial accounts may negatively impact what you can do within Twilio's Console or APIs and it is recommended to upgrade your Twilio account if you are planning a production use case.
If you owned multiple Twilio accounts that used IoT products prior to June 1, 2023, when you complete the account linking process on one account, KORE will check if there are other accounts in the data transferred from Twilio that are also owned by you based on your email address. If any are found, KORE will create additional accounts in the background for you and link those accounts together so you don't have to repeat this entire process for each one and fill in any remaining account information that is required by KORE. You will receive an email when you link your first one letting you know which accounts need your attention. You can switch between the KORE accounts that belong to your email address from the KORE Console.
At the moment, except for those in the case above where KORE made multiple accounts that belong to the same email address, you cannot re-use the same email address to manage multiple KORE accounts. If you have multiple Twilio accounts but they were not included in the data provided by Twilio, or you want to use multiple Twilio accounts in the future, you will need to use a different email address for each of their corresponding KORE accounts. KORE is planning to add the ability to create multiple KORE accounts and relate them back to the same owner email address.
(information)
Info
If you need to use multiple email addresses to create KORE accounts, you can leverage plus addressing to create unique logins but have all emails come to the same inbox. For example, if you created an account for alice+account2@gmail.com, all of the emails for that account such as one time passwords (OTPs) or billing alerts will be delivered to alice@gmail.com. To help manage multiple logins, consider using a password manager.
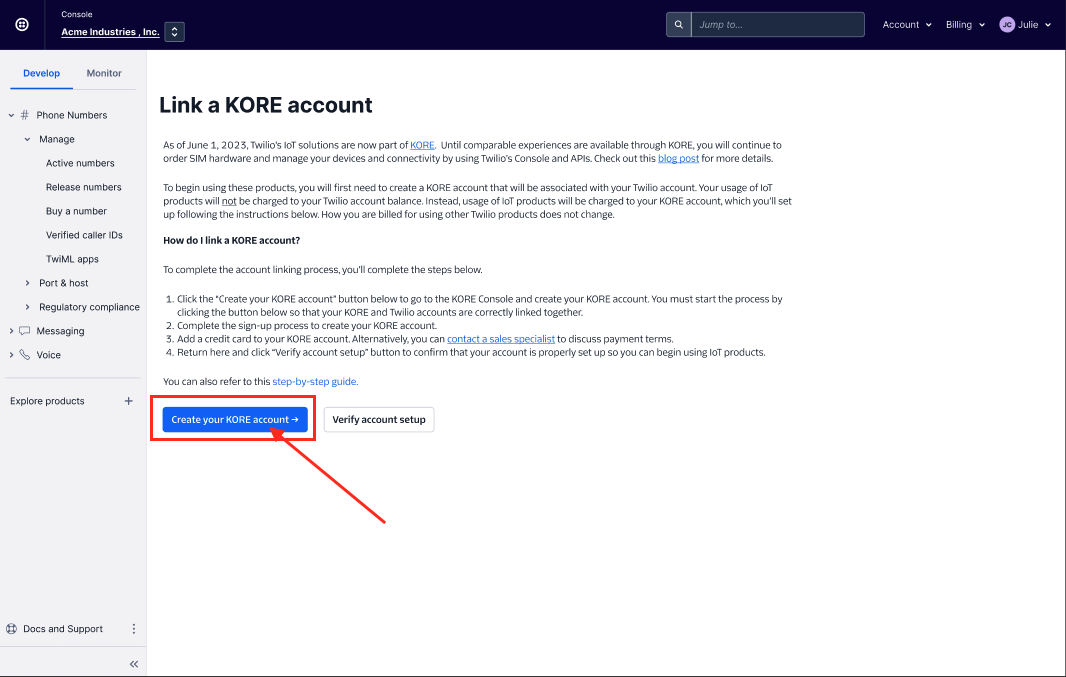
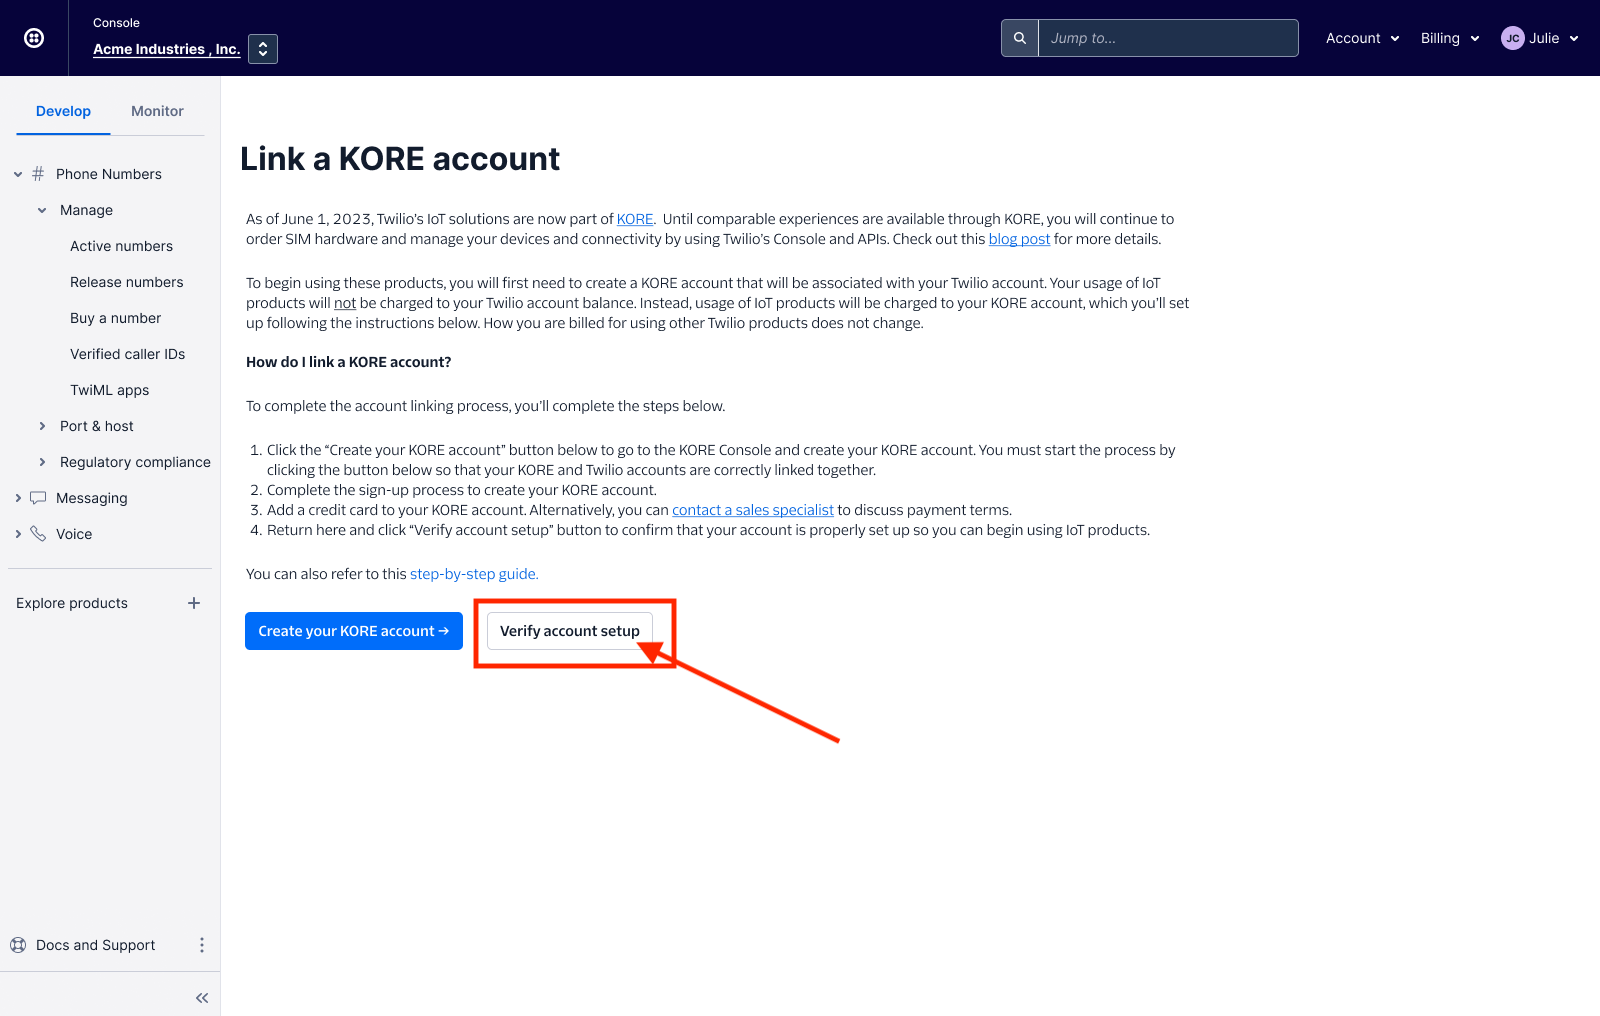
When you enter the Internet of Things section of Console and navigate to any place other than the Overview page, you will be greeted with a page asking you to link a KORE to your Twilio account. To link your accounts, you'll need to complete the following steps, each of which we'll guide you through below:
- Click the "Create your KORE account" button to go to the KORE Console and create your KORE account. You must start the process by clicking the button from Console so that your KORE and Twilio accounts will be correctly linked together.
- Complete the sign-up process to create your KORE account.
- Add a credit card to your KORE account. Alternatively, you can contact a sales specialist to discuss payment terms.
- Return to the Twilio Console and click the "Verify account setup" button to confirm that your account is properly set up so you can begin or continue using IoT products.
(information)
Info
If you have active SIMs that you may need to access immediately, don't worry. You'll have the option to complete this linking process later. Just come back and do it when you can before July 19 so you don't have any interruptions to your service. You can access the page directly by going to https://console.twilio.com/us1/develop/iot/link-kore-account.
While viewing the "Link a KORE account" page in the Twilio Console, click the "Create your KORE account" button to go to the KORE Console and create your KORE account.
(error)
Danger
You must navigate to the KORE Console by clicking the "Create your KORE account" button in the Twilio Console. The URL generated contains your encrypted Account SID so your Twilio and KORE accounts can be properly linked. If you make an account by going directly to the KORE Console, this critical information will be missing and your accounts won't be linked.
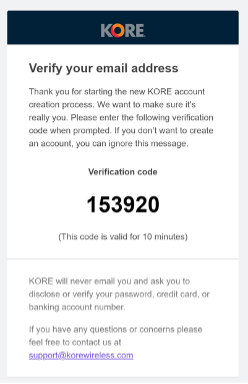
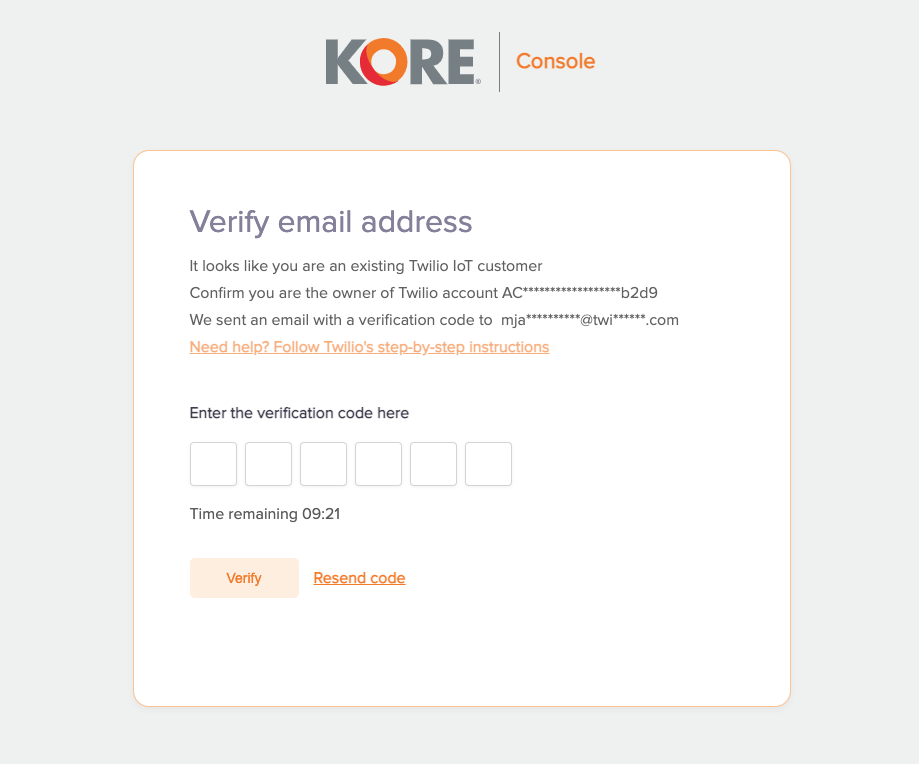
Once at the KORE Console, you'll be greeted by one of two experiences depending on whether or not you were already an existing Twilio IoT customer before July 19, 2023. If the email for your Twilio account's owner is found in the data provided to KORE to ensure continuity, you'll use that email to create your account. Otherwise, you'll be prompted to provide an email. In either case, a one time password (OTP) will be sent to verify your ownership of that email.
Check your email for the OTP from KORE.
Return to the KORE Console to enter the OTP that was sent to you.
With your email now verified, you'll be prompted to set a password for your KORE account.
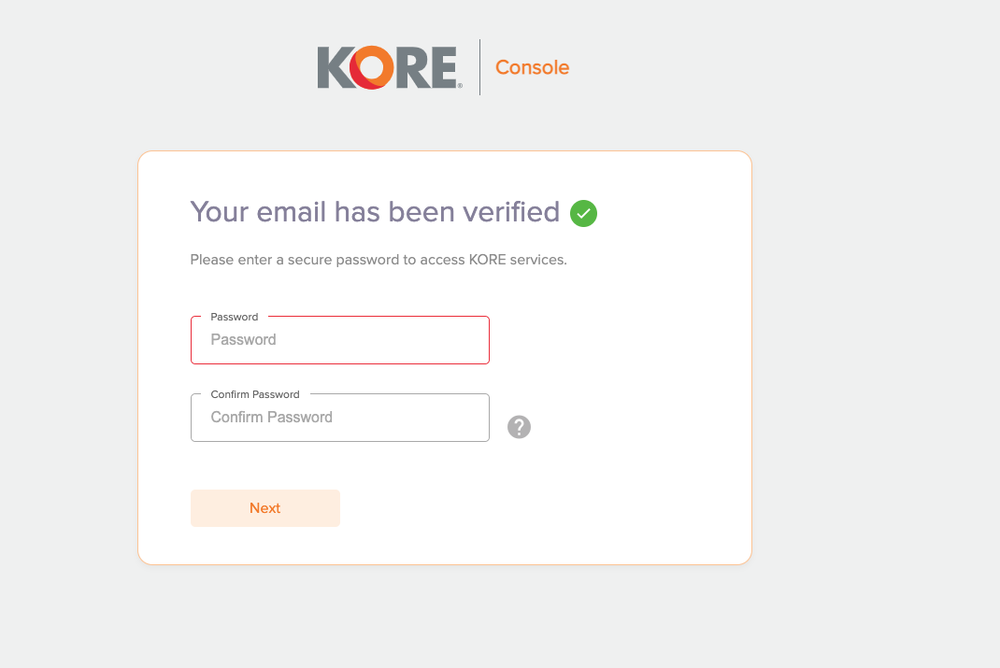
KORE has added an extra layer of security to secure your account. Go ahead and select a 2FA option.
If you select email, we'll use the same email address from earlier. You don't need to verify it again.
If you select Phone Number (SMS), the phone number you specify will also be used as the personal number for your KORE account. You'll need to verify the phone number through another OTP code that will be sent to you. Enter your number and click "Get Verification Code". A OTP SMS will be sent to you. Enter that code to verify your phone number and move onto the next step.

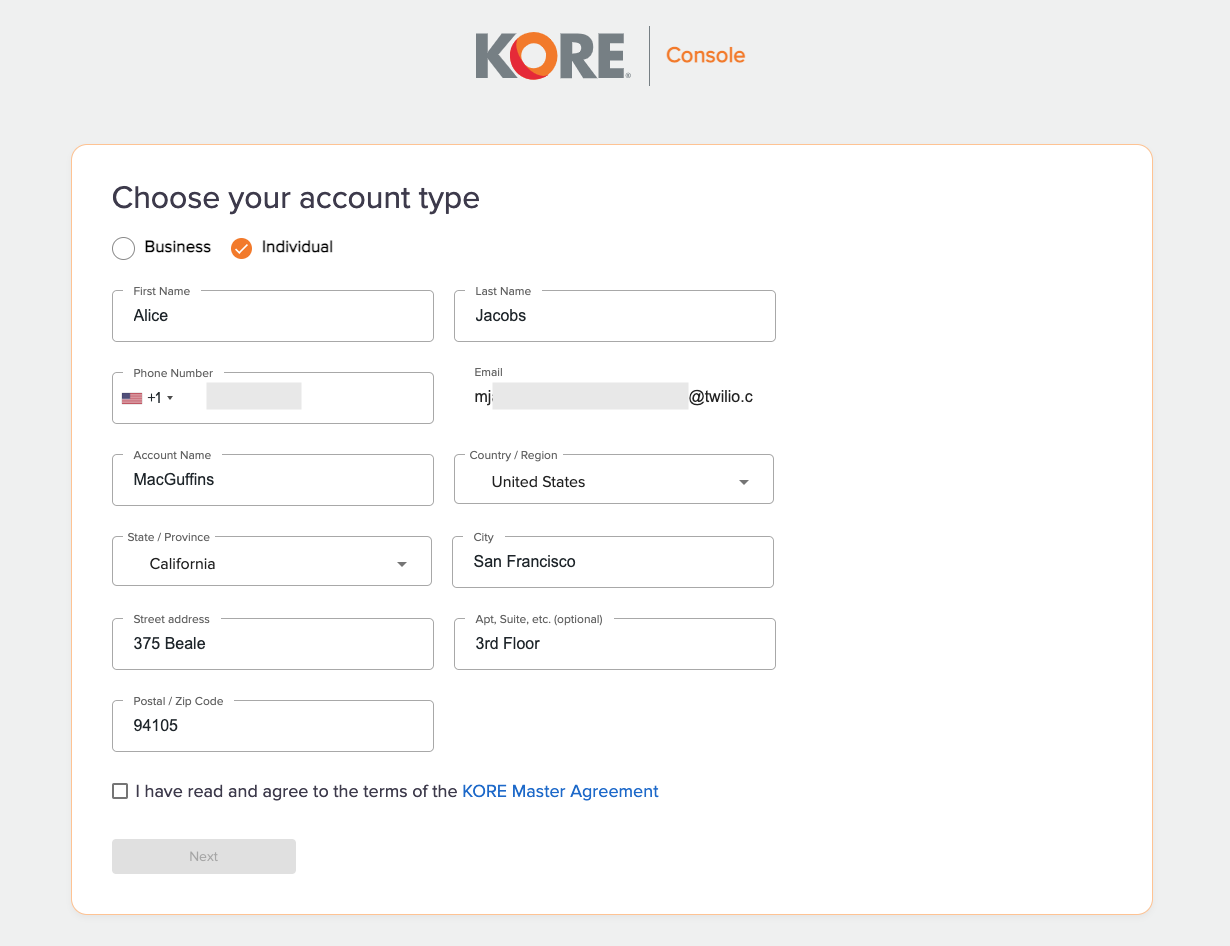
Now that KORE has verified who you are and you've secured your login, we need you to know some information about you or your business.
Select whether you are signing up as an individual or as a business.
- Individual: You're looking to try out our services or build something on your own.
- Business: You represent and can provide information about your company.
(information)
Info
Not sure which to pick? Maybe you're a developer at a company building out an MVP for a new project but you don't know your company's tax ID. Don't worry. You can sign up as an individual and work with customer support or an account representative to upgrade to a business account later.
Whether you're signing up as an individual or a business, you'll need to accept KORE's Master Agreement. Feel free to review the terms and then click the checkbox indicating that you agree to them.
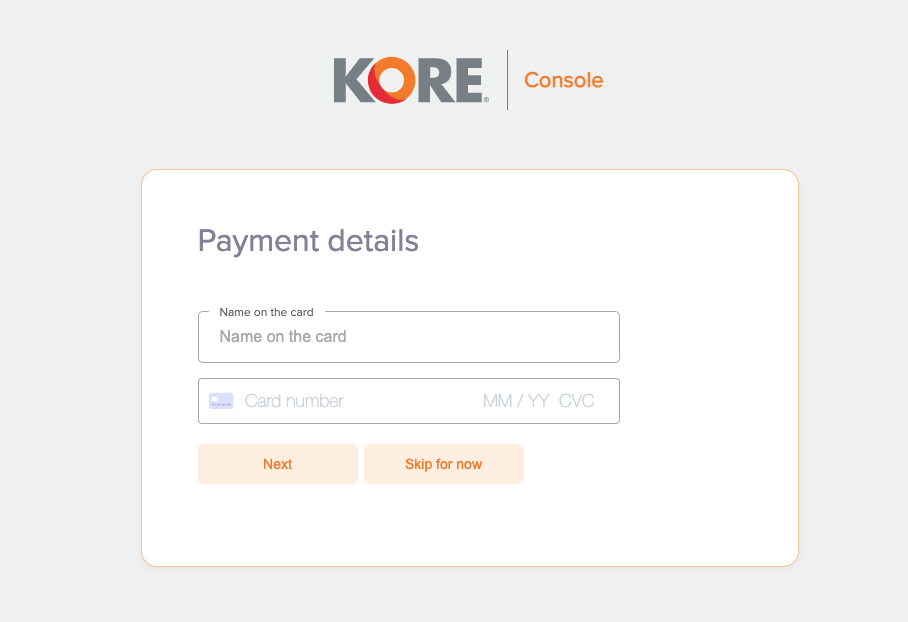
The easiest way to add a payment method to your KORE account is to add a credit card during the account creation process. If you're following this step-by-step guide to create your KORE account then you should have just finished adding your account details and are now being prompted to add a credit card.
(warning)
Warning
You can skip adding a credit card for now but you will not be able to order or begin using IoT products ordered through Twilio Console until you have a credit card added to your KORE account or you've been approved for payment terms. If you have payment terms with Twilio for your IoT services, you will have the same payment terms with KORE, so you do not need to apply for terms. Please click here for the remittance information for KORE.
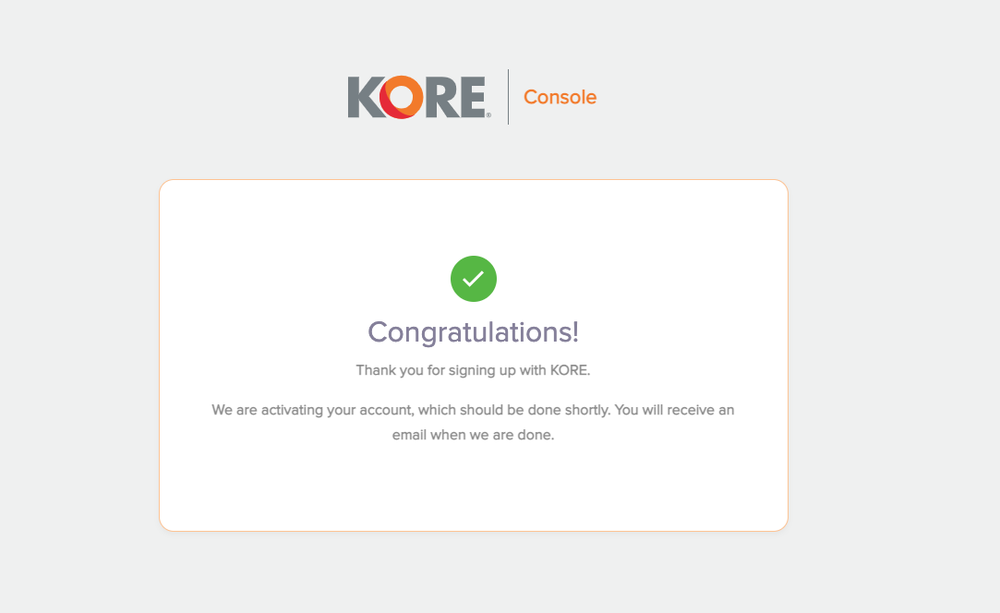
Congratulations! You've successfully created your KORE account. But hang in there. You're not quite done yet.
If you skipped adding a credit card during the account creation process or need to add a different one later, log into the KORE Console and select Billing from the side navigation.
With your KORE account set up, including having a payment method configured, return to the "Link a KORE Account" page in the Twilio Console.
Click the "Verify account setup" button. We'll check in with KORE's account service to confirm that everything is properly setup.
If everything has been correctly set up, which it should be if you followed this guide, you'll be greeted with a success message letting you know that your Twilio and KORE accounts have been successfully linked. If you're missing any information or you didn't add a credit card during the KORE account setup process, you'll be prompted to return to the KORE Console to finish adding that information.
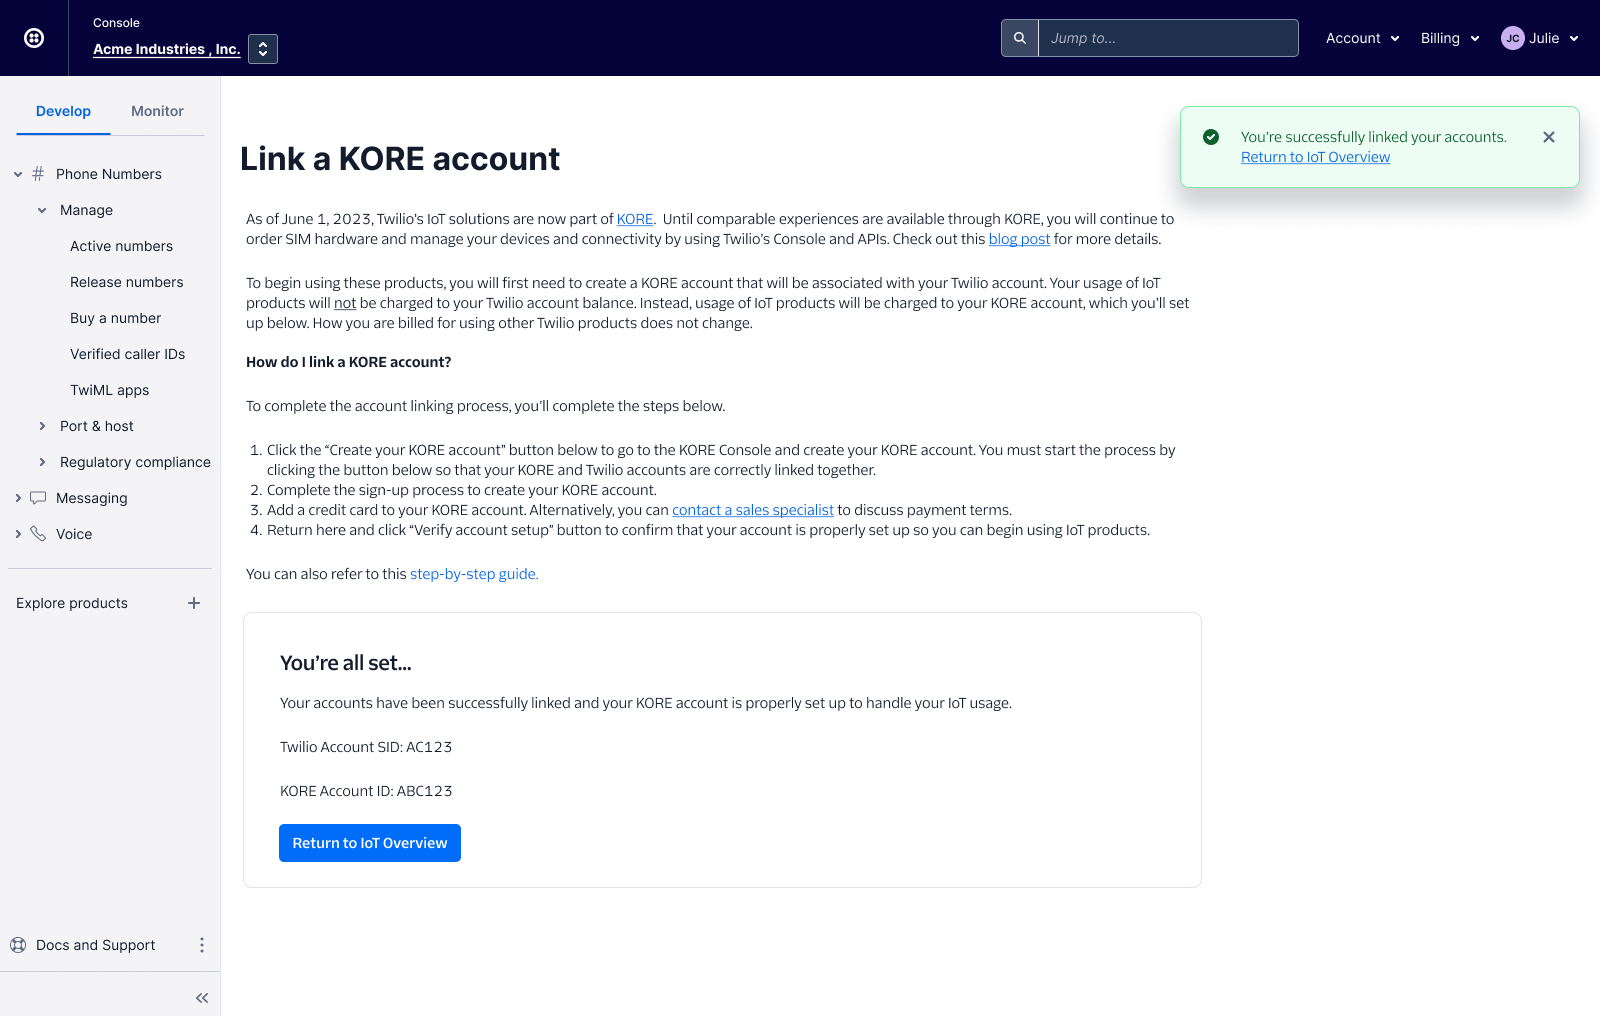
You're all done!
You can now click the button or the link in the success message to take you back to the IoT Overview page or navigate to any other pages.
(warning)
Warning
If you're new to using our IoT products, then the next place you'll probably want to go is the Order page to get the hardware you need to get started.