How to Set up iPhones for Super SIM
Super SIM is a data-oriented product. Though Super SIM doesn't support direct voice calling, many customers work with these devices to run voice and messaging apps over data — great applications for Super SIM — or to help them debug issues they may be experiencing with IoT hardware they have designed. Seeing a phone get a data connection with Super SIM indicates that the problem may lie with hardware.
We recommend using an Android device for tests like these because iOS' APN (Access Point Name) management system can sometimes prevent you from entering — or retaining — the Super SIM APN, super, especially in circumstances where Super SIM's IMSI switching functionality comes into play. If you must use an iOS device, please try to use an iPad as we have found them to be 'kinder' to user-specified APNs than iPhones are.
That said, using an iPhone for phone-mediated testing may be a requirement you must meet, so this short guide provides a tested way of imposing the Super SIM APN on an iPhone which may not be retaining a manually entered APN, or falling back to older, slower radio access technologies, such as 3G.
To follow this guide, you will need a Mac and an Apple ID for access to the macOS App Store.
Apple provides a free tool called Apple Configurator 2 which is to help organizations manage fleets of iOS devices. It lets you set up a Configuration Profile with a pre-defined cellular APN. This Configuration Profile can then be applied to all of your iPhones.
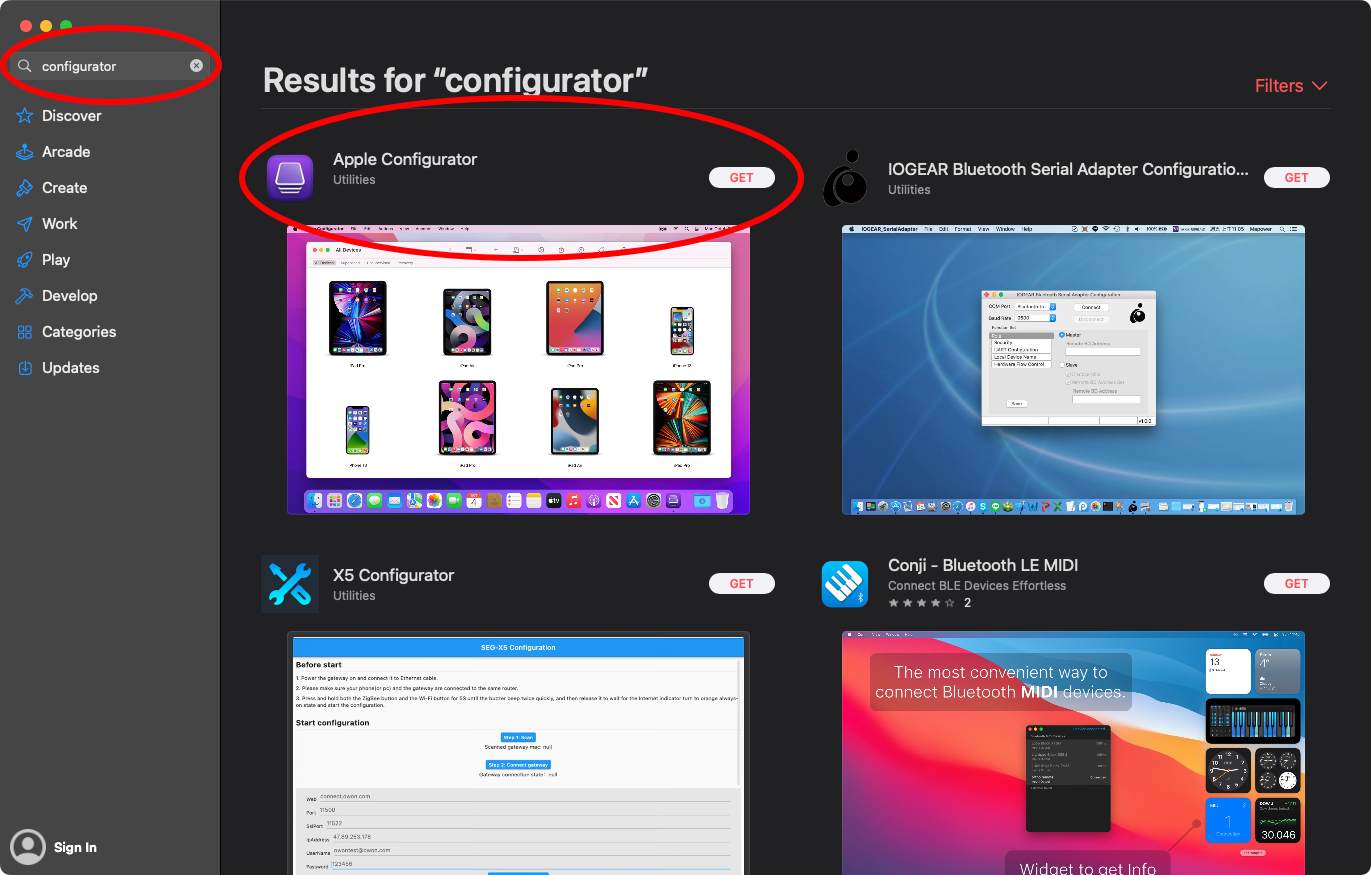
Go to the macOS App Store (Apple Menu > App Store...) and enter configurator into the search field at the upper left of the App Store window. Hit Enter and then click the Get button alongside the Apple Configurator entry that will appear:
You will need to sign in using your Apple ID if you have not already done so.
-
Click the
Open
button in App Store, or launch
Apple Configurator
from your
Applicationsfolder. - Select New Profile from the File menu.
-
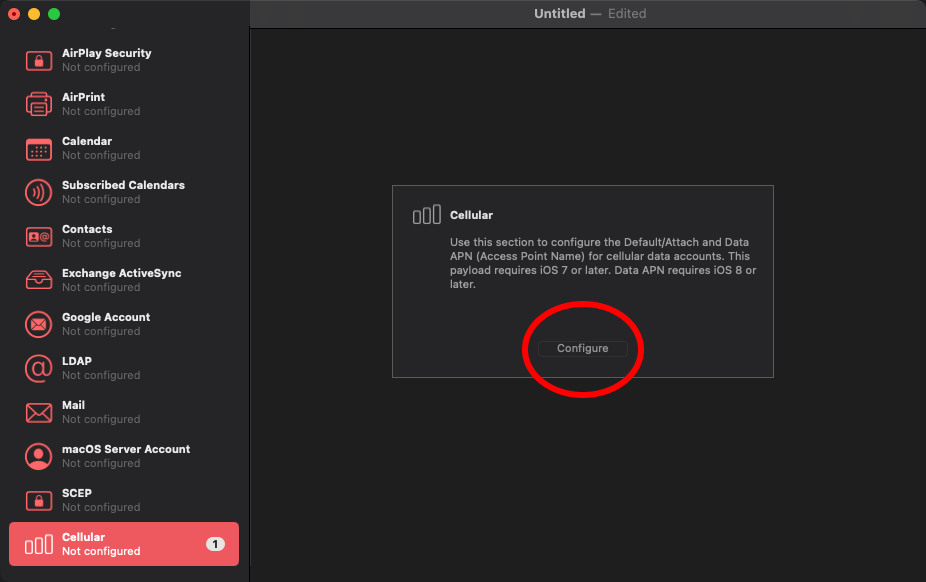
Scroll down to the
Cellular
entry in the left-hand list. Tip: typing
celwill get you there more quickly. -
Click on the Configure button in center of the panel:
-
Apply the following settings:
- Configuration APN Type : Data APN
-
Data APN Name
:
super - Data APN Supported IP Versions : IPv4 and IPV6
-
Data APN Supported Roaming IP Versions: IPv4 and IPV6

-
Optional You can also apply restrictions to which settings an end-user can change, and you can use these to lock down the cellular settings to those you have chosen above.
- Click on Restrictions at the top of the left-hand column.
- Click on the Configure button in the center of the screen.
-
Locate the Allow modifying cellular data app settings (supervised only) option and uncheck it, along with the next two options:

- Select Save... from the File menu. Name and save the profile to a convenient place on your hard drive.
Apple Configurator outputs a .mobileconfig configuration file which you can transfer to your devices using the same application: just connect the target device to the Mac running Apple Configurator. For more information, please see Apple's Configurator User Guide.
Alternatively, place the file on your web server and open it from within the iPhone's browser, or make the file accessible via the Files app or a cloud service like Dropbox, iCloud or OneDrive.