Get Started with the Programmable Asset Tracker
Programmable Asset Tracker Private Beta
The Twilio Programmable Asset Tracker is in a pre-release phase and the information contained in this document is subject to change. Some features referenced below may not be fully available until the Programmable Asset Tracker reaches General Availability (GA) release.
The Twilio Programmable Asset Tracker is a fully functional asset monitoring device that communicates over a cellular connection, provides all-direction movement sensing, and can determine its location using multiple methods, including satellite navigation, and WiFi and BLE sniffing. It's ready to perform, right out of the box.
But here's the key part: it's a programmable asset tracker. Its production-ready application is entirely customizable by you. Maybe there's some extra location information your use case requires, or an advanced function you'd like the device to be able to perform. By leveraging the development, testing, deployment, and fleet management capabilities of the Twilio Super SIM and the Twilio Electric Imp IoT platform, you can extend and upgrade your armada of Asset Trackers, securely and remote
However you plan to deploy your Asset Tracker, this guide will familiarize you with its hardware and its web-based front-end. It will help you quickly get up to speed with its key capabilities, and set you up to take the next step: putting a fleet of Asset Trackers into use — and perhaps even customizing the Asset Tracker's software to better meet the requirements of your use case.
Info
If you haven't yet obtained a Programmable Asset Tracker, just head over to this page where you can learn how to sign up for the Asset Tracker Beta Program.
Warning
Asset Trackers operate on top of the Electric Imp platform, Twilio's managed Internet of Things security and management cloud. Asset Tracker fleets and their code they run are maintained through Electric Imp's development, testing, and management console, called impCentral. Visit impCentral to create your Electric Imp account.
Your Asset Tracker comes complete with all you need to get started. It has a Super SIM on board that has been registered to your Twilio account.
The unit is fitted with three disposable L91/AA batteries that are keeping it in deep sleep mode ready for use. These batteries use Lithium-Iron Disulfide chemistry to deliver an extended battery life and are the recommended type for this tracker. Using other batteries, such as traditional Alkaline batteries, is not recommended as you'll experience a much-reduced battery life.
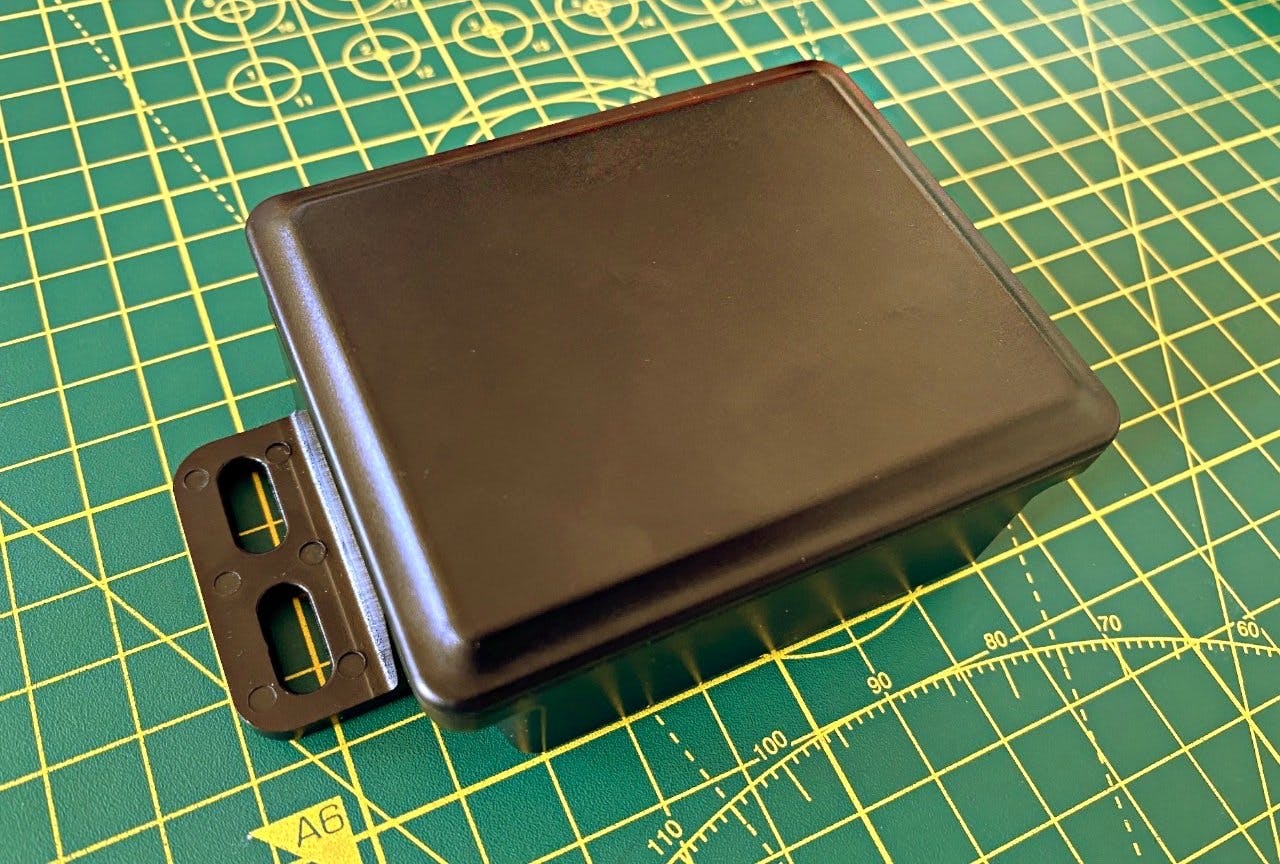
Before you get started activating your Asset Tracker, let's take a quick tour of the unit and its components.
Info
If you just want to cut to the chase and set up your Asset Tracker, just jump straight to the next section.
This will keep an Asset Tracker firmly attached to any steel or other ferrous metal surface however many rocks in the road it's subjected to. There are also mountings for screw/bolt attachment, and the base can be attached to the asset with adhesive between the red anti-scratch pads.
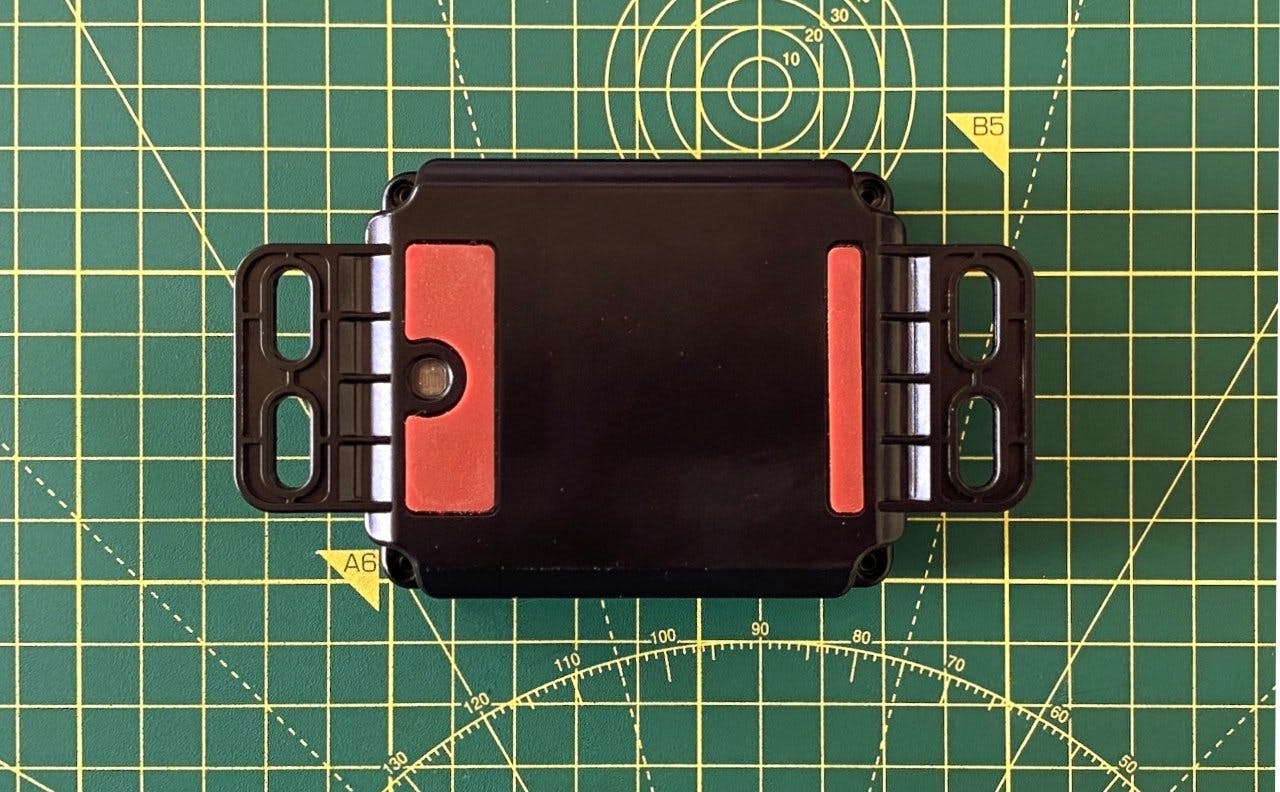
This port exposes the Asset Tracker's removal detector: a sensor which can be used to issue a warning if the Asset Tracker is removed from the asset. Out of the box, your Asset Tracker's sensor window will be covered. Leave it covered for the time being.

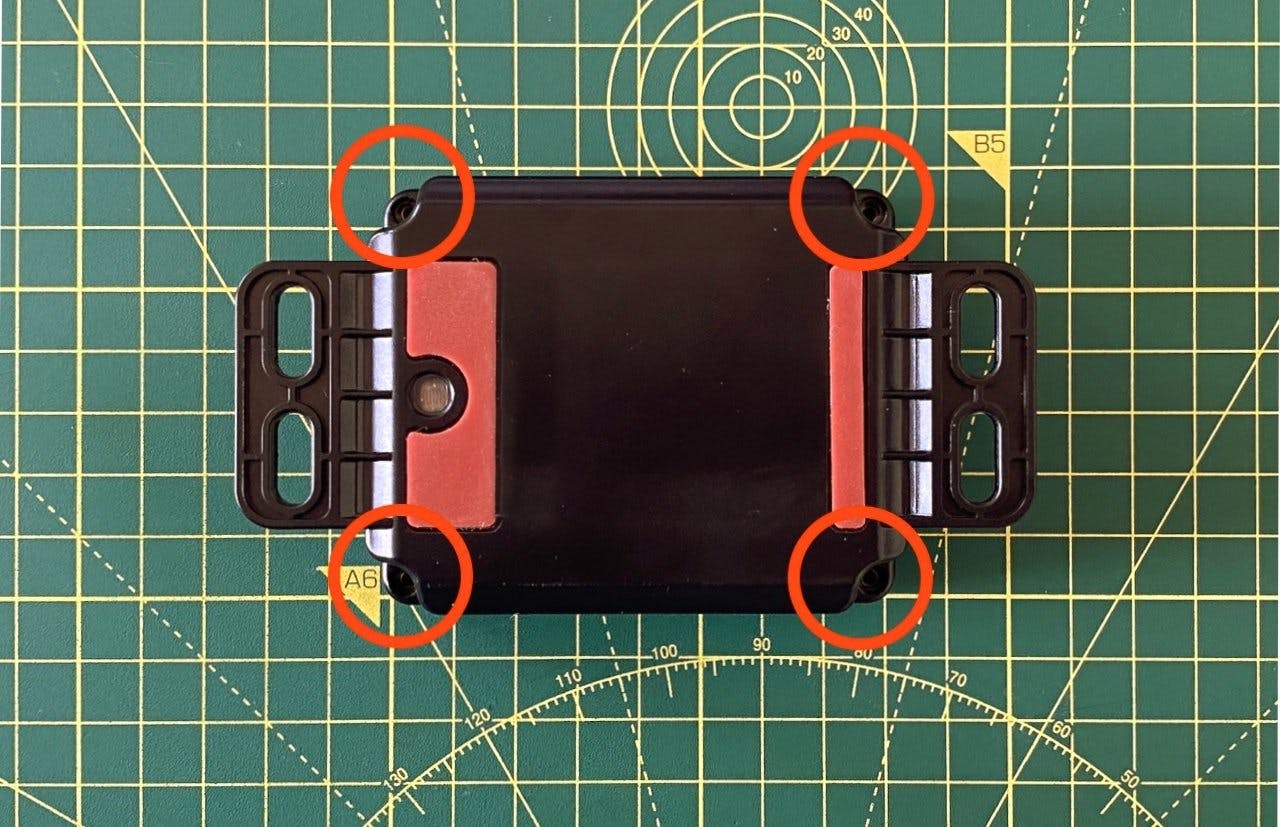
The Asset Tracker's enclosure is rated at IP67 for resistance to dust and fluids, but you can still open it by removing the four large screws accessed from the underside of the unit. Not that you will need to, except when you eventually need to replace the unit's batteries — which are rated for three-years-plus in-the-field usage, depending on the use case. You may also want to turn the unit off, or check its status indicators, all of which are protected inside the Asset Tracker.
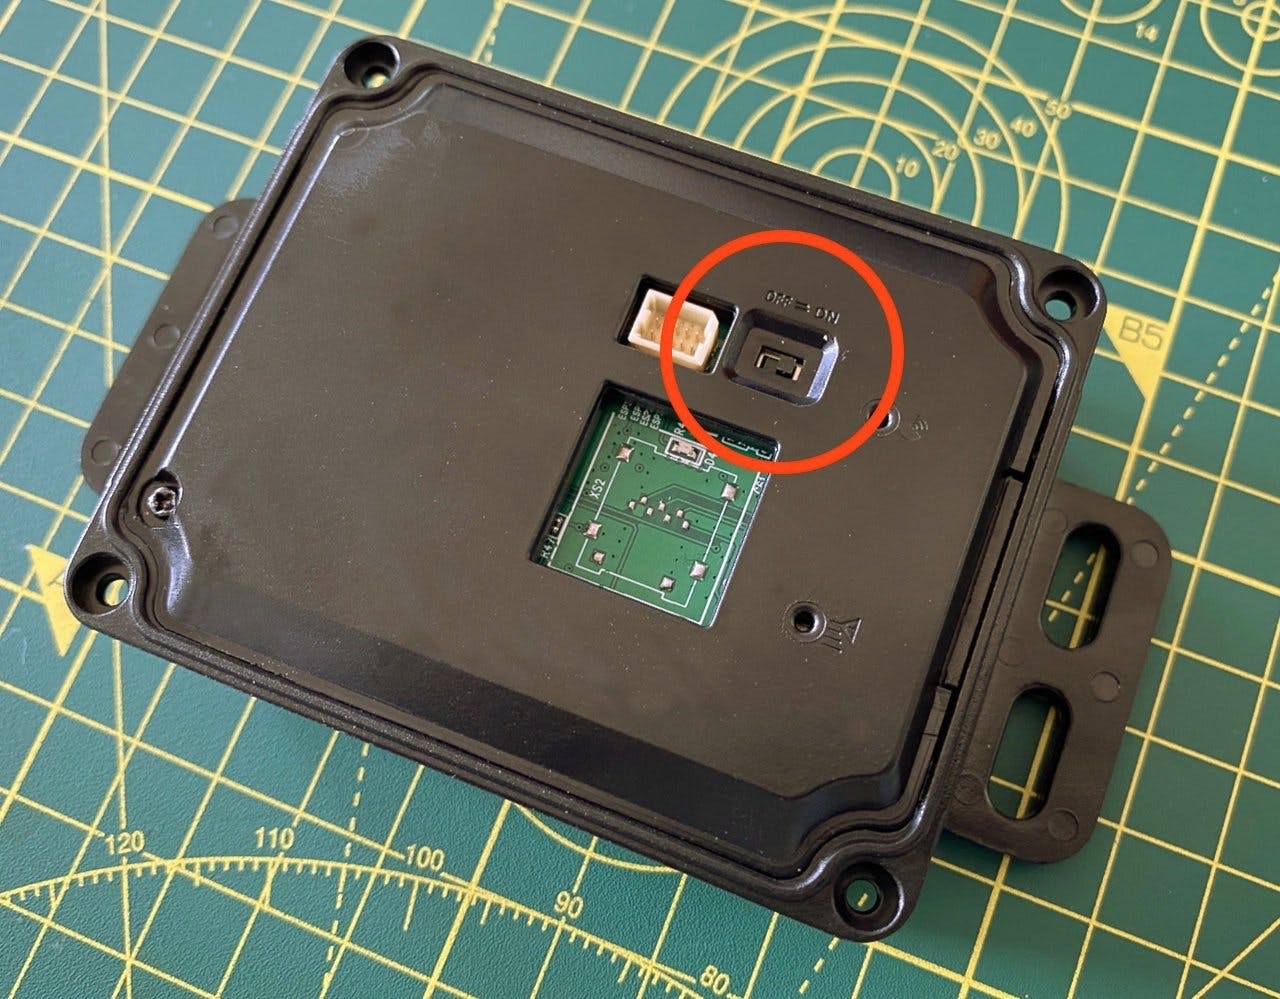
Opening the case and turning it over reveals the internal cover plate, which protects the Asset Tracker's circuit board and batteries. The plate exposes the unit's power switch, shown below, and informational LEDs. When you receive your Asset Tracker the switch will be set to ON — your Asset Tracker is in deep sleep mode and will wake when its tamper sensor window cover is removed. You'll do this in a moment after performing some initial setup.
When you shortly turn the Asset Tracker on by removing the cover over the Asset Tracker's tamper sensor window, you'll see this blue LED start to blink. It is the unit's network activity LED.
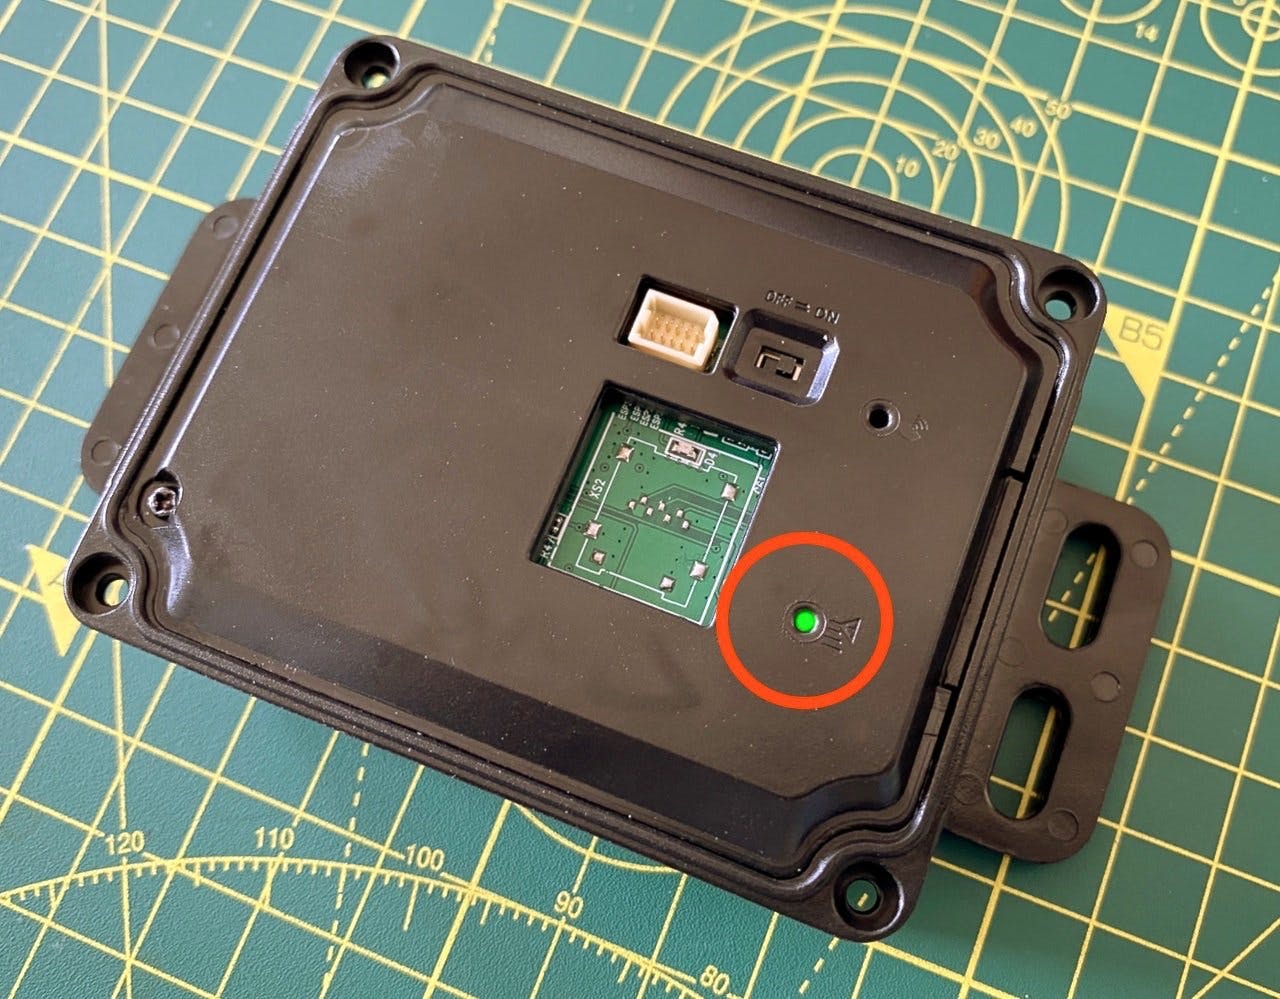
This indicates connection state. By default, it's only illuminated for a brief period after power-up. States are shown as sequences of colors and periods in between when the LED is turned off. For example, a steady green blink indicates the Asset Tracker is connected to the Internet, red that it is disconnected, and amber it is ready to be activated.
Some states are transitory and so their respective LED patterns may not be displayed in full — as soon as the state changes, the new state's pattern will be displayed. Use the LED to determine a consistent current state, not to track state transitions. If a connection error occurs, the LED will show the state the Asset Tracker had reached at the time of error.
After 60s, the LED is disabled automatically to conserve power. This is normal behavior.
Warning
The LED color sequences are not programmable but provided by the operating system, impOS, on which the application firmware runs. You can code your application to keep the connection state LED operating all the time, but this has a battery life impact and may not be appropriate for your use case.
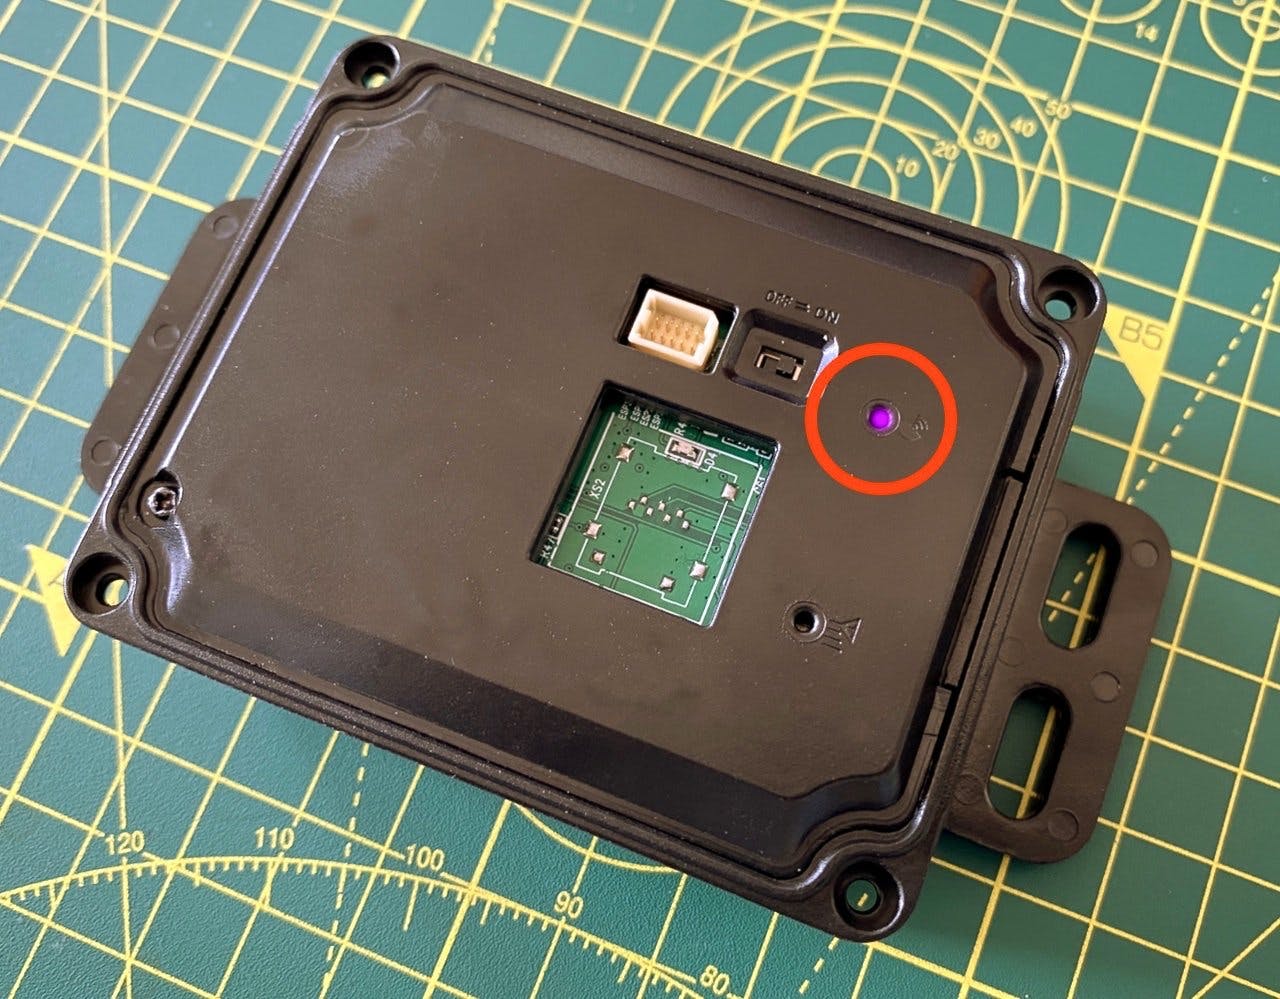
This is programmed by the Asset Tracker application firmware to blink different color sequences when the following events occur:
- New message generated: green.
- Shock detected alert: red.
- Movement detected: magenta.
- Motion started alert: white.
- Motion stopped alert: cyan.
- Temperature is low alert: blue.
- Temperature is high alert: yellow.
Info
We'll explore how you can alter these colors and add your own events in a separate guide.
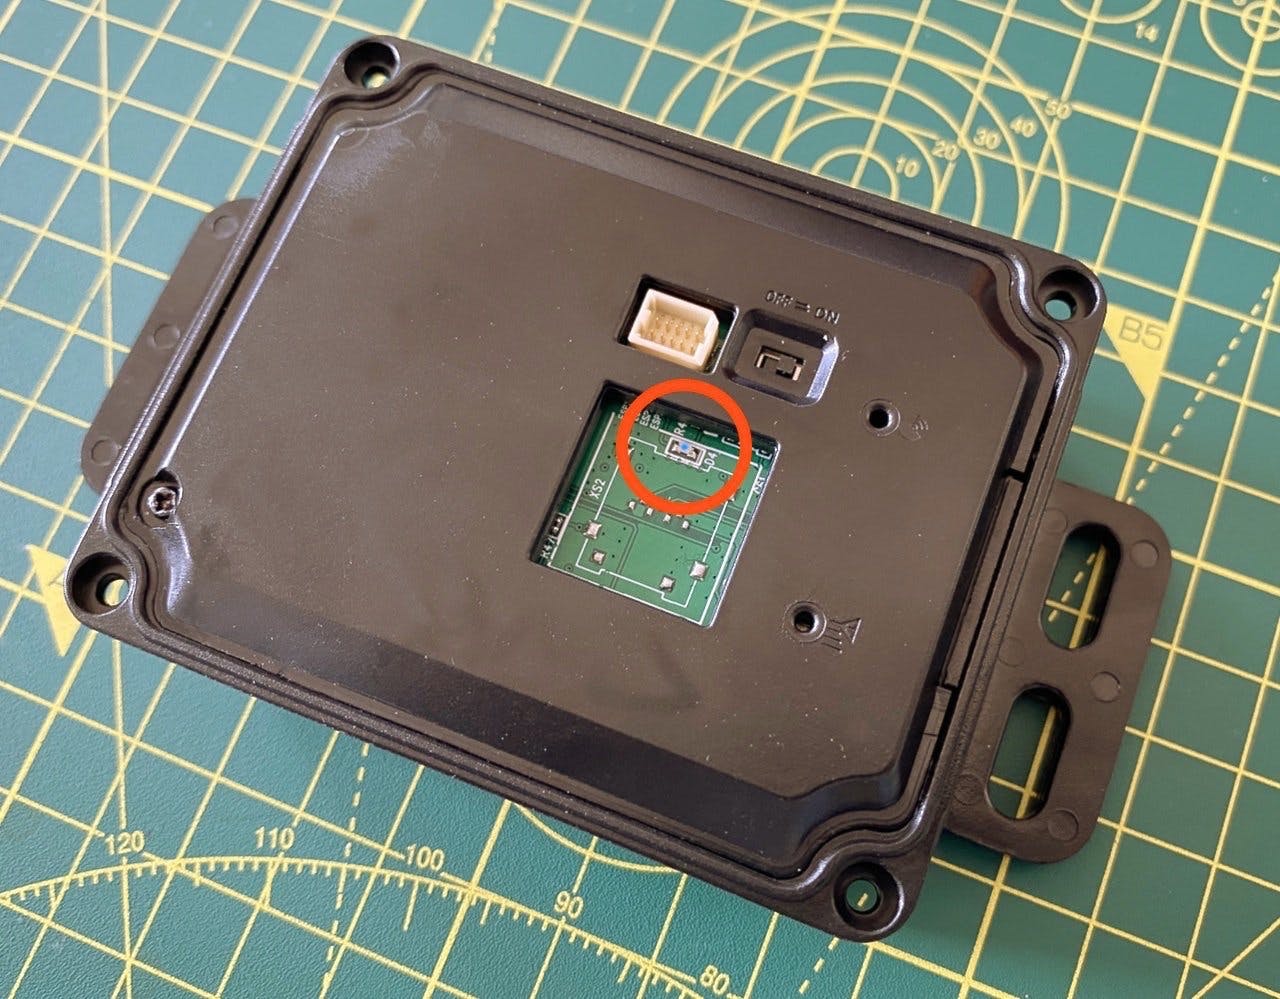
This port's functionality is used by Twilio in manufacturing for production line loading of code to the on-board ESP32 WiFi/BLE co-processor. You too can use it for this purpose, but Asset Tracker application code is not installed this way: it can only be sent securely over the air via the Twilio Electric Imp platform.
Now you've familiarized yourself with the Asset Tracker, it's time to connect it to the Internet and prepare it for use.
Info
This guide is written for developers working with a single Asset Tracker either for evaluation or to customize the default application code. If you are commissioning a fleet of Asset Trackers for use in the field, the setup flow is different.
Your Asset Tracker's cellular connectivity is provided by Twilio Super SIM: one has been integrated into your unit. Perform this step before you activate the Asset Tracker itself.
Network Access Profiles (NAPs) are Super SIM API entities which specify which cellular networks a Super SIM can connect to around the world. The first step in commissioning a Super SIM is to create the NAP that it will use.
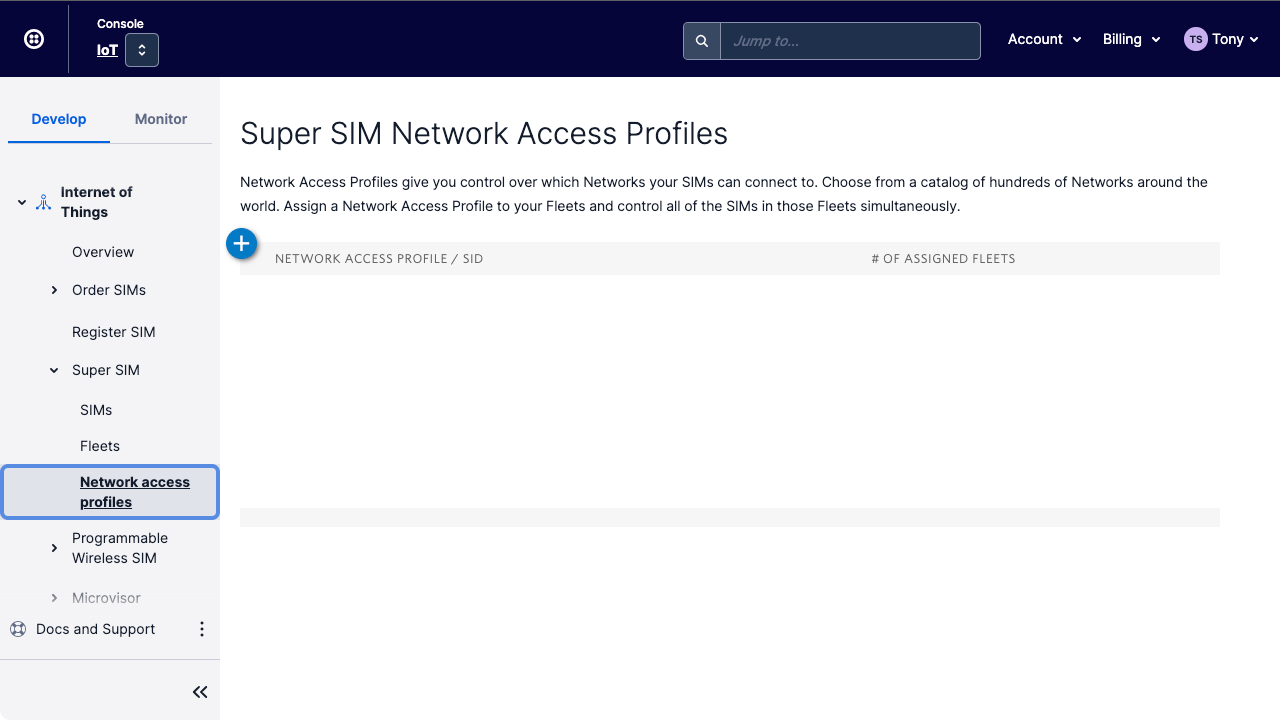
- Go to Internet of Things > Super SIM > Network Access Profiles .
-
Click on the blue + button:
- Give your new Network Access Profile a memorable Unique Name to make it easy to identify in future.
-
Select Instant global access. This is the recommended setting for new users: it pre-selects a set of networks around the world and favors those with the lowest data rates:
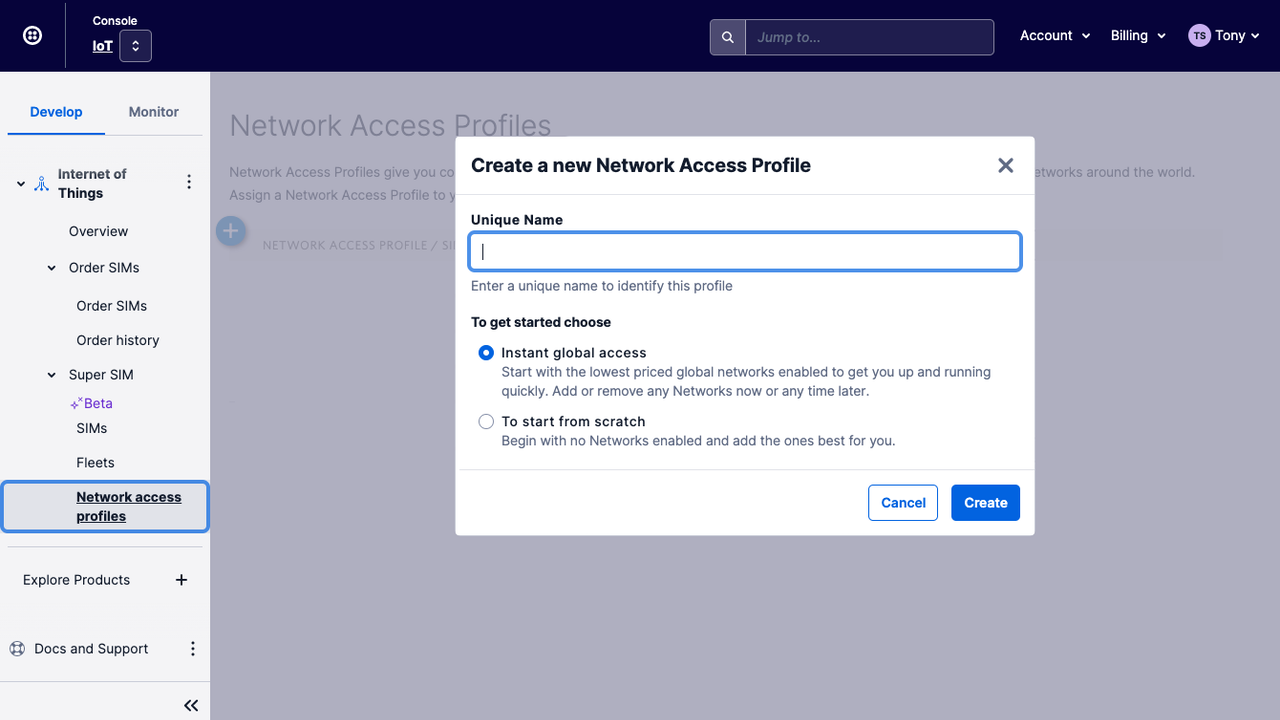
- Click the Create button.
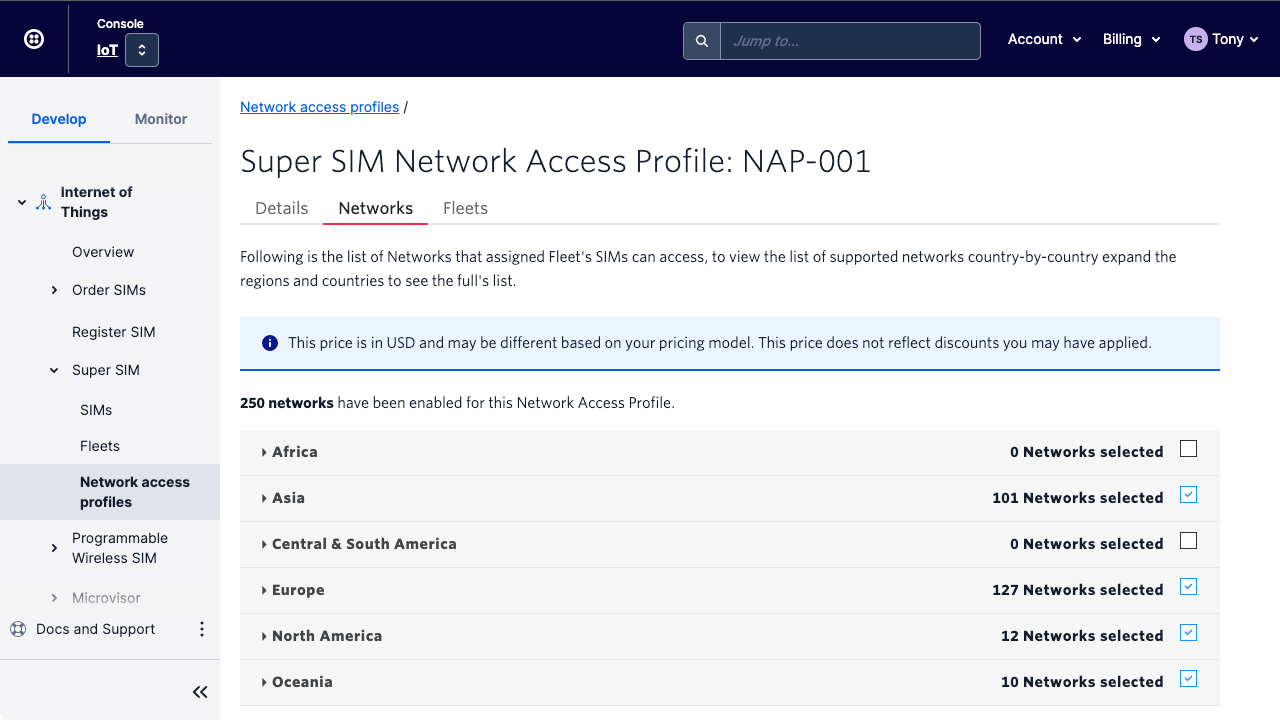
-
You will see the new Network Access Profile's Networks tab. This shows a list of mobile networks organized by continent and country. Only networks which have been selected will be accessed by Super SIMs using this Network Access Profile. A number of networks will already be enabled for you, but you can add any further ones if you wish — make sure you click the Update Networks button when you're done:
One Super SIM is easy to manage, but no one wants to update the settings of hundreds of SIMs one by one. So we organize Super SIMs into groups called Fleets. All Super SIMs inherit their capabilities from the Fleet they've been assigned to, so you need to create a Fleet and add your Super SIM to it. The mobile networks a Fleet's SIMs can use is set through a Network Access Profile bound to the Fleet.
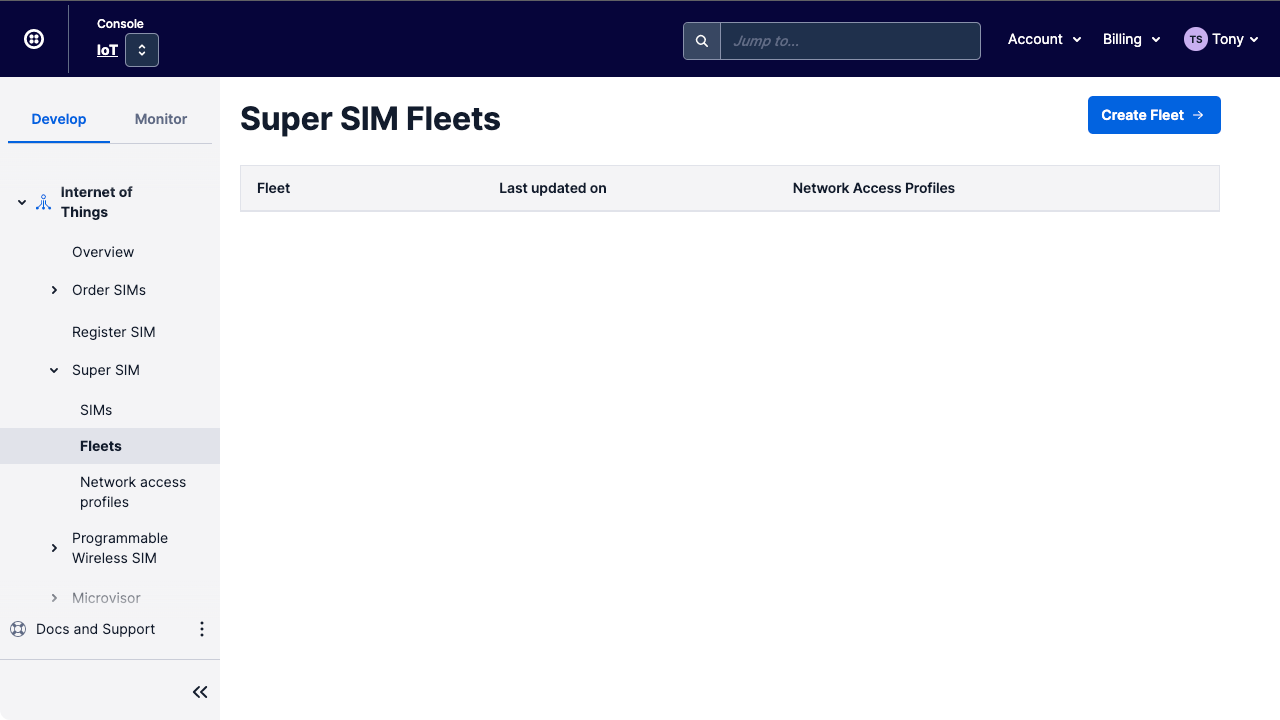
- Go to Internet of Things > Super SIM > Fleets .
-
Click the Create Fleet button at the top:
-
Give the Fleet a unique, memorable name to make it easy to identify in future:
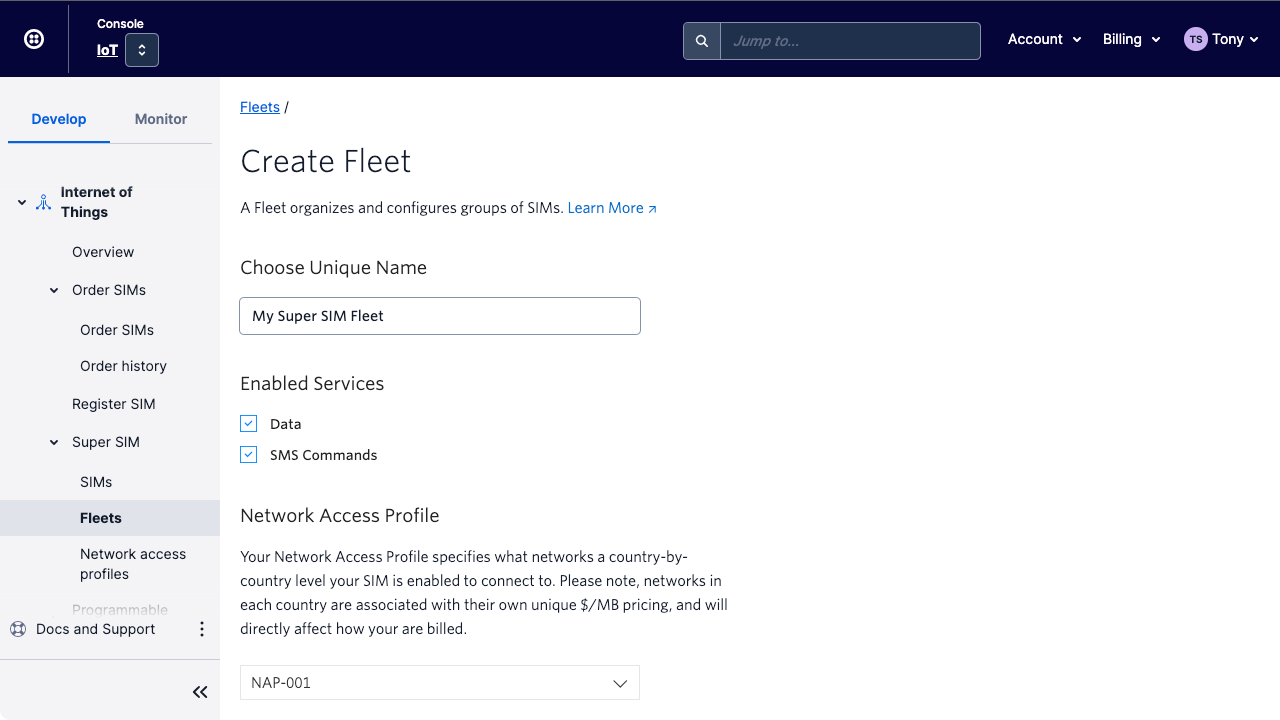
- The Console automatically enables the Fleet's Data and SMS Commands services; leave these as they are for now. In future, you can use these settings to block all the Super SIMs in the Fleet from transferring data across the network, or from receiving SMS Commands.
- Under Network Access Profile select the NAP you created in the previous section .
- The Console automatically sets the Fleet's Data Limit to 1GB (1,000MB) per month. This means that each Super SIM assigned to the Fleet can use 1GB of data. This number may be too high or low depending on your use case. If your chosen value turns out to be too high or too low, you can always update the Fleet with a different data limit later.
- Scroll down and click the Create button.
- Go to Internet of Things > Super SIM > SIMs .
- Enter your SIM's ICCID — you'll find it printed on the box your PAT arrived in — into the Unique identifiers field and click the Filter button:
- Click on the SIM's ID under the SIM column to open the SIM details page.
-
In the list of SIMs you'll see your PAT's Super SIM. It may be your only SIM — if not, you can locate it by viewing its
Status
, which will be
New. Click anywhere on the SIM's row. - Take this opportunity to give the Super SIM a unique, memorable name — this will make it easier to locate in future.
- From the Fleet menu, select the Fleet you created in the previous section .
-
Change the SIM's
Status
from
NewtoActive: - Click the Save button.
Your Super SIM is now ready to be used as the basis for your PAT's global cellular connectivity.
Warning
When you activate a Super SIM, you will begin incurring a monthly active SIM fee of $2.00. You can change the Super SIM's status to Inactive at any time to disable the SIM and stop incurring the monthly fee. You can reactivate at any time by switching the status back to Active.
Expose the tamper sensor window. This will wake your Asset Tracker and allow it to connect to the Internet. The first time the Asset Tracker connects to the Cat-M1 cellular network in a new location, can take some time: often a couple of minutes, but sometimes as many as ten, depending on your location. This is common to all Cat-M1 devices. Please be patient. Subsequent connections will be much quicker.
If you'd like to monitor connection progress, remove the Asset Tracker's upper face plate. You will see the blue network LED flash periodically and then more rapidly and randomly as the Asset Tracker connects.
Warning
The connection status LED will flash combinations of red and orange, and finally blink green as the Asset Tracker connects. As noted above, it may take some time for the Asset Tracker to initially connect and the LED to go green. However, the connection status LED is disabled automatically after 60s to conserve power. This is normal behavior. If your Asset Tracker has yet to connect, it will continue to try to do so, as the network LED will show.
Your Twilio Programmable Asset Tracker includes its own dashboard which you can access at your Tracker's unique URL. Always online, you can use the UI to get up-to-the-minute information on the Asset Tracker's location and state, and to view a log of the most recent events it has experienced.
Additionally, you use the UI to adapt the Asset Tacker's default configuration to better meet the needs of your use case, and to perform some additional setup: to enter the domain and credentials of the cloud service — which may be yours or a third-party platform of which you are taking advantage — the Asset Tracker will post status readings and alerts to.
Your Asset Tracker's dashboard URL is printed on the box the unit shipped in. It's written out in full and presented as a QR code that you can scan on your mobile device, and it's also displayed in impCentral. Use any of these methods to open the dashboard in a browser:
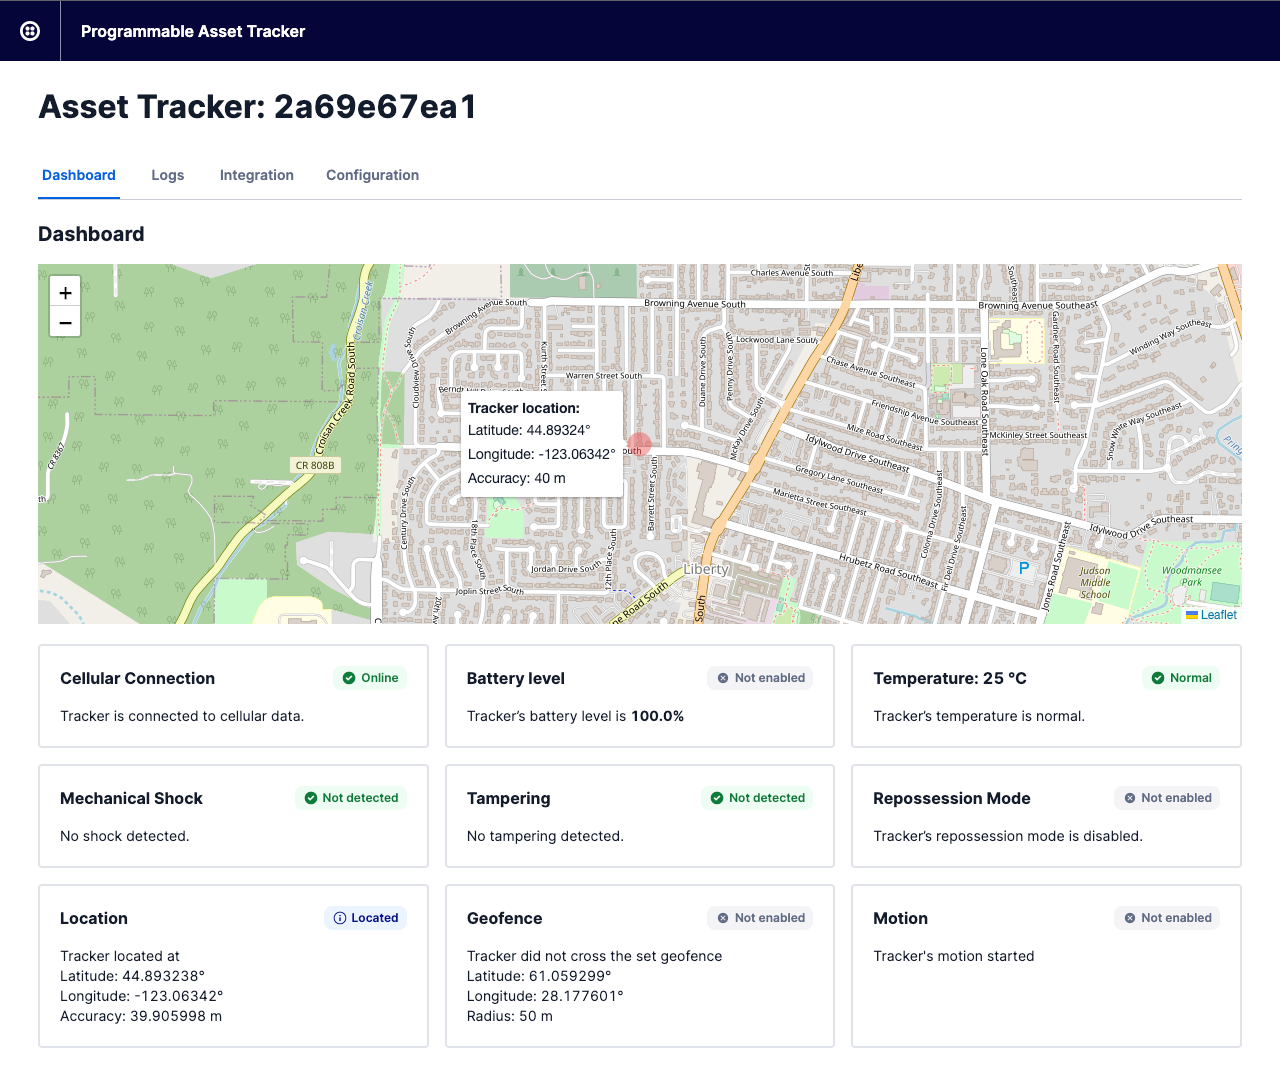
The Dashboard tab provides a readout of your Asset Tracker's current status. As you can see, its location is pinpointed in a zoomable map view, and the panels below give you an at-a-glance picture of the unit's state. Some of these — the top line — are current readings from the Asset Tracker's sensors.
The remaining panels focus on the Asset Tracker's key features: its motion, shock, and tamper detection, and its location-centric features, such as moving in and out of a set area — the virtual boundary around this region is called a 'geofence'.
Your Asset Tracker can post regular status updates and, when you have enabled them, alerts to your server or to a third-party cloud. Set this up now: select the web UI's Integration tab.
You set up your Asset Tracker's cloud connection in the API - Cloud integration section:
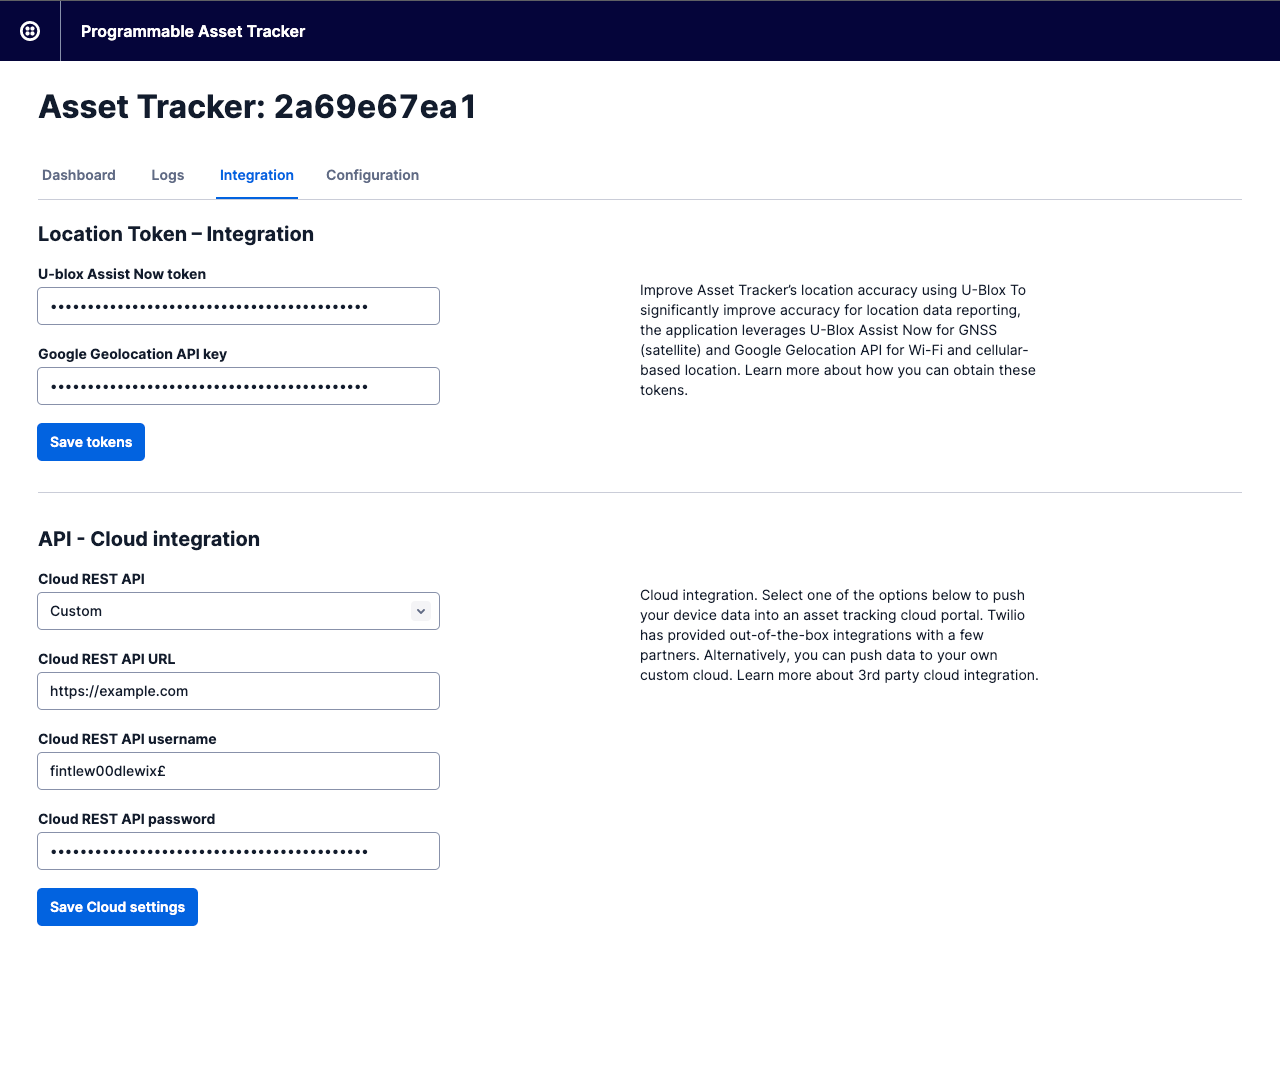
The Asset Tracker currently lets you enter generic access credentials to access these resources, but we will shortly be rolling out a series of integrations for specific tracker-oriented cloud platforms. You will be able to select from the Cloud REST API menu.
Right now, enter a target server URL and account access credentials in the fields provided. Click the Save Cloud settings button when you're done.
The Asset Tracker contains a u-blox GNSS receiver which is used to determine the unit's location. You can use this information just to learn where a unit is currently to be found, or to check whether it has crossed a geofence.
However, you can leverage additional methods to enhance the Asset Tracker's ability to pinpoint its location. You configure these optional extensions in the web UI's Integration tab.
Click on this now. Under Location Token - Integration, you can enter and save authentication tokens for two services. You can opt to use either of these, both, or none of them, depending on your use case:
- u-blox Assist Now — The service provides current ephemeris data to the GNSS receiver to allow it to generate more accurate location co-ordinates. To do so, you need to sign up for an account with u-blox's Thingstream service. Its AssistNow Online component has a free development tier: 100,000 requests per month.You can register for access and receive an access token. Enter this token into the Asset Tracker UI's u-blox Assist Now field to allow it to download the latest AssistNow data.
- Google Geolocation API — This service uses the known position of cellular towers and WiFi networks to determine a device's location. This is a good backup when the GNSS system is unable to get a fix for some reason, such as an indoor location. Access is managed by API key, and to get a key you'll need to set up a Google Cloud project with billing details in place. The service is billable , but Google applies $200 credit each month, so it is effectively free for low request volumes. Google has a guide to help you set up your API usage .
Obtain your tokens and paste them into the relevant fields in the Asset Tracker UI. Click the Save tokens button to store the tokens in your Asset Tracker's agent.
You have full control over how your Asset Tracker operates: if and how often it determines its location; whether it should check if it has crossed a geofence, and the area wrapped by the geofence; whether it should assess whether it is in motion; whether to alert you when temperature thresholds are crossed, the battery is running low, or the Tracker suffers a shock or has been removed from its asset.
You can set your Asset Tracker's configuration in the UI: go to the Configuration tab:
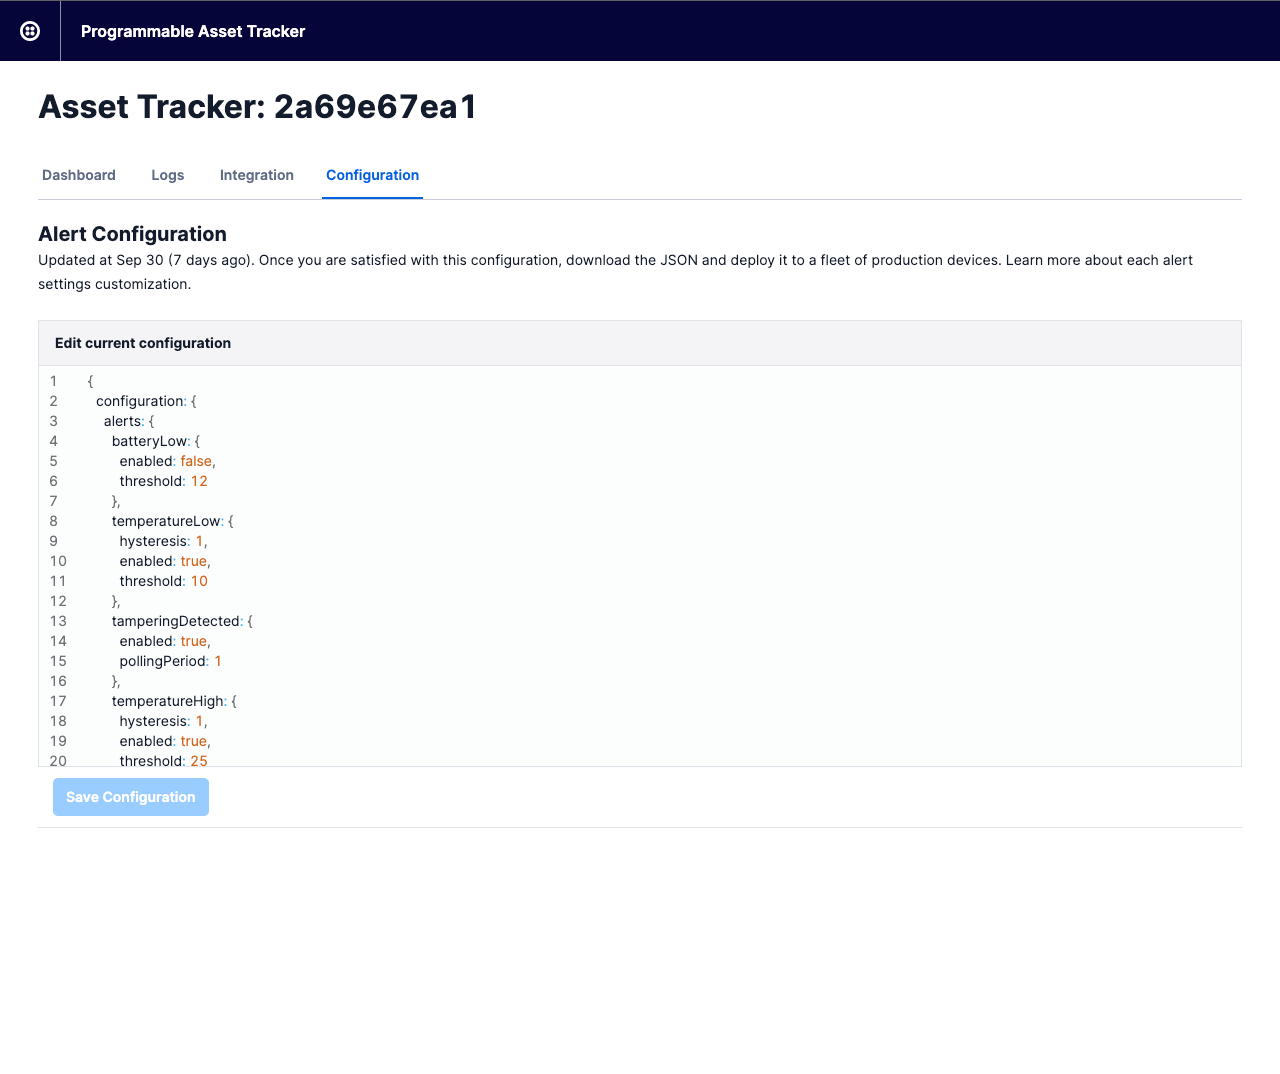
In the current version of the UI, you apply settings by editing the Asset Tracker's configuration JSON file in place. Just click anywhere in the Edit current configuration panel and make your changes.
The number of options you can change here is extensive, so we recommend you take time to review the Asset Tracker Configuration Guide, which describes all of the Asset Tracker's settings.
When you've made your changes, click the Save Configuration button, or click Reset to current settings to abandon the changes you made.
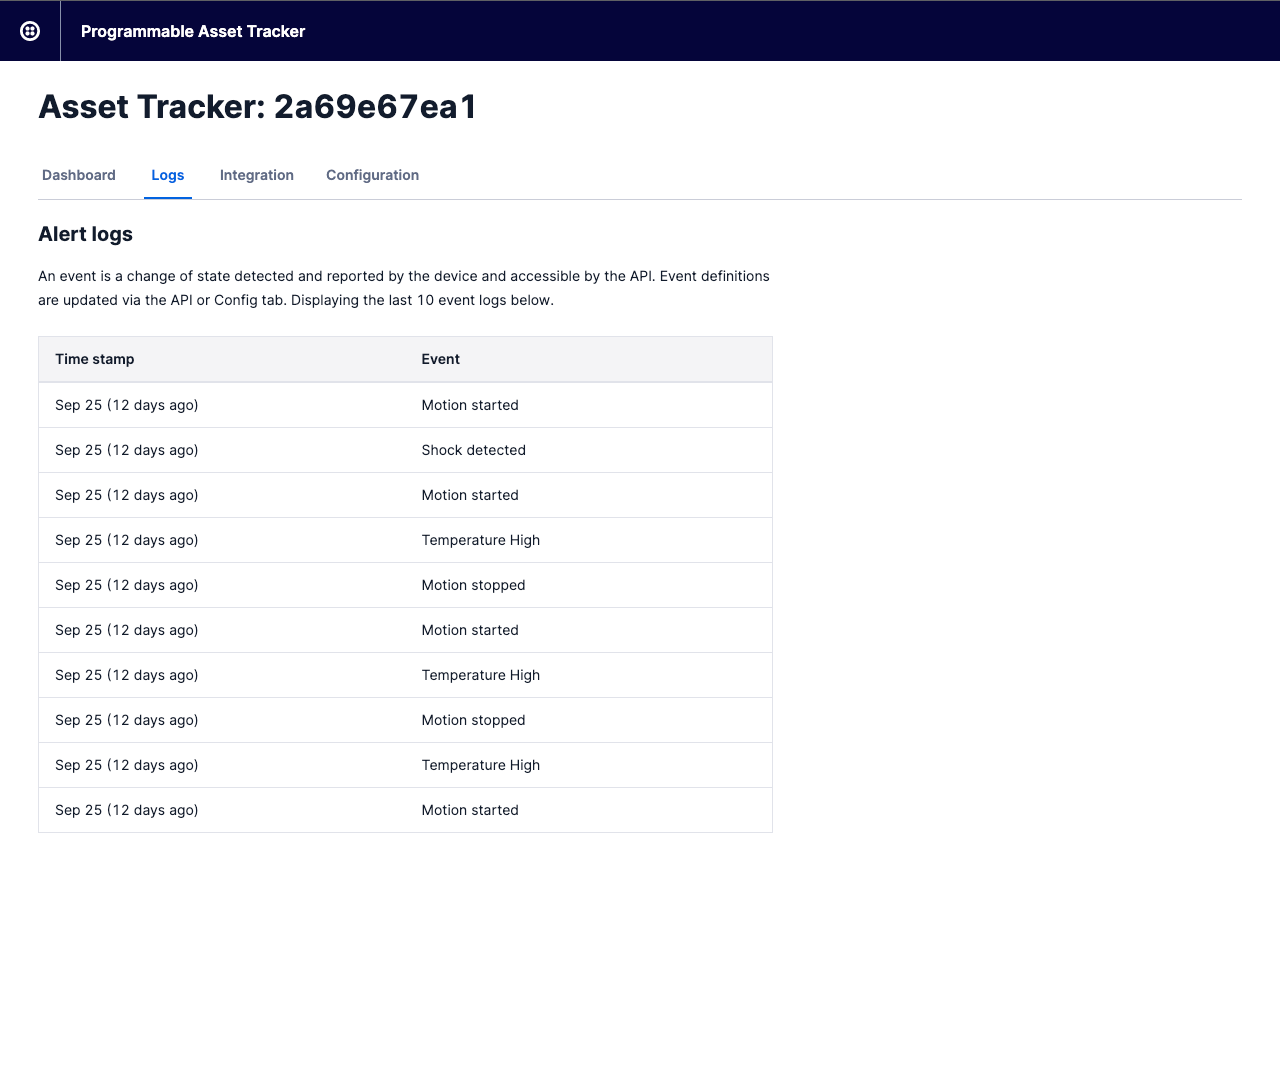
Your Asset Tracker maintains a log of events — changes of state as reported by the device — and the most recent 10 of these can be viewed at any time through the web UI.
Click on the Logs tab to view the most recent events recorded:
Congratulations! You now have a fully functioning Programmable Asset Tracker that's ready to be put to trial in the field, or to use to test the changes you want to make to its application code.
We can't wait to see how you customize and adapt, field-test and deploy your Twilio Programmable Asset Tracker.