How to Make and Take IoT VoIP Calls via Super SIM
Super SIM provides any modem-equipped device with worldwide data connectivity. Once in place, this data channel can be used to send and receive any kind of information — and that includes voice calls.
But while voice apps are ten a penny in mobile operating system app stores, making it easy to try out Super SIM mediated voice-over-data on a phone, how might voice functionality be enabled on an IoT device?
Twilio's Programmable Voice product supports the Session Initiation Protocol (SIP) for starting, maintaining, and ending interactive sessions over IP networks, in particular voice communications sessions. Programmable Voice lets you set up a SIP Domain, which is a unique point of presence that SIP clients — say, a VoIP softphone running on a Super SIM-enabled IoT device — can connect to and call other SIP clients, and phone numbers on public switched telephone networks (PSTNs).
The result: any cellular IoT device fitted with Super SIM and suitable audio IO can participate in voice calls with similar devices and even landlines and mobiles via Twilio and the Internet. Calling is two-way: calls can be made by an IoT device and received by it too.
By way of demonstration, this guide shows you how to set up a Programmable Voice SIP Domain, set up an IoT client device, and connect them. You'll need a Twilio phone number as an entry point for inbound calls and as an outgoing Caller ID. We also make use of another Twilio product, Functions, to provide a basic admin dashboard and allow incoming calls to be routed to specific devices. A Raspberry Pi single-board computer stands in as the IoT device.
First, you'll need a Raspberry Pi that has been set up and is ready to use. The Raspberry Pi Foundation has a great guide to help you if you've just unboxed your first Pi.
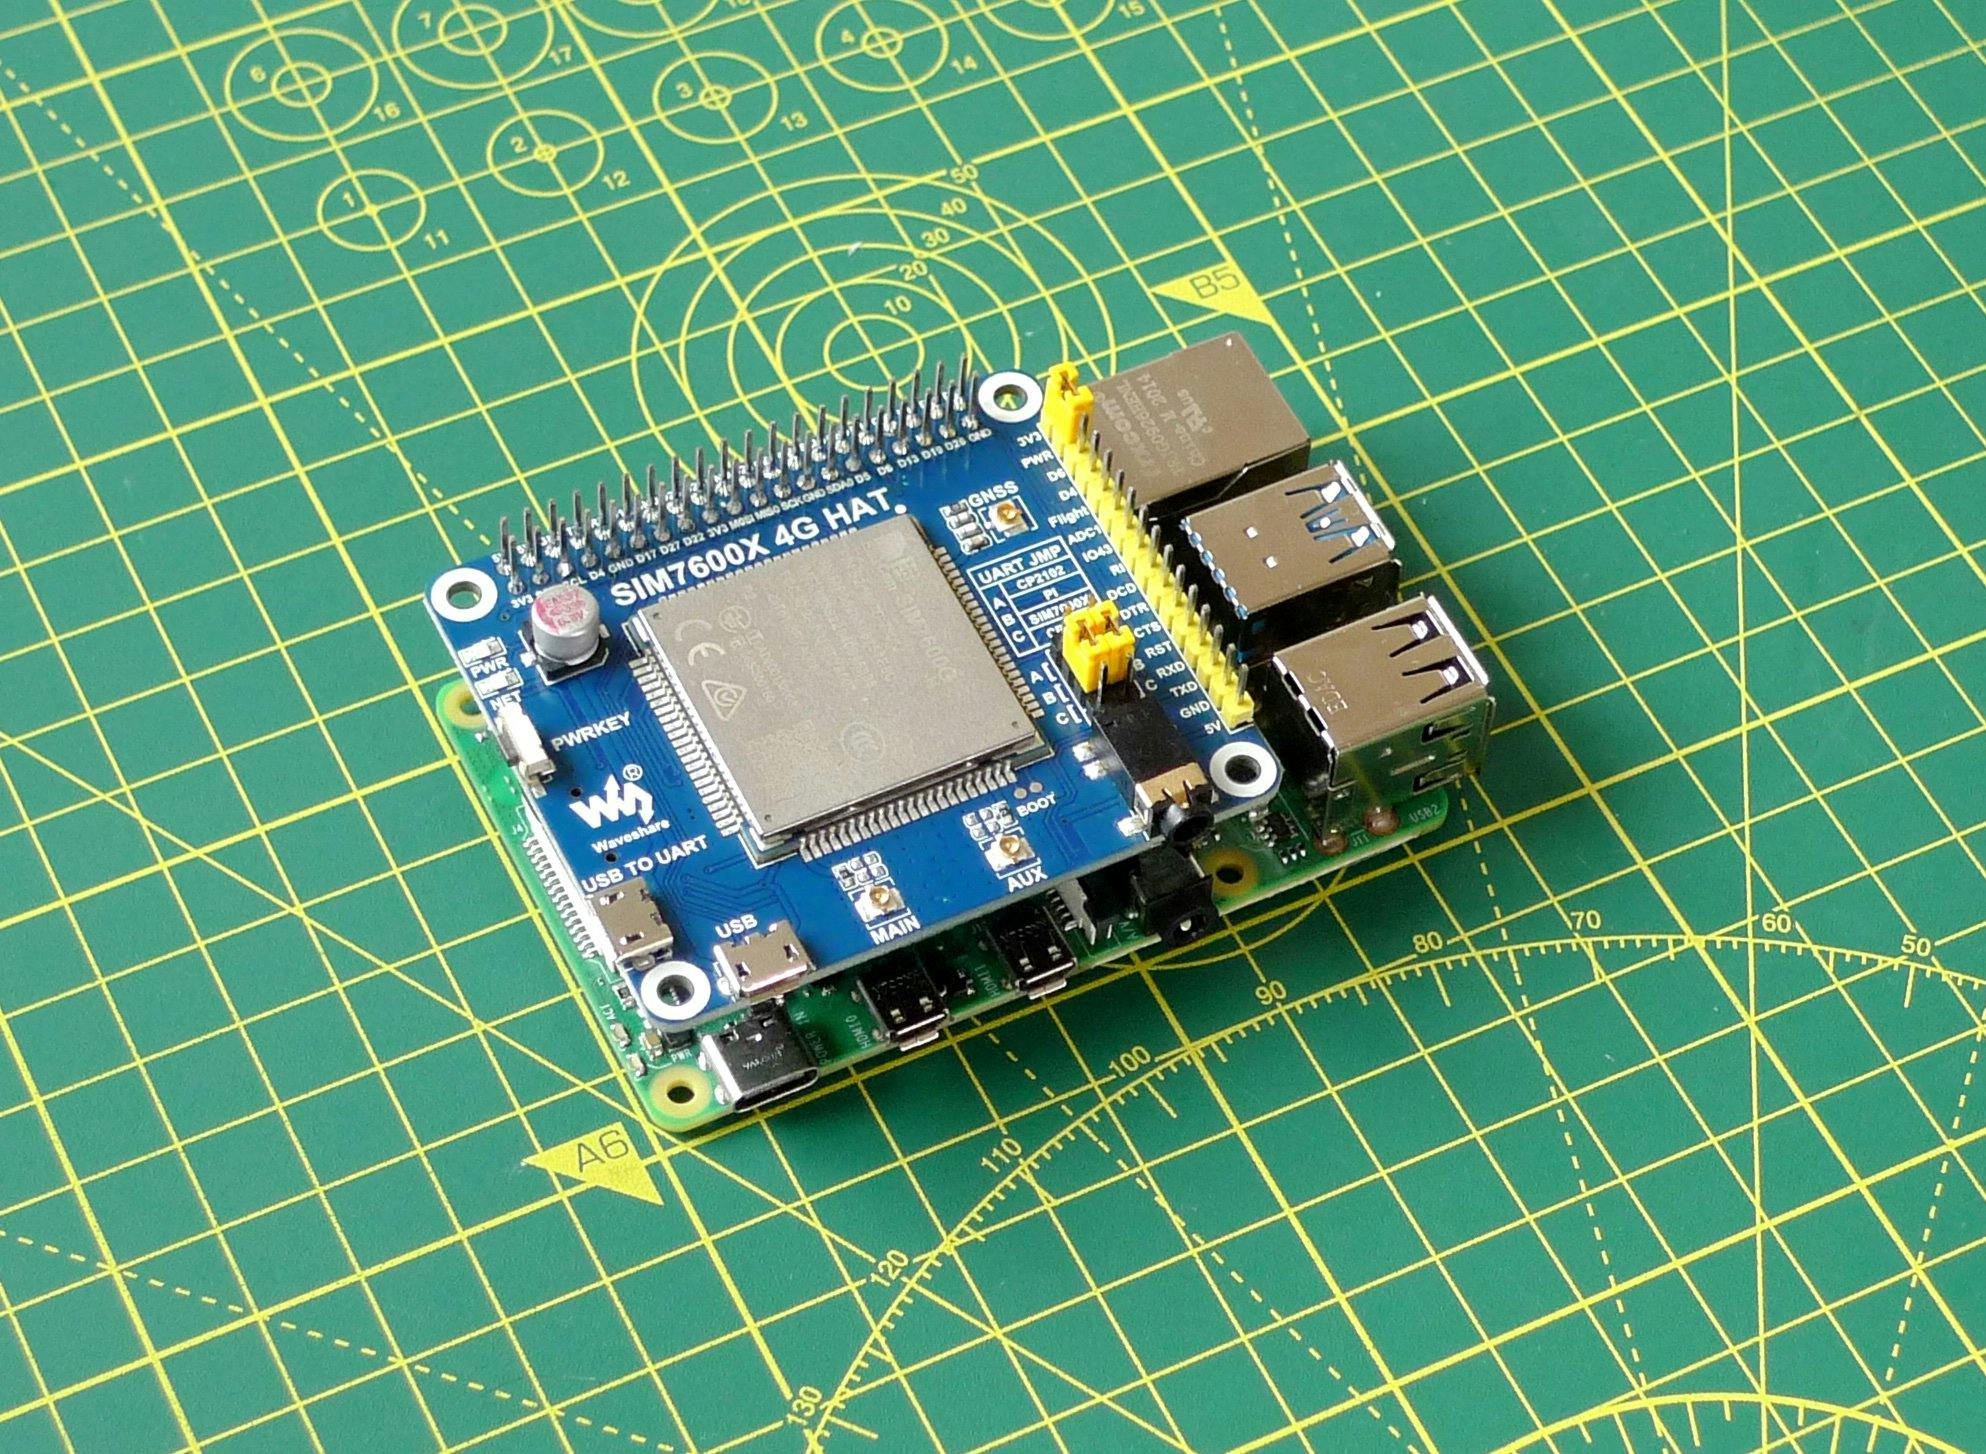
You'll also need a cellular module board — we'll use the same Waveshare SIM7600X 4G Hat that's used in our main Super SIM tutorial. It will need to be fitted with a configured Super SIM.
We have a detailed guide to bringing the Pi and the modem together. You should jump to it now and come back here when you've completed it. It will show you how to put in place the services you need to connect to the Internet using Super SIM. If you wish, you can skip Step 3, "Attach to a cellular network", to save a little time.

Finally, you'll need a USB audio adapter. The Raspberry Pi has a 3.5mm AV jack which can output to headphones, but it has no audio in. To remedy that, fit a USB audio IO adapter like this one and plug a headset into it. This is just one USB audio adapter — there are many, many similar ones available.
We'll interact with Twilio using the twilio command line tool. Unfortunately, support for twilio and the Serverless Toolkit plugin you'll use alongside it is not optimal on the Pi, so steps 2 through 4 need to be done on your primary computer. You may already have the Twilio CLI installed — if so, you can jump straight to Step 3.
Install twilio on distributions such as Debian, Ubuntu, Linux Mint, and more with apt:
_10wget -qO- https://twilio-cli-prod.s3.amazonaws.com/twilio_pub.asc \_10 | sudo apt-key add -_10sudo touch /etc/apt/sources.list.d/twilio.list_10echo 'deb https://twilio-cli-prod.s3.amazonaws.com/apt/ /' \_10 | sudo tee /etc/apt/sources.list.d/twilio.list_10sudo apt update && sudo apt install -y twilio
Now you're ready to set twilio up with:
_10twilio login
You'll be asked to name a profile — make sure you note the name and then run:
_10twilio profiles:use PROFILE_ID
Twilio's Serverless Toolkit is a twilio plugin that considerably simplifies the process of initializing, uploading, and starting a Twilio Functions environment. It uses the core Functions API as exposed by twilio and adds convenient bulk-upload functionality that will save you a lot of set up time.
Install the plugin with:
_10twilio plugins:install @twilio-labs/plugin-serverless
Now grab the source code files that underpin the Twilio-mediated SIP service that your IoT device will use to host calls. We have a GitHub repo that contains all the files you need and which the twilio tool will use to set up your service.
First, clone the repo:
_10git clone https://github.com/korewireless/super-sim-raspberry-pi-voip-demo.git_10cd super-sim-raspberry-pi-voip-demo
Optionally, you can edit the repo's .env file, which contains your application's admin and SIP client passwords. If you'd rather not use the default passwords, change these now.
Now upload and deploy the code:
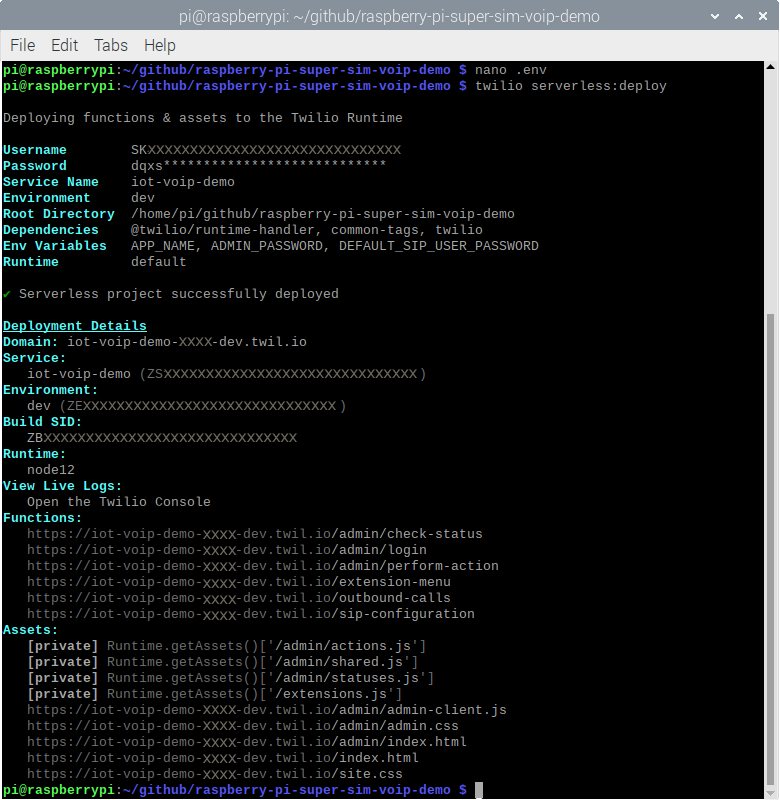
_10twilio serverless:deploy
The last command you ran will upload and deploy your Twilio Functions environment's functions and assets, and activate the environment. Look at the command's output in the terminal: there will be an /admin/index.html URL listed under Assets:. Copy the full URL and paste into into a browser window:
When the page loads, you'll first be asked to log in — use the password from the repo's .env file — and then be invited to initialize the environment:
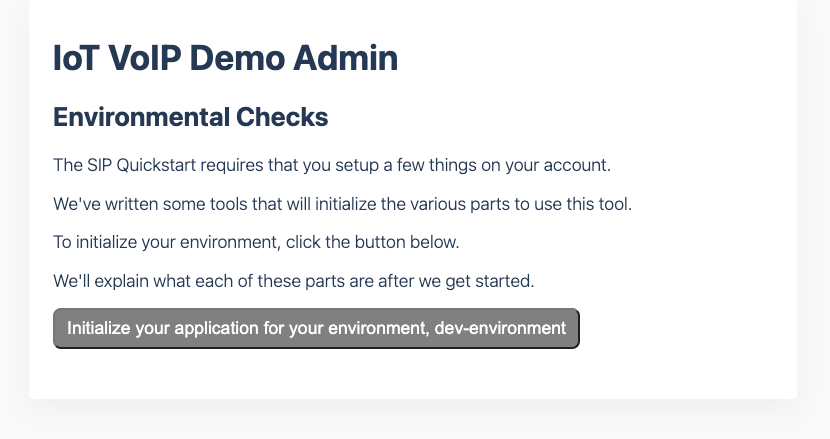
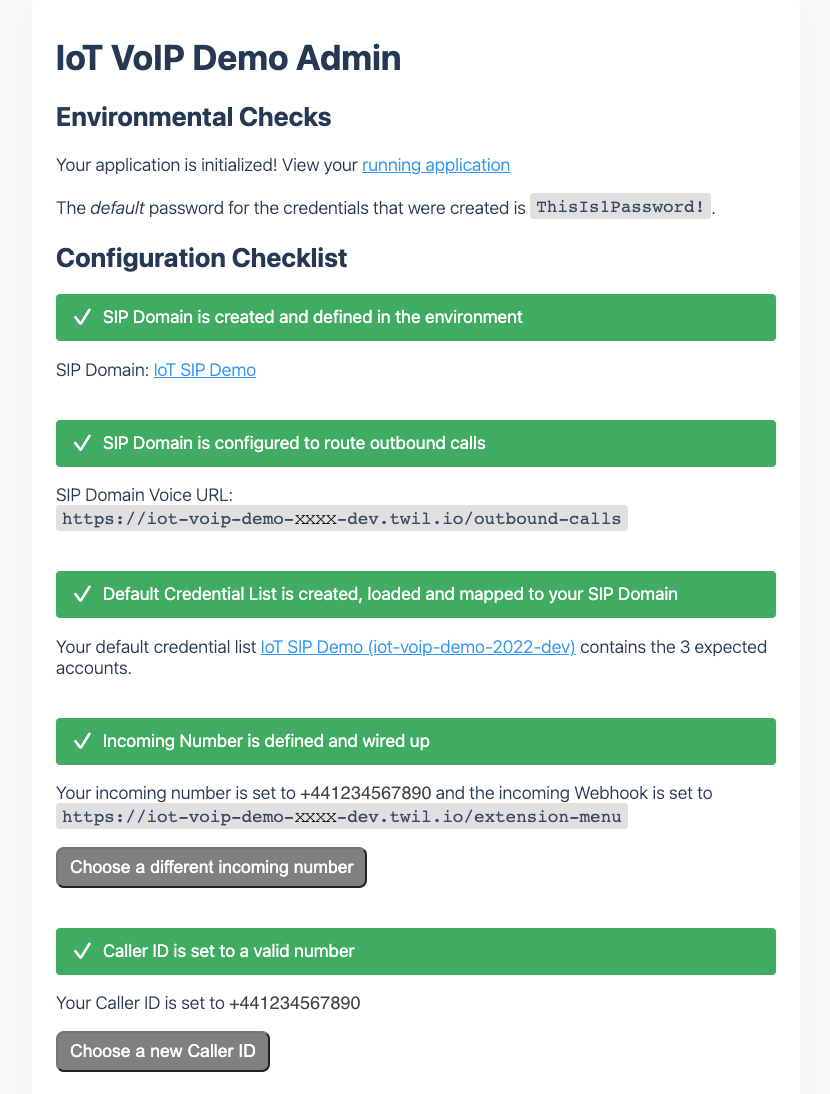
Click the Initialize... button to do so. The underlying code will set up your SIP Domain and an associated Credential List, which you can take a look at later in the Twilio Console under Voice > Credential lists. It will also configure the voice and fax functionality of your Twilio phone number: it will be set to accept voice calls and to route them to devices via the uploaded functions. When the service is configured, the admin page will look something like this:
Warning
If you have multiple Twilio phone numbers available, the admin page will inform you of this and provide a list of numbers from which you can select the one you want to use for incoming calls.
Scroll up the admin page and click the View your running application link to jump to the list of available SIP clients. These are mock users and they're defined in the repo file assets/extensions.private.js. It also includes the extension numbers at which they can be reached. Feel free to make changes, but make sure you re-run twilio serverless:deploy every time you do so.
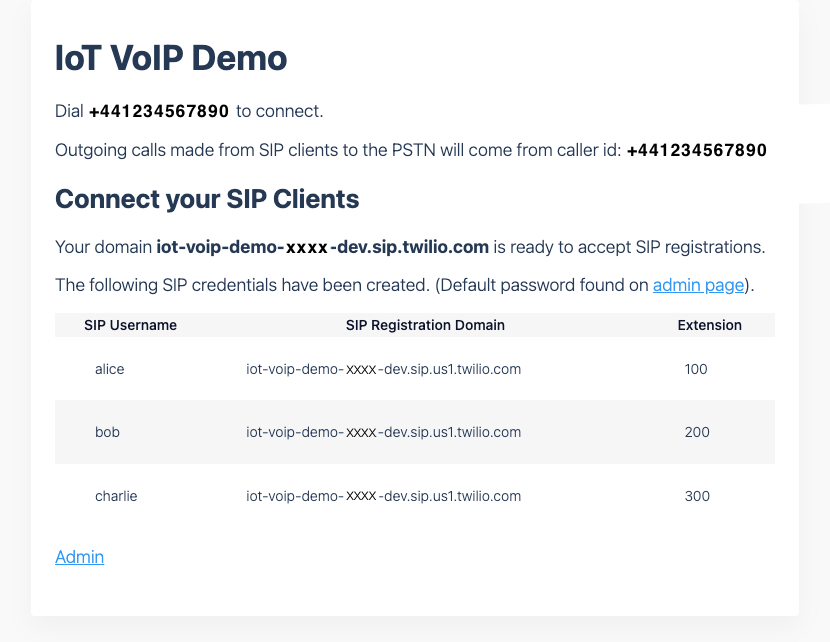
Pick one of the users as your Raspberry Pi SIP account and make a note of the SIP Registration Domain. Alternatively, note the page's address, enter that into the browser on the Pi when you jump across to it in the next step, and then copy the domain directly.
A real IoT application would have to incorporate its own code for communicating via SIP and handling the audio IO. For this demo, however, we're using a softphone called Jami. It's open source, free, and runs on the Raspberry Pi.
-
Switch over to the Raspberry Pi. If it hasn't already booted to the desktop, just enter
startxat the command line. - Select the Raspberry > Accessories > Terminal menu entry.
-
Enter the following lines:
_10sudo apt install gnupg dirmngr \_10ca-certificates curl --no-install-recommends_10curl -s https://dl.jami.net/public-key.gpg \_10| sudo tee /usr/share/keyrings/jami-archive-keyring.gpg \_10> /dev/null_10sudo sh -c "echo 'deb [signed-by=/usr/share/keyrings/jami-archive-keyring.gpg] \_10https://dl.jami.net/nightly/debian_11/ jami main' > \_10/etc/apt/sources.list.d/jami.list"_10sudo apt-get update && sudo apt-get install -y jami - Launch Jami by selecting the Raspberry > Internet > Jami menu entry.
-
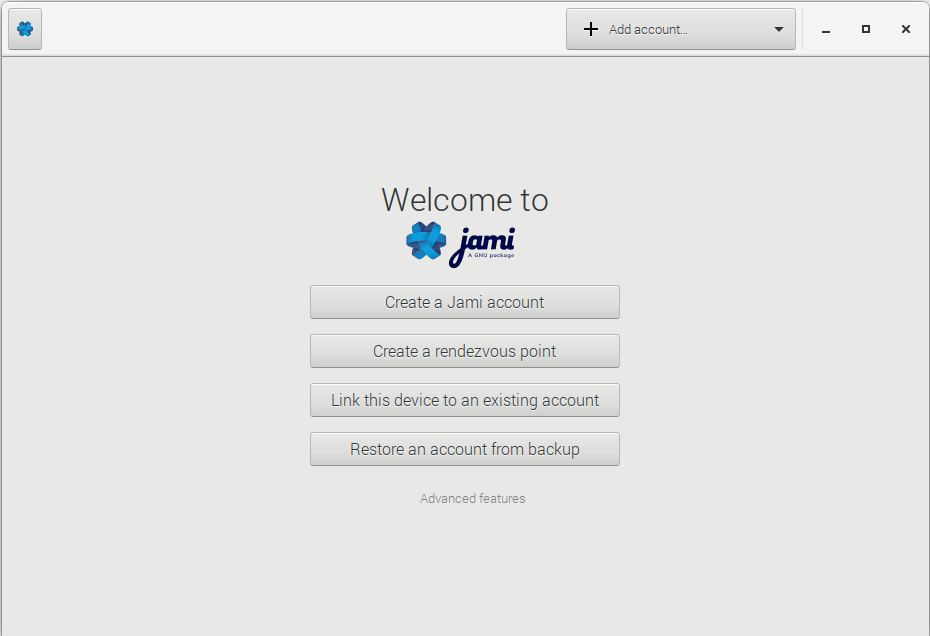
On the Welcome to Jami page that appears, click on Advanced features at the bottom:
-
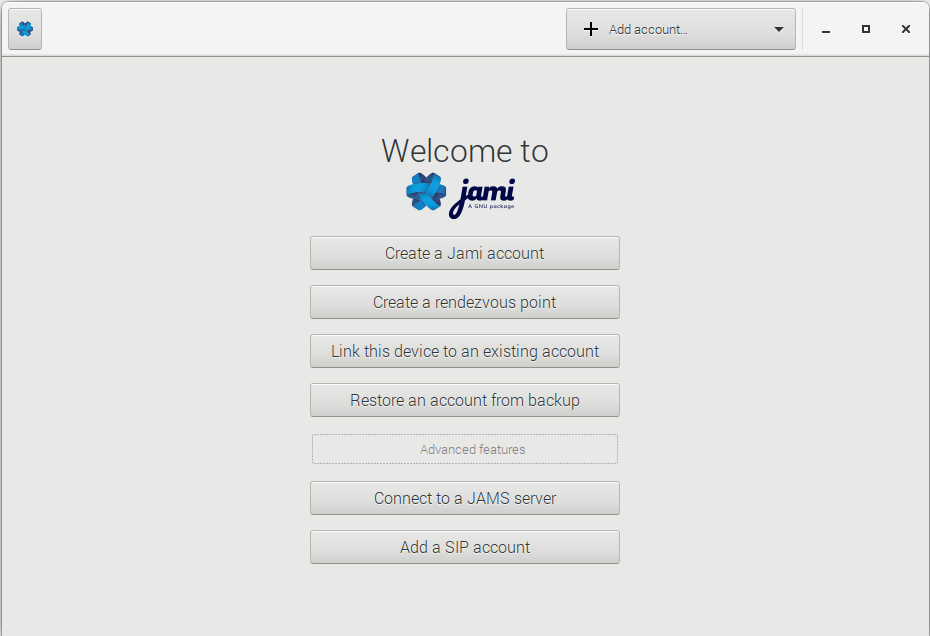
Click the Add a SIP account button:
- Enter the account name you selected earlier, in Step 5 — or pick one of the names from your IoT VoIP Demo browser window — into the Jami Username field.
- Enter the SIP Registered Domain from Step 5 into the Jami Server field.
-
Enter
ThisIs1Password!— or your own password if you changed it earlier — into the Jami Password field: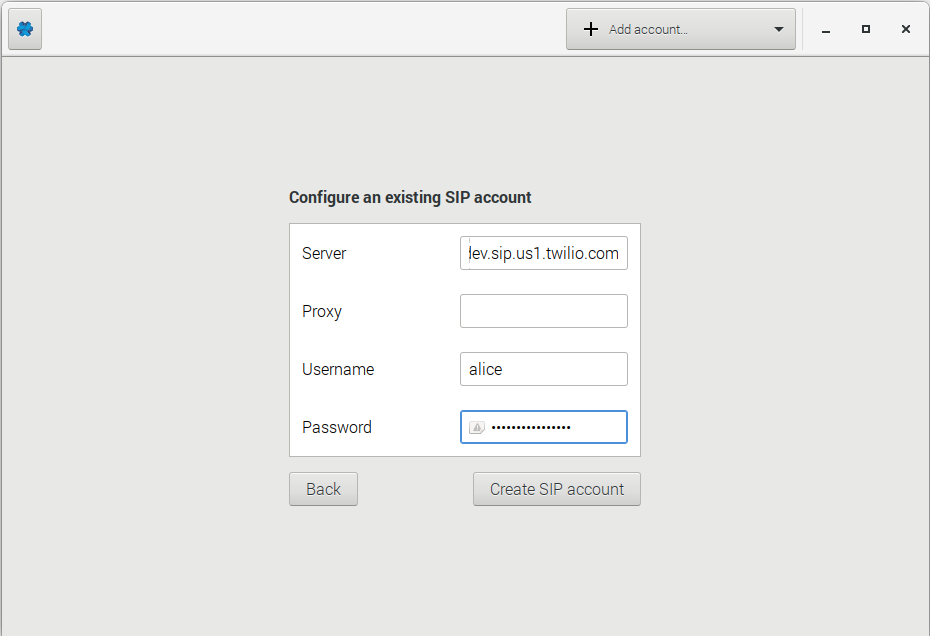
- Click the Create SIP Account button.
- Back at the main Jami UI, click the gearwheel icon to the left of your SIP account name, then click the Media button.
-
Set your Ringtone, Output and Input Device to your USB audio adapter. This may not be listed as it appears in the screenshot below, so just make sure you don't select Default , HDMI or AV Jack :
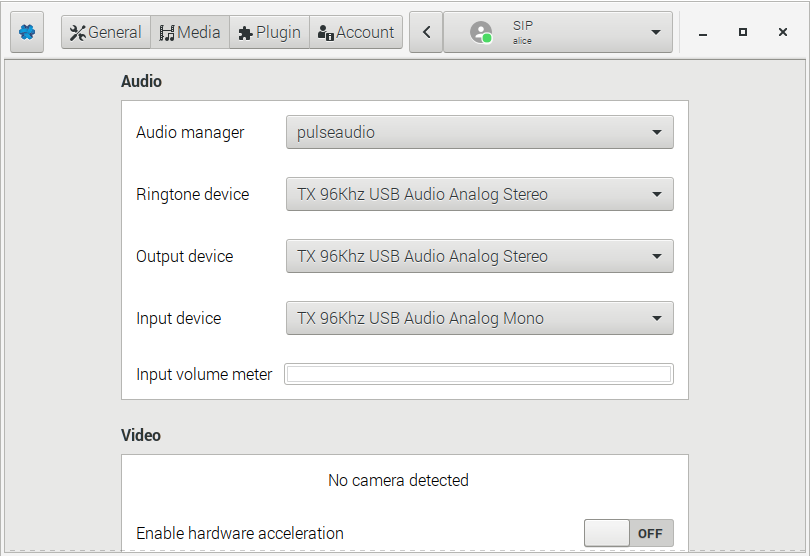
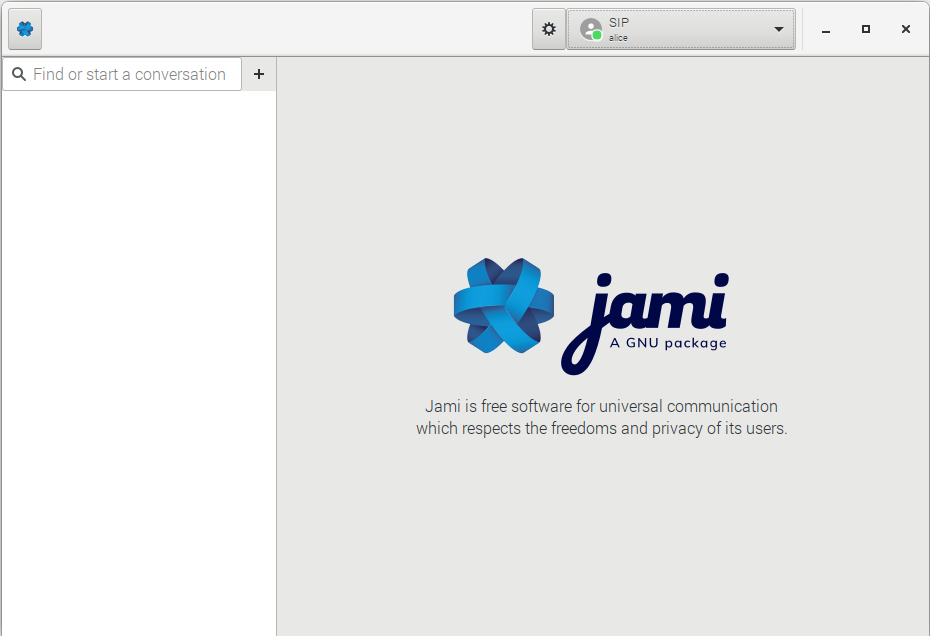
- Click the < to the left of your SIP account name to go back to the main screen.
-
In Jami, enter your own cellphone number into the Find or start a conversation field in the left-hand column:
-
Click on the phone handset icon at the top right to call the number:
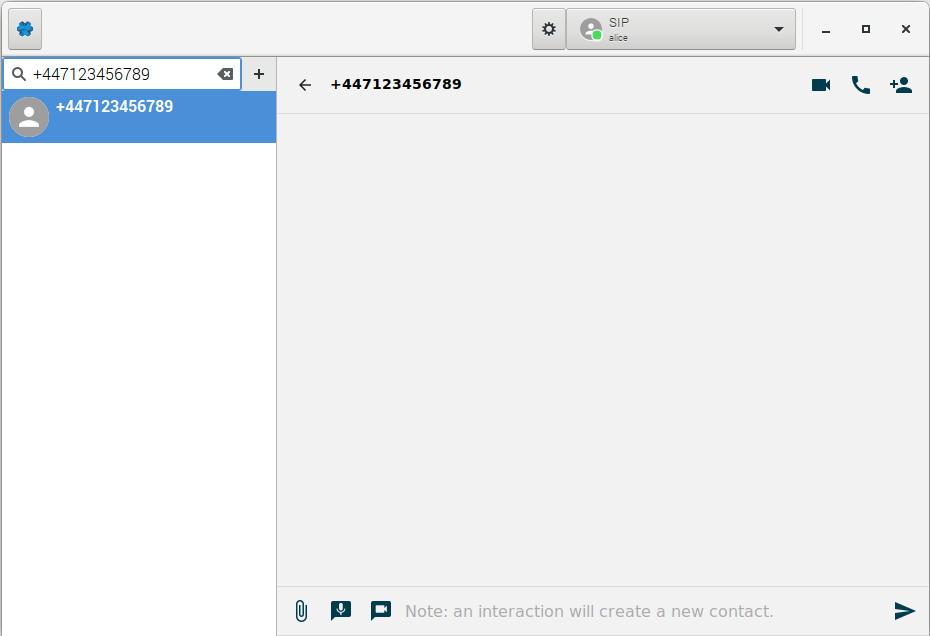
- Take the call on your phone!
- On your cellphone, dial the number back.
-
You'll hear a request for the extension of the party you're trying to reach. Key in
100on your phone keypad. - Talk!
You've built yourself a working demo IoT VoIP system that connects a softphone running on a Raspberry Pi computer, via a Twilio Programmable Voice SIP Domain and a cloud-side application constructed with Twilio Functions, to a cellphone for the purpose of making and taking voice calls.
The crucial point to recall, however, is that it is a demo, not a full application. But it neatly shows how you might architect such an application — imagine an industrial IoT unit in the field capable of hosting back-to-base support calls — and of what it would be capable.
Now it's over to you. We can't wait to see what you build.