Integrate Flex with Puzzel WFM
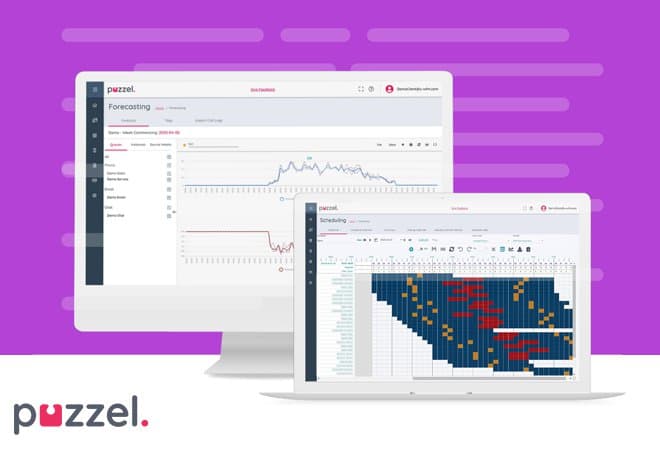
Puzzel WFM provides a cloud-based platform that enables forecasting, scheduling, and adherence monitoring for your entire Twilio Flex contact center workforce. The solution is specifically designed to increase agent retention, reduce administrative overheads, and increase productivity. Puzzel WFM can be set up in just days and is fully integrated with Twilio Flex.
This guide lists the prerequisites and all tasks that are required to complete the integration setup. However, detailed instructions for tasks marked with an asterisk are available through the Puzzel Help Centre.
Info
This guide was created in January 2021. Please refer to the Puzzel Release Notes for information on changes made to the Puzzel WFM solution that may affect the content or images in this guide.
The following Puzzel WFM terms are useful when completing this guide:
- Campaign: feature that is used to group and schedule agents who share the same Skills or Skill Sets. Campaigns can represent departments, services that you offer, or other company entities.
- Full Time Equivalent (FTE): number of hours that comprise a full-time work week for an employee in your contact center.
- Site: location of the contact center. Contact centers can have multiple sites.
- Custom Activity Types: activities that you create in Puzzel WFM to map to the TaskRouter activities in your Flex Workspace. Mapping activities is required for Real-Time Adherence. You do not need to create custom activities for the pre-populated TaskRouter activities "Offline", "Available", and "Break".
- Realtime Source: source that allows you to map activities in Flex to activities in Puzzel WFM. These sources enable the real-time adherence feature.
- Skills: queues that an agent can handle.
- Skill Set: group of Skills that an agent can handle.
- Patience: amount of time in seconds that an average customer will wait before they hang up.
- Alias: feature that allows you to map a TaskRouter TaskQueue to a Queue in Puzzel WFM if the queue has a different name across systems. You can also use Alias to merge multiple queues into one forecast queue. For example, if you have three separate queues ("Australia", "New Zealand", "UK") and you want to create a forecast that includes all three queues, you can create one queue ("International") and assign the three individual queues as Aliases for that one queue.
- Team Leader: equivalent term for Supervisor in Flex.
- You must upgrade your Flex project and select a paid pricing plan. This allows you to enable Flex Insights, which is required to provide Puzzel WFM with historical data from your Flex contact center. For more information, see Getting Started with Flex Insights.
- You must have a Puzzel WFM account with access to the Planner Portal.
- You must contact the Flex Integrations Support Team (flex-integrations@twilio.com) to enable the Puzzel WFM Integration tile so that it is available within the Flex → Admin → Integrations page mentioned below.
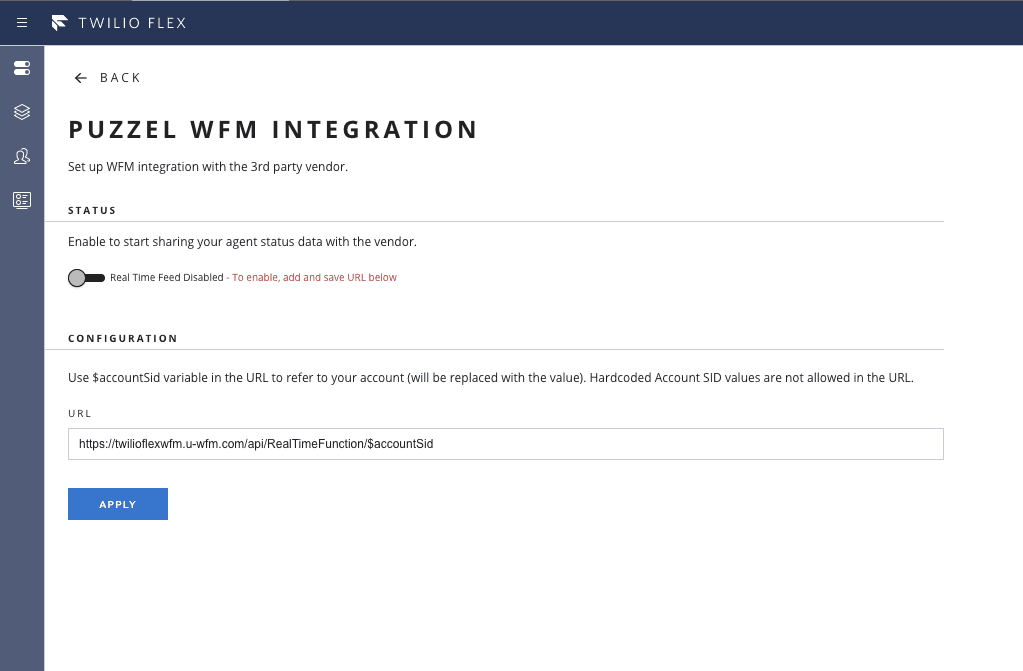
Configuring the Puzzel WFM integration in Flex enables Puzzel WFM to receive historical and near real-time data that are used for forecasting and real-time adherence. This means that by completing this task, you provide Puzzel WFM access to your Flex Insights reports.
- From the Twilio Console, select Flex > Launch Flex. The Admin page appears.
- Under Integrations, select Configure.
- On the Puzzel WFM configuration card, select Configure.
- Under Configuration, edit the URL and click Apply.
- Under Status, use the toggle to enable the Real-Time Feed.
Info
Detailed instructions for tasks marked with an asterisk are available through the Puzzel Help Centre.
Puzzle WFM offers three portals: Agent, Supervisor, and Planner. You must complete the following tasks using the Planner portal:
-
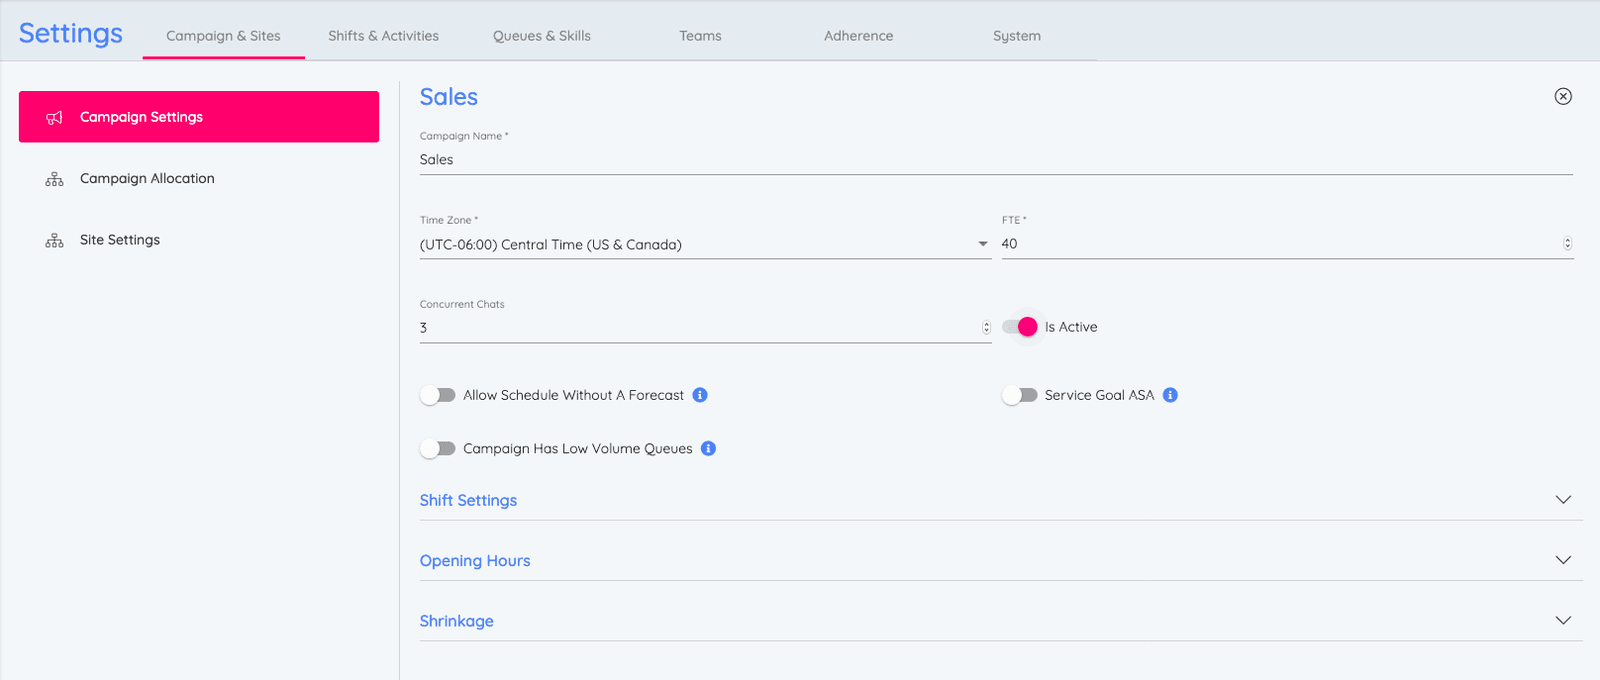
Create Campaigns* Note: You must set the Opening Hours.
-

-
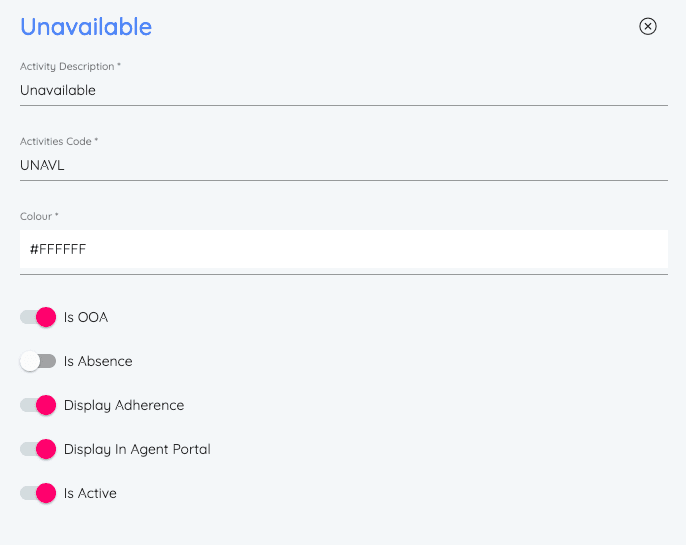
Create Custom Activity Types* Note: You must create the custom activity "Unavailable" to map to the pre-populated TaskRouter activity "Unavailable" in your Flex Workspace. Use the image below for guidance when creating this activity. You map the activity in Step 4.
-
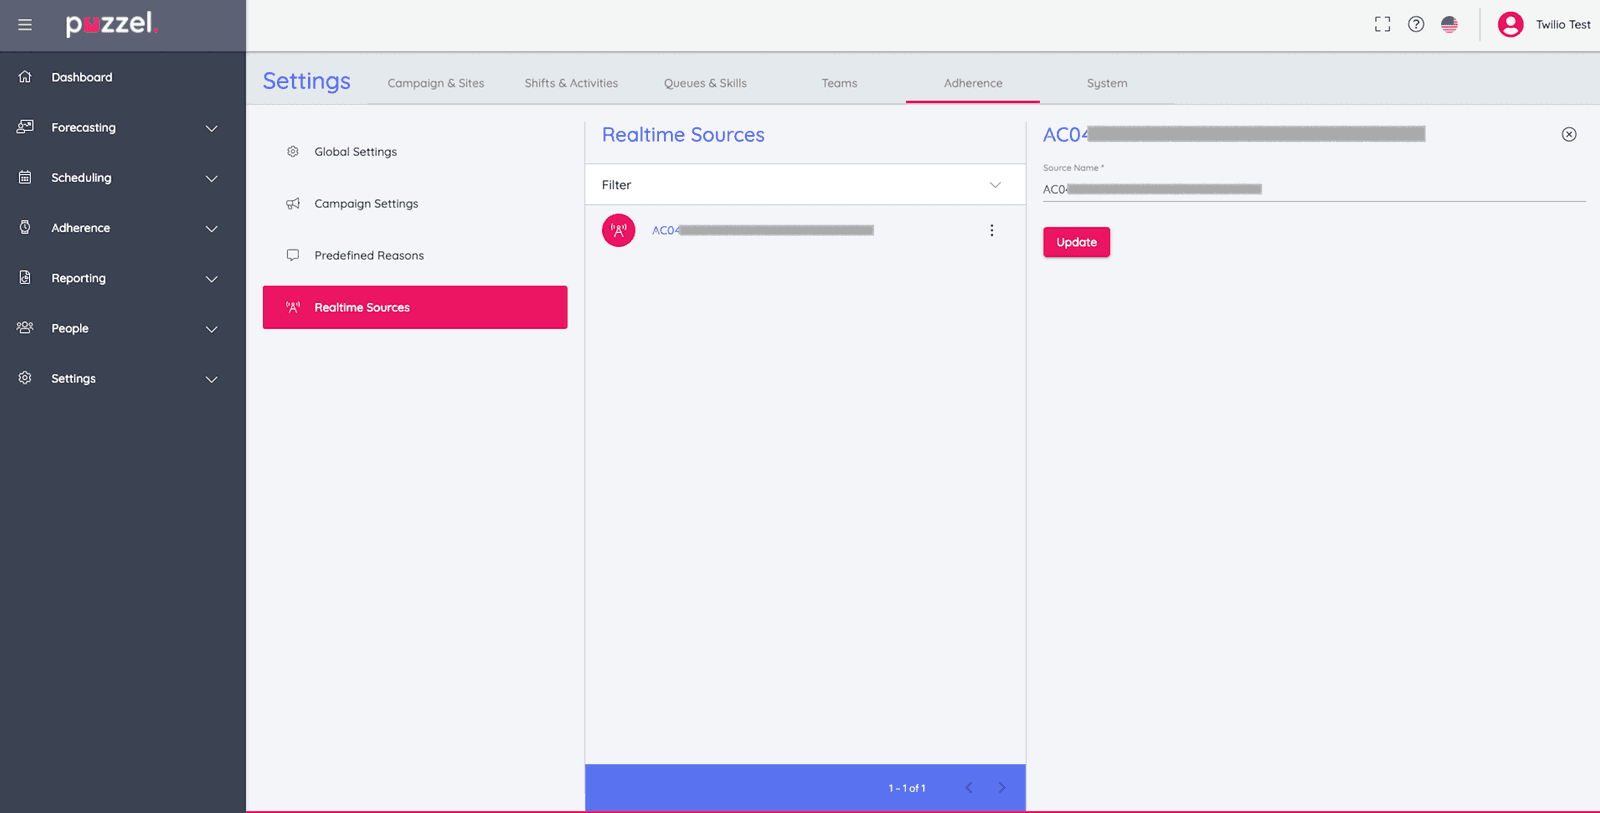
Create a Realtime Source and Map Activities:
-
From Settings > Adherence > Realtime Sources, click the plus sign to create a new source.
-
For Source Name, input your Flex Project Account SID, then select Create.
-
Select the ellipsis next to the source you created and click Activity Mapping.
-
Click the plus sign to map a TaskRouter activity from your Flex Workspace to an activity in Puzzel WFM. Complete the required fields then select Update.
Notes: At minimum, you must map the following pre-populated TaskRouter activities: Offline, Available, Unavailable, Break.
The image below shows how to map the custom activity "Unavailable" that you created in Step 3 to the pre-populated TaskRouter activity "Unavailable" in your Flex Workspace: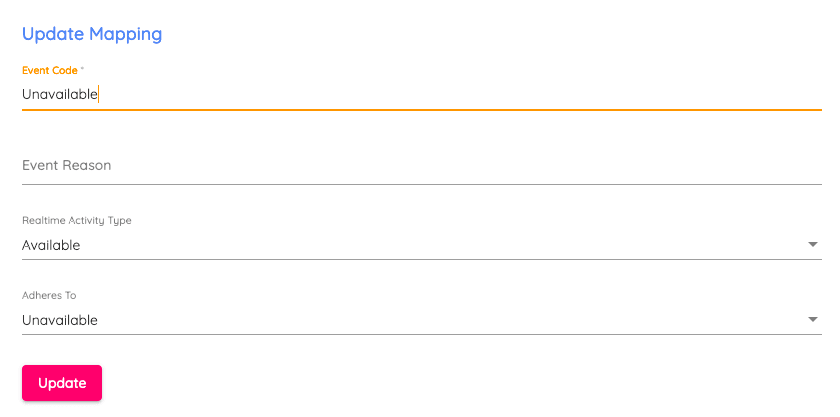
The image below shows the mapping of the pre-populated TaskRouter activities in your Flex Workspace: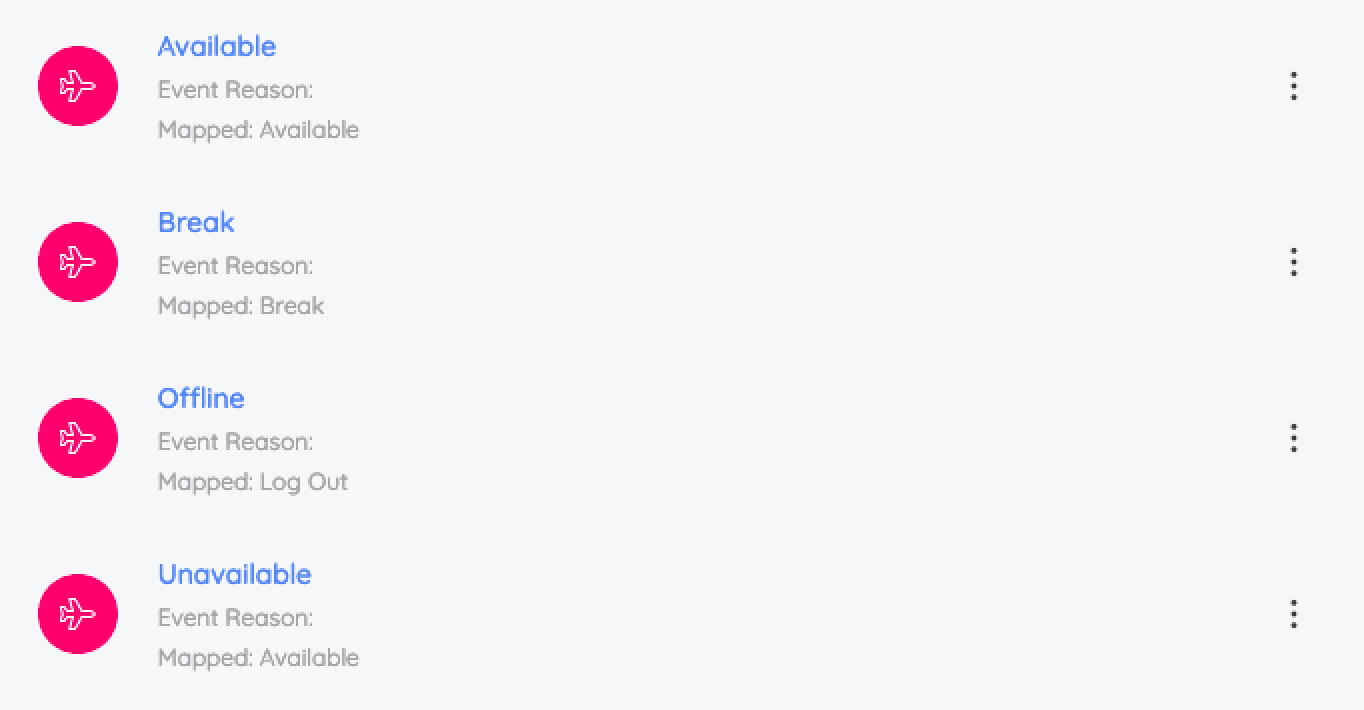
-
-
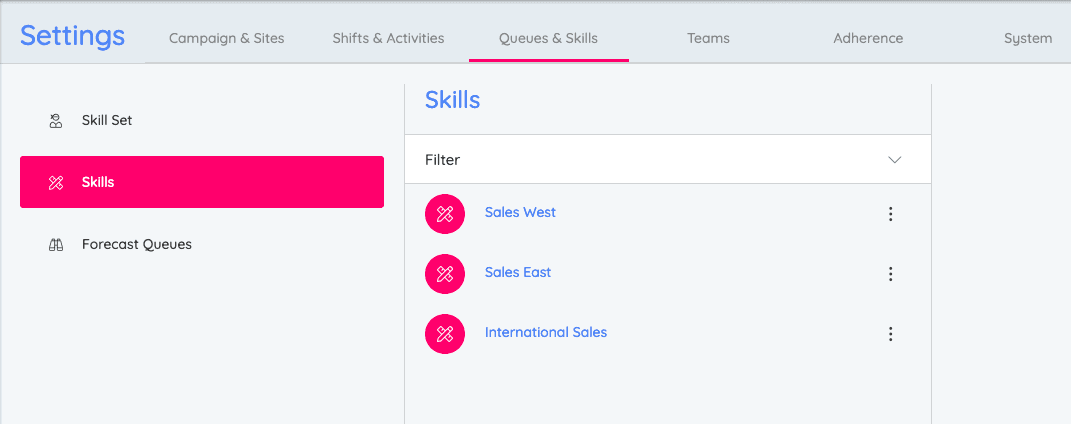
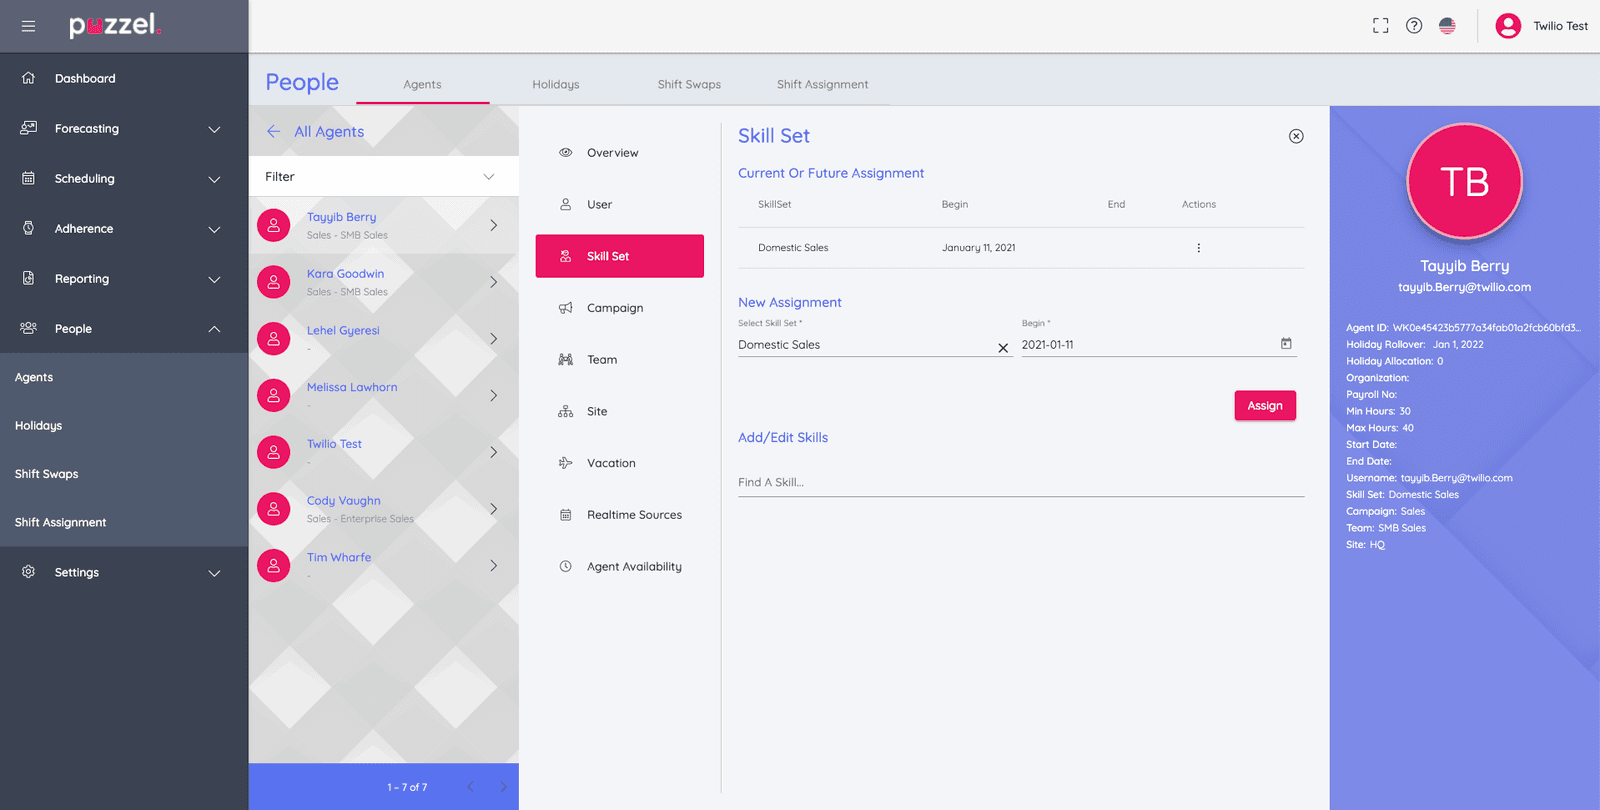
The following example shows a Skill Set that has two Skills assigned to it: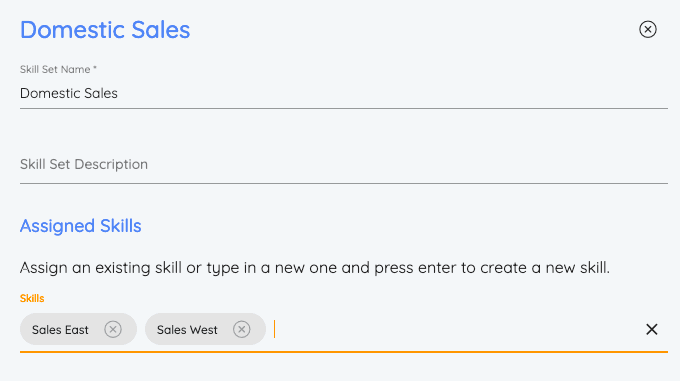
-
Create Forecast Queues* Notes: Ensure that you assign an Alias to any Queue that has a different name across systems. For example:
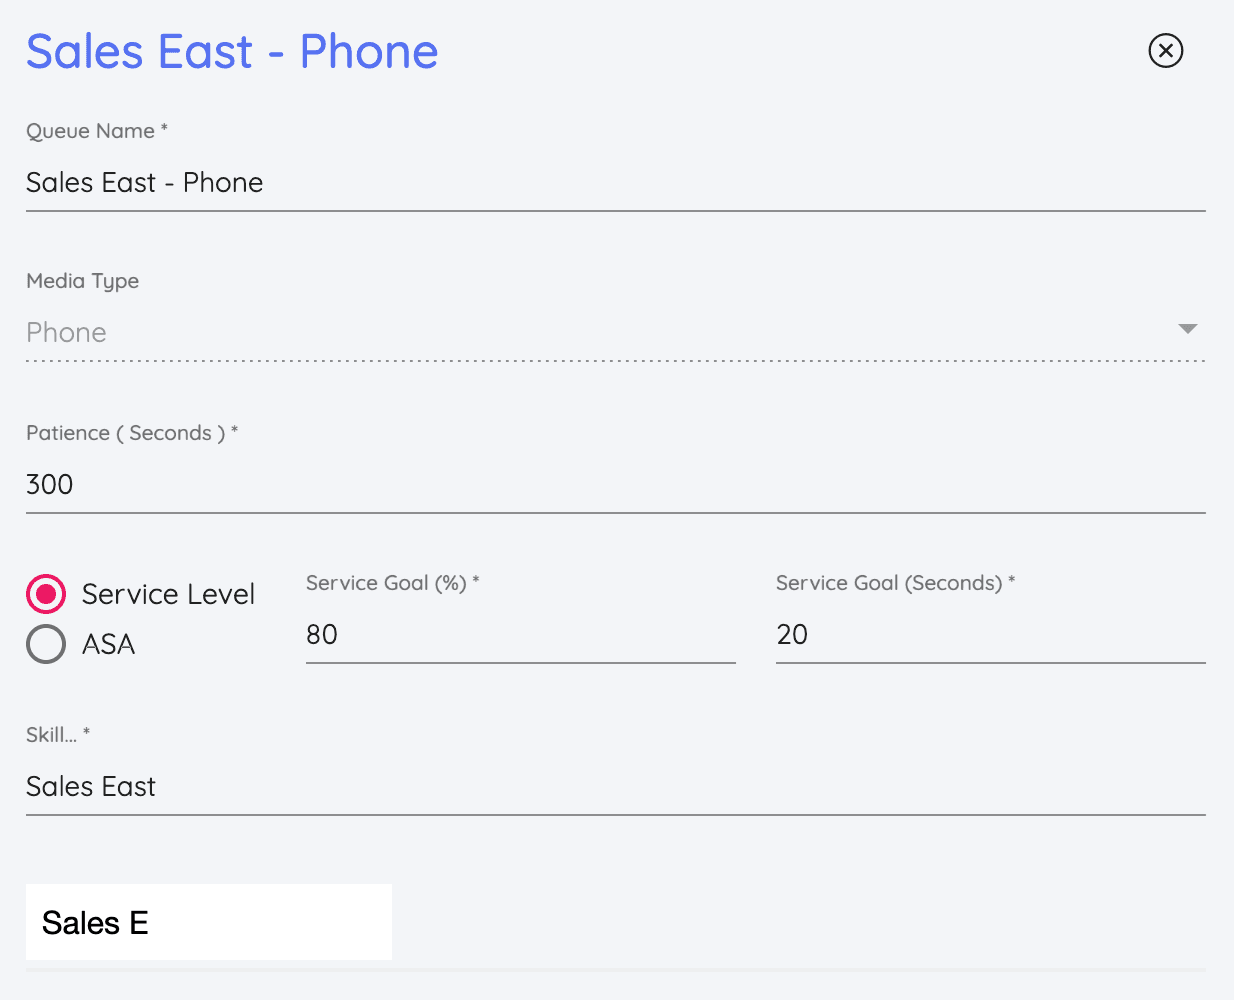
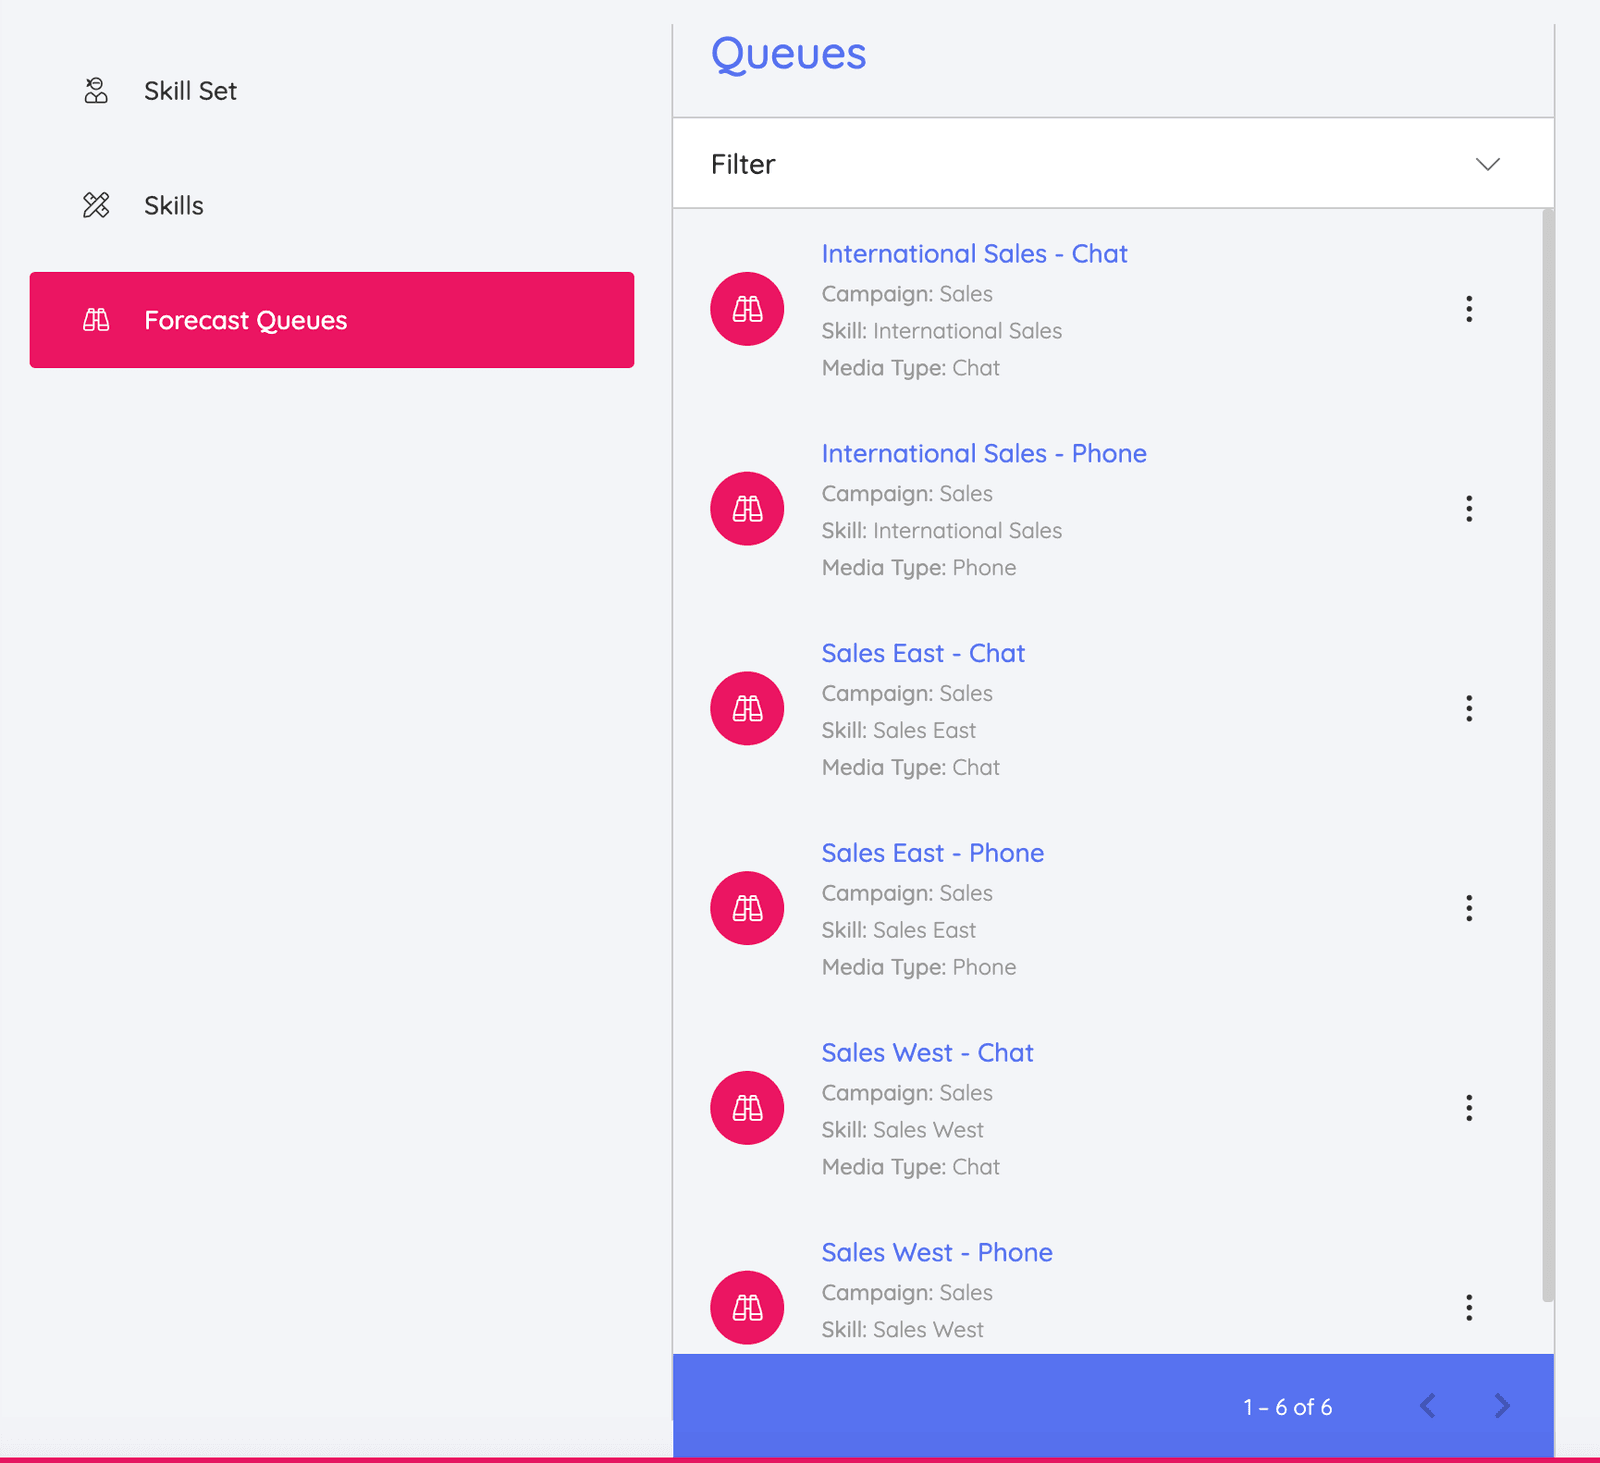
If a TaskRouter TaskQueue receives tasks from different TaskChannels, you must create a Queue in Puzzel WFM for each channel type. For example, "Sales East - Phone" and "Sales East - Chat". Example list of Forecast Queues:
-
Activate and Assign Campaigns to Queues:
- Select the ellipsis next to the queue that you created and click Activate / Assign Campaign.
- Complete the required fields then select Assign.
-
Import Team Leaders (Supervisors):
-
From People > Agents, select the plus sign in the bottom-right corner. Click the Import Agents icon.
-
Choose a Date Format and import a CSV file that includes the required fields listed in the table below. The right column in the table shows how these fields may be mapped to Worker properties in Twilio.
Required Fields Potential Mapping to Worker Properties agentIdWorker SID forenamePart of Worker attribute "full_name"surnamePart of Worker attribute "full_name"SiteN/A holidayAllocationN/A holidayAllocationRolloverDateN/A emailWorkWorker attribute "email"usernameWorker attribute "client"Note: If you include the fields
CampaignandSiteand provide values for these fields, you do not have to manually assign Team Leaders to a Campaign or a Site. Sample File. -
Review the imported data then select Next. Puzzle WFM validates the file.
-
Select Complete.
Note: You can also manually add Team Leaders in Puzzel WFM. Detailed instructions are available through the Puzzel Help Centre.
-
-
-
-
From People > Agents, select the plus sign in the bottom-right corner. Click the Import Agents icon.
-
Choose a Date Format and import a CSV file that includes the following required fields:
agentIdForenameSurnameCampaignTeamSiteminHoursmaxHoursholidayAllocationholidayAllocationRolloverDateemailWorkUsername
-
Review the imported data then select Next. Puzzle WFM validates the file.
-
Select Complete. Note: If you have already created Campaigns (Step 1), Sites (Step 2), and Teams (Step 9) and you include the fields
Campaign,Site, andTeam(and provide values for these fields) when you import agents, the agents are automatically assigned to the defined Campaign, Site, and Team.Note: You can also manually add Team Leaders in Puzzel WFM. Detailed instructions are available through the Puzzel Help Centre.
-
-
Import Historical Information* Note: You must complete this step once for each campaign. Sample File
-
Import Holiday/Vacation Allocations* Note: You must complete this step once for each campaign. Sample File
-
Create Shifts* Note: When working with rotational shifts, use the Effective Date field to specify when the rotation should begin.
Example Week Overview of shifts created to define a full-time work week: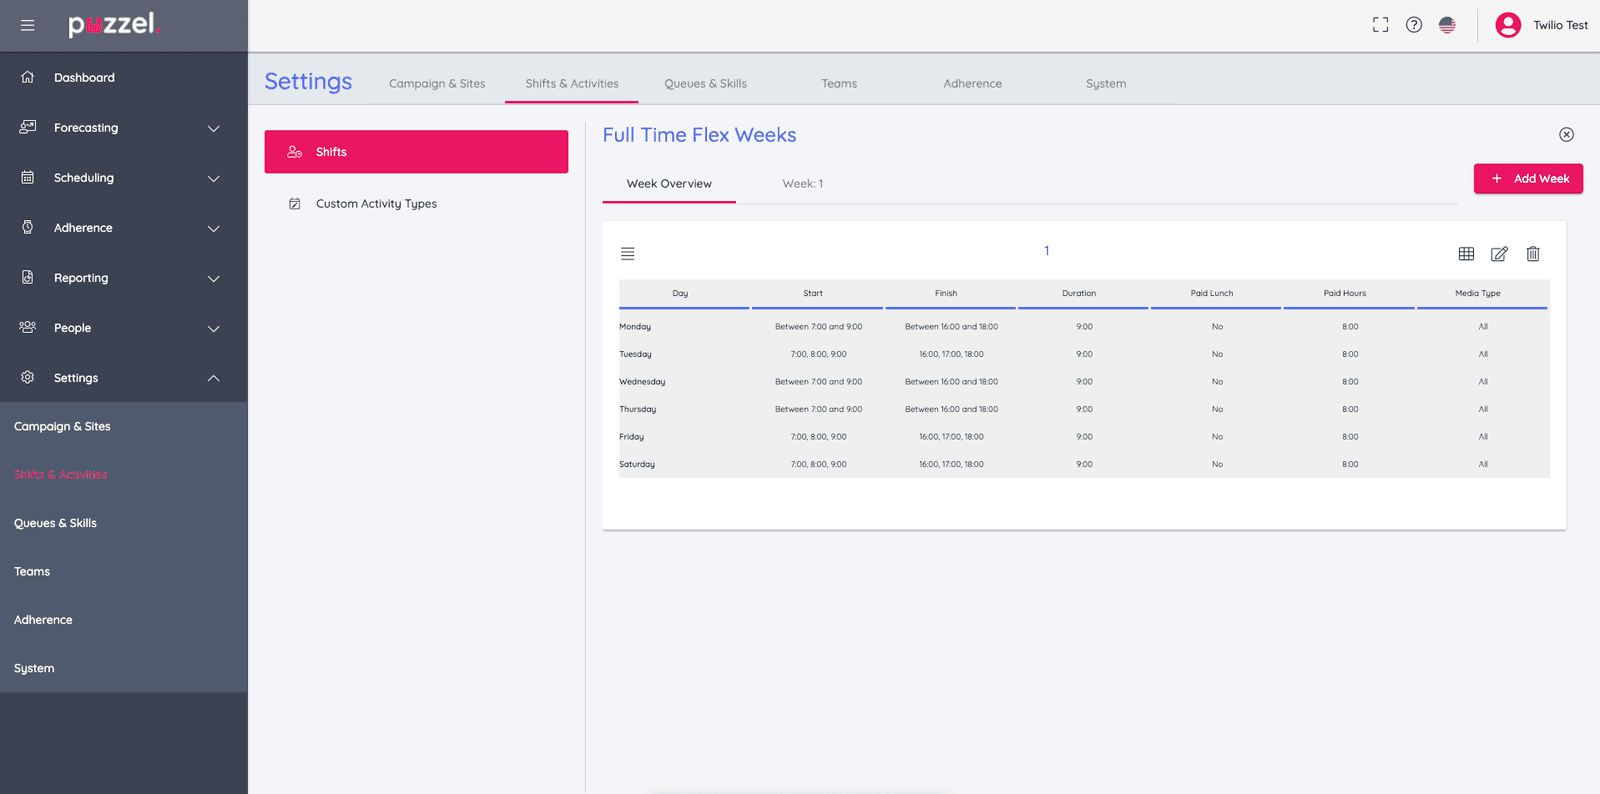
Example of Activities implemented to define shift specifics (Ex: Lunch):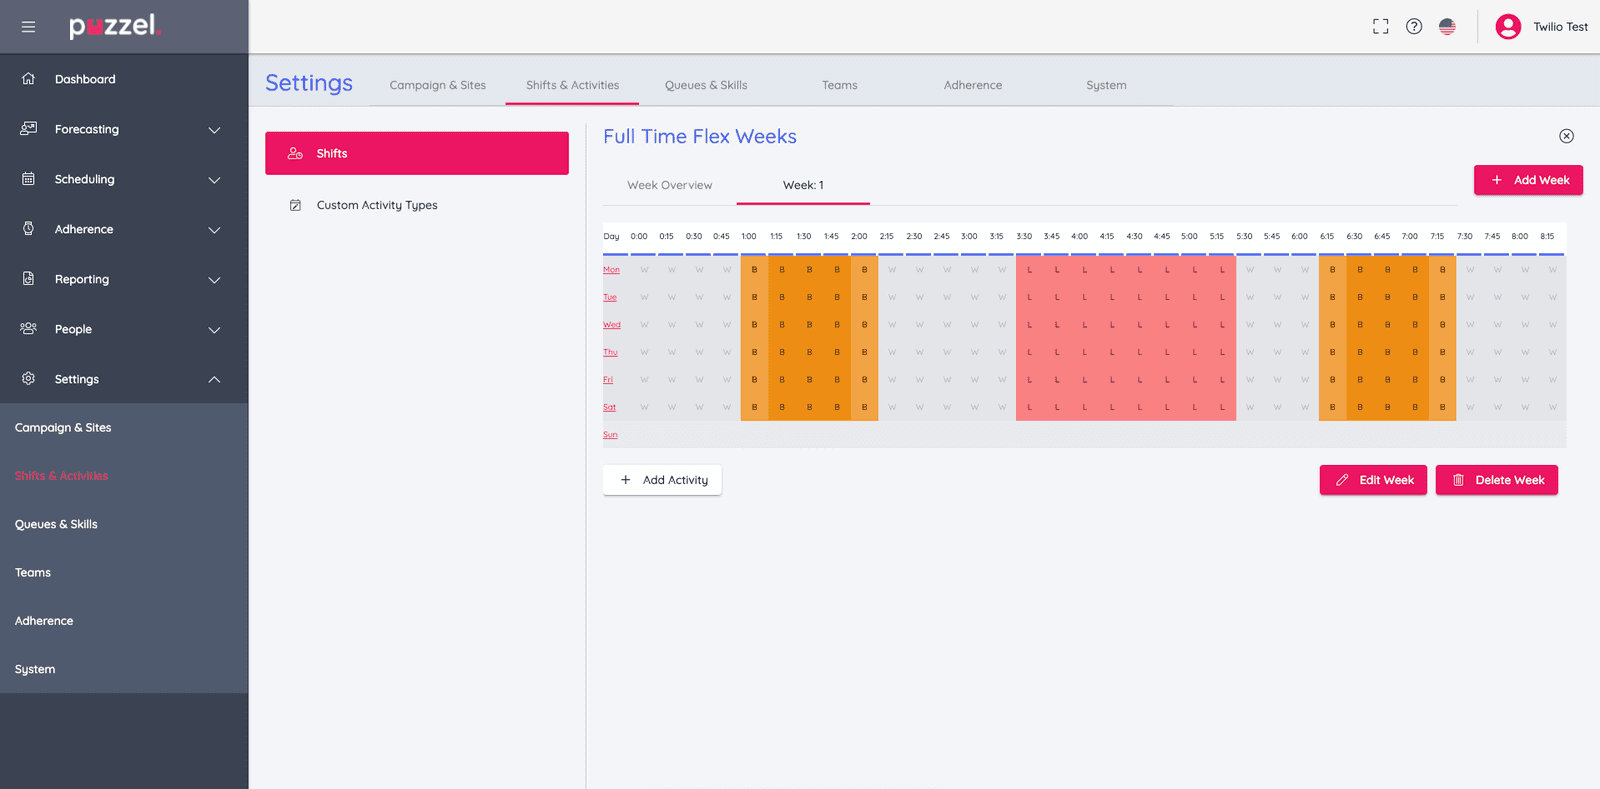
-
Assign Shifts to Agents* Note: We suggest that you do not provide values for Add Rotation.

-
-
Create Forecasts.*
Example of Step 1:
Example of Step 2: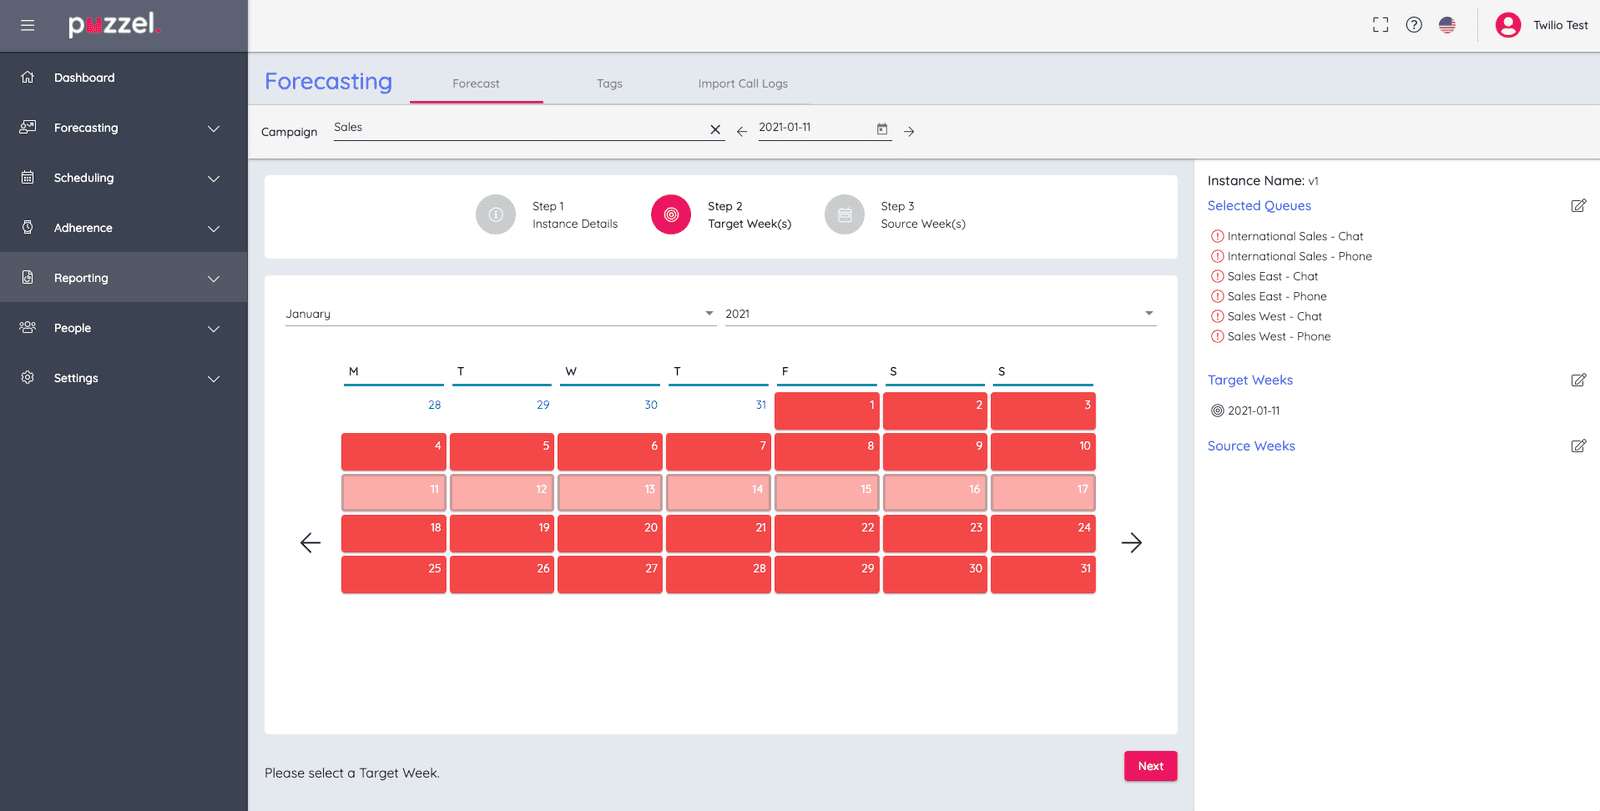
Example of Step 3: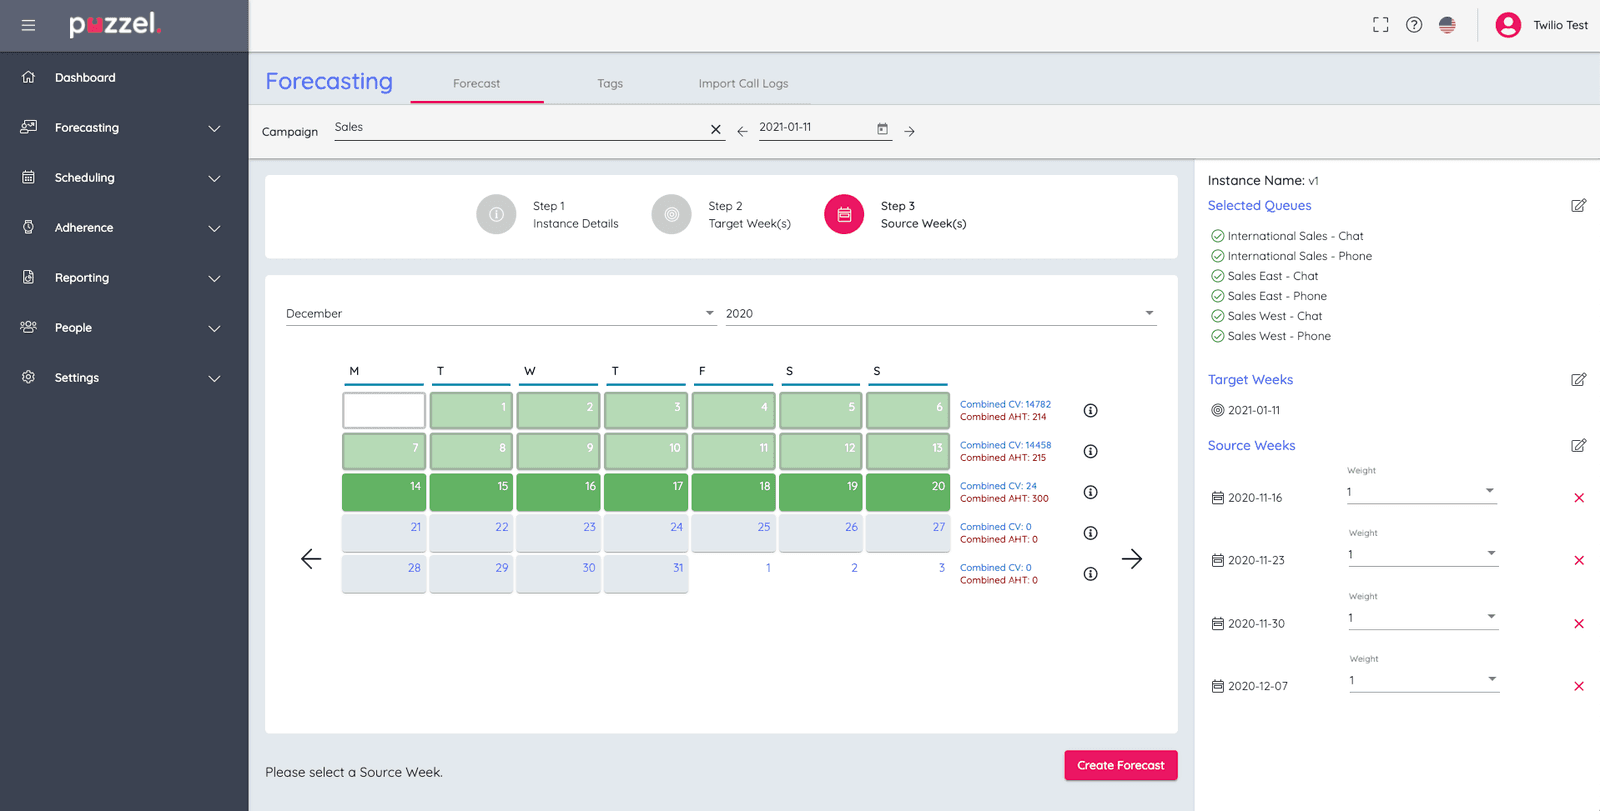
Example Forecast: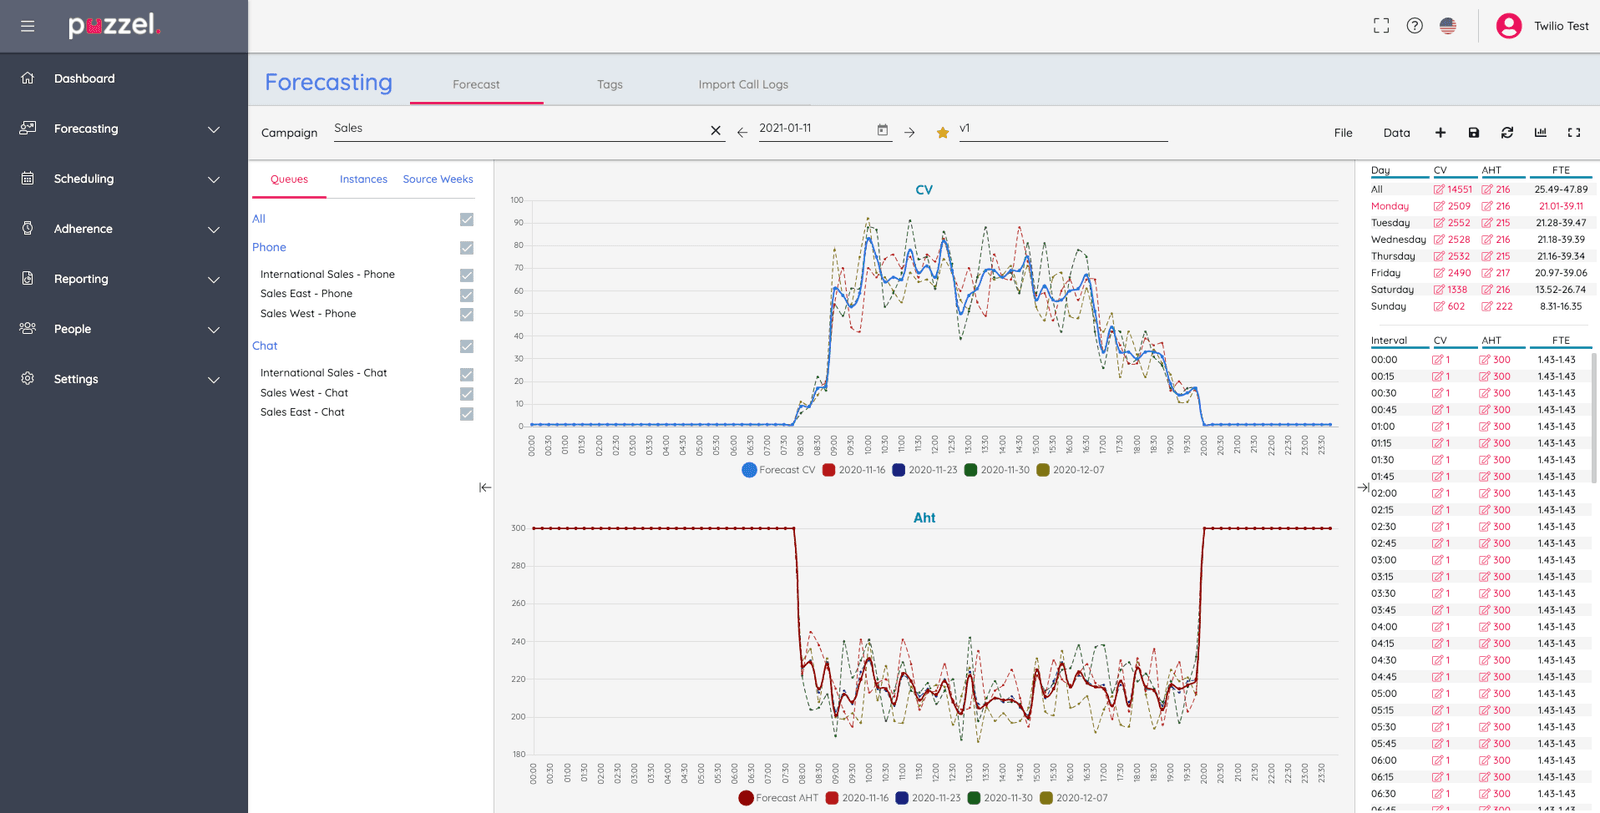
Note: You can manually adjust the forecast if necessary. -
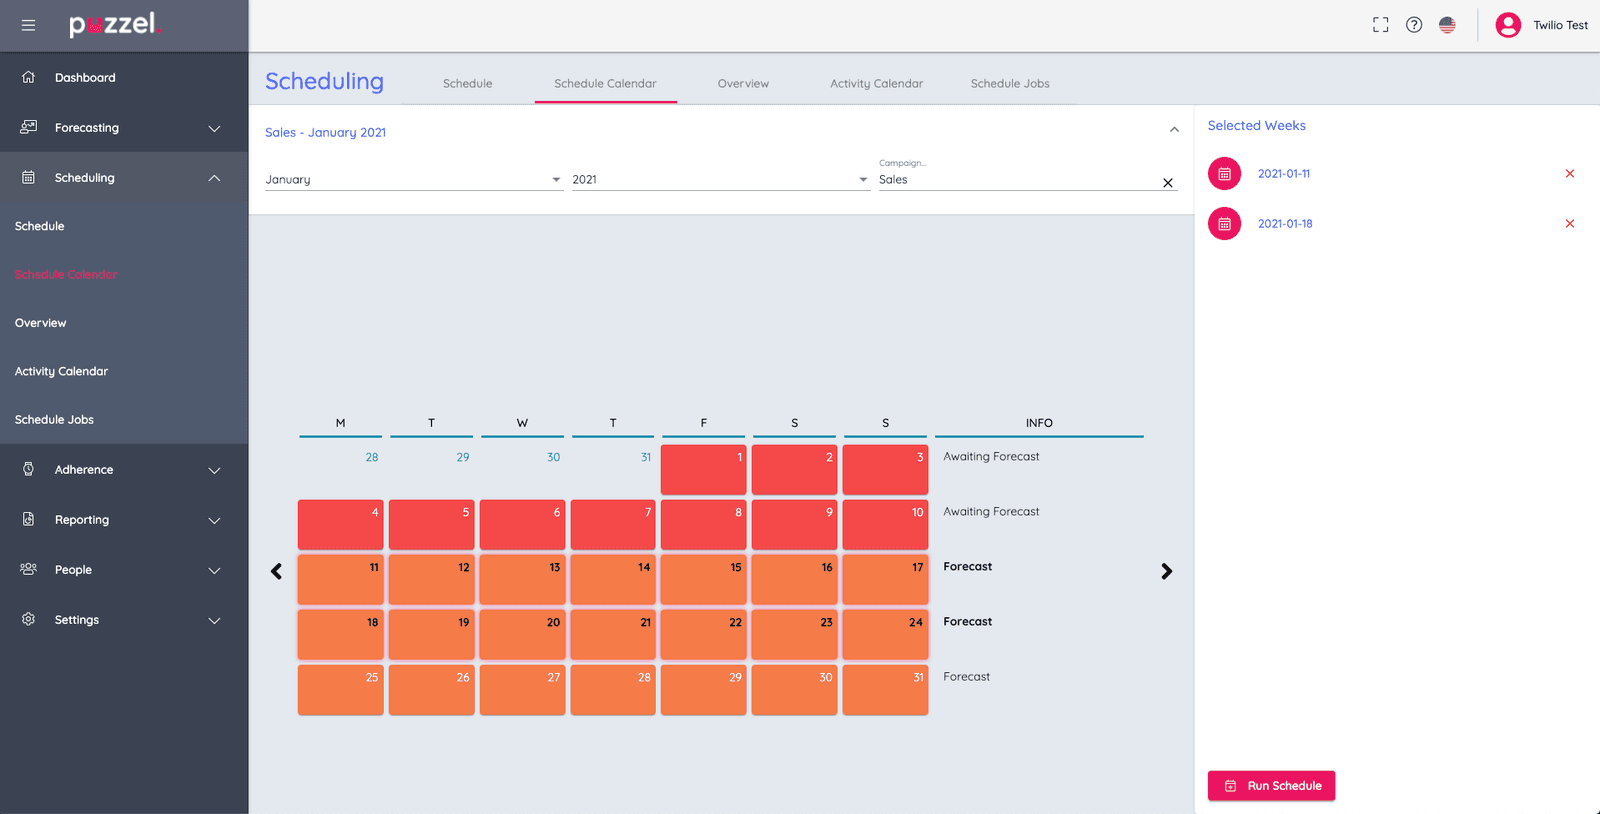
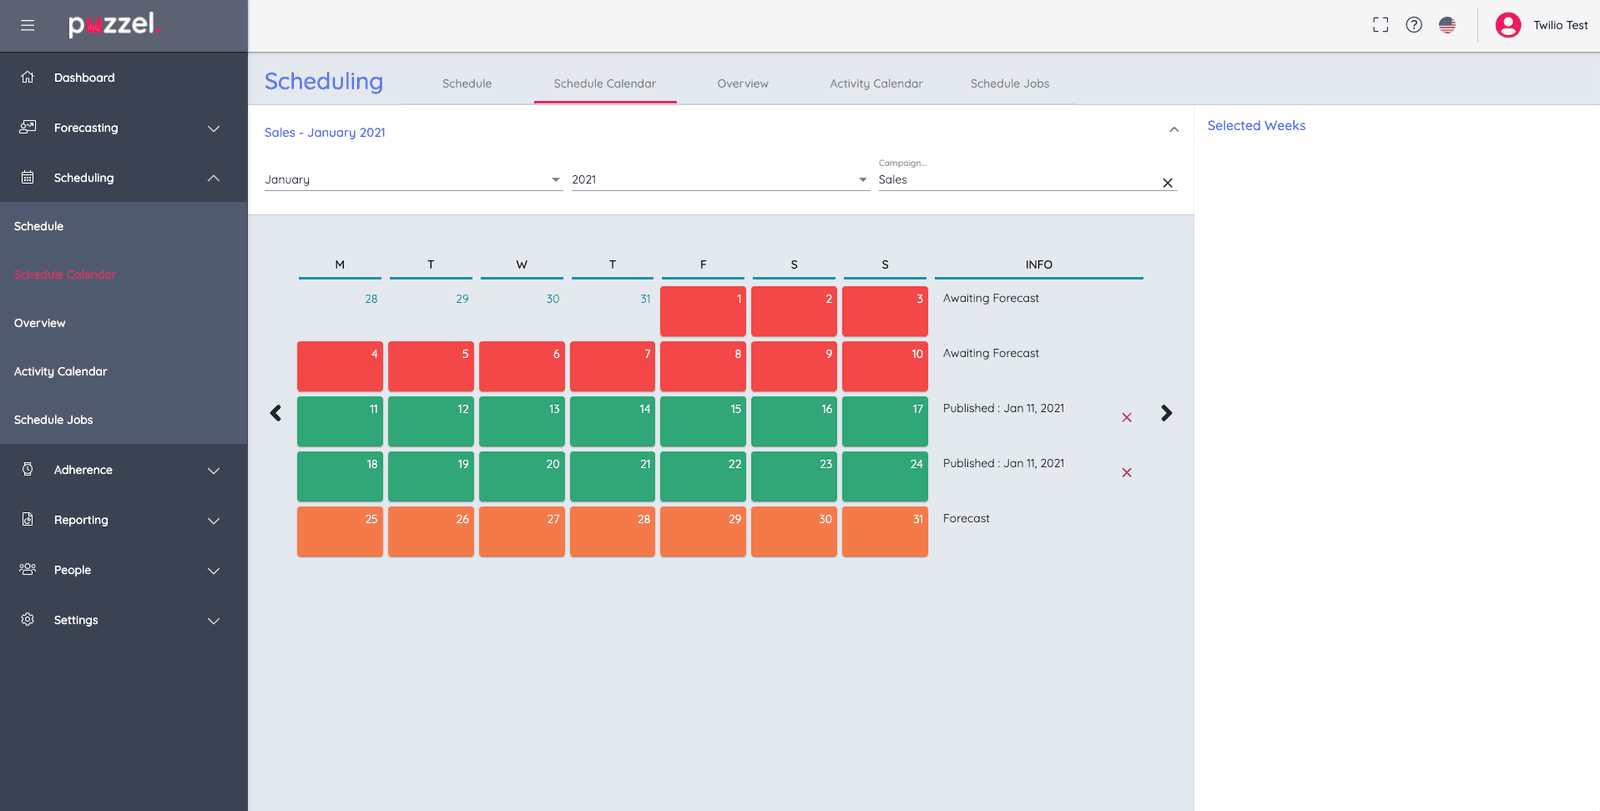
Create Schedules.* Note: Running a schedule may take some time.
-
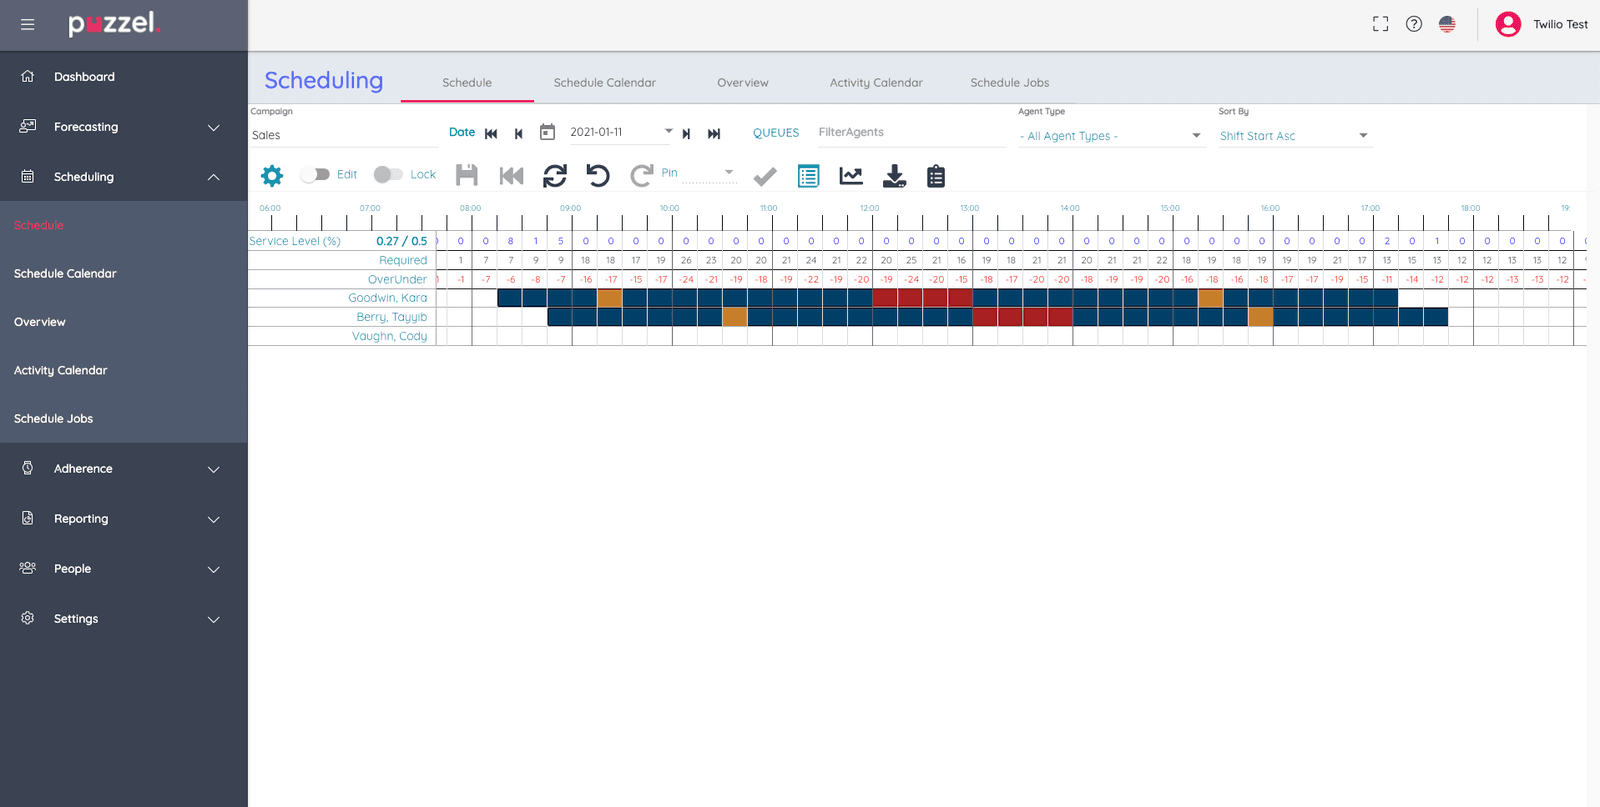
Edit Schedules and Add Activities.*
-
The Flex and Puzzel WFM Integration is complete.
Info
For more information or assistance with Puzzel WFM, visit the Puzzel Help Centre and select the Support tab on the right.