Build an IVR for Flex with Twilio Studio
On this page, you'll learn how to route calls to agents using an Interactive Voice Response (IVR) menu that we will build in Twilio Studio.
Info
Prefer to get started by watching a video? Check out our collection of Flex video tutorials and demos.
When conversations are routed to agents, agents can accept the conversation from their dashboards. When finished, agents enter wrap-up time. When that is finished, they're put back into the queue for more incoming tasks.
By default, dialing your Flex number automatically puts a call into the agent queue currently. That's not ideal in a real contact center. Usually, you'll want to add an IVR menu that plays before the call is queued and provides automated information such as business hours or location. Only callers who can't resolve their issue would then get dropped into the queue.
Next, we'll set up a small IVR to reduce the calls to our imaginary agents.
Let's put together a phone tree using a Twilio Studio integration. We'll use this IVR to report business location and hours automatically. If a caller asks for anything else, we'll put them into the agent queue.
There are quite a few steps to building the IVR, but most of them are drag and drop.
-
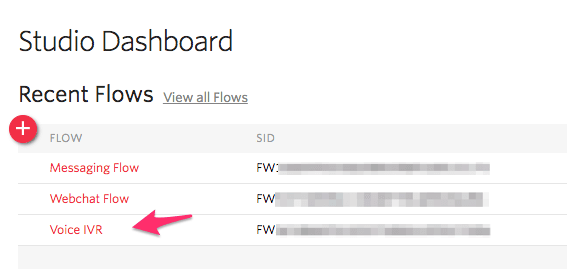
Navigate to the Studio section of the Twilio Console.
-
Click on the Voice IVR Flow to get started:
-
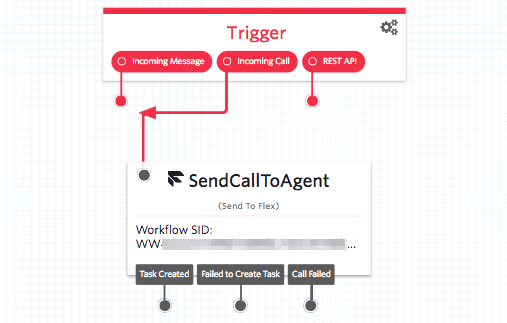
Twilio already added a Trigger event on Incoming Calls. As the IVR sits now, an Incoming Call will be routed directly to an Agent (that is, the behavior hasn't changed from before):
-
Find the Gather Input on Call widget on the right toolbar. Click down on it and drag it onto the canvas near Trigger. Click on the widget to bring up the Config tab. Enter your call greeting followed by instructions for your three options:
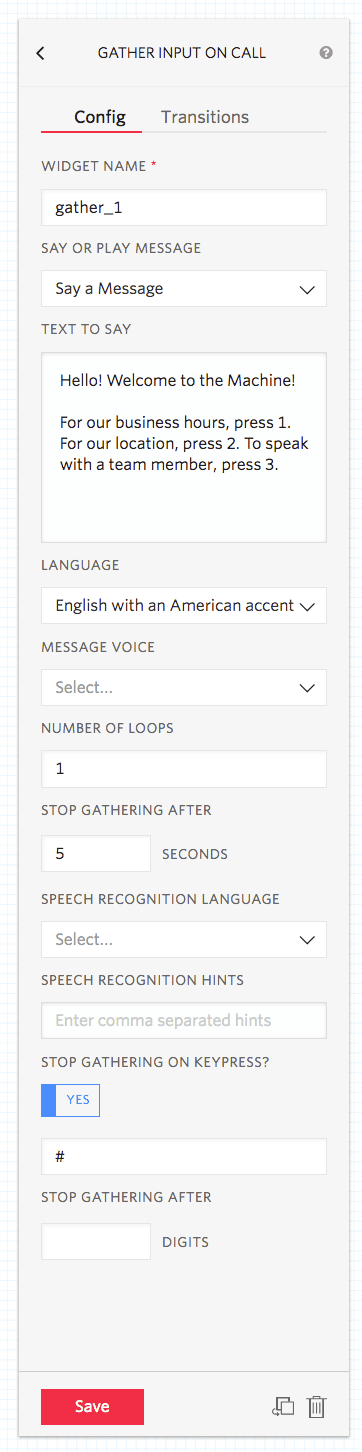
Name the widget gather_digits to make it easier to find on the canvas. -
Click Save to save the Gather widget.
-
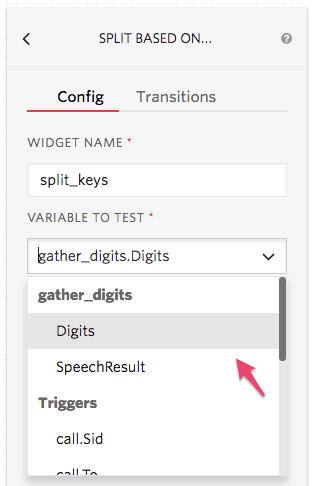
Click Back to go back to the Widget Library. Find the Split Based On... widget in the right toolbar. Drag one below the Gather widget from the last step.
-
In "Variable to Test", click to spawn a dropdown menu. Find the "Digits" variable associated with the Gather widget above and click Save.
-
Click on your Gather widget again. In the "If User Pressed Keys" Transition select the Split widget, then click Save. You should see the Trigger widget, Gather widget, and the Split widget all connected with the Send Call to Agent widget disconnected.
-
Click New on the canvas in the Split widget:
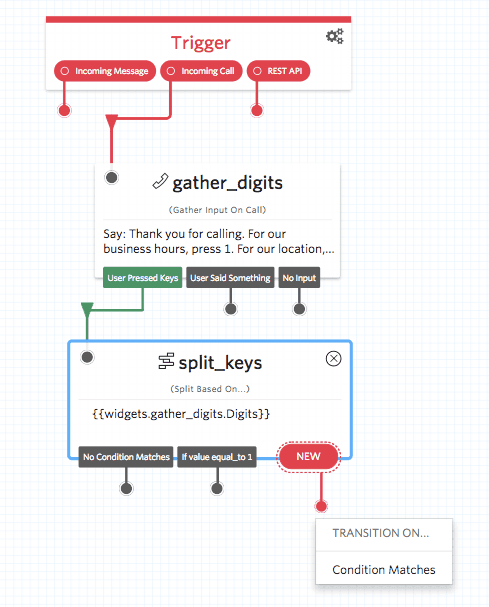
-
Select "Condition Matches" and enter
1, then click Save to save the transition. You'll see a new transition appear on your split: -
Drag a Say/Play widget onto the canvas below the Split widget. Enter a message in "Text to Say" which lists your business hours then click Save. Using your mouse, click the Split widget transition for
1and drag the line to the upper left bubble of your new Say/Play widget: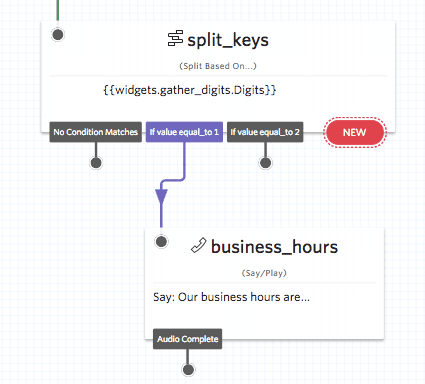
-
Repeat steps 9 through 11 except use
2in the split and have a new Say/Play widget announce the location for your business. -
From "No Condition Matches" in the Split widget, click and drag a transition to the upper left-hand bubble in the Send Call to Agent widget.
Optional: Clean up by dragging transitions and widgets around the canvas.
Your canvas should now look something like this: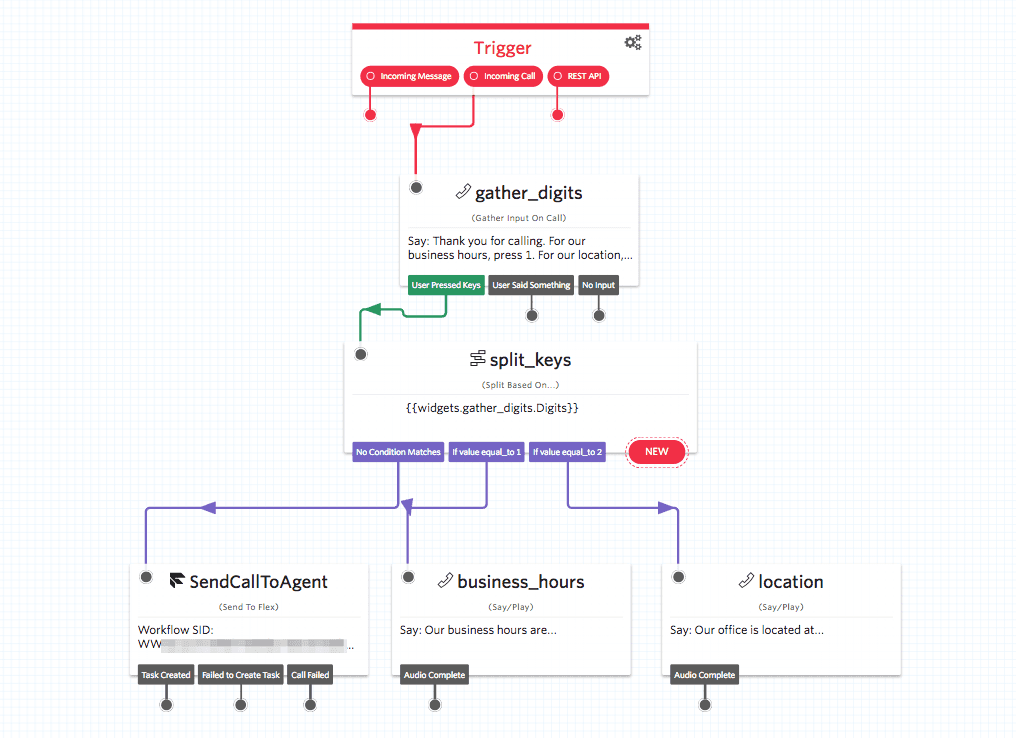
-
You're ready to go! At the top of the canvas, click Publish.

Now it's the moment of truth: Call your Flex number and verify that your IVR works. You should be able to query for business hours or location. Otherwise, your call will go into the agent queue.
If one of the transitions doesn't work, carefully follow the steps again. Be mindful of widget type, transitions, and triggers.
If it works, congratulations! You've now automatically handled some of the most common questions facing your agents.
Twilio Flex is infinitely customizable, and where you go next depends on how you want to scale your contact center. Here are a few possible next steps:
- Learn how to set up multiple call queues to manage multiple users and agents, assign skills to agents, and manage conversation routing with TaskRouter.
- Learn how to customize Flex using React.
- Learn the fundamentals of Studio and how to Build an IVR with Twilio Studio.