Configuring Sign in with Apple
Sign in with Apple lets users authenticate with supported apps and websites using their Apple IDs. This OAuth feature includes a privacy feature called "Hide My Email" that is particularly relevant to your Twilio SendGrid configuration.
This page covers the Twilio SendGrid configuration required to deliver messages to one of Apple's private email relay addresses. For more information about Sign in with Apple, consult Apple's Developer Documentation.
Info
The majority of this setup and management occurs outside the SendGrid console. SendGrid Support can help only with the steps that happen within your SendGrid account such as Domain Authentication setup.
To provide users with greater privacy, Sign in with Apple will create app-specific email addresses for users who prefer not to reveal their email addresses to a service. Apple does this with a private email relay.
When a user chooses to hide their email address, Apple will create a unique address shared between only the user and the specific service. These private addresses follow the format: <unique-alphanumeric-string>@privaterelay.appleid.com.
Apple will forward Messages sent to one of these relay addresses to the user's actual email address. As a developer, you must configure your mail send according to requirements specified by Apple if you wish to support Sign in with Apple as an authentication provider. If you fail to follow Apple's requirements, your messages to Apple's private relay addresses will be bounced with the error "550 5.1.1 bad mailbox name."
This guide will step you through either a recommended configuration, which will work for most of you, or an alternate configuration for those of you with many authenticated domains. If you have thirty-two or more authenticated domains, read the prerequisites, and then jump to the Alternative Configuration section.
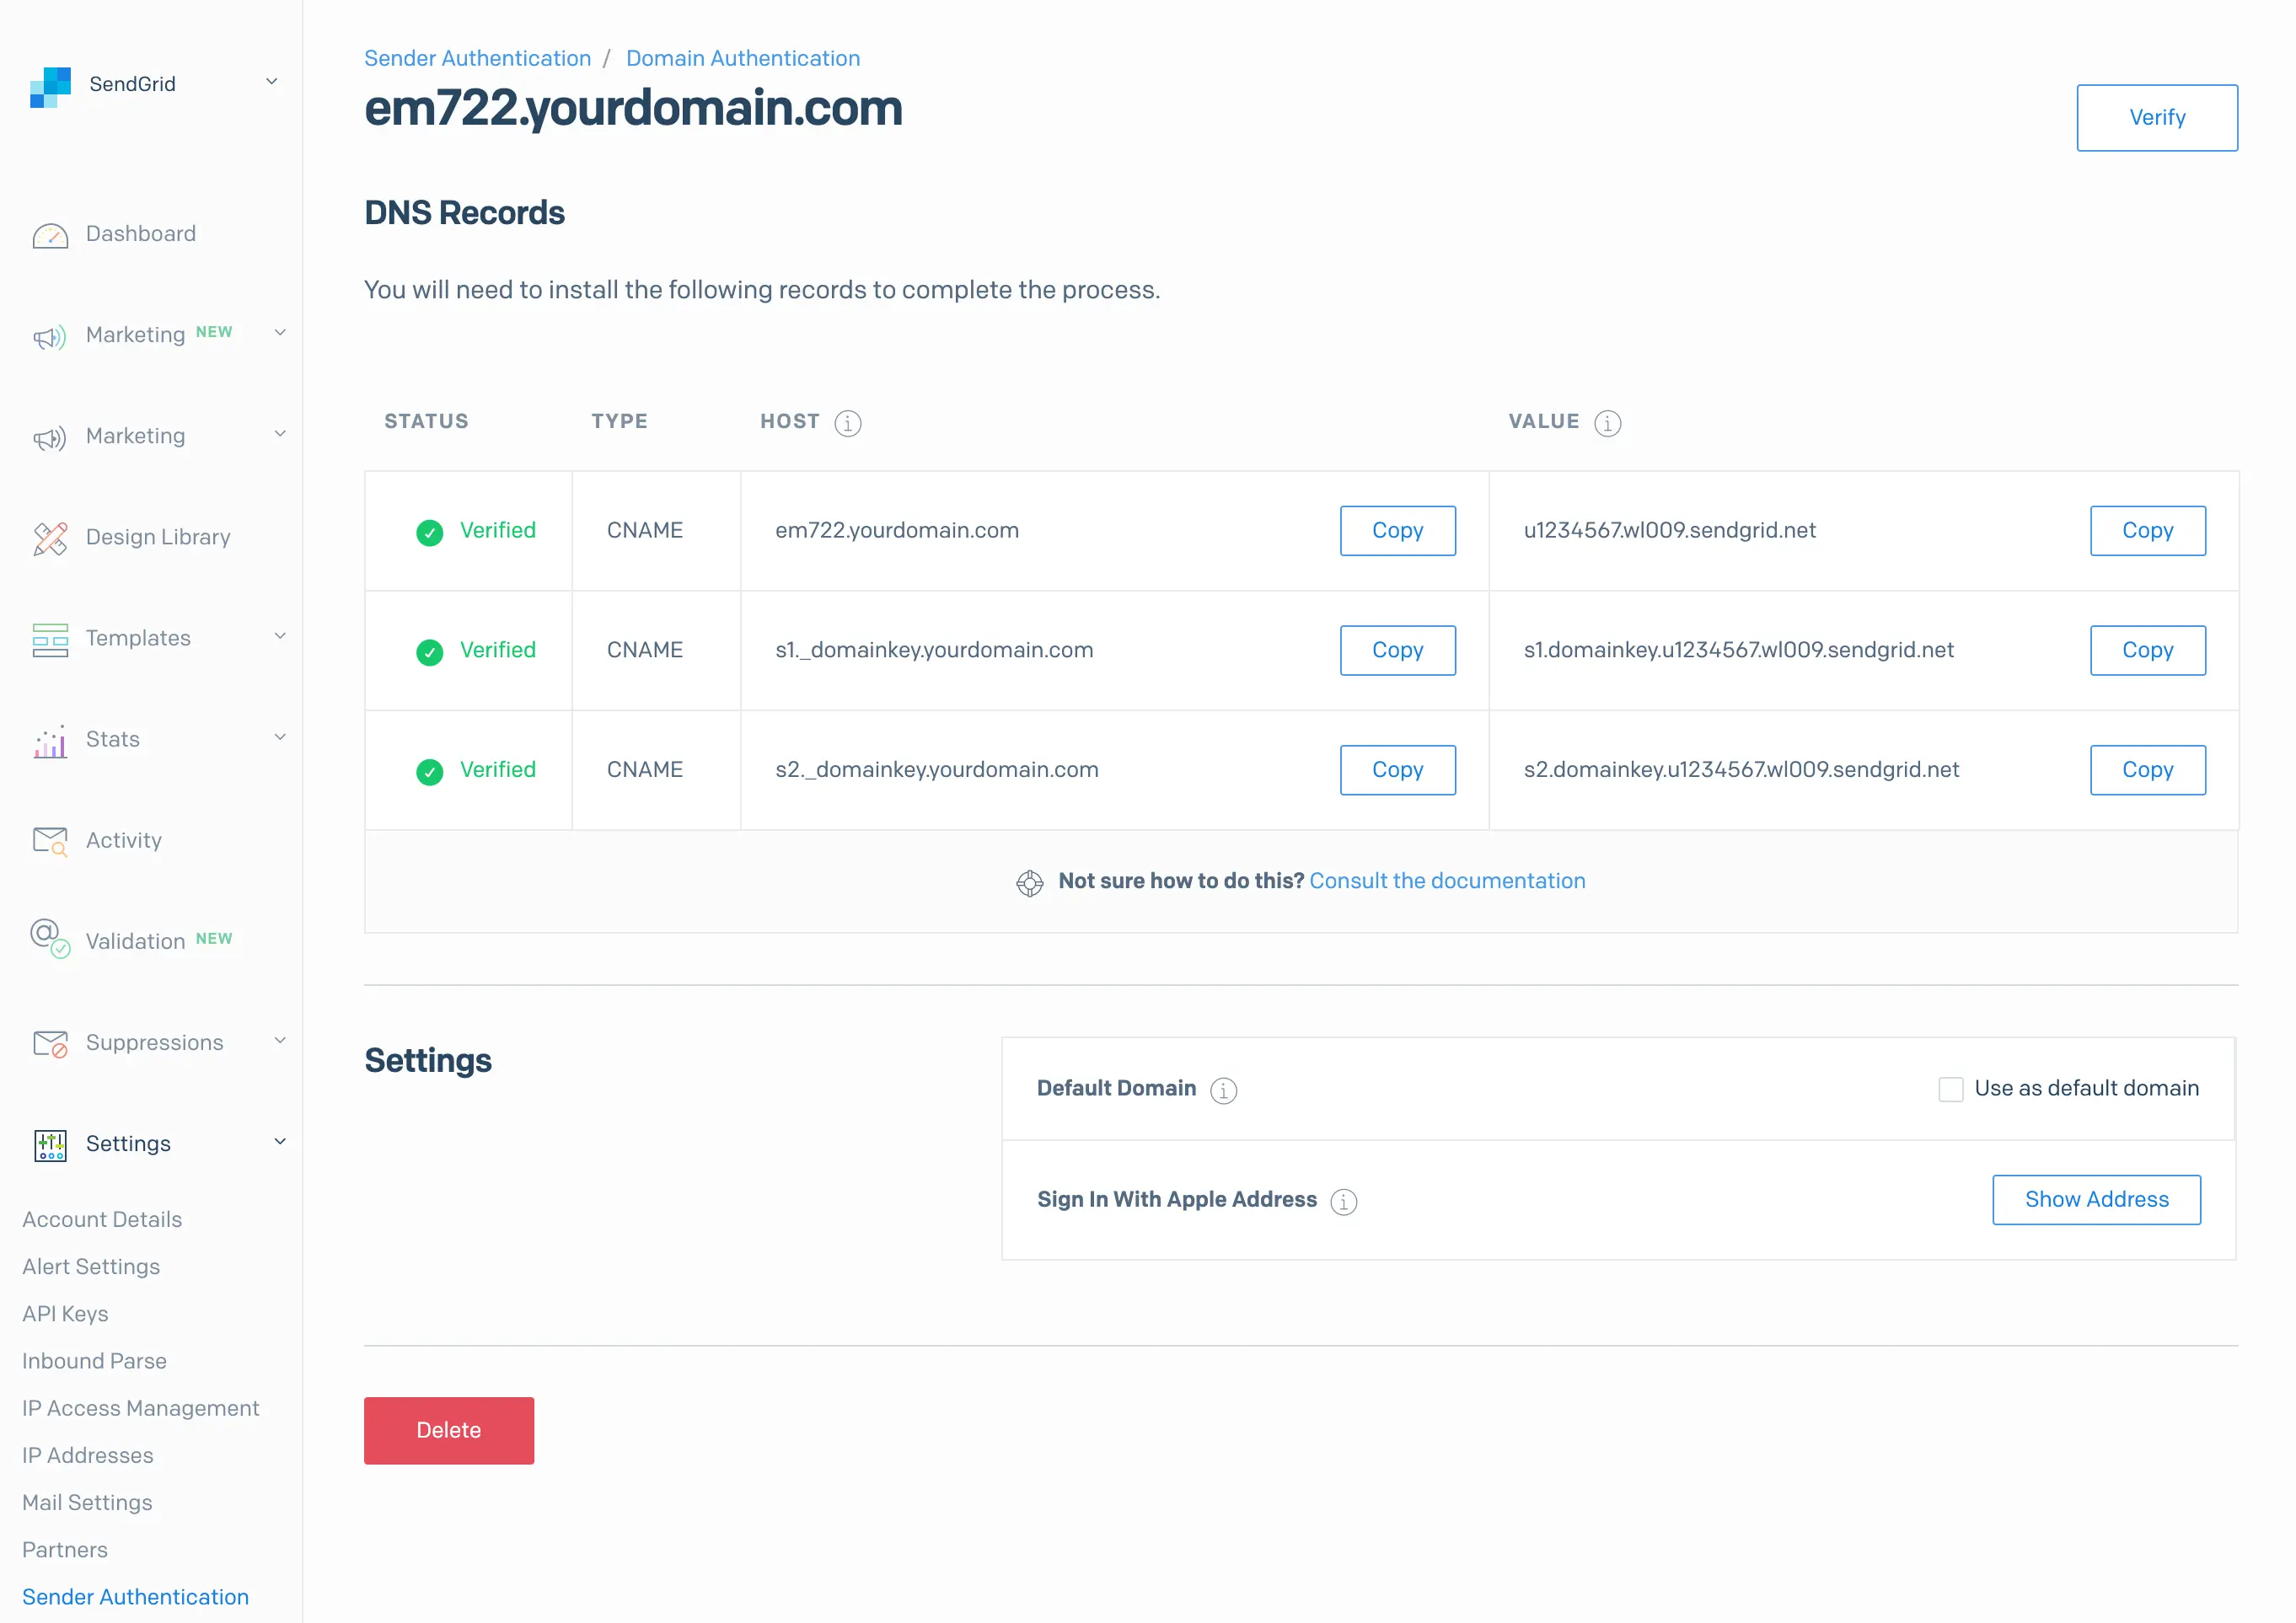
Before you can configure Sign In with Apple, you need to complete Domain Authentication setup for the domain you will use when sending mail to Apple's private addresses.
The option to configure Sign in with Apple will show only for a fully authenticated domain, so be sure to complete this step first.
Warning
When using the Alternative Configuration, it is critically important that you turn off automated security when completing the authentication process. Failure to do so will result in issues later in the configuration process.
To configure a Private Email Relay Service with Apple, you will also need a registered Apple Developer account.
Once you have successfully authenticated your domain, navigate to https://app.sendgrid.com/settings/sender_auth, and locate the configured domain.
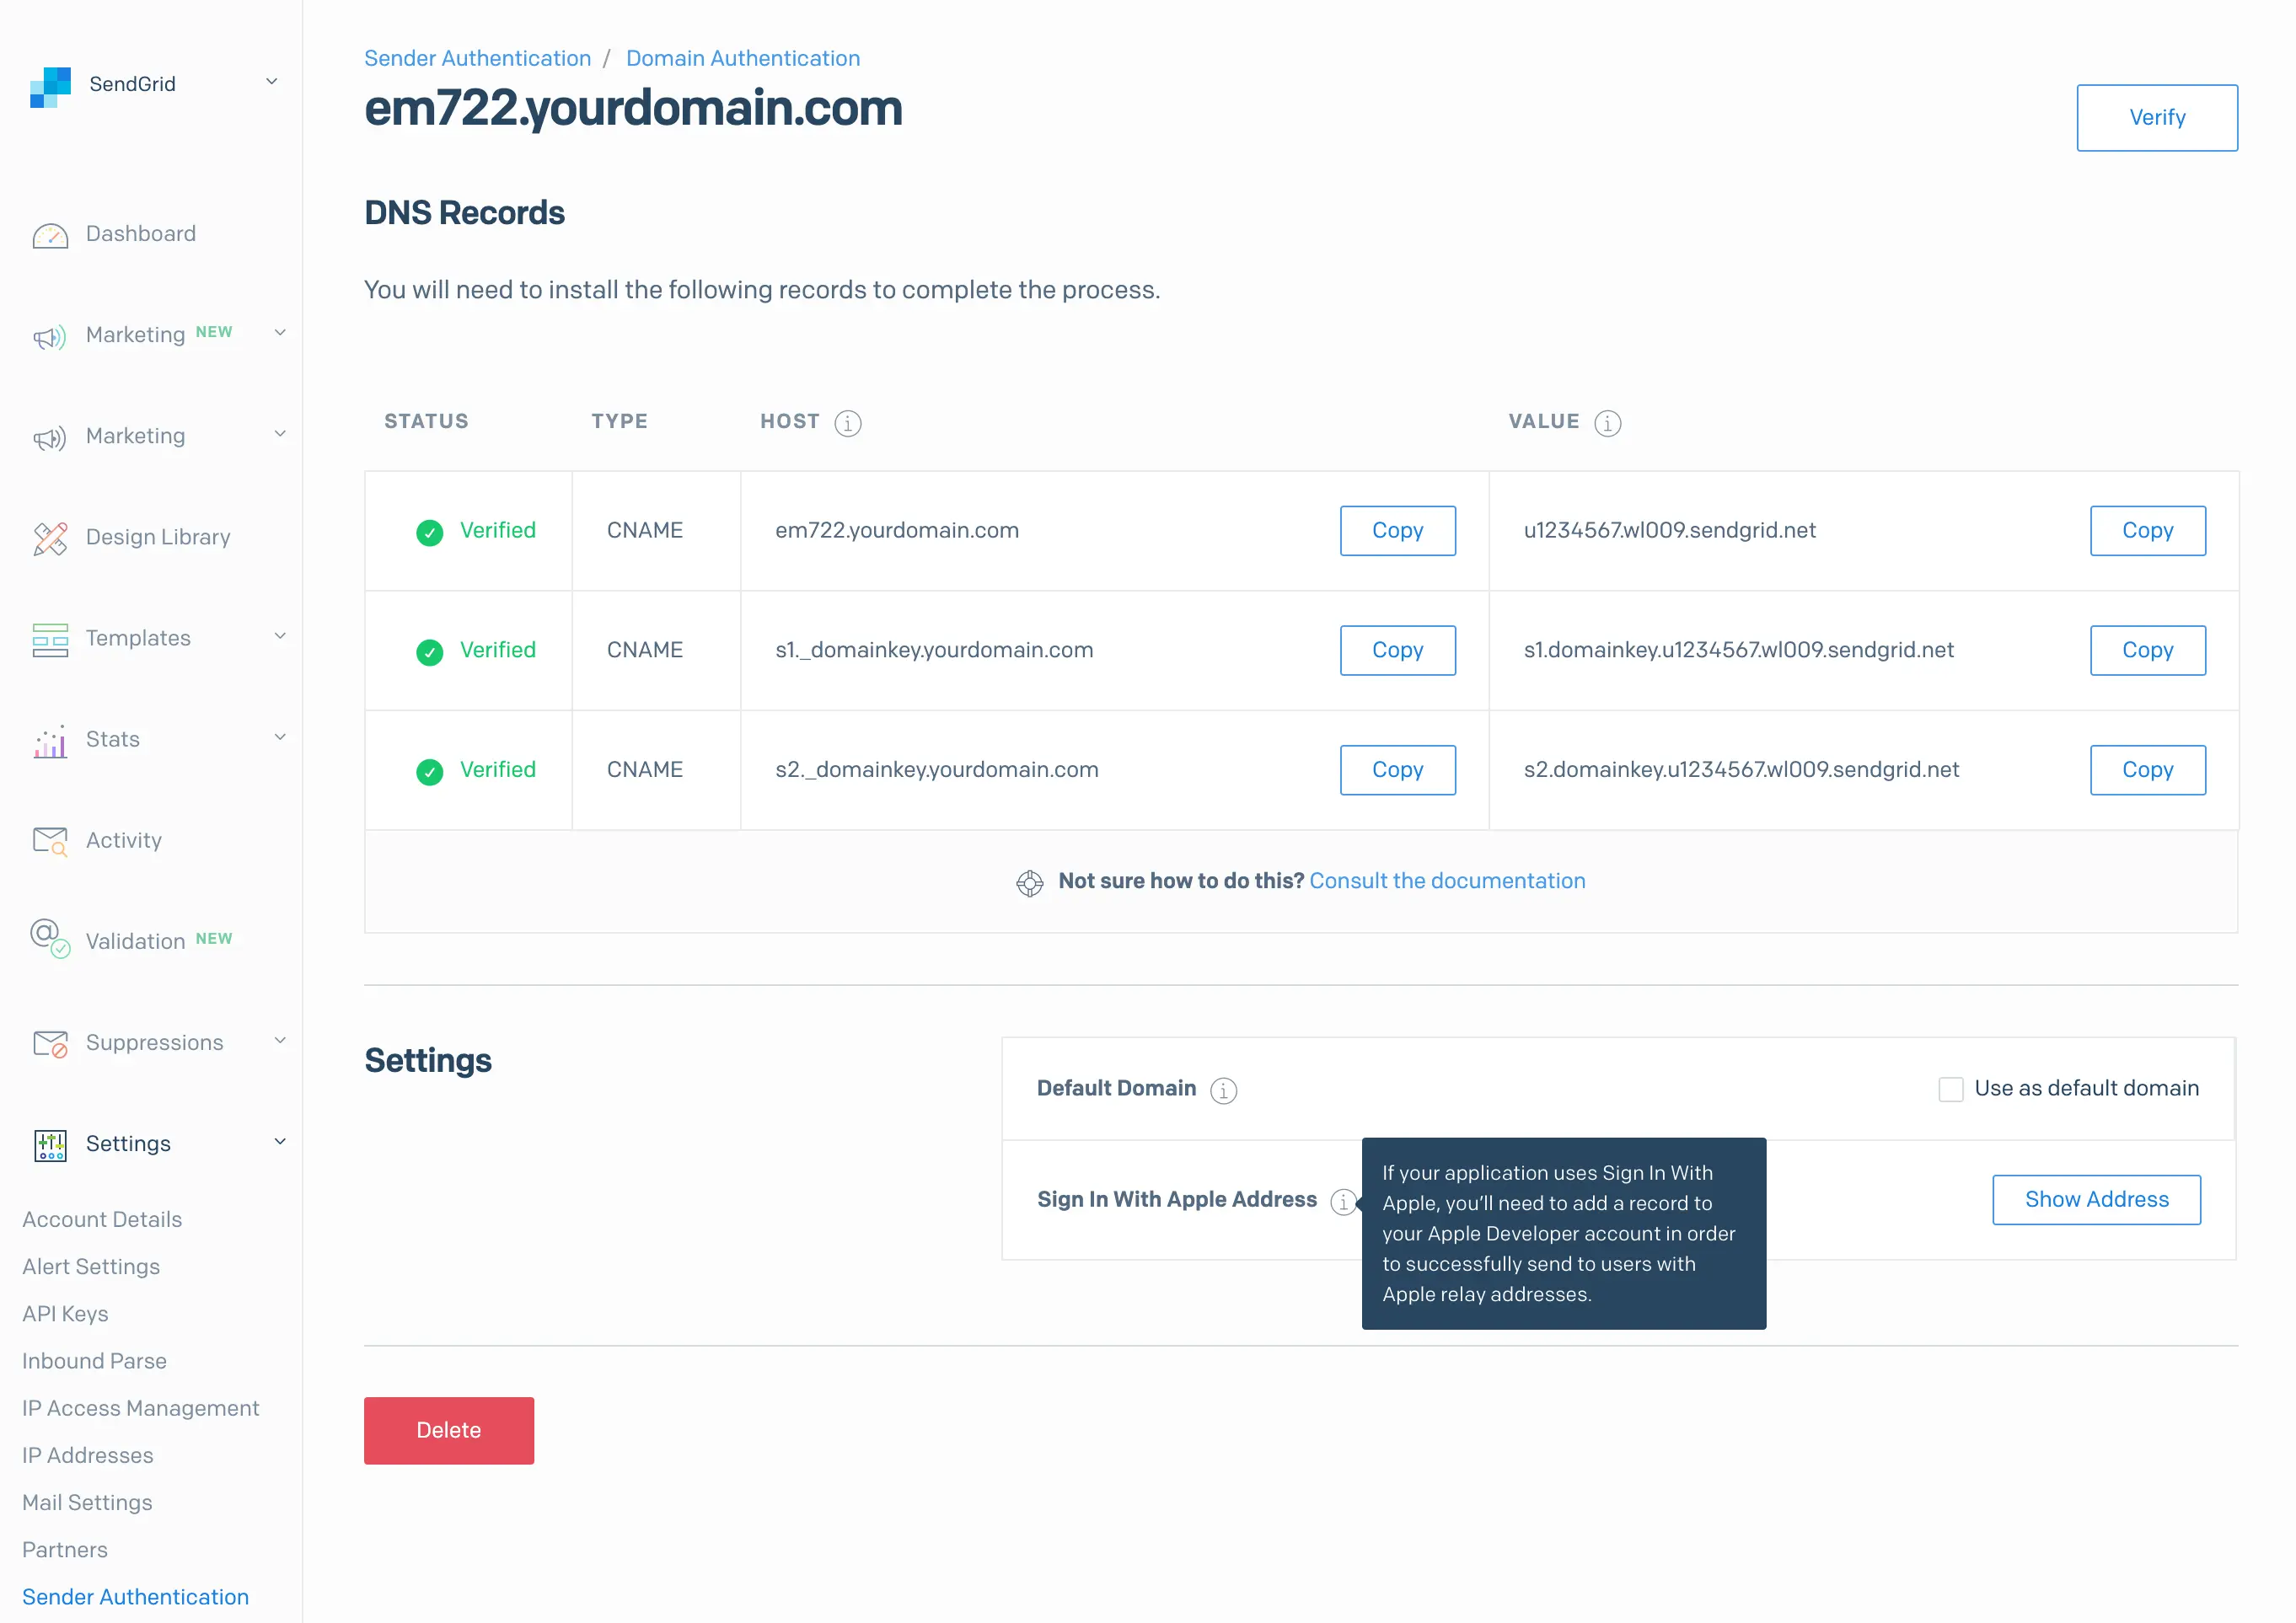
Click on the domain to navigate to its detail page. You should see a Settings section with a "Sign In with Apple Address" option and a button labeled "Show Address."
Click "Show Address" to reveal an allowed address that you can provide to Apple. This address should be the word "bounces," a + symbol, your account number, the @ symbol, and your authenticated domain. For example, your address may look like this: bounces+12345678@email.example.com. Copy the address from the information modal on the Sender Authentication page.
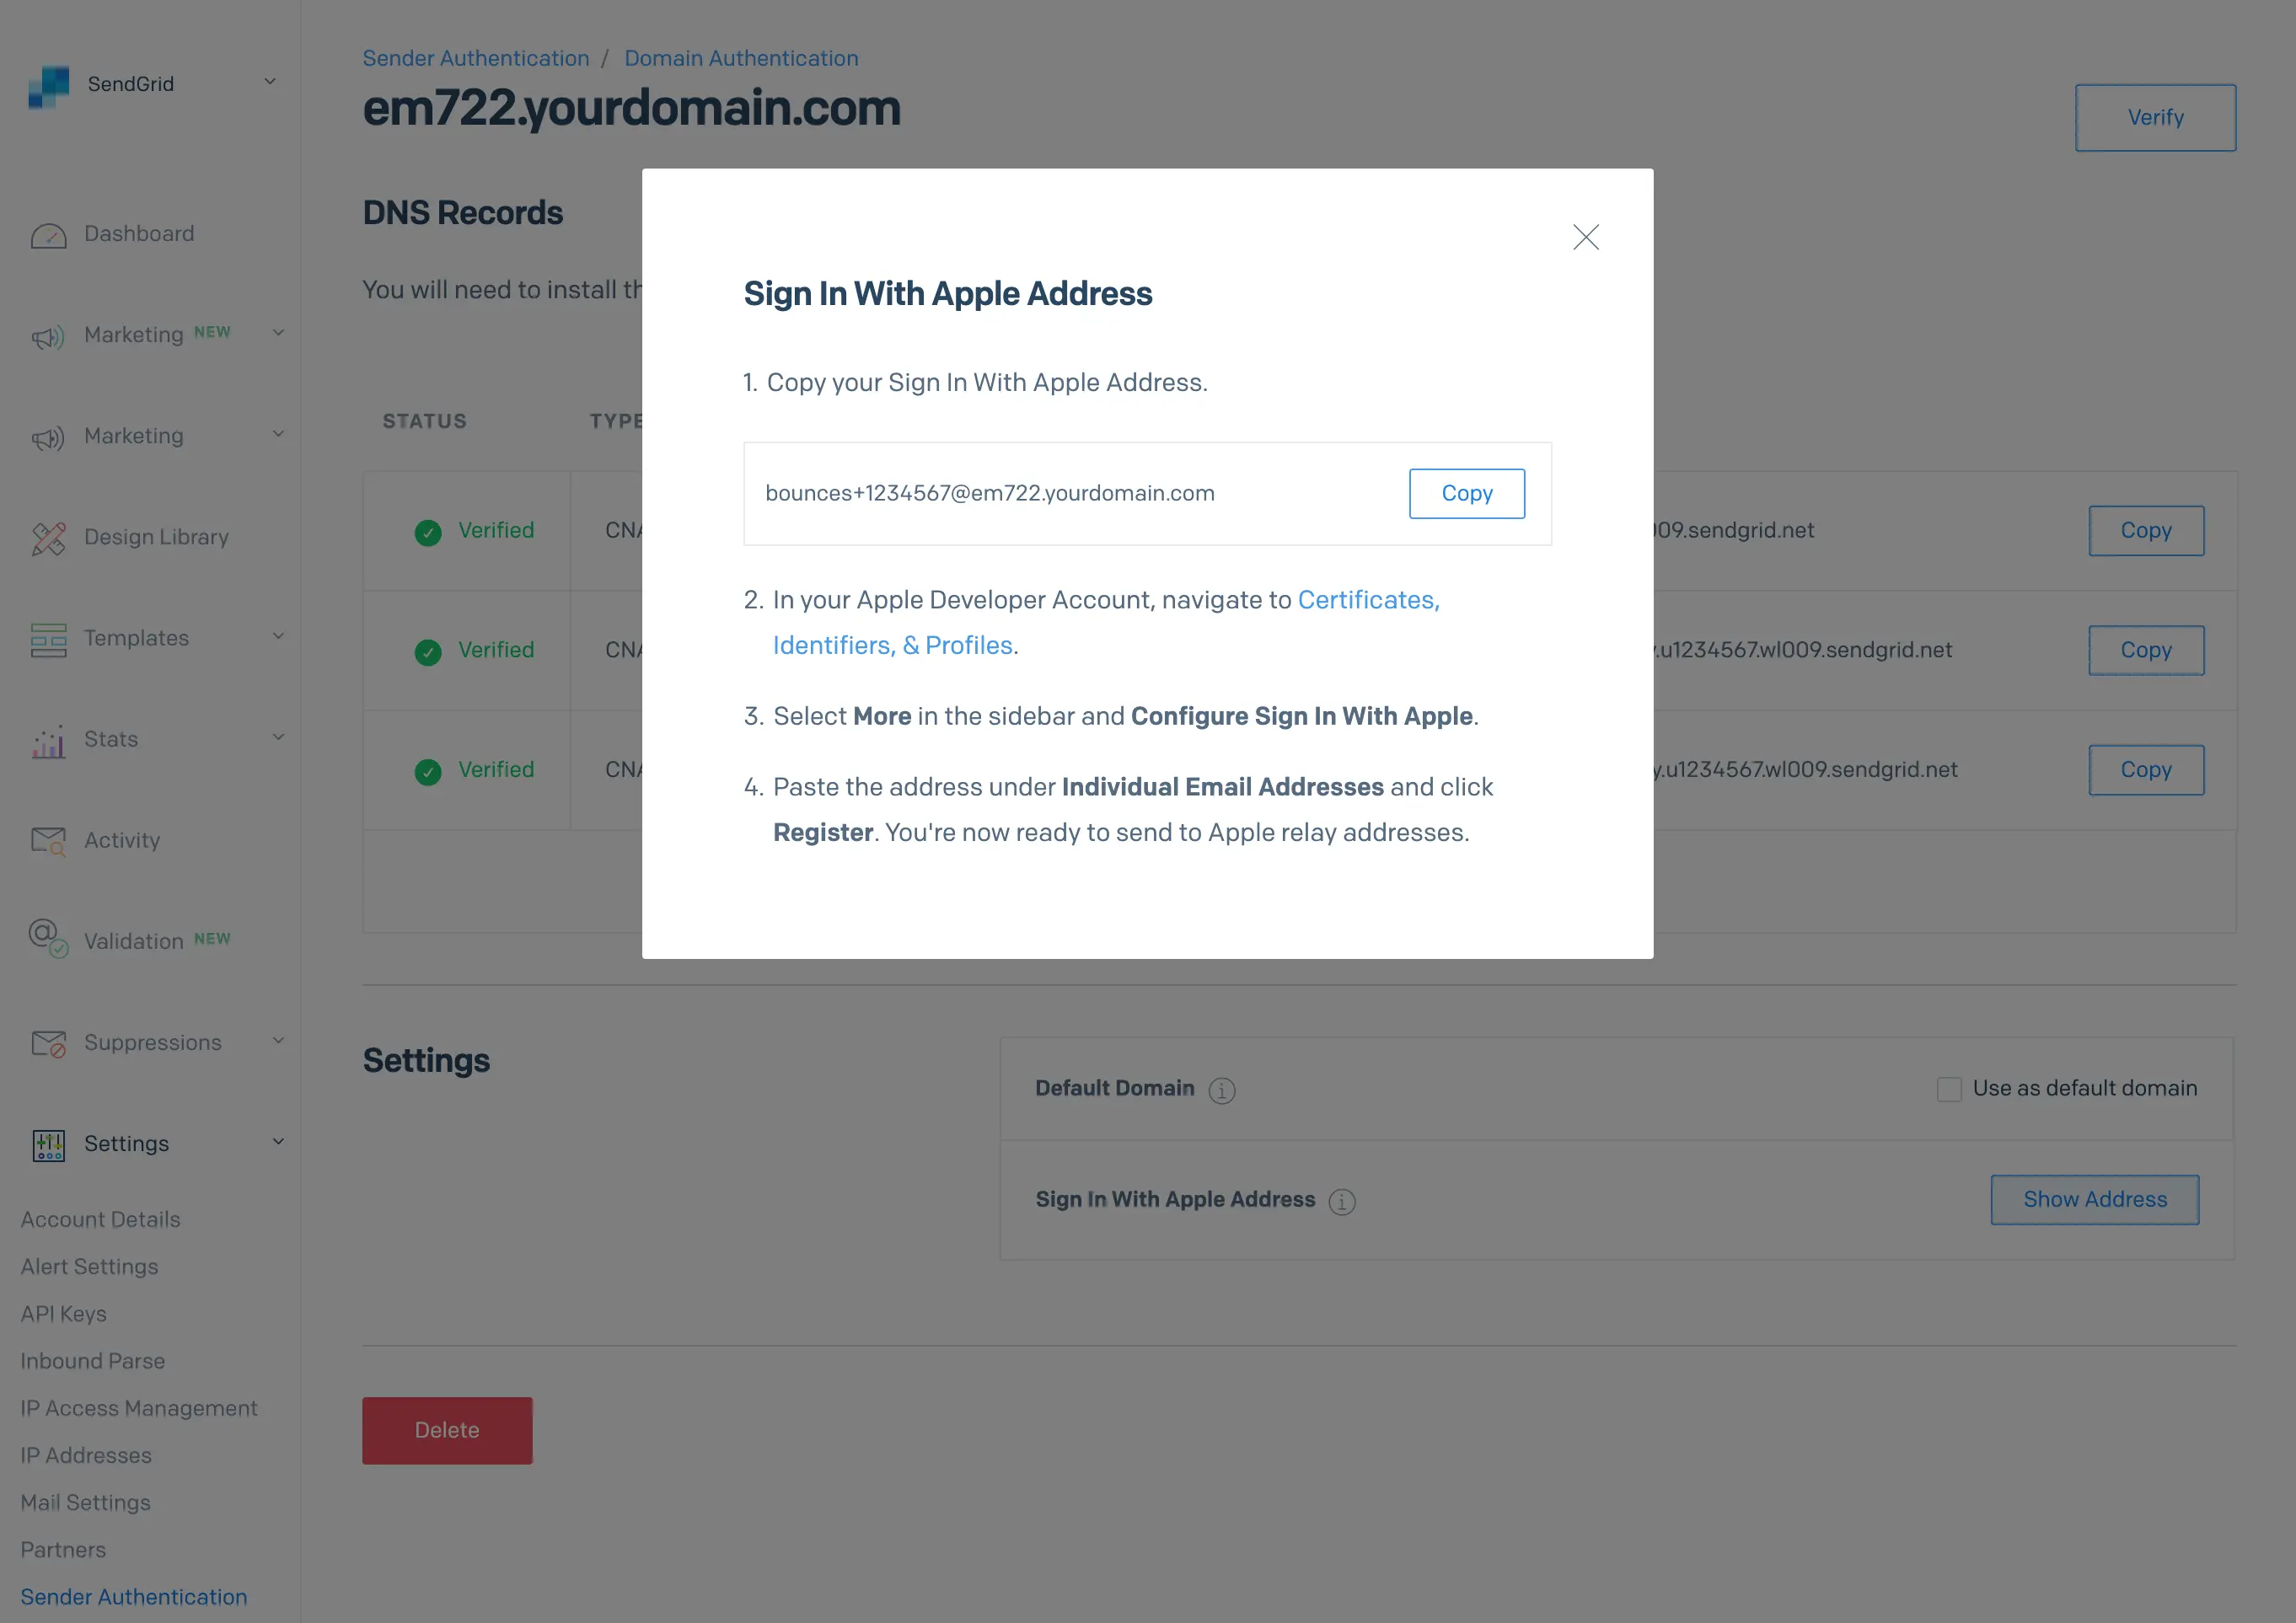
Log in to your Apple Developer account, and navigate to the Certificates, Identifiers & Profiles section of your developer resources. Click on "Configure Sign in with Apple."
In the section labeled "Individual Email Addresses," paste the allowed address you copied from SendGrid earlier, and click "Register." You should immediately see a green checkmark next to the email address. If you see an error, ensure that you completed domain authentication on the SendGrid Sender Authentication page.
You should now be set to send messages to Apple's private relay addresses.
Warning
If you are sending to Apple relay addresses from a sub user account, you must
add the bounces+subuserID@domain.com (example) return path under "Individual
Email Addresses" within the Apple console for each sub user and domain
authentication combination from which you send in order for mail to be
accepted by Apple properly.
Apple limits the number of addresses you can allow in the Apple Developer portal to a total of thirty-two. If you have more than thirty-two verified domains, you will need to configure each of the addresses following the steps below.
Before you begin the four-step process, you will need access to the following:
- The Sender Authentication section of your Twilio SendGrid account
- The DNS panel of the domain you'll be sending from
- The Apple Developer portal for your app
- An SSL certificate for your domain
- A web server to host files over HTTPS
When using the alternative configuration, be sure to turn off automated security. You will find this option in the settings section of the Sender Authentication page for your domain. Failure to do this will result in issues later in the configuration process.
If you have an existing domain that is set to use automated security, and you want to configure this domain to work with Sign in with Apple, you must create a new authentication for that domain that does not use automated security.
Info
Changing the root domain of your existing authentication will require rewarming that domain with Gmail. You want to avoid any changes to that root to avoid slowing this process.
Once your domain authentication completes successfully, navigate to https://app.sendgrid.com/settings/sender_auth. Locate your authenticated domain and copy it. You will need this entire domain, including the subdomain. For example, with an authenticated domain of email.example.com, email is the subdomain. The entire domain is email.example.com.
Log in to your Apple Developer account, and navigate to the Certificates, Identifiers & Profiles section. Select "More" from the sidebar, and click "Configure Sign In with Apple."
In the section titled "Domains and Associated Email Addresses," paste the entire authenticated domain from your SendGrid setup. Next, click the "Register" button. The page will prompt you with a download link. Click this link to download a unique text file generated by Apple.
Apple will use the text file you downloaded to verify that you control the domain associated with your mail send. You must host and serve this text file over https using a publicly available web server.
For more information about hosting and serving files, you may need to contact your web host. Many domain providers also offer web hosting solutions and may be able to help you configure delivery over SSL. You can also obtain free SSL certificates using Let's Encrypt.
To ensure verification of your domain by Apple, you must serve the file at the path /.well-known/apple-developer-domain-association.txt. This path should follow the domain you authenticated with SendGrid and provided to Apple in the previous steps. If you authenticated email.example.com, the full URL used to access the unique text file would be https://email.example.com/.well-known/apple-developer-domain-association.txt. To break this down, the parts of this address are:
- https — HTTP with an SSL certificate
- email.example.com — Your full domain, including the subdomain
- /.well-known/apple-developer-domain-association.txt — the path required by Apple
Finally, log in to the service you use to manage your domain's DNS records. This may be a service such as Amazon Route 53 or a panel provided by the company where you purchased the domain. Add a new A record to your domain containing the IP address of your web host. The A record needs to be located at the subdomain and domain you registered in the Apple Developer portal.
Info
If your DNS provider and web hosting provider are the same, you may be able to create a subdomain. Creating a new subdomain will usually create a new web host with the necessary A record and a location for uploading the file.
Once you have added the A record and uploaded the file, paste the full URL path to your text file into your browser. Again, the URL should look something like https://email.example.com/.well-known/apple-developer-domain-association.txt. If the contents of the file you uploaded show in your browser, you're ready to move on to the next step.
Back in the Apple Developer portal, go to the Sign In With Apple setup page, and click "Verify." You should see a green checkmark. If you receive an error, check that:
- Your domain was authenticated properly with SendGrid
- You uploaded the text file to the correct location
- Your SSL certificate is configured correctly for your full domain
You should now be set to send messages to Apple's private relay addresses. We recommend testing your implementation by signing in to your app with your Apple ID and attempting to send an email to the app-specific email address that is issued. You can use Email Activity to verify that the message was delivered. If you have questions, we recommend reaching out to our Support Team.
Note: SendGrid Support is unable to assist you with the configuration of the services required outside the SendGrid product.