How to Send Email with Marketing Campaigns
Info
This page refers to the most recent Marketing Campaigns product. If you're using legacy Marketing Campaigns, your workflow will be a little different and your screen won't look the same as the screenshots. Learn more about migrating from legacy Marketing Campaigns here.
Info
If you want to send email programmatically using Twilio SendGrid's Email API, see the API reference or the SMTP Reference.
Warning
Before you begin, go to your SendGrid account settings to verify that your timezone and account email address are correct. Verifying your account information ensures that when you upload contacts, you receive notifications and that we deliver scheduled email at the right time. You can also add additional email addresses to receive account notifications by going to the Marketing page and selecting Notifications. From Notifications, you can add a different email address to which we will send important account notifications, like contact export activity.
Your time zone is set at the account level, you'll need to navigate to your account settings to change it.
- Near the bottom of the left-hand navigation, select Settings.
- Click Account Details, or go here.
- Locate the Timezone field under Your Account, and correct it if necessary.
Specifying a sender in Marketing Campaigns is required by CAN-SPAM regulations, and provides identity information about where the emails are coming from in each email you send.
When you add a sender, you need to specify the following information:
- From name - the name of the person or company you wish to send email from.
- From email - the email of the person or company you wish to send email from.
- Reply to email - the email address of the person or company you want recipients to reply to. (Can also be a role address.)
- Company address - the physical location of the business you're sending email on behalf of.
- City - the city of the business you're sending email on behalf of.
- Nickname - the nickname is for your reference only; this field will not be displayed to recipients.
Info
If your email domain doesn't match one of your authenticated domains, you'll need to verify this email address before using this sender. We'll send this email address a verification email after you save this sender.
By default, notifications about your account's Marketing Campaigns activity, CSV upload summaries, sender verifications, and list or segment exports will send to the email you signed up with on your parent account. You can also opt-in to receive email notifications from SendGrid to up to 10 email addresses by following the instructions here.
Marketing Campaigns offers a number of ways to add contacts to lists, including:
Unsubscribe Groups provide your recipients with an alternative to opting out of all email that you send, by giving them the opportunity to specify the kinds of email that they would no longer like to receive.
- Navigate to Marketing and click Unsubscribe Groups.
- Click Add Unsubscribe Groups if you do not already have any unsubscribe groups, or click Create New Group to add a new group.
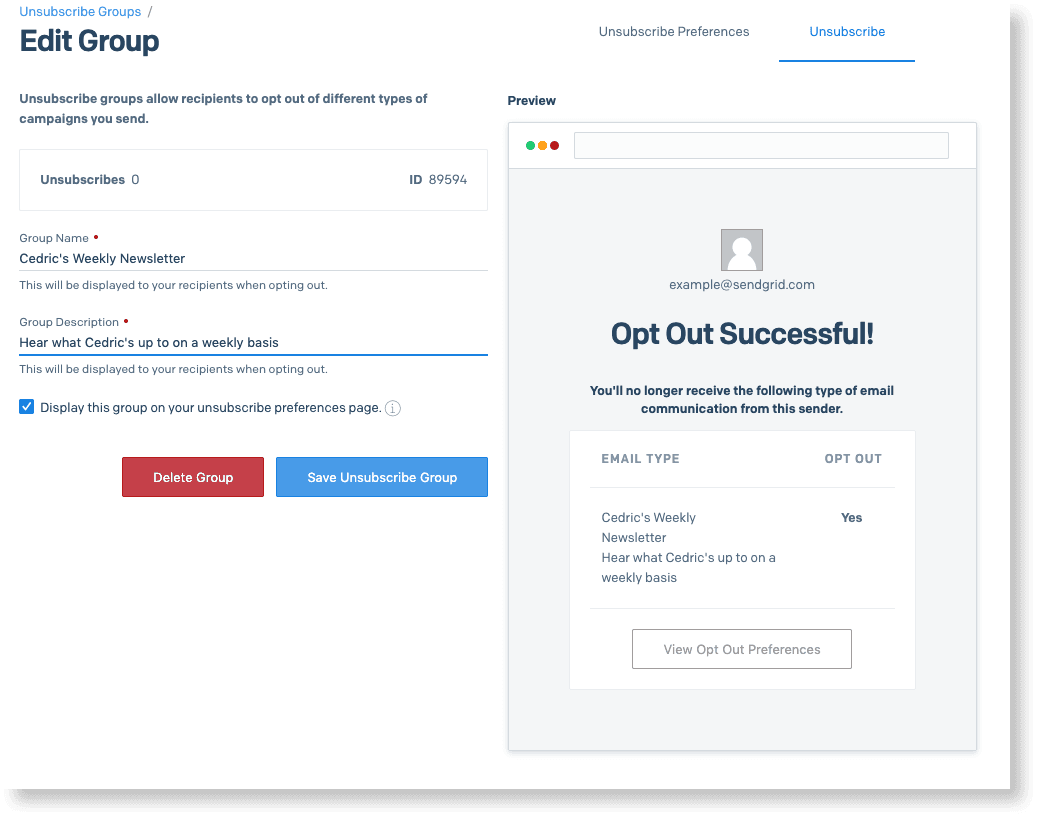
- Enter the Group Name and Group Description for your Unsubscribe Group.
Danger
The Group Name as well as the Group Description are public-facing and will be visible to your recipients.

- Select the checkbox if you want the Unsubscribe Group to display on the unsubscribe preferences page.
- Click Save Unsubscribe Group.
- Find your newly created Unsubscribe Group, click the action menu, and then click Preview.
- From the left-hand navigation, select Marketing.
- Select Single Sends.
- To create a new one-to-many email, click Create Single Send.
- Select the template that you want to use for your email. You can select a blank template, a custom template that you have already created, or one of SendGrid's responsive pre-built templates. For more information, see Working with Marketing Campaigns Email Designs.
Info
You can also create a template from an existing Single Send by selecting the action menu next to the email you'd like to reuse and selecting Create Template.
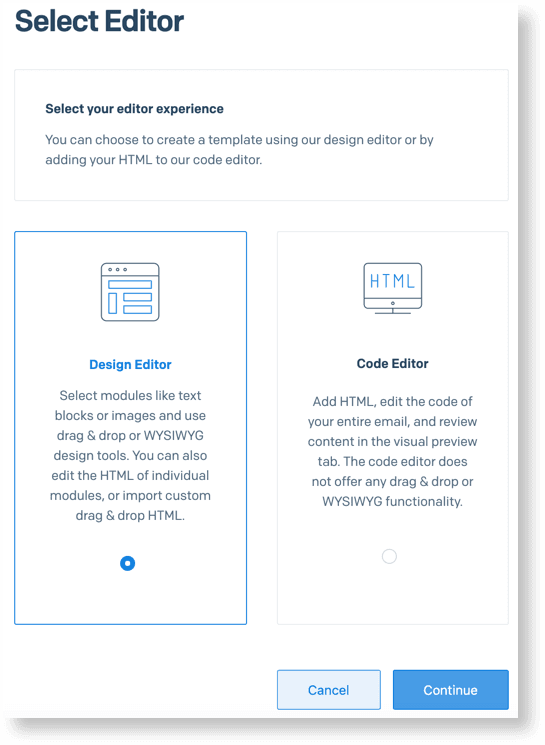
- Select an editor. You can choose between the Design Editor and the Code Editor.

Info
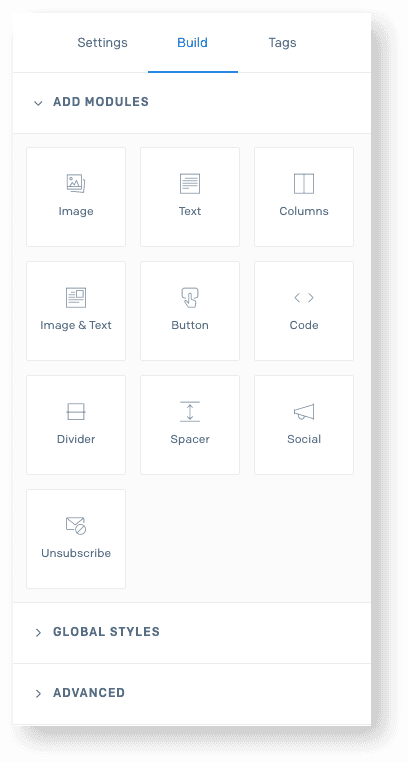
The Design Editor offers users powerful drag & drop editing tools, making it possible to build beautiful emails using a library of content modules like text boxes,images, buttons, and more. For those familiar with HTML, there are options to edit the HTML of individual modules, drag in a custom code module, or to import an entire HTML email with drag & drop markup.
The Code Editor provides users who are importing, editing, or crafting custom HTML a robust, IDE-like environment, featuring side-by-side code and preview panes, syntax highlighting, error flagging and image management.
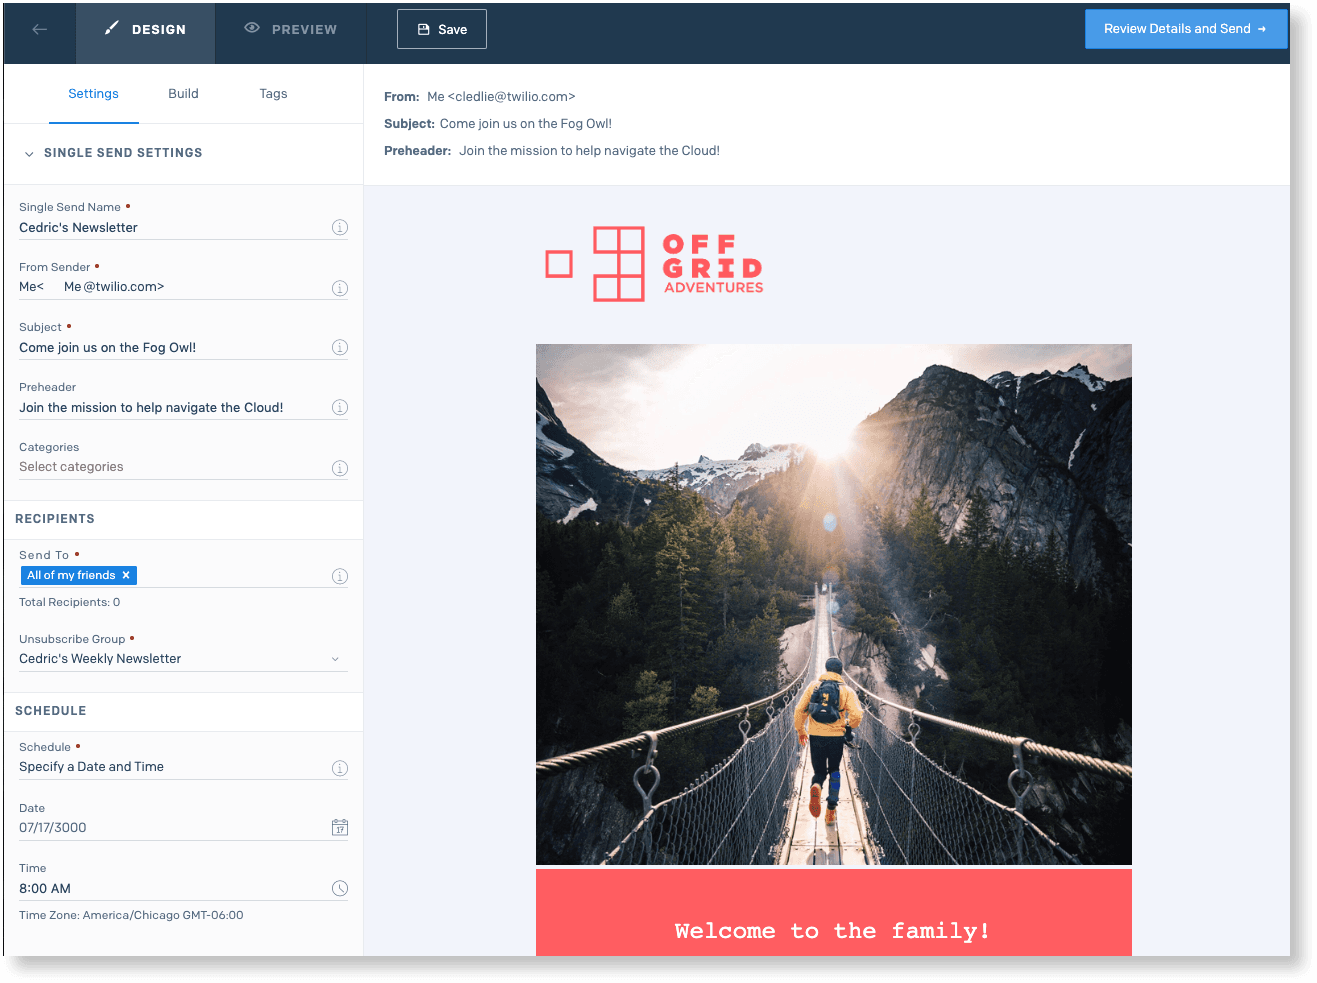
Inside the Design Editor, you use the Settings, Tags and Build tabs to design and configure your email. Inside the Code Editor, you can click the left Settings tab to expand the settings window, and then you can configure your email using the Settings and Tags tabs.

- Define key settings like From Sender, Email Subject, Preheader, Recipients, and Scheduling by filling in the fields in the Settings tab.
Danger
When selecting segments, make sure you are limiting your selection to 10 segments.
Info
If you have dedicated IPs, you can set up IP Pools that allow you separate your traffic and potentially enhance your deliverability by protecting your sender reputation. To utilize IP pools for Single Sends, navigate to Settings and from the IP Pool drop-down, select the IP pool you wish to use.
- Add your custom content by clicking the Build tab in the Design Editor, or by editing the HTML code in the Code Editor.

Info
Make sure to include the {{{unsubscribe}}} tag to test and send your campaign.
For more information about customizing your campaign, see Using the Design Editor or Using the Code Editor.
- As you're editing your email, you can see what it looks like by clicking Preview from within the design editor, or, from the code editor simply toggle between Desktop, Mobile, and Plain text. You can also preview from the Single Sends index page by hovering over the action menu and clicking Preview.
- You can test your email by sending it to yourself and up to 10 other recipients. We'll automatically append "Test - " to the subject line so your recipients know it's a test and not the real send. From Settings, click Test Your Email and enter the email addresses to send your test to.
- For more robust, automated testing, we offer Email Testing for both Automation and Single Sends so you can see what your email looks like across different operating systems, browsers, and inboxes.
- With your email fully tested and ready to go, click Send or Schedule. You'll have the chance to do a final review of settings before confirming your send!