Marketing Campaigns Statistics
Covers Marketing Campaigns v3
These tutorials cover the latest version of Marketing Campaigns. If you're using the legacy version of Marketing Campaigns, your experience might differ. To send email with the Twilio SendGrid Email API, see the API reference or the SMTP Reference.
Marketing Campaigns email statistics give you data to guide your email strategy. You get insights about both marketing and transactional email for a complete view of your audience's experience, and you can share your performance with teammates and stakeholders.
Once you send a single send message, you can view related statistics.
- Log in to the Twilio SendGrid console.
- Go to Marketing > Single Sends. The Single Sends page appears.
- Go to the desired Single Send.
Each entry includes the date sent, the name given the send, and the date last edited. - If it doesn't list its status as Draft, click its link. The page for that single send appears.
- If no statistics display, you might need to change the date range. Click the displayed date range and choose a different range of dates. Set the first date as the date the single send got sent.
- The statistics displayed include one or more of the following:
- Emails Triggered
- Delivered
- Unique Opens
- Unique Clicks
- Bounces
- Unsubscribes
- Spam Reports
- To filter out certain statistics, click Select Stats. You can select one or more of the following statistics to display:
Once you activate an automation, you can view related statistics.
- Log in to the Twilio SendGrid console.
- Go to Marketing > Automations. The Automations page appears.
- Go to the desired Automation.
Each entry includes the date sent, the name given the send, and the date last edited. - If it doesn't list its status as Draft, click its link. The page for that automation appears.
- If no statistics display, you might need to change the date range. Click the displayed date range and choose a different range of dates. Set the first date as the date the single send got sent.
- The statistics displayed include one or more of the following:
- Emails Triggered
- Delivered
- Unique Opens
- Unique Clicks
- Bounces
- Unsubscribes
- Spam Reports
- To filter out certain statistics, click Select Stats. You can select one or more of the following statistics to display:
With click tracking, you can see how many clicks each individual link in your Single Sends and Automation emails received. Marketing Campaigns lists each link separately, including links that appear multiple times. For example, links that appear at both the top and bottom of an email.
Marketing Campaigns will provide the "URL location" for each link, ordered top left to bottom right. You can use this to identify the link if multiple URLs are the same, and to understand which link locations are more or less engaging.
A/B tests are a special case for link click tracking.
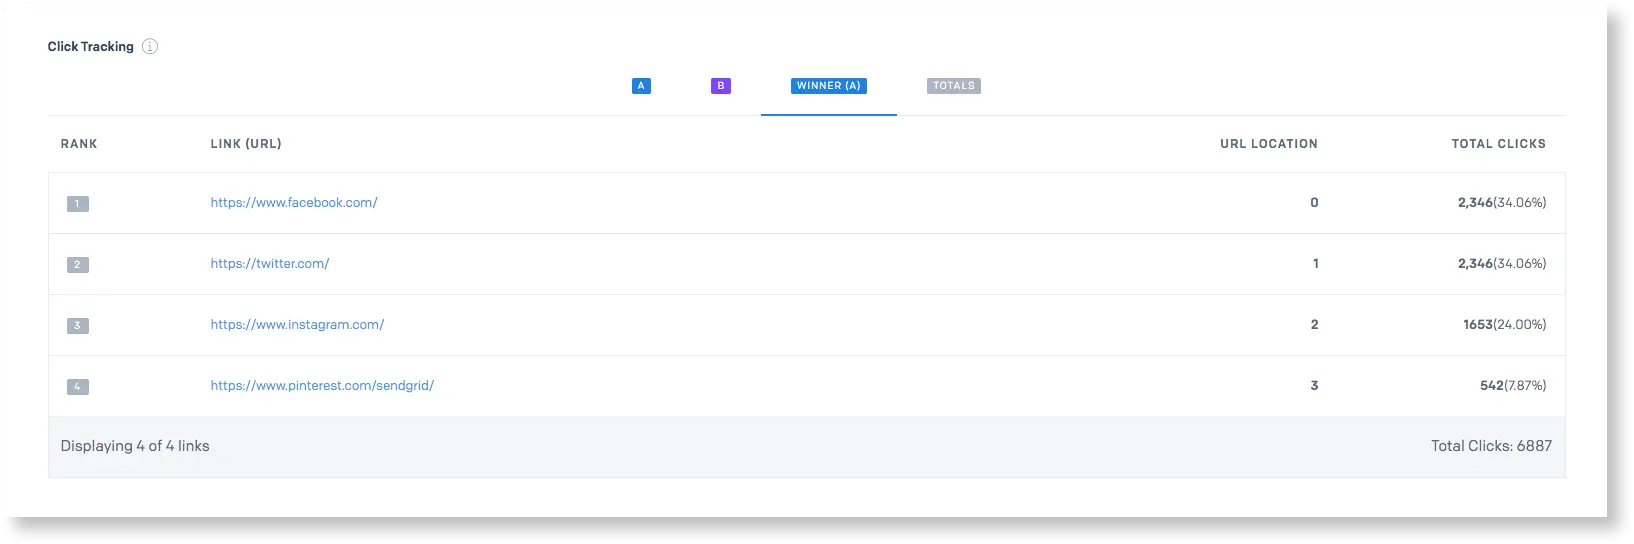
Each tab shows all-time clicks for each of the variants sent as part of a test sample size, as opposed to clicks just earned during the testing period. For example, if the sample size for a Single Send was 100 emails for each variant, you would see the engagement with those 100 emails inclusive of and beyond the test period. In other words, if the test period is 24 hours, but someone who received the test email opened it 48 hours later, that click would be included in the variant tab.
This means that if the winner were selected by clicks, there's a chance that in a test period, Version B could win, but over time, Version A could end up earning more clicks.