Twilio SendGrid Single Sign-On with Azure Active Directory
This guide will help you configure the Twilio SendGrid Single Sign-On (SSO) with Microsoft Azure Active Directory (AD). For additional information, such as how to edit and manage users, see the complete Twilio SendGrid SSO documentation.
Twilio SendGrid Single Sign-On (SSO) uses the widely supported Security Assertion Markup Language (SAML 2.0) to integrate your Twilio SendGrid user authentication with identity and access management platforms.
Single Sign-On (SSO) is available for Twilio SendGrid Email API Pro, Premier, and Marketing Campaigns Advanced plans only. See the Twilio SendGrid pricing page for a full list of Twilio SendGrid features available by plan.
Throughout this guide, you will see the following terms used to describe Azure AD, Twilio SendGrid, and their relationship to one another.
- Identity Provider (IdP): Azure is the IdP in this SAML relationship.
- Service Provider (SP): Twilio SendGrid is the SP in this SAML relationship.
The Twilio SendGrid SAML-based Azure integration supports the following SSO features:
- IdP-initiated SSO
- SP-initiated SSO
- JIT (Just-In-Time) Provisioning
This documentation will guide you through SSO setup using the official Twilio SendGrid SAML integration available in the Azure AD Gallery.
To add, delete, or modify an SSO integration, log in to the top level of your Twilio SendGrid account using your administrator credentials.
-
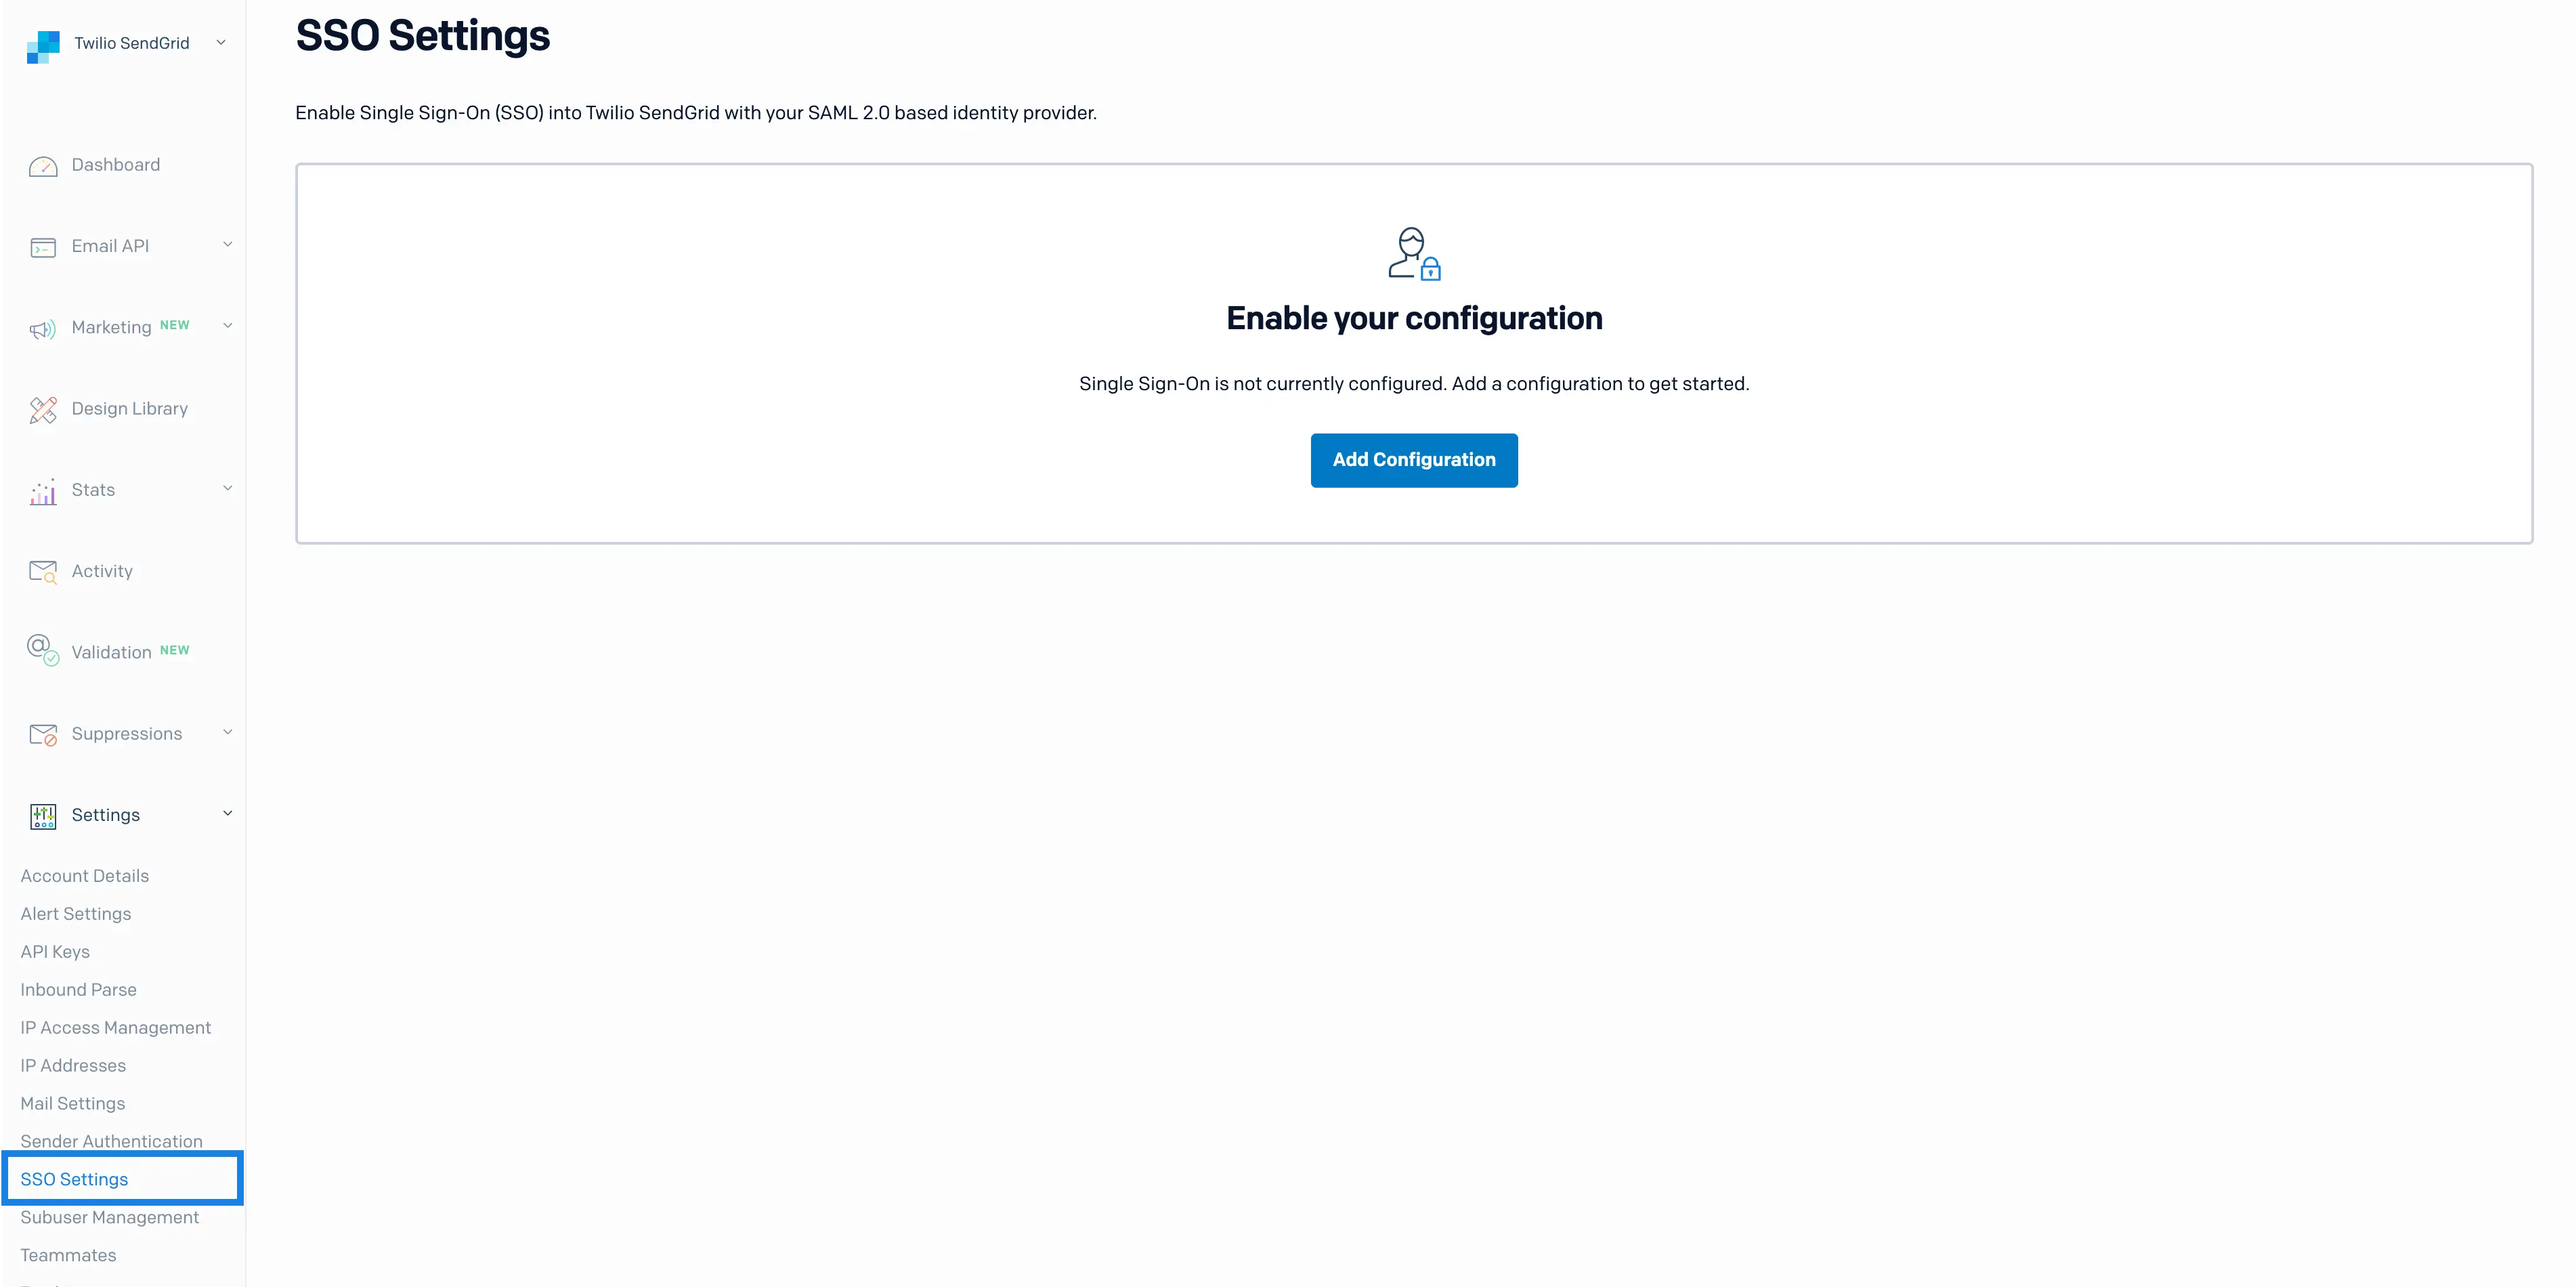
Navigate to Settings > SSO Settings in the left menu. The SendGrid App will display a page with an Add Configuration button.
-
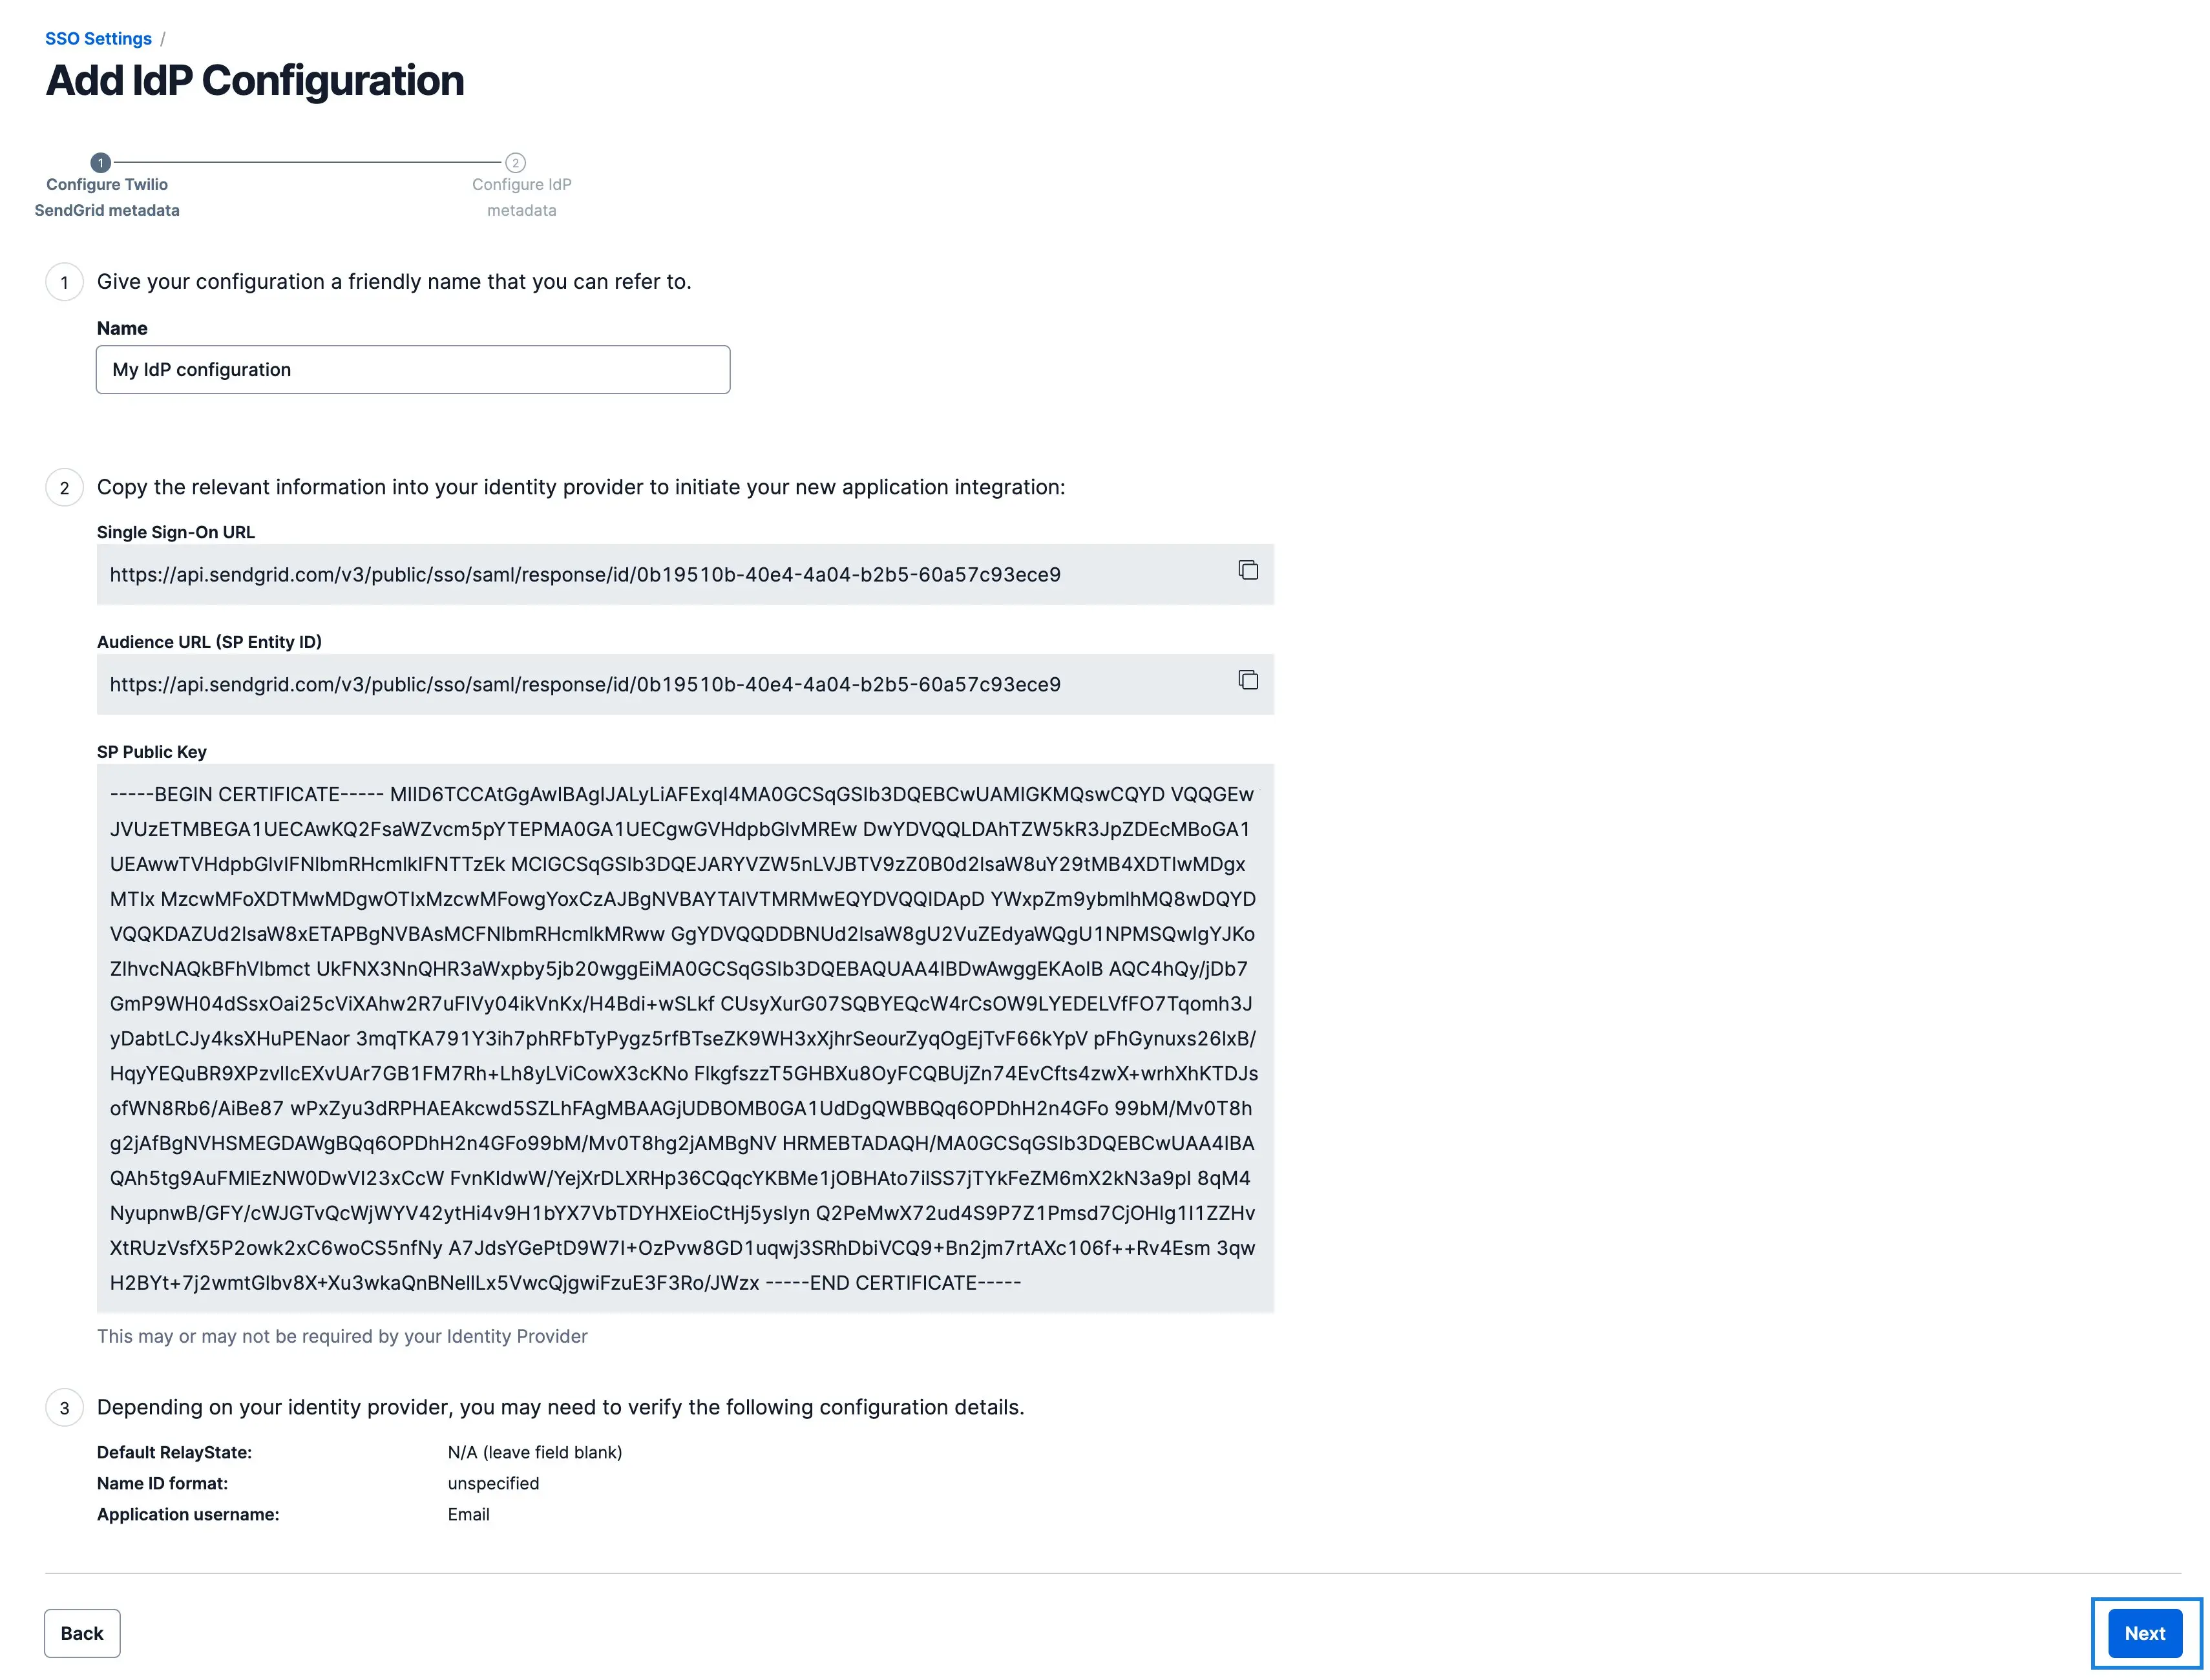
Click Add Configuration. A page will load and display the configuration fields listed in the table below.
-
You will add the Single Sign-On URL to your Azure integration as detailed in the next section of this guide. The rest of the values are provided for reference. Note that the Single Sign-On URL and Audience URL are the same.
| Twilio SendGrid SSO Metadata Field | Description |
|---|---|
| Name | A friendly name for your SAML SSO configuration. |
| Single Sign-On URL | The Twilio SendGrid URL where the IdP should POST its SAML assertion. The Single Sign-On URL and the Audience URL are the same when using Twilio SendGrid. |
| Audience URL (SP Entity ID) | A string identifier that defines the intended audience for the SAML assertion. The Audience URL and the Single Sign-On URL are the same when using Twilio SendGrid. |
| SP Public Key | A public key used to verify that requests are coming from Twilio SendGrid. |
| Default RelayState | Identifies a specific SP resource that an IdP will direct the user to following successful authentication. |
| Name ID format | The format used by an IdP when identifying a user in the SAML assertion. |
| Application username | The default username used for the Service Provider's application. This is Email when using Twilio SendGrid. |
Once an SSO Integration is added to your Twilio SendGrid account, you can configure the Twilio SendGrid Azure integration in the Azure Portal. You will select the official integration from the Azure AD App Gallery.
-
Sign in to the Azure Portal.
-
Select Azure Active Directory from the list of services. If you do not see Azure Active Directory, try searching or go to All services.
-
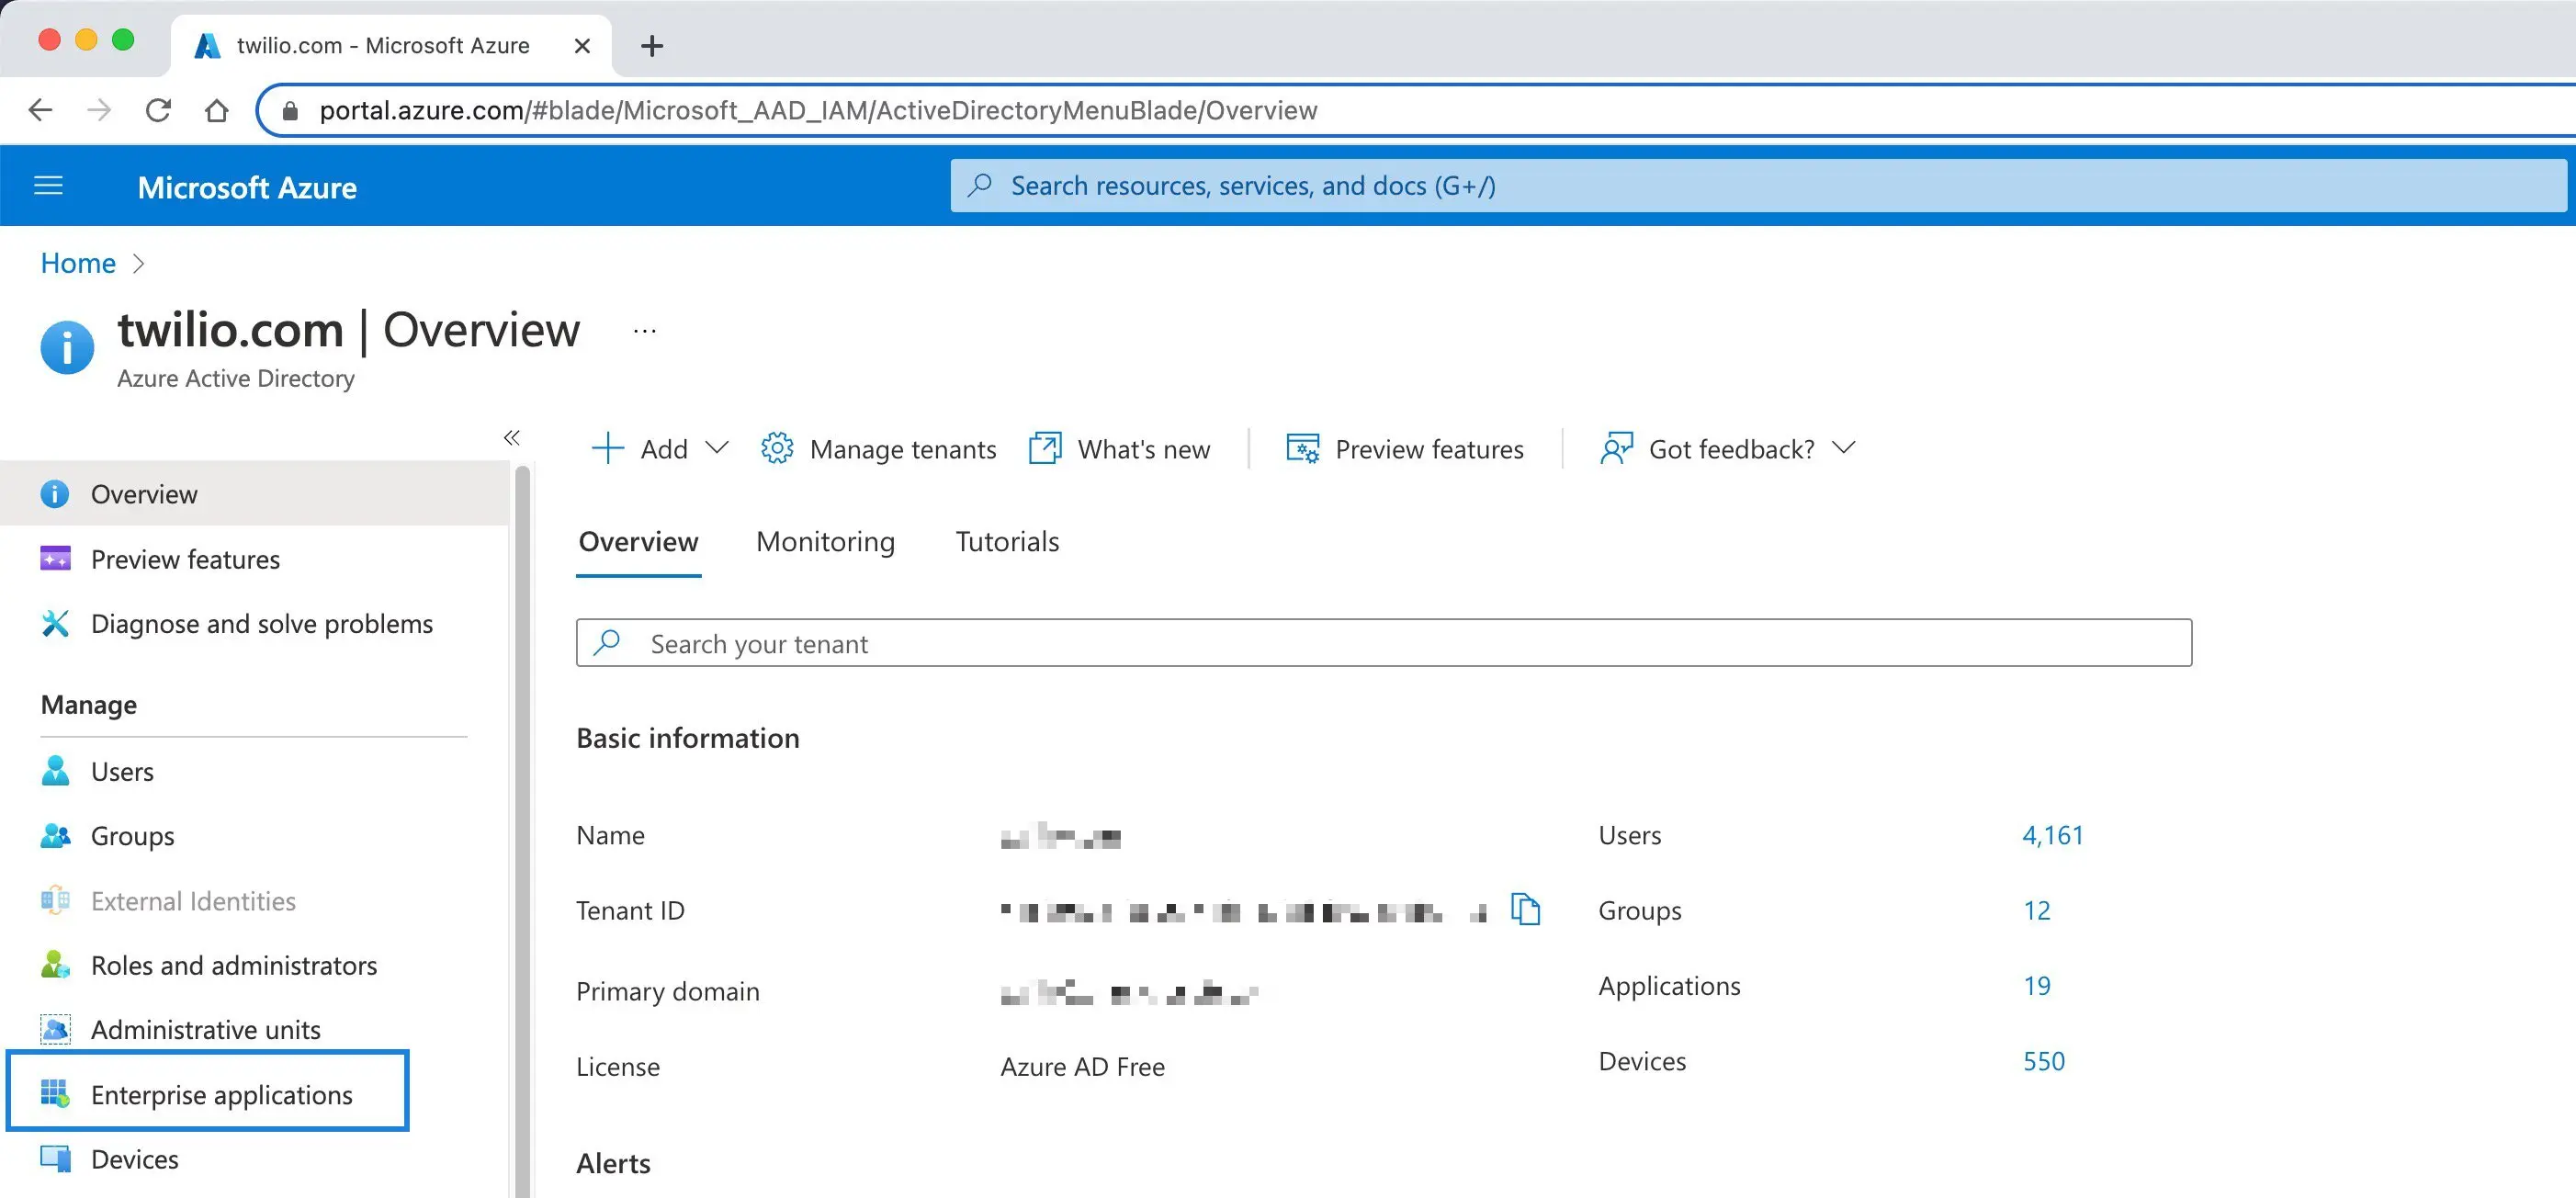
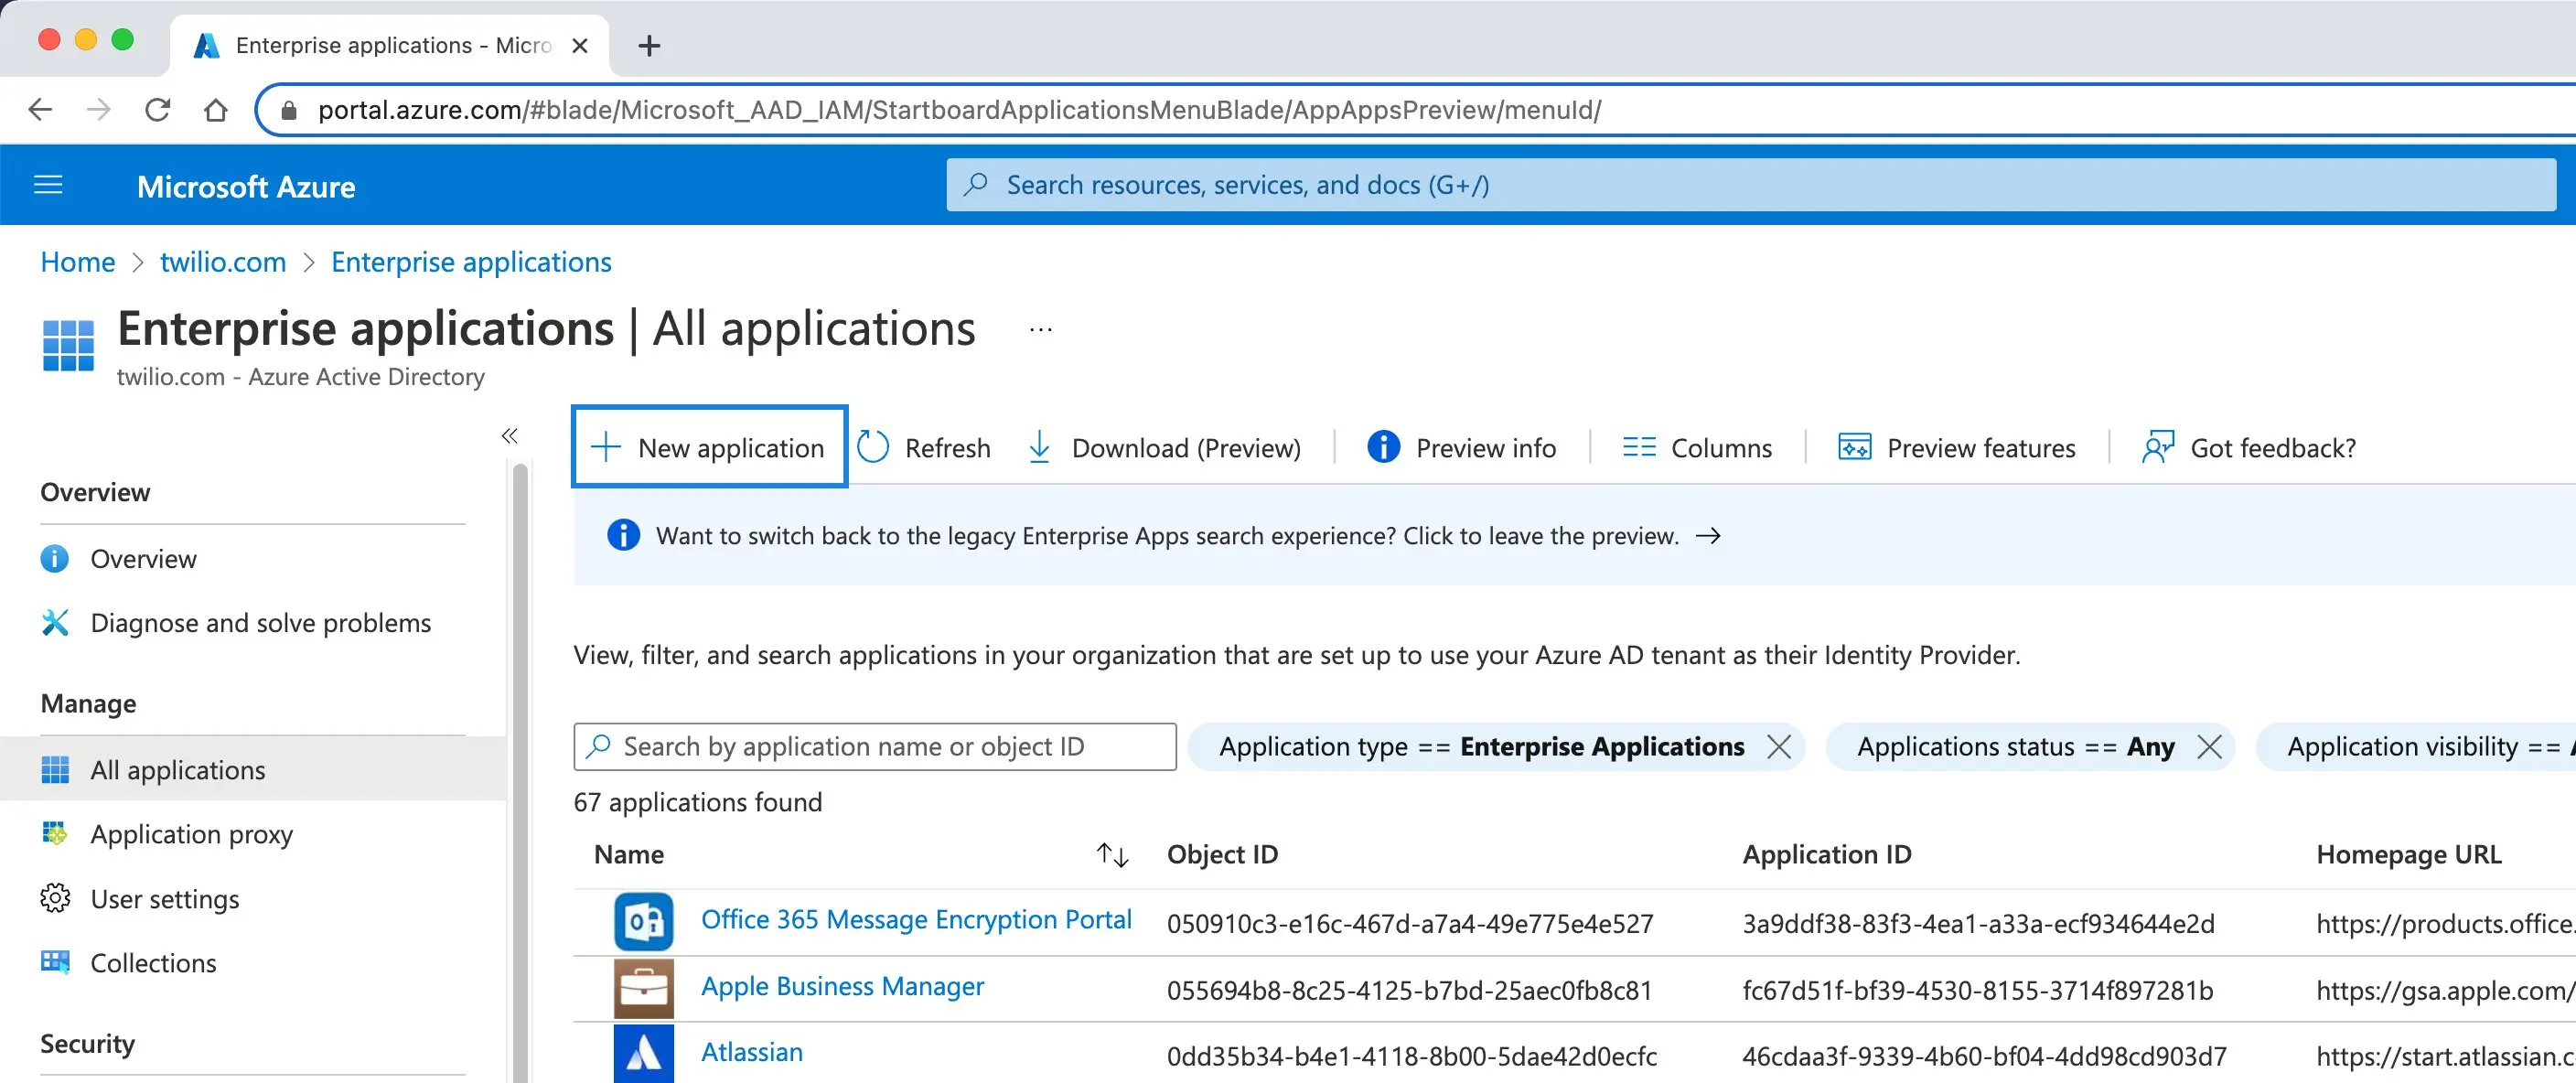
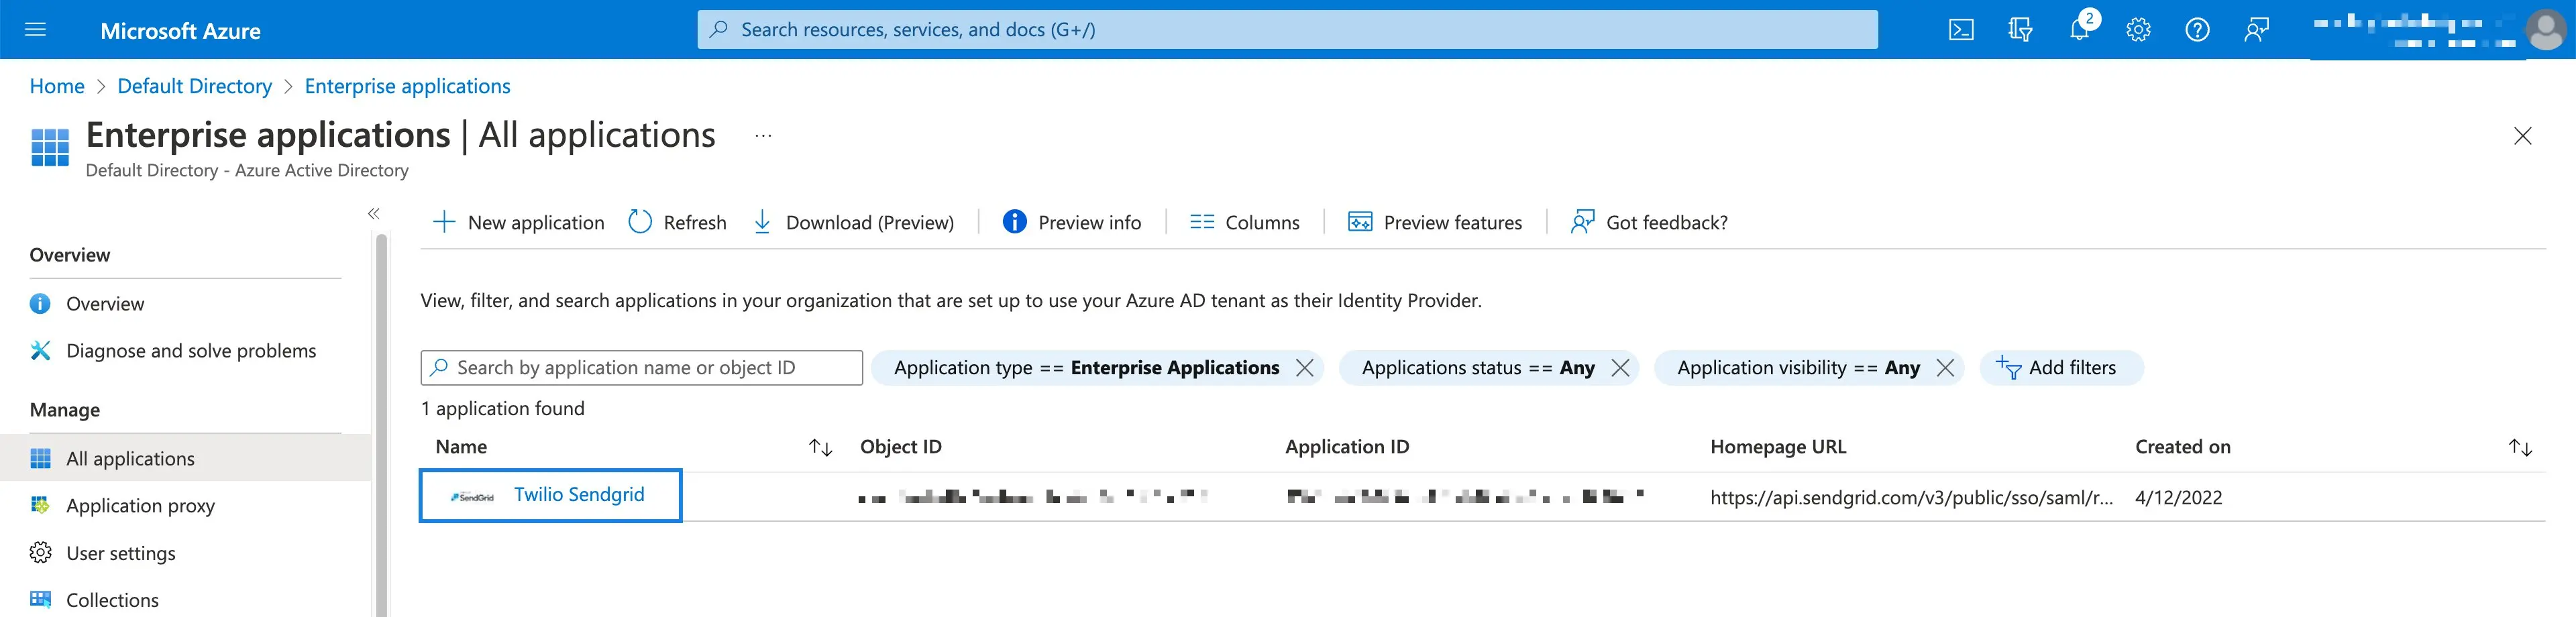
From the Active Directory page, go to Enterprise applications in the left menu.
-
A page will load where you can select + New application at the top.
-
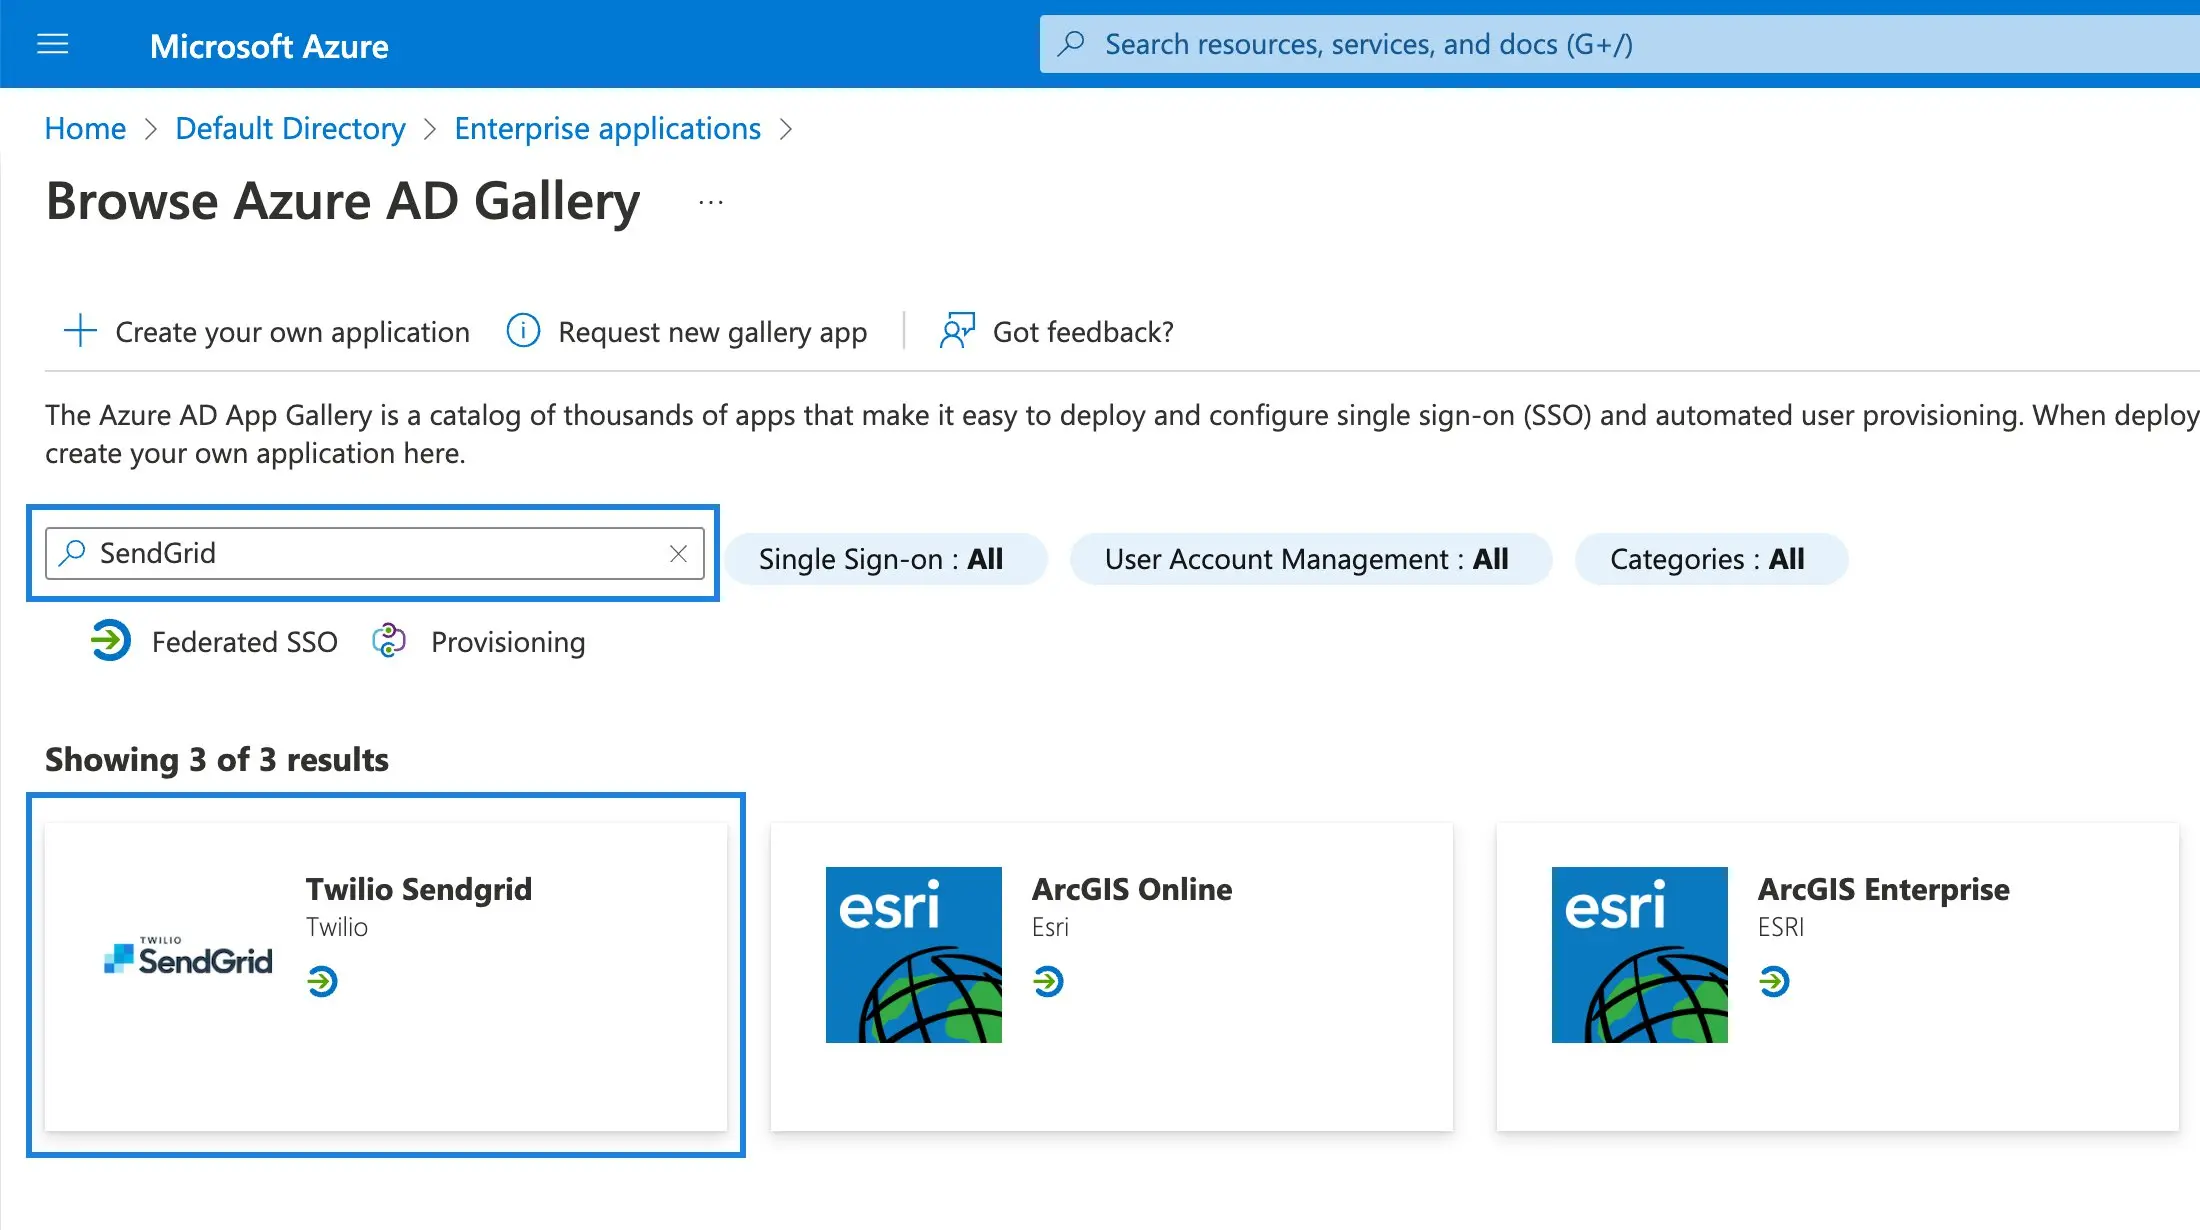
The Azure AD Gallery will load. Search for "SendGrid" and select Twilio SendGrid from the results.
-
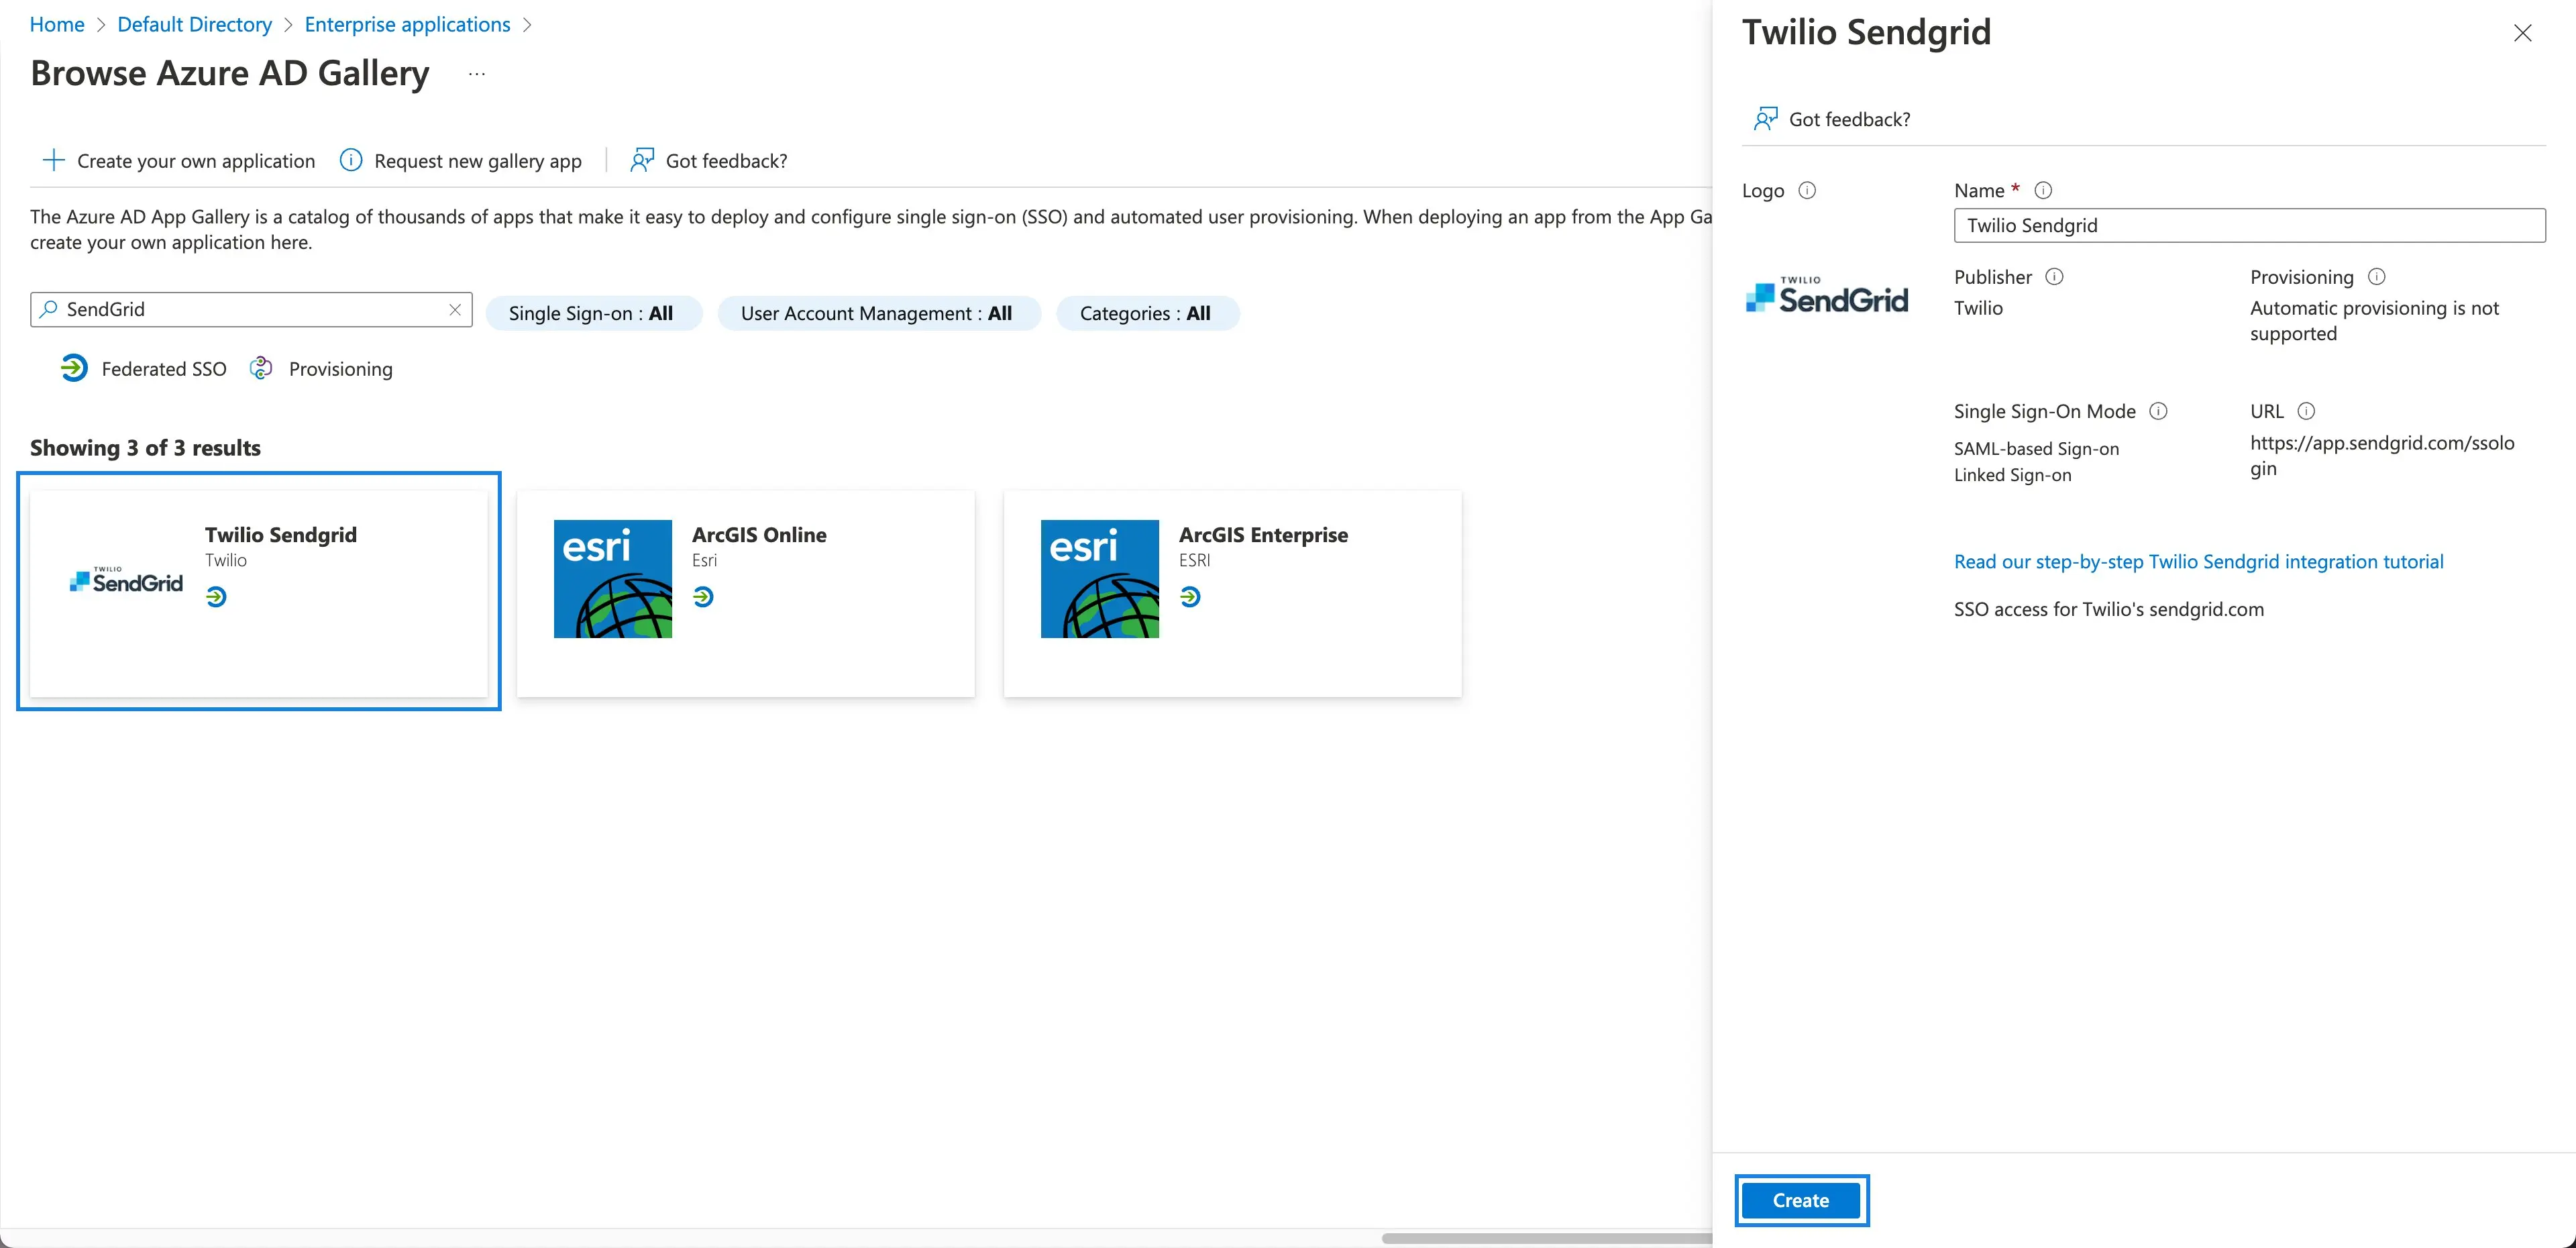
A preview with application details will appear to the right.
-
Click Create at the bottom.
-
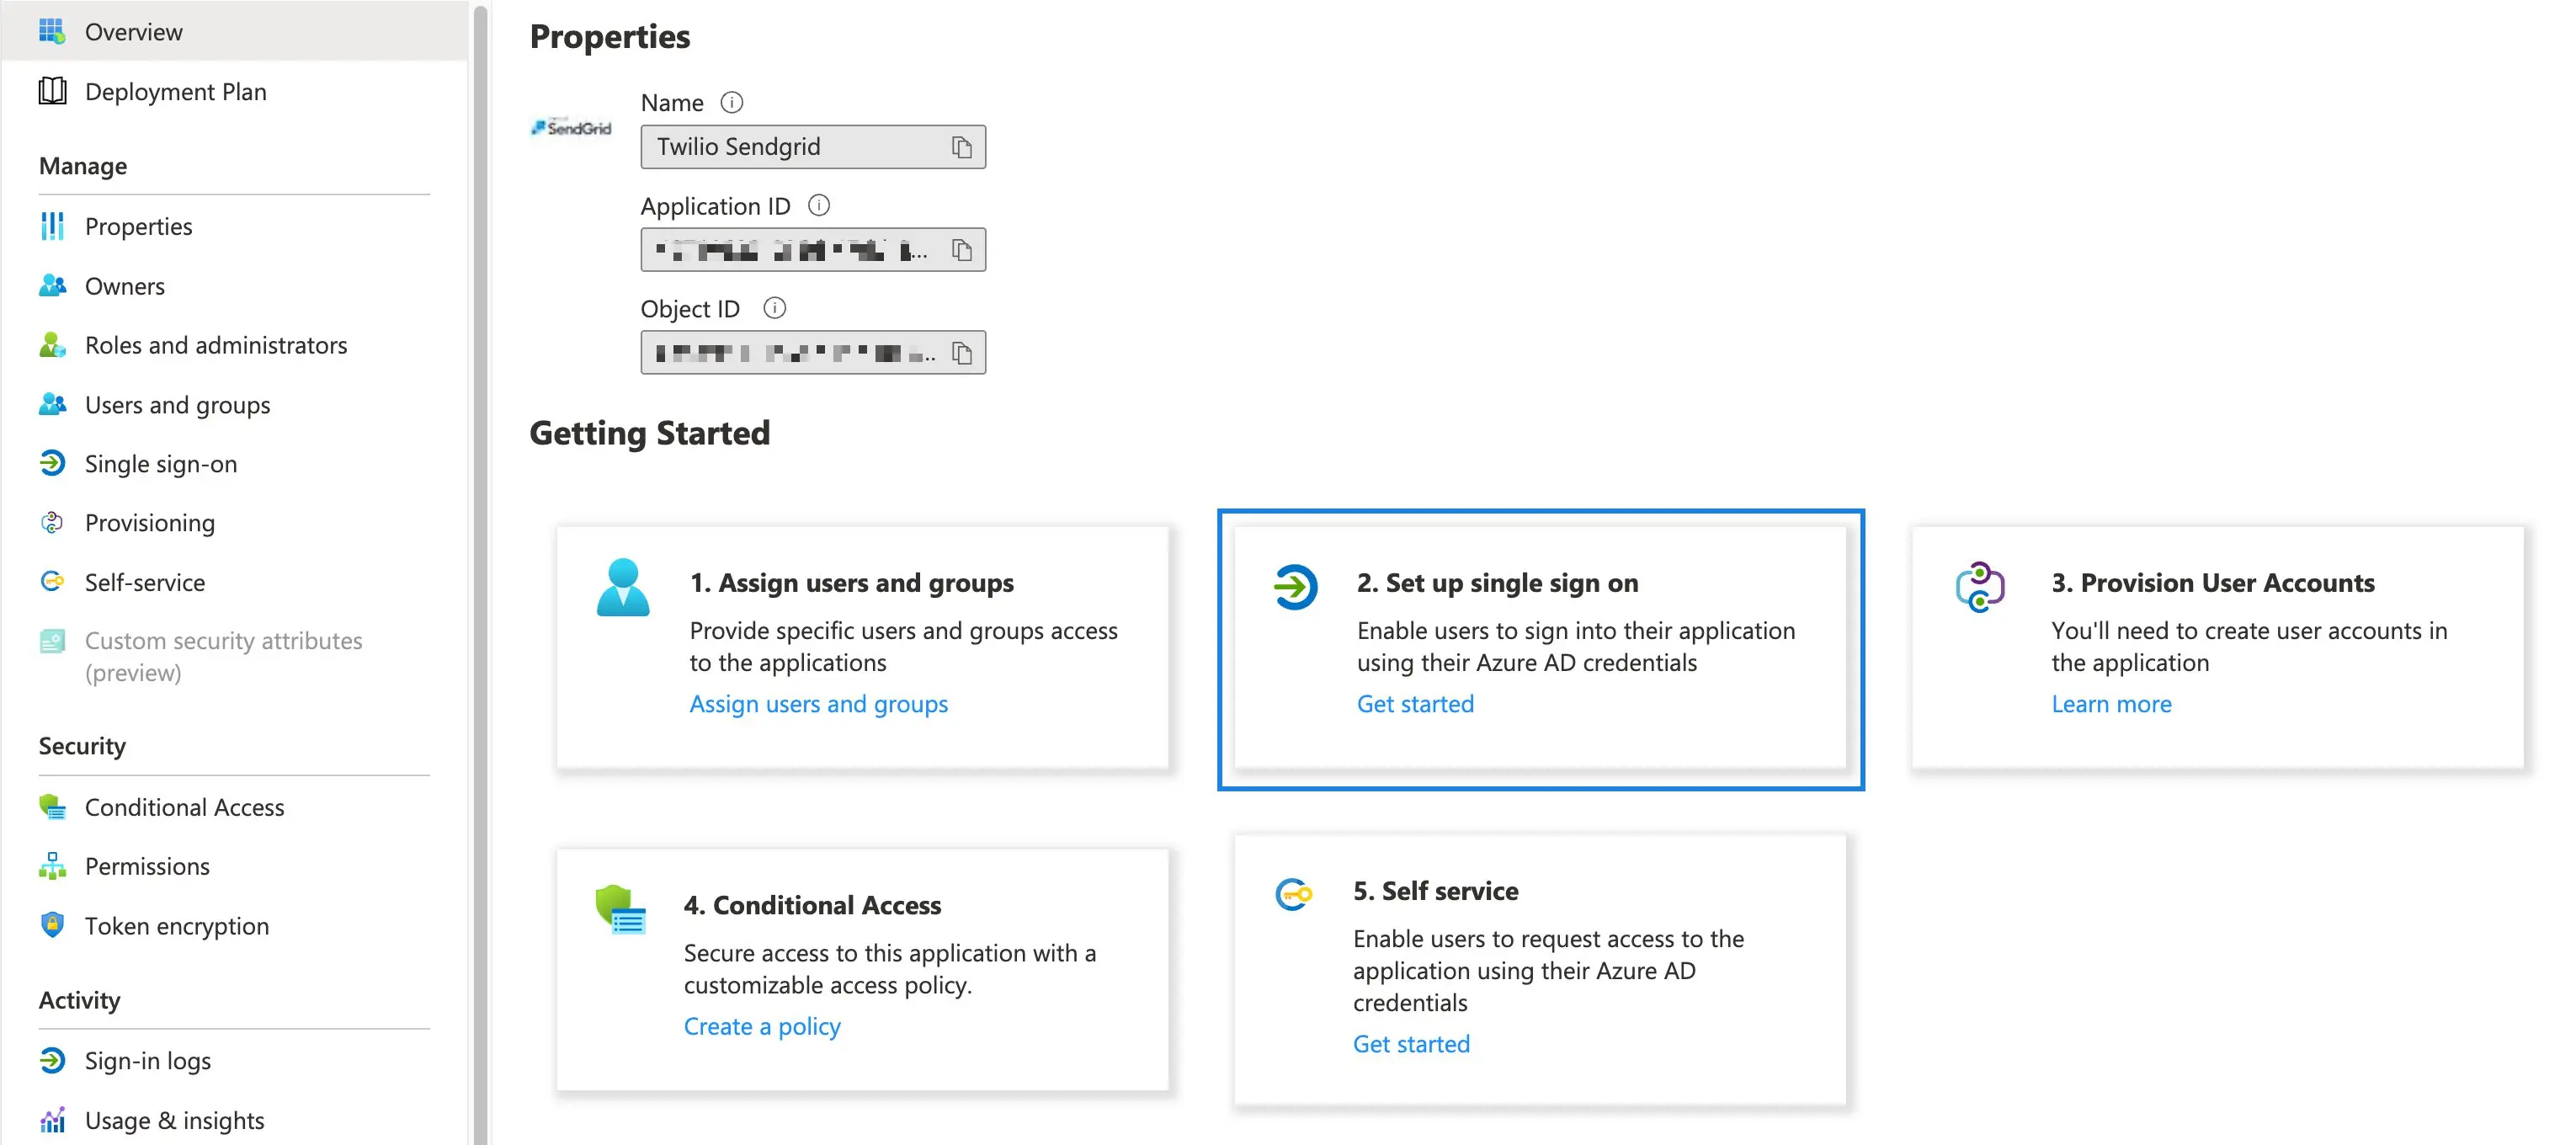
The Twilio SendGrid SSO application overview page will load. Select Get started on the Set up single sign on tile.
-
The Single sign-on page will load. Select SAML.
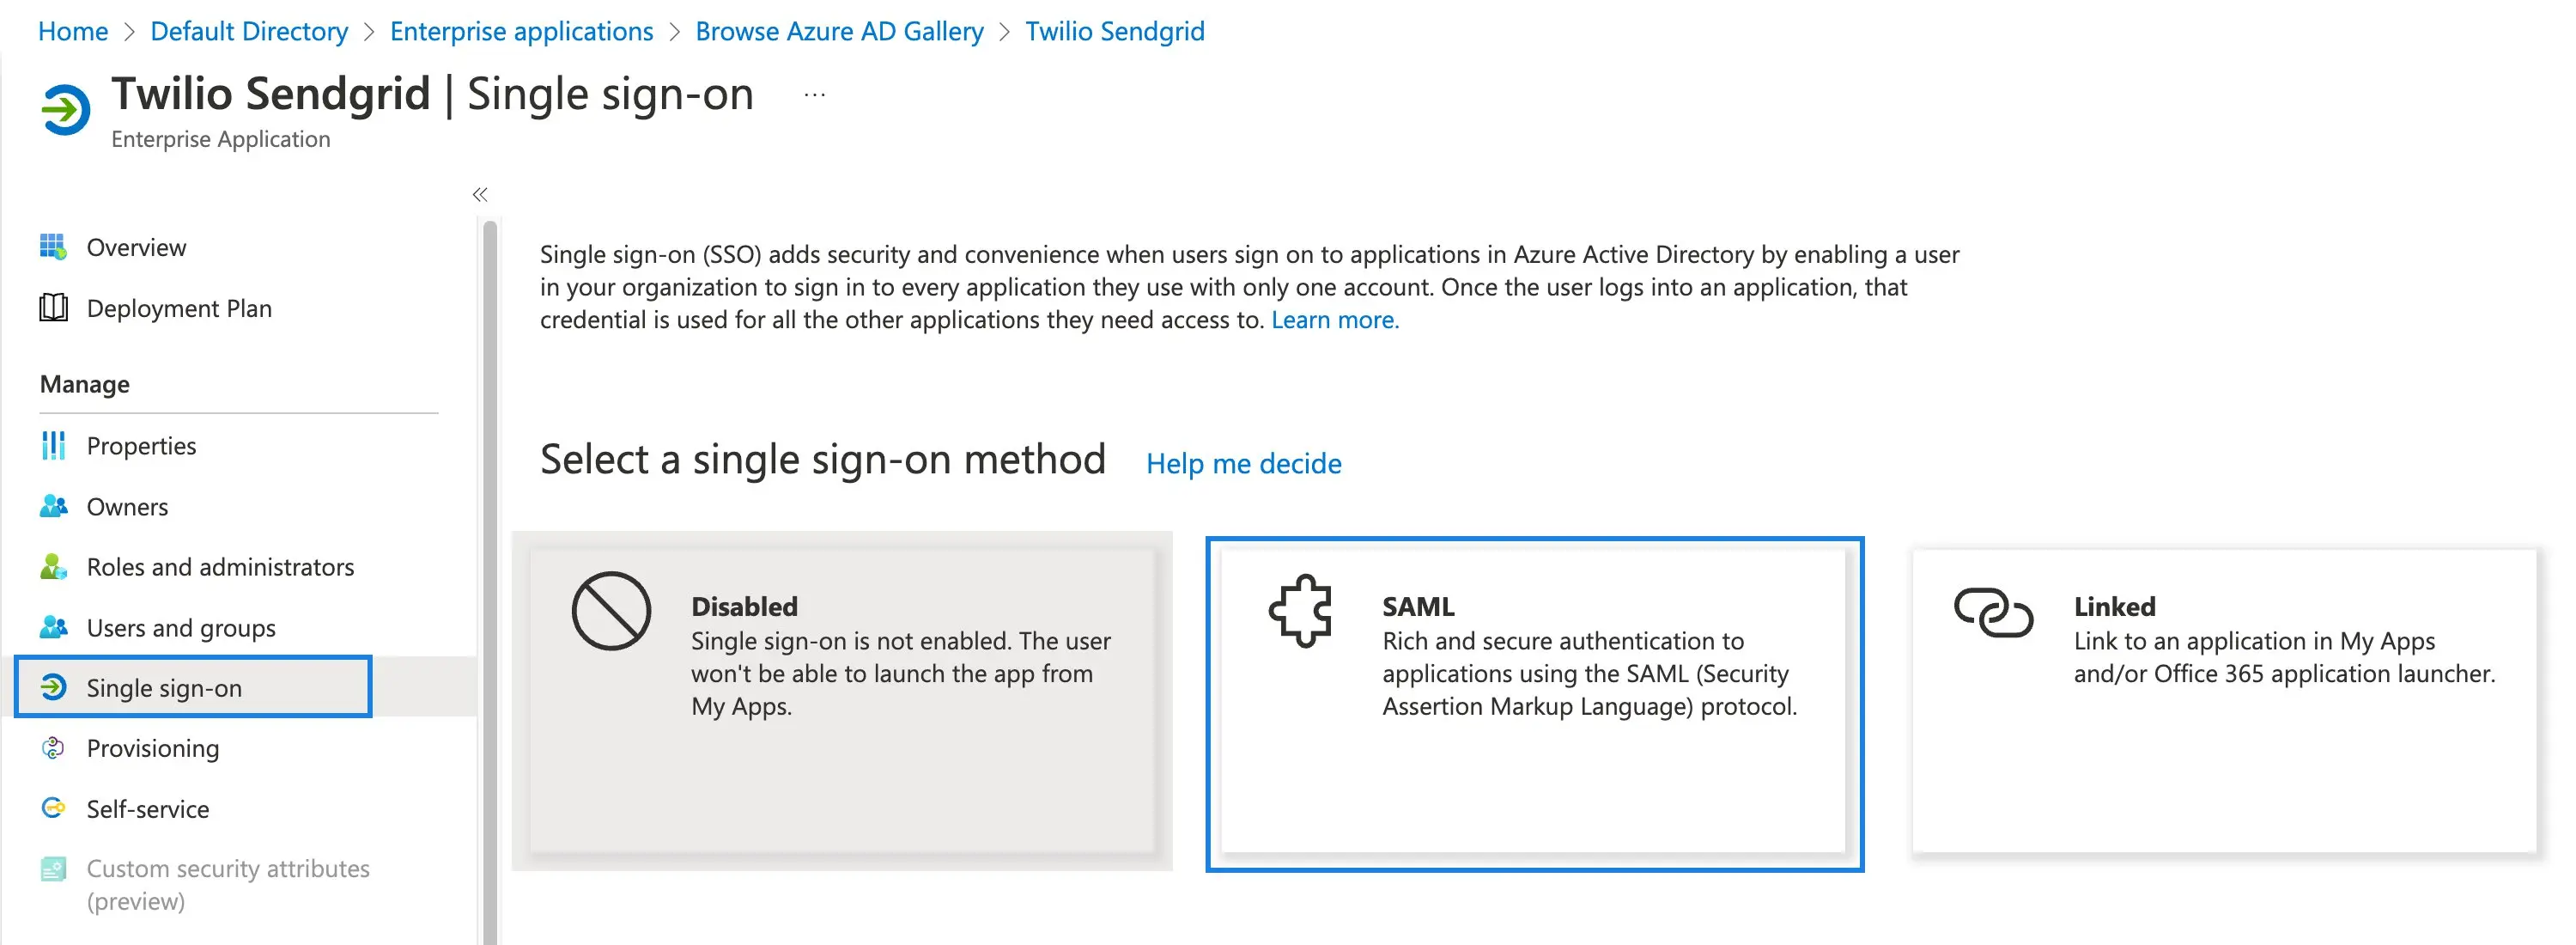
-
A page will load where you can configure the SAML values as shown in the following sections of this guide.
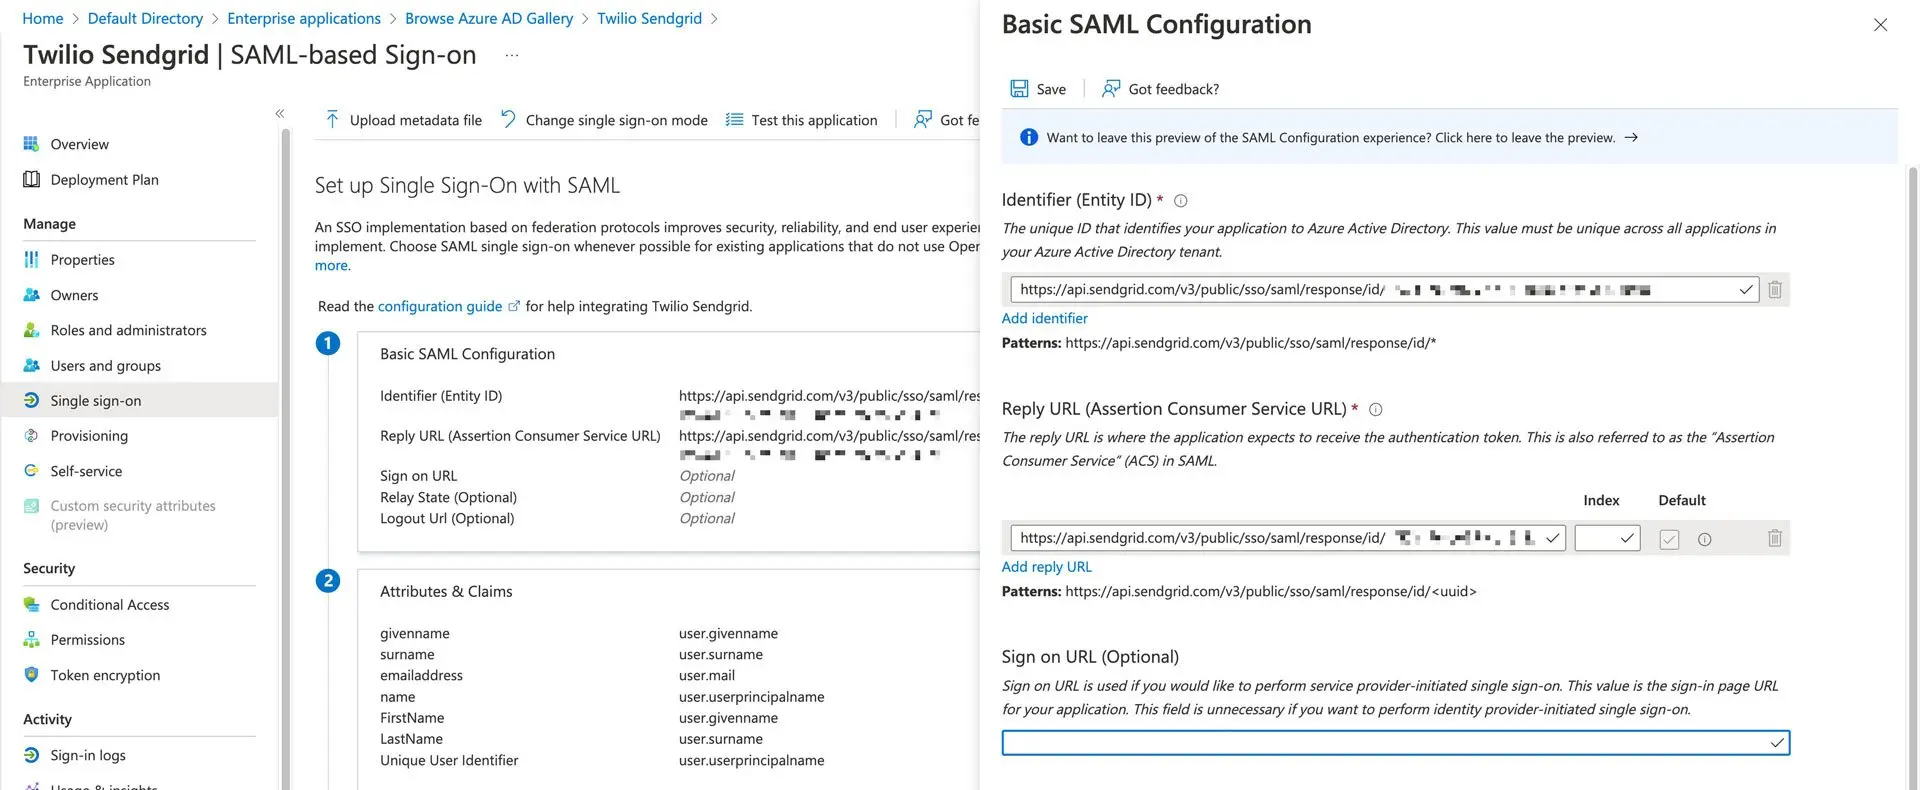
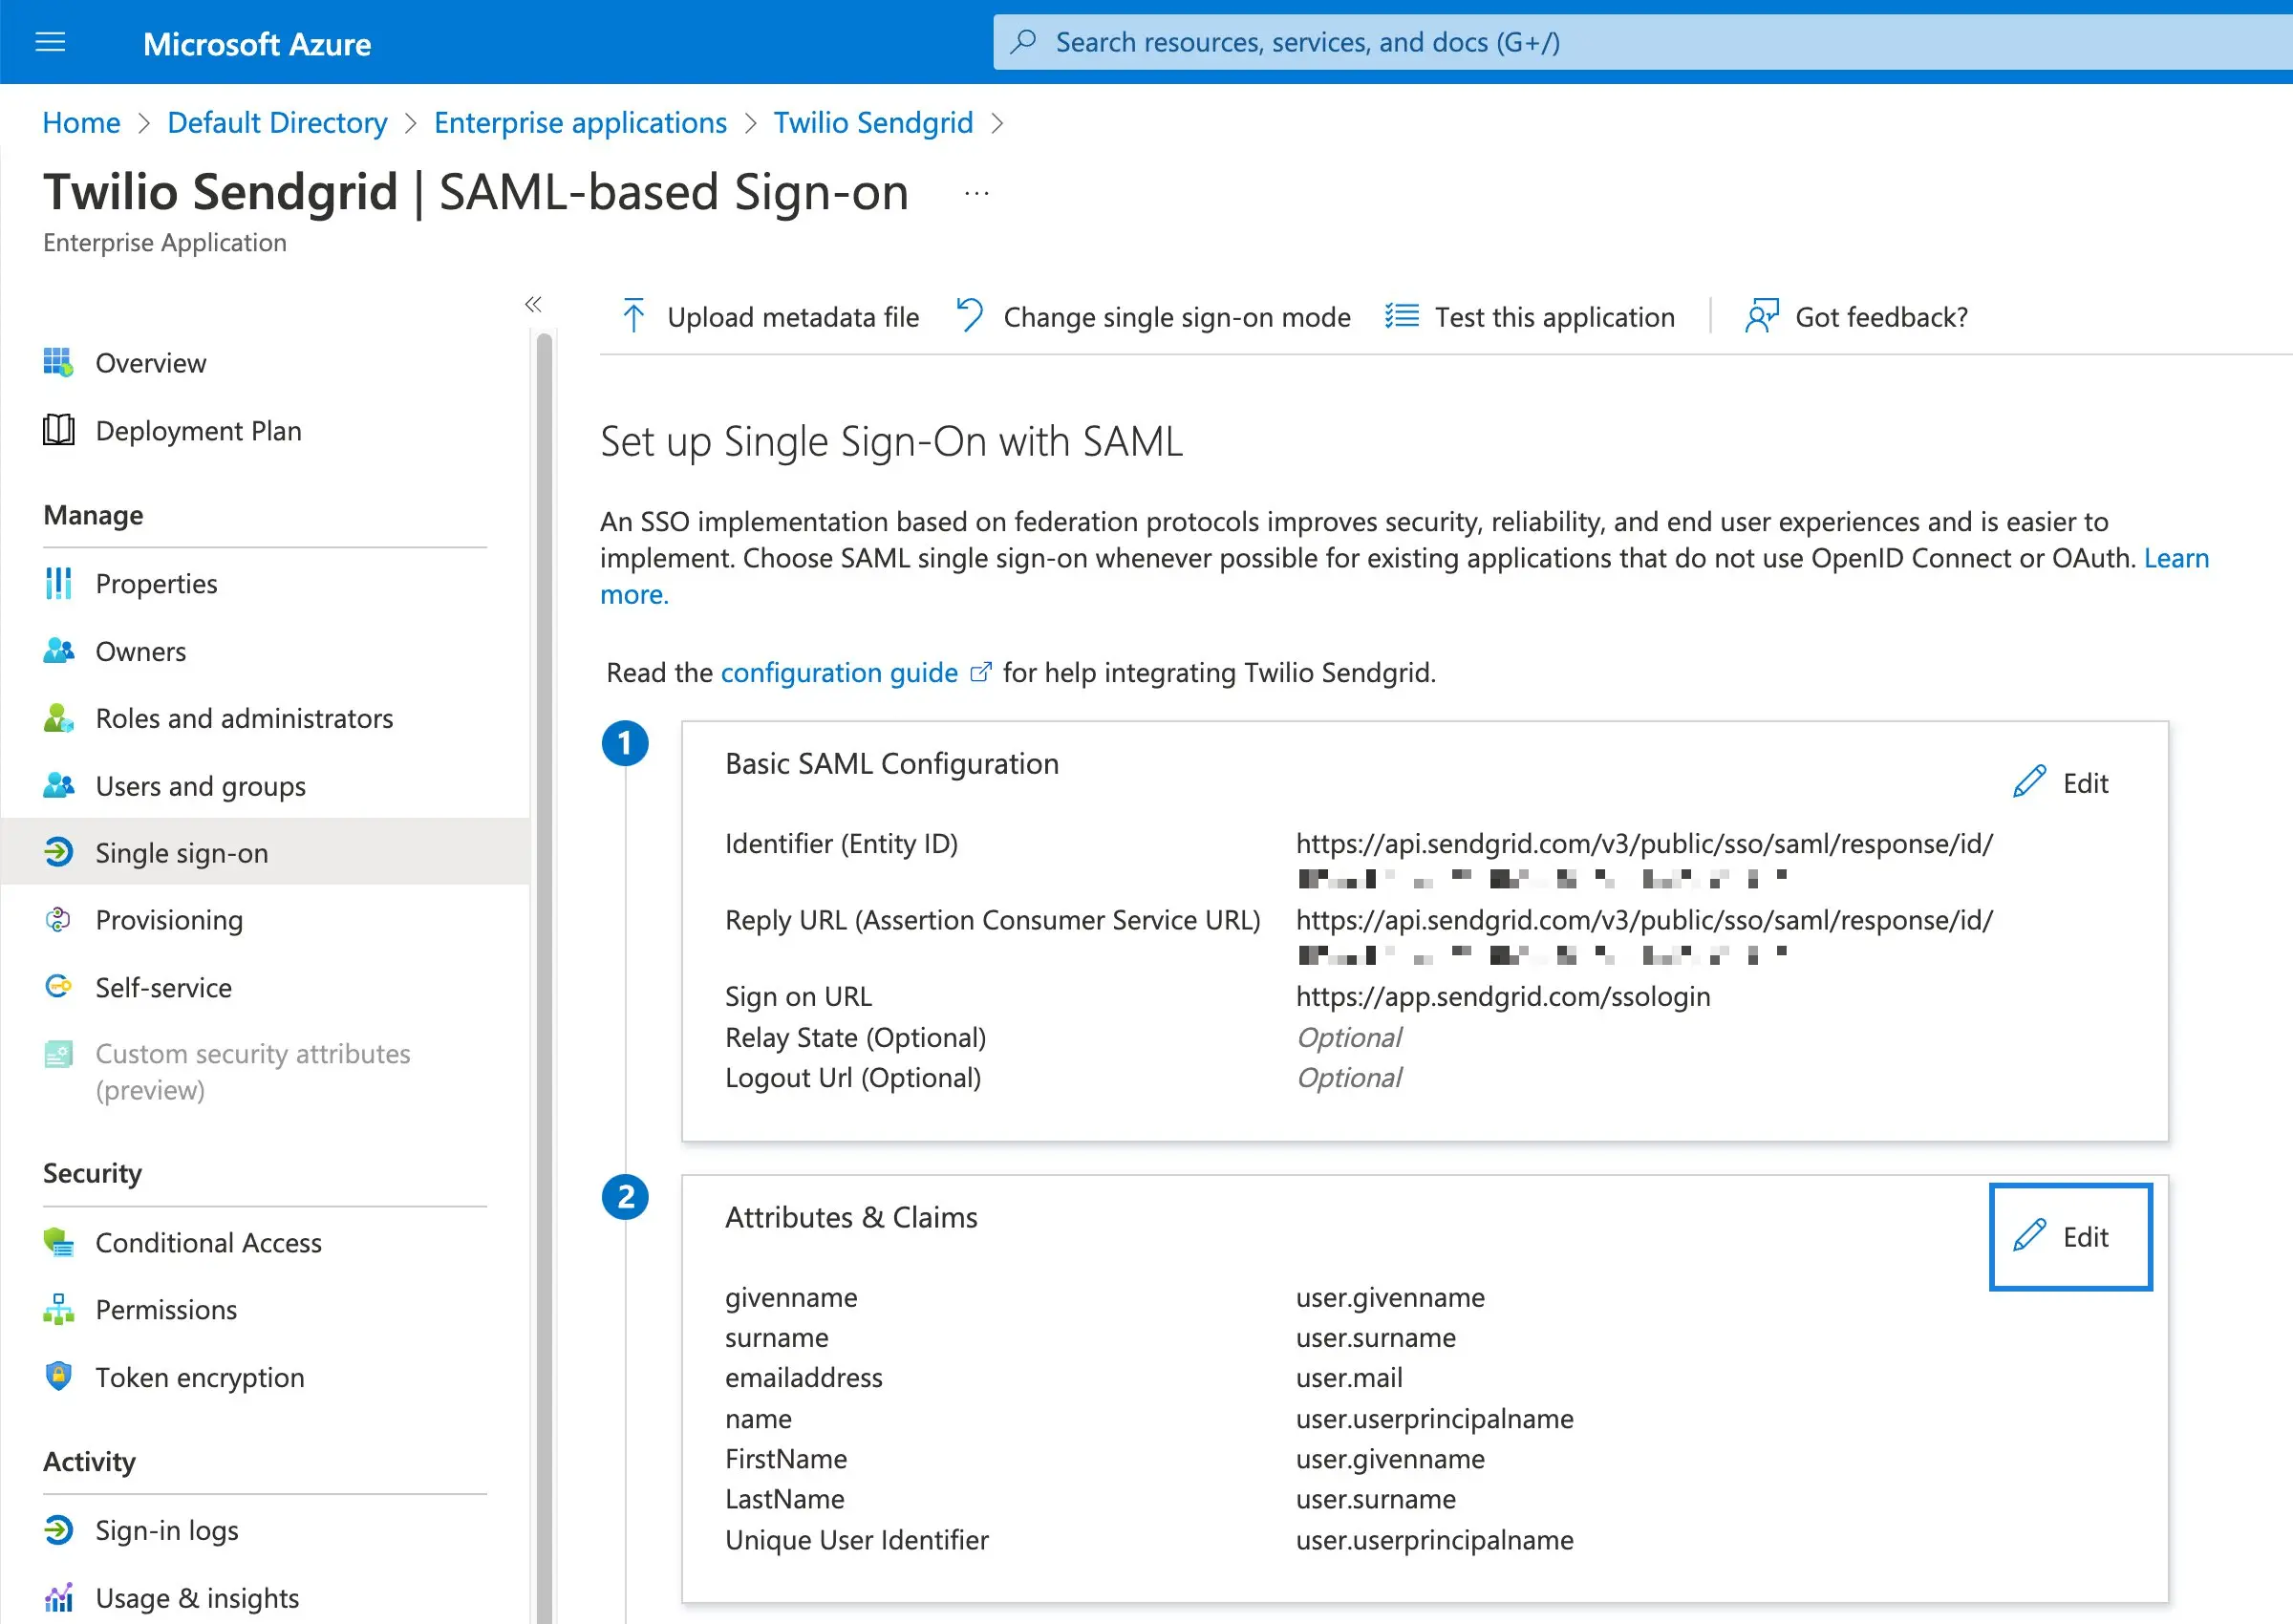
Once the official Twilio SendGrid application is added to your Azure Portal, you will configure it to establish the SAML relationship between Twilio SendGrid and Azure AD.
- Retrieve the Twilio SendGrid Single Sign-on URL from the Twilio SendGrid App if you have not already done so.
- Click the Edit icon in the following sections of the Azure configuration page, and modify them as outlined below. You will click Save after editing each section.
Note that the value is the same for both required fields because the Single Sign-on URL and Audience URL are the same for Twilio SendGrid.
-
Identifier (Entity ID): The Audience URL (SP Entity ID) provided by the Twilio SendGrid App.
-
Reply URL (Assertion Consumer Service URL): The Single Sign-on URL provided by the Twilio SendGrid App.
-
Sign on URL: This field is optional and should be left blank. If you are using just-in-time provisioning to create your Teammates, you must leave this field blank.
Info
If you have already integrated Twilio SendGrid with Azure AD manually (i.e., not using the official integration), you can enable JIT provisioning with your current integration. See the "Manually configuring JIT provisioning" section for instructions.
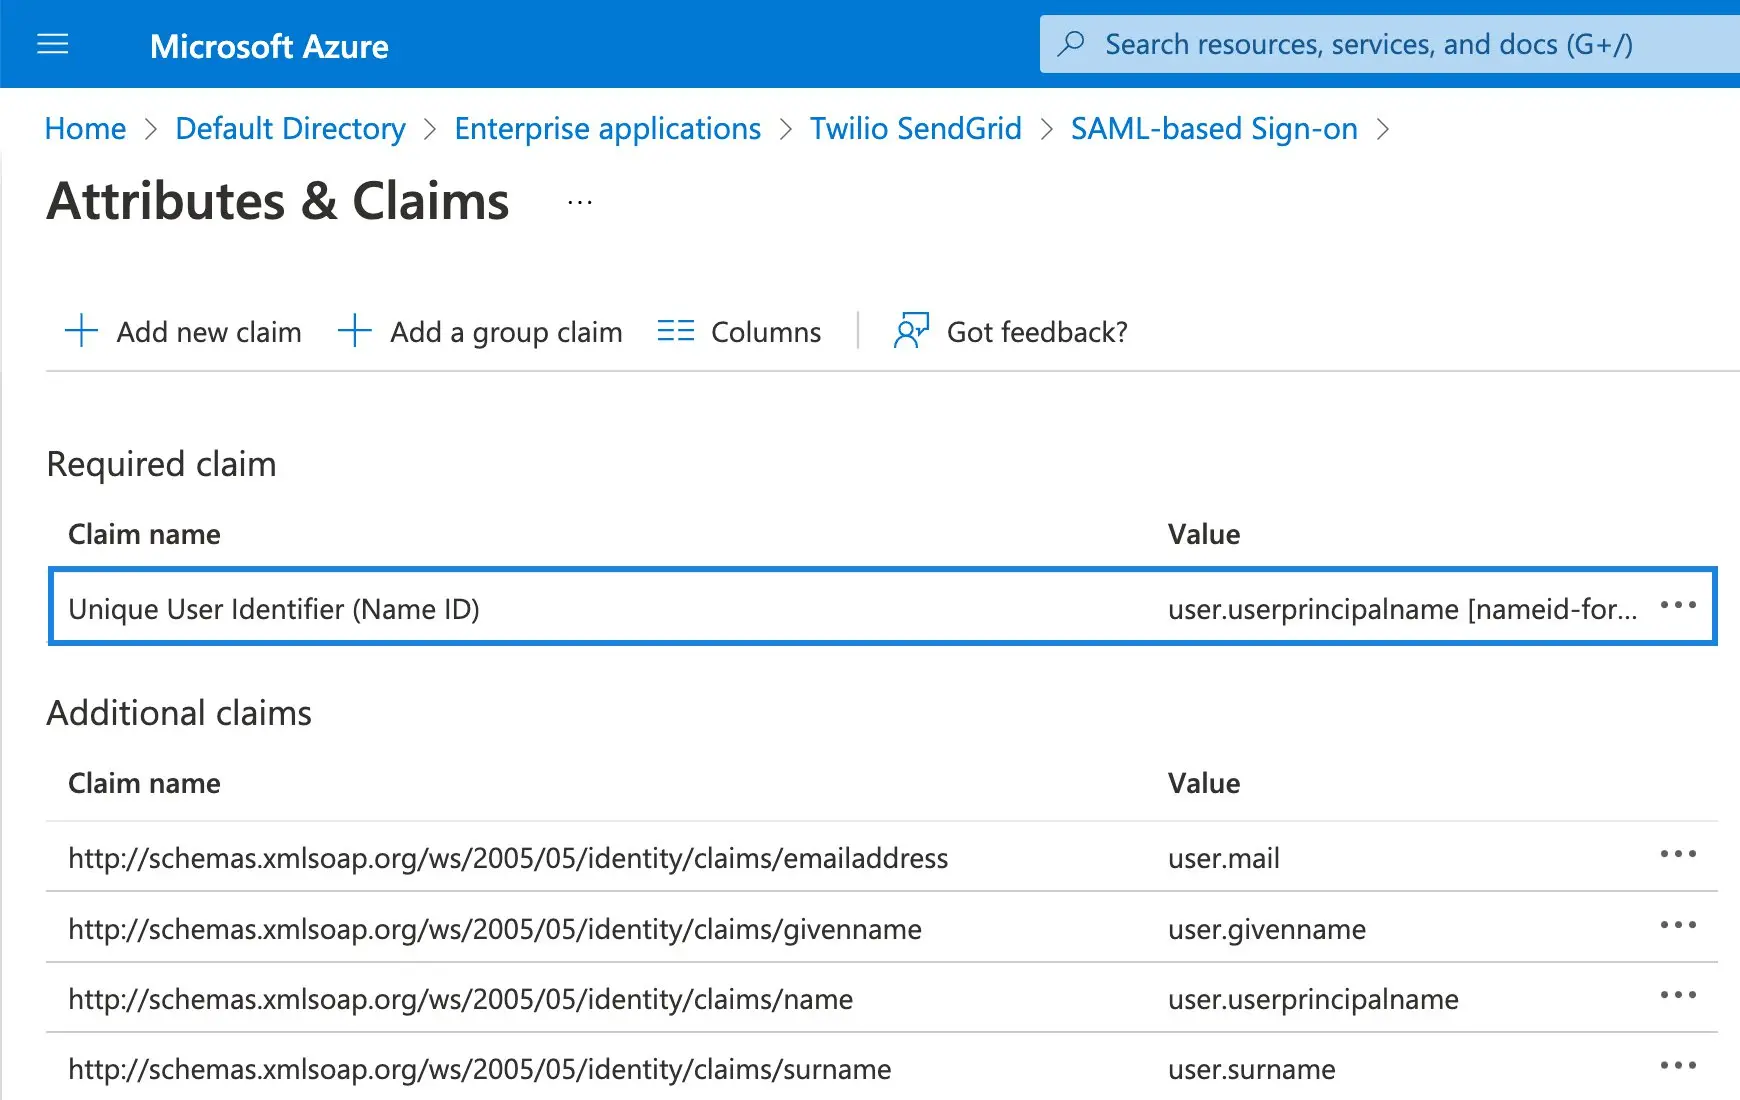
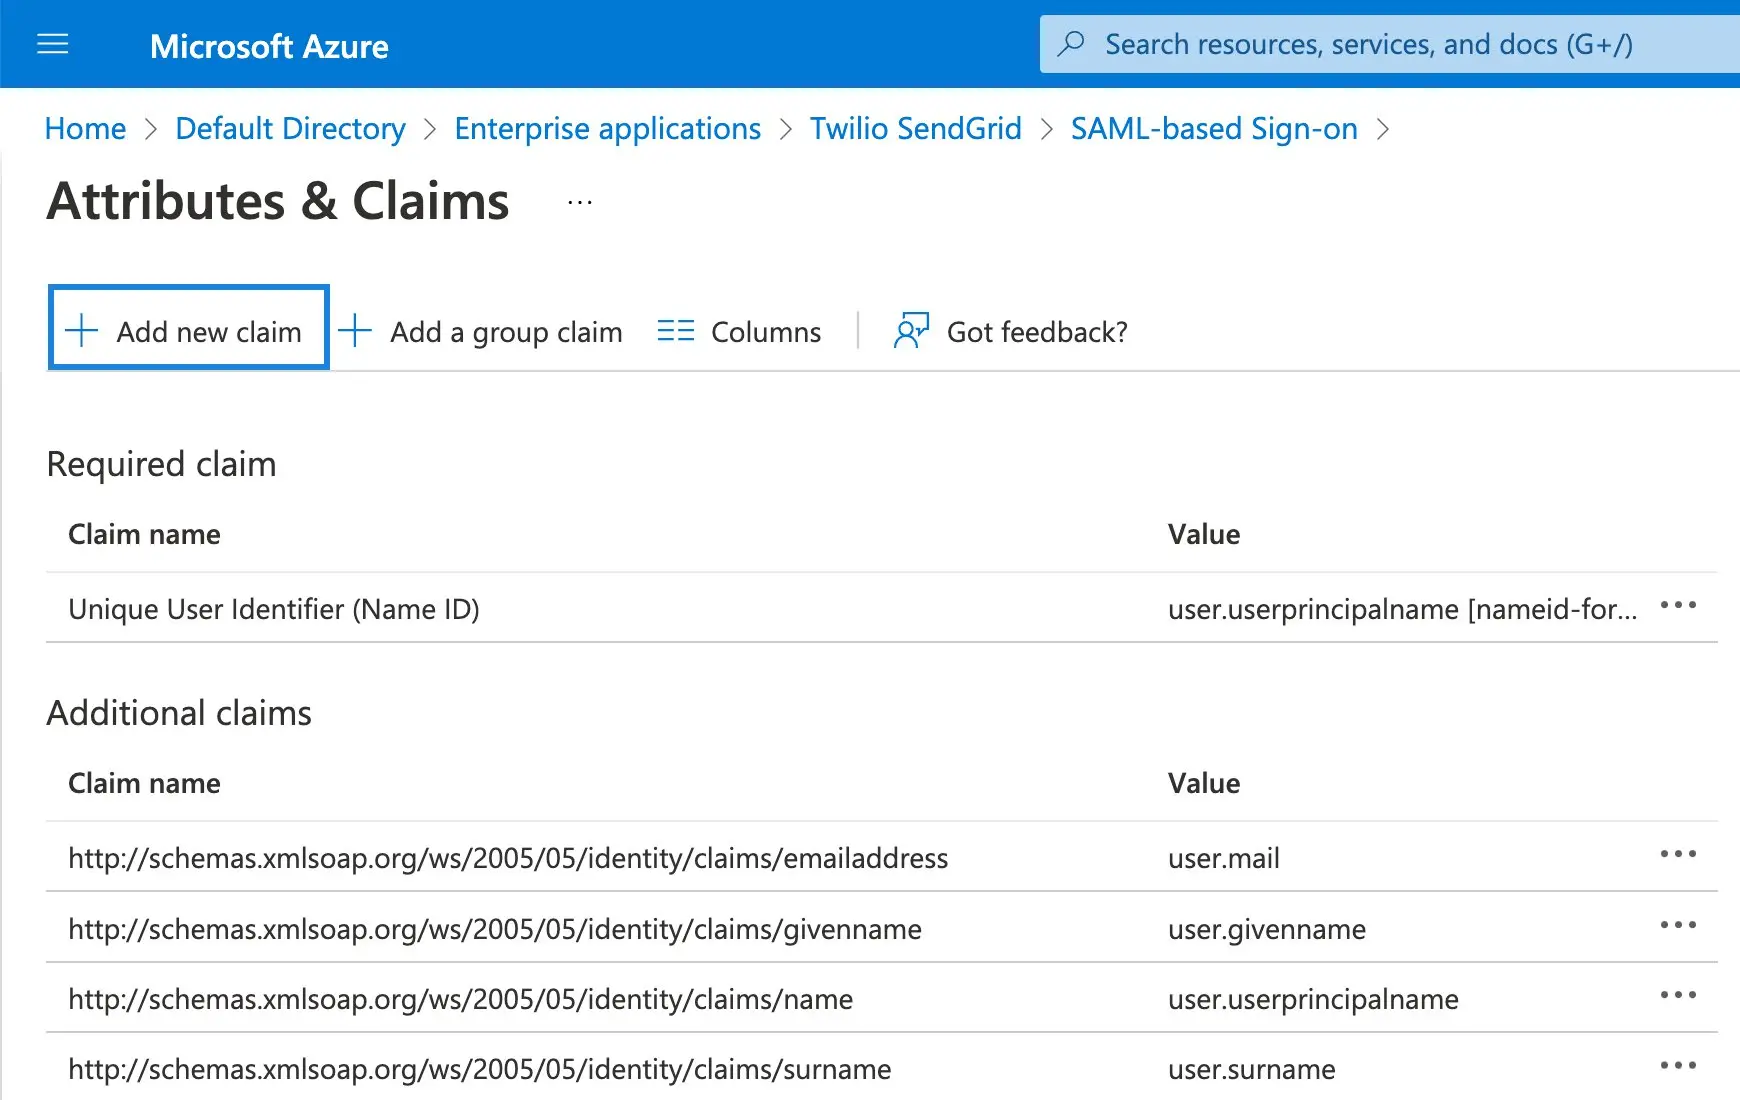
The Attributes & Claims are pre-populated for you when using the official Twilio SendGrid integration. You do not need to make any changes to this section of the SAML configuration. The following information is provided for your reference.
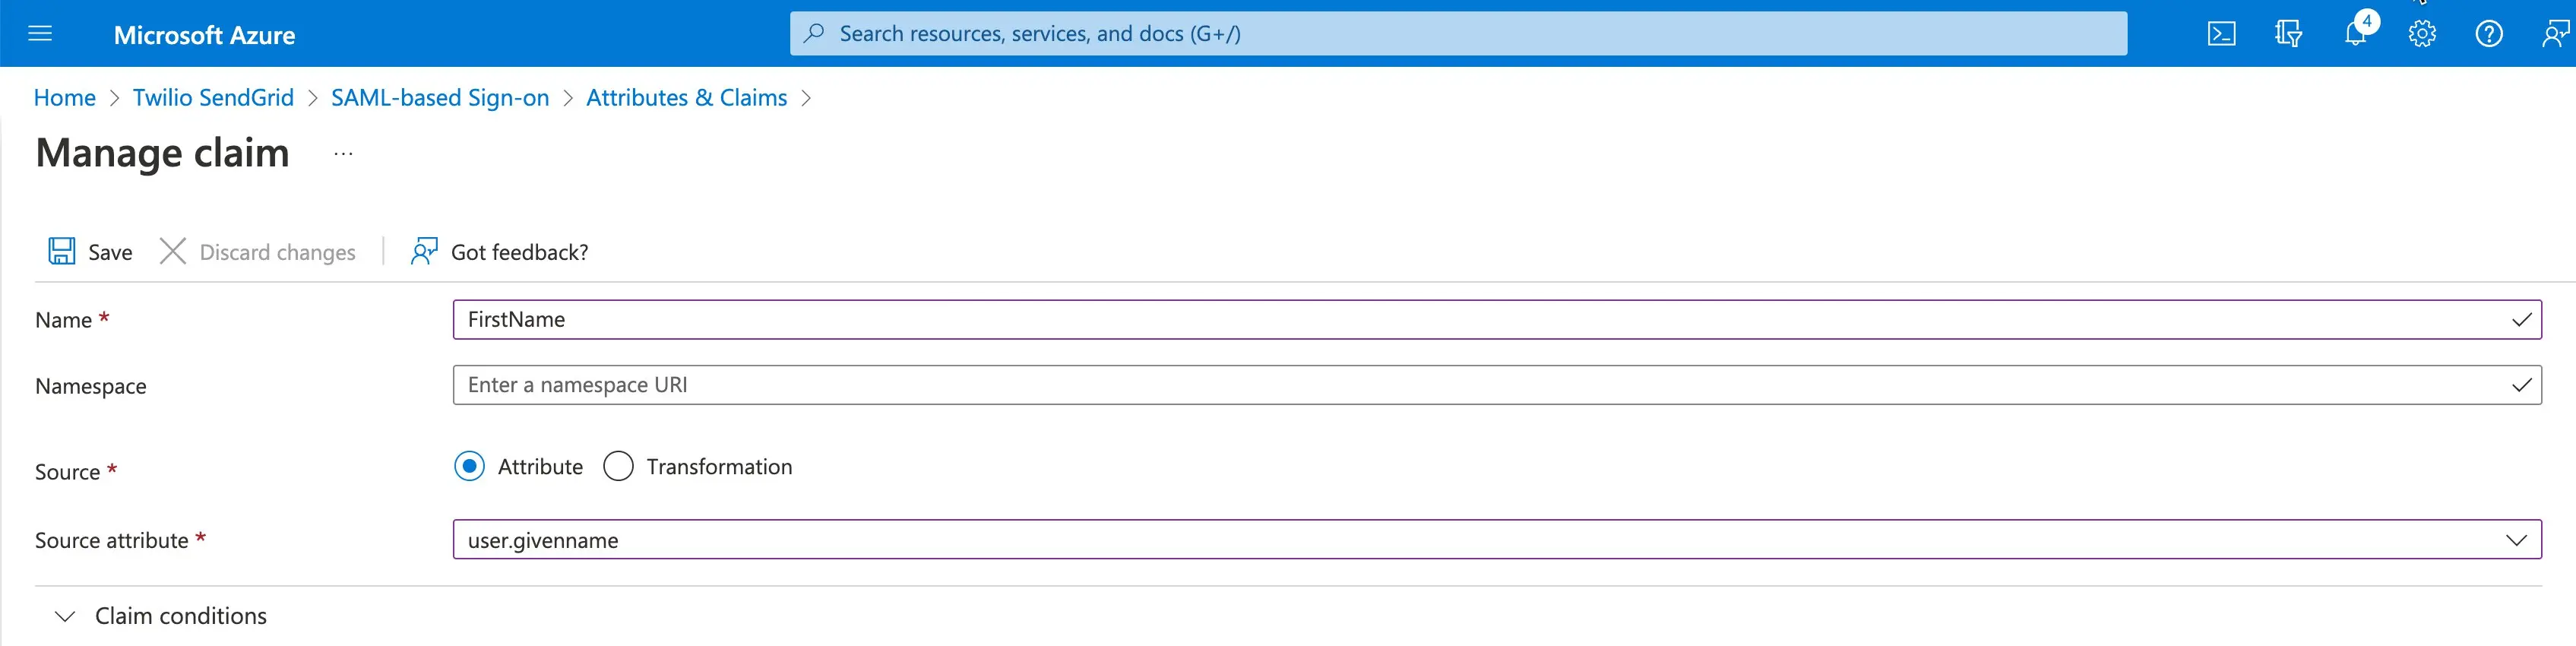
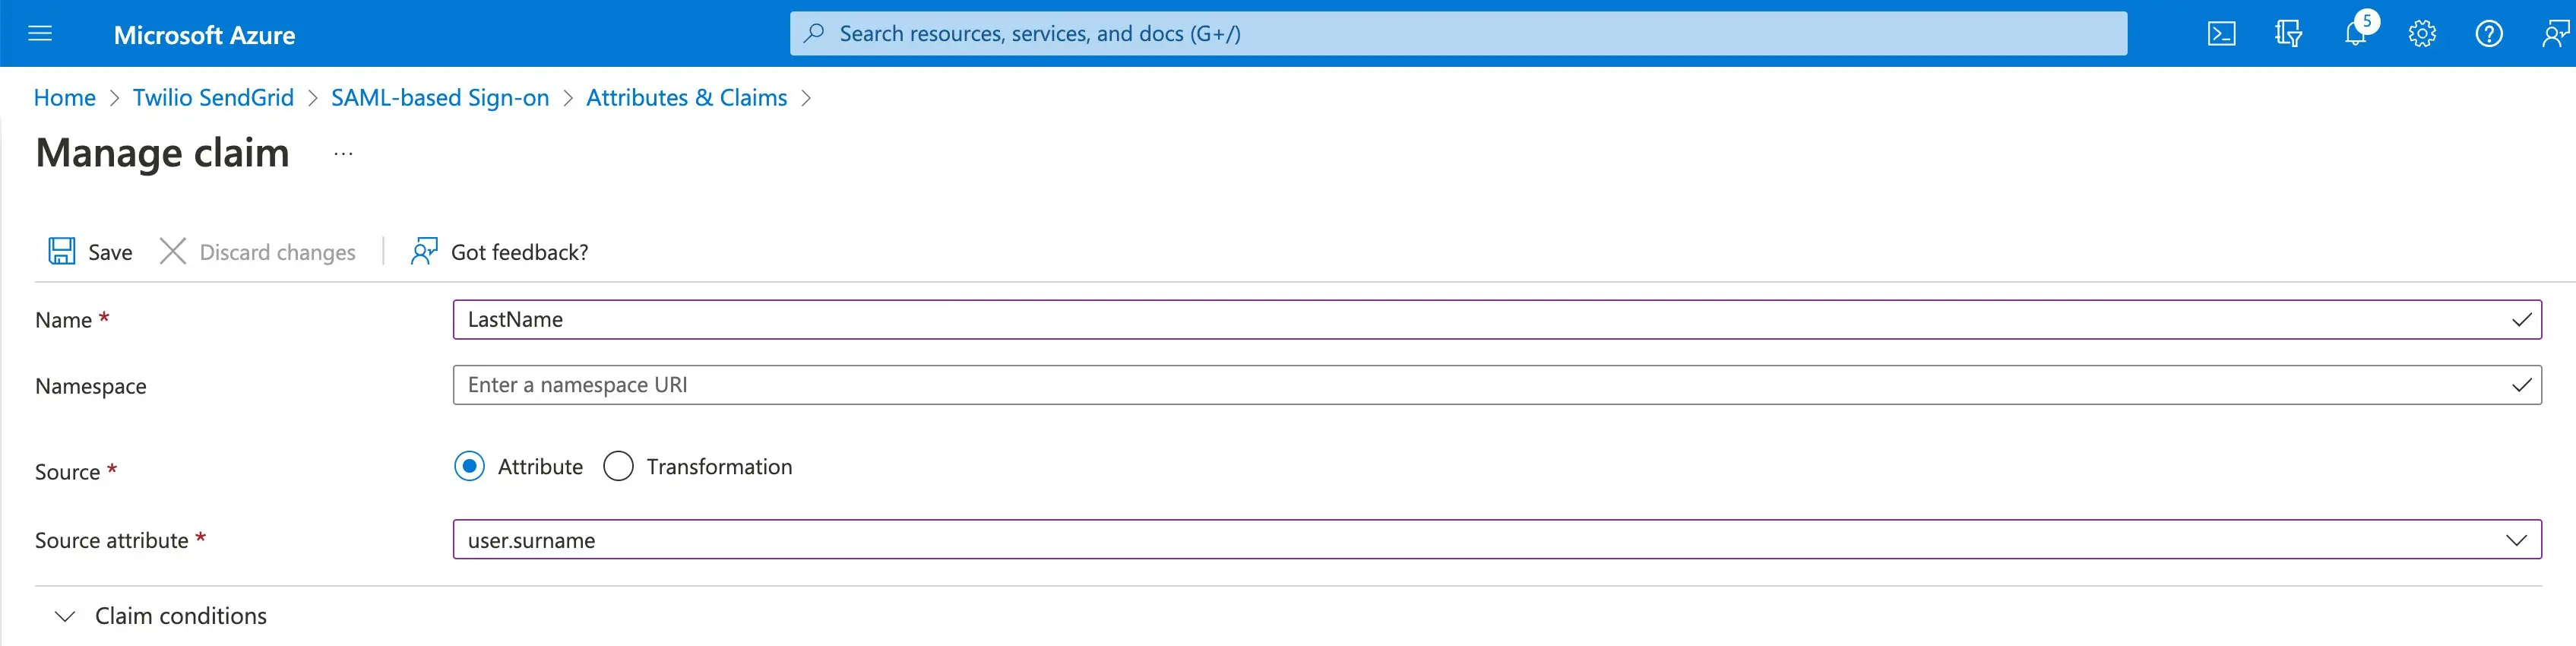
There are three attributes used by Twilio SendGrid: the Unique User Identifier, a FirstName, and a LastName. The FirstName and LastName attributes are required only if you enable JIT provisioning. See the JIT provisioning section of this guide for more information.
The Unique User Identifier's Name identifier format is set to Email address, and the Source attribute is set to user.userprincipalname.
The FirstName and LastName attributes have a Name and Source attribute. These attributes are set as shown below.
-
FirstName: user.givenname
-
LastName: user.surname
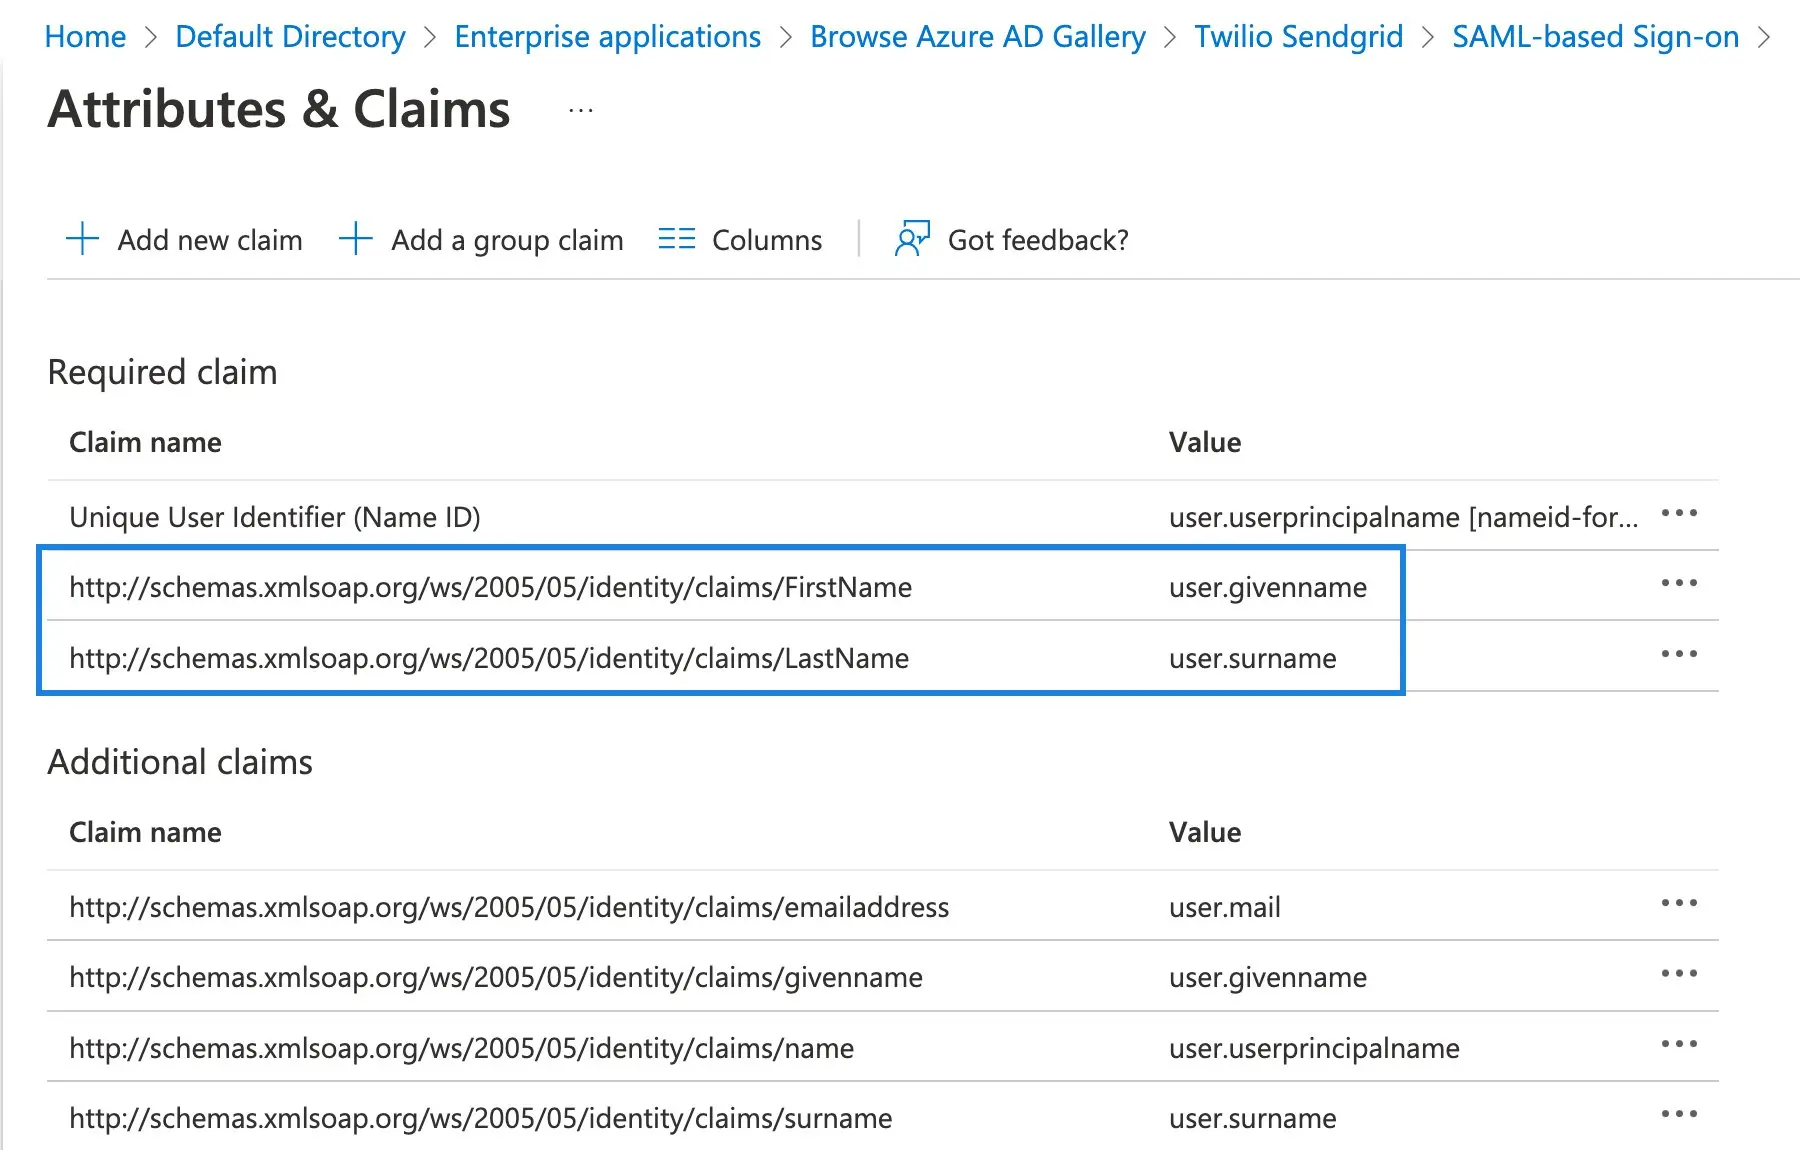
The Unique User Identifier, FirstName, and LastName attributes are the only attributes used by Twilio SendGrid. You can optionally delete the remaining attributes that Azure AD includes during the app creation process.

The SAML Signing Certificate section is where you will find the X509 certificate that identifies Azure assertions to Twilio SendGrid.
- Download the Base64 encoded version of the certificate and open it in a text editor.
- You will copy the certificate to your clipboard and add it to the Twilio SendGrid App in the next section.
The set up section contains values required by Twilio SendGrid to establish a relationship with Azure AD.
- Copy the following values from this section of the Azure SAML set up page. You will use them in the next section of this guide. Note that the Login URL and Logout URL are the same for this setup.
- Login URL
- Azure AD Identifier
Once you have configured the previous settings where appropriate in your Azure integration, you must add the values provided by Azure to your Twilio SendGrid SSO configuration.
-
You should have the following values from the Set up Twilio SendGrid section of your Azure SAML setup.
- Login URL
- Azure AD Identifier
-
Return to the Twilio SendGrid App.
-
From the page displaying your SendGrid SSO configuration, click Next.
-
You will now add the values you retrieved from Azure as specified below.
-
SAML Issue ID: The Azure AD Identifier. This value will be a URL.
-
Embed Link: The Azure Login URL. This is Azure AD's SAML
POSTendpoint, and it receives requests that initiate an SSO login flow.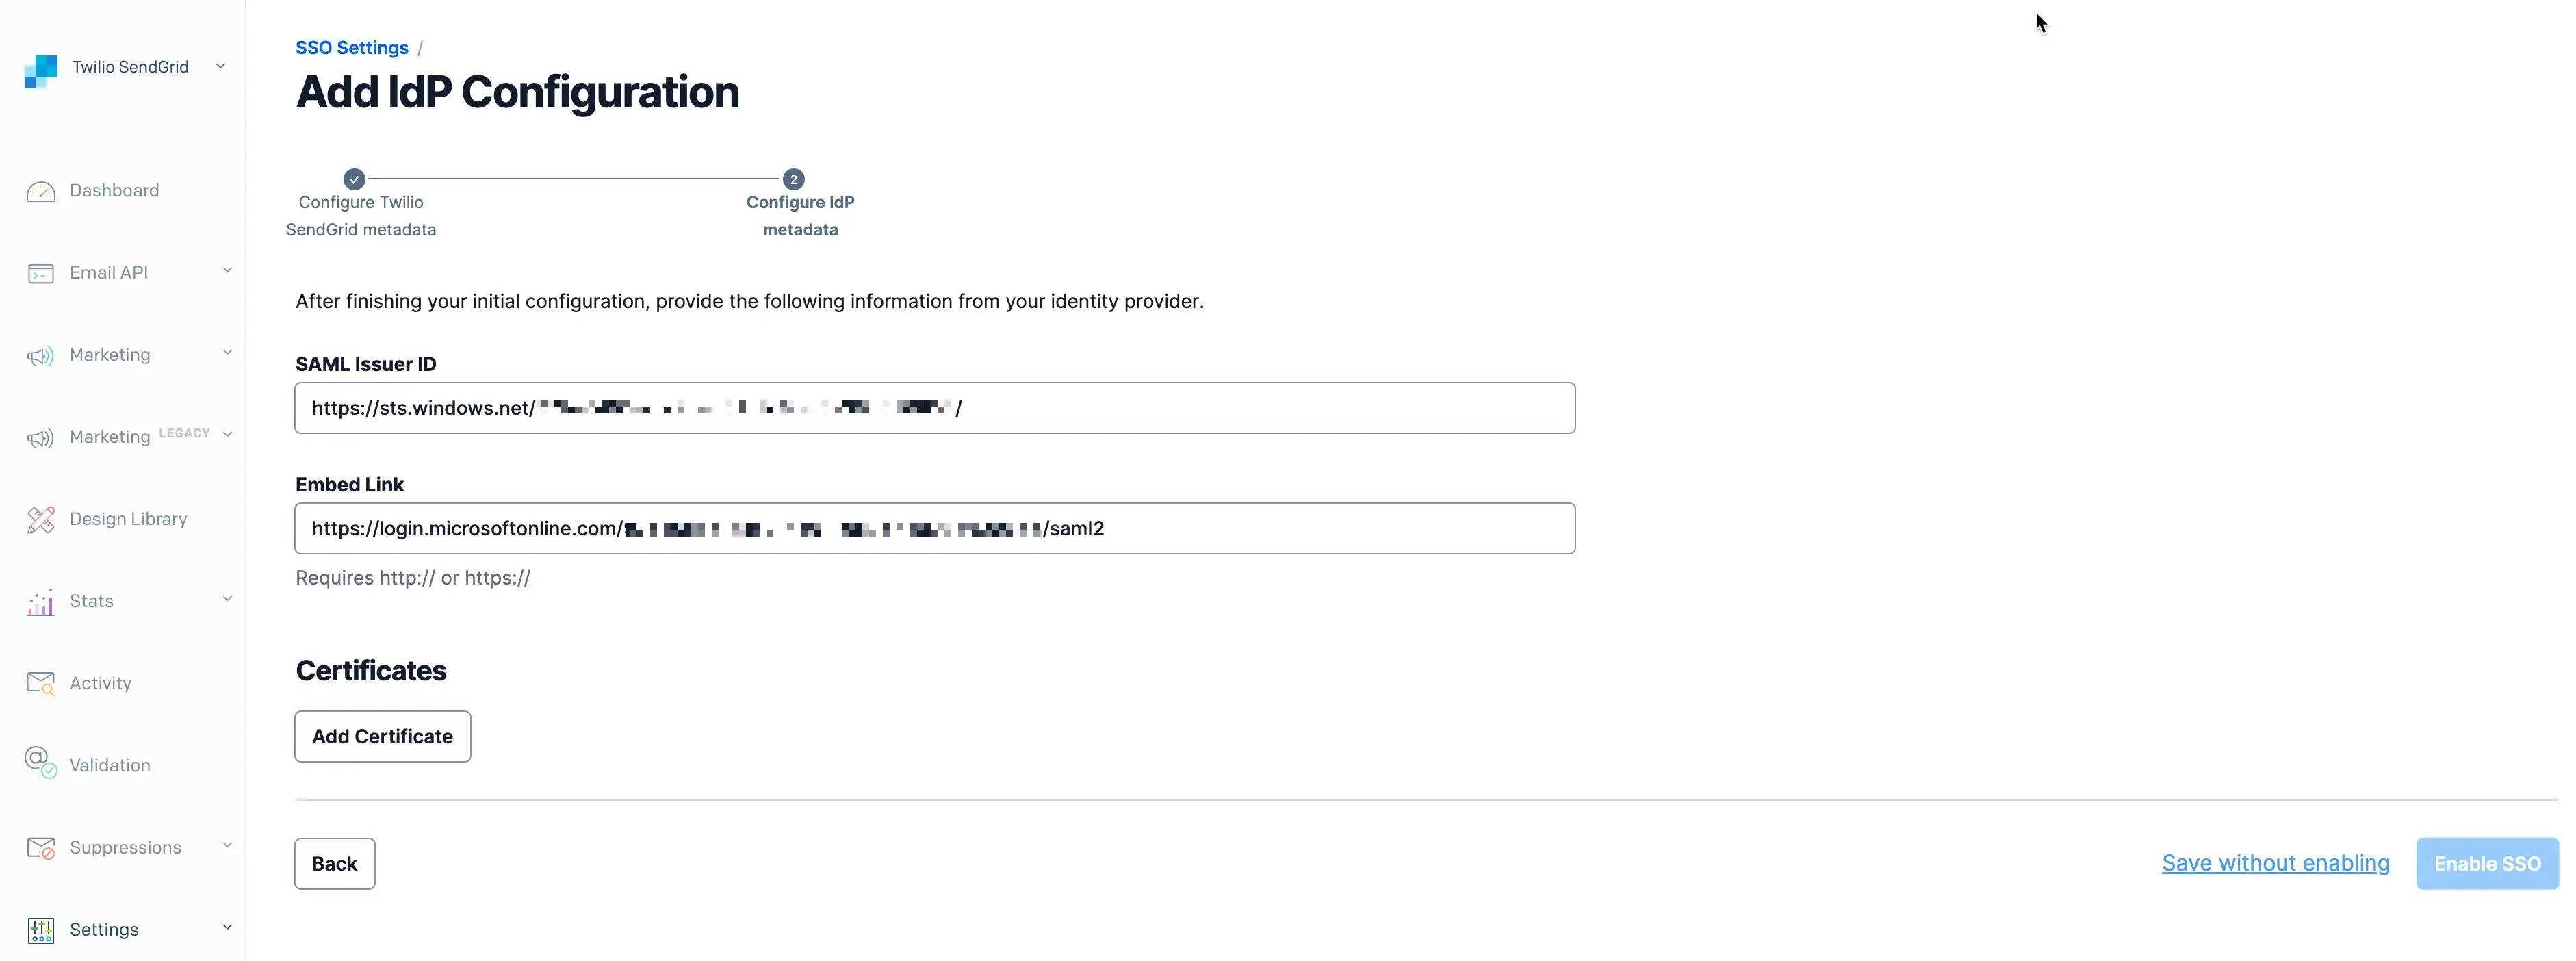
-
-
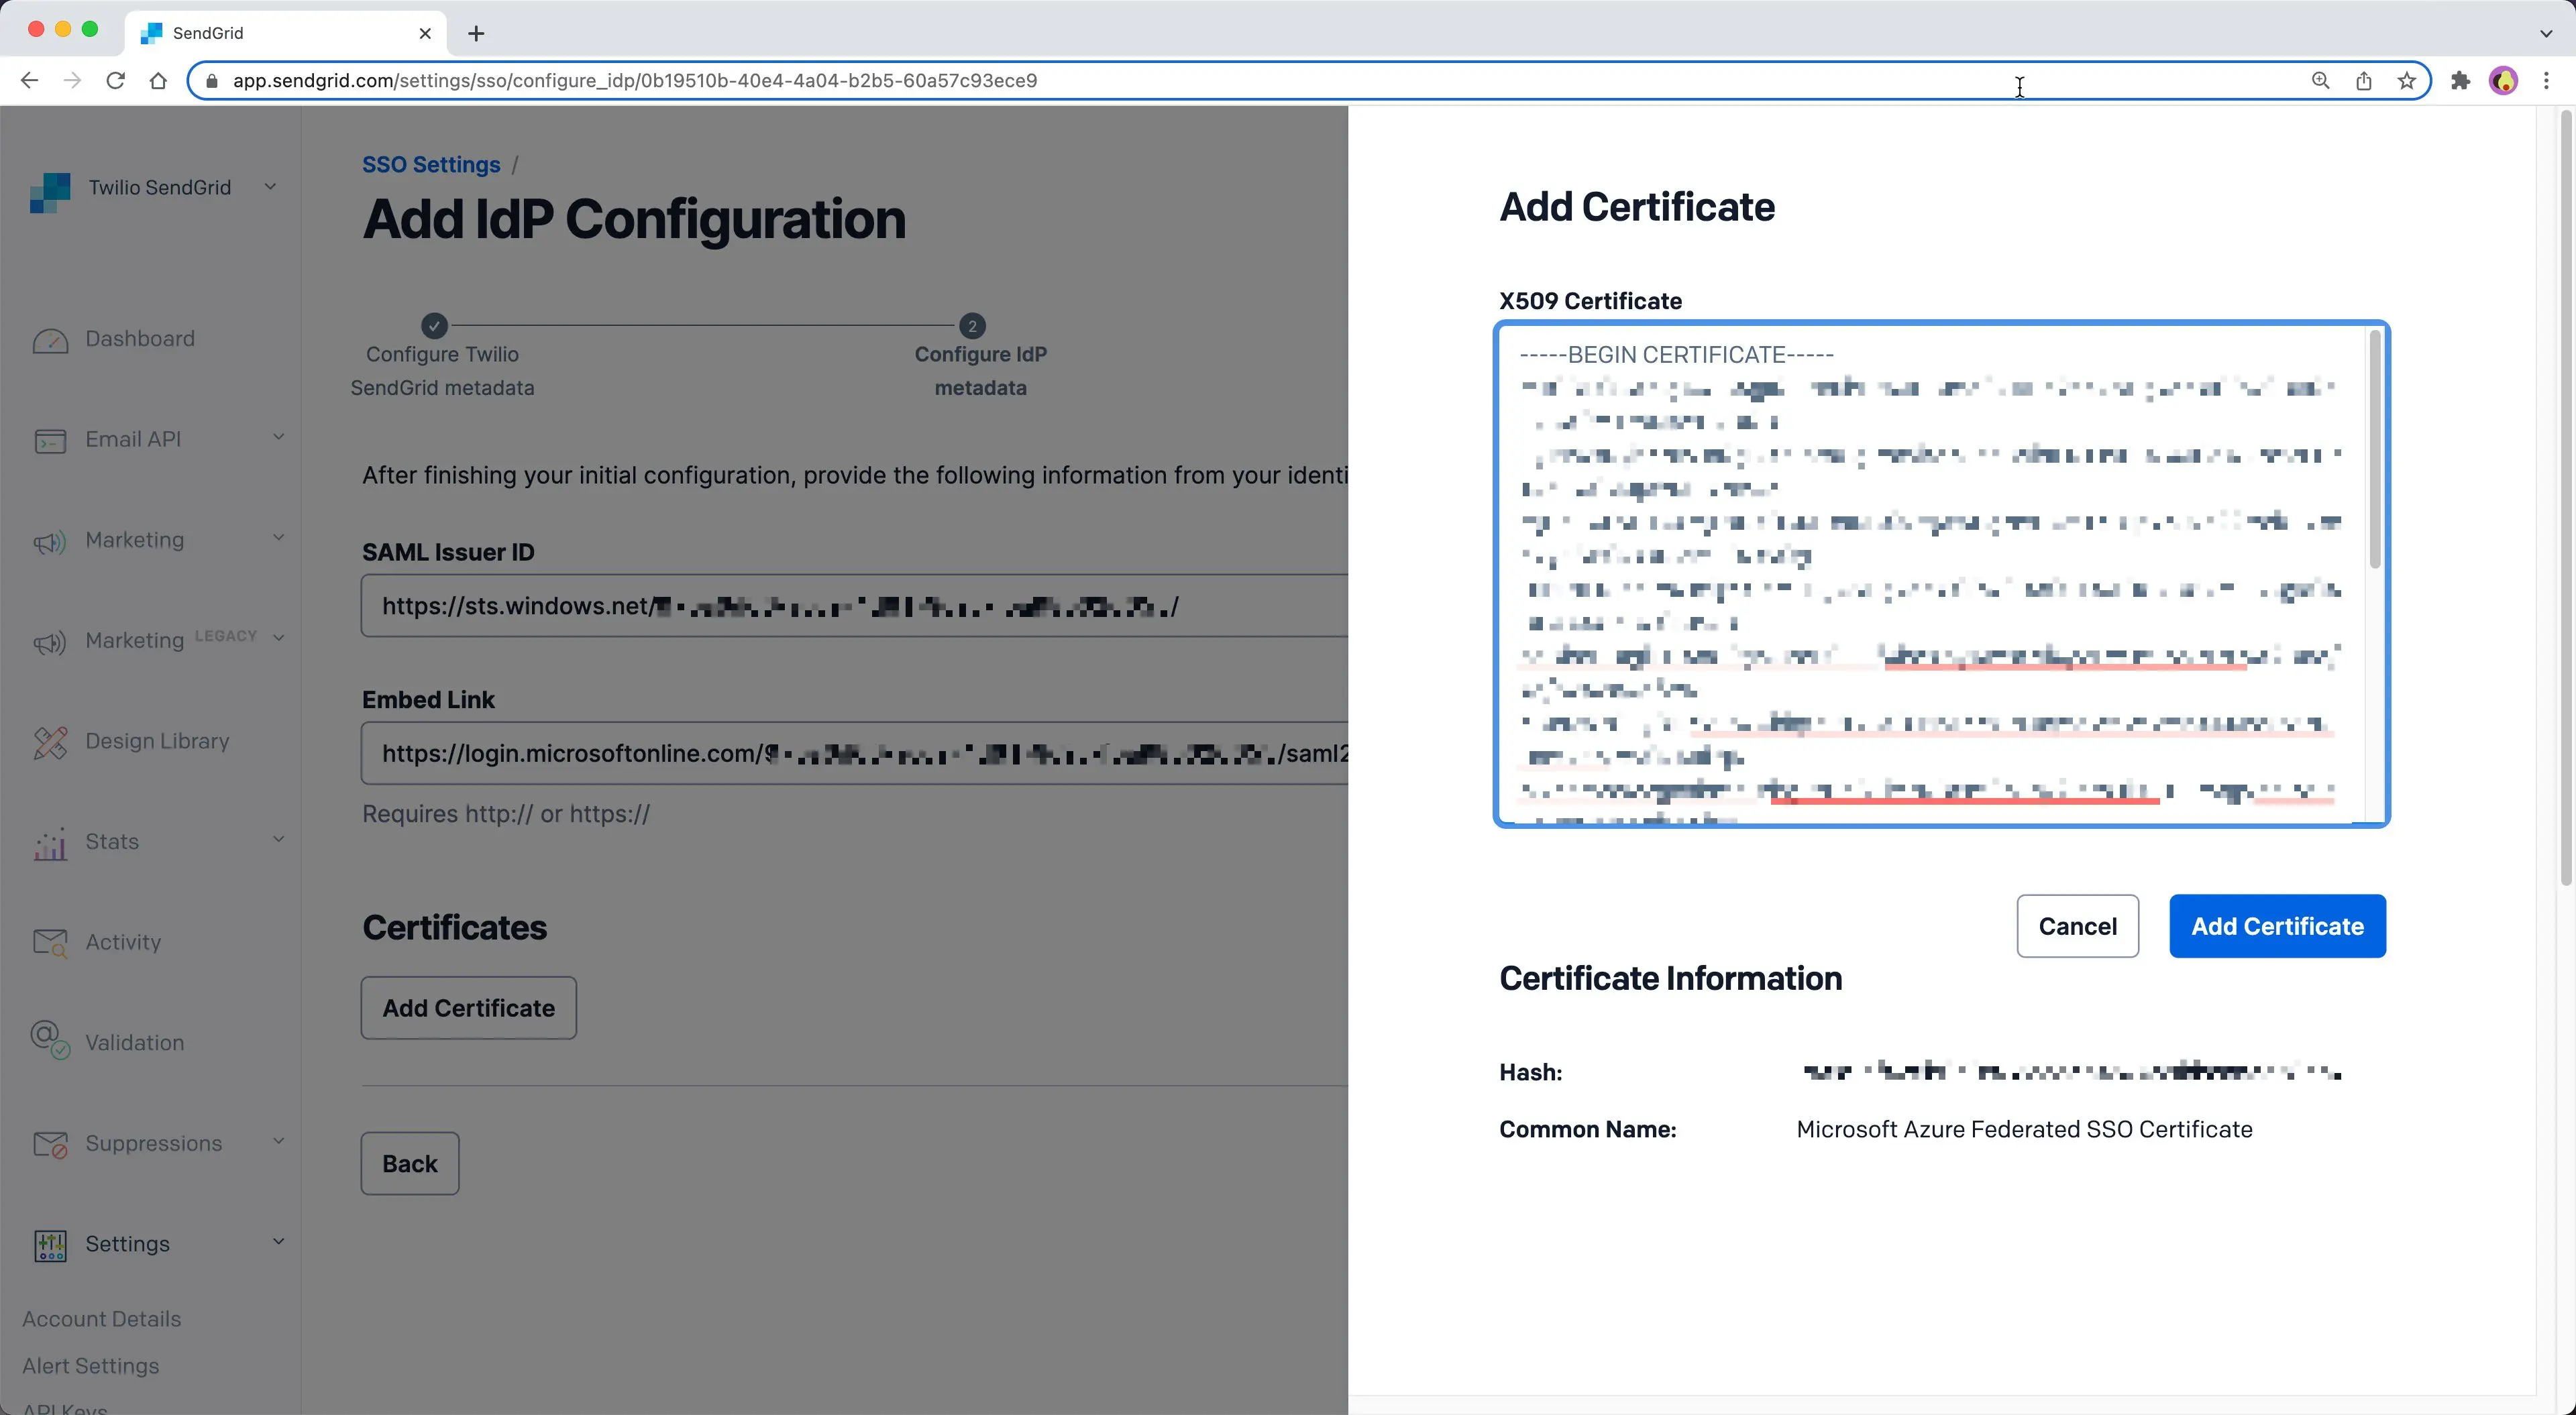
Click Add Certificates to display a menu with an X509 Certificate field.
-
Open the Base64 encoded X509 certificate you downloaded from Azure in a text editor and copy it to your clipboard.
-
Paste the X509 Certificate into the X509 Certificate field in the Twilio SendGrid App and click Add Certificate.
-
Select Enable SSO to complete the configuration. You can also Save without enabling.
Your SSO configuration and integration with the Azure Active Directory IdP is now complete.
Once you complete your Azure configuration in the Twilio SendGrid App, you will be able to manage users. Twilio SendGrid calls these users Teammates.
If you enable just-in-time (JIT) provisioning for your SSO configuration, you need only to assign users to the Twilio SendGrid App in Azure AD. Assigned users will be created as SSO Teammates when they log in to Twilio SendGrid for the first time.
Info
JIT provisioning will assign Teammates to the Twilio SendGrid parent account. It is not possible to assign JIT provisioned Teammates to Subusers.
Info
JIT provisioning is only possible from an IdP-initiated sign-on flow. When assigning users to your Twilio SendGrid App, you may want to instruct them to log in from your IdP the first time.
To enable JIT provisioning for your SSO configuration, you must edit the SAML configuration from the SSO settings page in the Twilio SendGrid App.
-
Edit a configuration by selecting Settings > SSO Settings from the left sidebar navigation. A page will load displaying all your existing IdP configurations.
-
Each configuration will have an action menu to the far right. Select this menu to display a dropdown where you can choose Edit or Disable.
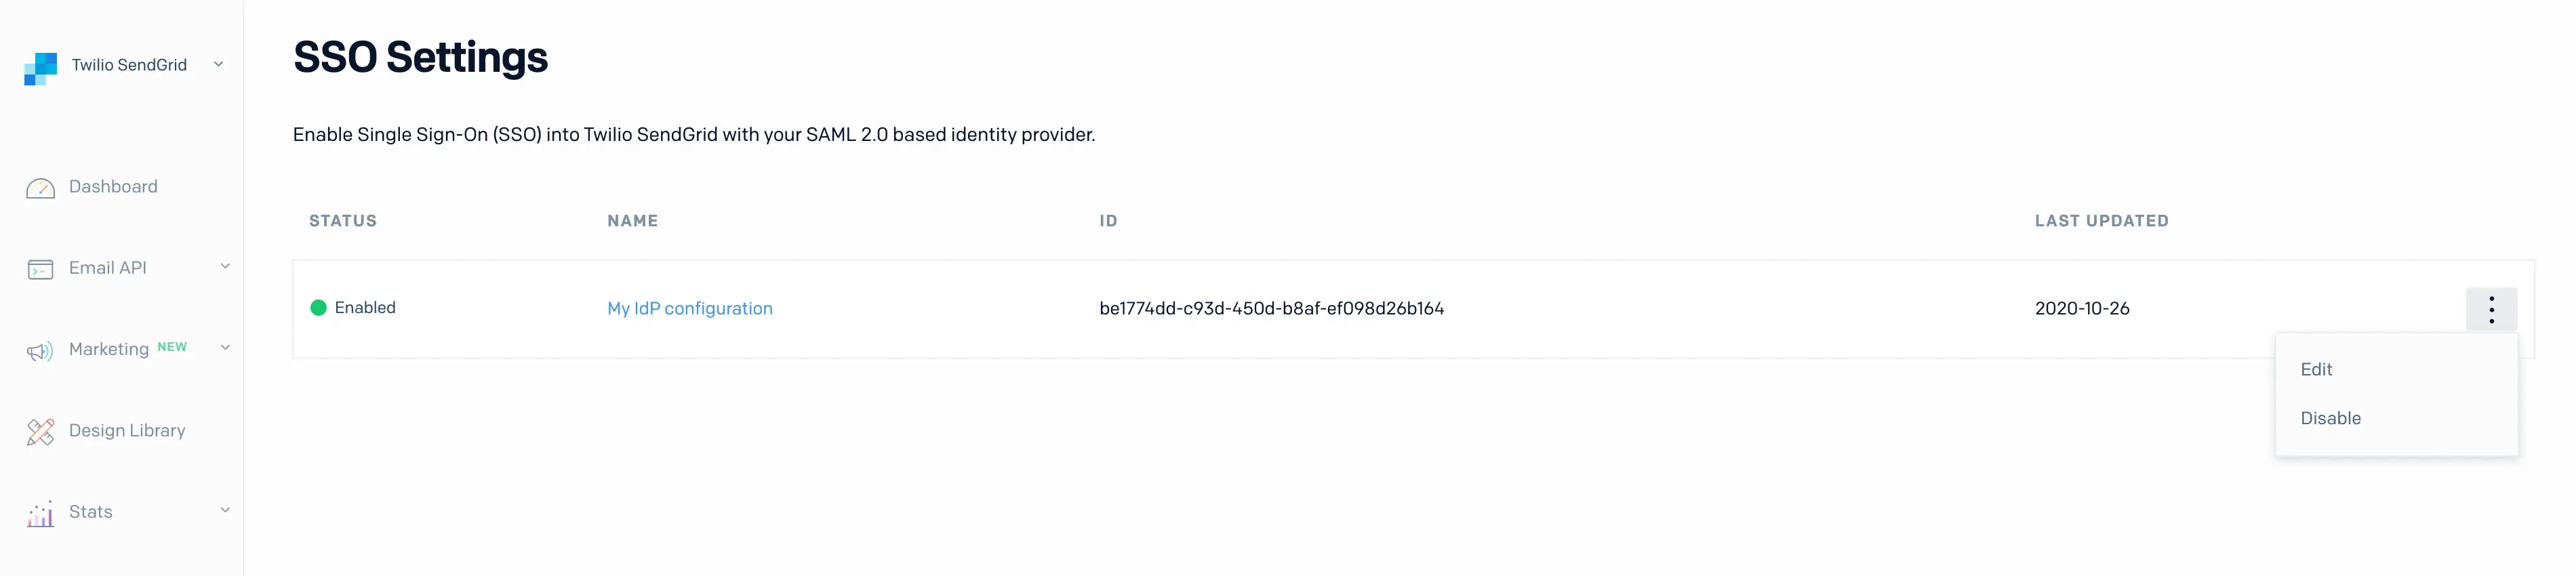
-
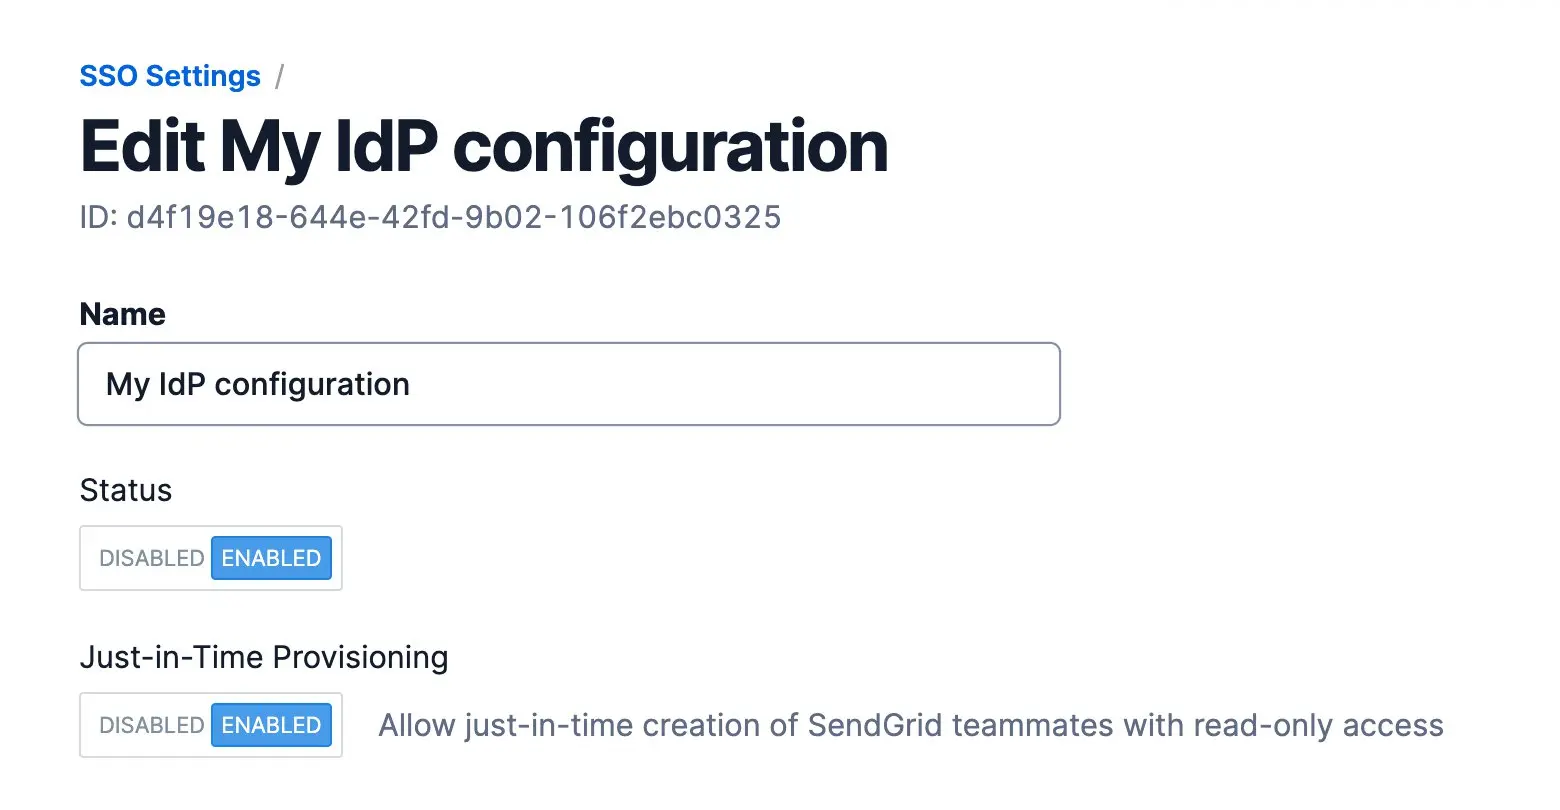
Select Edit from the action menu. A page will load that allows you to modify or complete an unfinished SSO integration. In addition to the fields available during initial setup, you will have Status and Just-in-Time Provisioning toggles.
| Twilio SendGrid SSO Metadata Field | Description |
|---|---|
| Status | A toggle where you can enable or disable the SSO configuration. |
| Just-in-Time Provisioning | A toggle to enable or disable just-in-time (JIT) provisioning. When JIT is enabled, you can auto provision users with read-only permissions. |
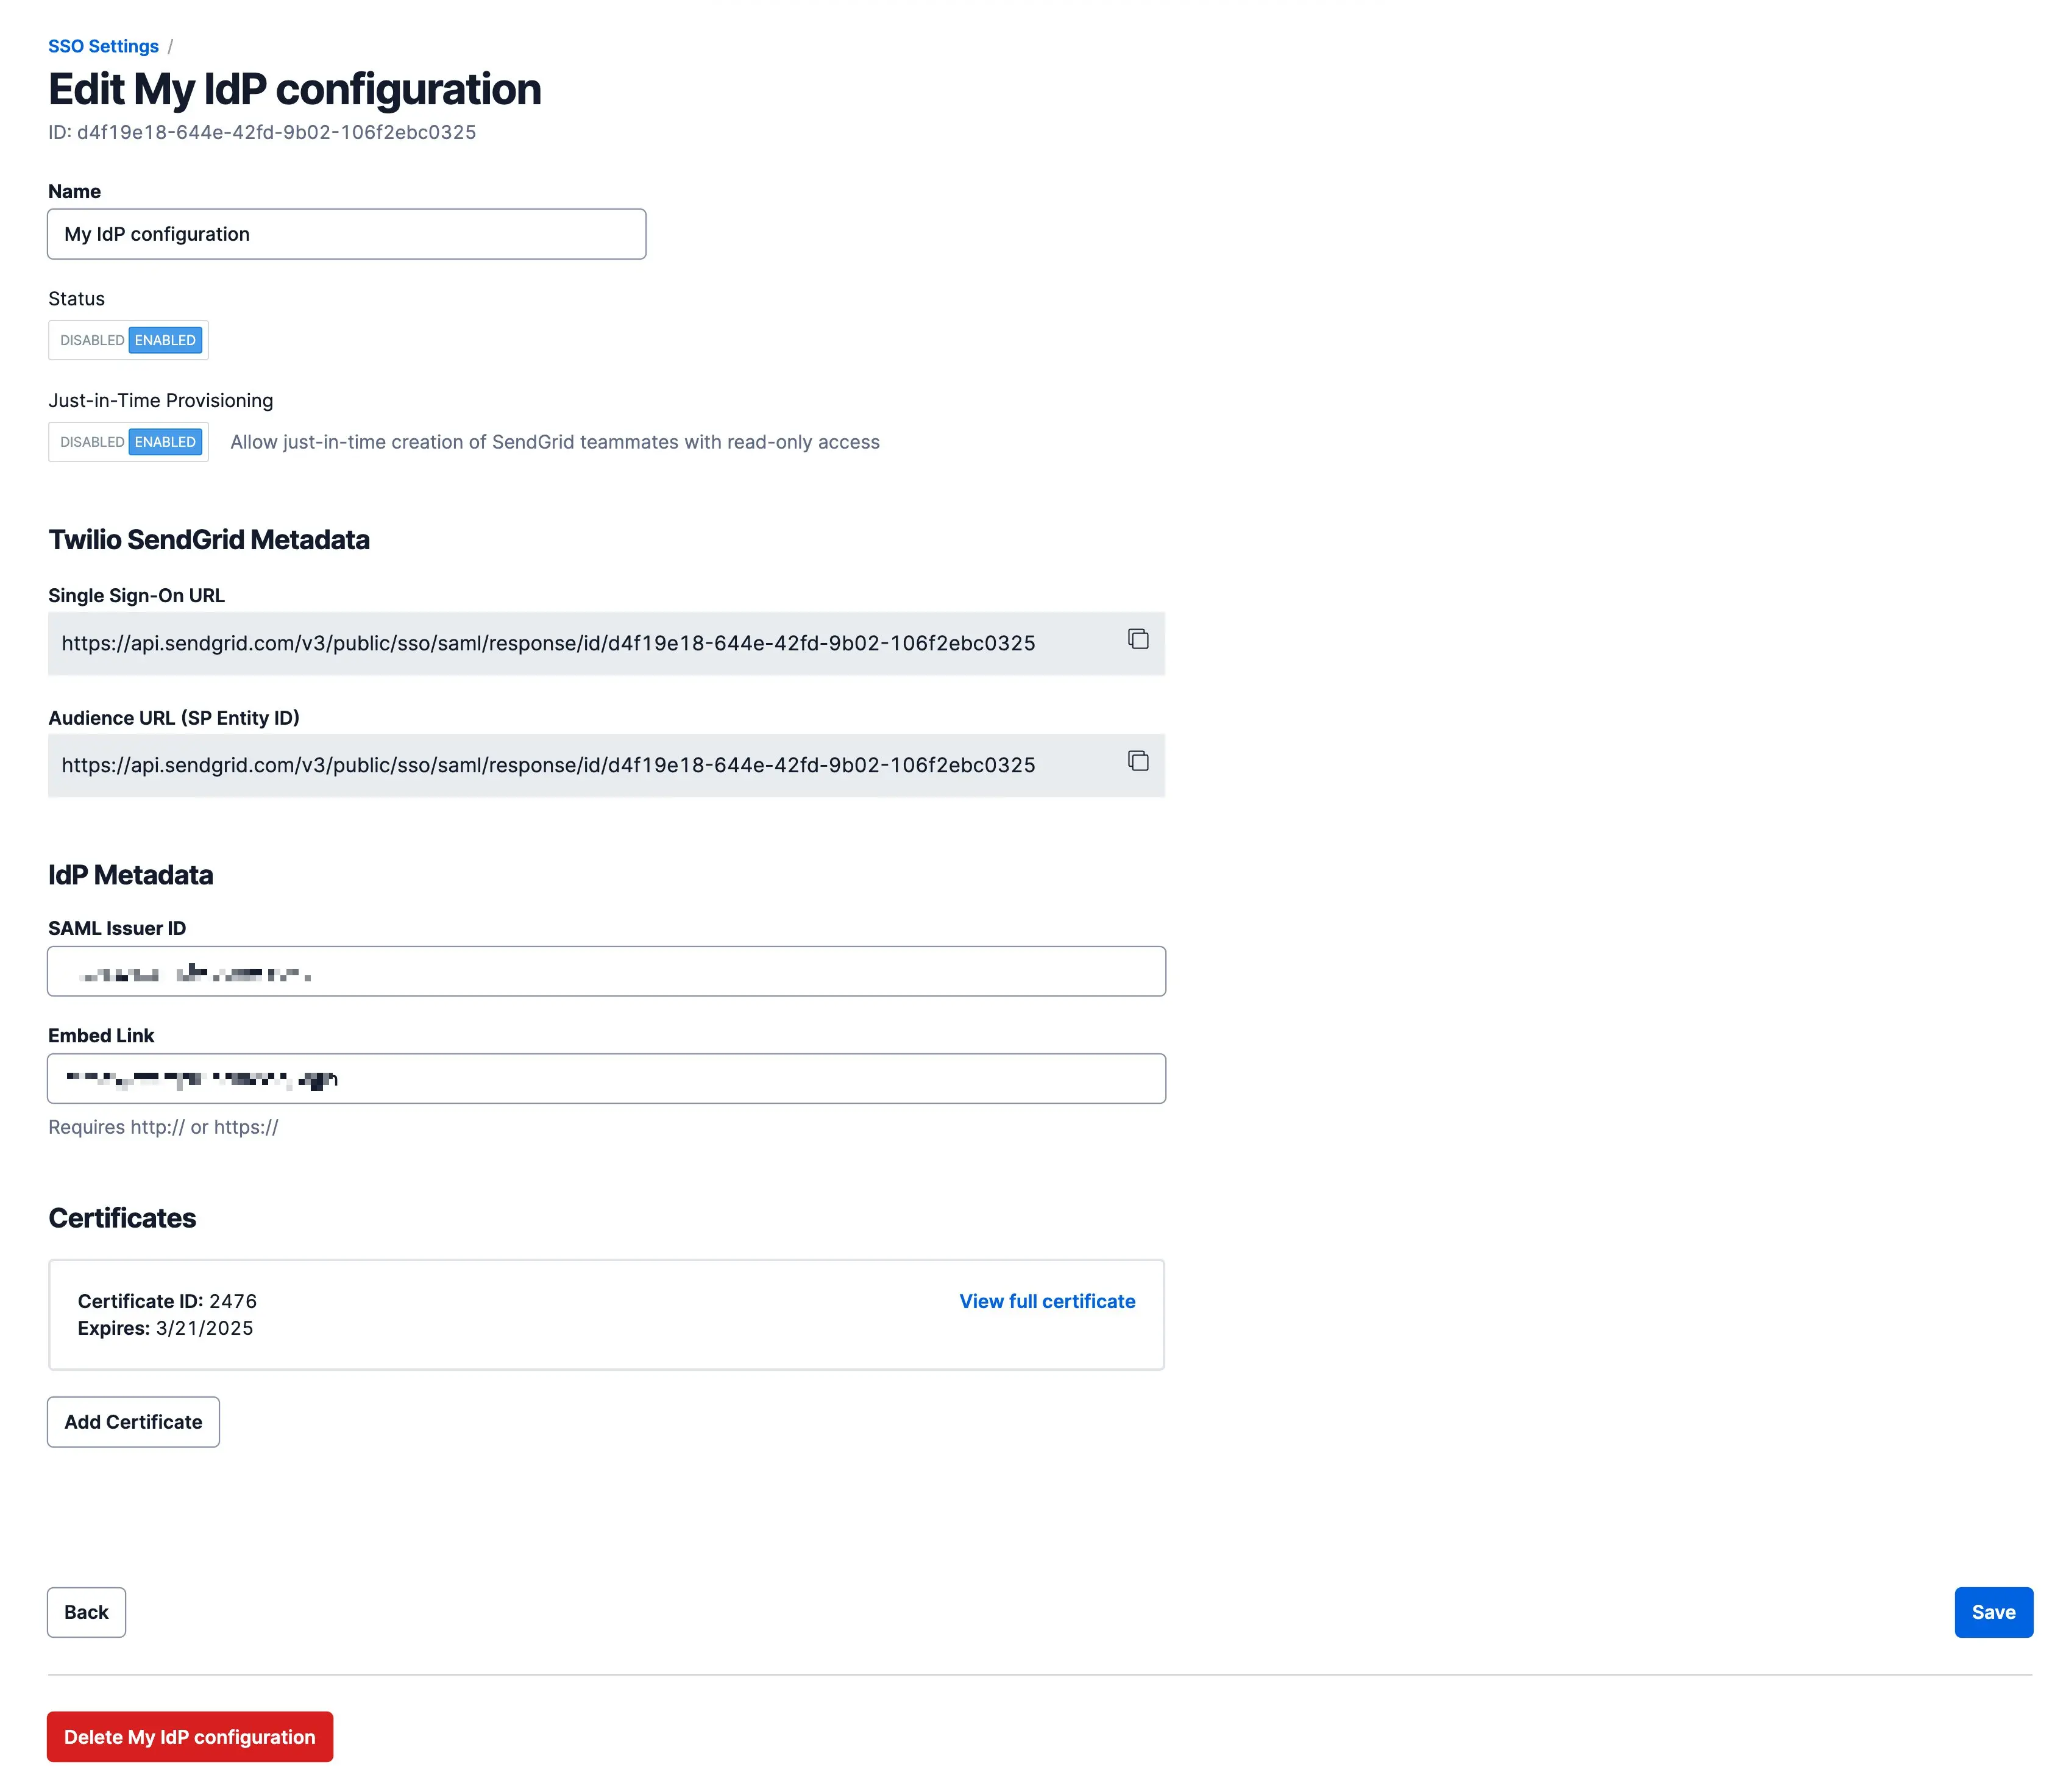
-
Click the Just-in-Time Provisioning toggle so that Enabled is shown in blue. Then, click Save at the bottom of the page.
The Twilio SendGrid SAML integration supports FirstName and LastName entity attributes. You can modify the values assigned to them as an administrator in the Twilio SendGrid App.
JIT provisioned Teammates will be given a Restricted Access account with permissions that correspond to read-only access. An administrator can modify a Teammate's permissions in the Twilio SendGrid App. See the Teammates documentation for more about Teammate scopes.
Warning
The following JIT instructions are provided as a reference for customers who have already integrated Twilio SendGrid with Azure AD manually (i.e., not using the official integration).
If you already have Twilio SendGrid configured with Azure AD using a manually created configuration, you can add JIT provisioning by editing your existing configuration in Azure.
-
Sign in to the Azure Portal.
-
Select Azure Active Directory from the list of services. If you do not see Azure Active Directory, try searching or go to All services.
-
From the Active Directory page, go to Enterprise applications in the left menu.
-
You will see a list of your applications, including your Twilio SendGrid integration. Select it from the list.
-
Your application's page will load. Select Get started from the Set up single sign on tile.
-
The SAML configuration settings will load for the Twilio SendGrid integration. Edit the Attributes & Claims section as shown below.
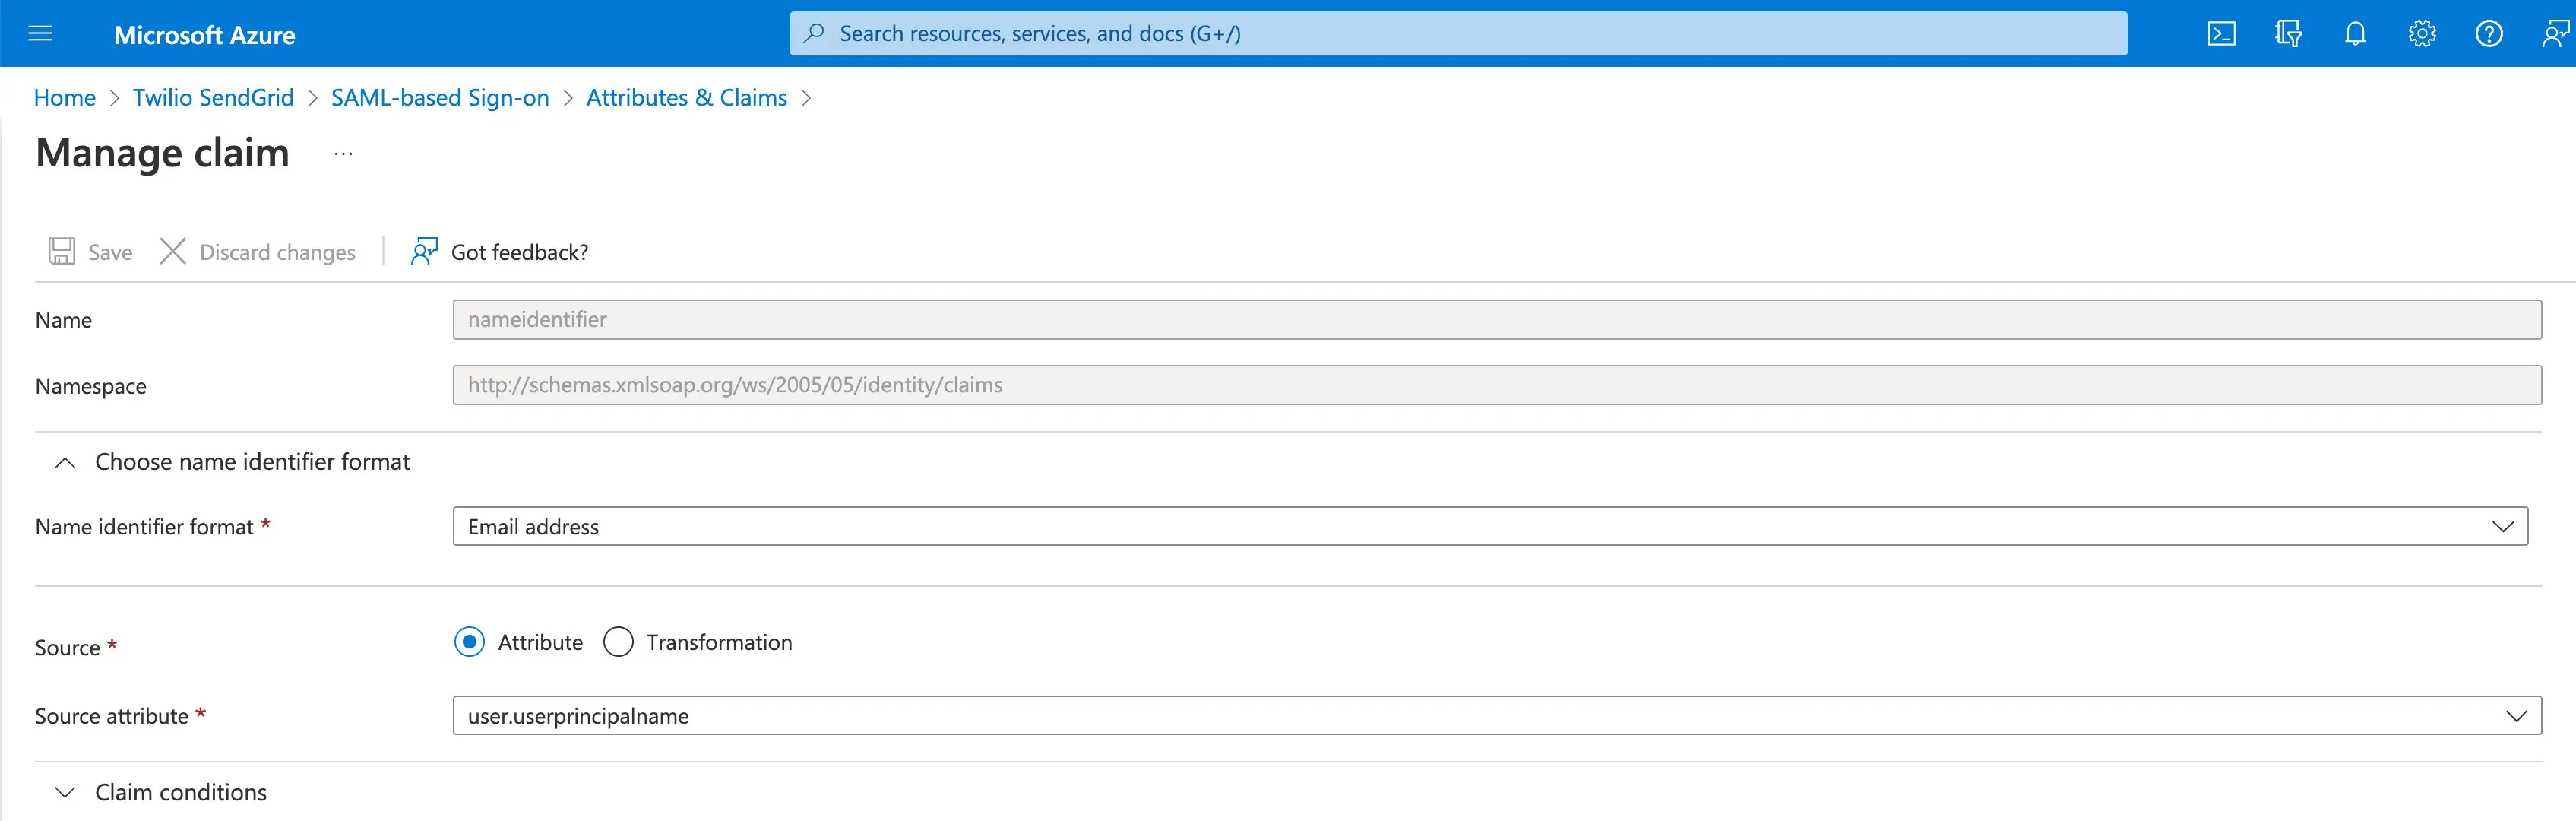
The one required attribute you must make sure is correct is the Unique User Identifier. The Name identifier format must be set to Email address.
-
To edit the Unique User Identifier, click Edit on the Attributes & Claims menu.
-
From the page that loads, click the Unique User Identifier (Name ID) field to load a details page.
-
Verify or edit the fields as follows.
-
Name identifier format: Email address
-
Source attribute: user.userprincipalname
Additional FirstName and LastName attribute statements are needed if you enable just-in-time (JIT) provisioning. For each attribute statement, you will have a Name and Source attribute. You will set up FirstName and LastName attributes as follows.
-
Click Edit on the Attributes & Claims menu.
-
From the page that loads, click + Add new claim to load a configuration page.
-
Add the FirstName attribute with the following values.
-
Name: FirstName
-
Namespace: You can leave this field blank.
-
Source: Leave Attribute checked.
-
Source attribute: user.givenname
- Click Save and repeat this process to add a LastName attribute with the following values.
-
Name: LastName
-
Namespace: You can leave this field blank.
-
Source: Leave Attribute checked.
-
Source attribute: user.surname
The Unique User Identifier, FirstName, and LastName attributes are the only attributes used by Twilio SendGrid. You can optionally delete the remaining attributes that Azure AD includes during the app creation process.
You can add Twilio SendGrid SSO Teammates manually, delete Teammates, and modify Teammates' permissions in the Twilio SendGrid App. See the user management section of the Twilio SendGrid SSO docs for instructions.
If you are having trouble configuring Twilio SendGrid SSO, please submit a support ticket, and the Twilio SendGrid Support Team will be in touch.