Migrate Legacy Plugins to the CLI
Legacy plugins are all Flex Plugins that are deployed as Twilio Assets using Serverless (UI and Toolkit). You can identify which Assets are legacy Flex Plugins by their naming convention:
- Plugins based on Classic Assets use the path
/assets/plugin-[name].js. You can view these in Twilio Console. - Plugins based on Serverless Assets use the path
/plugins/[name]/0.0.0/bundle.jsand are deployed to a Serverless environment with a unique name that starts with 'plugin'. You can view these using the Twilio CLI.
Starting in version 4.0.0, the Flex Plugin Builder is installed and managed as a Twilio CLI called Flex Plugins CLI. This CLI is the primary way to create, build, deploy, and manage your Flex plugins.
To use the Flex Plugins CLI, you must configure your development environment to work with the Flex Plugins CLI and migrate your existing plugins.
In the legacy plugin builder, the create-flex-plugin node package is used when you create new plugins. In the Flex Plugins CLI, this package is automatically managed for you.
Use the following command to check whether the create-flex-plugin package is installed as a global package:
1$ npm list -g --depth 023/usr/local/lib4├── create-flex-plugin@3.0.05├── npm@6.14.76├── twilio-cli@2.6.0
When installed globally, your existing create-flex-plugin version is used when creating a new plugin. By uninstalling create-flex-plugin, you ensure that you'll always use the latest version for any new plugin. You can uninstall this package with the following command:
npm uninstall -g create-flex-plugin
Install the latest version of Flex Plugins CLI using the following command
twilio plugins:install @twilio-labs/plugin-flex
For more information, see Install Flex Plugins CLI.
Before you start the migration process, ensure that the name of the plugin directory matches the name of the legacy plugin.
By using the same name, the plugin name that you create using the Flex Plugins CLI will be the same as the legacy plugin name. A matching name enables Flex to identify the legacy plugin as a duplicate and not load it when it finds your newly migrated plugin (created using Flex Plugins CLI).
While dots were permitted in the names of Assets plugins that were deployed using Assets(Classic) UI, they are not permitted in the names of plugins created with the Flex Plugins CLI. If you migrate any Assets plugins with dots in their names, Flex will not automatically recognize the newly migrated plugin as a duplicate.
In these cases, we recommend that you deploy your plugin using Flex Plugins CLI first. Then, release it and delete the bundle from Console. For details on deploy and release commands, see our deployment and release guide. Because these actions can interrupt asset handling in your contact center, we recommend migrating these plugins when you don't expect high usage of your contact center.
Complete these steps for each plugin that you need to migrate. Execute all of these commands within the directory that contains the plugin code.
To find legacy plugins that you need to migrate, check the version of each of your plugins by using the flex-plugin dependency within your plugin's package.json. Legacy plugins use a version below 4.0.0.
1"dependencies": {2"flex-plugin": "^2.0.0",3...4}
-
In the directory of your plugin run the following CLI command. This command updates your plugin dependencies to use the latest version of the Flex Plugins CLI.
twilio flex:plugins:upgrade-pluginThis command updates the scripts and the dependencies in
package.jsonof your plugin. It does not override any custom dependencies you've added topackage.json. -
In the directory of your plugin, delete the
package-lock.jsonfile andnode_modulesdirectory. -
Run the following command to reinstall your dependencies:
npm install
Use the CLI's deploy command to allow your plugin to be managed by the CLI and the Custom Plugins page. For details, see Custom Plugins. Following is an example:
twilio flex:plugins:deploy --major --changelog "Version notes" --description "Plugin functionality"
The deploy command makes your plugin available on the Custom Plugins page.
However, it will not be live for your agents and it will not yet replace the legacy plugin you are using. This will happen once you use the CLI's release command, or when you release the plugin using the Custom Plugins page. Following is an example of the release command:
twilio flex:plugins:release --plugin <plugin-name>@<version> --name "Release name" --description "Description of this Flex plugin configuration."
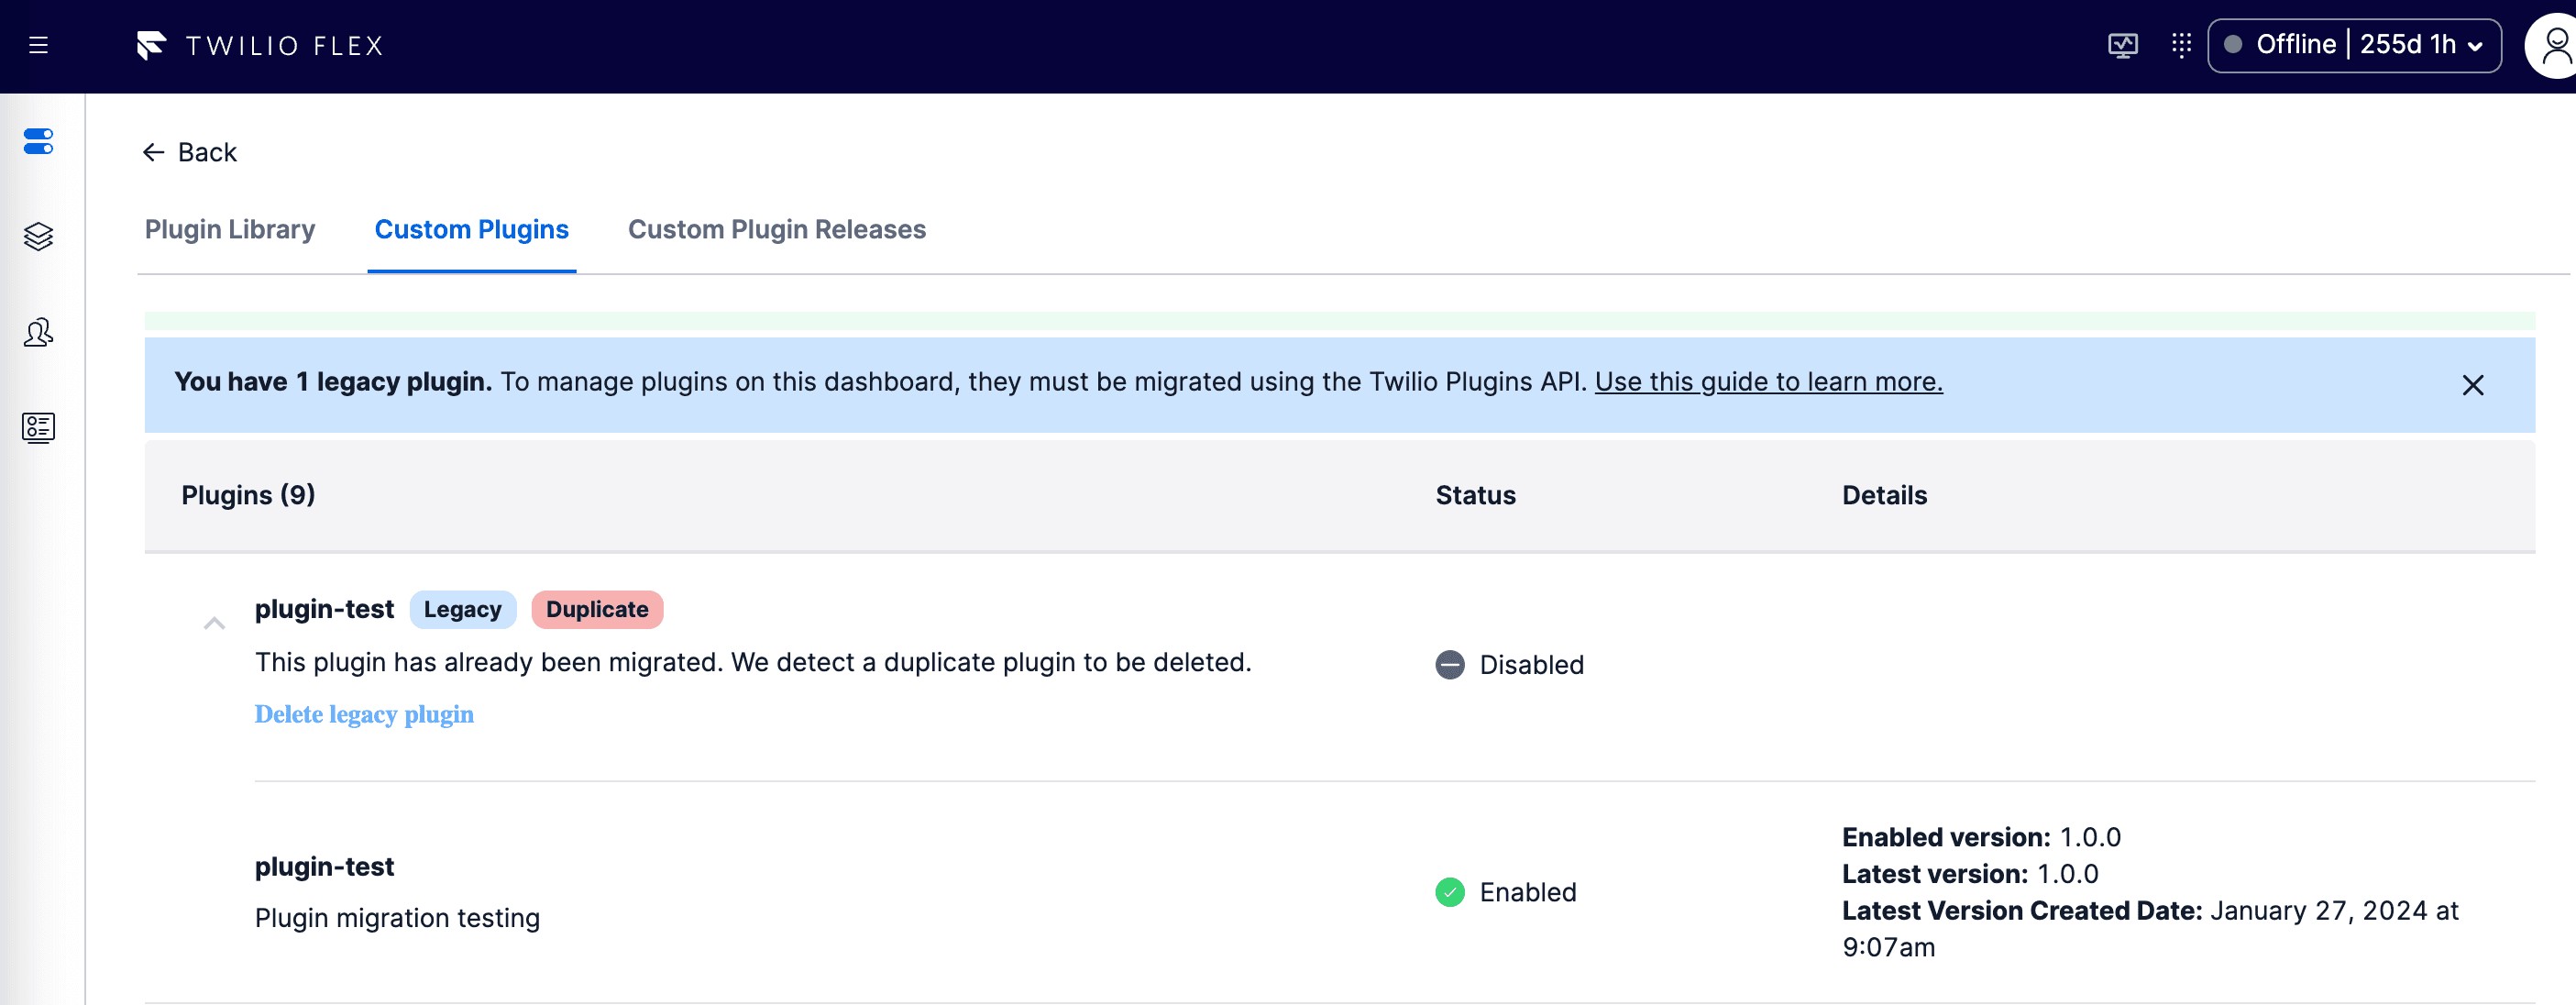
After you release the migrated plugin, the legacy plugin with the same name stops loading automatically and appears with a status of Disabled on the Custom Plugins Dashboard.
If you have problems and need to go back to your legacy plugin, disable the migrated plugin and do a release. The legacy plugin with the same name is automatically enabled.
Once you've successfully migrated a plugin, remove its legacy plugin equivalent: Before removing a legacy plugin, confirm that Flex is actively using the migrated version of the plugin. Use one of the following methods:
- Check the Custom Plugins page to confirm that the migrated plugin appears as Enabled.
- Use the following command:
twilio flex:plugins:describe:release --active
You have the following options for removing plugins:
- From Flex UI, navigate to the Custom Plugins page.
- You'll see that the migrated and legacy plugins with the same name are grouped together and tagged as Duplicate. Click Delete Legacy Plugin. This option is available only when your migrated plugin is enabled.
Most legacy plugins were originally uploaded using Twilio Assets.
From Twilio Console, navigate to Assets list (Classic) and delete the legacy versions of your migrated plugins. Once you delete your legacy plugins, they will no longer appear on the Custom Plugins page.
Version 3 of Plugin Builder provided the npm run deploy command. This command deployed plugins using the Serverless API.
To remove these assets, run the following command:
twilio flex:plugins:upgrade-plugin --remove-legacy-plugin
You will have already run upgrade-plugin once on the plugin. Running it this second time will have no impact on your plugin.
If you use Serverless Functions (Classic) in your plugins, you must migrate to a newer version of Functions in Serverless. For details about using Serverless Functions, see Functions and Assets and Serverless Toolkit.
When you migrate your Functions version, a new URL is created. You must use the new URL in your plugin code to start using the updated function. After you update the URL, you must deploy and release the plugin.
If you are migrating a plugin that is hosted in a shared repository like GitHub, we recommend committing the changes in your remote repository. This ensures that your plugin updates are shared with the rest of your collaborators.
Your collaborators will need to install the Flex Plugins CLI in their own environments. Once they pull down the updates to your plugin, they will be able to continue using the Plugins CLI for managing versions and releases of your plugins.
Because react-scripts has been removed from Flex Plugins CLI in version 4.0.0 and later, Flex no longer supports using Craco to customize Webpack and Jest environment
Because craco.config.js is no longer supported to modifying the Webpack configuration, you must create the following configuration files:
- For Jest, create
jest.config.js. - For Webpack, create
webpack.config.js. - For Webpack DevServer, create
webpack.dev.js.
Use the following format for each of these configuration files:
1module.exports = (config, { isProd, isDev, isTest }) => {2/**3* Modify the configuration and then return it4*/56return config;7}
- Familiarize yourself with common workflows you can implement using the Flex Plugins CLI.
- See the full reference guide for the Flex Plugins CLI.
- Get back into plugin development with the Flex Plugins Quickstart.